Baby food meal prep
How To Meal Prep Baby Food For A Week
Miles is the greatest joy of my life but oh man, is he a lot of work! Now that he’s getting older, one of the biggest tasks on my table (no pun intended) is feeding him. I no longer give him breast milk. Miles is now on a mix of formula and baby food. So to set myself up for success for a week of feeding my growing healthy baby boy, I’m all about prepping his meals as much as I can.
Don’t let me fool you, I can certainly not some amazing chef or child nutritionist. But I do know that there are fantastic benefits to preparing homemade food, especially for babies. But when you think about how much kids eat, the idea of food prep can no doubt be exhausting. However, when you do as much as you can in advance, it will make your life a whole lot easier for the rest of the week.
Again, I’m certainly no child food expert pediatric whatever, but over the last couple of months, I’ve got into a pretty solid routine of food prep for Miles each week. And while I’m just sharing my personal experience and tips today, I’d still LOVE to hear yours. So if you’ve got some baby food meal prep advice, make sure to leave me a comment at the bottom of this blog post! (But just a note let’s keep this a positive space. No mom-shaming – thank you!)
Organize Your Grocery Shopping List
First things first, you need to get the food into your kitchen in order to prep meals. I love using Instacart for the delivery of my groceries so heading to the store is one less step I have to think about. The best part is that these online grocery delivery apps allow you to save your shopping lists so you can easily just click “buy again” and you’re good to go.
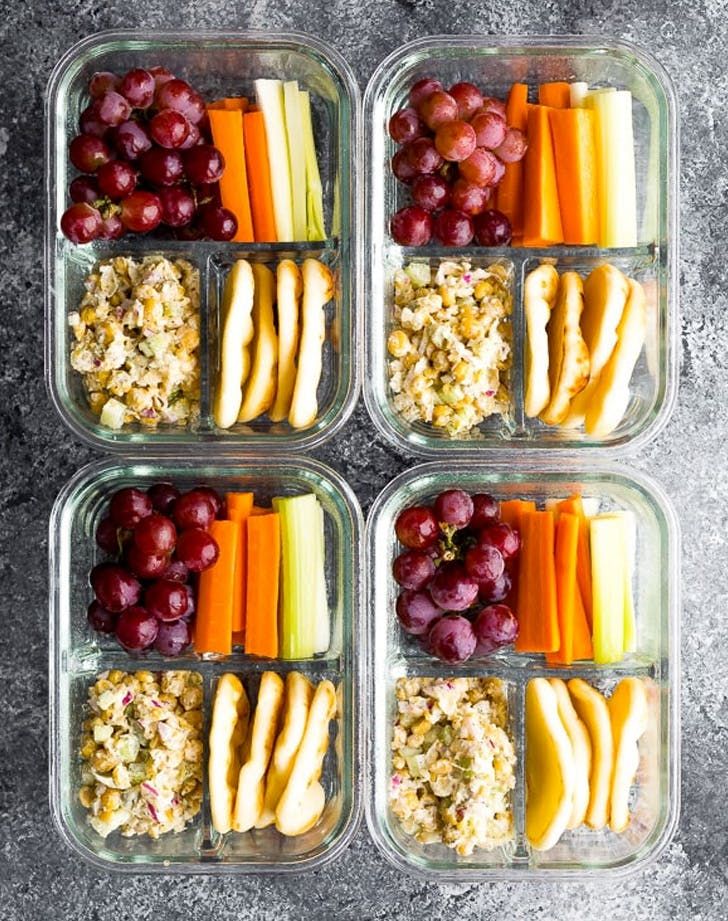
Miles is currently about 10 months old and eats just about anything I put in front of him. Current fruits and veggies he loves include sweet potatoes, butternut squash, strawberries, avocado, bananas, blueberries, scrambled eggs, etc. We also do chicken, pasta, and salmon. I’ll cook these with a little olive oil for healthy fats and flavor.
Prepare and Store
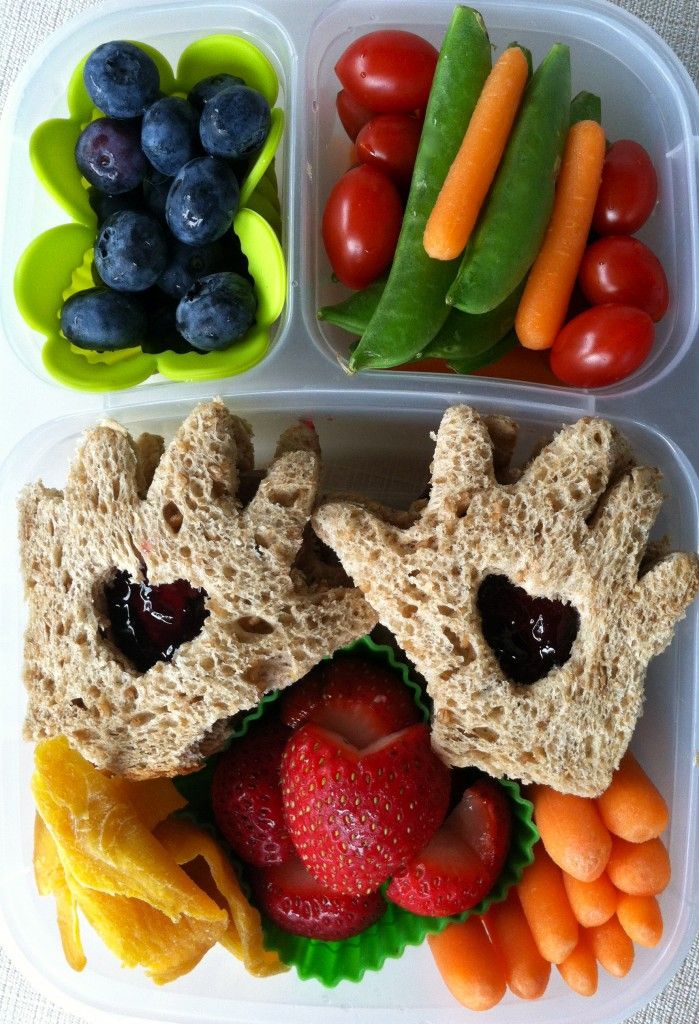
We do a mix in our homemade baby food purees and finger food for Miles. Sometimes I spoon-feed him things that I’ve pureed and others I let him feed himself. I find the mix works so I can ensure he’s getting enough nutrients in his belly instead of all over his face/the floor.
With that, I have varying storage container sizes (more on that below) where I keep pureed sweet potatoes, berry mixes, cooked chicken, etc. Then I use additional containers for cut-up fruit and veggies he can eat with his hands. Miles’s appetite fluctuates daily so some days he’ll eat everything I put in front of him and want more, some days he doesn’t finish his plate. I follow his cues on when he’s hungry or not.
Keep The Baby Food Recipes Simple
One of our go-to’s in this house is a sweet potato puree. I will bake a few potatoes in the oven and then cut them into cubes and put it in a blender. (You can totally use a food processor if you want, but I only own a blender so that’s what I use.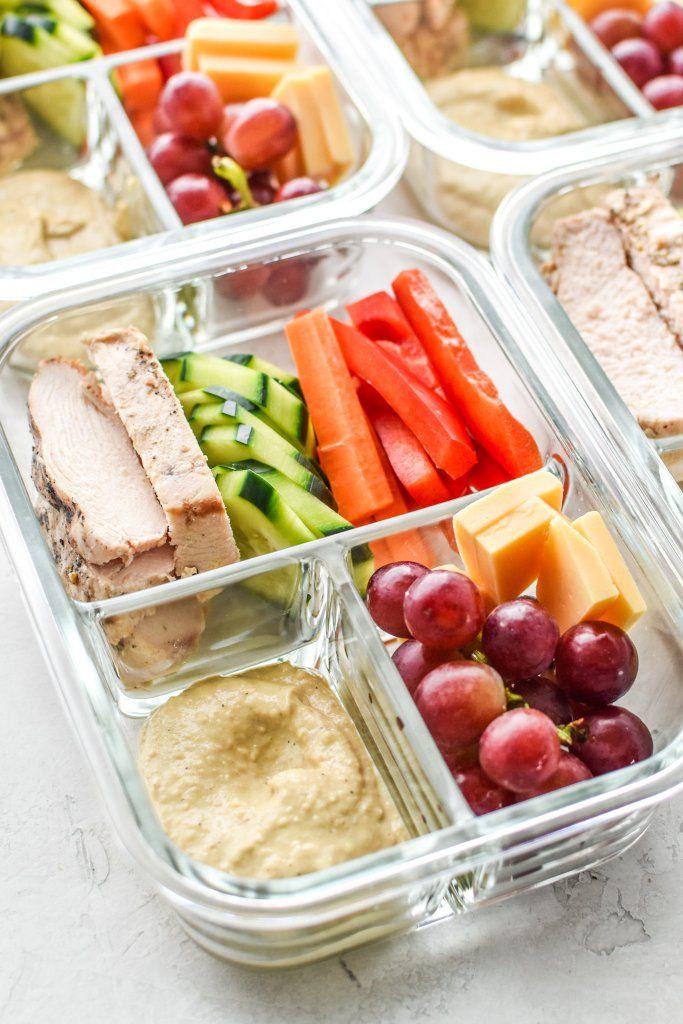 ) I’ll add up to a cup of water pending on how chunky/smooth I want the puree to help thin it out. For flavor, I’ll add a little cinnamon which also has great health benefits for kids and adults.
For chicken, I’ll bake a few white meat breasts, cut them into strips, and either refrigerate or freeze pending on when I plan on Miles eating them. To re-heat, I simply place them in the microwave in 10-second intervals (so they don’t get hot spots) and will cut them into smaller finger food sizes for him once cooled. Baby food recipes are more about just easy preparations rather than a million ingredients. In our house, simple is best!
Any pureed food I make will last 2-3 days in the fridge. If I made a large amount, I’ll freeze the excess in ice cube trays where they’ll stay good for up to 6 months. If you’re really slammed for time, you could even freeze up to a month’s worth of food. For me though, I don’t have a ton of freezer space to store too much so that’s why I meal prep baby food for a week at a time.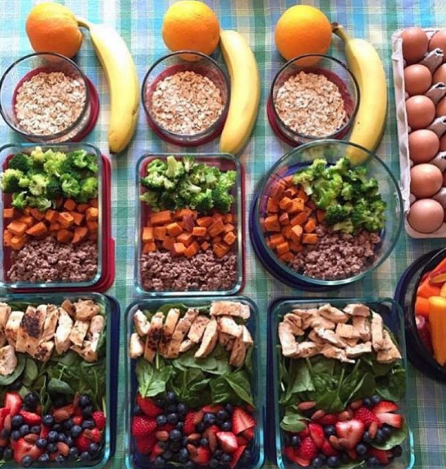
You Don’t Have To Make It All
While I applaud any mom or dad that has the time and energy to meal prep and plan every single organic item that goes into their child’s mouth, that is simply not me. I’m all about taking help from the store when I can get it! There are some awesome baby food brands that make delicious and healthy options to feed your baby. From jarred food to frozen chicken meatballs to teether cookies – bringing in a mix of textures and tastes to Miles that is easy for me is totally worth what may be an additional cost.
Meal Prep Ideas For Babies
For reference, we currently do the 8-10 months Moms On-Call schedule app for Miles. He will have a bottle (6-8oz) at 7 AM, 11 AM, 3 PM, and 7 PM. Below is simply a sample week of his “real food” breakfast, lunch, dinner, and snack schedule. I write this down as a quick guide but sometimes, we stray from the schedule because, you know…life. And that’s ok! Don’t beat yourself up, do the best you can.
Day 1 – MONDAY
Breakfast (8 AM) – Oatmeal Cereal with strawberries
Snack (10:30 AM) – Teething wafers with a sippy cup of water
Lunch (12 PM) – Frozen chicken meatballs with sweet potato puree
Snack (2:30 PM) – Blueberries and raspberries with a sippy cup of water
Dinner (5 PM) – Baked salmon (shredded) with green beans vegetable cups
Day 2 – TUESDAY
Breakfast (8 AM) – Organic yogurt with bananas
Snack (10:30 AM) – Avocado mash and shredded cheese
Lunch (12 PM) – Macaroni and cheese cups
Snack (2:30 PM) – Organic puffs and a sippy cup of water
Dinner (5 PM) – Roasted chicken and smashed cooked carrots
Day 3 – WEDNESDAY
Breakfast (8 AM) – Scrambled eggs
Snack (10:30 AM) – Strawberries with a sippy cup of water
Lunch (12 PM) – Jarred baby food
Snack (2:30 PM) – Teething wafers with a sippy cup of water
Dinner (5 PM) – Ground turkey with roasted zucchini
Day 4 – THURSDAY
Breakfast (8 AM) – Oatmeal Cereal with blueberries
Snack (10:30 AM) – Organic puffs and a sippy cup of water
Lunch (12 PM) – Sweet potato puree and small ripe avocado chunks
Snack (2:30 PM) – Shredded cheese and a sippy cup of water
Dinner (5 PM) – Jarred baby food
Day 5 – FRIDAY
Breakfast (8 AM) – Organic yogurt with raspberries
Snack (10:30 AM) – Shredded cheese and a sippy cup of water
Lunch (12 PM) – Pasta with butter and cut cherry tomatoes
Snack (2:30 PM) – Jarred fruit puree
Dinner (5 PM) – Roasted chicken with smashed avocado
Day 6 – SATURDAY
Breakfast (8 AM) – Pancakes with banana slices
Snack (10:30 AM) – Teething wafers with a sippy cup of water
Lunch (12 PM) – Frozen chicken meatballs with green beans vegetable cups
Snack (2:30 PM) – Organic puffs and a sippy cup of water
Dinner (5 PM) – Jarred baby food
Day 7 – SUNDAY
Breakfast (8 AM) – Scrambled eggs
Snack (10:30 AM) – Organic yogurt with strawberries
Lunch (12 PM) – Ground turkey with smashed cooked carrots
Snack (2:30 PM) – Teething wafers with a sippy cup of water
Dinner (5 PM) – Macaroni and cheese cups
How to Prep One Month of Healthy Baby Food for Less Than $25!
Since Evie’s pediatrician gave her the thumbs up to start testing out solids at her 4 month check up, I decided to have some fun! She had been showing interest in our foods for over a month and I am a firm believer that a baby will tell you when they are ready.
We picked up a few organic jars of baby food from Whole Foods and she gobbled those down. I gave her 1 jar per day in addition to breastmilk. However, at a whopping $1/small jar, I knew I could make MUCH more baby food for a LOT less money. Ain’t nobody got time for dat?!
I went and purchased some produce and groceries and ended up making a month’s worth of baby food for less than $25. It took around 1 hour total, but I had a blast getting to experiment with different combinations and tastes. I tried out each and every one of my creations to make sure it was tasty for Everly.
In this post, I will share with you my top tips to baby food making and each meal that I made, but most importantly, how you can make it too.
Here are my 5 steps to preparing healthy and yummy purees for your baby:
Step One: Select your recipes.
This is the very first step to even beginning the baby food making process. I know what you are thinking, “What the hell do I even make for my kid?” Simple. Start off with one ingredient basic foods first and only try out a new food once every 3 days or so to make sure that your baby does not have an allergy. When you know that your babe is good to go, have fun and experiment with different combos and flavors. The recipes weren’t that hard to come up with and you can just do two combination recipes if you wish. There are no rules to baby food making!
The recipes that I selected were:
- Kiwi + Apple + Flax
- Blackberry + Blueberry + Kale
- Coconut Milk + Banana + Cinnamon
- Mango + Prune + Quinoa
- Pear + Apple + Kale
- Banana + Avocado + Flax
- Sweet Potato + Squash + Prune
- Avocado + Apple + Apricot
- Green Beans + Apple + Pear
- Sweet Potato + Squash + Apricot
Step Two: Make a grocery list.
The second step is to create an easy to follow grocery list based off of the recipes you have chosen. You can make a list of all the items separately and then combine them into a bigger list if that is easier for you. Personally, I just round everything up in my head because whatever is leftover I can use for something surely. I used my iPhone notepad to make my list-simple as that.
Here’s my list:
Fruits
- 5 apples
- 2 pears
- 3 kiwis
- 2 avocados
- 1 small carton blueberries
- 1 small carton blackberries
- 2 bananas
- 1 small package of prunes
- 1 small package of apricots
- 1 mango
Veggies
- 1 bunch kale
- 1 butternut squash
- 2 sweet potatoes
- 1 small bunch of green beans
Misc:
- Cinnamon
- 1 Can of Full Fat Coconut Milk
- Quinoa
- Flax seeds
Step Three: Go grocery shopping.
When you have created your game plan, it is time to put it into action! I went to Publix for grocery shopping which is a little more expensive than Walmart, but I like the fact it has less traffic and Walmart tends to bring out the asshole in me so I figured this would be best.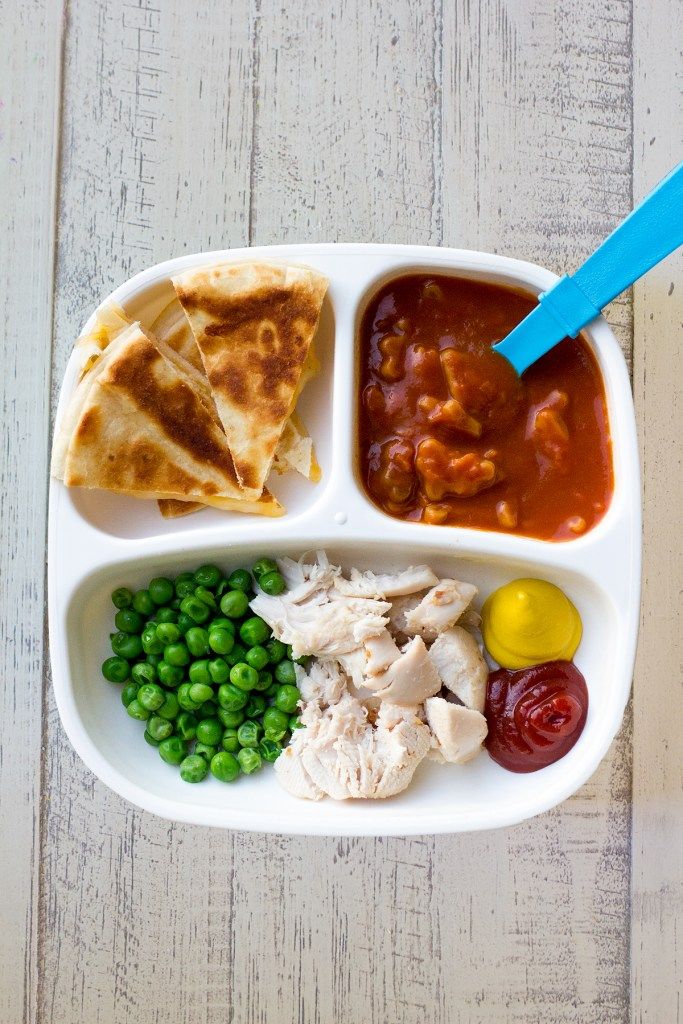
Here’s a snap of my purchase. My total ended up being less than $25-woohoo!
Step Four: Get your supplies & recipes ready & prep.
Once you have all of your groceries and supplies together, you can officially do the damn thing! Oh wait… supplies..
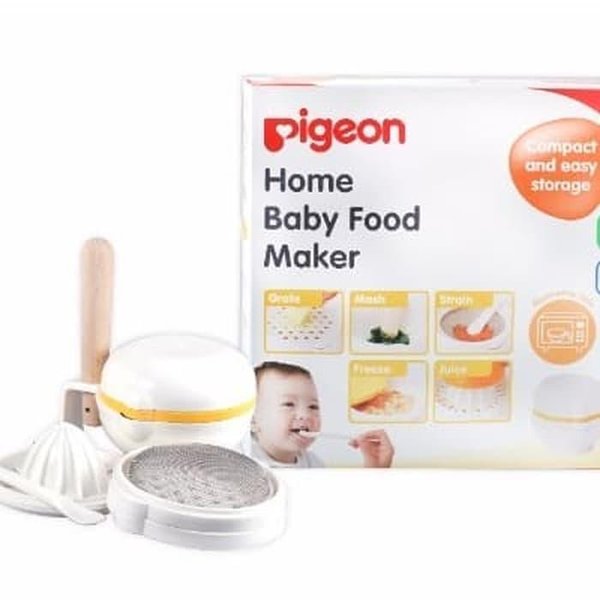
Here’s what you will need to make the baby food:
- Magic Bullet Baby Bullet System
- Gallon Ziplock Bags
- Sharpie Marker
- Silicone Baby Food Freezer Tray
- Small Glass Jars OR Mini Tupperware Bowls
Once you have these, then you are 100% ready to move on to making all of your meals. I grabbed my recipes, put on my game face, and went to work.
Step Five: Cook!
Alright! Now it is time to get to work. The whole process of making the food takes approximately one hour-this does not include the packaging or prepping.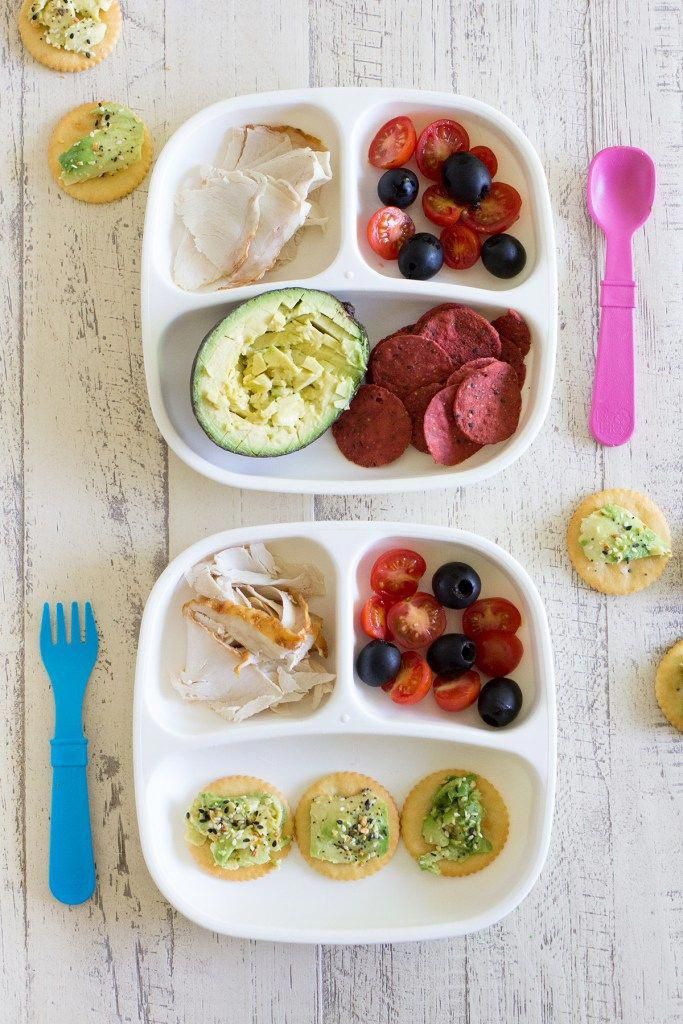 You can save yourself a whole lot of time by prepping your food the night before.
For example, steaming what needs to be steamed, soaking what needs to be soaked, boiling what needs to be boiled, or baking what needs to be baked. You catch my drift?
Kiwi + Apple + Flax
Ingredients:
- 1 apple, peeled, cored and chopped
- 3 kiwis, peeled and chopped
- 1 tbsp flax seeds
Instructions
- In large microwave container, steam the apples with about ¼ cup water for 8 – 10 minutes, or until soft.
- Add the cooked kiwis and apples with any cooking liquid to a food processor bowl and puree.
- Add in 1 tbsp. of flax seeds.
Blackberry + Blueberry + Kale
Ingredients:
- 1 small container blueberries
- 1 small container blackberries
- 1 cup kale, packed
Instructions
- In a medium saucepan, bring 2 inches of water to a boil over medium heat.
 Place the kale into a steamer basket, in that order, and steam for 10 minutes. Reserve cooking water. Let cool slightly.
 - Plaec blackberries, blueberries, and kale into a blender or food processor and puree, adding 1/4 cup of liquid at a time, until you have reached your desired consistency.
Coconut Cream + Banana + Cinnamon
Ingredients
- 1 banana, peeled
- 1/2 full fat canned coconut milk
- 1 teaspoon cinnamon
Instructions
- Place the banana in a small bowl and smash with a fork until almost smooth.
- Microwave the banana for 10 seconds, stir and repeat until the puree is warm.
- Stir in coconut milk and cinnamon and serve.
Quinoa + Mango + Prune
Ingredients
- 1/2 cup quinoa
- 1/2 mango
- 6 dried prunes
Instructions
- Peel, seed and chop mango into chunks.
 Meanwhile, soak prunes in water for 20 minutes to soften.
 - Cook quinoa according to package instructions.
- Puree mango and prunes in food processor.
- Stir in cooked quinoa.
Pear + Apple + Kale
Ingredients
- 2 apples, peeled, cored and chopped
- 1 pear, peeled, cored and chopped
- 1 cup kale, packed
Instructions
- In large microwave container, steam the pears and apples with about ¼ cup water for 8 – 10 minutes, or until soft.
- Steam kale for ten minutes or until soft.
- Drain and add to a food processor bowl. Add the kale and process until smooth.
Banana + Avocado + Flax
Ingredients:
- 1 banana, sliced
- 1 avocado, pitted and sliced
- 1 tbsp Flax seeds
Instructions:
- Place banana and avocado into blender and puree until smooth.
- Add in flax seeds.
- Serve immediately for best flavor and color.
- NOTE: **Because of the avocado and banana, this puree does not freeze well.**
Sweet Potato + Squash + Prune
Ingredients:
- 1 sweet potato
- 6 prunes
- 1 cup butternut squash
Directions:
- Boil sweet potato and butternut squash until tender and soak the prunes for 20 minutes in water.
- Place into a food processor and puree until smooth.
Avocado + Apple + Apricot
Ingredients:
- 1 apple, cubed and cored
- 1 avocado, cored and sliced
- 6 apricots
Directions:
- Boil or steam apples until soft.
- Soak apricots in water for 20 minutes.
- Place apples, avocado, and apricots into food processor and puree until smooth.
Green Beans + Apple + Pear
Ingredients:
- 1 apple, cored and cubed
- 1 pear, cored and cubed
- 1.5 cups green beans
Directions:
- Steam apples, green beans, and pears until soft.
- Place in a food processor and puree until smooth.
Sweet Potato + Squash + Apricot
Ingredients:
- 1 sweet potato
- 6 apricots
- 1 cup butternut squash
Directions:
- Bake sweet potato until tender while,
- Soak apricots in water for 20 minutes.
- Steam butternut squash until tender.
- Place all ingredients inside food processor and blend until smooth.
After making each batch of baby food, I either froze or refridgerated each recipe that was made. For foods containing banana or avocado, I pretty much kept in the fridge for up to 5-7 days since freezing and thawing tends to be not so yummy with these two types of produce.
For all others, I froze using my silicone baby food trays and then stored them in ziplock bags or secured them in my mini tupperware containers. Then you label the bag or container with a date, place in the freezer, and use when needed. Most purees will last you about 3 months in the freezer, typically.
There are so many ways to make and store baby food that you really cannot go wrong here! It is also so easy, stressless, and very thrifty to make your own baby food. Plus, you can control what your baby eats!
To make everything, I spent around $25 total. It depends on where you shop! Obviously, you might have some things on hand which would be very helpful. To make it all cheaper, you can replace quinoa with oats and skip the flax seeds-these two ingredients do make it more expensive. But I love the nutrition that it adds to the foods!
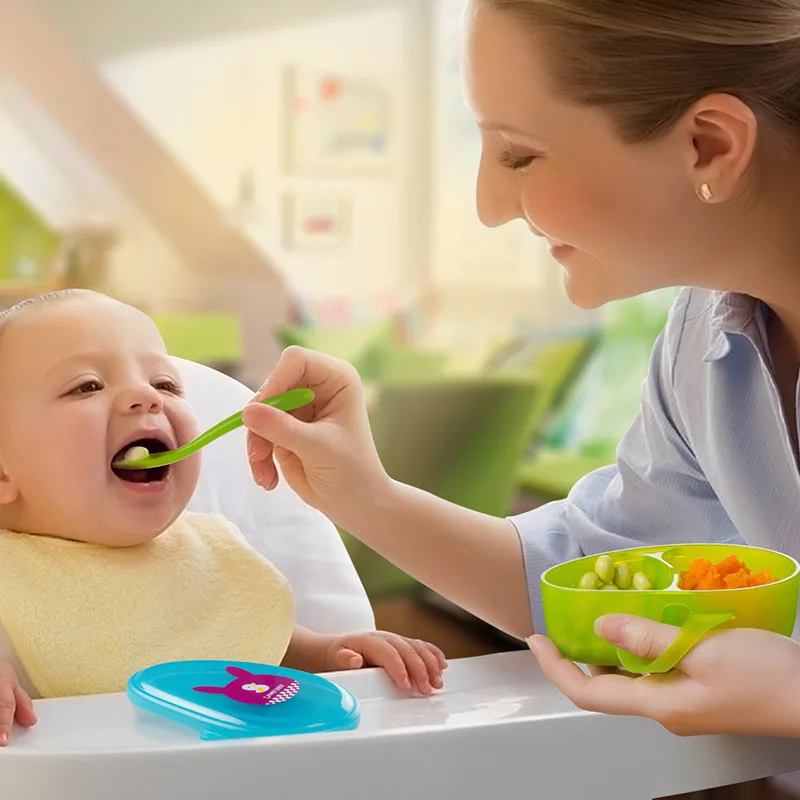
Making your own baby puree is also super fun because you get to see which foods your baby likes. The feeling of approval is so rewarding! My little girl is seen here munching on my Banana + Avocado + Flax puree.
This is about a little more than half of my stash (the rest is in the fridge/freezer), but you get the idea of how much this will make!
Do you have any fun baby food combos to share? Easy methods of preparing baby foods? Something unique that your little one surprisingly loves?
Your trainer and friend,
SHARE THIS POST:
Baby puree at home: recipes
Baby puree from vegetables and fruits at home: cooking secrets
Vegetable and fruit puree often becomes the first meal of the baby after breast milk or formula, so many mothers prefer to cook it on their own. Although modern manufacturers convince us that baby food is devoid of preservatives and harmful additives, fresh vegetables and fruits are much healthier, especially when it comes to infant nutrition. Yes, and cooking baby puree at home is not so difficult.
Vegetables or fruits?
Let's try to make baby puree for our beloved baby. Despite the fact that pediatricians of the last century recommended starting complementary foods with fruits, it is better to first introduce the child to vegetables - modern doctors and nutritionists have come to this conclusion. Boiled vegetables do not irritate the gastrointestinal tract, are better absorbed, satisfy hunger, do not cause allergies and increased gas formation. In addition, vegetables do not contain fructose, which irritates the pancreas. And one more weighty argument in favor of the fact that it is better to start with vegetables - fruits are tastier, and if the baby tries them first, he will refuse vegetables, because they will seem to him more insipid.
How to prepare baby vegetable puree
What can baby puree be made of? The ideal puree for the first feeding is from cauliflower or zucchini. A little later, you can introduce pumpkin, broccoli, carrots, potatoes and green peas. Before cooking, vegetables are washed well, peeled, cut into pieces and cooked - steamed, in the oven or in the usual way, in water. The first two methods are preferable because oven roasting and steaming preserve the vitamins, minerals, nutrients, and natural color in the vegetables. And most importantly - such vegetables are much tastier. Some nutritionists recommend boiling vegetables with their skins on before peeling them, so choose your own cooking method.
If you do have to cook vegetables in a saucepan, use an enamel pot, add less water and put the vegetables in boiling water. Boil until soft, but do not overcook vegetables and fruits, otherwise they will become tasteless and lose a lot of vitamins. Ready vegetables are chopped with a blender until smooth and slightly diluted with water, vegetable broth, breast milk or mixture to a gruel state, since the child does not yet know how to digest thick food. Small pieces of vegetables in puree sometimes cause the baby to refuse to eat, so the knives in the blender should be well sharpened, and if there is no technique, you can grind the vegetables through a sieve.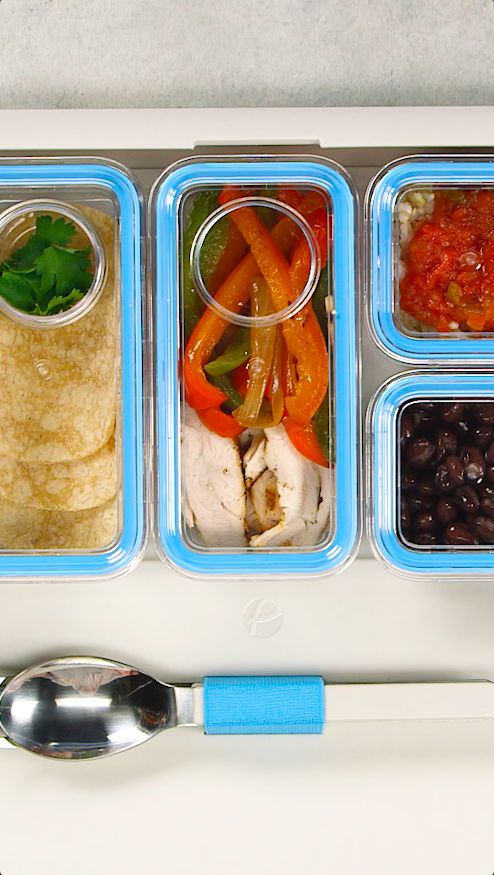 Salt and spices are usually not added to baby vegetable puree, and if the baby is more than 6 months old, you can put a little butter in the puree.
A few rules for making baby puree at home
- Use only fresh vegetables and fruits.
- Water for cooking vegetables must be filtered or bottled.
- If you are using frozen foods, choose only whole fruits and vegetables as they retain the most nutrients.
- All utensils for preparing baby food should be perfectly clean, so if the knife falls on the floor, it should be washed well. Also, the presence of pets in the kitchen during the cooking process is not allowed.
- Avoid vegetables and fruits high in nitrates, such as spinach, lettuce, beets, melons, and watermelons, in infants' diets.
- Store-bought vegetables are recommended to be soaked in water to remove nitrates: 1-2 hours for this, up to 24 hours for potatoes.
- Mix sour-tasting fruits and berries with sweet fruits - for example, blackcurrant goes well with a banana or pear.
 Sour puree is unlikely to please the baby.
 - Give your child only fresh food, but yesterday's puree from the refrigerator is better to eat yourself.
DIY fruit puree for children
Children are more likely to eat fruit puree, because fruits are tastier and sweeter. Fruits contain a large amount of vitamins, minerals, trace elements, fiber and antioxidants, so they are very useful for a growing body. However, fruits are strong allergens, especially berries, bananas, pomegranates and apricots, so they should be given with caution, watching the child's reaction. The most low-allergenic fruits are apples and pears, so it is better to start complementary foods with them, and then introduce all other fruits. First, the baby is fed with a one-component puree made from only one product, and then you can mix different vegetables and fruits, and not only among themselves. Very tasty combinations of fruits and vegetables, such as apples and zucchini, pumpkins and pears.
Fruits must be of good quality, without damage, ripe and juicy, and the rules for preparing fruits do not differ from the rules for cooking vegetables. Naturally, fruit puree is not sweetened with honey and sugar - the later the child learns the taste of sugar, the stronger his health will be.
Aromatic pumpkin puree
Babies love to eat pumpkin because of its pleasant sweet taste, besides pumpkin is very healthy. It contains a whole storehouse of various vitamins, including vitamin T, which normalizes the metabolism in the body. For pumpkin puree, small pumpkins are suitable, since large fruits are not as tasty and difficult to peel.
Cut the pumpkin in half, and then into small slices, one or two of which (depending on the appetite of the crumbs) cut into cubes. Boil the pumpkin in a double boiler or in water for 20 minutes, while warm, beat with a blender to a smooth puree and dilute if necessary with water or a mixture. Add oil and salt depending on the age of the child.
Gentle Broccoli Puree
One of my favorite homemade baby puree recipes is broccoli. This cabbage is extremely useful because it contains potassium, iron, calcium and other valuable substances. It has much more vitamin C than lemon, and the reason for its nutritional value is its high protein content.
Separate the broccoli into florets, wash thoroughly and steam for 20 minutes. Cabbage cooks faster in water - fresh broccoli will take 7 minutes, and frozen - about 15 minutes. Broccoli puree does not need much water, it should lightly coat the vegetables. After the cabbage becomes soft, chop it in a blender or pass through a sieve. If you're mashing for kids older than a year old, be sure to add butter - the little ones will gobble up broccoli on both cheeks!
How to make baby pear puree at home
Pear is a very delicate, tasty and healthy fruit that rarely causes intolerance. In addition to the high vitamin value, the pear has other beneficial properties - it facilitates digestion and removes toxins from the body.
For baby food, choose green pears to reduce the risk of allergies, which are rare among babies. Peel the fruits from the peel and core with seeds, and then stew the pear in a bowl with a thick bottom in a small amount of water for 15 minutes. Let the pear cool slightly and puree it in a blender with a little of the remaining pear broth. For large kids, fruits can not be boiled, but add half a teaspoon of natural honey to the puree.
Zucchini and apple puree
Little gourmets will love this delicious puree, besides, zucchini is considered the most hypoallergenic vegetables, which, due to their high potassium content, have a beneficial effect on the heart. Apples contain iodine, iron and phosphorus, and due to the high concentration of vitamin C, apples help in the prevention of colds and viral infections.
Wash the zucchini and apples well, de-seed them, cut into pieces and cook in a saucepan for about 20 minutes, considering that the zucchini will cook 5 minutes faster. By the way, apples are steamed for 15 minutes, zucchini - 10 minutes. Next, vegetables and fruits are chopped in a blender, mixed and brought to a boil. For allergic children, this is the best side dish!
Exotic mango
Sometimes you can pamper your baby with exotic fruits - for example, make mango puree. This is a very delicate fruit with an original taste, containing 12 amino acids and improving sleep.
Choose only ripe fruits that are soft and reddish-yellow in color. Peel the mango from a thick skin and a large bone, put the pulp in a blender, add 2 tbsp. l. water and mash it, and then heat it in a saucepan for several minutes. For a baby up to a year old, it is better to give mashed potatoes with heat treatment to facilitate digestion, and older children can be fed raw mangoes.
Carrot and Potato Puree
Make normal potato puree without oil. Peel the carrots, grate them and stew them with butter and vegetable broth - about 1 tsp is required for 200 g of carrots. butter and 150 g of broth. When the carrot becomes very soft, wipe it through a sieve, and then put it on a plate, put mashed potatoes on the second half. Let the child choose whether to mix two types of puree for him or eat separately!
Pumpkin and apple puree
This sweet, sugar-free pumpkin-apple puree, cooked in a double boiler, is suitable for children who are already accustomed to “adult” food and are able to perceive a new unusual dish. It is better to take a pumpkin with a gray or green skin and with bright pulp - such fruits contain more vitamins and other useful substances. Apples are green because they have fewer allergens.
Cut pumpkin and apple flesh without peel or seeds into pieces, place in a steamer and cook for 20 minutes. Grind pumpkin, apples and raisins in a blender or by hand with a pusher if the child has already learned to chew. They say that this puree is very good for skin and hair, and you can check the truth of this statement yourself if you start feeding this dish to your baby.
In autumn, you can take care of preparing vegetables for baby purees. Some vegetables, such as pumpkin, carrots and apples, are stored fresh, and zucchini, broccoli, berries are frozen in small portions, because due to frequent freezing and thawing, vegetables lose vitamins and become tasteless. You can roll up fruit and vegetable puree in jars, but this snack should not be given to babies. Remember that the taste of vegetables determines whether the baby will love them in the future, so try to prepare an appetizing and tender puree - for health and good mood!
How to cook baby food - Encyclopedia Baby food
Viktoria Levchuk© Broccoli, zucchini and cauliflower pureeTaking care of your child's health in today's world means starting complementary foods right with whole, healthy foods prepared with love. Most mothers will immediately ask how to prepare baby food that is of high quality, easily digestible and tasty.
Canned food can sometimes seem easy to feed a baby, but when you start reading the ingredients of each tiny can (not to mention the cost of each can), it makes more sense to try your hand at making homemade baby food yourself.
When you think about how to prepare baby food, it seems so complicated. However, everything is much easier. In fact, baby food is the easiest recipe to prepare. Many mothers who hate to cook learn how to cook with healthy complementary foods for their beloved child.
Let's start with a few practical tips on what you need, what products to choose and what else to keep in mind to make the process as easy as possible.
Contents:
So, how to prepare baby food? Simple - choose a fruit or vegetable that needs to be introduced into complementary foods, cook until tender, make a smooth puree and voila ... a batch of baby food is ready. And now to the details, the following tips will teach you how to cook baby food in no time.
1. Buy the right tools
-
Blender
This “devil machine” is the best assistant in the kitchen. Only a blender can bring fruits, vegetables, grains, meat and other products to the ideal consistency. During the first few months, solid foods are made smooth and tender without lumps so that the baby's digestion slowly gets used to the complex textures.
-
Stainless saucepan
Good, regular dishes will always be washed. The first experiments burn, stick and are almost not washed off. Buy one good quality baby food pot. I have never regretted in 6 years. She washes with a brush, dishwasher, iron brush and she is still like new. We choose high-quality, stainless dishes, small up to 1 liter, with a good handle and lid. I have a lid with heat protection, I can take it with my bare hands, it is not hot, and neither is the pen.
Broth with peas and rice-
Baby food freezer tray with lid
One good plastic or flexible silicone tray will last a long time. Moreover, it is needed for the first 4-6 months; you will not need to freeze baby purees anymore. You can buy without a lid, but then you have to suffer from bags, as baby purees love to absorb odors from the freezer.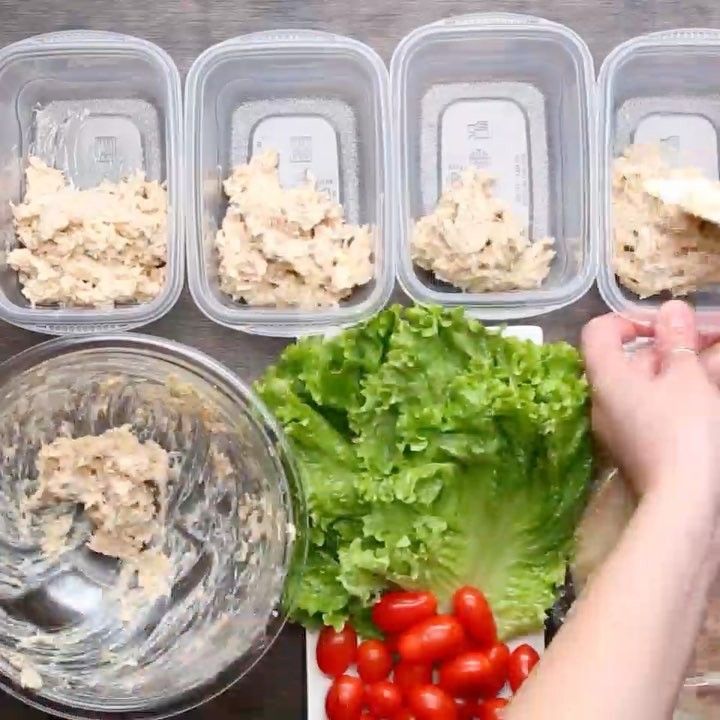 During meals, portions can be diced and heated in the microwave before serving.
-
Food thermometer
Many new mothers are advised to buy a food thermometer. I didn't buy. My wrist was an indicator, always, if I'm hot, then the child will be very hot. But for speed and convenience, a food thermometer comes in handy to make sure the food is at the right temperature for small mouths.
-
Steamer or multicooker
A modern kitchen cannot do without these devices, because it is easier and more useful for us. In principle, a slow cooker will always help out when you need to cook porridge, and a double boiler - a lot of vegetables and fruits. These tools always help out, save the time of an eternally busy mother. I advise!!!
2. Choose Your First Foods Carefully
Choose fruits and vegetables for your first weaning foods that are rich in nutrients. Brightly colored vegetables are fresh vegetables. For the first feeding, foods such as broccoli, zucchini, zucchini, pumpkin are suitable, they are rich in vitamins, and at the same time look attractive. Fruits such as apple and pear can be introduced from about six months of age and are also very rich in vitamins, such as blueberries and peaches.
It's a good idea to talk to your doctor about which foods to introduce first and what is the best age to start complementary foods (this can be between four and six months) and don't forget to start with one.
We offer the child the same food for four days - if any signs of allergy appear, the mother will immediately notice it.
3. Safety first
Making homemade baby food is a convenient way to provide your baby with a healthy diet free of additives and preservatives.
Preparing and freezing small batches of food in advance makes the task much easier. However, do not forget to throw away any food that has been touched with a used feeding spoon, food that has already been reheated, and food that has been in the freezer for too long.