Beaba babycook baby food maker manual
BEABA BABYCOOK INSTRUCTIONS MANUAL Pdf Download
-
page of 36
- Contents
- Table of Contents
- Bookmarks
Advertisement
Table of Contents
Important Safeguards
Product Overview
How to Use
Cooking
Blending
Reheating
Defrosting
Cooking Guide
Cleaning
Recommendations
Technical Data
Instructions
Notice d'utilisation
Folleto de Instrucciones
Instruçoes de utilizaçáo
BABYCOOK
the original babyfood maker
™
Previous Page
Next Page
Table of Contents
Related Manuals for Beaba BABYCOOK
- Baby Accessories Beaba Babycook Manual
Baby food maker appliance (85 pages)
- Food Processor Beaba Babycook Duo Instructions Manual
(82 pages)
- Electric Steamer Beaba BABYCOOK Instructions Manual
(66 pages)
- Electric Steamer Beaba Babycook Instructions Manual
(39 pages)
- Electric Steamer Beaba BABYCOOK Instructions Manual
(32 pages)
- Electric Steamer Beaba Babycook Instructions Manual
(25 pages)
- Kitchen Utensil Beaba Babycook Instructions Manual
(20 pages)
- Cooking Equipment Beaba Babycook Instructions Manual
(16 pages)
- Electric Steamer Beaba BABYCOOK Instructions Manual
(15 pages)
- Kitchen Appliances Beaba Babycook Quick Manual
(8 pages)
- Electric Steamer Beaba Babycook Original Instructions
(5 pages)
- Kitchen Appliances Beaba Babycook Neo Quick Manual
(8 pages)
- Kitchen Appliances Beaba Babycook Smart Manual
(56 pages)
- Kitchen Appliances Beaba Babycook Express Instructions Manual
(96 pages)
- Kitchen Appliances Beaba DRY n SNACK Instructions Manual
(65 pages)
- Kitchen Appliances Beaba STERIL'TWIN Instructions Manual
(11 pages)
Summary of Contents for Beaba BABYCOOK
FAQ and troubleshooting the Beaba Babycook – le bébé +
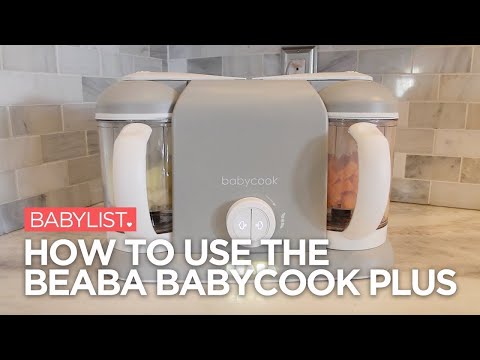
Using the Babycook
Open the lid by pressing the coloured latch on the top of the lid. Remove basket and fill it with diced food (approx. ½ inch cubes). Determine the amount of water needed depending on the type of food you are steaming (see instructions manual). Measure out the water with the cooking bowl (using the graduations 1-2-3). Pour water into the heating reservoir by placing the lip of the bowl on the upper edge of the reservoir. Place the bowl on the base and lock into place by turning clockwise until you hear a click and the bowl cannot turn any further. Then lock the lid into place by pressing on the rubber arrow on the locking arm until you hear it click into place. Plug in the appliance and press the round steam button. A light and a sound signal when the cooking cycle starts. When cooking is complete, a sound signal is heard and the steam symbol.
Babycook steam cooks food very quickly and takes between 5 and 15 minutes depending on the amount of water in the heating reservoir. When steaming food with high water content, such as string beans, zucchini, apples and pears, Babycook runs for approximately 10 minutes with 2 measures of water. When steaming foods with low water content, such as potatoes, carrots, peas, red meat and poultry, Babycook takes approximately 15 minutes with 3 measures of water. When reheating foods, cook with 1 measure of water (about 5 minutes).
Place the flat mixing lid on the cooking bowl and ensure that it is lying flat inside the bowl so that it does not slip down when mixing. Place the bowl on the base and lock into place by turning clockwise until you hear a click and the bowl cannot turn any further. Then lock the lid into place by pressing on the rubber arrow on the locking arm until you hear it click into place. Plug in the appliance and turn the dial to the right, pulsing until you reach the desired consistency of your food. For a thinner consistency, you may add liquid to the bowl before blending.
Ensuring you use the mixing lid will keep any food debris from re-entering and contaminating the steam heating compartment, which will make your Babycook last longer.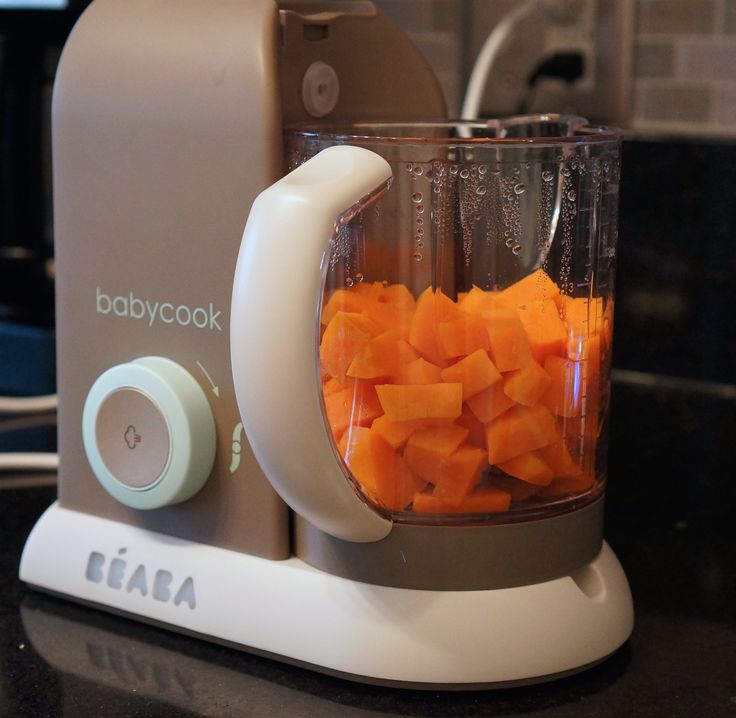
Babycook reheats food using steam. Food should be placed inside a heat resistant bowl or a Béaba Portions Container, and then inside the steam-cooking basket (the one with holes). Pour 2 measures of water into the heating reservoir and start a cooking cycle. When the sound signals the end of the cycle, remove the container with a dry cloth. Caution: the residual water is very hot at the end of the cooking cycle. Mix the contents with the included spatula to obtain an even temperature.
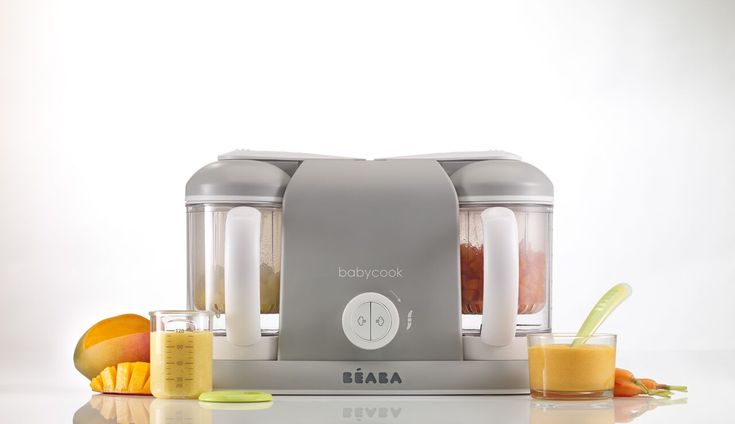
Yes, Babycook Duo has 2 separate steam reservoirs and 2 steam buttons so you can cook 2 meals simultaneously.
While Babycook Duo has 2 steaming chambers, it only has 1 motor for blending. Once food is steamed on either side of the appliance, simply place the bowl in which you would like to blend on the right side of the machine and follow the blending instructions found in your manual.
Babycook shuts off automatically when there is no water present in the steam reservoir. Best practices include unplugging the appliance when not in use.
Technical questions and maintenance
Always unplug the appliance before you start cleaning it. Immediately rinse the accessories that have come into contact with the food under running water. Wash with warm soapy water. After cleaning the blade, make sure that the gasket and seal are reattached properly. Never submerge the appliance in water. The bowl, basket, lid and spatula are top-rack dishwasher safe.
Carrots and other vegetables contain natural dyes that discolour plastic. As plastic is a porous material, it accepts the dyes easily, showing discolouration. You can remove the staining from your Babycook by dipping a paper towel or cotton ball in vegetable oil until it is soaked. Scrub the stain with the paper towel or cotton ball until it disappears. Once the stain is gone, wash the cleaned area with a paper towel soaked in soapy water to remove the oil.
If residual staining remains, soak your stained accessories (not the appliance itself) in hot water with degreasing dishwashing soap overnight. Use a wet sponge or scrub brush to work the soap (Jif or baking soda can be effective too) into the stain until it is gone. Rinse the excess soap off of the dish. The degreasing properties of the soap will likely cut through the carrot's natural oils, causing the stain to disappear.
When the steam button turns red, it is necessary to descale the heating reservoir. Descale the heating reservoir regularly using our descaling liquid, or white vinegar. Ensure the device is cold and not connected to the electrical outlet; pour a mixture of ½ cup of descaling liquid + ½ cup of water into the heating reservoir. Leave for the night and then empty. Repeat if necessary until all lime deposits have been removed. Connect the device to the electrical outlet and then complete two heating cycles using water only in the heating reservoir (3 measures of water) in order to rinse it well. Before the 2nd heating cycle, press and HOLD the steam button down for 30 seconds to reset the cycle counter. The steam button light will turn white.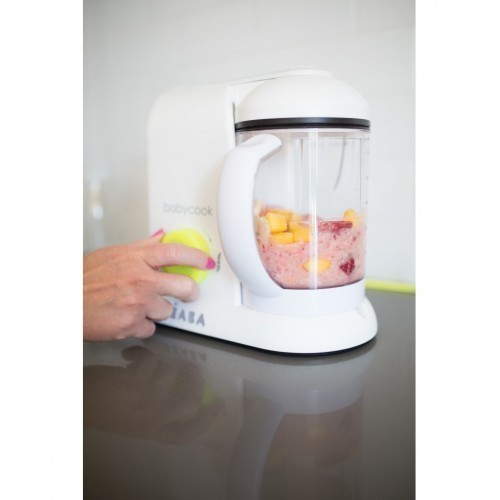 Then clean the bowl and accessories with warm, soapy water. Never use a chemical descaler or a coffee machine descaler in the heating reservoir.
Babycook parts are not suitable for sterilizing.
If you notice a brown deposit (lime scale) in your heating reservoir, you'll need to descale your appliance. Instructions for descaling are located in your product manual or below.
Please note: this is not toxic to your infant.
Instructions on how to descale your Babycook:
- Fill the entire heating reservoir with descaling liquid (or white distilled vinegar) and let it sit overnight
- Pour out the liquid
- Run 2 cooking cycles with plain water
- Repeat as many times as necessary until clean
Be sure not to run the cooking cycle until the reservoir is completely clean. Otherwise, you are just "baking" the build-up onto the sides of the reservoir.
Once the reservoir is clean, be sure to descale your Babycook at the first sign of build-up. Keeping the reservoir clean is much easier than trying to remove stubborn build-up.
Please note that all Babycooks are Quality Controlled as part of the manufacturing process. This involves running a few cooking cycles and can lead to a small deposit of limescale at the bottom of the cooking reservoir. These testing runs are taken into account in the cycle count for your descaling indicator light, which will remind you when to descale your Babycook.
When the gasket is properly cleaned (not suitable for the dishwasher) and properly attached, there is no need to change it. However it will wear over time and with use, so check that it is still sealing properly each time you use Babycook.
Babycook comes assembled and ready to use. However, for hygiene reasons, before using for the first time, we recommend completing 3 cooking cycles of water only using 3 measures of water each time.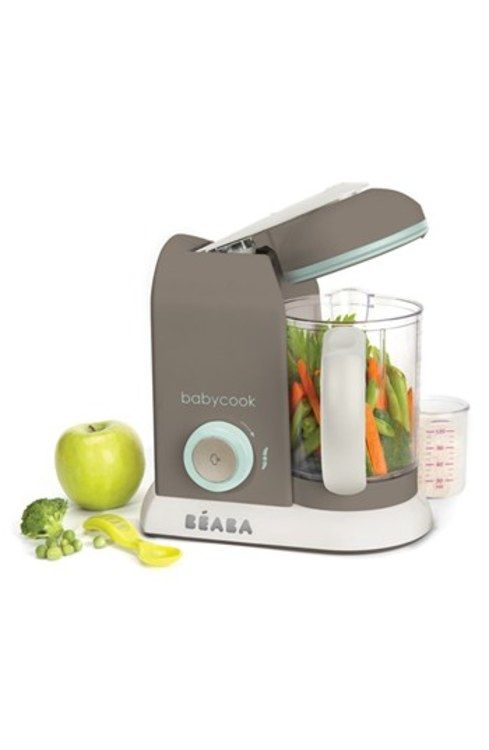 Then clean the bowl and accessories (spatula, bowl lid, basket, blades, gasket and mixing lid) with warm soapy water. Your Babycook is now ready to use!
Yes of course! Watch the video below to see exactly how to remove and reattach the Babycook lid.
This is normal. The assembly lid must have a gap to ensure steam can escape.
If you have a clear bowl, the bowl is made of Copolyester. The inside steam basket is made from transparent Polypropylene. Both of these materials are BPA-free, lead-free and phthalate-free.
Yes, the Multiportion tray is made of platinum quality silicone, which is freezer, oven, microwave, and dishwasher safe. Be careful not to bake the milky white lid, the lid is not oven-safe.
We recommend a maximum temperature of 200 degrees Celsius when baking.
Yes, it can. Follow the steps shown in this video to remove the blade.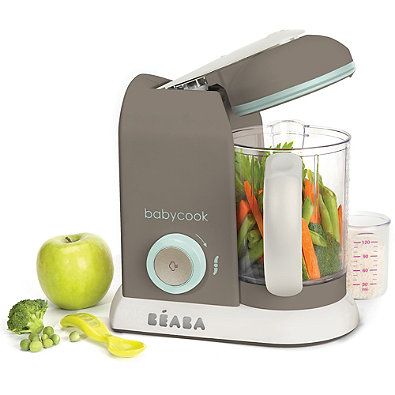
Troubleshooting
- There is not enough water in the steam heating compartment. Add the correct measure of water to the steam heating compartment (the water goes in the tank NOT the bowl).
- The cooking cycle is complete. Press on the steam button and the flashing will stop.
Don't worry, nothing is wrong with your Babycook. The red light is just the descaling reminder light. Follow the instructions for descaling; you can find the instructions in your manual. Once you have descaled with our descaling liquid (or white vinegar), it is important that you unplug the unit for several minutes. Then, plug it back in. Lock your Blending Bowl(s) in to place (Listen For Click) press down on arrows at the top of your lid to ensure your lid is locked, and then PRESS and HOLD the steam button down for 30 seconds to reset the cycle counter. The steam button will turn white again.
Instructions on how to descale your Babycook:
- Fill the entire heating reservoir with descaling liquid (or white distilled vinegar) and let it sit overnight
- Pour out the vinegar
- Run 2 cooking cycles with plain water
- Repeat as many times as necessary until clean
Be sure not to run the cooking cycle until the reservoir is completely clean. Otherwise, you are just "baking" the build-up onto the sides of the reservoir.
Once the reservoir is clean, be sure to descale your Babycook at the first sign of build-up. Keeping the reservoir clean is much easier than trying to remove stubborn build-up.
- The bowl lid and/or the bowl are not correctly attached. When positioned on the base, turn the bowl clockwise until you hear a click and the bowl will not turn any further. Then make sure the lid is also locked by re-opening it and then closing it while pressing on the rubber arrow on top of the locking arm that holds the lid until you hear a click.
 Most people find that they can solve this issue after watching the video below.
 - If the instructions above and the video below do not help you, the heating element or other electrical element may be out of order. In this case, either the base or the whole product may need to be replaced. You will need to contact your place of purchase or Béaba directly to claim under your warranty.
- Babycook may not be properly plugged in. Check that the appliance is properly plugged into a standard polarized outlet with power. The polarized plug is intended to reduce the risk of electric shock. This plug is designed to fit only one way. If the plug does not fit fully into the outlet, reverse the plug. Do not attempt to modify the plug in any way.
- The bowl lid and/or the bowl are not correctly attached.
 When positioned on the base, turn the bowl clockwise until you hear a click and the bowl will not turn any further. Then make sure the lid is also locked by re-opening it and then closing it while pressing on the rubber arrow on top of the locking arm that holds the lid until you hear a click. Check out the video below for more info on this.
 - You have not pressed the round steam button. You will know that the button is pressed and a heat cycle is in progress when the steam button is back-lit.
- There is no water in the steam heating compartment. Add the correct measure of water to the steam heating compartment (the water goes in the tank NOT the bowl).
- If Babycook is not heating and you have ruled out the above causes, the heating element or thermostat may not functioning properly. In this case, either the base or the whole product may need to be replaced. You will need to contact your place of purchase or Béaba directly to claim under your warranty.
Most commonly, this means that power cord on the bottom of the machine is loose. Babycook is designed with a removable cord for easy storage, but the cord needs to be pushed in all the way in order for the machine to function. Simply turn over your Babycook, remove the cord and then push it back in as far as it will go. If this does not work, you will need to contact your place of purchase or Béaba directly to claim under your warranty.
- There is too much scale build-up in the steam heating reservoir. Descale your appliance regularly to prevent lime scale build up in the water tank. See above directions for descaling.
- There is not enough water in the steam heating compartment. Add the correct measure of water to the steam heating compartment (the water goes in the tank NOT the bowl).
- There is too much food in the bowl and there is no room for the steam to circulate and fully cook the food.
 Reduce the amount of food in the bowl and/or run the steaming cycle again.
Leakage can be caused by a variety of issues. It is best to check each one to ensure your product is working properly.
- Check the gasket and ensure that it is properly assembled under the knife blade. The gasket should be mounted with the thin edge of the gasket touching the metal part of the bowl. Please watch the video below to make sure that your gasket is properly attached to the blade and bowl. If there is no gasket underneath the blade or if the gasket is worn out or ripped, you must replace the gasket.
- The bowl is cracked or broken.
- There is a significant gap between the silicone nozzle on the outside of the steam reservoir and the bowl lid so some steam comes out, creating water drops along with casing. Replace the bowl if excessive amounts of water are escaping. However, some water droplets are normal.
- There is no nut on the knife blade. Reattach the nut.
 Correctly fasten the nut with the flat side in contact with the metal part of the bowl and turn the nut counter-clockwise.
Proper attachment of the blade, gasket and locking nut
If your Babycook is leaking or not blending, you may just need a little tutorial on how to secure the blade to the bowl. Watch this video and try to imitate what we do.
Note: Please be careful. Never touch the sharp metal blade itself
- Babycook may not be properly plugged in. Check that the appliance is properly plugged into a standard polarized outlet with 240V power. The polarized plug is intended to reduce the risk of electric shock.
 This plug is designed to fit only one way. If the plug does not fit fully into the outlet, reverse the plug. Do not attempt to modify the plug in any way.
 - The bowl lid and/or the bowl are not correctly attached. When positioned on the base, turn the bowl clockwise until you hear a click and the bowl will not turn any further. Then make sure the lid is also locked by re-opening it and then closing it while pressing on the rubber arrow on top of the locking arm that holds the lid until you hear a click.
- There is no nut on the knife blade. Reattach the nut. Correctly fasten the nut with the flat side in contact with the metal part of the bowl and turn the nut counter-clockwise.
- You hear the motor running but the blade does not turn. If this is happening, the rotating belt is not in contact with the pulley inside the machine. In this case, either the base or the whole product may need to be replaced.
- The motor is not functioning properly. In this case, either the base or the whole product may need to be replaced.
 You will need to contact your place of purchase or Béaba directly to claim under your warranty.
Proper attachment of the blade, gasket and locking nut
If your Babycook is leaking or not blending, you may just need a little tutorial on how to secure the blade to the bowl. Watch this video and try to imitate what we do.
Note: Please be careful. Never touch the sharp metal blade itself
Your Babycook may be faulty. If it still under warranty (within 2 years of purchase and used in accordance with the warranty conditions), you can make a warranty claim.
If you purchased your Babycook from us, contact us to lodge a warranty claim. Otherwise, please visit:
- in Australia / NZ: beaba.com.au/pages/warranty
- in North America: support.beabausa.com/new
- in Asia: beaba.
 com.hk/en/contact-us
 - in the UK: beaba.co.uk/contact/
Can't find the answer to your question? Ask us your own
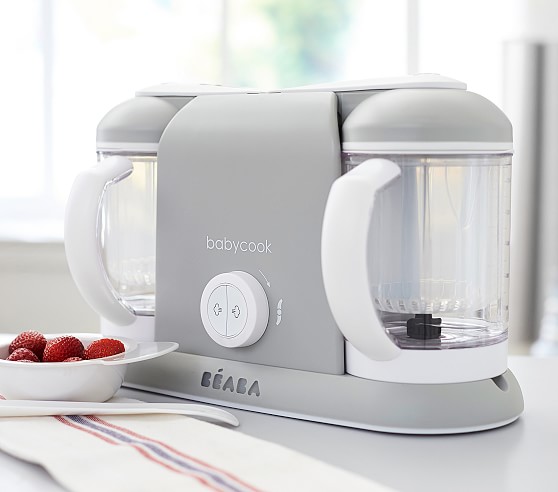
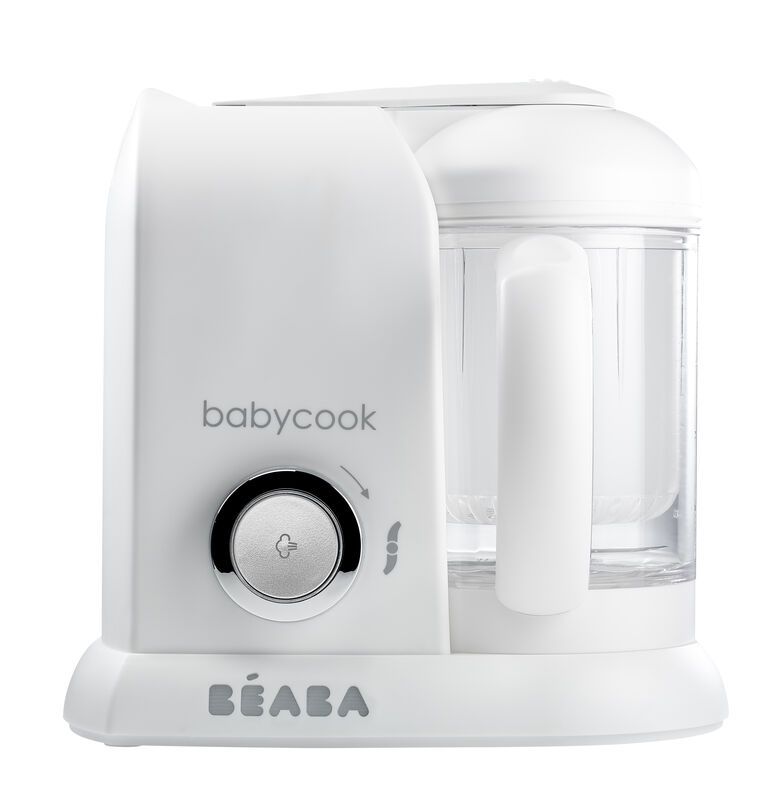
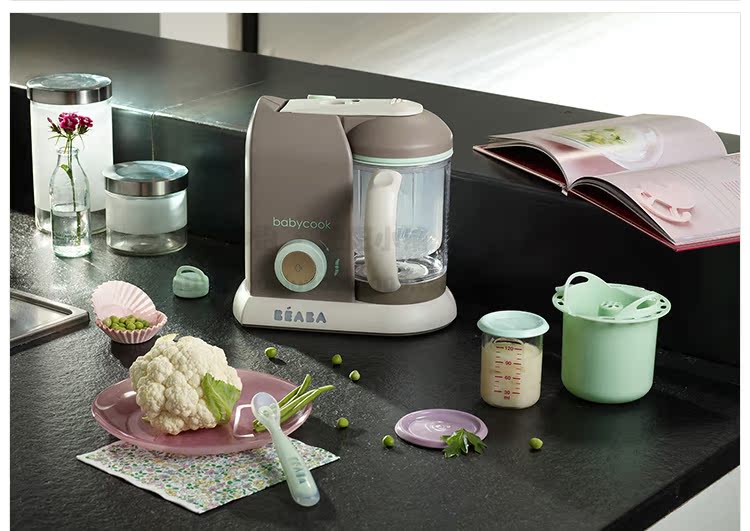
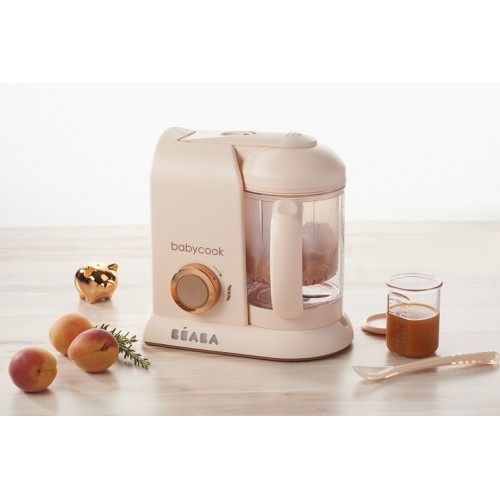
Overview of the Beaba Babycook Original
blender-steamer In my post about complementary foods, I wrote why I leaned towards the option of making homemade purees for the baby, rather than purchased jars of baby food, and that to simplify my own life I decided to buy a blender-steamer - I chose between Philips Avent and Beaba Babycook.
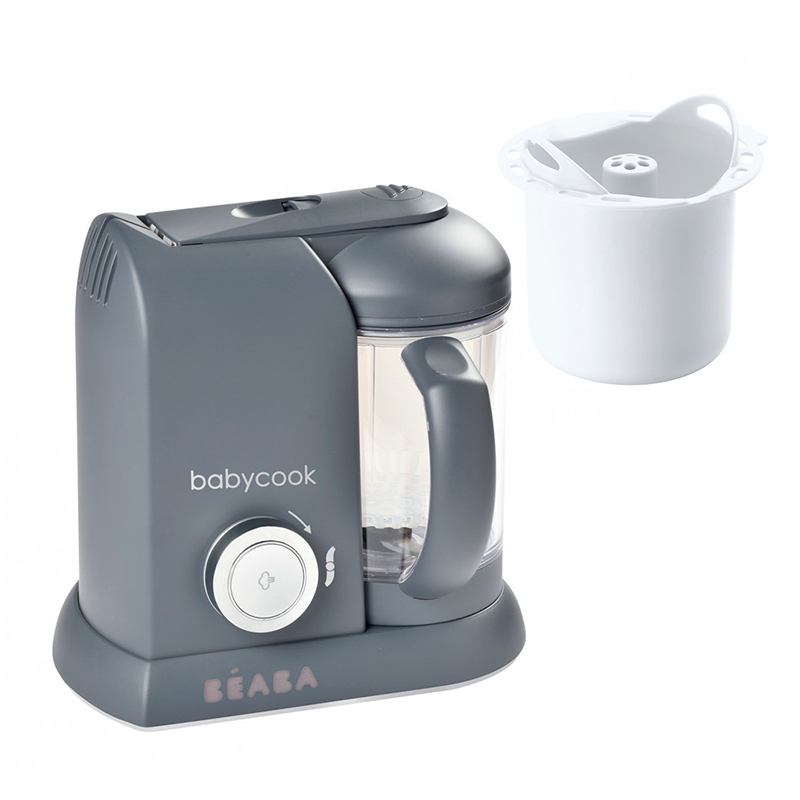
I finally settled on the Beaba babycook original steamer blender: firstly, you could buy a container for cooking cereals (I also cook porridge from ordinary cereals and grind them)
I've been testing it for the second week and I want to share my impressions.
First things first
- Steam blender main unit with water tank, blender bowl attachment and mains connection.
- Blender bowl with lid.
- Steaming basket for vegetables, fruit, fish, meat.
- Grinding cover.
- Spatula.
- Container for cooking cereals (sold separately) .
Before using, according to the instructions, I ran the steamer three times on the longest mode (“3”) with an empty bowl.
Steam vegetable (carrot) puree (steps clockwise on the collage)
water (for reheating and defrosting),
"2" - 90-100 ml (mainly for fruits, berries and some vegetables, such as zucchini),
"3" - 150-160 ml (for cereals, vegetables, meat).
2. Pour water into a special compartment in the base of the blender-steamer.
3. Put the finely chopped vegetables into the steaming net, insert the net into the blender bowl.
4. Close the blender bowl with a lid and fix it on the base. We turn on the device for steam cooking (the switch is in the leftmost position), the red indicator lights up.
5. After a while, the water begins to evaporate. 150-160 ml of water (marked "3") provides approximately 15-20 minutes of cooking.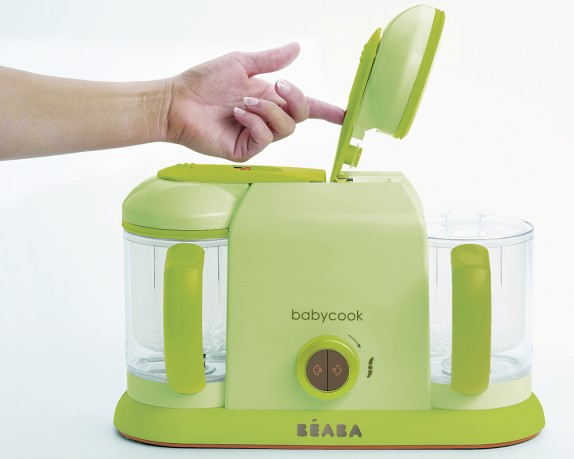 When the water has completely evaporated, the indicator goes out. nine0003
6. Remove the lid from the bowl and take out the mesh with carrots - for this you can use the spatula included in the kit.
7. Pour the vegetables from the mesh into the blender bowl, close the lid for grinding (if you forget to do this, you will have to collect mashed potatoes all over the bowl, including the lid).
8. Turn on the grinding mode
either because of a small amount of vegetables, or because the carrots were not fully cooked, the result was not a homogeneous puree, but as if rubbed on a fine grater. Because we still have small doses of complementary foods and I think that it is not necessary to accustom the child only to perfectly pureed food, I did not bother much with this, and so I fed Vera. From zucchini and cauliflower, the puree turned out much smoother, and from one zucchini - as well as from a jar. nine0003
Carrot puree.
Zucchini and cauliflower puree.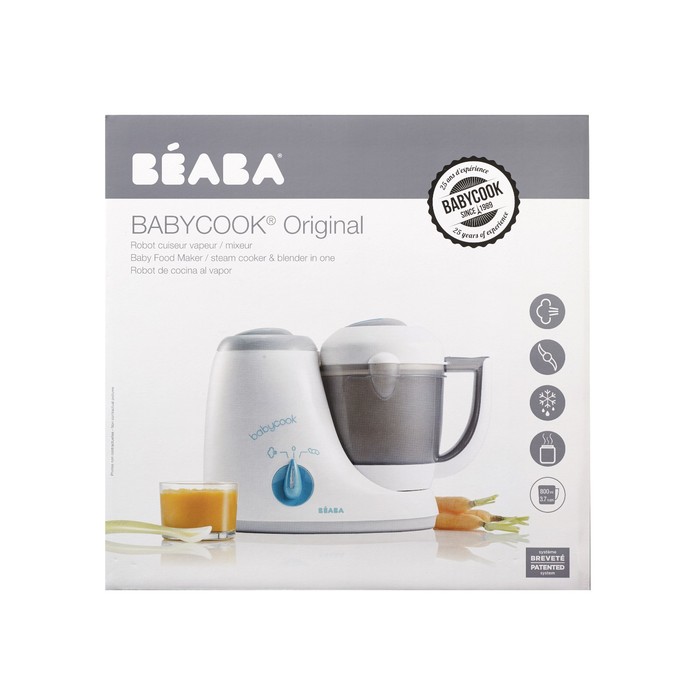
I leave the rest of the puree for the second feeding, store it in Philips Avent expressed milk containers (they never came in handy for their intended purpose) for no more than a day, and usually from morning to evening of one day. You can of course buy Beaba containers.
Steaming porridge (rice) - using a container for cooking cereals. nine0011
1. We measure the required amount of water.
2. Pour it into the reservoir in the main unit.
3. Insert the rice cooker into the blender instead of the steamer. Pour the washed cereal into the middle part of the container and pour water (for 50 g of cereal, according to the instructions, you need to pour 75 ml of water, I poured a little more, because I didn’t need rice for a side dish, but viscous porridge).
4. Close the lid of the blender bowl, attach it to the main unit and turn on the steam mode. nine0003
Rice was not boiled into porridge, it remained in grains, water remained in the container.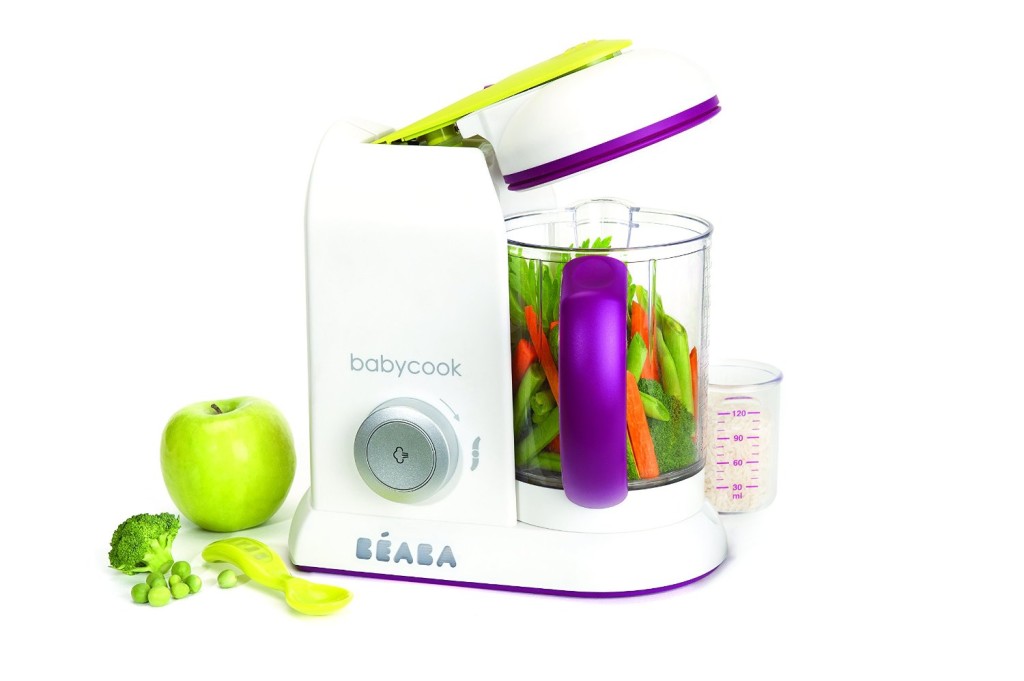 I read in reviews that cereals are not boiled enough in those 15-20 minutes, and this turned out to be true. With corn and buckwheat, the issue is solved very simply: you need to soak them on the eve of cooking (ideally overnight), then one run is enough.
I had to restart the steamer with rice.
5. Pour water into the tank at the base of the steamer, cover the blender bowl with the rice cooker and rice with a lid (nothing needs to be added), restart the steaming mode. The second time the rice was cooked properly. nine0003
6. Transfer the rice from the rice cooker to the blender bowl.
7. Close the bowl with the chopping lid, then with the bowl lid.
8. Turn on the grinding mode.
The result is a homogeneous rice porridge, quite viscous and incredibly popular with my daughter. Leftovers as usual in a container and in the refrigerator.
On the advice of a friend, I tried to make homemade tomato sauce in a double boiler: I steamed tomatoes and chopped them. True, spices and salt were already added in another bowl. In addition to detailed instructions for using a blender-steamer with scheduled modes and the amount of water required for a particular product, a colorful booklet with recipes is attached to it. True, there are no recipes in Russian, but the pictures are very clear. And I can say that regarding the timing of the introduction of certain products, the French are much more loyal than our pediatricians. nine0003
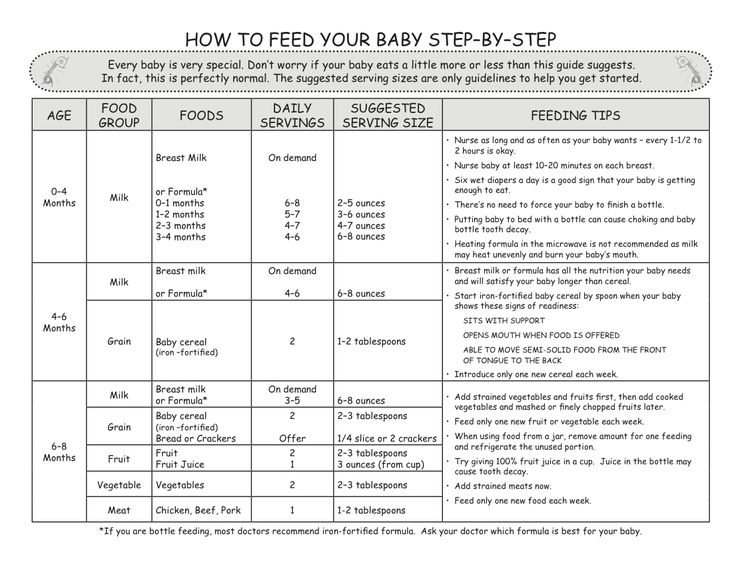
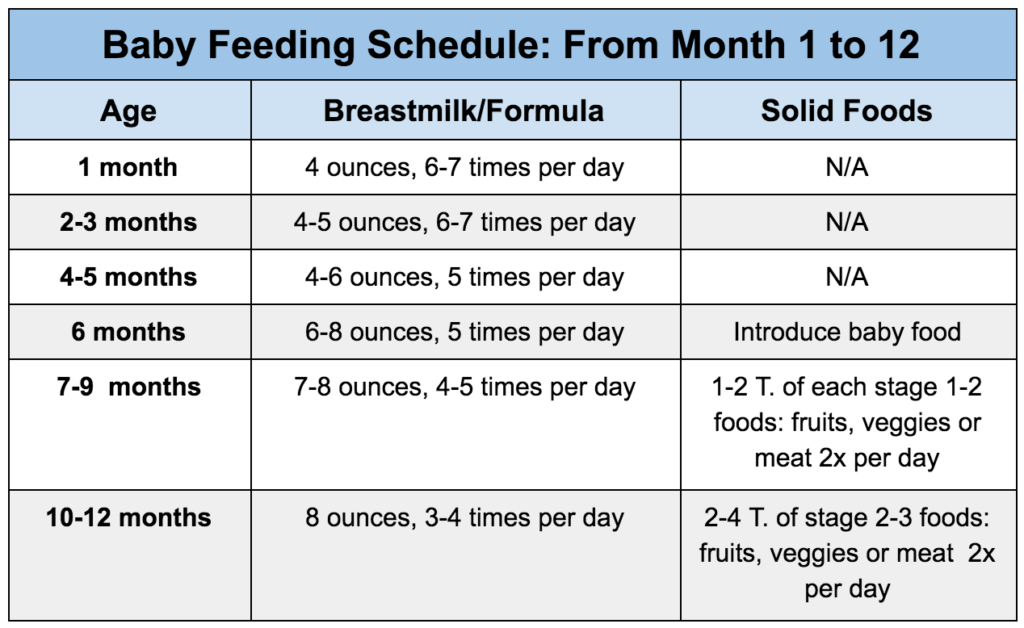
In the same booklet, in fact, there is a supplementary feeding table.
Fruits and vegetables from 4 months, milk and gluten-containing products from 6, shrimp from 12.
Pros:
- Easy to use 2-in-1
- no need to take out, dirty and clean a large steamer (or a slow cooker with a doubler function) and a blender.
- Hygienic: the child has his own separate device for cooking, where, for example, leftover minced meat that was prepared for adult cutlets, or spices that it is too early for him to try (yes, I'm a little paranoid) will fall. nine0003
— High-quality, pleasant to the touch plastic, easy to clean and dry quickly.
— Possibility to prepare a small amount of puree.
- The device does not have any sound signals, which will certainly be appreciated by mothers of sensitive sleeping children (this, however, implies the need to monitor the indicator light).
— Can be used to make adult sauces or small portions of puréed soup when it is no longer necessary to prepare baby food.
Cons:
- In the reviews, I read about the smell of plastic from the device: I repeat once again that according to the instructions, the first three times I started the steamer empty. Indeed, the first couple of times the device smelled a bit of plastic. But after these idle runs, the smell of plastic was gone. - The lids of the water tank and the blender bowl heat up noticeably during cooking - it’s unlikely to get burned, but it creates a certain discomfort.
— In order for the cereals to boil properly, it is necessary either to soak them in advance or to run the appliance twice. Summing up, I will say that in general I was satisfied with the blender-steamer. I get up in the morning, start cooking for my daughter and at this time I calmly have breakfast myself. The child eats fresh quality vegetables without the addition of starch and preservatives, my inner alarmist is relatively calm. nine0003
See also:
Agu Baby Steamer baby food blender 3 in 1 processor Cookee
Our advantages
Delivery on the day of order
Delivery works 7 days a week across the Crimea from 10:00-20:00
Wide range
children under 5 years old.
Quality assurance
All products presented in my Lvenok stores have a manufacturer's warranty.
Promotions and discounts
Be the first to know about promotions, discounts and special offers from moy Lvenok store.
Convenient self-delivery
You can pick up the order yourself in one of the stores in Simferopol.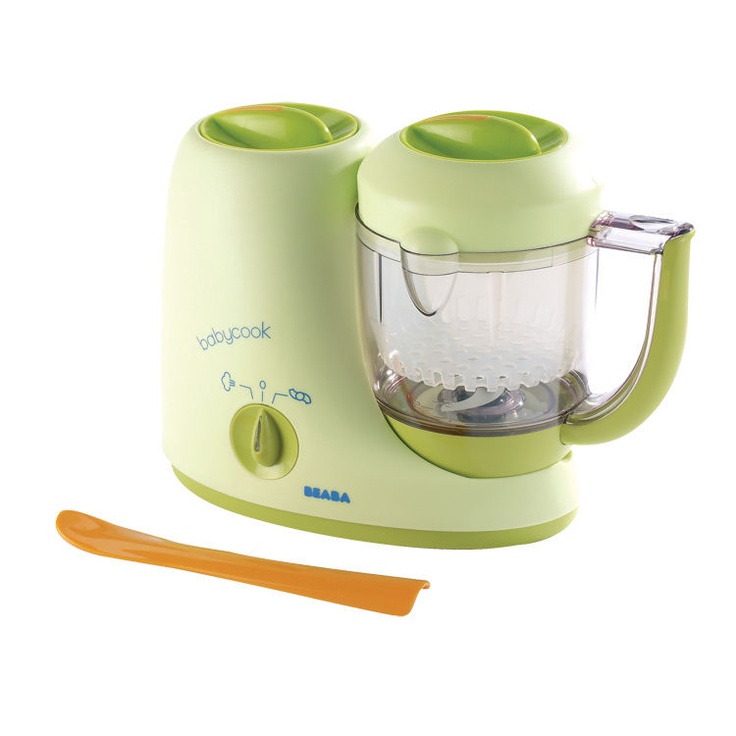
Own warehouse
All goods are placed in moy Lvenok's warehouse equipped for storing children's goods. nine0003
Payment methods
You can pay for the purchase in any way: cash to the courier, bank card to the courier, card according to the details.
- 10900 rub
- 9265 R
Not available
Promotional item
AGU Mini 3in1 Baby Meal Processor is a compact device that fits in any kitchen and takes care of all the key tasks of preparing healthy and tasty food for little ones… and more! nine0011
AGU Cookee is operated by one button, very easy and convenient to use. It will become a reliable assistant on trips and travels. The safe composition of the product components (BPA free) will allow you to enjoy healthy and tasty food without harm to the body.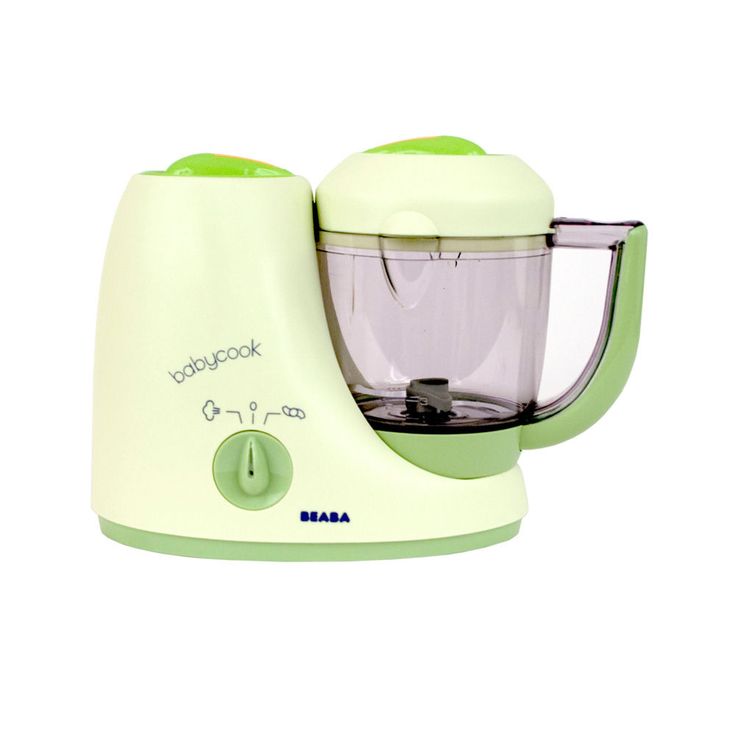 Automatic shutdown is provided in the absence of water in the tank of the device.
The main thing for parents is to study the tastes of the child, and the 3 in 1 mini processor for cooking children's dishes AGU will cook everything.
3 functions combined in the AGU:
- steamer
- blender
- sterilizer
Product information:
- Type: food processor
- Power supply: AC 220-240V, 50Hz
- Max. heater power, W: 400
- Motor power, W: 120
- Warranty: 12 months
- Product dimensions (LxWxH), mm: 238x187x210
- Weight, kg: 1.7
- Bowl volume, ml: 600
- Water compartment volume, ml: 300
Functions:
- Sterilization of pacifiers and nibblers;
- Steam cooking;
- Blender.
Features:
- Pitcher and spatula included;
- Fast cooking;
- Compact size;
- Cup volume 600 ml; nine0019
- Bowl and blades are dishwasher safe;
- BPA free;
- Double safety switch on body and water tank;
- Low noise level.
Reviews
Agu Baby Steamer Baby Food Blender 3 in 1 Cookee
Previous Next
Our advantages
Delivery on the day of order
Delivery is available 7 days a week in the Crimea from 10:00-20:00
Wide range
We offer the most complete range of products for expectant mothers, newborns and children under 5 years .
Quality Assurance
All items in moy Lvenok stores come with a manufacturer's warranty.
Promotions and discounts
Be the first to know about promotions, discounts and special offers from moy Lvenok store. nine0003
Convenient self-delivery
You can pick up the order yourself in one of the stores in Simferopol.
Own warehouse
All goods are placed in moy Lvenok's warehouse equipped for storing children's goods.