Dehydrated baby food recipes
Dehydrated Food For Babies and Toddlers
UBlUOGsRnzQ
Just launched from Beaba, the Dry ‘n’ Snack Food Dehydrator. Perfect for making healthy, easy food and snacks for babies, toddlers and the whole family too.
Eco-friendly and versatile in nature, the Dry ‘n’ Snack is set to be a staple piece of kit in every family kitchen. Nichola Ludlam-Raine from @mummynutrition gives us the low-down on dehydrated foods, and how you can incorporate these within your child’s everyday diet.
Dry ‘n’ Snack by Béaba: creating convenient on-the-go snacks for kids
The Béaba Dry ‘n’ Snack food dehydrator not only creates delicious snacks for your little ones but makes foods that can be added to salads, porridge and cereal, baked goods and smoothies, so you can use it from six months plus.
Your new kitchen companion has a digital display with an adjustable timer and temperature dials, with a built-in automatic switch off for complete peace of mind.
SHOP NOW
What are dehydrated foods?
If you haven’t heard of a dehydrator before, the device resembles a microwave and works by circulating air on low temperatures to ‘fan dry’ fruit, veg, meat and fish to help preserve vitamins and nutrients.
What foods can be dehydrated and rehydrated for what ages?
Béaba’s Dry ‘n’ Snack can be used to dehydrate so many foods, the list is pretty inclusive.
Fresh herbs and seasonings can be dehydrated to prolong their shelf life, as well as fruit and veg – plus baby purees! The foods that don’t work well dehydrated are avocados, olives, butter, milk, egg and nuts.
Dehydrated foods for babies 6 months +
For babies aged six months plus, the Dry ‘n’ Snack food dehydrator is brilliant at dehydrating purees, fruit and vegetables that can be ground and mixed with drinks or used as toppings. Dehydrated purees are a fantastic option for travel, as you can rehydrate these when you need to, adding to porridge, yoghurts or mixing in with drinks.
If you’re baby-led weaning, dehydrated fruits and vegetables can work brilliantly, but aren’t suitable as ‘first foods’ due to texture and potential choking risks. In fact, harder dried fruits remain a choking risk until children are much older – around 4 years of age, so it’s important to make sure any food is soft and of the same size as an adult’s finger so they can grip, chew and swallow with ease.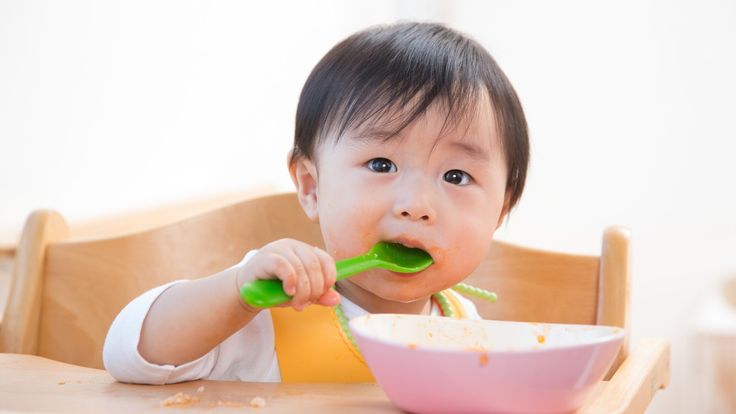
Top tip: When dehydrating purees containing meat or fish, ensure purees are cooked through first prior to dehydrating.
Dehydrated food for toddlers 12 months +
It’s not recommended to give babies snacks until they are 12 months old, as they should be offered milk between meals, but once your baby turns one, you can create all sorts of delicious tasty treats with the Béaba Dry ‘n’ Snack.
Fruits contain a higher amount of sugar so these types of food should be offered with a meal to protect dental health. Dried fruit and veg count as one of your child’s 5-a-day portions, and as everything is made at home, you can ensure there’s no added sugar.
As your child gets older, you can get creative, using your Dry ‘n’ Snack for homemade dried snacks, crackers, fruit rolls, macaroons and granola bars.
Nutritional benefits of dehydrated foods
Dehydrated foods maintain nearly all of their nutritional value, and they’re pretty resistant to bacteria. Dehydrated fruit and veg are more concentrated in fibre, which is brilliant for supporting gut health, and preventing and treating constipation.
How long does dehydrated food last and where should I store it?
Dehydrated fruits and vegetables have a shelf life of a few months to a year, which will reduce wastage and save you money on your food shop, as dried foods are typically very expensive to buy. Dehydrated foods should be stored in an airtight container in a cold, dark area.
Dehydrated food recipes for older babies and toddlers
We’ve picked out four of our favourite Béaba Dry ‘n’ Snack dehydrated recipes created by @my.little.food.critic for your family to enjoy.
Falafels
Loaded with veggies, protein and iron, these falafels are so delicious and they take just a few minutes prep time.
- Suitable from 10 months
- Prepare 5 minutes
- Dehydrate 6-8 hours at 45°C
- Makes 16 falafels
Ingredients
- 1 tin chickpeas (c400g) + 2 tbsp water
- 1/2 white onion, finely diced
- 1 carrot, peeled and roughly chopped
- 1/2 lemon
- 1 tsp cumin
- 1 tsp coriander
- 1/4 tsp cardamom powder
- 1 tbsp tahini
- A large handful of chopped parsley
- 1 tsp minced garlic
- 2 tbsp sesame seeds
Instructions
- Add all the ingredients to to Babycook® Neo (or a blender) and pulse until combined.
- If the mixture is a little dry add another tbsp of water at a time until the mixture can be flattened into a falafel shape.
- Line 2 mesh dehydrator trays with a non-stick sheet or parchment paper.
4. Scoop about 1 1/2 tbsp of the mixture and roll into a ball with your hands and then flatten into a falafel shape. Sprinkle over the sesame seeds.
5. Place the falafels onto the trays.
6. Dehydrate for 6-8 hours at 45°C. If you would like them slightly dryer dehydrate for 8 hours or if you would like them a little bit more moist dehydrate for 6 hours.
7. Once dehydrated remove from the parchment paper and store in an airtight container for up to 5 days.
Oatmeal Cookies
These cookies are packed with goodness and flavour. The bananas, cinnamon and cannula add natural sweetness and the coconut adds a delicious tropical flavour. Great for snacking on the go if even breakfast.
- Suitable from 10 months. Omit honey if making for babies under 12 months
- Prepare 10 minutes
- Dehydrate 10 hours at 45°C
- Makes 8-10 cookies
Ingredients
- 2 cups/180g rolled oats
- 2 bananas, medium/large sized, ripe
- 1/3 cup/80g desiccated coconut
- 1 tbsp milled flaxseed
- 2 tbsp coconut oil, at room temperature
- 1 tbsp honey (optional, omit if making for babies under 12 months)
- 1 tsp vanilla
- 1 tsp cinnamon
Instructions
- Add all the ingredients to the Babycook® Neo (or a blender) and pulse until combined.
- Line 2 mesh dehydrator trays with a non-stick sheet or parchment paper.
3. Scoop about a tbsp of the mixture and roll into a ball with your hands and then flatten into a cookie shape.
4. Place the cookies onto the trays.
5. Dehydrate for 10 hours at 45°C.
6. Once dehydrated remove from the parchment paper and store in an airtight container in the fridge for up to 5 days.
Sweet & Savoury Cauliflower Popcorn
These are addictive! Cauliflower is seasoned to perfection with sweet maple syrup and savoury spices.
- Suitable from 12 months
- Prepare 5 minutes
- Dehydrate 10 hours at 45°C
- 4 servings
Ingredients
- 1 small/medium head of cauliflower
- 1/2 tbsp olive oil
- 1 tbsp maple syrup
- 1/2 tsp paprika
- 1/2 tsp onion powder
- 1/2 tsp garlic powder
- 1/2 tsp turmeric
Instructions
- Cut the cauliflower into bite-sized pieces, try to keep them as even as possible.
- Then add the olive oil, maple syrup, paprika, garlic powder, onion powder and turmeric. Stir to combine. Ensure that all of the pieces are coated.
- Line 2 mesh dehydrator trays with a non-stick sheet or parchment paper. Transfer the pieces of cauliflower to the trays.
- Dehydrate for 10 hours at 45°C.
5. Once dehydrated these can be stored in an airtight container for 3 days.
Yoghurt Drop Buttons
These little yogurt drop buttons are so easy to make and a delicious snack for on the go. You can easily customise them to your preference or to use up any fruit you have to hand.
- Suitable from 9 months
- Prepare 5 minutes
- Dehydrate 6 hours at 60°C
Ingredients
- 1 cup/280g plain yoghurt
- 1/2 cup/100g raspberries (or use strawberries/blueberries)
Instructions
- Blend the raspberries in the Babycook® Neo (or a blender) to form a purée.
- Add the yoghurt and fruit purée to a bowl and stir to combine.
- Line 2 mesh dehydrator trays with a non-stick sheet or parchment paper.
4. Using a teaspoon, drop circles of the yoghurt mixture onto the parchment paper, ensuring that there is space between them.
5. Dehydrate for 6 hours at 60°C.
6. Once dehydrated remove from the parchment paper and store in an airtight container in the fridge for up 2 weeks or at room temperature for 1 week.
NB: If you are unsure if your little one can manage the texture of dehydrated foods please consult your health visitor. Children experiencing delayed progression with weaning and/or developmental delays should seek tailored advice from a health care professional before introducing these types of foods i.e. GP, speech and language therapist, and/or dietitian.
Read Next
Which Tonie Character Will You Be On World Book Day?
Harry Judd And Greg Shepherd Celebrate The Magic Of Thomas & Friends
Sponsored content in collaboration with Béaba
Toddler SnacksParentingbabymain 5WeaningToddlerreview 5
About The Author
Editor of My Baba and author of The Jellie Diaries on Facebook, YouTube and Instagram. IVF Mama to two children, five-year-old Maddie, and three-year-old Billy.
Homemade baby puffs - kale & apple
22.1K shares
Baby Puffs are such an easy baby snack. I do not count the times when my kids were babies and we were either on the go or I needed a light snack for them…and baby puffs were such a fast + convenient + loved by them!!! solution.
There are many Organic Healthy products on the market, but when you will see how simple it is to make them at home you might change your mind 😉
Also, homemade baby puffs are not only super healthy but you can change flavor/color simply changing the organic and seasonal vegetables or fruit you will use.
Today I prepared some “green” puffs using kale and apple, a lovely mix. They are Gluten Free + Dairy Free + Refined Sugar Free!
The recipe is suitable for babies starting from +6 months, but the puffs were sooo good that even my 4yrs and 6yrs old kids loved them (they called them “green chips”).
The procedure is so simple that it will surprise you. To be 100% honest with you the tricky part is the baking phase. We want the puffs to be cooked (not burned!), dried and crisp so that they will melt in the baby’s mouth, exactly like the store bought ones.
Let’s start from the super easy part!
In a food processor add all the ingredients.
Blend up until a smooth cream will be formed (4min)
Using a chef pastry bag or a simple plastic bag, create tiny small dots on some parchment paper, the size you like.
Bake at 350 for 10, reduce at 250, and bake for additional 30 min up until crisp.
This is exactly the procedure that I followed to obtain the green puffs in the pictures. Pending the size of the puffs and/or how liquid the final mix will be (the apple sauce might be a bit more liquid than mine, the kale might have some water from washing it…) you might need more or less minutes for baking. So. My suggestion is to check the puffs in the oven after 30 min (that means 10 min at 350 + 20 min at 250) to see if they are ready. How you see if they are ready you will ask 🙂 You should be able to tap them with your finger and have no sticky residual. The sides should be lightly golden like in the picture (golden, not brown). Also, remember that they will dry out even more once cooled down.
If you are looking for an egg free recipe, simply switch the two egg yolks with 2 Tbsp of ground flax mixed with 6 Tbsp of water. Simple 😉
Storage: in an air tight container on the countertop for 1 week.
A special THANK YOU to the lovely Gemma that tested my green baby puffs 🙂 She is simply a cutie!!!
4.23 from 31 votes
- 1 Tbsp coconut oil
- 2 egg yolks OR 2 T flax seed + 6 T water
- 1 Cup kale
- 1/2 Cup apple sauce
- 1/2 Cup instant rice cereal
- 1 tsp baking powder
-
In a food processor add all the ingredients.
-
Blend up until a smooth cream will be formed (4min)
-
Using a chef pastry bag or a simple plastic bag, create tiny small dots on some parchment paper, the size you like.
-
Bake at 350F for 10, reduce at 250F, and bake for additional 30 min up until crisp.
-
Store in an air tight container for 1 week
22.1K shares
applebaby food kalebaby puffsbaby rice cerealbaby snackbaby snacksgreen baby puffshealthy baby puffshomemade baby puffskalepuffsricerice cerealvegetable baby puffs
About Barbara Lamperti
In Italian BuonaPappa means “enjoy your baby food”. I thought that if I had issues cooking for my baby for the first time, well, maybe I was not the only mom in this situation. Why not start sharing what I learned with other moms and dads all around the world? That's how BuonaPappa. net was born, THANK YOU for following! I feel honored and humbled daily that you would stop by and view my recipes. Grazie mille!
How to create a healthy menu for children [for restaurants]
Want to create a healthy menu for children?
Offering healthy food is a vital step in effectively satisfying your customers.
In addition, you can enjoy the following benefits:
- A wider menu that can satisfy children as well as parents concerned about the nutrition of their children.
- You will save whole families who will prefer your restaurant because it offers good healthy food.
- You can also increase the number of customers you attract to your restaurant.
All this and more just by creating a healthy menu for kids. Let's start!
The importance of healthy baby food in your menu
Every year people are becoming more and more aware of the importance of nutrition.
This fact is due to the high levels of obesity and childhood obesity in different countries.
However, with this new awareness, you can take advantage of a new wave of visitors looking for healthy food options for their families.
How? Directly meeting your customers' new need to have access to a healthy menu for children.
This is important because:
- This makes your restaurant a major impact on local rates of childhood obesity. This ultimately creates a much healthier society!
- The previous point also helps to improve the image of your restaurant.
- Create opportunities for the development of your restaurant. You will be able to cater to more visitors, save entire families, and optimize your bottom line at the same time.
- It's very easy to do! Creating a children's menu is especially easy, because the simpler it is, the better the result.
Finally, creating a healthy children's menu gives you an edge over the competition - unless, of course, there is no competition.
Even so, you can always improve or expand your menu options to keep your restaurant competitive, because it's family-friendly .
How to make a healthy menu for children?
As we mentioned above, creating a healthy menu for kids is pretty easy.
To create healthy meals for children, the following 3 points must be considered:
- Basically they should be tasty .
- You need to create a unique, beautiful and delicious plate !
- They should consist of a balanced combination of proteins, carbohydrates and healthy fats.
I will elaborate on each of these aspects below.
Taste - dishes should be tasty
Satisfying a child's taste is harder than most people think, especially when you consider that these should be healthy meals.
To do this, you must create simple but tasty combinations of ingredients.
Ingredients such as:
- Olive oil.
- Fresh and dehydrated vegetables; tomatoes, eggplant, bananas and more are good options.
- Chicken breast, lean meat, tuna, salmon and more.
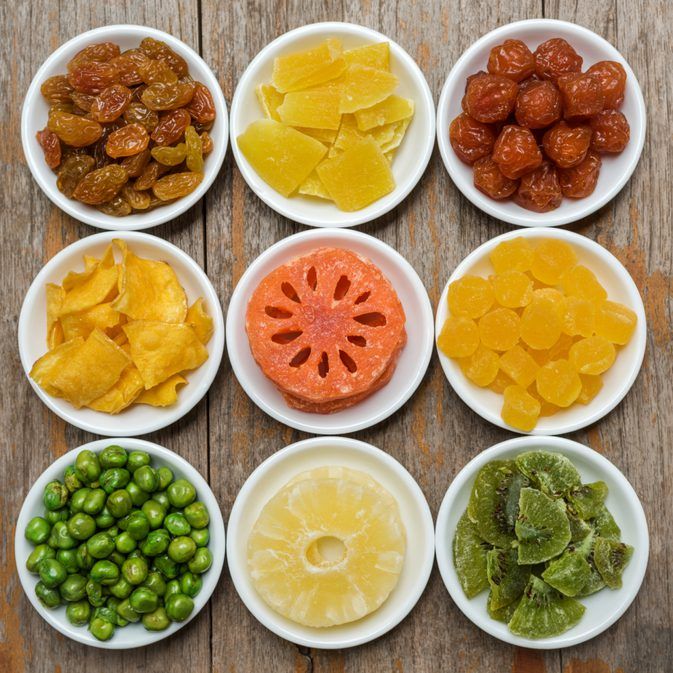
- Seasonings in small quantities; oregano, cumin, salt and sugar will be your main allies.
You can create great, simple, healthy and delicious recipes by using traditional Italian cuisine as a model .
Presentation - dishes should look appetizing and beautiful
This is difficult to achieve, if you do not take into account the opinion of children when compiling the menu.
If you take into account their opinion, you will get access to hundreds of creative ideas, created by children for children .
To do this, just take the first aspect into account and start testing them until you get some definite ideas.
Also take into account the classic children's meals that were not healthy in any way, and rotate them 360° .
For example:
- Do not use hot dogs. But who said you can't make hot dogs with lean protein or vegetables? So, you can create a healthy hot dog!
- You must not use anything fried or breaded .
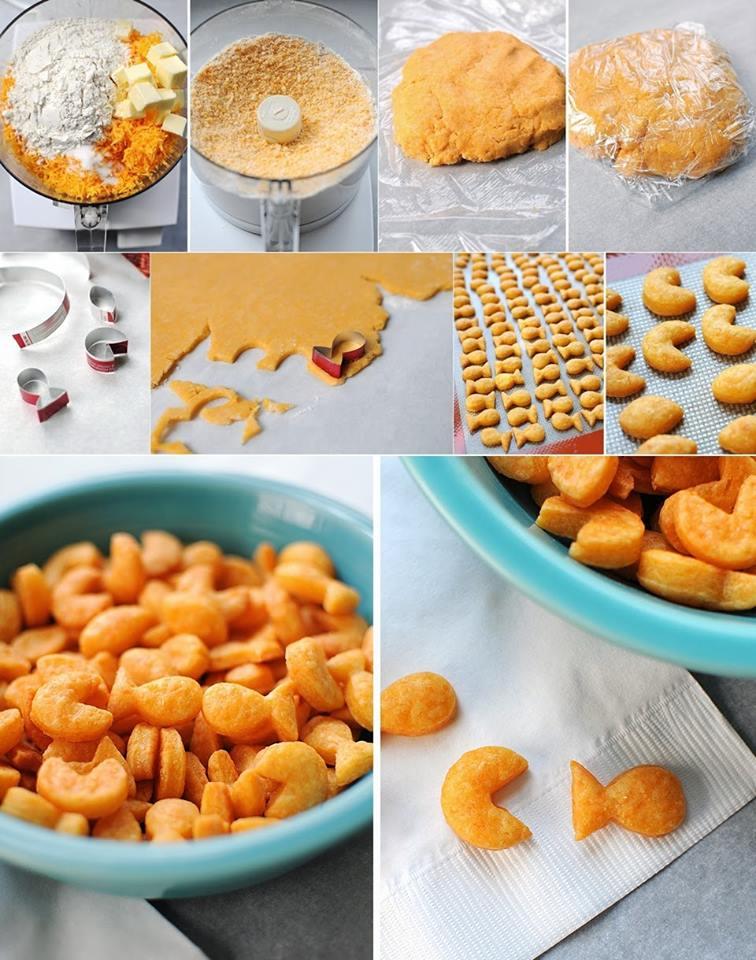 But you can create pseudo-fries in the oven! You can also use dehydrated vegetables to create a layer of faux breading that looks and tastes amazing.
This is one of the best ways to diversify your menu without leaving the "useful".
Balanced nutrition - every meal should be nutritious
If there's one real thing that fast food marketing has been telling you for years, it's that children need good food .
Therefore, each dish must contain:
- Lean protein . By default, this removes the pork! Focus on white and red meat, fish, eggs, and grains such as lentils, chickpeas, beans, etc.
- Healthy Sources of Carbohydrates such as complex carbohydrates made famous in the fitness industry.
- Healthy unsaturated fats (no frying). Avocados, all kinds of nuts*, olive oil and other healthy oils, eggs, low-fat cheeses, and skim milk.
* Note : It is important to remember that nuts create and increase the risk of allergies in your customers. Add very large warnings to menus or avoid them to minimize risks.
Examples of healthy meals for children
Now I will give you 3 useful examples to help you organize your menu ideas.
If you wish, you can temporarily add them to your restaurant's children's menu while you create more options with the aspects mentioned above in mind.
1. Breaded chicken fingers
This is a classic recipe that we've recreated to give you a quick yet kid-friendly option.
Ingredients:
- Chicken : You can use it in three ways. Chicken tenders (by far the best option), minced chicken breast or chicken breast pieces.
- 2 eggs
- 150 g wholemeal flour.
- Seasonings: we recommend oregano, pepper, salt, pepper and a pinch of sugar.
- A tablespoon of mustard.
- 250 g coarse dehydrated vegetable powder. You can also use 250g breadcrumbs.
Preparation:
Take the breadcrumbs and spread them evenly on the tray.
Bake at 150°C until they are golden, which usually takes about 10 minutes. (If you are using dehydrated vegetable powder, this step is not required)
Then prepare the breading mixture.
Mix eggs with whole grain flour, mustard and spices to make a mixture that you will dip each tender meat into.
Remember to keep your salt and sugar levels low.
When the breadcrumbs are ready, remove them and let cool until slightly warm.
In the meantime, prepare the breading station and once the breadcrumbs are warm, start breading each tender.
Place them on a baking sheet with olive oil spread over the bottom.
At the end of each tender, place them in the oven for approximately 20 minutes at 180°C.
Treat chicken fingers with homemade tomato sauce.
2. Banana oatmeal pancakes with homemade jam.
Banana-oatmeal pancakes are a real breakfast of champions. You can also add it to your healthy menu at as a family option.
Pancake ingredients:
- 200 g oatmeal
- A generous tablespoon of olive oil
- 1 large banana
- 2 whole eggs
- 50 ml skimmed milk
- One teaspoon baking powder
- Salt
Pancake Maker:
This mixture is somewhat complex; however, the more effort you put in, the better it will taste.
First of all, mix milk with oatmeal and banana. Leave this mixture in a large bowl.
Then separate the egg whites and yolks into two separate bowls.
Beat the egg white with a mixer until it rises. You can add a pinch of salt to increase friction and make things easier. Also add baking powder.
Repeat the same step with the egg yolk, but also add a tablespoon of olive oil and start beating as if you were making mayonnaise.
Thoroughly mix egg whites, yolks and oatmeal until well coated.
That's it; this mixture is ready for the pan!
To finish them off, simply add a little olive oil to a cast iron skillet and continue the process as you would normal pancakes.
Jam ingredients:
- Fruit! You will need about 350 g of fruit per serving of jam. We recommend eating low fructose fruits such as strawberries and berries.
- Two tablespoons of white chia seeds (black chia seeds are fine too, but more visible).
- Med. For strawberry jam, about 3 tablespoons of honey is enough.
Jam making:
First, mix strawberries with a little water and place in a skillet over medium heat.
When they boil, start stirring the strawberries with a wooden spoon to make sure they don't stick to the bottom.
When it has reduced slightly, remove the pan from the heat.
Add honey and stir with a wooden spoon. If you need a little, feel free to add
more until you reach your desired sweetness.
Finally, add the chia seeds while the jam is still hot and stir with a wooden spoon until everything is combined.
Let it cool, then pack into a suitable size jar and set aside until cool and ready to use.
3. Toast, guacamole and scrambled eggs.
Sounds easy? Is not!
This recipe is very effective for satisfying the hunger of the little ones, and also delicious for adults.
Guacamole ingredients:
- 1 large avocado
- 1 tomato
- ½ bulb
- Cilantro
- Juice of 1 lemon
- Olive oil (optional)
- Salt
Making guacamole:
This is a pretty simple guacamole recipe.
Simply peel an avocado and mash with a fork.
Cut the tomato and onion into the smallest cubes with a very sharp knife.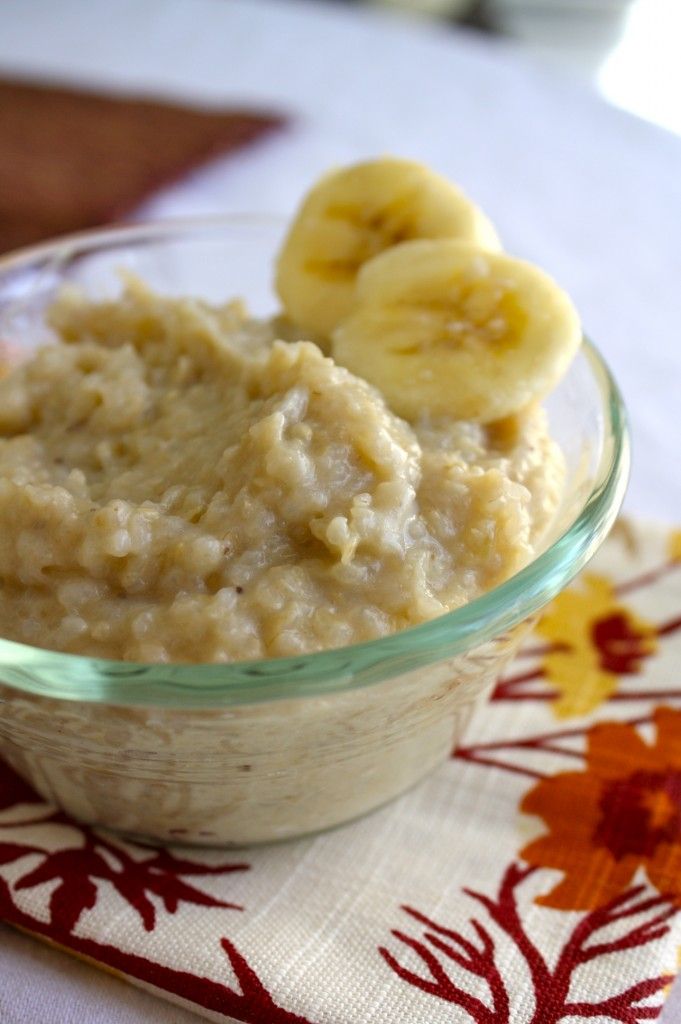
Add tomatoes, onions and finely chopped fresh cilantro leaves.
And add freshly cut lemon juice, salt and olive oil.
We connect everything, and voila!
For scrambled eggs:
- 2 whole eggs. You can also use 3 egg whites.
- 25 ml whole milk.
- 1 tablespoon olive oil or butter (not margarine).
- Salt to taste
Cooking eggs:
Mix two eggs, whole milk and a pinch of salt.
Heat up a frying pan and add olive oil or butter. Carefully distribute the fat in the pan.
Add eggs and cook for about 15 seconds over medium heat.
Then stir the eggs with a wooden spoon and wait another 15 seconds.
Repeat the process two more times and then remove the pan from the heat.
Serve immediately with toast and guacamole!
You ask yourself: what is the complexity of this dish?
To present a dish attractive enough for a child!
But you will have to deal with this task yourself.
Healthy drinks should also be part of a healthy children's menu.
Did you know that the drinks we drink are actually a big source of calories?
Worst of all, most people don't count these calories.
Therefore, we also recommend that you offer not only the usual options: carbonated drinks with an incredible amount of sugar.
What are the best drinks for children?
Here I recommend three of them:
- Natural juices: freshly squeezed orange juice, lemonade and other citrus juices sweetened with honey are an excellent alternative.
- Smoothies: Vegetable and fruit smoothies are a good source of antioxidants, vitamins and minerals. In addition, they allow children to eat vegetables even if they don't know it.
- Cocktails: shakes can also be a healthy option, especially if you find recipes that are low in calories but great in taste.
Healthy drinks and the right meals are all you need to create a healthy children's menu.
A single dessert would not be enough! But honestly, I don't know if society is ready to accept healthy desserts as viable... Just kidding, but I'll save that for another article.
Creating a healthy menu for children is a huge benefit for your restaurant!
Creating a healthy menu is more than an opportunity - it's an advantage that you must use to get ahead of your competitors.
Without a doubt, with a healthy menu for children, you can improve your performance, attract new visitors looking for healthy dishes, and much more.
Don't forget to read our article on how to calculate the cost of a meal. include these recipes in your menu.
Do you think this is a big challenge for your restaurant? Accept and overcome it before the competition does it for you!
Baby food recipes - step-by-step baby food recipes from photos on maggi.
