How to make baby fish food
Tiny Foods for Small Fry
Once fish eggs have hatched, you’ve only just begun the journey to breeding fish and raising their young. Keeping fry alive is far more difficult than getting their parents to breed, and after a successful mating this can be tedious and difficult.
For one thing, while most cichlid fish and livebearer fry are large enough to eat commercially prepared fish food at hatching time, most other fish, including rainbowfish, gouramies, gobies and tetras, require a smaller food source. In fact, the fry of these fish would barely be large enough to be a food source for cichlids and livebearers.
Also, many young fish will only eat food that is moving. You have a short period in which to adapt a young fish to nonmoving food before the fish will die. If you can keep it alive through this period, however, you typically can convert a fish to flake and other commercial foods when it gets older.
The following overview of many of the foods used by aquarists to feed their fry will help you keep your fry alive. Each of these foods provides enough nutrients that it could be used alone, but you should use several different foods when feeding your fry to help satiate their different appetites.
Prepared Foods
Prepared foods are not alive. Here, we will cover boiled egg yolk, powdered egg yolk, liquid fish food and commercial fry flake.
Boiled Egg Yolk
This is an easy, inexpensive food to use with young fry. It has the added bonus of not resulting in the unpleasant smells that live cultures often create.
To prepare this yolk food, start by hardboiling an egg. Remove the shell and egg white — all you need is the yolk. Place a small piece of the yolk in a small container with water (unused yolk can go into a sealed container in the refrigerator), and shake the container vigorously. When you agitate the water the yolk should dissolve, and you now have a suspended food that you can feed your fry.
If necessary, pass the mixture through a cloth to sift out any remaining larger pieces of yolk.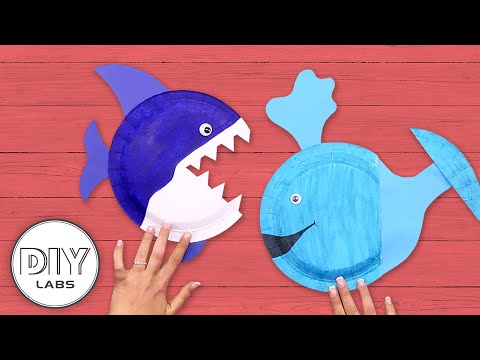 You can then pour the egg yolk solution directly into the fish aquarium. It will typically remain suspended in the water for some time and will be eaten ravenously by most baby fish.
A single egg yolk could feed a batch of baby guppies for months. Of course, egg yolk won’t last that long in the fridge; discard any remaining yolk that begins to decompose. Also, do not add too much yolk to your mixture or add too much food to the aquarium, as it can cause pollution.
One problem with egg yolk is that some of the suspended yolk might be too big for the smallest fry to fit it into their mouths. Even after sifting, some pieces come out too large, so there may be less food to eat and more potentially water-fouling, uneatable food.
Powdered Egg Yolk
This is commonly available at pet stores, and you will find that powdered egg yolk is mixed with many other substances to help provide vitamins and minerals that can aid fish growth.
Powdered egg yolk can be added to an aquarium by sprinkling it directly on top of the water or mixing it with water before pouring it into the aquarium. Typically, if placed on the water surface, the food floats, whereas if you mix the food with water, it remains suspended for a short time before dropping to the bottom of the aquarium. Use both methods to maximize the opportunity for the fish to feed.
This food is excellent for small fish because it is much smaller than you could ever grind flake food. The actual size of powdered yolk is smaller than real suspended egg yolk, which can be very helpful when feeding the smallest of fry.
Liquid Fish Food
Liquid fish foods are foods that are already suspended in water. The particles tend to be too large for smaller fry to fit into their mouths, but there has been a shift toward smaller sizes. This new generation of liquid fry food has many hobbyists anxious for the final results. The initial results have been mixed, but these new liquid foods are small enough to be used in place of other small fry foods. Another plus for these is that they stay suspended long enough for small fish to eat them.
Commercial Fry Flake
Commercially available flake food for fry has been available for many years. Although fry flake foods are good for large fry, such as livebearers and most cichlid fish, they will not work well for small fry. The food is often as large as the fry themselves.
Cultured Foods
Live foods for fry include vinegar eels, microworms, baby brine shrimp and infusoria (both green water and zooplankton).
Vinegar Eels
Vinegar eels are a great food. They are easy to keep and very small (0.04 to 2 millimeters in length and 0.10 millimeter in diameter). Unlike microworms and other cultured foods, you can ignore your vinegar eel culture for weeks without killing off the culture.
A vinegar eel is actually not an eel — it is a nonparasitic roundworm, Turbatrix aceti, that can live in vinegar. Being a live food makes vinegar eels especially helpful in cases where fry will not accept prepared foods. Vinegar eels can live for a long time in aquarium water — often up to 24 hours — so they won’t pollute the aquarium water quickly and will provide a food that is available to your fry throughout the day.
Vinegar eels are so-called because they are cultured in apple cider vinegar. To prepare a culture, fill a quart or larger- sized jar half full of pure apple cider vinegar with no additives. Fill the remainder of the jar with water, preferably distilled or reverse osmosis water. Then add a couple of pinches of sugar or some apple slices, as this helps create food for the vinegar eels. After you’ve prepared your medium, add the eels to the mix.
Vinegar eel cultures are often available online and may be obtained through a local aquarium society. Let cultures grow about two weeks before harvesting.
It can be challenging to harvest vinegar eels.The vinegar that the eels live in is very acidic and can be deadly to fish, especially fry. Therefore, the eels must be removed from the vinegar. Given their small size, this can be tricky. You can purchase a small screen with holes small enough to allow the vinegar to pass through but not the eels, or you can try the long-neck bottle approach.
If you use the screen method, simply pour about half a cup of vinegar from your culture through the screen. You can then wash the vinegar eels off of the screen and into a cup to be dispersed among your fish aquariums. The long-neck bottle method involves using a bottle with a neck that is long and narrow. Fill the bottle with vinegar from the culture until it’s filled a little more than halfway up the bottle’s neck. Then put in a cotton ball, pushing it down until it is in the vinegar, but not submersed in it. Then add a little water above the cotton ball. The eels will move through the cotton into the water above, where they can be removed with a pipette or eye-dropper.
In either case, you will have a nontoxic food that is small and moving — and just great for newly developing fry. Because the vinegar eels are different sizes, there is likely to be a size for most every type of fry. However, it is likely that the smallest vinegar eels will not exist in sufficient quantity to act as your fry’s sole food source.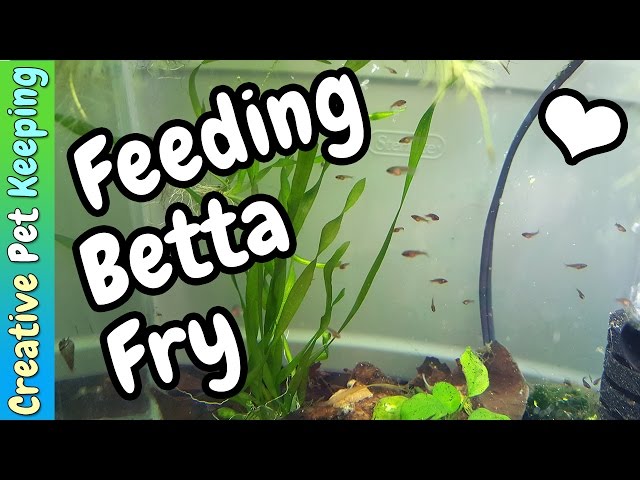
Infusoria: Zooplankton
Infusoria is not a single type of food; it is comprised of different types of organisms that are 0.02 millimeters and larger in diameter, depending on the species.
To create your own infusoria, place some hay, spinach or lettuce in a bottle of water, and put it in a sunny place. The problem with infusoria is that you have no control over what types of organisms are in the water, and some may be toxic to young fish. You could create a more usable infusoria by first boiling the hay, spinach or lettuce, and then introducing one of the paramecium species that is used as fish food. Aeration can be used to help decrease the decay and smell of the culture. For cultures intended to be kept beyond a few days, siphoning the bottom of the culture out every couple of days will help prolong the life of the culture.
Several paramecium species may be used, and the culture of different species has a good bit of variation. If you purchase or obtain a culture of paramecium, ask about any special directions for keeping that particular species. Many can be kept simply by covering the jar that contains your “salad” mixture and putting the jar in a sunny place.
Fill a 1-quart jar with water and your food source. Add the paramecium to the culture. You should be able to use the culture after about four days. Pour it through a piece of cloth to remove the wheat/hay/lettuce/spinach gunk. The water that has passed through the cloth should not be toxic to fish, and it and the organisms in it can be added to your aquarium.
Infusoria cultures do not last as long as vinegar eel cultures, so start a new culture every few weeks to ensure that you don’t run out of food. One of the biggest benefits of the paramecium is its extremely small size. It will produce a large amount of food at a very small size that will feed typically even the smallest of fry.
To avoid paramecium and other microscopic critters that are toxic or dangerous to fry, make sure you fully understand how to keep and feed your species before you begin feeding it to your fish.
Infusoria: Phytoplankton (Green Water)
Infusoria can be broken down into two categories. Zooplankton (discussed in the previous section) include microscopic living animals. Phytoplankton include microscopic plant material (0.02 to 2 millimeters in length). Aquarists speak of using green water as food, but they are actually referring to phytoplankton.
Green water is very easy to cultivate and extremely inexpensive. Simply take some water out of the aquarium (you should not need spinach, hay or lettuce for a culture if you use aquarium water), put it into a 1-quart jar, and place the jar in the sun. The sunlight will cause the water to turn green within a couple of days. When the water turns green, remove some and feed your fish. Then add some new aquarium water back to the culture to help maintain its longevity.
You’ll notice that this is very similar to how we cultured infusoria, and for good reason. Because they both contain microorganisms, we are relying on the replication of those for food. Any culture made from an aquarium will have both zooplankton and phytoplankton, but by increasing the direct sunlight by two to three hours, we encourage more phytoplankton to grow. On the other hand, if you keep the jar in an area that isn’t as well-lit, more zooplankton will grow.
Green water is among the smallest foods available, and many aquarists consider it indispensable when raising newly hatched fry that are too small to accept most other foods. Because the green water will float in the aquarium water, it can stay in the fish aquarium for a long time until it is consumed. One drawback is that the culture may suddenly collapse and need to be replaced. For this reason, it’s recommended to have multiple cultures “percolating” at the same time. It is also possible to order specific phytoplankton and grow them with more specific culturing and harvesting techniques.
Microworms
Microworms (Panagrellus redivivus) are small nematodes (0.05 to 2.0 millimeters long and 0. 05 millimeter in diameter) that may seem initially too small for your baby fish (or too gross to touch). However, they have qualities that make them ideal candidates for growing fish.
To create a culture, mix about a tablespoon of corn meal with water until it forms a paste. Then add about a quarter-teaspoon of yeast. Place this mixture in the bottom of an empty peanut butter jar and add a culture of microworms. Screw on the lid, which should have holes punched into its middle. After a few days you’ll find that there are microworms crawling everywhere. Scrape them off the walls of the container with a razor blade or with your finger and feed them to your fish.
Fish eat these worms ravenously. Unlike vinegar eels, microworms will not live long in the water, so don’t overfeed. In addition to the microworms, the medium they live in may sometimes be introduced into the aquarium. If this happens, don’t worry; it, too, will be eaten by the fish and may provide another source of food for young fry.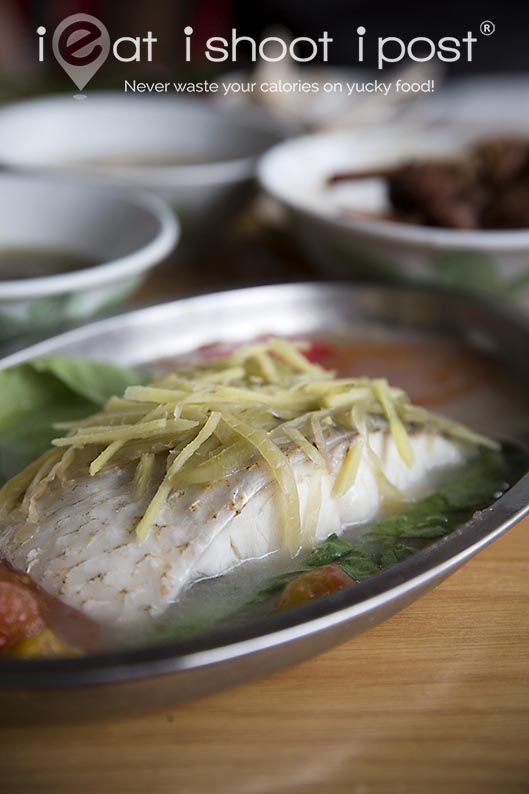
Microworm cultures typically last about two weeks before they need to be replaced. You should not need to do anything to maintain this culture. As with green water, maintain two cultures at a time to avoid having any one culture crash.
Opinions vary on how to maximize a culture. Some people recommend using rolled oats instead of corn meal. Be aware that the smell of the culture is unpleasant. On the positive side, microworms are probably a better nutritional food for your fish than baby brine shrimp.
Baby Brine Shrimp
Newly hatched brine shrimp (0.08 to 0.12 millimeter) have been used in the hobby for years because of the ease of hatching and harvesting it. They are active in freshwater and can live in it for up to five days. There are many opinions on how to make the perfect brine shrimp hatchery. One way is to start with a 1-quart (or larger) jar of water and add about 2 teaspoons of sea salt per quart. Add about 17 ounces of brine shrimp eggs per quart, and aerate the water with a fish tank pump and some air line tubing. You may want to use an airstone, but be aware that doing so can cause problems if you use one that makes very fine bubbles. Ultra-fine bubbles can become lodged in newly hatched shrimp, causing them to float to the surface and suffer an untimely death.
Brine shrimp eggs hatch in 24 to 48 hours, after which the babies can be siphoned out and fed to your fish. Unplug the pump to stop the aeration, and allow the shrimp to settle to the bottom of the jar. Typically, hatched brine shrimp will congregate at or near the bottom of the water, and eggs will float. Use a piece of air line tubing to siphon the shrimp into a fine net or a cup (be careful not to siphon out any unhatched eggs). The little bit of saltwater you add to your aquarium while feeding brine shrimp is not a concern, but you can rinse the shrimp in freshwater if you wish.
It is discouraging to try to keep fry alive when they are so small and unable to eat what you can easily give them. But with a little work, you can create foods that will help get you through the difficulties of raising these small fish to adulthood.
Posted by: Chewy Editorial
Featured Image: Tony Terceira
Share:
Top 5 Tiny Foods to Feed Your Aquarium Fish Fry for Healthy Growth – Aquarium Co-Op
Top 5 Tiny Foods to Feed Your Aquarium Fish Fry for Healthy Growth – Aquarium Co-Op Skip to contentHome· Freshwater Aquarium Blog·Top 5 Tiny Foods to Feed Baby Fish for Healthy Growth
Breeding fish is such a fun and rewarding part of the aquarium hobby, but while it can be easy to get fish to spawn, raising their tiny babies is where the real challenge begins. High losses often occur in the newborn phase because of water quality issues, predation, or simply not feeding enough of the right foods. In this article, let’s talk about 5 miniscule foods that you can feed even the smallest fry to help them grow quickly and get past the first few weeks of their lives.
1. Baby Brine Shrimp
Peacock gudgeon fry eating baby brine shrimp
If you talk to veteran breeders or fish farms that produce massive numbers of fish, they know that the #1 best food to feed fry is baby brine shrimp (BBS). Newly hatched brine shrimp have a nutrient-packed yolk sac that is chock full of healthy fats and proteins — perfect for feeding baby fish. As a live food, their jerky swimming movements also entice the fry to eat more so they grow faster and stronger. To hatch the brine shrimp eggs, simply soak them in salt water, add aeration with an air pump, and heat the water up to 74-82°F (23-28°C). Within 18–36 hours, the baby brine shrimp are ready for harvesting. As long as you buy good eggs, the recipe is very reliable, so follow the instructions in this article.
Baby brine shrimp are approximately 400–500 microns in size and are suitable for many baby livebearers, African cichlids, and other species that lay larger eggs. However, if you are hatching tiny fry from egg layers like killifish, rainbowfish, and tetras, the newborns are too little to eat baby brine shrimp. Therefore, the rest of the article focuses on even smaller “starter” foods, with the strong recommendation that you switch over to baby brine shrimp after a couple of weeks once the fry are big enough.
2. Infusoria
Freshwater plankton under a microscope
In the wild, most baby fish eat microorganisms such as protozoans and invertebrate larvae ranging between 20–300 microns. Infusoria is the common name that fishkeepers use for these freshwater plankton, and there are many methods for culturing them. One of the most popular techniques is to fill a large jar with a few quarts (or liters) of old tank water and mulm, and then drop in a piece of banana peel, catappa leaves, instant yeast, or other organic matter. Warm the water to tropical temperatures between 78–80°F (26–27°C) for faster results and add aeration to minimize the smell. Soon, the water should become cloudy as bacteria breaks down the food, and then it will turn clear as the infusoria consumes the bacteria.
To harvest, use a pipette or turkey baster to suck out some water just below the surface scum and feed it directly to the fry. Depending on the size of the jar and how often you are harvesting, the culture may last 2–4 weeks.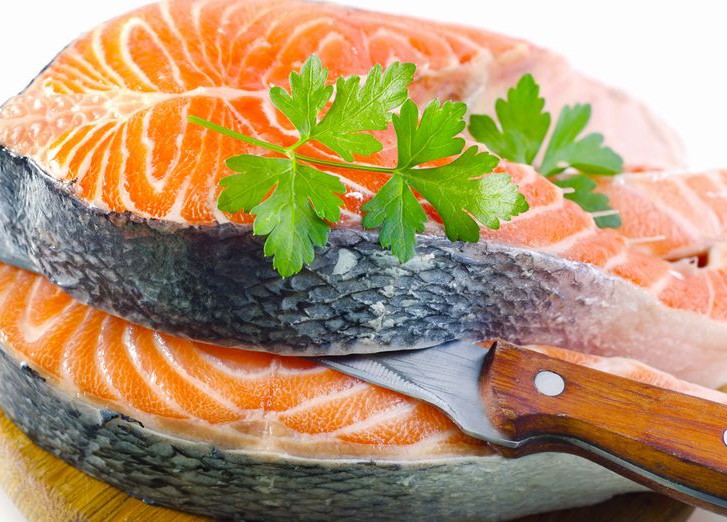 You can extend the life of the culture by topping off the jar with tank water, adding more food every week, and using a turkey baster to remove some of the decomposed gunk at the bottom. If you are raising lots of babies and need a constant supply of infusoria, you may need to start a new culture every 1–2 weeks. Just pour water from the old culture into the new jar, add a food source, and fill the rest of the jar with aquarium water.
3. Vinegar Eels
Vinegar eels being harvested in a bottle neck
If keeping infusoria sounds too time-intensive, try your hand at another live food — vinegar eels. This teeny nematode or roundworm is very simple to culture and is approximately 50 microns in diameter and 1–2 mm in length. Create a mixture of 50% apple cider mixture and 50% dechlorinated water inside a wine bottle or other long-necked container. Add some apple slices and a starter culture of vinegar eels, and wait for them to reproduce. Once you can visibly see them wiggling near the surface, harvest them by adding a wad of filter floss in the neck of the bottle and some fresh water above the filter floss. The vinegar eels will swim to the fresh water up top, so you can easily suck them out with a pipette and directly feed them to the baby fish. Their wiggling motion will attract the fry, and they provide longer access to food since they can survive in fresh water for several days. A vinegar eel culture can last up to 6 months, so follow our detailed instructions to create your own.
4. Powdered Fry Food
Sera Micron fry food
If you do not have access or time to maintain live food cultures, prepared foods are an option to consider. Fry food tends to come in a powdered form that ranges from 5–800 microns, depending on the brand. The key is to provide a variety in diet so that the baby fish do not develop any nutritional deficiencies. Some of our favorites include:
- Sera Micron
- Hikari First Bites
- Easy Fry and Small Fish Food
- Golden Pearls
- Crushed flakes
- Spirulina powder
- Repashy gel food (in the raw, powdered form)
Powdered foods tend to float at the surface because of the water tension, so if you are feeding baby bottom dwellers, you may need to swirl the water to get the particles to sink faster for them. To avoid overfeeding the fish, we recommend using a small children’s paintbrush. Dip the bristles in the powder and lightly tap the paintbrush a few times over the fry tank to feed them. This technique ensures that you do not feed the fry too much at one time, which can end up deteriorating the water quality.
5. Green Water
Microalgae under a microscope
Green water is very similar to infusoria in size, but the green color is more prominent because it’s primarily made up of microalgae and other phytoplankton that create energy through photosynthesis. Hobbyists are usually trying to figure out how to get rid of green water in their aquariums and ponds since it makes it harder to view the fish and plants. However, it has many benefits — such as purifying the water, making it harder for adult fish to predate on their young, healing minor ailments, and serving as a food source for baby fish and daphnia cultures. Start with a large jar, aquarium, or other container and fill it with old tank water. Add some liquid fertilizer, fish food, or other organics to create a nutrient-rich environment for the microalgae. Some people also like to use an air stone, filter, or other device to agitate the water surface and encourage gas exchange, helping to ensure the algae gets enough oxygen and carbon dioxide. Use a light source like a desk lamp to shine directly on the container non-stop for 24 hours a day. After several days, the water should start to turn more and more green and will be ready for feeding to the fry.
A Few More Fry Feeding Tips
Because baby fish have baby-sized stomachs, they need to be fed mini meals at least 3–5 times a day. Also, it helps to put the fry in a smaller container or aquarium so that they don’t need to swim as far and waste as much energy finding the food. The problem is that frequent feedings in a smaller container can quickly foul the water and cause fry mortality, so frequent, small water changes are needed to keep the water clean and stable. Master breeder Dean addresses this problem by creating a rack of fry trays that constantly drips and circulates water from a larger aquarium down below.
Feeding is just one aspect of raising healthy fry, so keeping reading to learn about our top 5 tips for growing baby fish to become big and strong.
Read Now
Tags
Breeding TipsTop 10
Subscribe
Get weekly aquarium blog articles right in your inbox.
Recent blog posts
- Top 10 Amazing Rainbowfish for Your Next Freshwater Aquarium
- Care Guide for Chili Rasboras — Spicy Red Nano Fish for Planted Tanks
- How to Treat Camallanus Red Worms in Aquarium Fish
- Top 10 Aquarium Plants for Breeding Fish and Raising Fry
- Care Guide for Ember Tetras — Orange Jewels of the Nano Aquarium
Featured Products
Back to Freshwater Aquarium BlogUse left/right arrows to navigate the slideshow or swipe left/right if using a mobile device
DIY food for aquarium fish: recipes and breeding methods
Contents:
- Protein food
- Vegetable foods
- Breeding of live food at home
If there are older aquarists in your family, among friends or acquaintances - those who kept fish back in Soviet times, the era of scarcity - then you should hear from them more than once how much easier life is for modern aquarium lovers. nine0003
Indeed, there is now a huge amount of equipment and medicines in stores. The approach to maintaining aquariums has also changed: it is not required, for example, to completely replace the water in the aquarium weekly. And a huge range of aquarium fish, plants, invertebrates allows you to make the balance in your home pond perfect.
But the most important thing is that a huge selection of ready-made fish food has appeared. Aquarists of the older generation had to spend a lot of time preparing food for their pets, getting bloodworms and daphnia, and getting scarce ready-made food. nine0003
However, their experience can also be useful for modern aquarium lovers, because food prepared by one's own hands is confidence in the quality and naturalness of the components, and, therefore, in its benefits for fish.
Protein food
Made by hand from natural products, such food can become a complete replacement not only for dry food, but also for live food. In terms of their nutritional value, they are not inferior to the highest quality aquarium food, but will cost you much less. nine0003
- Beef heart. Grate frozen beef heart. Give, without washing, in small portions no more than once a day.
- Chicken egg. Pour the raw chicken egg into a cup, stir, whisking lightly. Boil water and pour the prepared egg into boiling water in a thin stream. Stir constantly while pouring. Catch the finished egg with a net. Feed the fish in small portions.
- Fresh frozen fish. The fish is grated or passed through a meat grinder. Having decomposed the prepared mass into small containers, it can be stored in the freezer for quite a long time. Before use, it is recommended to defrost the mass at room temperature, give the fish in small quantities. nine0006
- Boiled fish. The same cooking method as freshly frozen, the only thing is that you can chop food with just a knife. In both cases, it is better to use white, lean fish, such as cod.
- Shrimp, krill. Boil, cool, chop, rinse.
- Milk. Boil the milk, cool, separate the “foam” from its surface - a slimy film. She will be the food. Give the crushed film in small portions.
- Curdled milk. Prepare yogurt (for this, just let the milk sour). Important: curdled milk is made not from pasteurized, but from raw milk! Rinse the resulting mass from whey. To do this, place it in a container of water, shake, wait until the curdled milk sinks to the bottom, drain the water. Repeat this several times. Washed yogurt is stored for a long time. nine0006
When feeding aquarium fish with home-made natural protein food, it is important to give food in small portions, and remove the leftovers from the meal immediately after feeding. These foods are very nutritious and spoil quickly, left in the water they will begin to decompose and can cause a bacteriological explosion - cloudy water, fish diseases.
Protein food is especially useful for predators, and boiled egg yolk is a classic food for fry or very young small fish. nine0003
Back to content
Vegetable foods
These types of foods can be prepared from vegetables, cereals, herbs, bread - there is also enough vegetable fiber. This is an excellent top dressing for herbivorous aquarium fish.
Feeding conditions are the same as for protein foods: small portions, fast removal of uneaten residues.
- Manka. Pour a tablespoon of semolina with boiling water, let it brew for 15-20 minutes. Rinse, give out a little. nine0006
- White bread. Does not require special preparation. It is better to use stale, with a crust. Crumble and give out little by little, remove the remains immediately.
- Lettuce, broccoli, carrots. Boil vegetables, chop, rinse, give out in a small amount.
- Oatmeal. Grind, brew with boiling water. Rinse the resulting mass.
Both vegetable and protein components can be mixed in different proportions, vitamins can be added to them, based on the needs and characteristics of aquarium fish. You can develop your own, unique homemade food recipes. It is recommended to add chopped dry nettle to the feed (there are a lot of vitamins in it, it is purchased in pharmacies), dried daphnia (it gives the feed an attractive aroma for fish, it can also act as an independent feed). nine0003
Back to contents
Breeding live food at home
The method is usually somewhat laborious, but quite justified. It is difficult to argue the benefits of live food for aquarium fish, and if you breed them at home, you can be sure that such food is safe for your fish. After all, the risk of introducing an infection into a home reservoir, which is always worth fearing when purchasing live or frozen food, is practically reduced to zero.
Basic rules for growing various crops of live food:
- Do not overdo it with nutrient substrate. With too abundant feeding, the culture begins to multiply rapidly, and then also rapidly die from a lack of oxygen and poisoning with its own waste.
- Periodically change the water in the tanks where you breed live food.
- Do not keep the entire crop in one container so that, in the event of the death of some part of it, you can easily renew the population from the reserve breeder.
Daphnia
Daphnia is an ideal live food for fry, most types of fish. In nature, it can be caught in warm weather in small, sun-warmed ponds with stagnant water. In favorable conditions, daphnia will live with you in the winter, and you can always provide your pets, especially young fish, with valuable, fresh, live food.
Breeding crustaceans are best obtained in waters where there are no fish - this way you do not risk infection. Place the caught daphnia in a prepared container with settled water. Crustaceans are very sensitive to the amount of oxygen, so you need an aerator. The surface of the water must be large enough. They do not like overlight, the ideal temperature for breeding is from 22 to 25 degrees. One fifth of the water should be changed daily. nine0003
Yeast can be used for top dressing (an amount the size of a pinhead is diluted in a spoonful of water and injected into a breeding container). Do not be afraid of clouding - it will pass quickly. You can also use water tinted with blood (from washing meat or fish) - it is administered quite a bit, no more than a tablespoon. The juice of cabbage, beets, carrots is also suitable for feed - a teaspoon of 5-6 liters. Make sure that the water does not deteriorate - it should not emit an unpleasant odor, because the crustaceans filter the liquid, eating excess bacteria. nine0003
Daphnia is an excellent live food for all types of fish, especially for rearing fry in winter. And it can also save you from the “blooming” water in the aquarium - it’s enough to release crustaceans there for a couple of days, and they will clean everything with high quality.
Nematode worms
Common, easy to breed live food. They live in moist humus. In order to get worms for the initial live culture, you need to pick up last year's wet foliage, separate the nematodes and place them in a bowl with a mixture of flour and milk. Put a twig or piece of wood in a bowl. After 3-5 days, multiplied worms will begin to gather on a piece of wood. They are collected with a brush and fed to the fish. nine0003
The culture exists for about a month, then the nutrient substrate must be changed.
Drosophila flies
No initial culture is required for breeding - these insects appear as if by themselves wherever there are rotting vegetables or fruits.
To dilute them, put any fruit puree mixed with oatmeal flakes and yeast into a closed breeder. The first flies will appear in a couple of days, and after 8-10 days they will be enough to feed your pets. nine0003
Enchitreus Soil Worm
Small white worms are very easy to breed and are loved by all fish. In order to breed enchitreus at home, you need to lay garden soil from a wet area (after sifting) in a wooden box with a layer 15-20 cm thick, cover with plywood or a board. Moisten the earth regularly, add a nutrient mixture for worms (boiled potatoes mixed with black bread and milk) in the amount of half or a whole glass no more than once a week. Enchitreus lives and breeds at a temperature of 15-20 degrees. nine0003
The worms for the original live crop can be found when digging up potatoes - they usually settle in the seed potato "womb" from which the bush grows.
Enchitreus comes in different sizes within the same culture, so it is suitable for a variety of fish.
Of course, it is much easier to buy ready-made vegetable or live food than to cook it yourself, or, moreover, breed it yourself. However, those who are really seriously interested in keeping an aquarium, and especially in breeding aquarium fish, know that the more effort and knowledge is applied, the more healthy, attractive and active the fish will be, and their offspring will be strong and strong. By combining homemade food with store-bought food, you create the perfect diet for your pets. nine0022
Back to Contents
DIY Fish Food
When breeding aquarium fish, the problem of feeding them becomes almost the main problem. This whole process for a novice aquarist is fraught with a number of questions: what is the best way to feed pets? how often should this be done, in what quantity? Can you make your own fish food?
Contents
- All about feeding fish
- DIY fish food
- Fried eggs
- Feed mix
- Self-cultivation of live food
- Daphnia
- Artemia
Questions, it must be admitted, are not idle, and therefore let's deal with them in order.
All about feeding fish
Errors in feeding aquarium inhabitants are the main cause of their illness and subsequent death. To avoid mistakes in this responsible process, you should thoroughly study what representatives of this species of underwater fauna eat in the wild. Many of them are omnivorous, that is, their diet can include:
- decaying organic matter;
- protozoa;
- underwater plants;
- worms and insects;
- representatives of other fish species;
- snails and crustaceans;
- chopped fruits, vegetables, etc.
This, of course, makes the task easier, but among the fish you have purchased, there will certainly be those who have live food or, on the contrary, vegetable food as a priority, which means they should be fed accordingly.
The specific question of how much food should be given to the inhabitants of the aquarium requires a specific answer, and the conventional wisdom that it is better to underfeed than to overfeed your charges is fundamentally wrong. nine0003
In fact, both are harmful to your aquarium pets. Systemically overfed fish will die sooner than those who are constantly underfed - that's the whole difference.
To avoid these extremes, the following rules should be followed:
First. Reduce the amount of feed if your pets crowd near the surface without being active a short time after feeding and the water becomes cloudy.
Second. With obvious weight loss of pets, their lethargy on the face of underfeeding. Increase the portion or feed the pets not 2, but 3 times. nine0003
Third. Watch your fish's eating time: with a balanced diet, it will take the inhabitants of your home water from 5 to 15 minutes to eat all or almost all of the food.
Sufficiency of food for all fish in the pond requires special attention. There may be those in the aquarium who are weak or naturally less active, so they can be constantly underfed if you do not pay due attention to this.
Feeding on the crumbs left from other fish, such fish will soon die, completely weakened. nine0003
The food of your wards must contain all the necessary components for their successful growth, development and reproduction:
- proteins;
- carbohydrates;
- fats;
- vitamins;
- trace elements.
This can be ensured by live, dry, frozen foods, which are sold in specialized stores. They are dedicated to books, instructions for use, issued by their manufacturers. But that's not all. It is quite possible to feed your pets with food prepared independently from ordinary products. nine0003
Do-it-yourself fish food
Purchasing fish food is easy today. Any pet store will have a variety of options to choose from. And if such a store is outside your access zone, because not all aquarists are city dwellers?
For this occasion, there are ways to feed your aquarium wards by making their own food dishes. So, let's look at a few recipes for fish dishes that you can actually cook with your own hands at home.
Fried eggs
It is well known that this is the simplest food in terms of cooking technology, for which you just need an egg and a pot of water.
Method of preparation: Break the egg into a cup, stir vigorously and pour into boiling water. Cook stirring for about a minute. Omelet for fish is ready.
We feed the crushed omelet in small portions to the fish, while making sure that the pets immediately eat everything (the water should remain clear). This food will keep in the refrigerator for 3-4 days. nine0003
More articles about fish feeding:
How should aquatic pets eat, read here?
Key benefits of using live food.
Food mix
Another suitable home food option for any aquarist's pets, made from many ingredients, is a long shelf life mix. Its composition may be different, we offer here one of them:
- lean fish; nine0005 squid;
- fish roe;
- egg, pre-cooked;
- yeast;
- milk powder;
- breadcrumbs;
- underwater plants;
- shoots of nettle, dandelion, plantain scalded with boiling water;
- deep red bell peppers (makes the color of the fish brighter).
The listed ingredients are ground in arbitrary proportions in a convenient way (with a knife, in a meat grinder or blender), supplemented with multivitamins according to the instructions. Everything is thoroughly mixed, laid out in a dosage convenient for feeding according to prepared molds, frozen. nine0003
Food can be offered to fish both frozen and thawed. Freshly cut greens or chopped fresh green peas may well serve as a side dish.
Ensure ingredients are free of additives, sugar and salt. Meat and caviar of fish caught in the nearest reservoir are not recommended for feeding, as they can serve as a source of helminthic diseases.
Self growing live food
Culinary delights are not all that a caring owner can do with his own hands for his beloved pets. As noted above, live food should be present in the diet of aquarium fish as the main source of protein.
But there is always a risk of bringing pathogens of fish diseases into your home reservoir along with live food. Therefore, it makes sense to grow your own zooplankton for your pets. This case is troublesome at first glance, but it protects against contamination of aquarium water. So, it was decided - we grow. nine0003
Daphnia
To cultivate Daphnia, it is enough to get a few individuals from the wild. They live in various nearby water bodies. It is better to catch them in the summer, as warm-water forms do not require cool water and are easier to care for. Most often, crustaceans can be found in well-warmed shallow water. Their sizes vary depending on the species - females of large species reach 6 mm, and small ones up to 2 mm.
Make sure that no Cyclops gets into the cultivator along with Daphnia, otherwise the colony will be quickly destroyed. nine0003
Place the crustaceans in an enamel, glass or plastic vessel. It is important to remember that daphnia are sensitive to the oxygen content of the water, so the surface area must be wide. It will not be superfluous to supply the cultivator with aeration.
Daphnia are cultivated in aquarium water, the temperature of which should be 20-28ºС. It is better not to allow sudden temperature fluctuations, as these cladocerans are extremely sensitive to them.
Daphnia are fed baker's yeast diluted in warm water. 1-3 g should fall on 1 liter of water. Feeding is carried out 2-3 times a week. However, you can focus on the water in the cultivator - if there is turbidity and an unpleasant smell, then the amount of feed should be reduced. If the water began to quickly become transparent - on the contrary, increase. nine0003
Every day you need to catch the number of crustaceans necessary for feeding the fish, and change a third of the water once a week.
In order to get daphnia eggs, you need to lower the water temperature and change it more often up to several times a day. The crustaceans will prepare for wintering and will lay shelled eggs that can tolerate long periods without moisture. Store them in a dry state, preferably with river sand. In order for them to hatch, it is enough to add warm water. nine0003
Daphnia eggs are even sent by mail. This method is popular in the northern regions where these crustaceans are not found.
Daphnia.
Artemia
This zooplankton variant with a high level of natural adaptation is valuable for its nutritional value and is especially often used in rearing fry. To breed Artemia nauplii for fry, you will need:
- salt solution in the proportion of 20 g per ½ liter of water;
- her dried eggs - half a teaspoon; nine0006
- jar 0.75 l with lid;
The contents of the vessel must be kept at a constant temperature. Its higher level ensures accelerated hatching of crustaceans. The whole process takes 20-40 hours and proceeds as follows:
- the container is filled with saline (brine) at a temperature of 24-30°C;
- eggs are sprayed there;
- is sealed with a lid with a pair of holes for tubes, through one of which oxygen is supplied, and through the other air outflow is provided; nine0006
- the appearance of nauplii (larvae) marks the completion of the process, they are filtered through a fine mesh, washed with water.