Making baby food in blender
10 Easy Homemade Baby Food Ideas (No-Cook, Super Fast, Stage 1)
Learn how to make the EASIEST homemade baby food recipes (stage 1) for your little one with these super simple no-cook ideas. Plus: I have the best tips for making them ahead and freezing them so you can batch cook and simplify your days!
Homemade Baby Food
As a mom to three kids, I know firsthand how the urge to make homemade baby food can be both exciting and a little daunting. And if you have a busy schedule or other kids in the house, finding the time to actually do it can seem impossible. But, there are so many healthy foods that you can transform into stage 1 baby food purees with hardly any work or special equipment at all!
TIP: I use a regular blender for all of these recipes, so you don’t need to buy a special baby food maker unless you want to.
Baby Food Recipes for 6, 7, and 8 Month Old Babies
These homemade baby food ideas are designed for younger babies who are still eating thinner purees, but you can of course use them for older babies and toddlers too. Each can be served as is, or you can combine more than one together to create new flavors if you’re feeling creative!
TIP: If you want to add fat or protein to any of these fruit or veggie purees, simply stir in a little whole milk yogurt, coconut cream, or Avocado Puree.
Best Way to Make Baby Food
I’ve found that the easiest and most approachable way to make baby food is to simply use a blender. With fresh ingredients and a little water, breastmilk, or formula to thin it as needed, you can easily make your baby meals without investing in equipment you may not use very long.
TIP: You’ll want to start with at least 1 cup of any base ingredient to ensure that there’s enough in the blender to fully blend up.
Tools You Need to Make Homemade Baby Food
To make these baby food recipes you’ll need:
- Blender (you could also use an immersion blender if yours is very strong)
- Water, formula, or breastmilk to thin as needed
- Knife for chopping produce
- Spoon
- Bowls
- Ice cube tray
- Freezer bags for storage
- Baby food storage containers
Stage 1 Baby Food
These baby foods are meant for early eaters as they are typically very thin and easy for a baby to move around in their mouths.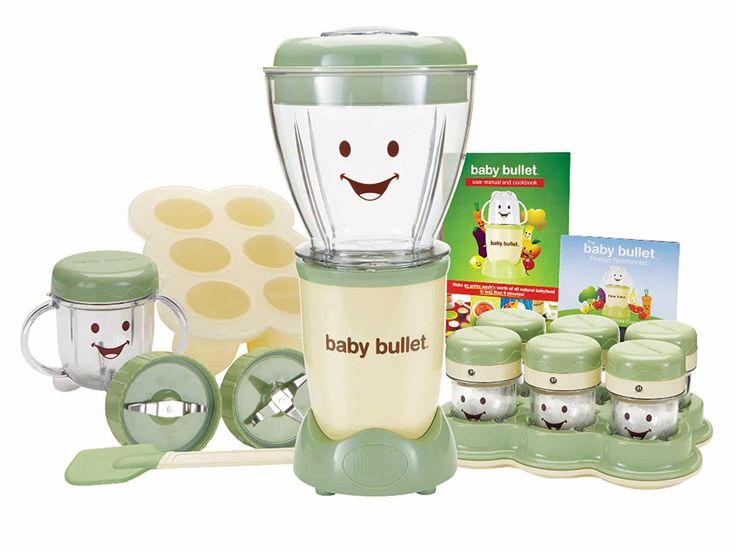 I follow the recommendations to wait until 6 months to start solids, so I personally don’t worry excessively about this distinction as I like babies to experience some texture in their purees. (The ones you find at the store are low allergenic foods and are meant for 4+ months.)
Stage 2 Baby Food
These baby foods are typically a little bit thicker, sometimes include more than one ingredient, and offer a wider variety of ingredients. Most babies are ready for these sorts of purees around 7-8 months, or once they’ve mastered thinner purees. (Again, since I like to do a combined baby feeding approach with both baby led weaning and purees, I don’t worry too much about following the calendar to decide when to introduce these.)
TIP: As a backup to my homemade baby foods, I love the options from Amara Organic Baby Food (paid affiliate link) since you simply need to stir it together with breast milk, formula, or water and it’s ready to serve.
And now, for my ten go-to homemade baby food purees that you don’t even need to cook!
1.
 Avocado Puree
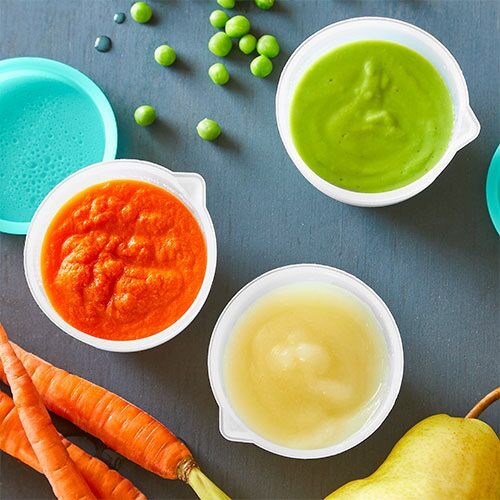
To make avocado puree for a baby, you just need a fresh avocado, a blender, and some lemon juice if you plan to store it for later. I sometimes even do this with just a fork if the avocado is super soft! It’s a perfect way to introduce a low allergenic food that’s rich in healthy fats.
TIP: Get the full recipe for Avocado Puree here.
2. Bean Puree
Baby’s early foods don’t have to be all one food group and beans are a great food to have in the mix. You can do this easy bean puree with chickpeas, pinto beans, black beans, or even white beans, thinning it as needed with water, formula, or breastmilk. This is a great puree to mix with a little sweet potato or butternut squash.
TIP: Get the full recipe for Bean Puree here.
3. Blueberry Puree
Using fresh or frozen blueberries, this easy berry puree is loaded with fresh flavor and antioxidants. It’s delicious on its own or stirred into plain whole milk yogurt or baby oatmeal. (Note that it thickens up as it sits in the fridge, so you’ll need to stir it well to serve.)
TIP: Get the full recipe for Blueberry Puree here.
4. Kiwi Puree
With a bright flavor, this puree is great for babies who seem to love flavor—and it’s a fun one to make and store for later. You’ll want to make sure that you choose very ripe and sweet kiwi and taste it before you make the puree to ensure that it’s not too tart. (If it seems tart, you can mix with banana or applesauce.)
TIP: Get the full recipe for Kiwi Puree here.
5. Mango Puree
Using fresh or thawed frozen mango, this baby puree blends up in seconds. It’s bright, flavorful, and a great source of immune-boosting vitamins. Taste your mango to be sure that it’s sweet and not too tart. (If it’s tart, you can add Applesauce or ripe Banana Puree.)
TIP: Get the full recipe for Mango Puree here.
6. Peach Puree
Turn fresh or frozen and thawed peach slices into a super smooth Stage 1 baby food with this easy blender method.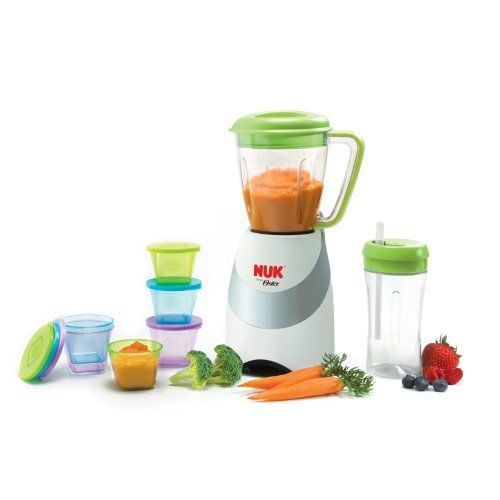 You’ll want to strain out the skin since it’s hard to blend up smooth, even with a high powered blender, but that’s so easy to do! This baby food recipe is a nice alternative to applesauce.
TIP: Get the full recipe for Peach Puree here.
7. Whipped Peanut Butter
This may not have occurred to you, but whipped peanut butter is a great baby food! This is a perfect way to introduce baby to peanut butter and to offer it safely there after. You just need to stir water into unsweetened creamy peanut butter until it forms a whipped consistency like yogurt. It’s smooth, not too sticky, and packed with protein.
TIP: Get the full scoop on introducing peanuts to baby here.
8. Pineapple Puree
Blend up fresh or frozen pineapple chunks into a tropical baby food puree that’s smooth and creamy. This is yummy on its own or paired with whole milk plain yogurt. Taste your pineapple to ensure that it’s not too tart. (If it’s tart, you can add Applesauce or ripe Banana Puree. )
)
TIP: Get the full recipe for Pineapple Puree here.
9. Strawberry Puree
Fresh strawberries blend up into a perfectly smooth homemade puree without the need for any additional liquid. You can serve this as is, or mix with applesauce if desired. The flavor of your berries will determine the flavor of your puree, so be sure to taste them for sweetness.
TIP: Get the full recipe for Strawberry Puree here.
10. Banana Puree
Ripe bananas make great homemade baby food with the help of just a blender. This is a super simple baby food to make at home and it’s easy to digest as a Stage 1 baby food. Use ripe bananas with brown spots to ensure that the puree tastes sweet and is easy for baby to digest.
TIP: Get the full recipe for Banana Puree here.
Homemade Baby Food Storage
The easiest way to store homemade baby food is to add fresh purees to an ice cube tray and freeze. Once frozen, simply pop out the cubes and store in labeled freezer bags for up to 3 months. These are a perfect way to make it easy to send homemade baby food to daycare or to simply get ahead for the coming week.
TIP: Find more information about storing baby food—including the best small food storage containers—here.
]
Tips for Making the Best Homemade Baby Food
- Use at least 1 cup base ingredient to ensure that a blender has enough volume to blend well.
- Thin any homemade puree with water, formula, or breast milk.
- Freeze any baby food you won’t use within 3 days in an ice cube tray. Transfer frozen cubes into freezer storage bags for up to 3 months. Thaw these frozen baby food recipes in an airtight container in the fridge overnight before you plan to serve.
- Taste all fresh foods for sweetness and to ensure that your puree isn’t too tart. To tame tartness, mix any puree with Banana Puree , Avocado Puree, Applesauce, or Mashed Sweet Potato.
- If you want to add fat or protein to any of these fruit or veggie purees, simply stir in a little whole milk yogurt, coconut cream, or Avocado Puree.
- Use breastmilk or formula in place of the water if desired.
- Mix two purees together for more complex flavors.
- Add texture to any puree by stirring in baby oatmeal or hemp seeds.
- For more details on each of these, find them here: Avocado Puree; Banana Puree, Bean Puree; Blueberry Puree, Kiwi Puree, Mango Puree, Pineapple Puree, Peanut Butter Puree, Peach Puree, Strawberry Puree
I’d love to hear your feedback on this way of making simple baby food, so please comment below. I so appreciate hearing your experience with my recipes!
Prep Time 5 minutes
Cook Time 0 minutes
Total Time 5 minutes
Author Amy Palanjian
Cuisine American
Course Baby Food
Calories 42kcal
Servings 4
- ▢ 1 cup blueberries, diced strawberries, diced peaches (peeled), diced kiwi (peeled), diced pineapple (peeled), diced banana (peeled), diced mango (peeled), diced avocado (peeled), OR beans (rinsed and drained)
- ▢ water, formula, or breast milk (as needed)
Choose one fruit, the avocado, or beans and add to a blender.
If making the puree with blueberries, strawberries, peaches, kiwi, pineapple, mango, or beans, add ¼ cup water and blend, adding more water as desired to make a thin, very smooth puree. If making avocado or banana, just blend (without water) until very smooth.
Serve or store in an airtight container for 3-5 days in the fridge, or up to 3 months in the freezer.
Vitamix Blender
Storage Containers
Silicone Ice Cube Tray
- Use at least 1 cup base ingredient to ensure that a blender has enough volume to blend well.
- Thin any homemade puree with water, formula, or breast milk.
- Freeze any baby food you won't use within 3 days in an ice cube tray. Transfer frozen cubes into freezer storage bags for up to 3 months. Thaw these frozen baby food recipes in an airtight container in the fridge overnight before you plan to serve.
- Taste all fresh foods for sweetness and to ensure that your puree isn't too tart.
To tame tartness, mix any puree with Banana Puree , Avocado Puree, Applesauce, or Mashed Sweet Potato.
- If you want to add fat or protein to any of these fruit or veggie purees, simply stir in a little whole milk yogurt, coconut cream, or Avocado Puree.
- Use breastmilk or formula in place of the water if desired.
- Mix two purees together for more complex flavors.
- Add texture to any puree by stirring in baby oatmeal or hemp seeds.
- For more details on each of these, find them here: Avocado Puree; Banana Puree, Bean Puree; Blueberry Puree, Kiwi Puree, Mango Puree, Pineapple Puree, Peanut Butter Puree, Peach Puree, Strawberry Puree
Serving: 0.25cup, Calories: 42kcal, Carbohydrates: 11g, Protein: 1g, Fat: 1g, Saturated Fat: 1g, Polyunsaturated Fat: 1g, Monounsaturated Fat: 1g, Sodium: 1mg, Potassium: 57mg, Fiber: 2g, Sugar: 7g, Vitamin A: 40IU, Vitamin C: 7mg, Calcium: 4mg, Iron: 1mg
Tried this recipe?Rate in the comments and tag @yummytoddlerfood on IG!
Tips on Freezing and Best Containers
Learn the secrets to storing and freezing homemade baby food for ultimate freshness—AND the best baby food storage containers to use to ensure that you never waste what you make!
Baby Food Storage
Going through the effort to make homemade baby food really only works if you have a good plan for how to store the food to ensure that it stays fresh and that baby has plenty of opportunities to enjoy it. After making a LOT of baby food for my third kiddo to send with him to daycare, I got into a good routine of making and storing baby food—both in the fridge and freezer. Here’s how you can do it too.
TIP: You can find my favorite baby food recipes here.
Homemade Baby Food Storage: In the Fridge
You can store baby food in the fridge in airtight containers for up to 3 days. You can use masking tape and a Sharpie to label the containers with the contents and the date if you have a hard time keeping track of when you made something. (It’s definitely helpful to do that!)
Best Baby Food Storage Containers
I have a four favorite baby food storage containers that I use regularly.
1. Wean Green Baby Food Cubes
These are small, incredibly durable, and made from glass. They’re easy to clean and last forever. (Seriously, I’ve been using the same set for 7 years and they’re still as good as new!) $19.99 for a set of 4
2.
These small containers are a perfect size for 1-2 frozen baby food cubes and they’re my go to for packing food for a baby to take to daycare. They also nest nicely when stored in the cabinet. $7.95 for a set of 8
3. Beaba Food Storage Containers
I have two sets of these and I use them regularly for larger amounts of baby food (you could probably fit 4 cubes of frozen food) and for toddler snacks. When assembled, they snap together, so they’re an easy way to stay organized. $14.95 for a set of 6
4. Oxo Tot Baby Food Blocks
This neat system is easy to keep contained in the fridge and is also made from a polypropylene body that is PVC, BPA, and phthalate free. They are dishwasher and microwave safe. $9.99 for a set of 6
Homemade Baby Food Storage: For Freezing
Storing homemade baby food in the freezer allows you to make a bigger batch at once, and then serve it to baby over the course of a few weeks or months. The easiest way is to use an ice cube tray, which has the added benefit of portioning out the baby food nicely.
TIP: Any ice cube tray will do. You can use silicone ice cube trays if you prefer a non-plastic option.
Baby Food Storage Without An Ice Cube Tray
If you don’t have an ice cube tray or you’d just rather not use one, you can place a predetermined amount of baby food into a pint-size freezer bag. Remove as much air as possible, press flat, and seal. Place flat in the freezer to freeze. Then you can thaw the entire bag in the fridge overnight, or break off a portion of it to thaw.
How to Store Baby Food in the Freezer Step by Step
- Place baby food into each compartment of the ice cube tray, or fill as many as you need to with the amount of baby food you have.
- Cover (if your ice cube tray has a cover) and freezer for 4-6 hours or overnight.
- Pop out frozen cubes and transfer to freezer storage bags. Label as desired with the type of baby food and the date.
- Store in the freezer for up to 3 months.
TIP: I like to have a bag of sweet fruit purees and more savory vegetable purees to avoid having too many separate bags in the freezer at any given time. Then you can combine them into baby food combinations easily!
How to Thaw Baby Food
To thaw baby food, simply remove a cube (or as many as you need) and place into airtight containers. Thaw overnight in the fridge and serve. 1 cube may be plenty for a baby aged 6-7 months and older babies may enjoy two cubes.
Tips for the Best Baby Food Storage
- Keep fresh baby food in an airtight container for up to 3 days in the fridge.
- Use a regular ice cube tray to freeze, a silicone ice cube tray with a lid, or a small freezer bag with the contents pressed flat.
- Store frozen baby food in a freezer storage bag in the freezer for up to 3 months.
- To avoid freezer burn, try to remove as much air as possible from the storage bags.
- Label your bags with the contents and the date.
- To thaw baby food, simply remove a cube (or as many as you need) and place into airtight containers. Thaw overnight in the fridge.
- Use leftover baby food to flavor yogurt, baby oatmeal, baby rice cereal, smoothies, or cottage cheese.
- See some of my favorite Baby Food Pouch recipes here for more ideas on how to serve your baby food!
I’d love to hear your feedback if you have another storage technique or container that you love, so please comment below!
What can a child cook in a blender
August 6, 2014 Food Health
Instead of buying expensive baby food, you can make fruit and vegetable purees at home with a regular blender. Here are five healthy vitamin mix recipes for kids.
Iya Zorina
Author of Lifehacker, athlete, CCM
When your child is 4-6 months old, he starts to pay attention not only to milk, but also to other food. After finishing his bottle of milk, the child may try to take something from your plate. If you've had this before, it's time to add some soft foods to your baby's diet. But before you go shopping for baby puree, try making it at home. Here are five healthy baby food recipes that can be made in minutes in a blender.
Store-bought infant formula contains more sugar and salt and less of the natural fibers that homemade formula would have.
In addition, shop mixes are sterilized, due to which vitamins and other useful substances are killed. And, of course, the price - homemade baby formula will cost you half the price.
So if you have a blender and a few minutes to spare, why not try making your own blend? Here are five recipes that are quite suitable for a child.
1. Apple puree
Apple pureeIngredients:
- water - 100 g;
- 3 medium red or yellow apples, peeled and cut into small cubes;
- cinnamon - 1 pinch.
Combine the ingredients in a saucepan and simmer for about 12 minutes until the apples are tender. After that, we send the mixture to a blender and make a puree.
During cooking, you can add as much water as needed. Serve the puree as is, or you can freeze it in ice cube trays and serve it on a hot day.
2. Raspberry-banana puree
Ingredients:
- 1 banana;
- raspberries - 0.5 cup.
Place the ingredients in a blender and blend until smooth. The child will surely like the natural sweetness of the mixture, and not only him - not only children, but also adults can enjoy the fruit and berry smoothie. For example, you can add a vitamin sweet mix to ice cream or Greek yogurt.
3. Fiesta fruit breakfast
Fiesta Fruit BreakfastIngredients:
- water - 75 g;
- oatmeal - 1 tsp;
- crushed raisins - 1 tsp;
- small banana (mashed) - 0.5 pcs.;
- ground flaxseeds (prevent constipation) - 0.5 tsp.
Combine all ingredients in a saucepan and bring to a boil. After that, reduce the heat to a minimum and cover with a lid, cook for another 10 minutes. Pour the mixture into a blender and blend until desired consistency.
This puree is especially useful for preventing constipation. In addition, the mixture is rich in minerals and vitamins that strengthen the growing body. You can give it to older children, without first rubbing it in a blender.
4. Puree of chickpeas and vegetables
Puree of chickpeas and vegetablesIngredients:
- unsalted chicken broth - 1 cup;
- milk (breast or baby food) - 0.25 cup;
- chickpeas - 1 cup;
- small onion (sliced) - 0.5 pcs.;
- carrots (peeled and chopped) - 1 pc.;
- celery (washed and chopped) - 1 sprig;
- garlic (chopped) - 1 clove;
- bay leaf - 1 pc.;
- dried thyme - 1 pinch.
Combine all ingredients except milk and thyme in a saucepan and bring to a boil, then reduce heat and simmer for 10 minutes, covered, until all ingredients are soft.
Drain the broth into a separate saucepan, remove and discard the bay leaf. Add milk and thyme and heat for five minutes.
Pour the mixture into a blender and add some of the remaining broth. The final consistency depends on the amount of broth. Blend in a blender until pureed.
5. Egg, vegetable and rice puree
Egg, vegetable and rice pureeIngredients:
- 1-2 hard-boiled egg yolks;
- brown rice (boiled) - 1 cup;
- vegetables (boiled and chopped) - 0.25 cups.
Blend all ingredients in a blender until pureed. If you don't want to use egg yolks, you can make the mixture without them.
In any case, before formulating formulas, check with your pediatrician about foods you can and shouldn't give your baby.
How to choose a baby food blender?
For baby food, you need to prepare mashed potatoes and cereals - any blender can handle this task. But modern models have various nuances that are not so obvious. We will tell about them below.
Baby food blender: things to consider
Materials - safe and durable
Blender bowls come into contact with food, so the quality of the material is in the first place, because the children's digestive system is very sensitive. There are blenders made of glass, polycarbonate and tritan. What is the difference?
Power: for cream soup or nuts
The more powerful the blender, the faster it grinds foods with complex and hard textures: nuts turn into paste and milk, fibrous herbs and wild plants into green smoothies, frozen fruits into ice cream .
To prepare puree and cream soup from thermally processed products, a stationary blender with a power of 1200 watts or more or a personal blender of 250 watts is sufficient. But if you want to turn peanuts into homemade Nutella in no time, and spinach leaves into absolutely uniform green juice, take a closer look at more powerful, semi-professional and professional models.
Portable: easy to carry around
If you often travel with your child and cook outside, choose personal blenders. Such models are compact, they are convenient to take with you. The advantage of personal blenders in the small volume of the glass. You can cook in small portions without transferring food to another container and without losing part of the product and your time. There are also fewer dishes for washing: grind, close the glass with a lid and take it with you.
Silence of operation
Everything affects the volume of the blender: materials and construction of the body, knives, bowl and fasteners. High-quality models make less noise without losing their power. Professional blenders are not quiet, but some models come with special noise-absorbing hoods (for example, Blendtec Professional 800). Blenders with tritan bowls tend to be a little quieter: tritan does not amplify, but absorbs vibrations. Due to their compactness and low power, personal blenders make less noise than professional models.
Extras
As your child gets older, you may want to treat them to other foods: frozen berry sorbet, nut butter, vegetable milk. Yes, and it will be useful for mom to restore strength with a glass of green juice. Choose from models that are suitable for different tasks: with medium power, special modes or additional knife blocks (separately for grinding dry and wet products).
What other nuances to consider?
Models to look out for
Stationary blenders have more options than personal blenders. However, in a fundamental moment, they lose: they will not be able to cook a small portion of baby food (the products must at least cover the knife blades for normal grinding).
Another aspect is mobility. For regular trips to your parents or country house, a portable personal blender is more suitable.
Personal and stationary models complement each other in the kitchen, so ideally use both. But if this is not possible, choose the type that best suits your needs and lifestyle.
The Hurom BL-C01 blender is a novelty of this year from a Korean company that has been known on the market for more than 45 years. Portable model, which is convenient to take with you when traveling with a child. Two tritan cups of 350 and 600 ml allow you to prepare small portions of purees, soups and smoothies, as well as easy storage of the product, thanks to travel lids.
Tribest Personal Blender Glass PBG-5050 is one of the latest developments of the company, a personal, but at the same time quite powerful blender (as much as 500 watts). The model is suitable not only for purees and soups, but also for homemade sorbets, nut milks and healthy smoothies. And three glass bowls with lids of 240, 480 and 720 ml allow you to quickly chop and easily transport the right amount of baby food.
Tribest PB-350 is a versatile and compact model, a real classic that has proven itself in the market. The blender is equipped with two glasses (for whisking and chopping), as well as 120, 240 and 350 ml glass jars for easy storage (and preparation) of even the smallest portions of baby food. The model is equipped with automatic and manual pulse control mode, as well as two knives for comfortable grinding of liquid and dry textures.
BlendTec Classic 575 is a classic stationary model from a well-known American manufacturer. Equipped with blunt blades made of reliable stainless steel (10 times stronger than blades from other manufacturers), which cannot be cut when disassembling and washing the blender. Sufficiently powerful (1560 watts) and durable model combines two types of control (4 modes + pulse). The blender is also equipped with a self-cleaning function for more comfortable use.
The L'equip BS5 Cube blender is a professional stationary model. This blender is great for processing hot and cold foods. You can also grind dry foods like grains, beans, and nuts into flour or a paste without adding liquid. The high-strength tritan jar and ultra-sharp titanium-coated Japanese stainless steel blades ensure reliable and fast preparation of any, even the most complex dishes.

