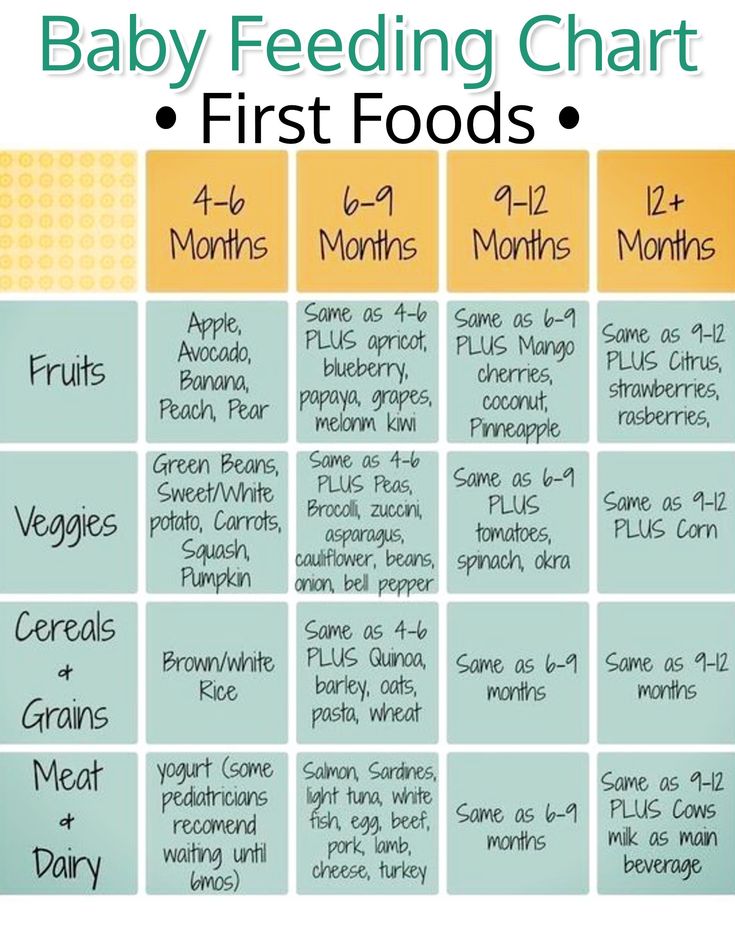
What to feed a baby bulbul bird
Hand-rearing and rehabilitation of bulbuls: Red-vented and Red-whiskered bulbul, continued
Ravi Jambhekar and Devna Arora
Link to Page 1: general guidelines
Stage-wise care of bulbul chicks
Stage 1: Nestling – unfeathered
Characteristics: Bulbul chicks are born completely naked with their eyes closed and are completely dependent on their parents for warmth, food and care. Thermoregulation is poorly developed in new-born chicks and they need an external source of heat at all times. The chicks’ eyes open by the end of the first week. At the same time, the first pin feathers begin to erupt. Pin feathers rapidly erupt in the second week of the chick’s life and the chick is fairly feathered by the end of the second week.
Feed: The chicks are extremely delicate at this stage and must only be fed on soft and very easily digestible foods. The chicks are primarily fed protein-rich foods at this stage and their diet can comprise of soft boiled egg, green caterpillars and grasshoppers for the first couple of weeks of their life. [Feed only green caterpillars and grasshoppers and refrain from using hairy moth caterpillars as they can cause intense discomfort and damage.] Soft fruits like banana, chiku, melon, figs, etc. and some infant cereal, like Nestum which is without milk, too may be added to the diet.
A blend of egg and infant cereal may be made for the entire day and refrigerated but skinned and pureed fruits must be added fresh to every meal. The feed may be diluted a wee bit in the first week by adding fresh squeezed fruit juices – grapes and pomegranates are excellent for the purpose. The formula, especially when offering pureed fruits, is best fed with a syringe while pieces of caterpillars and grasshoppers may simply be offered using a pair of forceps.
OOnce the chicks have settled and are accepting the feed well, ¼ drop of vitamin and calcium drops must be added to at least 2 feeds a day to begin with and gradually increasing to ¼ drop in four feeds of the day by the end of the second week.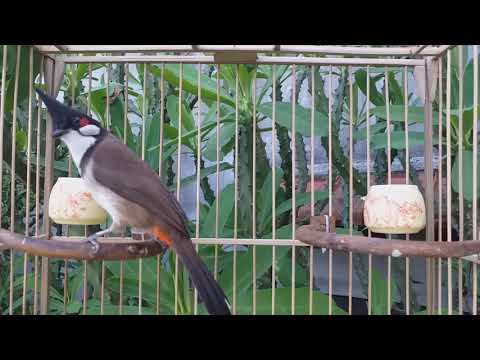 Probiotic supplements too may be added as per the chick’s requirements – a tiny pinch of powder added to 3-4 feeds should be adequate for a chick at this age.
The chicks do not require any additional water at this stage as they get the required amount through their feed. [Please refer to note on ‘Water and Hydration in the previous page for further details.]
Feeding quantity and frequency: Feeding must begin at about 6 am and continued till about 7 pm. The chicks must be fed every half hour in their first week of life and every 40-45 minutes in their second week of life.
A new-born chick may only have 0.1 ml of formula per feed, increasing to 0.2 ml of formula per feed by the end of the first week. The feed quantity would gradually increase to 0.5 ml of formula per feed by the end of the second week. Once the chick has had enough, it will cease to beg and must then be fed at the next feed. Over-feeding must always be avoided.
As a rough estimate, a chick will consume 2-3 ml of feed a day at birth and up to 4-5 ml of feed per day by the end of the first week.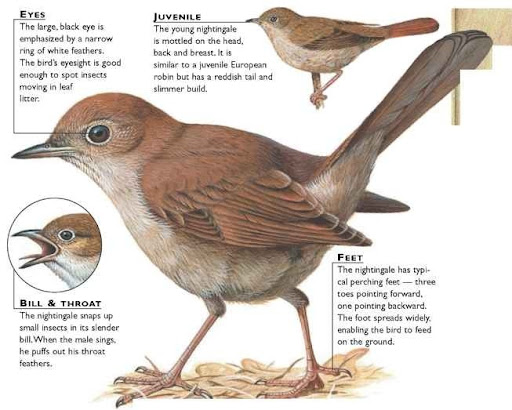 The daily average of feed consumed would increase to roughly 8-10 ml by the end of the second week.
Special care: Naked nestlings require additional warmth throughout the day even when housed at room temperatures. The surrounding temperature must be maintained at approximately 104˚F – 106˚F for the first week and reduced to approximately 102˚F – 104˚F in the second week of the chick’s life.
As their skin is very tender, they must be kept on soft bedding – a lining of soft cotton cloth may be preferable to paper towels at this stage. Refrain from using fleece or cotton towels.
Stage 2: Nestling – feathered
Characteristics: The chicks are adequately feathered, covering the bulk of the body, at this stage. Colour markings which are indicative of the species, become prominent at this stage. Chicks develop rather quickly now and will be ready to attempt short flights in another two weeks. The chicks are quite active and strong by this stage and begin standing on their legs by the time they are a month old.
Feed: The chicks are given a similar diet but the food proportions vary. At this stage, the protein content (eggs, green caterpillars and grasshoppers) can be reduced to about 50% of the chick’s diet, while the proportion of fruits and cereal can be increased to 50%. Infant cereals may be completely discontinued gradually. Formula must nonetheless be pureed and fed with a syringe in the 3rd week but the chicks will now start accepting mashed fruits, while slowly introducing small pieces of fruit that can be fed with a pair of forceps or by hand.
½ a drop of vitamin drops and calcium drops must be added to three feeds daily. Probiotics too may be added if required – a pinch of probiotics thrice a day should suffice each chick.
Feeding quantity and frequency: The chicks may only be fed every hour in the 3rd week and every hour to an hour and a half in the 4th week as they will now be able to consume larger quantities in one go. Feeding must begin by 7 am and continued till about 7 pm.
Special care: External heat may be discontinued during the day [on warmer days or depending upon the environmental conditions where you live] in the 3rd week but will still be required at night. The ambient temperature may be maintained at 100˚F for the chicks at this stage. Thermoregulation also develops by this age and as the chicks are now also feathered, they retain heat a lot better. External heat may be totally discontinued in the 4th week but the chicks must nevertheless be housed in warm spaces at night.
Stage 3: Fledgling – dependent upon parents
Characteristics: The chicks fledge by the time they are a month old. Flying feathers develop with speed at this age and their bodies are thickly covered in insulating feathers, making the chicks look like puffballs.
Feed: The chicks will now readily accept small cut pieces of fruit: banana, apple, chiku (sapodilla), muskmelon, figs, grapes, etc.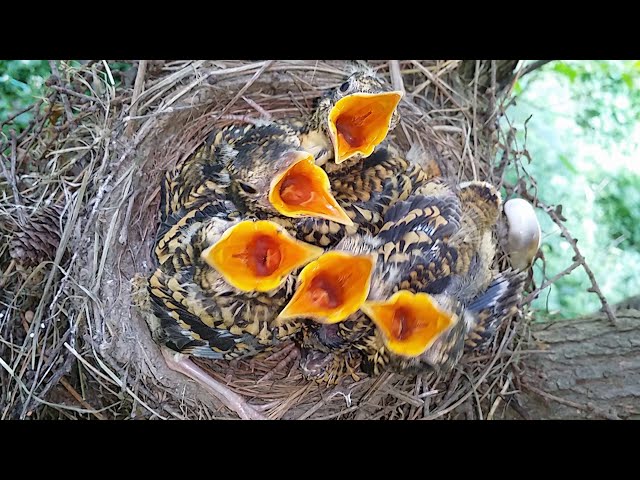 Caterpillars may be offered whole while egg may be offered in small pieces.
Feeding quantity and frequency: A plate of chopped fruit and egg must be given to the chicks 5-6 times a day. The plate must be left before them to encourage eating on their own and fruit must be replaced every 2 hours. The chicks start feeding by themselves at this age and will be completely off hand-feeding within a few days of fledging. Intermittent hand-feeding must be continued for a week or two after fledging until they chicks are consuming an adequate quantity themselves. To encourage eating on their own, offer a plate of chopped food and draw the chick’s attention to it. To encourage independence, the plate must be offered to the chicks when they beg instead of offering pieces of fruit by hand – they learn to pick up pieces of fruit faster this way.
By the time the young birds are 6 weeks old, i.e. a couple of weeks after fledging, feeding may be reduced to 4-5 times a day. A plate of chopped fresh fruits may be offered to the birds early in the morning, mid-morning, early afternoon and late afternoon.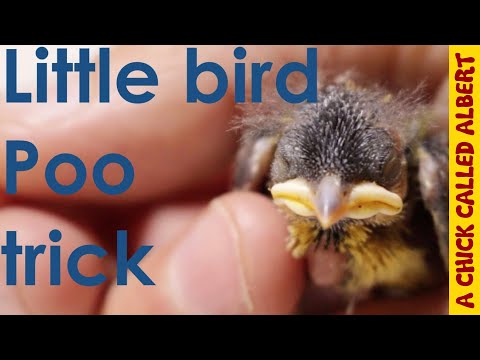 Older birds rarely eat after 5-6 pm – they prepare to return to their roosts at this time.
Hand-feeding must have completely ceased by six weeks of age. The chicks will also not require skinned fruit anymore. In fact, they must also be offered whole fruits (i.e., complete with the skin) so they can learn to choose and eat the choicest parts on.
Special care: The chicks must be shifted to an aviary at this stage as they need flight practice before release. The aviaries must also have a nest box for the chicks as they may prefer to roost in the box at night. Alternatively, they may be shifted indoors for the night.
The chicks don’t require any external heat at this stage but must nonetheless be given warm roosting spaces at night, at least until a week or two after fledgling. What they essentially need is something to block off the cool breeze at night until they are a little older. Older fledglings may now be allowed to sleep in their aviaries and may even prefer to just sleep on branches instead of going into nest boxes – ensure that there are some covered branches so the chicks learn to sleep under leaf cover.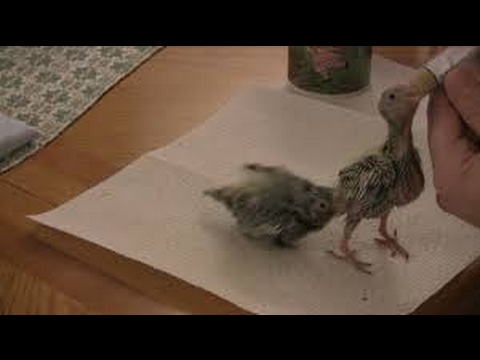
Once the chicks start to eat by themselves, they will attempt to pick up anything brightly coloured that stands out against the background. Often, they will pick up and ingest their droppings for the first few days until they are able to distinguish between their dropping and actual food. Droppings must be picked up frequently to prevent this.
A bowl of fresh water must also now be available for the chicks at all times as they will now start drinking water. It is also a good idea to offer a big and shallow bowl of water for the birds to bathe in – they will certainly enjoy it during the summer months.
Stage 4: Fledgling – independent
Characteristics: The chicks are fairly self-sufficient at this stage. Primary flying feathers will have erupted by this stage and the chicks will have lost the excess nestling weight.
Feeding: The chicks will now consume an adult diet and must be given an assortment of foods. Wild picked berries and fruit must now be introduced to their diet – this helps them familiarize with the foods available in the wild.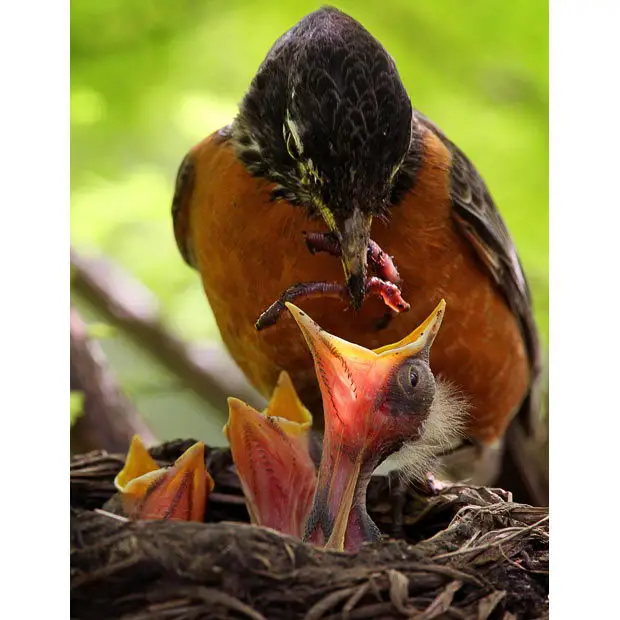 Fresh food and water must be available for them at all times.
The birds must be offered a combination of whole fruit and some chopped fruit pieces. The whole fruit encourages the birds to learn to peck small pieces out of whole fruit as they will consume many fruits that cannot be swallowed whole.
Special care: The chicks are now completely independent and must be readied for release. The process of soft release begins at 16 weeks of age.
Stage 5: Sub-adult/Immature
The chicks will have undergone their first moult and will have their adult feathers by six months of age. Adult colour makings also start to appear now. The chicks must have undergone rehabilitation by this stage. If opting for a hard release, this is the right time to release them.
Stage 6: Adult birds
Adult bulbuls will be completely independent and should have completely stopped returning to the aviary. They will breed in the following season.
Rehabilitation and Release
The young birds must be must be shifted to an aviary at the time of fledging and given adequate flight exercise before release. This is essential for them to develop the agility and swiftness required for survival. The aviary must be at least partially sheltered so the birds are not exposed to harsh sunlight throughout the day. Food at this stage must not be offered in one place but scattered around throughout the day so the young birds learn to search for it. Care must be taken to prevent the chicks from flying into the mesh and injuring themselves. Fresh drinking water and a larger shallow bowl of water to bathe in must be available at all times. The aviary must also have a couple of nest boxes, hung higher in the aviary, for the young birds to roost in.
The first step towards getting your bird ready for release is to break the young bird’s dependency on human beings and to give it maximum opportunities to be tuned in to its natural instincts. The process of rehabilitation must actively start by the time the chick fledges and followed meticulously until release.
Important things to be kept in mind when releasing bulbuls
1. Place of release and the prevailing environmental conditions
Wherever possible, all rescued animals must be released where they have been picked up from. This is particularly important when releasing animals that had been admitted to care centres as adults so they can have the chance to go back to familiar and known spaces. Younger birds must be released in suitable locations with good tree cover and ample fruiting trees, and in locations where they will be easy to monitor for the first few days after release.
The only instance where release to the same location must be avoided is if there have been irreversible changes which led to the initial displacement of the birds in the first place and will have rendered the place unsuitable for the survival of the species.
2. Age and timing of release
Birds that have been admitted as sub-adults or adults may be released just as soon as they are ready to be released. The only consideration for them is fitness for survival.
Birds that have hand-raised, on the other hand, need to go through a more protective method of release. Young birds may be released at the age of about 2½ - 3 months when opting for a soft release whereas those that are being hard released must only be released after 4-6 months of age.
3. Method of release
Birds may be released by following protocols for either a soft release, which is most ideal and recommended for hand-raised young, or through a hard release.
Hard Release is a means by which the animal is released into a new location without its being accustomed to the new environment. This process is appropriate for bulbuls that have been taken into care as adults.
Soft Release is a means by which the animal is gradually introduced or familiarized to a new environment before its release into that location. Hand-raised animals are at a disadvantage of not having had adequate parental learning and require additional safety and protection during release; hence the ideal way to release them is through a process of soft release.
The simplest way to soft release a bulbul is by allowing it to fly in-and-out of its enclosure for the first few weeks after it fledges and becomes fairly independent. The young must be shifted to enclosures where they will be released from so that they can identify the enclosure and their surroundings – this will help in building site fidelity and make it easier for them to return to the safety of the enclosure until they are completely independent and ready to leave. The young birds may be allowed to fly out in a few weeks thereafter through a couple of openings/windows in their enclosures. At this age, the birds will not fly far and return to their enclosure several times during the day and most certainly to roost at night. The access opening and windows must only be opened at dawn and closed at night to prevent entry of predators like rats, cats, snakes, etc.
Once they have explored their surroundings and have found safe roosting spaces for themselves (typically in a few weeks), they will cease to return to the protection of their aviary but may return for titbits of food. Eventually, they will become completely independent and cease to return to the aviary at all. Supplemental feeding must be continued until the birds are independent but may be ceased once the birds are self-sufficient.
BBirds may be released in a similar manner if hand-raising and rehabbing from home. Consider a small cagey extension out of any room or window – this system works best in apartment buildings. The extension may simply be a light frame with wire mesh if there is no threat of cats – this is inexpensive and very easy to install. The extension below has been used successfully and the birds were periodically let in the room to exercise their wings.
Experience suggests that birds released from homes return for longer durations as they may have stronger bonds with both the homes and the caregivers. They are also known to visit every now and then well after the gain complete independence. Do refrain from encouraging the birds to enter the house if the birds visit you.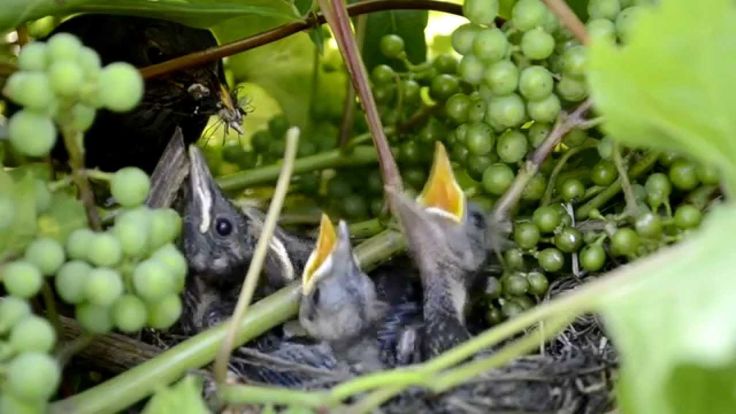 Birds that are accustomed to entering the house are twice as likely to accidentally fly into someone else’s house and land into trouble.
Note of caution: A ceiling fan must never be used in a room with birds to ensure they don’t fly into a moving fan and get injured fatally.
Acknowledgements
We sincerely thank Kalpana Chatterjee, Parthiv Patel and Palak Thakor for the permissions to use their photographs of the bulbul chicks.
Photographs used
Kalpana Chatterjee – Nestlings begging for food. Available from: http://www.flickr.com/photos/kalsnchats/3781656324/
Kalpana Chatterjee – New born chick. Available from: http://www.flickr.com/photos/kalsnchats/3781649314/
Kalpana Chatterjee – Pin feathers erupt by the end of the week. Available from: http://www.flickr.com/photos/kalsnchats/3781658228/
Palak Thakor – Sub-adult bulbul
Parthiv Patel – Bulbul with babies in the nest. Available from: http://www.flickr. com/photos/parthivpatel/3972443794/in/photostream/
References and further reading
Baker, E.C.S. (1922) The Fauna of British India, including Ceylon and Burma: Birds – Vol. I (II Ed.), Taylor and Francis, London, pp. 383–389, 394-397
Please note: This document is targeted at hand-rearing alone and does not address or substitute any veterinary procedures. For any medical concerns, please consult your veterinarian at the earliest.
For amateurs or people handling new born chicks for the very first time, please keep in touch with a trained and experienced hand for guidance and regular progress updates.
Protocol published in 2013
Hand-rearing and rehabilitation of bulbuls: Red-vented and Red-whiskered bulbul
Bulbuls
Bulbuls are medium-sized passerine birds in the family Pycnonotidae that are widely distributed across Asia, Africa and South-Western Europe. Some of the highly adaptable and generalist species of bulbuls have spread extensively and can been seen in several other countries well beyond their native range. Bulbul species differ considerably in their habitat requirements with some preferring deep forests and thick undergrowth while others like the commonly found red-vented and red-whiskered bulbuls preferring forest fringes, scrublands, gardens, orchards and other rural and urban landscapes.
Both, the Red-vented bulbul (Pycnonotus cafer) and the Red-whiskered bulbul (Pycnonotus jocusus) are commonly found throughout India, although the red-vented bulbul, which is one of the most common birds of India, appears to be more numerous and extensively distributed.
Both species are extremely territorial although red-whiskered bulbuls are less aggressive in comparison. Although primarily frugivores, bulbuls are omnivorous birds that consume various invertebrates and (the urban species in particular) may even accept some grain.
Although bulbuls typically nest in the warmer months between February to September, it is not uncommon to find nests of red-vented bulbuls all year round. Both the red-vented and red-whiskered bulbuls make a cup-shaped nest in low shrubs, bushes or trees and readily nest in and around human habitations. The nest is primarily made of twigs, leaves, grass and moss and mostly built within a height of 7-10 feet off the ground. In fact, they have also been recorded nesting on the ground.
Need for assistance
Bulbuls are commonly rescued birds owing to their extensive distribution and proximity to humans. They are primarily admitted on account of the nest or nesting trees falling during heavy winds and storms. Such rescued babies may be placed in artificial nests and hung close to their original nesting trees – wicker or straw baskets or an open shoe-box will be ideal for the purpose. The basket must be large enough to accommodate the mother and the chicks. Observe the nest from a distance to make sure the parents have returned to the new nest and have started feeding the chicks. The parents are almost always there readily accepting the chicks and bulbuls have been reunited with great success.
The chicks are also commonly found during the fledgling stage when they either jump out of the nest too soon or land in unsafe locations. In most cases, the parents will be close-by, keeping an eye on the chicks and feeding them wherever they are, thus requiring no human intervention. Ensure, from a safe distance away so as not to scare away the parents, that the chicks have been unfed or unattended to for at least a few hours before attempting to rescue the chicks. The chicks must be hand-raised if the parents fail to return.
Chicks are also frequently rescued after unsuccessful predator attacks, typically by cats or crows. Such chicks are often in shock and may have extensive injuries. Healthy looking chicks must be placed back in their nest while those with injuries must be treated and returned to the nest at the earliest. It will be best for the bird to be with its own parents if it is in shock.
General guidelines for hand-rearing bulbuls
Hygiene
The chicks must be kept in extremely hygienic conditions until they are ready to fledge as young chicks are susceptible infections.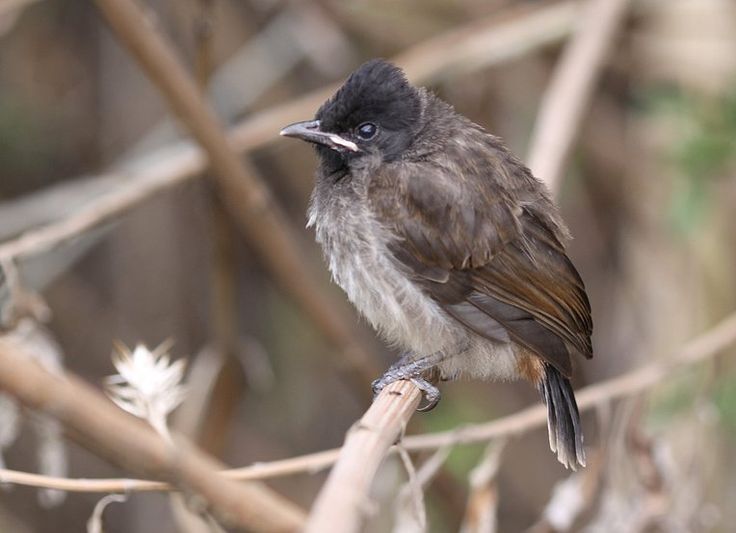 Their bedding must be kept clean and changed as often as required. Hands must be washed every single time before touching the nestlings. Excessive handling of the chicks must be avoided and they must only be handled during feeding times, although in most cases, it will be absolutely unnecessary to touch the chicks even when feeding them.
Chicks will defecate several times through the day. Baby bird droppings are often enclosed in a capsule-like structure which makes it very easy for the parent birds to pick and drop them away from the nest. In most cases, you should be able to do the same and the paper towel lining may only be replaced a couple of times a day. But if you are unable to pick the droppings, then the towel must be replaced each time the chick defecates to prevent the droppings from sticking to the chick’s feathers and skin. Droppings harden after sticking to the body and are extremely painful to remove and inevitably peel off with a bit of skin, exposing raw skin to bacterial infections.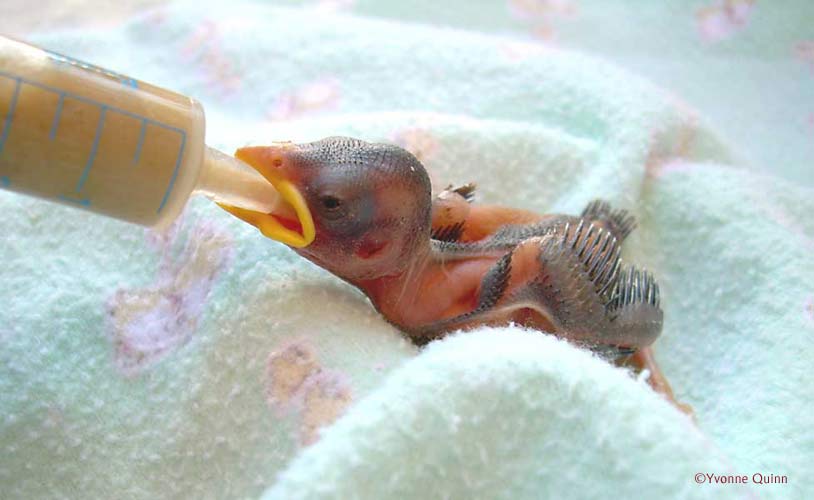
To remove any dried food particles or droppings that have stuck to the feathers or skin of the baby birds, wet the area with a drop of warm water and allow the particle to soak for a minute or two before attempting to remove it with your finger or with a piece of wet cloth. The procedure must be repeated if the particle doesn’t come out in the first wash.
Housing
The chicks must be housed indoors in small boxes or incubators. Smaller chicks may be kept in nesting cups to simulate the feel of the nest. A nesting cup is simply a bowl shaped bowl or basket covered with towels and tissue paper for the chicks. A 1-2 foot box will be adequate for the chicks. If using nesting cups, the cups may simply be placed inside the box.
The chicks must never be placed on the cloth towels directly as their nails tend to get caught in the fibrous loops of the towels. Cotton too must never be used to line the nests as it gets entangled around the chick’s beak and claws and also sticks to the droppings. The chicks must instead be placed on paper towels upon the cloth towel which also makes it easier to clean and replace soiled bedding.
On fledging, the chicks must be shifted to an aviary for adequate flight exercise before release. An aviary that is roughly 10 ft. X 10 ft. and 8-10 feet high is adequate for bulbul chicks. The aviary must be equipped with several perches and some foliage but must also allow the bulbuls to fly about freely and exercise their fight muscles.
Inter-species interactions
The chicks must never be house in close proximity to predatory species like crows, hawks, cats or dogs. Housing the chicks in close proximity to such species will either lead to constant stress due to the smells, sounds and movements of the predators; or it will lead to habituation and lack of fear and decrease their chances of survival after release.
Imprinting and dependency
Imprinting is a process whereby a young animal learns and imitates the behaviour traits of its parents.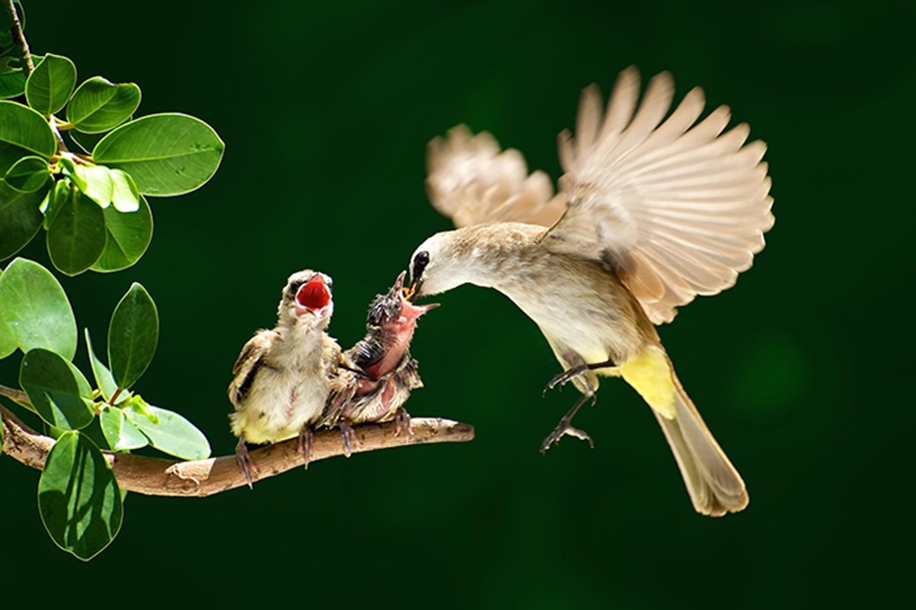 It serves as an indirect method of instilling the appropriate behaviour and survival traits in young animals.
Under the unnatural conditions of captivity, the chicks may imprint on humans and other animals they are constantly exposed to. To prevent this, they must never be handled excessively or exposed to too many people and animals, and handling must cease once the chicks have fledged. This also keeps them from being dependent on the caregivers.
Warmth
Birds, especially smaller sized birds, have higher basal metabolic rates and higher body temperatures ranging between 39˚C – 43˚C (102˚F – 107˚F). New-born chicks require additional warmth to maintain their body temperatures in the initial weeks of their lives and must always feel slightly warm on touch. As a rule of thumb, the smaller the chick, the more warmth it will require. Unfeathered chicks will require external heat all day long. The intensity of heat required will gradually reduce as the chicks become adequately feathered and discontinued upon fledging.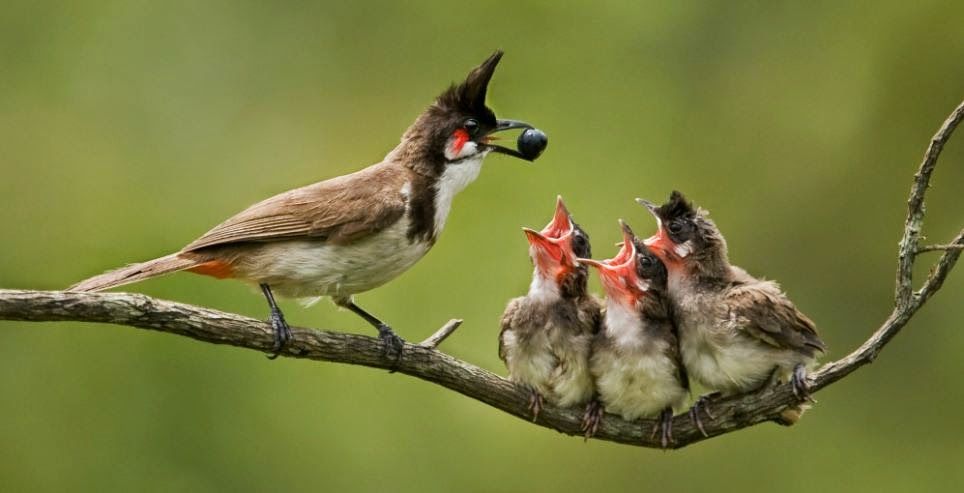
External heat may be provided in the form of incubators, heating lamps or hot-water bottles. Most breeding and rescue centres are equipped with incubators and prefer the same for baby birds. It is easiest to both control and monitor the temperature of the nest chamber when using incubators. But these may not be easily available to individual rescuers, in which case, alternate methods of providing external heat may be used. Baby birds found in the warmer months of the year will require little additional heat when kept at room temperatures but those found in the colder months of the year will require additional warmth throughout the day and will need to be monitored closely.
Heating lamps adequately serve the purpose of providing heat for nestlings. The distance of the heating lamp from the box will depend upon the local weather conditions, the wattage of the bulb and the body condition of the chicks. A room thermometer placed in the box will help you gauge the temperature and adjust the distance of lamp as and when required. Chicks that get too warm will pant to decrease their body temperature. If such behaviour is noticed, external heat must be reduced and ventilation increased immediately to prevent over-heating. The box must be covered with a cloth at night to prevent the light of the lamp from falling directly on the chicks and interrupting the natural circadian rhythm of the chicks.
Hot-water bottles may also be used for the chicks and are safe to use with smaller birds. The bottle, wrapped in a couple of layers of cloth, must be placed under the chick’s bedding and you must ensure that the chicks cannot come in direct contact with the bottle as they will scald if they do. Hot-water bottles must only be placed under half of the chick’s bedding leaving them the flexibility to shift to the uncovered part of the box if they get too warm. Hot-water bottles may even be placed just outside the box while still touching the box to ensure adequate warmth.
Water and hydration
Baby birds are seldom given water orally.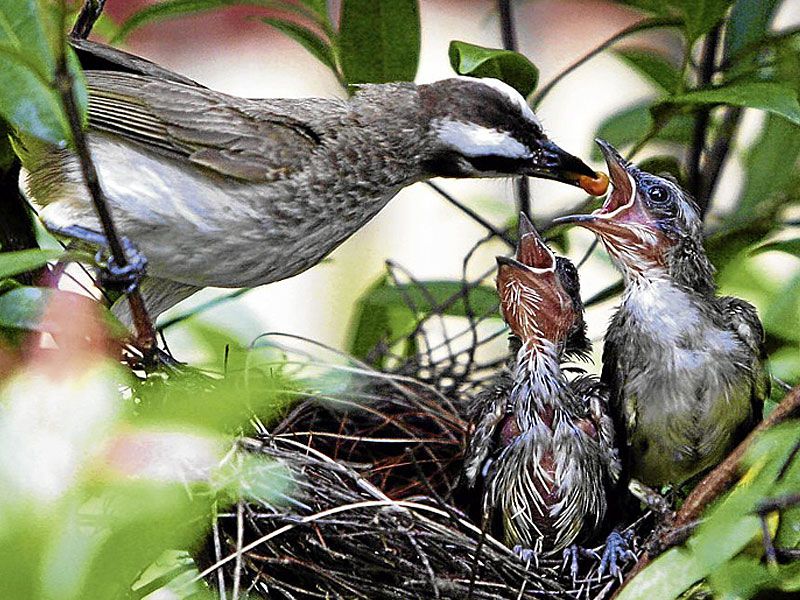 They receive adequate water through their feeds. Baby birds must be offered soft and moist foods as it both assists digestion and ensures sufficient hydration. Mild dehydration may be addressed by offering the chick softer foods or formulas until dehydration has been addressed. To help restore the electrolyte balance in dehydrated chicks, rehydration electrolytes may be added to the formula. Refrain from administering water orally as the risk of water going down the trachea and aspirating the chick is high. If severe dehydration exists, the chick may be given fluids subcutaneously but this must only be done by an avian veterinarian. Severely dehydrated chicks must only be fed after dehydration has been addressed.
Baby birds that are dehydrated will appear weak and listless. Their skin, especially around the breast and stomach, will appear tighter and wrinkled. The skin turgor test or the ‘tent test’ may also be used to assess dehydration in naked hatchlings. Well hydrated chicks, on the other hand, are soft to touch and appear rounded and well. They will also be a lot more active and interested in movements around them than are dehydrated chicks.
Feed and formulas
The chicks need to be fed every half hour for the first two weeks of their life, and then every hour to every hour and a half until they fledge. Feeding must begin at dawn and continue for the next 12 hours or so until sunset. If feeding several chicks, you must ensure that all chicks are well fed as the runts or weaker chicks often get pushed aside and may consequently get weaker if not given adequate attention.
Baby bulbuls can be hand-raised on soft fruits and infant cereals. Protein must be provided in the form of boiled eggs or any of the green caterpillars or grasshoppers. Refrain from using hairy moth caterpillars as they can cause intense discomfort and damage to the baby. Baby bird hand-raising formula, where available, too may be used for baby birds. Different feed combinations will be appropriate for the chicks at different stages of their growth and development – details given in ‘stage-wise care’ after page 14.
Avian vitamins and calcium supplements must be added to the formula for baby birds. The next best choice to avian supplements (if none available) would be other veterinary or paediatric vitamin drops – choose a supplement with added minerals too. Most multivitamin combinations do not include calcium and this must be supplemented as well – veterinary calcium drops are a good option. Probiotics too may be added to the chick’s diet. Avian probiotics are of course the first choice but human or veterinary probiotics, for example, Gutwell, too will be helpful. The exact doses may be obtained from an avian veterinarian.
Baby birds are given a formula pureed fruit, infant cereals and boiled eggs. It is easiest to feed them with a syringe for the first 2-3 weeks of their life. Caterpillars may be introduced in small pieces initially. Once the birds are nearing fledging age, they can be fed small boluses of mashed fruit and egg either by hand or with a pair of forceps. Fledglings will comfortably takes pieces of fruit with a pair of forceps and will soon pick up pieces of fruit from a plate.
The consistency of the formula should be similar to that of a soft pudding – neither too thick, which would make it difficult for the baby to swallow and it may choke, nor too diluted as the baby could inhale the formula into its lungs causing aspiration. The chicks must be fed warm formula just as mammalian young are given warm milk. Formula that is too hot will scald the baby bird’s crop, causing crop burn, which is the scalding of the chick’s crop and oesophagus. Cold formula, on the other hand, will slow the process of digestion and cause ‘sour crop’. Sour crop is a condition in which the formula in the chick’s crop has gone bad as the contents of the crop have not emptied.
Once the chicks have fledged, fruit pieces must be offered at room temperature. Refrain from offering refrigerated fruits, rather, let the fruit come up to room temperature for an hour before offering it to the chicks.
Feeders
Feeding syringes are required for feeding formulas as baby formulas are much too soft to be picked up with the forceps or by hand. Syringes however must either be discarded or sterilized after every use. I prefer using a fresh 1 ml tuberculin syringe for each of the feeds. The 1 ml syringes are difficult to sterilize in water as the plastic is too soft and loses shape and is best discarded after every feed.
Bigger syringes (2 ml onwards) can be sterilized. However, I find them impracticable for thick feeds – they are okay for mammal milk formulas. The syringes must be rinsed to wash off any feed residue and then boiled in boiling water for 5 minutes to sterilize it. Not sterilizing the feeders will lead to a build-up of bacteria in the feeders which can prove to be fatal for the chicks.
A pair of blunt-tipped forceps is ideal for feeding fledgling bulbuls. These are easy to use, comfortable for the chicks and easy to clean. They only need to be washed with soap and water after the feed.
Feeding instructions
The chick can be placed on a napkin or paper towel on a table so you can feed the chick in a comfortable position – this is vital when feeding the chicks with a syringe. You can also feed the chick when it’s in the basket but all spilled food must be picked up immediately, often necessitating the bedding to be changed after feeds.
The chicks gape as soon as the feeder approaches them. If not, you may gently tap on the chick’s beak to stimulate begging and feeding. The chicks will only have a couple of morsels at a time. If using a syringe, feed the chicks the equivalent of a couple of bite-sized morsels for that chick. The chick must be given time to swallow the first morsel before the second one is offered. Once it has had enough to eat, the chick will stop gaping and refuse to open its beak. Feeding must be stopped immediately. The baby must not be forced to feed when it is reluctant to accept food. Force feeding or over feeding can cause the formula to flow into the throat and down its windpipe, which can be life threatening. The beak and feathers must be wiped gently with a moist cloth after feeding.
Baby bird droppings
Baby bird droppings are enclosed in a capsule which makes it easier for the parent birds to lift and throw out of the nest.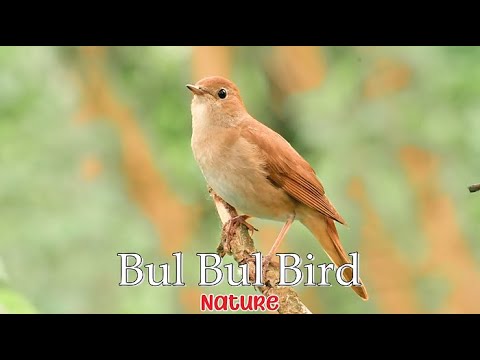 The dropping will of course vary in colour and consistency depending upon the feed given, but should always be well-formed.
Bathing
Bulbuls love to bathe and play in water, particularly in the summers. Always have a shallow bowl of water for the birds (after they have fledged) to play in.
Sexing bulbuls
Male and female bulbuls are monomorphic, i.e., there is no external distinguishing factor between the male and the female.
Continue to Page 2: growth and corresponding care
Please note: This document is targeted at hand-rearing alone and does not address or substitute any veterinary procedures. For any medical concerns, please consult your veterinarian at the earliest.
For amateurs or people handling new born chicks for the very first time, please keep in touch with a trained and experienced hand for guidance and regular progress updates.
Protocol published in 2013
How to feed the found chick, how many times a day
If you find a chick, the first thing you need to do is determine its species.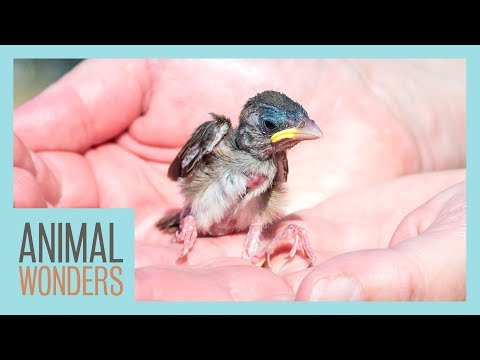 Feeding granivorous, insectivorous and predatory chicks have their own differences. But in the early stages of feeding, you can use the same feeding methods, and then, after finding out what kind of bird you found, transfer the chick to the appropriate feeding.
Here is one of the most common feeding options for granivorous and insectivorous chicks. This nutrient mixture is well used for feeding for chicks and fledglings from the passerine family. To prepare our mixture, we need the following products: Boiled egg, low-fat cottage cheese, raw carrots, meat (beef, chicken, turkey), greens (lettuce, dandelion leaves, wood lice), hamarus and daphnia, Calcium gluconate (shell from boiled eggs) glycerophosphate , children's dry dairy-free porridge or boiled millet (without salt and fat on the water). nine0003
Action one. Boil the egg, free from the shell. We free the shell from the shell film. Grind the egg as much as possible, you can use a grater with small holes.
Second step. Boiled meat, it is better to take the pulp from the breast of a turkey or chicken and also chop or divide into fibers. The mixture will require meat 40 (for granivorous) and 60 grams (for insectivorous).
Third step. Take washed carrots of a small size, grate them on a fine grater, then squeeze the juice and we will use the remaining pulp. nine0003
Fourth step. We take not sour and not fatty cottage cheese. Cottage cheese should have 0% fat content, anything above is considered fat for poultry. We need 90-110 grams of cottage cheese. Sour cottage cheese must be boiled twice changing the water and then it will be suitable.
Step five. You can use greens to add the mixture, but you can do without it for the chicks. And so you can take the greens listed above, chop and add 1.5 teaspoons to the mixture.
Action six. To the above ingredients, add 1.5 -2 tsp. dairy-free porridge or boiled millet (well boiled, without salt and fat in the water). nine0003
Step seven.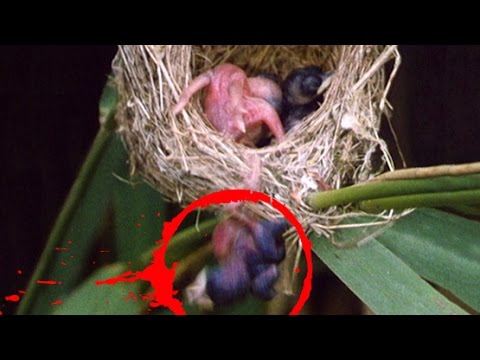 To the mixture we add the shell from the boiled egg, which must first be ground in a coffee grinder, plus one fourth of the crushed tablet of glycerophosphate. If it is not possible to find glycerophosphate, then you can purchase bone meal and add one fourth tsp. in powder form. At the very least, the shells are enough for now.
Step eight. We take chopped hamarus and daphnia and add about 1 tsp to the resulting mixture. Then we mix everything, it turns out a very thick, crumbly porridge, it should not stick to the fingers. If the mixture is sticky, you can add dairy-free porridge or powdered cereals. nine0003
From the resulting mixture we roll small balls no larger than a small pea, focus on the size of the chick's beak. You can feed 2-5 balls at a time and after each feeding drink plain water from an insulin syringe with a removable needle (without a needle) 4-6 drops. A week-old chick should be fed every 1-1.5 hours, older than two weeks of age every 2-4 hours, at three and four weeks of age you can feed 3-4 times a day. Do not forget that the chick is growing and, accordingly, one-time portions of food are growing. A very important point, do not forget to warm the chicks, because at their age they themselves cannot maintain normal body temperature. Warming up promotes better assimilation of feed. Don't forget to control your chick's weight. If possible, show the chick to a specialist. To control the work of the intestines, you can take the litter from the chick for a coprogram, this is an analysis of the digestibility of the feed. nine0003
Take care and love your feathered friends and they will love you back.
Veterinarian ornithologist
Chuguevsky VV
Veterinary clinic Bambi.
You can ask an ornithologist on the forum.
Red-cheeked bulbul | Fauna
The red-cheeked bulbul, widespread in the southern regions of Asia, was brought by man to Australia and North America, where it successfully acclimatized.
Habitat. nine0039
Distributed in South Asia.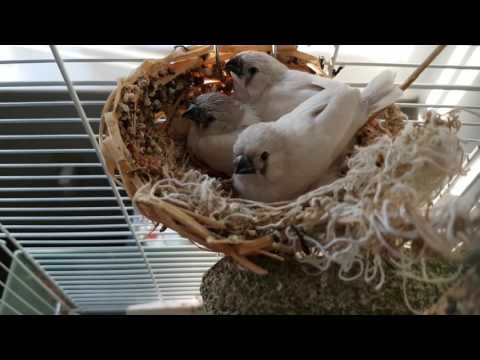 Introduced to Australia and North America.
Habitat.
Native to Asia, the red-cheeked bulbul lives in areas with a warm climate: in Nepal, India and South China. Bulbuls are most likely to settle in gardens or next to fruit plantations. Some species live in open areas, others prefer dense forests. Bulbuls brought to Australia settled in the vicinity of Sydney and Melbourne, and in North America - in the state of Florida. nine0003
Species - Red-cheeked Bulbul - Pycnonotus jocosus.
Family - Bulbul.
Detachment - Sparrows.
Class - Birds.
Subtype - Vertebrates.
Do you know?
1. Almost all types of bulbuls are sedentary. Only birds that live in the northern regions of the range make seasonal migrations: offspring are bred in the north, and fly away to places with a warmer climate for the winter.
2. Not all bulbuls feed on trees: some species prefer to collect fruits, berries and insects right on the ground. Those birds whose diet consists mainly of insects (for example, brown bulbuls of the genus Phyllastrephus living in Africa) feed mainly on beetles. nine0027 3. At the height of the mating season male bulbuls wake up indomitable fighting fervor, and in the past people even arranged fights of these militant birds in the manner of cocks.
4. The yellow-bellied bulbul (Pycnonotus goiavier), which lives in the forests and clearings of Southeast Asia, is small, but brave to the point of insolence and watches everything that happens around with curiosity.
Lifestyle. nine0039 Reproduction. Red-cheeked Bulbul - Pycnonotus jocosus. Crest. The head is decorated with a crest of dark feathers.
Red-cheeked bulbuls are sociable and noisy birds that lead a sedentary lifestyle. For the night, flocks of bulbuls settle in the crowns of tall trees, and at dawn they leave the night shelter and devote most of the day to searching for food, tirelessly calling to each other in sonorous voices. Their “vocabulary” is very rich, and some species even know how to sing. During feeding, birds usually stay in flocks of three to five individuals, flying together from tree to tree and meticulously examining each branch in the hope of finding a juicy berry or a sweet flower bud. Birds most willingly eat the fruits of palm trees, plants of the laurel family and papaya, not disdaining overripe fruits that have fallen to the ground. Their varied menu also includes flower parts, nectar, spiders and insects, especially ants. Outside the nesting season, when bulbuls live in pairs on jealously guarded home sites, rather large flocks of up to fifty individuals gather near rich food sources. Forest bulbuls are far from being so sociable, and during the day everyone hunts on their own, but at night they also gather in groups. nine0003

In the nesting season, which lasts from January to August, the male bulbul tirelessly sings his short songs, consisting of sonorous chirps and boisterous trills. In this way, he not only lures the female, but also notifies the neighbors that this territory is occupied and a nest will be built on it. At this time, the male becomes aggressive and does not tolerate the presence of rivals in his area, the area of \u200b\u200bwhich is from 4000 to 8000 square meters. Having created a pair, the birds build a cup-shaped nest from soft blades of grass, roots and other fragments of plants. The loose weaving of the walls of the nest allows rainwater to drain without accumulating in the tray. After mating, the female lays 2-4 light pink eggs dotted with brown specks. Both parents incubate the clutch in shifts for 11-12 days, and after the chicks appear, they diligently feed them with soft insects and fat caterpillars. After two weeks, the chicks leave the nest and switch to plant foods, although they still do not refuse parental offerings. At three weeks old, juveniles fledge. In one season, an adult pair of bulbuls makes two or three broods. nine0003
Body length: 20-21 cm.
Weight: 25-42 g.
Number of eggs in clutch: 2-4.
Incubation period: 11-12 days.
Food: fruits, flower nectar, insects.
Beak. The beak is medium in size, straight and sharp.
Head. There are oblong bright scarlet spots on the sides of the head under the eyes.
Plumage. The plumage is brownish on the back, the upper side of the head is dark, the throat and cheeks are white, the belly is light brown. The wings and tail are brownish-gray, the undertail is bright red.
Legs. Fine legs painted in dark grey.