What to feed baby goldfish fry
What Are The Best Foods For Goldfish Fry (babies)?
- Home
- Raising Goldfish Fry (babies)
- Feeding Goldfish Fry
Feeding goldfish fry as much food as they need as soon as they need it, but also maintaining excellent water conditions in their aquarium or pond are the most important secrets to raising fry successfully.
Keeping these two important issues in mind let’s look at the most common options for feeding fry during the most important first month stage.
Fry food options depend on the age of the fry.
Goldfish fry with orange bellies from eating Brine Shrimp
Brine Shrimp - First Food
The advantages and disadvantages of brine shrimp have been discussed elsewhere. The biggest advantages are:
- The fry can eat them as soon as they are free swimming
- You can hatch as much or as little as you need
- They are disease free
- They are always available when you need them.
Infusoria – First Food
These are microscopic forms of animal life that live in water. They are usually cultured in 1 quart mason jars or similar.
As soon as the eggs are laid you need to start a culture. You will need many jars of the culture to satisfy an average hatching of 500 to 1000 fry.
The infusoria will satisfy the fry for about two weeks before they need something more substantial.
To learn how to grow infusoria click here.
Mosquito Wrigglers – First Week Onwards
Mosquito wrigglers
Mosquito wrigglers are the best food for feeding goldfish fry. Growth speed can be doubled if you can get enough of them, which is a problem in early spring.
The way they are fed to the fry is by placing egg rafts in the fry aquarium. As the wrigglers hatch, they are eaten by the fry.
Fry just free swimming struggle with the wrigglers even though they are tiny. I tend to feed the wrigglers to fry about a week after they become free swimming. The fry have no trouble eating them then. You also avoid the problem of uneaten wrigglers becoming too big for the fry to eat, which occurs within a few hours, and having to remove them from the fry aquarium before they become adults.
To learn how to collect mosquito rafts click here.
Daphnia – Second Week Onwards
Daphnia are a small fresh water crustacean found in still water, sometimes in such quantities that the water appears red.
Some species of daphnia can be used as a first food. The adults are put in a fine sieve and the larvae that pass through are fed to the fry.
Daphnia supply can be uncertain, one day the water is teeming with daphnia, the next day they are gone.
Daphnia can introduce enemies of fry such as hydra that kill fry under two weeks old.
Most of us don’t have access to a good supply of daphnia these days but it is well worth considering seeding your own pond in readiness for introducing your two week old fry.
If you can get the timing right, you won’t have to feed your fry for the next two weeks.
To learn how to prepare a daphnia pond click here.
To learn how to feed and maintain a daphnia culture so you have a live food source year round, click here...
Microworms - Second Week Onwards
Microworms are very small white nematodes that look like tiny worms. Sizes range from 1.5 to 3mm. They are not to be confused with white worms that are much larger.
Microworms can be raised in any small container, a plastic takeaway food container with a lid is ideal. The taller ones are best as the worms will crawl out of the shallow trays.
You need to obtain a starter culture from an aquarium shop or other source. Place a thin layer of oatmeal that has been soaked in water in the bottom of a container, and on top of this sprinkle some dried yeast which the nematodes feed on.
Keep the culture covered but punch some small air holes in the lid.
Add the starter culture to the mix and within a week or two depending on temperature, a white film of micro worms will form up the sides of the container. Scrape them off the sides with a knife or small paint brush and stir them into the water so they separate.
Keep them between 68-85 degrees F.
When reproduction of the worms appears to be slowing, make up a fresh culture. The culture usually starts to smell at this stage.
As microworm cultures can smell unpleasant at times, keep them away from living areas.
Artificial Foods – First Food
I’ve put artificial foods last because that is where they belong…last.
Using artificial foods exclusively for feeding goldfish fry is seldom satisfactory because:
- The food doesn’t provide all the nutrients necessary
- They quickly pollute the water
- Fancy Goldfish varieties don't develop properly.
If you have had a failure with your brine shrimp or infusoria culture, hard boil an egg, and squeeze the yolk through muslin so it enters the water as a mist.
Most shop bought liquid fry foods are primarily egg yolk anyway so I would avoid them.
Feeding Goldfish Fry Live Food The First Month is Critical
Feeding goldfish fry isn’t hard, but for the first critical month you must be well organized and supply as much food as the fry need on a daily basis, 2-3 times daily for the first few weeks.
Tip:
If a brood is receiving the correct amount of food, the size difference between the smallest and largest fry won't be big enough for the larger fry to start chomping on their smaller siblings.
In other words you shouldn't have to separate out the larger specimens.
After the first month, you can start introducing some high quality dry food into their diet, but, dry food is never as good as live food, and the fry growth rate will drop if dry food is fed exclusively.
To raise high quality fish, live food should make up the majority of their diet for the first six months.
Top of Feeding Goldfish Fry page
What to Feed Goldfish Fry: Best Foods & Schedule
Congratulations, fish parent. If you’ve found this page in a panicked Google search for “what to feed baby goldfish,” you’re in the right place.
I’m here to share the feeding secrets I’ve learned in raising my goldfish babies!
What to Feed Baby Goldfish Fry
View this post on Instagram
A post shared by 金魚専門店 カハラ (@kahala_goldfish)
Goldfish don’t eat for the first 2 days after hatching. They’re still absorbing their yolk sacks, and they don’t have a mouth yet. During that time, they literally just hang out.
Now: Once they become free swimming, they start poking around looking for something to eat, and it’s time to feed them baby goldfish their first meal! The question is—what?
I’ve experimented with several kinds of fry food. The thing is, good fry food will be 2 things: small and enticing. I did some testing to find which foods were accepted by the babies. Here are my results:
1. First Test: Hard-boiled egg yolks
Credit: MichelleCoppiens, PixabayThis is small enough to fit in their mouths but has a low acceptance rate (20-30%). This means the fry typically eat some but spit most of it out. Some fry won’t take it at all and will only reject it. What’s the worst part? It can foul the water.
And when the fish don’t take much food, they won’t grow quickly. Interestingly enough, I found many anecdotal reports of feeding fry exclusively on egg yolk are often coupled with anecdotal reports of a low fry survival rate
So,I soon realized that this was not working if I wanted to save all of these babies.
2. Second Test: Powdered Fish Food
So next, I tried Repashy Super Gold, the powder kind you use to make gel food. I learned that when the babies are under 2 weeks, it’s pretty much useless to try to get them to eat this.
They almost always spit it out. When they are bigger, it can be great food, but not at such an early stage.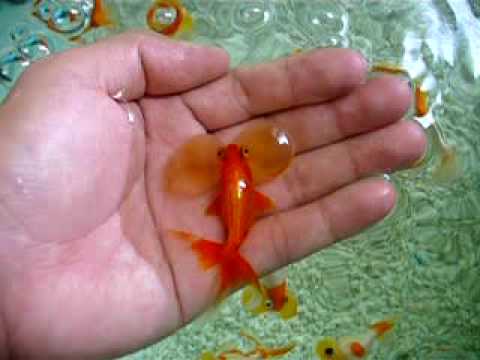
3. Third Test: Instant Baby Brine Shrimp
Next, I tried Instant Baby Brine Shrimp. I liked the fact that it requires no hatching hassle and that there was no yucky preservative in the jar water.
It is also small enough to fit in their mouth and is more accepted than the egg yolk, but it still is pretty low. It seemed like about 50% of the time, it was spit right back out. It stayed suspended in the water column for a long time which was good.
Honestly, the fish weren’t eating enough of it to develop a bulging belly (which is important for growth). I think this is because the brine shrimp are dead. They don’t move, and it does not appeal to the baby fish!
Ultimately, I decided to keep it on hand just for emergencies or if I ran out of the next food…
4. I Finally Caved: Live Baby Brine Shrimp
Trying to avoid the best live food for baby goldfish (aka live baby brine shrimp) ended in frustration and stress. So I bit the bullet.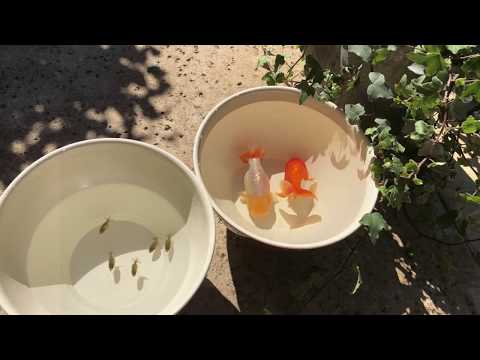 I got the package of baby brine shrimp eggs, and it was a winner!
- Small
- Enticing
- Nutritious
- High acceptance rate (about 90%)
- Doesn’t foul water
The movement of the baby brine shrimp makes the baby fish enjoy hunting them for hours. Their bellies turn big and pink with the BBS. Hatching them does NOT have to be a nightmare or require a science lab!
I avoided getting live baby brine shrimp for so long because I didn’t have the extra counter space for a big project. So I don’t set up a fancy hatchery with water bottles, airstones, lamps, tubes, etc.
- I got an empty plastic snack container (the flattish kind that holds dates or raisins is fine), filled it up 1/3 full, and added about 1/4 tsp salt and 1/4 tsp of eggs.
- Shut the lid and set it anywhere and forget it for the next 24-36 hours.
There were tons of baby brine shrimp hopping around and ready to be dished up. Maybe this small setup doesn’t work for really large batches of fry, but in my case, it was perfect. The hatch rate was AWESOME from the brand I got called Sequoia Brine Shrimp.
Pretty much every egg hatches! If you have 50 fry or less, the 0.5-ounce package is fine to start with.
If you have more fish, I’d go with the 2-ounce package. You might need to get more, depending on how long the package lasts for you.
Tips
- Set the container in a warm place for the eggs to hatch faster. I set mine on top of my aquarium light.
- I found it’s easier to use 2 containers so you can alternate hatching and not run out while you wait for the eggs to hatch.
- Once all the eggs are hatched, put the container in the refrigerator. This will make them last longer, 4−7 days.
- When it’s time to collect, shine a flashlight for about 10 minutes on one side of the container. This makes it easier to separate them from the eggs as the baby brine shrimp swim towards the light.

- Use a pipette or eyedropper to suck them out. Strain the salty water through a coffee filter or brine shrimp net first and use a toothpick to dispense in the water.
- Feed the baby brine shrimp 2−4x per day as much as they can eat in 10-15 minutes. Remove uneaten brine shrimp if there is any at the end of the day. Start with a small amount initially and gradually increase as they age.
- Wash the container with soap and water between uses. You don’t want it getting gross.
The only problem with this method is you can end up getting the empty eggshells mixed in with the food. The eggshells of the brine shrimp are not great for the fish. They can’t digest them, so (if they don’t pass right through) they can ferment in the gut, leading to bloat.
And picking out the eggs can be kind of a pain. The good news is you can mostly avoid this if you create a piece of tubing propped up on something thin and put the eggs in that, so when they hatch, the brine shrimp swim under it and escape, leaving the eggs in the trap.
This design shows what I’m talking about and is premade. Finally, if you need to hatch a larger quantity of brine shrimp for larger spawns, a special dish hatchery would probably work better than my off-the-cuff method (and be easier and less invasive than the water bottle method).
5. Algae
Image Credit: Chaikom, ShutterstockIf you are able to grow some algae in your tank (the green kind, not the brown kind), your fry will thank you.
Algae gives your little fishies a source of food around the clock and promotes better growth. Obviously, this isn’t always possible, depending on your light source and water supply. But it’s worth mentioning.
Remember, the algae alone would not be enough, you would want that in addition to the high protein food. This can be one benefit of having the fish be raised in a pond – algae and little bugs all the time.
But obviously, this doesn’t work for everyone’s situation, including mine.
Further Feeding for Bigger Babies
Yay, your fish made it past the first 2 weeks! After about 2–3 weeks of feeding live baby brine shrimp, you can start feeding other stuff and quit that baby brine shrimp business.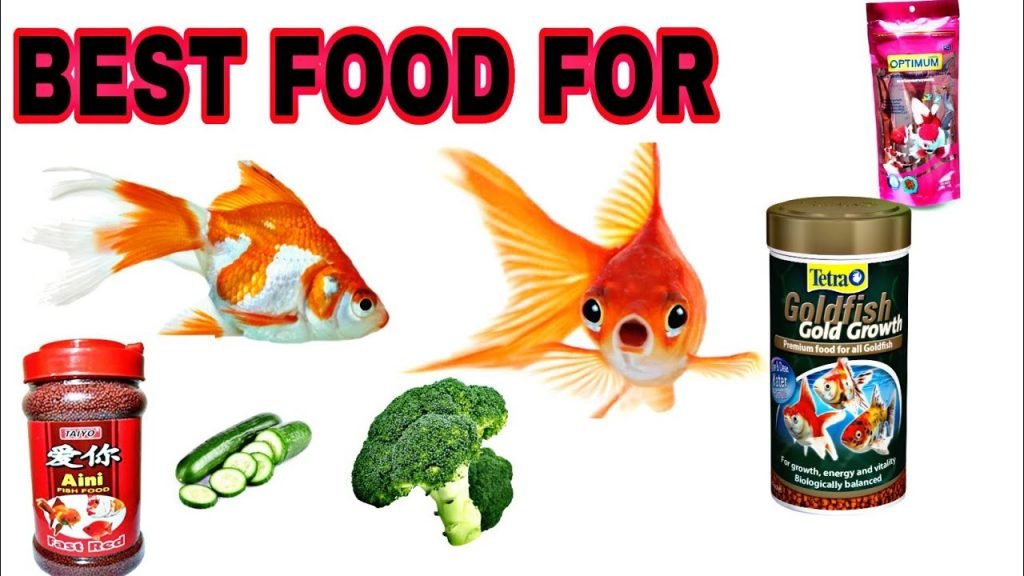
Weaning off BBS should be done over a couple of weeks. By then, they should be looking more like fish as well. Some people use microworms, but microworm cultures are smelly and a general pain to deal with.
As soon as I can get away from live foods, I’m so done with them. I use Northfin Fry Food once they start taking it. The protein makes for superior growth and coloration. In addition, Repashy Super Gold is great as a powder sprinkled on the water surface or for gel food.
Many breeders find fish grown on Repashy Super Gold do better than on other diets. You can also use steamed eggs, though this necessitates more water changes, and the protein isn’t as high. Young goldfish will grow well when fed frozen bloodworms (these are typically in addition to another staple).
Now, please do NOT feed Tubifex worms! These are vectors for very bad fish diseases. Then after a while, you can introduce pellets or other “adult” food.
If you're new to the world of goldfish or are an experienced goldfish keeper that loves to learn more, we recommend you check out our best-selling book, The Truth About Goldfish, on Amazon.
From diagnosing illnesses and providing correct treatments to ensuring your goldies are happy with their setup and your maintenance, this book brings our blog to life in color and will help you to be the best goldfishkeeper you can be.
Related Post: How to Raise Goldfish Fry
Conclusion
Whatever you feed, just make sure to stay on top of your water quality. Goldfish fry will not tolerate bad water conditions. You want to make sure your goldfish fry have nice bulging bellies after their first few days. This is important in helping them grow.
But don’t overfeed! Overfeeding your fry can cause death. So on that note, do you want to leave a comment?
Featured Image Credit: Prosun Paul, Shutterstock
Goldfish: breeding, fry, live food, feeding
Looking at goldfish, it is hard to believe that the fry of these fish are born very tiny and do not differ from the fry of medium-sized species of spawning fish. If you are breeding goldfish for the first time, do not think that the fry of these fish for the first time in their lives will be the same as their omnivorous and gluttonous parents. Goldfish fry are real fussy and trying to feed them with various dry and artificial foods, as a rule, turns out to be a failure. nine0003
When buying fish food, you don't always have to believe the "fry food" advertisements. For fish and fry, the food that they eat with pleasure is always good, even if this food is poor in proteins and vitamins, because the most important thing is that the food is well eaten, and the body will always receive the necessary amount of nutrients from the amount eaten.
Therefore, starting from the moment when the fry swim, they should receive only live food, namely “live dust” containing ciliates, rotifers, small crustaceans of daphnia and cyclops. You can get such food in natural reservoirs, and even then only in spring and summer, and it is usually not possible to buy live food for goldfish fry. nine0003
Feeding goldfish fry does not require all of the listed composition of living organisms, just two easy-to-breed at home will be enough. A good option would be ciliates shoe and daphnia. Since nematode worms are not eaten by goldfish fry, they are not considered here.
How to properly breed ciliates you can read in my publication "Ciliates breeding", and how to breed daphnia in the publication "Food for Daphnia fish". You can also buy live food for goldfish fry, or rather, order river sand containing daphnia eggs (ephippia) for daphnia cultivation at home. nine0003
There are actually several ways to feed goldfish fry. For example, where infusoria as a starter food can be replaced with boiled yolk or brine shrimp. You can read how to feed fry with boiled yolk in my publication “How to feed fry with yolk”, but in any case, growing fry must be transferred to larger live food, and daphnia will fit well here.
Unlike brine shrimp, the advantage of daphnia is that they remain constantly alive in the aquarium and even multiply, and the water, thanks to daphnia, which actively eat bacteria, is always clean and transparent, which cannot be said about brine shrimp that live in fresh water just a few hours.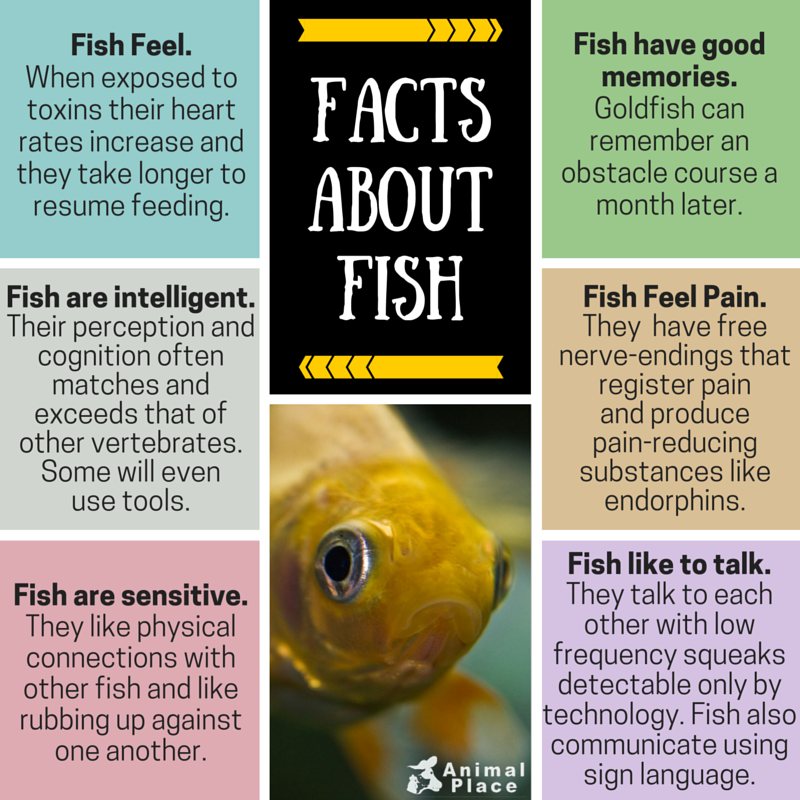 nine0003
It is especially important that the hatched Daphnia fry are well eaten by stunted fry, and already grown crustaceans are eaten by larger fry, and thus the distribution of food among all fry becomes uniform, and the percentage of mortality is reduced to a minimum.
Breeding of goldfish, how to feed goldfish fry, larvae, feeding rearing of goldfish fry, keeping conditions, aeration, growth, coloration of young, telescopes, formation of bulging eyes, aquarium fish
A newly hatched goldfish fry is very weak and helpless. It looks like a thread, equipped with two eyes at one end and a yolk vesicle in the middle. The yolk sac contains a supply of food for the fry in the first days of its life. At first, the fry can move only in small jerks and has the ability to attach itself to the place it touches.
Lionhead
The next day after hatching, the larvae can be seen hanging on plants and on aquarium glass or vessel walls. After two or three days, they begin to swim freely, the supply of yolk ends and they need other food. The first natural food of fry is the so-called "live dust" (culture of ciliates). It must be given in small portions. It is useful to give the fry the smallest algae in the form of a small amount of blooming water. nine0003
Related article Interesting facts about goldfish
After one and a half to two weeks, the fry can be fed with small daphnia and cyclops (instead of ciliates or rotifers), sorted through a gas sieve. Then - adult cyclops and daphnia. At the age of one month, juvenile goldfish are already able to take small bloodworms.
If live crustaceans are difficult to obtain, they can be replaced with boiled egg yolk, mashed with water, passed through a fine sieve, finely chopped bloodworm, then fine bloodworm or specialized food for fry, which are sold in pet stores. nine0003
Ranchu fry
Feeding oatmeal (for young up to 2.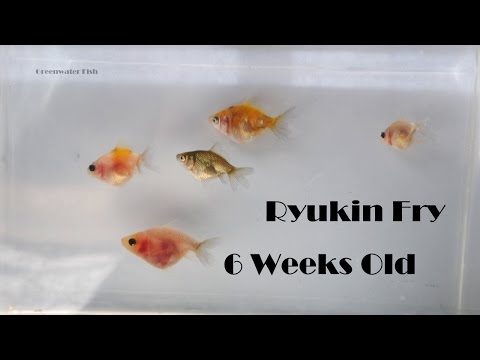 5 months old) passed through a fine sieve gives the fish a short, round body, which is desirable for veiltails and telescopes.
Feeding should be plentiful, fry eat more than their weight per day. It is better to feed little by little, but several times a day, and do not leave food for the night.
Sufficient oxygenation of the water or a sufficiently spacious room is very important to ensure good conditions for the development of young animals. nine0003
The fry should be kept in the same aquarium where they hatched for up to two weeks. After that, they should be seeded, placing no more than 250 fry in a 40-80 liter aquarium (do not forget about aeration and daily water changes). In such an aquarium, fry can be kept up to two months of age, sorted by size. With the growth of young animals, the number of them in the aquarium should also decrease. At an early age, fry are not recommended to be caught with a net, it is better to pour them over with a saucer. In the saucer, the fry are clearly visible and can be counted. nine0003
Lionhead
The fry need daylight for their bright colors, but they need to be protected from direct sunlight by creating shaded areas in the aquarium with plants or corymbs. If the sun illuminates the aquarium for no more than two hours a day, no shading is needed. If there is no daylight, bright electric is needed.
Juveniles of scaly varieties initially have the silvery-gray color of their progenitor, crucian carp. This color changes to gold, white and pure black at the age of 3-5 months. Some part always remains unpainted until old age. Scaly ones necessarily change their color, the last ones are white. The color change occurs in the period from a month - in young fish, up to six months - in old ones. Staining, with rare exceptions, goes from darker to lighter colors: from black to red, from red to white. Picturesque variegated red and black colors are fickle and turn into red. nine0003
Related article Enemies and diseases of goldfish
Scaleless fry do not go through a period of silvery coloration and already at the age of one and a half months they begin to turn into their final color. At 2.5 months you can already get an idea of the final color, although the best chintz colors are fully developed within 2-3 years.
The eyes of telescopes in the first weeks of life seem normal, not bulging. At the age of two to six months (sometimes even up to two years), it is impossible to say whether the fish will be telescopes. Usually the formation of bulging eyes occurs in 3-5 months. nine0003
During the first months the base of the tail of scaleless fish is dark, then this coloration gradually disappears.
Some litter of short-bodied goldfish is significantly stunted and dwarfed during the winter. This is due to the delay and suspension in development due to improper action of the endocrine glands. Some dwarfs die during the winter, while most of the rest develop rapidly in the spring, catching up with normally developing peers.