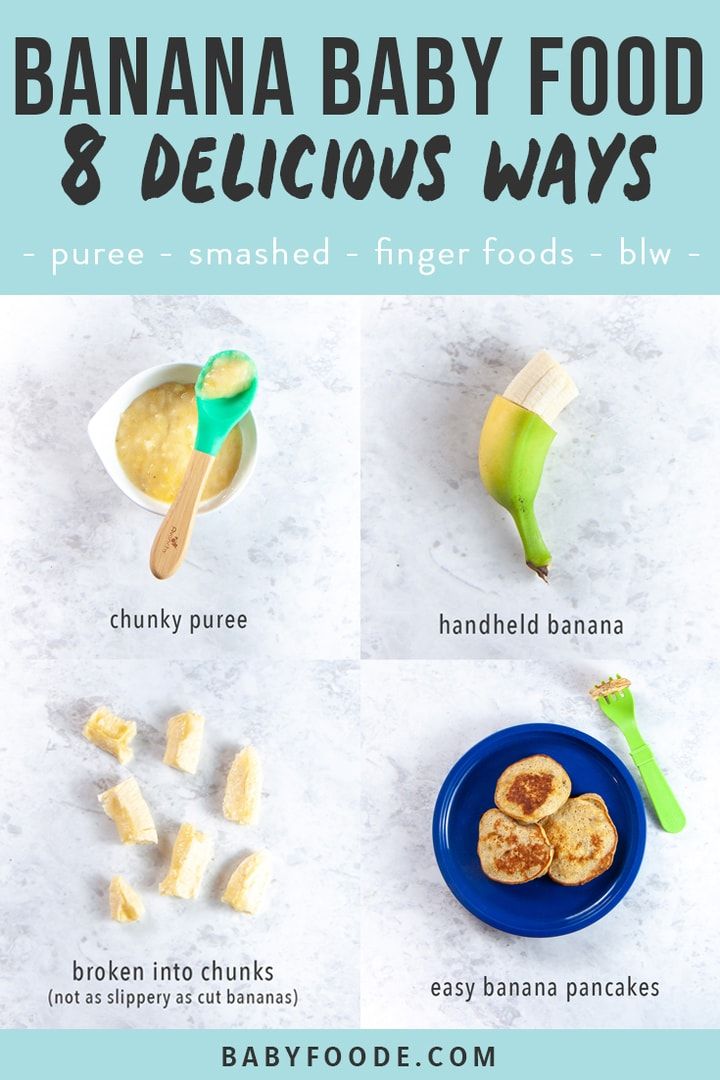
Baby bullet recipes first foods
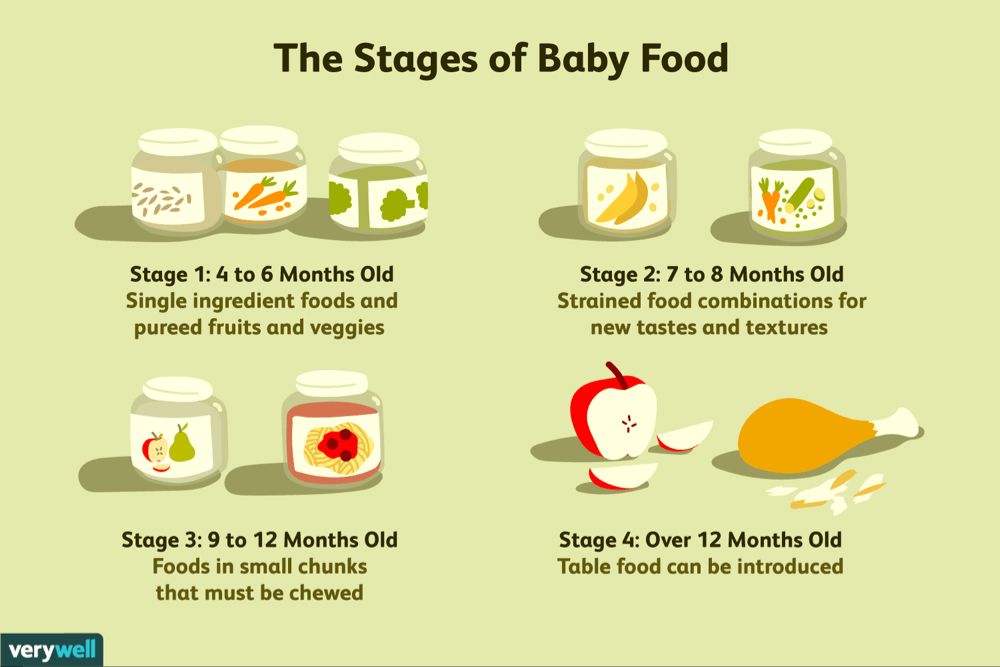
15 Stage One Baby Food Purees (4-6 Months)
Home » Feeding Style » Baby Food Purees » Stage One » 15 Stage One Baby Food Purees
These 15 Stage One Baby Food Recipes will tempt your baby’s taste buds! These simple, homemade baby food recipes are made with nutrient-dense fruits and vegetables with an added pinch of spice that makes these purees out-of-this-world delicious! They’re great for babies 4-6+ months of age!
Medically reviewed and co-written by Jamie Johnson, Registered Dietitian Nutritionist (RDN), and Lauren Braaten, Pediatric Occupational Therapist (OT).
Stage One Baby Food PureesAre you looking to make your baby homemade purees, but don’t know where to start? Does the process intimidate you?
Then you have come to the right place! Here you will find 15 of my all-time favorite starter baby food purees that have been viewed (and made) millions of times by my readers and combined have over 400 5-star reviews!
I would also like to personally welcome you to the wonderful world of baby food, this is a fun (and yummy) club to be in.
Does your baby’s first bite need to be boring?
Of course not!
Baby’s food can (and should be) delicious from the very start!
While it may seem daunting at first, making your own baby food is super easy once you get the hang of it.
And I’m here to walk you through it every step of the way.
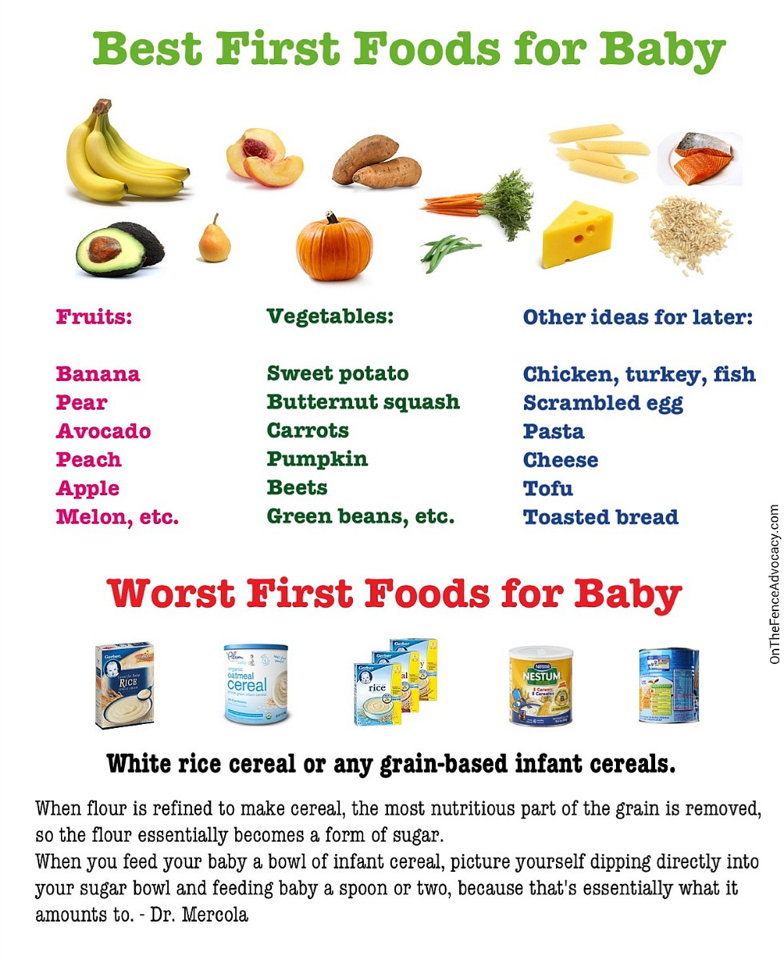
First time making homemade baby food? Then I suggest you start this journey by reading my in-depth Guide on How to Make Homemade Baby Food. The detailed guide goes over all the important information such as the best cooking tools to have on hand, safe storage, how to know when baby is ready for solids, how to introduce purees, the best first foods for baby, and so much more! You can also check out my best-selling cookbook for even more information and recipes!
15 Stage One Baby Puree Video
While the recipes themselves are simple, in this video I will show you how to add in a pinch of cinnamon, rosemary, curry, or mint to quickly roasted or steamed fruits and vegetables that enhance their natural flavors.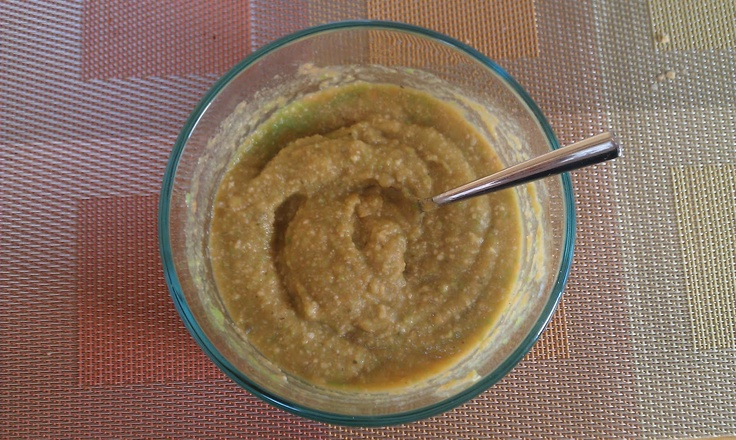 In other words, these are simple purees that I am pretty sure you will want to eat as well!
What is In Each Puree Recipe
After going through this guide, you will want to check out some (or all!) of the homemade baby food recipes below. Each recipe goes into detail about the:
- produce that is in the puree
- benefits of that produce for your baby
- recipe cooking options
- detailed photos and videos with step-by-step instructions
Reminder: The homemade baby food recipes below are made for babies that want to try the most delicious food from the very first bite! 😋
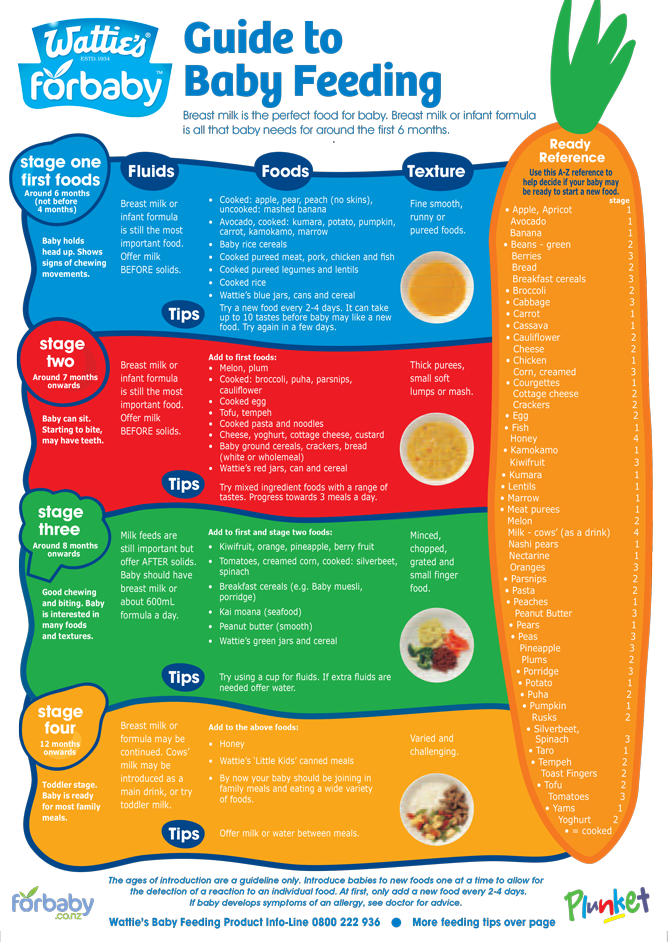
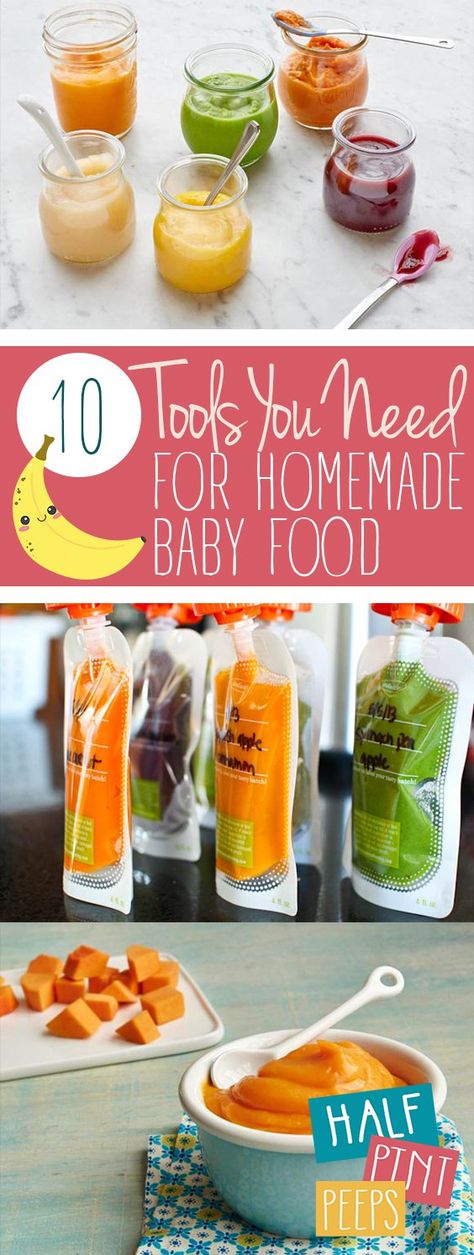
Helpful ToolsLet’s start with a few of my favorite kitchen essentials to make the best homemade baby food purees! These kitchen tools will help make the process of cooking, blending, and freezing baby food hassle-free. You can find a full list of my favorite baby and toddler food making tools in my online Shop.
- Blender or Food Processor
- Freezer Storage Tray
- Fridge Storage Containers
- Stasher Bag
- Baking Sheet
- Steamer Basket
- Medium Saucepan
- Reusable Pouches
- High Chair
- Suction Bowl and Spoon Set
- Bib with Food Catcher
Learning Resources: looking for the best high chair, cups or spoons for your baby? Then we’ve got you covered! Here you will find How to Find the Best High Chair for Baby, an easy guide on Best First Open Cups for Baby (plus 4 tips when introducing a cup) as well as 3 Tips on How To Spoon Feed Baby (plus – our favorite spoons for purees or BLW).
Frequently Asked QuestionsCan babies have spices in their food?
Yes, yes, yes! Babies can absolutely have spices mixed into their purees from the very first bite. Adding a pinch of spice or herbs to a baby’s food makes it taste better and gives the food additional medicinal properties. Read more here. But as I always say — you do you! If you don’t want to add spices to your baby’s food, you can certainly leave them out. Don’t worry, I give instructions on each recipe card for both.
What about allergies? Can spices cause an allergic reaction?
My rule of thumb is that unless there is an immediate family member that has a true allergy to a certain spice or food, then introducing your baby to spices at the same time as new food is completely acceptable. Spice and herb allergies in babies and adults are very rare. But remember, it’s always recommended to keep an eye on your baby when introducing any new food or spices.
At what age should I start my baby on baby food purees?
When a baby can start on solid foods is determined by their own rate of development, which generally comes between 4-6 months of age.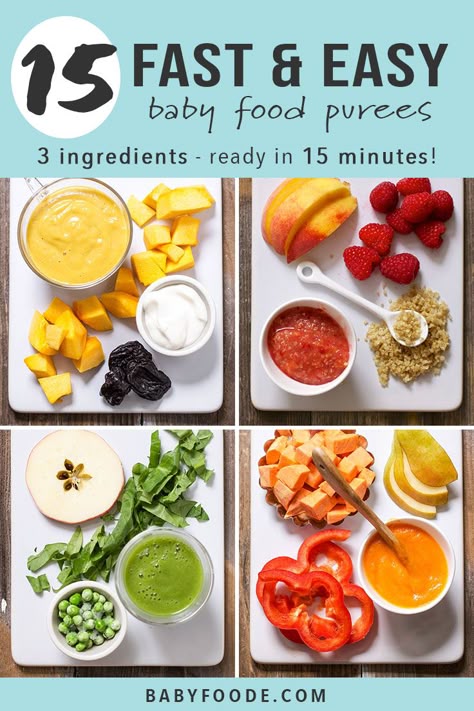 Some of the developmental milestones babies need to reach to start solids include: if your baby has solid control of their head and neck, if your baby has doubled in weight, and if your baby is reaching for or opening their mouth when you eat (see my guide here). Before you start your baby on purees, you should consult with your pediatrician to make sure your child is developmentally ready for solids.
All of our baby food recipes are designed to enhance the natural taste of the fruits and veggies while keeping as many nutrients intact as possible. In other words, the goal is to make a puree that’s both healthy and delectable.
There are several ways you can cook baby food purees, but the main techniques I use are:
- Steaming
- Roasting
- Simmering
- Raw
Keep in mind, that as long as the produce is cooked until soft, that there isn’t a right or wrong way to cook it for baby food.
If a recipe for broccoli calls for steaming but you want to roast it because you will already be roasting some broccoli for yourself for dinner, then go ahead and roast the broccoli for your baby’s puree. Play around and have some fun with it!
Adding Spices to Baby PureesIt’s encouraged that you can serve your baby a homemade puree with a pinch of spices or herbs from the very first bite.
Benefits of Spices
- boost and compliment any fruit or vegetable puree
- broaden baby’s emerging palate
- add more flavor and depth into their foods
- decrease picky eating in the years to come
- have medicinal properties in them — they can help with digestive issues, boost brain functions, repair muscle tissues, and so on.
While each puree recipe on this site has a selection of spices or herbs that complement the flavors of the fruit or vegetable in the puree, it’s up to you if you want to add them. You do you! Either way, the puree recipes on this site will be delicious.
Top Spices to Add to Baby’s Puree
- Cinnamon
- Cloves
- Nutmeg
- Basil
- Mint
- Parsley
- Mild Curry Powder
- Fresh Lemon Juice
- Garlic
- Rosemary
Every recipe below has specific instructions on how to store that particular puree, but these are the general guidelines.
How to Freeze Baby FoodYour freezer is about to become your new best friend, allowing you to keep several weeks’ worth of baby purees at the ready. Whenever you make a puree, put several ounces in the fridge for your little one to enjoy that week, then freeze the rest of the batch for your baby to eat at a later date. Please make sure you get it in the puree into the fridge or freezer within 1 hour of cooking to prevent bacteria growth.
- Make a puree.
- Let it cool slightly.
- Transfer the puree to freezer trays or freezer jars.
- Cover the freezer trays with a lid or plastic wrap.
- Label with date and name of puree.
- Place the tray in the freezer.
- Let it freeze for at least 5 hours.
- Take the tray out of the freezer.
- Crack the purees out of the trays.
- Place the frozen purees into zip-lock baggies or stasher bags.
How to Store Baby Food
Purees can be stored for up to four days in an airtight container in the fridge or 4 months in the freezer.
How to Thaw Baby Food
Thawing may seem like a no-brainer, but it never hurts to know your options. There are three different ways to thaw purees.
Microwave- Take the frozen puree cubes that you want to serve out of your freezer.
- Place them in a glass microwave-safe container.
- Microwave in 20-second increments, stirring every time.
- The puree is ready when it is just warm to your touch.

- Grab two clean spoons, one for you and one for your baby, and test your puree before serving.
Heating Tip: To prevent the microwave from unevenly heating the puree, which can leave it with cold and really hot spots and can burn your baby’s mouth, make sure you stir between each interval and taste test it before serving to your baby.
Refrigerator
This one takes the longest time, but it is an excellent alternative to using a microwave.
- Take the frozen puree cubes you want to serve out of your freezer.
- Place the cubes in an air-tight glass container.
- Place the container in the fridge and let the cubes thaw for 8 to 12 hours, usually overnight.
- Do not leave the puree in the container to thaw on the counter or anywhere out of the fridge, as bacteria will start to grow at a rapid rate — which is definitely not recommended.
- Note that the puree will be cold but thawed. So if your baby likes their puree warmed, you’ll have to finish the job using the microwave or stovetop method.

- In a small saucepan, add the frozen puree cubes you want to serve to your baby.
- Over medium-low heat, gently cook the puree until warm, stirring occasionally.
Thawing Tip: Some infants like their puree cold, warm, or really warm, and some will eat it no matter the temperature. You will get to know your baby’s personal preferences as the two of you bond over food.
Feeding Tips
- Make sure baby is showing readiness signs for eating – good control of their head and trunk, sitting with minimal assistance, bringing hands or toys to their mouth, and appearing interested in your food when you’re eating.
- Follow your baby’s lead – when feeding purees from a spoon, sometimes there’s a tendency to keep offering bites past the point of your baby being full. Always follow your baby’s cues for when they are done eating. Turning away from the spoon, closing her mouth, or pushing food away are all signs that your baby is finished with the meal.

- Throwing spoons – is a common phase that all babies go through at one point or another. One of the best ways to handle spoon throwing is to ignore it and keep feeding your baby as usual (with an extra spoon you already have at the table). If your baby ends up also throwing back up spoons #2 AND #3, simply encourage your baby to eat with their hands until they appear to be finished with the meal.
Top Rated Baby Food Purees
Pea Baby Puree (Stage One)
4.91 stars (83 ratings)
A delicious way to introduce peas to baby. Mild peas paired with a fresh hint of mint – a mouth-watering combo!
Get the recipe
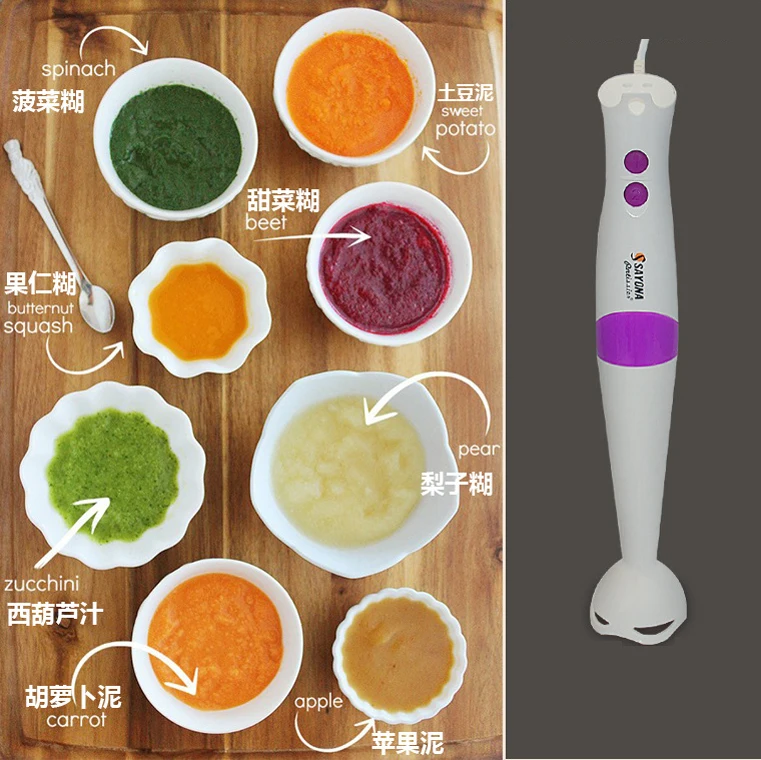
Apples Baby Food Puree
4.76 stars (57 ratings)
This Apple Baby Puree recipe is a wonderful first food for baby! A delicious nutrient-dense puree that baby will go gaga over!
Get the recipe
The Best Sweet Potato Baby Food
5 stars (56 ratings)
This Homemade Sweet Potato with Curry Baby Food Puree is a fun and exotic first puree for baby! Great for 4+ months and is completely freezer-friendly!
Get the recipe
Broccoli Baby Food
4. 81 stars (72 ratings)
This Broccoli Baby Food with olive oil recipe is a great way to introduce healthy green vegetables into your baby's diet. A delicious puree full of essential vitamins and healthy fats for growing baby
Get the recipe
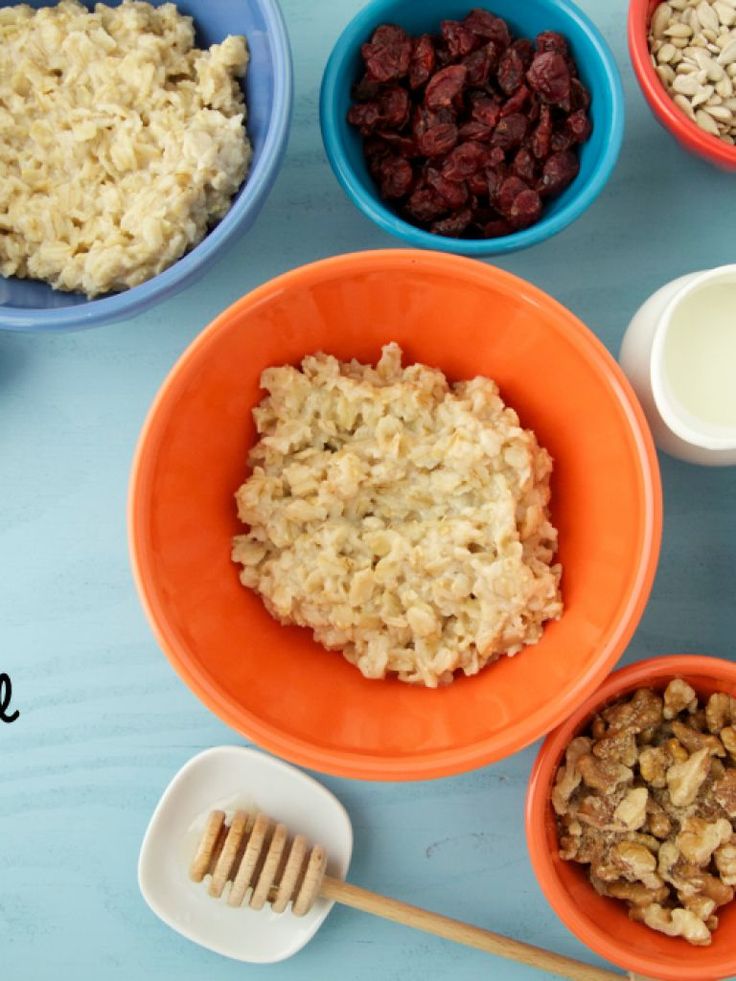
Oatmeal for Babies (Stage One)
5 stars (40 ratings)
This Oatmeal Recipe for Baby is made with simple nutrient-dense ingredients in less than 10 minutes, and it's perfect for baby's first bite or added into their favorite fruit or veggie puree. Great for 4+ months and up.
Get the recipe
Avocado for Baby – Puree & BLW
5 stars (16 ratings)
Avocados are a superfood and great first food for babies 6 months and up. Serve them pureed, smashed, or as a finger food for baby-led weaning.
Get the recipe
WeeSprout Baby Food Freezer Tray
My all-time favorite freezer tray! Individual servings pop out easily. The hard plastic lid snaps on with ease and allows for convenient stacking of freezer trays. Dishwasher safe!
View Product
Butternut Squash Baby Food
5 stars (30 ratings)
This homemade Roasted Butternut Squash Baby Food Puree not only contains calcium, folate, vitamins A and C and fiber but it is also a deliciously smooth way to introduce butternut squash to your baby!
Get the recipe
Green Bean Baby Food
5 stars (35 ratings)
Green beans are steamed until just tender, this puree has a mild taste for baby's palette.
Get the recipe
Creamy Mango-licious Baby Food Puree
4.87 stars (29 ratings)
This 5-minute Mango Baby Food Puree is a great way to introduce baby to the magical taste of one of the world's healthiest fruits – MANGOS!
Get the recipe
Pear Baby Puree (Stage One)
5 stars (19 ratings)
This smooth and creamy homemade Pear Baby Puree is a wonderful first puree for baby – easy on the taste buds and great for their growing bodies!
Get the recipe
Peach Baby Puree (Stage One)
5 stars (16 ratings)
Smooth and creamy, this homemade Peach Baby Puree delivers big on taste with naturally sweetened peaches and flecks of vanilla bean.
Get the recipe
Basic Chicken Baby Food
4.42 stars (198 ratings)
This homemade Basic Chicken Baby Food is a great puree to add to any of your baby’s favorite fruit or veggie purees. Great for extra protein and flavor!
Get the recipe
Homemade Baby Rice Cereal
4.88 stars (49 ratings)
Using only 1-ingredient, this Homemade Baby Rice Cereal is a simple and easy recipe to make baby!
Get the recipe
Red Pepper Baby Puree
4.88 stars (33 ratings)
This Red Pepper Baby Puree recipe is a smooth, creamy and naturally sweet puree that is loaded with vitamin A, B6 and C. Great for 4+ months and older (or stage 1 puree).
Get the recipe
More Baby Fooe Purees
- Strawberry Baby Puree
- Blueberry Baby Puree
- Pumpkin Baby Puree
- Rasberry Baby Food
- Banana Puree
- Homemade Quinoa Baby Cereal
Or watch the shortened video here.
Pea Baby Food Puree
- 2 cups peas, fresh or frozen
- 1 medium zucchini, roughly chopped (optional)
- 4 mint leaves, roughly chopped (optional)
Sweet Potato Baby Food Puree
- 2 large sweet potatoes
- 1/4 tsp mild curry powder (optional)
- 1/4-1 cup liquid, (water, fresh breast milk, formula or sodium-free chicken stock) for pureeing
Roasted Banana Puree
- 4 bananas, cut lengthwise
- 1/8 tsp fresh rosemary, finely chopped (optional)
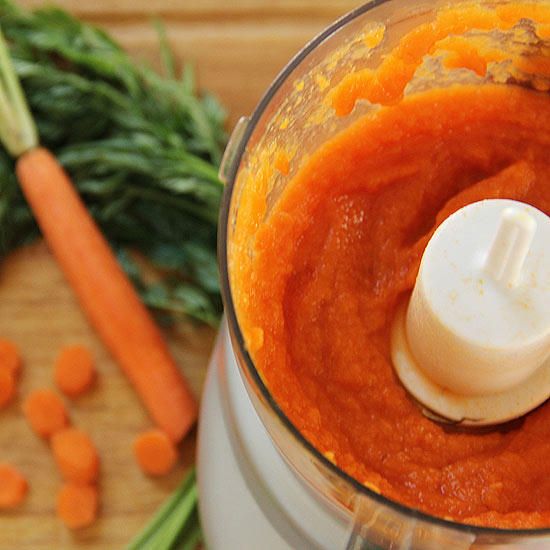
Carrot Baby Food Puree
- 2 pounds carrots, trimmed, peeled and roughly chopped
- 1/4 tsp nutmeg (optional)
- 1/2-1 cup liquid, (water, reserved water, fresh breast milk, formula or low-sodium stock) for pureeing
Apples Baby Food Puree
- 6 apples, peeled, cored and chopped
- 1/2 cup water
- 1/4 tsp cinnamon (optional)
Broccoli Baby Food Puree
- 2 cups broccoli, chopped into small florets
- 1 small white potato, apple or pear, peeled and roughly chopped, roughly 1/2 cup (optional)
- 1 tbsp good quality olive oil (optional)
Butternut Squash Baby Puree
- 1 butternut squash
- 1 tsp fresh thyme, roughly chopped (optional)
- 1-2 tsp olive oil (optional)
- 1/2-1 cup liquid (water, fresh breast milk, formula, low or no-sodium stock or bone broth), for pureeing
Green Bean Baby Food Puree
- 1 pound green beans, fresh or frozen, trimmed
- 1 big pinch fresh basil, cilantro or parsley, finely chopped (optional)
Creamy Mango-licious Baby Food Puree
- 2 cups fresh or frozen mango, deseed, peeled and roughly chopped.
 If using frozen mangos, thaw first
 - 1 medium banana (optional)
- 1 pinch nutmeg (optional)
Pear Baby Food Puree
- 6 pears, peeled and roughly chopped
- 1/8 tsp cardamom or cinnamon (optional)
- 1/4 cup water
Peach Baby Puree
- 3 fresh peaches or 12oz frozen peaches, do not thaw frozen peaches – use frozen
- 1/4 cup water
- 1/2 tsp vanilla bean pod (optional)
- 1 pinch pinch nutmeg (optional)
Basic Chicken Baby Puree
- 1 8-ounce boneless skinless chicken breast or thighs, cubed
- 1 cups chicken or veggie stock, low-sodium or sodium-free
- 1 tsp dried parsley (optional)
Homemade Baby Rice Cereal
- 1 cup brown rice, I prefer organic short grain
- 2 cups water for cooking
- 1-2 cups of liquid for blending, (water, fresh breastmilk or formula)
Red Pepper Baby Puree
- 2 red bell peppers, deseeded and roughly chopped
- 1/2 cup white potato, apple or pear, peeled and roughly chopped
Oatmeal for Babies
- 2 cup water
- 1 cup old fashioned oats
- 1/2 tsp chia seeds (optional)
- 1/2 tsp hemp seeds (optional)
Avocado for Baby
- 1/4 avocado
- 1 tsp breast milk, formula or water
Pea Baby Food Puree
In a medium saucepan, bring 2″ of water to a boil over medium heat.
 Place the zucchini in a steamer basket, and place over boiling water. Cover and steam for 5 minutes.
Add in the peas, and steam for an additional 3-5 minutes. Reserve steamer water. Let cool slightly.
Add the zucchini, peas and mint leaves to a blender or food processor and puree for 1 minute or until you have achieved the desired texture. If the puree is too thick, add in 1/4 cup of the reserved steamer water until you have the right consistency.
Note on Zucchini: while this is a 2 vegetable starter puree, zucchini allergies are very low, so I added it to this recipe to give the peas a mild taste and smoother texture. You can completely leave them out if you prefer. Just steam the peas as directed.
Sweet Potato Baby Food Puree
Heat oven to 400°. Line baking sheet with tin foil, parchment paper or a silicone mat.
Wash and dry the sweet potatoes.
 Prick with a fork in several places and then place the sweet potatoes on the baking sheet. Bake for 45 minutes – 1 hour or until a fork can easily prick the sweet potato. Let sit until cool to touch.
Make a cut into the skin of the potato lengthwise and peel away the skin of the potato. Scoop out the sweet potato meat and place into a blender or food processor, adding in the mild curry powder and water.
Puree on high for 1-2 minutes or until smooth, adding in additional liquid in 1/4 cup increments if needed. I had to add in 1 cup of water to the puree pictured. Serve or freeze for a later meal.
Additional Spices: Feel free to use the following spices instead of the curry – 1/2 tsp of cumin, 1/4 tsp of nutmeg, 1/2 tsp of cloves, 1 fresh garlic clove, 1/2 tsp of chopped fresh thyme, 3-4 basil leaves, 1/2 tsp chopped rosemary or even a big pinch of fresh ginger or 1/2 tsp ginger powder.
 Or you can leave out the spices altogether.
Roasted Banana Baby Puree
Heat oven to 325 degrees F. Line baking sheet with parchment paper.
Place bananas on a baking sheet and roast for 10-12 minutes or until golden brown. Let cool slightly.
Place bananas and rosemary into a blender or food processor and puree for 1-2 minutes or until completely smooth. You may need to add additional water, so start by adding in 1/4 cup increments until you get the desired consistency.
Additional Spices: This recipe is also great with 1 tsp cinnamon, 1/2 tsp cloves, 1/2 tsp nutmeg, or for a fun twist, 1/2 tsp mild curry.
Note on Bananas: while any ripeness of bananas will work, I have found that the bananas that are ripe to very ripe tend to work best in this recipe.
Carrot Baby Food Puree
In a medium saucepan, bring 2″ of water to a boil over medium heat.
Place the carrots into a steamer basket, cover and cook for 9-11 minutes or until tender. Reserve steamer water. Let cool slightly.
Place the carrots, nutmeg and 1/2 cup of liquid into a blender or food processor and puree for 1-2 minutes on high, adding 1/4 cup liquid at a time until you achieve the desired consistency. Serve and enjoy, or freeze for later.
Notes on Nutmeg: adding in spices to babies first purees are completely optional, but totally safe. Nutmeg rounds out the acidic taste carrots sometimes have and make this puree taste grounded and full-bodied.
Additional Spices: Feel free to substitute 1/2 tsp ginger powder or 1/4 fresh ginger, 1/2 tsp mild curry powder, 1/4 tsp cloves, 1/2 tsp finely minced fresh chives or 1/2 garlic clove instead of the nutmeg.
Apples Baby Food Puree
In a medium saucepan, place the apples, water and cinnamon.
 Cover and heat on medium-low for 15-20 minutes or until apples are tender. Let cool slightly.
Transfer all of the ingredients into a blender or food processor and blend for 1-2 minutes or until completely smooth. For a chunky puree, quickly pulse the ingredients 10-15 times or until you receive your desired consistency. Serve or freeze for later.
Additional Spices: Feel free to sub in these spices instead of the cinnamon for this recipe – 1/8 tsp of cloves, 1/8 tsp of nutmeg, 1-2 leaves of fresh mint, 1-2 leaves of fresh basil, a pinch of fresh or 1/4 tsp of ginger powder or even 1/4 of coriander for a fun twist.
Apples: you can use any sweet apple in this recipe – Gala, Honeycrisp, Fuji, McIntosh, etc.
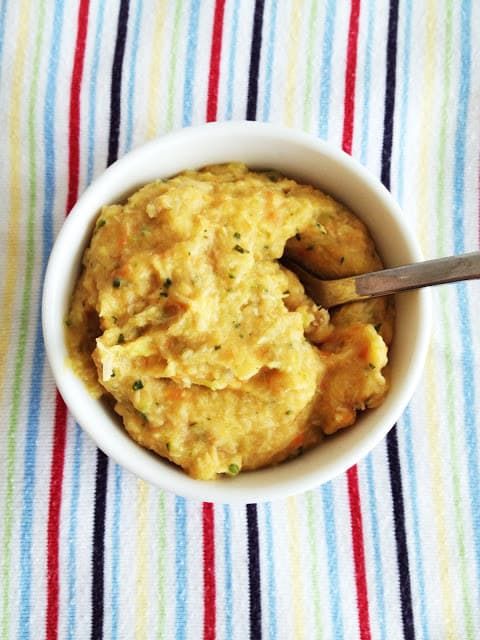
Broccoli Baby Food Puree
In a medium saucepan, bring 2 inches of water to a boil over medium heat. Place the broccoli and potato (or apple/pear) into a steamer basket and place over boiling water, cover and steam for 10-12 minutes or until the broccoli and potato are tender.
 Reserve water from the steamer. Let cool slightly.
Add the broccoli, potato and olive oil into a blender or food processor and puree until smooth, adding the reserved water from the steamer basket in 1/4 cup increments if needed.
Adding In Spices: Feel free to add in 1 tsp of chopped chives, 2-3 mint leaves, 1 tsp of chopped cilantro, 1/2 tsp cumin or a squeeze of fresh lemon juice.
Butternut Squash Baby Puree
Heat oven to 450 degrees F. Line baking sheet with a silicone mat, tin foil or parchment paper.
Cut butternut squash in half, deseed and place flesh side up, skin side down. Optional – Feel free to drizzle the squash with 1-2 teaspoons of olive oil for some added healthy fat.
Bake for 45 minutes or until you can easily prick the squash with a fork. Let cool until you can handle the squash with your hands.
Scrape off the skin and discard. Place the butternut squash into a blender or food processor. Add thyme and puree for 1-2 minutes, adding water in 1/4 cup increments until you have your desired consistency. I had to add 3/4 cup of water to my puree shown below.
Additional Spices: Feel free to sub the thyme for 4 basil leaves, 1 tsp chopped rosemary, 1 tsp ginger powder, or 1 big pinch of fresh ginger, 1/2 teaspoon nutmeg, or even 1/2 tsp of coriander.
Green Bean Baby Food Puree
Fill a medium saucepan with 2” of water and bring to boil over medium heat. Place the green beans (fresh or frozen) into a steamer basket over the boiling water, cover, and cook for 10 minutes or until tender. Let cool slightly. Reserve steamer water.
Transfer the green beans and herb to a blender or food processor and puree for 1-2 minutes or until smooth, adding reserved steamer water in 1/4 cup increments if needed until you reach your desired consistency.
Adding Spices: you can add a big pinch of roughly chopped basil, cilantro, mint, parsley, or chives to this puree before blending.
Creamy Mango-licious Baby Food Puree
Place the mango, banana and nutmeg (if using) into a blender or food processor. Puree for 1 minute or until completely smooth. If your mango is not ripe enough, you might need to add in up to 1/4 cup of water while blending to get the right consistency. Serve or freeze for later.
Mango Tip: I usually find that organic frozen mangos are easier and cheaper to find than fresh organic mangos, but if mangos are in season when you are making this recipe, by all means, you can use fresh over frozen. For fresh mangos, simply peel and chop.
Pear Baby Food Puree
In a medium saucepan, place the pears, cardamon and water, cover and heat on medium-low heat for 10-15 minutes, or until tender.
 Let cool slightly.
Using a slotted spoon, scoop the pears out of the saucepan, leaving water behind, and into a blender or food processor. Blend for 1-2 minutes until you have your desired consistency. If your pear puree is too thick, add the leftover cooking water in 1/4 cup increments.
Peach Baby Puree
If using fresh peaches, peel, pit and slice the peaches. If using the fresh vanilla bean pod, cut in half and then slice open lengthwise. Take the back of your knife or spoon and scrape out all of the vanilla bean, reserve.
In a medium saucepan, add the peaches and water, cook over medium-low heat for 5 minutes (fresh peaches) – 10 minutes (frozen peaches). Right before the peaches are done cooking, add in the vanilla and nutmeg (or any other spices you prefer) and stir until incorporated—Cook for 1 more minute.
Using a slotted spoon, transfer the peaches to a blender or food processor, leaving all excess water in the saucepan.
 You do not want to add any additional liquids, or the puree might be too thin. Starting on low and increasing to high speed, puree the peaches until smooth and creamy. Serve to baby or freeze for later.
Basic Chicken Baby Puree
In a medium saucepan, bring the cubed chicken, broth, and parsley to a boil over medium heat. Turn the heat down to low and simmer, covered, for 15 minutes or until chicken is just cooked through. Let cool slightly.
Using a slotted spoon, transfer the chicken to a blender or food processor, leaving the broth in the saucepan. Reserve the broth.
Starting on low and working your way up to high-speed, puree the chicken until you reach your desired consistency, adding in broth in 1/4 cup increments if needed. I had to add in just 1/4 cup of broth to get the consistency seen in this photo.
Extra Healthy Fat: For some extra healthy fat, this puree is also wonderful, with a teaspoon of grass-fed butter (salt-free) added to the blender right before pureeing.
Homemade Baby Rice Cereal
IMPORTANT STEP: Place the rice in a fine-mesh colander and rinse with water until the water runs clear.
Transfer the rice to a medium saucepan and add 2 cups of water. Bring to a boil over high heat, then reduce heat to low, cover with a lid and simmer for 35-45 minutes or until the rice is tender and the water is evaporated. Each batch of rice cooks a little differently, so taste at 35 minutes to see if the rice is tender. Remove the saucepan from the heat and let rest for 10 minutes, covered. If using fresh breast milk or formula for blending, I would remove the lid and let the rice cool for 15 minutes.
Place the rice into a blender or food processor and add 1/2 cup of liquid of choice. Blend for 1-2 minutes on medium-high speed until completely smooth and creamy, adding in the additional liquid in 1/4 cup increments, if needed, until you have your desired consistency.
Red Pepper Baby Puree
In a medium saucepan, bring 2″ of water to a boil.
If using a potato: place it in a steamer basket and steam for 10 minutes before adding peppers, and cooking for another 5-7 minutes.
If using pear or apple: add in the red peppers and apple or pear and steam for 5-7 minutes or until tender. Reserve steamer water. Let cool slightly.
Add in all of the ingredients into a blender or food processor and puree for 1 minute or until completely smooth, adding in a tablespoon of water at a time if needed.
Oatmeal for Babies
In a medium saucepan, bring 2 cups of water to a boil. Add in 1 cup of old-fashioned oats along with the chia seeds, hemp seeds and any spices you are using. Turn down the heat to medium-low and cook the oats for 5 minutes, stirring occasionally, or until all of the water is gone and the oats are soft. Let cool slightly.
Transfer the oats to a blender or food processor and puree for 1-2 minutes, adding water in 1/4 cup increments if needed, until completely smooth.
 I had to add 1/2 cup of water to my oatmeal. You will want the oat cereal to be on the thinner side, so it doesn't become sticky. The oats will continue to absorb liquid as they cool, so you can add more water, fresh breast milk, or formula as needed. Serve to baby or freeze for later.
 Type of Oats: This recipe is for old-fashioned oats: for steel-cut or instant oats, read the full post.
Adding Spices: you can add a big pinch of cinnamon or pumpkin pie spice mix or a smaller pinch of nutmeg or cloves to these oats before blending.
Chia and Hemp Seeds: are added for a nutritional boost, but you can add or omit them if you prefer. You can get both of these at any health food store or online here (chia/hemp).
Avocado for Baby
Age: 4-6 months and up
Yield: roughly 15-25 ounces, depending on the recipe
Freezer Tray
Bumkins Baby Bowl
Blender
Saucepan
Did you make this recipe?
Tag @babyfoode on Instagram and hashtag it #babyfoode!
Pin <em>Recipe</em> Email <em>a Friend</em>
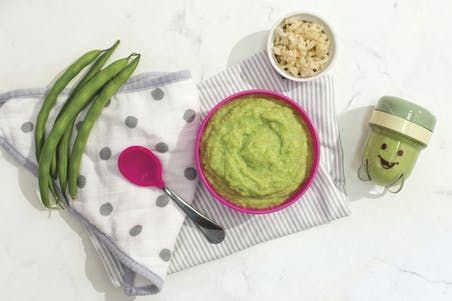
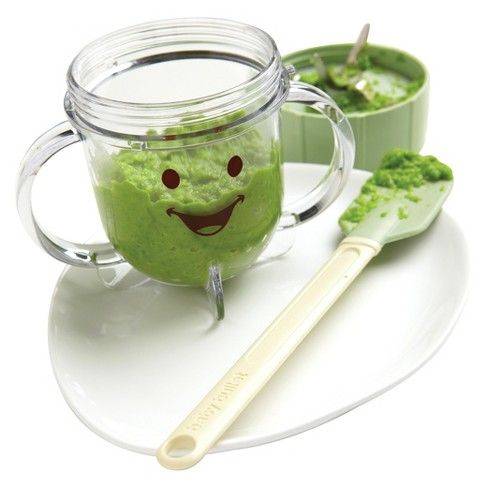
Pea Baby Puree (4-6+ Months/Stage 1)
This Pea Baby Puree with mint is a smooth and mild baby food puree that is perfect for your baby’s first bite! Your baby will love this green puree thanks to its fresh and earthy flavor. It’s a great stage 1 baby food for 4-6 months and up.
Medically reviewed and co-written by Jamie Johnson, Registered Dietitian Nutritionist (RDN), and Lauren Braaten, Pediatric Occupational Therapist (OT).
Homemade Pea Baby Food
Don’t get caught up on what you think pea baby food is going to taste like.
Store-bought brands can be thick and lumpy with a strong acidic taste of overly cooked peas. Don’t even get me started on the smell! 🤢
But this homemade pea puree is exactly the opposite! And trust me; it tastes nothing like you expect.
I’m telling you… this pea baby food is beyond delicious. It’s heavenly!
Smooth and creamy with a mild taste and a hint of minty freshness, it’s also bright and appetizing to look at.
It will actually put a smile on your and your baby’s faces! 😁
Is it your first time making homemade baby food? Then I suggest you start this journey by reading my in-depth Guide on How to Make Homemade Baby Food. The detailed guide goes over all the important information such as the best cooking tools to have on hand, safe storage, how to know when baby is ready for solids, how to introduce purees, the best first foods for baby, and more! You can also check out my best-selling cookbook for even more information and recipes!
Pea Baby Puree Video
Watch this video to see just how easy this Pea Baby Puree is to make!
Reasons to Love this Pea Baby Puree- great baby food for 4-6+ months
- starter puree
- 3 simple ingredients
- super smooth and creamy
- delicious green puree
- easy to make — requires less than 10 minutes
- freezer-friendly
- budget-friendly
- homemade
- healthy
- organic – can easily (and cheaply) use organic peas and zucchini
- can use fresh or frozen peas
Make sure to read the recipe card below for the full ingredient list and instructions!
- Peas: They are high in fiber, folate, vitamins A, C, and K, and are a good source of protein.
 They also help promote healthy digestion and may protect against cancer.
 - Zucchini: While this is a 2-vegetable starter puree, zucchini allergies are very low, so I added it to this recipe to give the peas a mild taste and a smoother, creamier texture. You can completely leave it out if you prefer. Just steam the peas as directed below.
- Mint: This is an ideal herb to add to baby food because it helps soothe an upset stomach, improves digestion, can help improve mental awareness and focus, and is rich in nutrients. However, adding mint to this puree is entirely optional.
- A good source of protein
- Contains a high amount of fiber, which helps with digestion
- Contains an array of micronutrients, such as thiamine, folate, manganese, vitamins K and C
- A good source of antioxidants
Frequently Asked Questions
When can babies eat peas?
development, which generally comes between 4-6 months of age.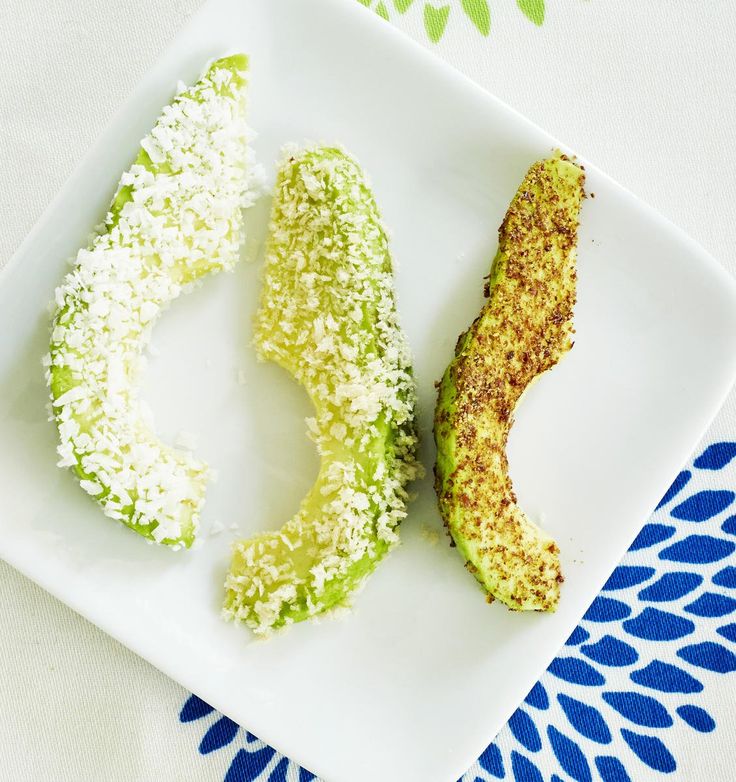 Some of the developmental milestones babies need to reach in order to start solids include: if your baby has solid control of their head and neck, if your baby has doubled in weight, and if your baby is reaching for or opening their mouth when you eat (see my guide here). Before you start your baby on purees, you should consult with your pediatrician to make sure your child is developmentally ready.
Can peas be baby’s first food?
Peas can 100% be baby’s first food if you want it to be. It is recommended to wait to introduce the top eight allergen foods to your baby once a few other well-tolerated foods have been introduced, but otherwise, foods can be introduced in any order so choose whatever you are most excited for your baby to have.
Are peas a common allergen for baby?
No, peas are not a common allergen, however, as with any food, start with a small portion and be aware of any signs that might be an allergic reaction after introducing it.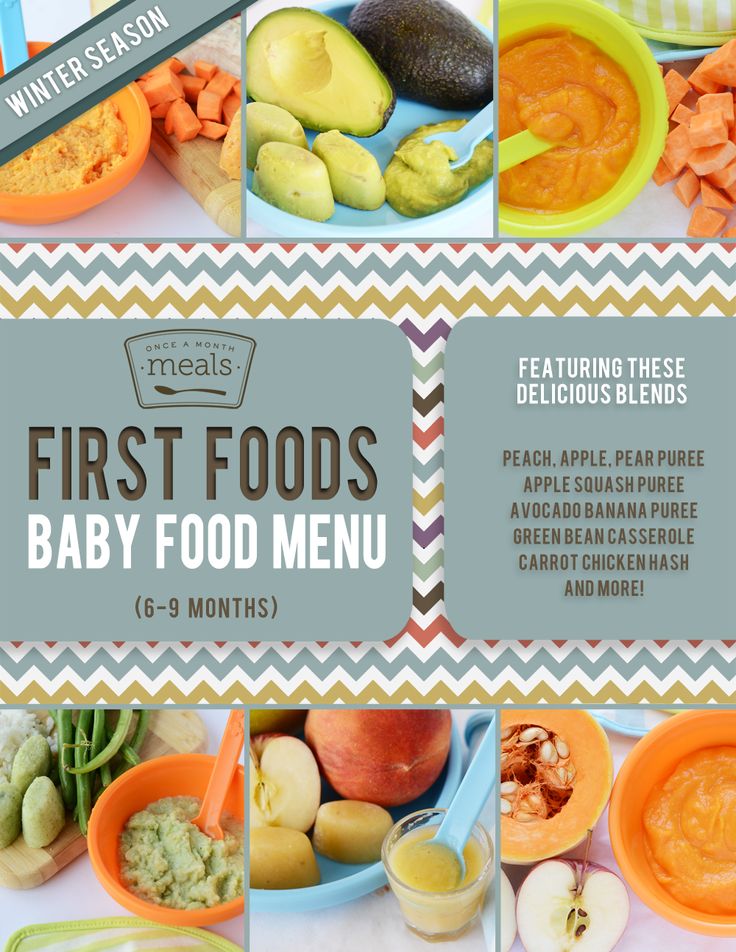
Do peas cause constipation for babies?
No, peas are not known to cause constipation in babies, and they may actually help relieve constipation in babies due to the high fiber content that makes it easier for your baby to pass stools.
Can you use frozen peas for baby food?
Yes, you can definitely use frozen peas in baby food! For this recipe, I added the frozen peas straight into the steamer basket to cook along with the zucchini. You can also freeze the peas once they are cooked and pureed.
How to Make Pea Baby Puree- Bring Water To Boil: Bring a saucepan with a little water to a boil.
- Steam Zucchini: Add chopped zucchini (optional) to a steamer basket, cover, and steam for 5 minutes.
- Steam Peas: Add the peas (fresh or frozen) and steam for another 3-5 minutes.
- Let Cool: Let it cool slightly and reserve the steamer water.
- Transfer to Blender: Transfer the cooked peas and zucchini to the blender or food processor.
- Add Mint: Add in the chopped mint or another spice.
- Puree: Puree until smooth or creamy, adding reserved water if needed to thin out the puree.
- Serve or Freeze.
- Medium Saucepan
- Steamer Basket
- Blender or Food Processor
- Freezer Tray
- Storage Containers for Fridge
- highchair
- suction bowl or baby bowl
- baby spoon
- open lid cup
- bib with catch pocket
While I love the fresh flavor of steamed peas with mint, there are several ways you can cook peas for baby food.
BEABA BabycookDoes anything sound better than a homemade baby food puree with a 15-second hands-on prep and cook time? I didn’t think so.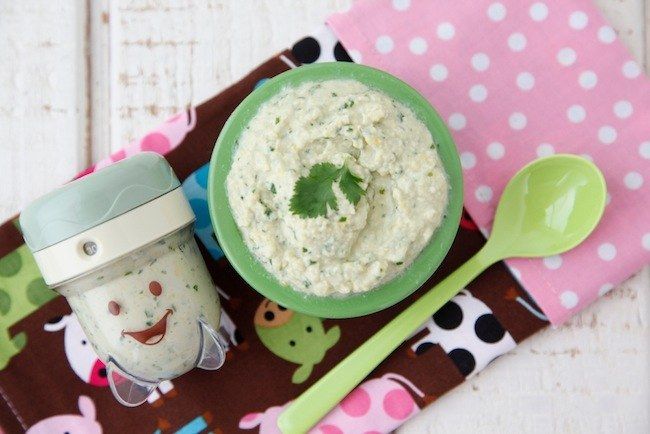 Let me introduce you to the magic of the BEABA Babycook! With the touch of a button, the Babycook will cook and blend the peas into a smooth and creamy baby food puree! It’s like magic. To make, place 2 cups of peas into the stainless steel steamer basket, and place the basket into the glass container, closing the lid. Fill the reservoir tank to a level 3, close and lock the lid. Hit the steam button and let the machine do its magic. Once steamed, transfer the peas into the glass container, leaving the water. Add in a pinch of fresh mint, if using. Close the lid, and hit the blend button for 1 minute or until the puree is smooth.
Full Review: read my full, in-depth and honest review of the BEABA Babycook Neo here! Make sure to grab 15% off your Babycook with code (BabyFoode15)!
SkilletIn a medium skillet, add 2 cups of frozen peas. Cook over medium heat for 5-7 minutes, stirring often. Puree in a blender as directed below.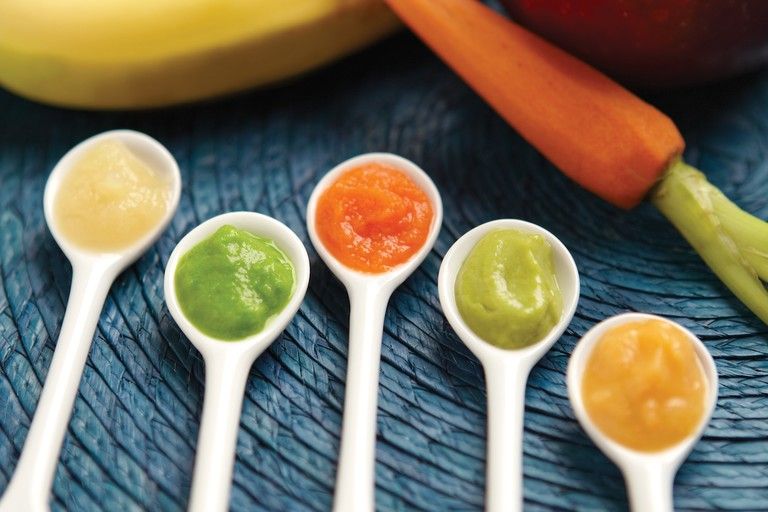
Place 2 cups of peas into a medium saucepan, add enough water to cover the peas, and bring to a boil. Reduce to simmer and cook for 8-10 minutes or until tender. Puree in a blender as directed below. Note that boiling will rid the peas of some nutrients as they are leached into the boiling water, so steaming or using a skillet is preferred. If you need liquid to thin out the puree, use some of the leftover water.
Great Pea Combination PureesWhile this pea puree is delicious and satisfying by itself, it’s also easy to mix and match with other nutrient-dense baby food purees. So give these fun flavor combos a try!
- Apples
- Broccoli
- Bananas
- Pears
- Quinoa Baby Cereal
- Fennel and Peaches
- Green Beans
- Chicken
- Spinach
- Soft Tofu
- Mango
- Yogurt
WeeSprout Silicone Baby Food Freezer Tray
Our favorite freezer storage container for baby food! Made of 100% food-grade silicone and comes with a hard clip-on lid. Large 3oz sections with 2oz markings to make sure you have the right amount for your baby.
View Product
Adding SpicesWhile the most popular option is adding mint to baby food, you can also add a splash of lemon or lime juice, 1/2 tsp coconut oil, 1 tsp chopped basil, 1 tsp chopped parsley, or 1/4 tsp fresh ginger.
Tip on Spices: I always add spices or herbs to my baby food purees, but you can choose to leave them out in all of your baby food. You do you! Either way, this puree will surely taste amazing.
How to Store Pea Baby FoodRefridgeratorYou can store this puree in an airtight container in the fridge for 3-4 days.
FreezerThis puree can be frozen for up to 4 months.
- Spoon puree into a freezer storage container. Do not overfill.
- Place the lid on the storage container or cover with a piece of saran wrap, and label with the date and recipe name.
- Place the tray into the freezer and let it freeze completely — preferably overnight.
- Pop-out the baby food cubes and place them in a ziplock baggie or stasher bag. Don’t forget to relabel the baggie or stasher bag for future reference.
Need more information on how to store your baby foods? Head over to my Best Baby Food Storage Containers – Plus 6 Tips on Freezing and Thawing post!
Related
15 Stage One Baby Food Purees
Feeding Tips
- Follow your baby’s lead – when feeding purees from a spoon, sometimes there’s a tendency to keep offering bites past the point of your baby being full. Always follow baby’s cues for when they are done eating. Turning away from the spoon, closing her mouth, or pushing food away are all signs that baby is finished with the meal.
- Try adding a little seasoning or spice to purees – babies like flavor! Or consider changing the temperature of purees from time to time, to slightly warmed or slightly chilled.
 Varying these aspects adds to the sensory experience!
 - Place a small amount of puree on the tray during spoon feeding, so that your baby can dip their fingers or hands in the puree. Allowing baby to explore foods in this way helps them learn to self-feed and can help them be more willing to try new textures and foods in the future.
Or watch a shortened version of this video here.
- 2 cups peas, fresh or frozen
- 1/2 cup zucchini, roughly chopped (optional)
- 4 mint leaves, roughly chopped (optional)
Steam: In a medium saucepan, bring 2″ of water to a boil over medium heat. Place the zucchini in a steamer basket, and place over boiling water.
 Cover and steam for 5 minutes.
Add Peas: Add in the peas, and steam for an additional 3-5 minutes. Reserve steamer water. Let cool slightly.
Blend: Add the zucchini, peas and mint leaves to a blender or food processor and puree for 1 minute or until you have achieved the desired texture. If the puree is too thick, add in 1/4 cup of the reserved steamer water until you have the right consistency.
Serve: let cool and serve to your baby or freeze for a later meal.
Age: 4-6 months and up
Yield: 15 ounces
Note on Zucchini: while this is a 2 vegetable starter puree, zucchini allergies are very low, so I added it to this recipe to give the peas a mild taste and smoother texture.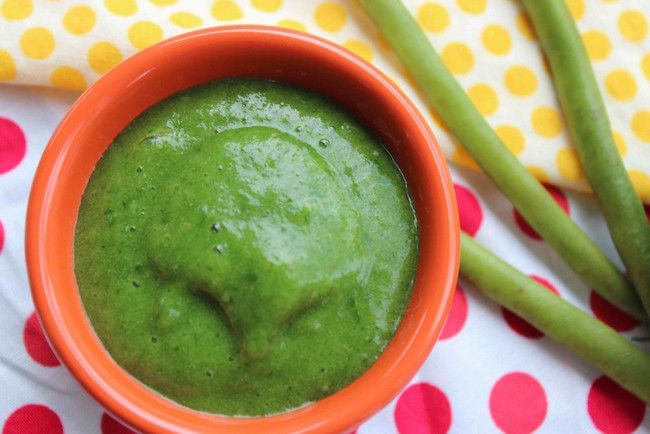 You can completely leave them out if you prefer. Just steam the peas as directed.
Additional Spices: instead of the mint, feel free to use a splash of lemon or lime juice, 1/2 tsp coconut oil, 1 tsp chopped basil, 1 tsp chopped parsley or 1/4 tsp fresh ginger.
Storage: Fridge – store in an airtight container in the fridge for up to 4 days. Freezer – can be frozen for up to 4 months.
Blender
Freezer Tray
Saucepan
Tripp Trapp High Chair
Bumkins Baby Bowl
Serving: 1ounce, Calories: 15kcal, Carbohydrates: 2.9g, Protein: 1.1g, Fat: 0.1g, Sodium: 1mg, Potassium: 57mg, Fiber: 1g, Sugar: 1.2g, Calcium: 5mg
Did you make this recipe?
Tag @babyfoode on Instagram and hashtag it #babyfoode!
Pin <em>Recipe</em> Email <em>a Friend</em>
Alarm case. What to put in it to survive
Collage
Anna Ulyanova / hromadske
One of the possible scenarios that the world media recently wrote about: Russian troops attacked Ukraine from several sides at the same time.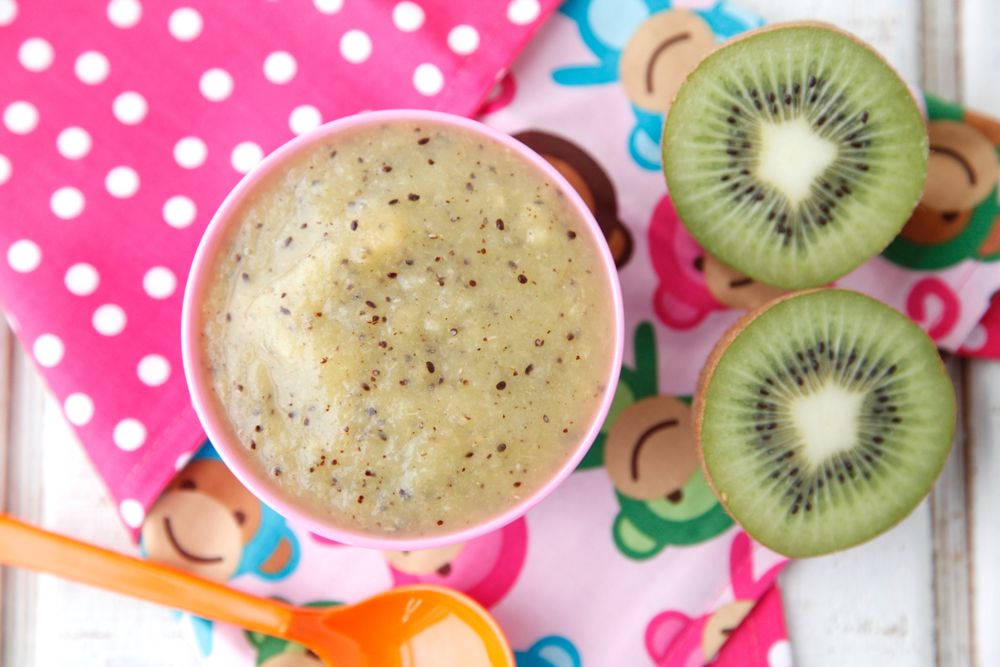 Imagine a situation where the armed forces are resisting, but the Russians are using aircraft, multiple launch rocket systems and even kinetic weapons (no one understands what it is, so the panic only spreads). The front line is rapidly approaching your city. We do not want to scare you - we just want you to be ready in case of the worst options. What to do under such circumstances? nine0005
First of all, it is obvious that at a critical moment the citizens must help their army to hold out. But the support of civilians will be more productive not from the city in the line of fire, which is being occupied today or tomorrow, but from a safer foothold. So if you do not have sufficient skills, you cannot guerrilla or collect information - it is better to think about evacuation in advance.
Where to start?
If you live near Crimea, the Russian border, or the current demarcation line, chances are you will need knowledge of the evacuation plan. nine0005
Determine for yourself under what conditions you will leave and under what conditions you will stay. The best option is to leave before the fighting approaches your city. However, it is not always possible to quit everything, so we will briefly tell you how to prepare your home for war.
First, apply masking tape to the windows. This will protect against a large scattering of glass fragments in the event of a bullet or shell fragments hit. Do this even if you intend to leave the city.
nine0006 Remember that tap water, electricity at the socket and gas on the stove are not something natural. As well as full supermarket shelves. All the benefits of civilization can disappear at any moment and never appear again.Provide your home with a supply of potable and process water. Buy durable foods. Buy some flashlights (regular and headlamp) and spare batteries for them.
Stock up your first aid kit at home.
It is not bad to have a fire extinguisher, a kerosene lamp, candles, a stove for cooking. nine0005
Be sure to get up-to-date information about the nearest shelter. We talked about this in detail in the article “Where to hide if Putin attacks. Everything you need to know about protective shelters.
How do I know that I need to leave?
When making a decision, you can act at your own discretion or rely on the state. If an emergency occurs, a siren will alert you, which means "Attention everyone." Then you need to turn on the TV or radio and follow the instructions. You will probably hear that you urgently need to move to a shelter or come to a collection evacuation point. nine0005
You will need a standard set of items for evacuation. Of course, centralized evacuation means you don't have to chop wood in the forest to build a fire and keep warm. However, it is better not to count on excessive social guarantees in the first days and weeks. In the event of a full-scale conflict, there will be many like you, so it is better to rely on yourself.
If you have a personal vehicle, make sure that it is in good condition and with a full tank (there should be enough fuel to leave the dangerous area). nine0005
Also arrange with your family how you will leave the dangerous area if the situation escalates. Who picks whom, at what point everyone will meet.
In any case, it is better not to stay in the city that is being fought over.
“The State Emergency Service recommends the same as we do: get out of the city in advance, where hostilities can begin. If you don’t have the opportunity to dump yourself, then you need to at least send your family. Children, elderly relatives, sick people. Those who need more attention or are required by doctors ent, which you simply will not find in military chaos, ”the guys from the forest say on their channel, who explain in detail how to survive in the conditions of the beginning of the war.
The contents of the emergency caseAnna Ulyanova / hromadske
What is an emergency case?
In case of an evacuation, it is better to pack your belongings in advance. Of course, it will be better if you do not need an alarm case and just stand in the corner. However, if the “H” time does come, an assembled and compactly folded set of certain things will increase the chances of survival. nine0005
"Assembled in advance" means before the invasion took place. When the Russians attack, everything you need will instantly disappear from the shops. So it will be possible to collect an alarming suitcase only from what you find at home.
What should I bring first?
It is important to collect all documents and copies of documents (both paper and scanned, and "thrown" on a USB flash drive). Passport, driver's license, title deeds, military ID, etc. It is better to keep your passport so that you can get it quickly. Pack the rest of the documents in a sealed bag. Suitable, for example, a large ziplock or stationery folder wrapped with tape. nine0005
Credit cards and a small amount of cash can also be placed there. Divide cash into several parts.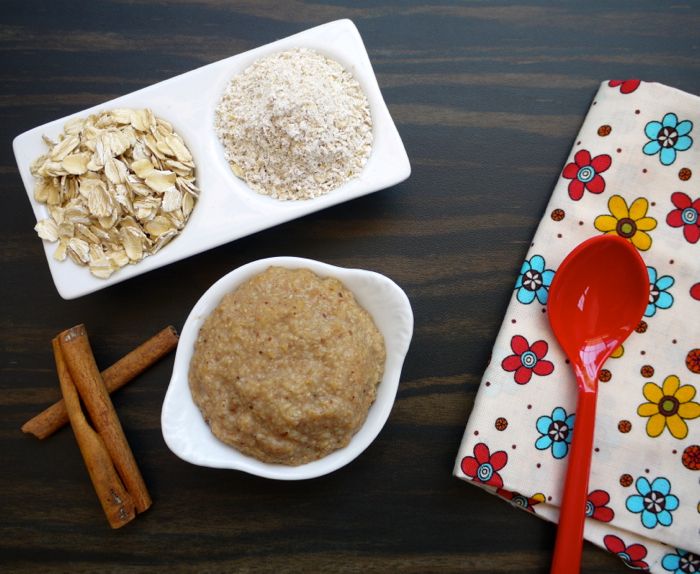 Put some in documents, hide some at the bottom of the backpack, keep some in your pocket. It does not hurt to have a few banknotes in dollars or euros.
Basic information about you and your family members can be put in the same folder. Blood type, existing health problems (in particular information about allergies to medications), a list of medications you take with a description of the method of application and doses, prescriptions, names and mobile phones of your doctors. nine0005
All this is better to invest in a moisture-resistant strong backpack with a volume of 20 to 50 liters. But if you are with one or two other people, then it is better to avoid large volumes, this may arouse suspicion. The backpack should not be a bright color. It is also better to do without khaki.
Essential medicinesAnna Ulyanova / hromadske
nine0006 What medicines should I take with me? Take the standard kit you have in your first aid kit. It must contain a bactericidal patch, a cream for superficial skin lesions, activated charcoal, a cold remedy, antibiotics, hydrogen peroxide, and ethyl alcohol. First aid means: bandage, adhesive plaster, cotton wool, iodine, tourniquets or Esmarch tourniquets, individual dressing packages. Also buy water disinfection tablets.
The material about the emergency suitcase on the website of the State Emergency Service, published back in 2016, contains the names of specific drugs: paracetamol (antipyretic), pentalgin (painkiller), suprastin (anti-allergic), imodium (drug against diarrhea), fthalazol ( from a stomach infection), albucid (eye drops). nine0005
Medications that you take regularly or periodically should last at least a week.
Like documents, the first aid kit must be in the immediate access area.
grocery setAnna Ulyanova / hromadske
Should I take food too?
Grocery kit is required. Take at least one and a half liters of water per person and a supply of food for three days. These can be instant soups, instant vermicelli, stew, biscuits, canned meat and fish, low-calorie sweets, candies (their value is that they are high-calorie, but do not melt or deteriorate in the sun). nine0005
All this can be packed in a small pot, with a capacity of a liter and a half.
A travel burner or taganok will help warm up food.
All products can easily replace army dry rations. They are light and maximally nutritious, with a flameless warmer.
But remember: if the Russian army advances faster than you, you risk encountering an enemy checkpoint. And dry rations of the Armed Forces of Ukraine can cause a negative reaction among the soldiers of the occupying troops. Therefore, do not be too lazy to unpack the dry ration and tear off all the stickers from it. nine0005
Also take metal utensils - a cup, a flask, a spoon, a bowl, a knife.
Survival ItemsAnna Ulyanova / hromadske
What else will help you survive?
You will also need flashlights - a headlamp with a rechargeable battery and charger, and a hand-held flashlight with replaceable batteries. Take with you hermetically packed matches (preferably tourist ones - you can buy them in tourist and hunting shops), a lighter, candles. nine0005
You will definitely need a Swiss Army knife and a multitool. An ax or a folding saw will not interfere either.
You may find yourself in a situation where you need to give your location. For this, a whistle, fire or smoke bomb is suitable.
Take a couple of packs of dry and wet wipes, a few 120 liter trash bags. The latter may be needed to protect against rain. However, a few square meters of strong oilcloth are better suited.
The mandatory set also includes needles and threads, glue, a wide roll of transparent adhesive tape - with its help you can make an awning and protect things from moisture. nine0005
Comfortable to wear paracord bracelet. If necessary, it can be untwisted and get a couple of meters of strong cord. However, in the event of an evacuation, this will not be enough, so it is better to have 50 meters of paracord with you.
When you evacuate, you may be placed in the school gym. There you will definitely need a karemat, a sleeping bag or a thermal cover.
The State Emergencies Service also recommends taking a pack of condoms. If necessary, they can be used to protect matches and lighters from moisture, reliably seal containers from insects and sand, and also to carry water. nine0005
What to take with you from clothes?
Much of your time will be either outdoors or in cold rooms. Take with you clothes in which you will not freeze even after a day in the open air. In particular, a warm sweater, hat, mittens, scarf. It is also important to take a raincoat (cellophane is also suitable). Shoes should be comfortable and athletic.
If you are a civilian, even avoid wearing camouflage clothing, as you may be mistakenly identified as a combatant in the enemy army. nine0005
How to navigate the terrain?
It is usually advised to print out a map of the area, on which you need to indicate the place of collection.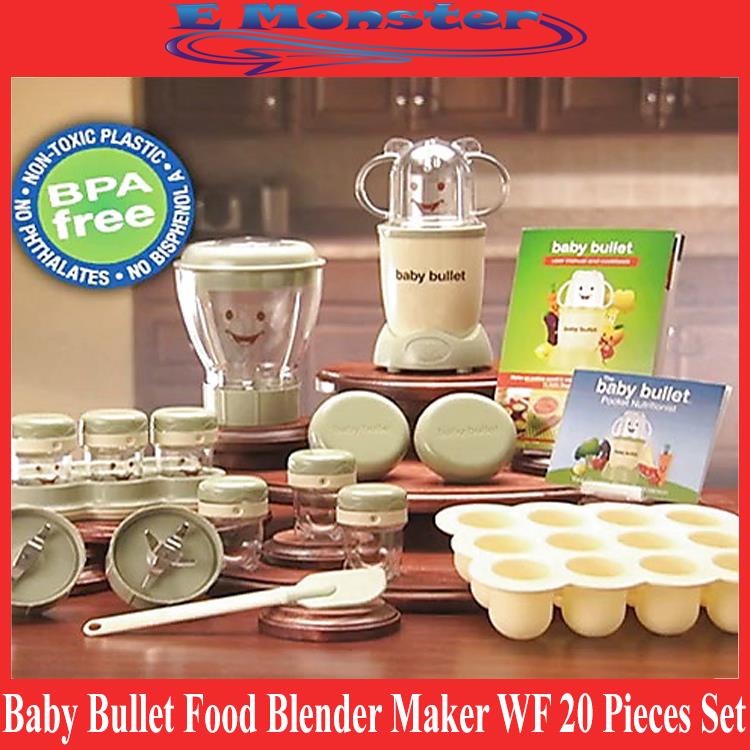 You may need a compass and watch.
Good to have a navigator. The phone will not work because it requires an internet connection. If you don’t have a navigator and you can’t get hold of it, install an offline navigator in advance, for example Openstreetmap.
Naturally, you need to take your smartphone with you. However, it is better to remove everything superfluous from it by saving a backup copy in the cloud. “Extra” means absolutely everything that will not help you survive - all correspondence, photos, browser history ... Even the name of a contact in the phone book can be a reason for a more thorough check. nine0005
How to keep in touch with the outside world?
Take a push-button mobile phone with you. It holds a charge for a long time. Don't forget to include some important numbers there. Just in case, duplicate them in a notepad.
Don't forget your charger and power bank. It is very good if you have a portable solar charger.
Thanks to the radio, you will be able to understand what is happening around (button phones also often have this function on board).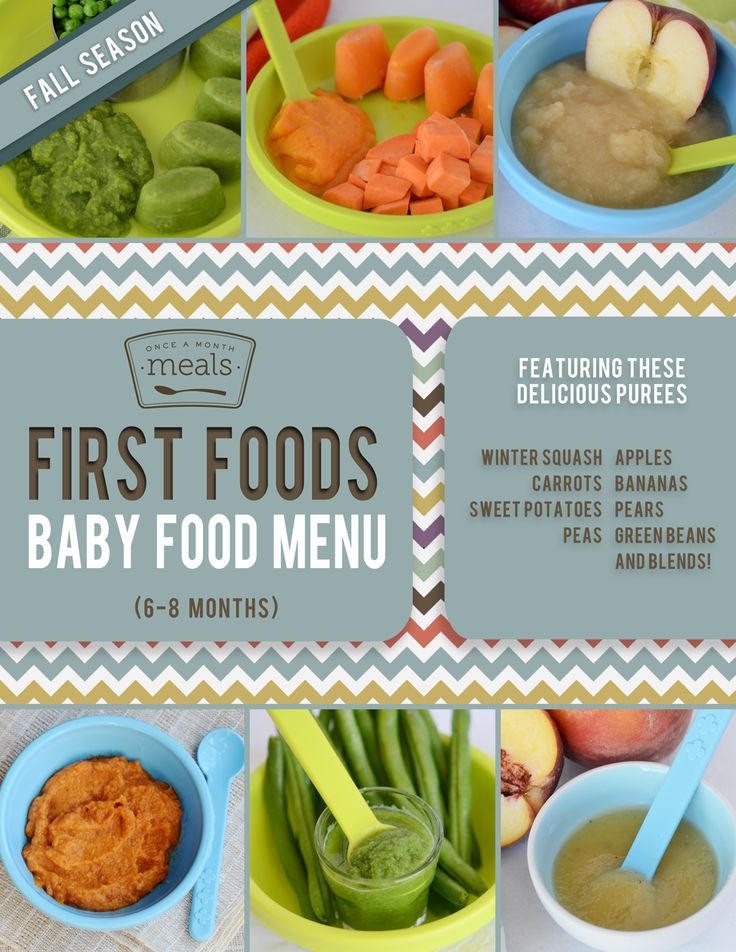 nine0005
And how do you fit all this into a backpack?
Put the heaviest things in the bottom of the backpack. Things with sharp corners should not touch the back. Fill all empty spaces with clothes. Place the items you need first in the outer pockets of your backpack. What can be crushed - up. It is better that access to things is both from above and from below. You need to put on a waterproof cover (raincover) on the backpack. You can replace it with a trash bag, but this is not a very reliable option. nine0005
Ideally, this backpack should be already assembled at home. Every few weeks you need to change the water, control the shelf life of food, review the stock of clothes depending on the weather outside.
If you need the fastest possible way to collect an evacuation case (for example, for another person, when there is little time left before the evacuation), imagine that you are going on a three-day hike that can take a long time. Also imagine that you will never return home.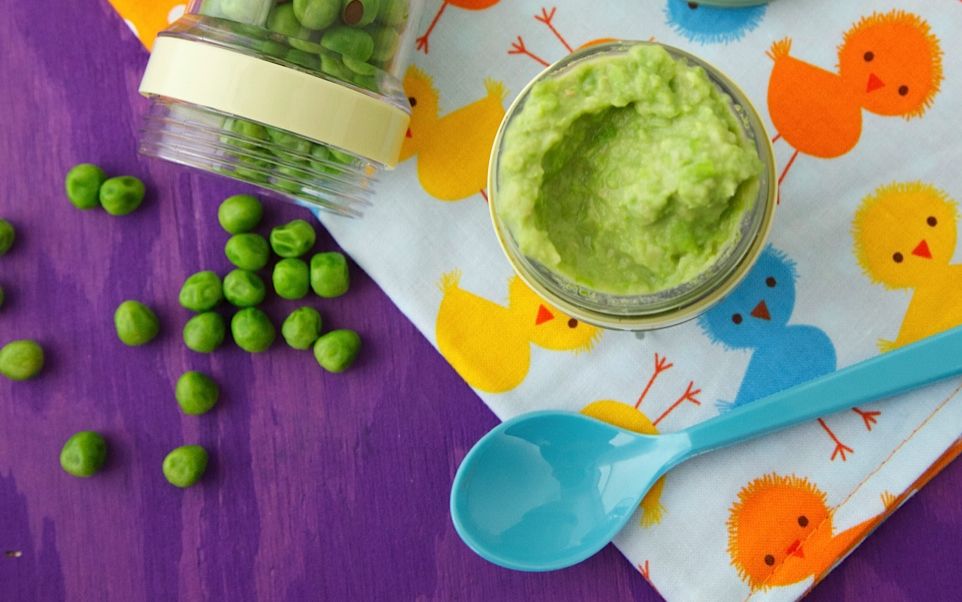 But your task is not to evacuate material values, but to save yourself. Based on this, consider what to take with you, and what you can do without. nine0005
According to the recommendation of the State Emergency Service, the total weight of the "emergency suitcase" should not exceed 50 kilograms. However, with such a weight on their backs, most people will not go far. Therefore, it is better if the backpack weighs no more than 25 kilograms.
Baby food history | Maternity
Today, the baby food market is the fastest growing in the food industry. It is hard to believe that even a century and a half ago the very idea of feeding babies with something other than mother's milk seemed wild. nine0170
It is worth recalling that in the old days, of course, there were no maternity leave. A week after giving birth, peasant women had to work in the field, maids - to scrub the floor, factory workers - to go to the machine.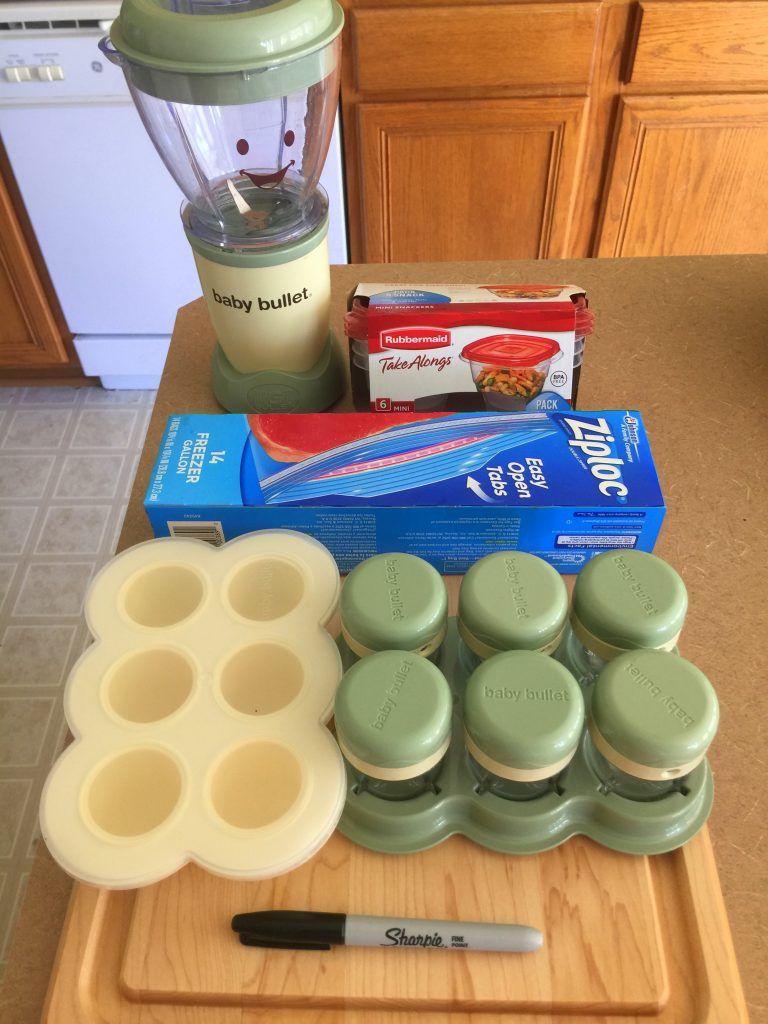 In addition, there was a belief that before the baptism of the child, the mother should not breastfeed him. At that time, the child remained in the care of relatives, who instead of milk gave him "zhevka" - a rag with chewed bread or porridge. Sometimes it was soaked in milk, vegetable oil or sugar water. The rich had their own problems: feeding spoiled the shape of the breast, especially for mothers with many children. If a wealthy lady decided to feed the child herself, it was considered - depending on the fashion - either a feat or a strange quirk. Usually, a nurse was hired for this purpose, since there were enough young healthy women with an excess of milk. nine0005
The reason for this excess was not joyful: the huge infant mortality, which in the 18th century reached 40%. The main reason for this was the complete lack of hygiene: in Russian villages, in addition to a dirty rag, children were stuffed into their mouths with other rubbish, like a cut off cow's nipple. It was put on a horn, into which the same soaked bread or oatmeal was charged. Russian doctors wrote that in some provinces it was customary, along with the nipple, to give children wort, mash from the very first days. French peasant women, in order for their children to fall asleep better, gave them diluted wine to drink. Yes, and the nurses themselves drank wine and beer, it was believed that this adds milk. In one of Dickens' novels, a young mother drinks four glasses of port at dinner "under the pretense of breastfeeding." nine0005
In most nations, breastfeeding continued up to 6 months, after which the child was transferred to solid food. Sometimes this was celebrated with a solemn ritual like the Indian "annaprashana", when the eldest member of the family blessed rice porridge with sugar, tasted it and gave it to the baby. In China, children were accustomed to normal food in stages: first, liquid rice porridge (sifan), then boiled vegetables, tofu, and fish.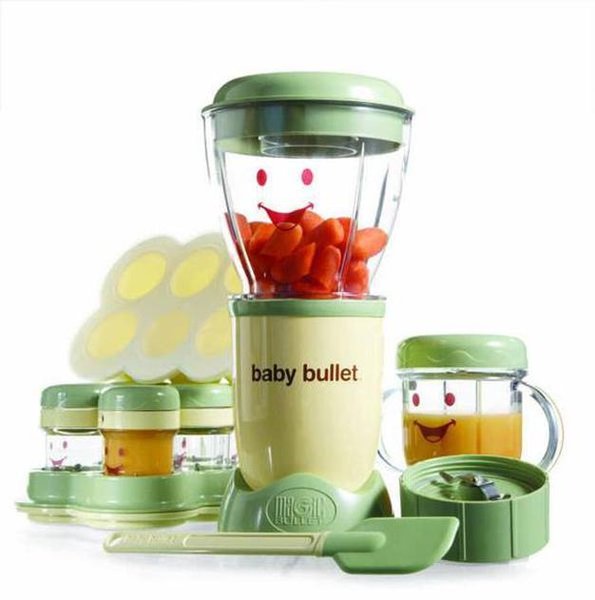 In Africa, the first solid food for babies was corn porridge. In ancient Greece, it was a liquid barley stew, to which bull's blood was added in Sparta so that the boy would grow up to be a real warrior. nine0005
When children teethed, they were fed just like adults, only worse, because they were of no use. And this applied not only to poor peasants: Elizaveta Vodovozova recalls her childhood in a large landowner family in the middle of the 19th century: “Children were given everything that was worse and could not be used by adults ... Every pot of spoiled jam or marinade, the nanny showed mother. or another, mother sighed heavily and said something like this: “What a misfortune! Really, it's no good. Well, let's go to the children. "And to prolong our pleasure, and not because we could get sick from spoiled food, she told us to give us a small saucer." nine0005
Doctors learned to cope with indigestion in children, but the lack of mother's milk became an increasingly serious problem. In big cities, the intense rhythm of life, air pollution, constant stress led to the fact that 30% of women did not have enough milk to feed a child, especially if he was the first or, conversely, the fourth or fifth. In families that could not afford to hire a wet nurse, babies were fed cow's or goat's milk. However, in composition it was very different from breast milk, so it often caused indigestion. There was also the problem of hygiene, which is why the German doctor Biedert warned: “It is necessary to observe pedantic purity both in keeping cows and in milking and preserving milk ... Since milk can acquire harmful properties from inappropriate food, cows should not be given any bards, nor waste, because the poisonous substances contained in them pass into milk and cannot be eliminated. There were also problems with the nurses, because they suffered from all kinds of diseases, up to syphilis, which, when fed, were often transmitted to the child. nine0005
All this made scientists work hard to find a substitute for breast milk. Gradually, the necessary conditions for this arose: they learned how to preserve and disinfect products, and in 1855 the Englishman Grimweid began to make powdered milk. But if it were not for the son of the Frankfurt glazier Heinrich Nestle, who preferred to call himself Henri in French, all these discoveries might have existed on their own. The problem of baby food arose before Nestlé after the birth of his first child. A certified pharmacist who ran a pharmacy in the small Swiss town of Vevey, in 1867 made a mixture of powdered cow's milk, wheat flour and sugar, which he called "Henri Nestle's Milk Flour". Diluted with water, this mixture turned into the world's first artificial baby food. nine0005
According to legend, the first formula-fed baby was a premature baby of one of the local factory workers, who, of course, thanks to the Nestlé formula, began to grow by leaps and bounds. The delighted pharmacist opened his own company, whose logo was a nest with chicks, because Nestle in German means "nest". Very soon canned "milk flour" appeared in all European capitals. In 1872, it began to be sold in St. Petersburg, where a local merchant Alexander Wenzel became an agent of the Nestle company. He also sold other children's products, such as Maltos-Cannabis sugared hempseed extract, which was advertised as the best way to get a good night's sleep...
In Russia, baby food did not catch on at that time, but in Europe its popularity grew rapidly. Feeding babies has become unprecedentedly simple - open a jar and dilute its contents in water. However, even then doctors warned about the dangers of this simplicity. The German physician Gottfried Kühner wrote: “As for mealy surrogates, such as Nestle, Gerbera, Kufeke, Hartenstein’s leguminous powder, rakout, arrowroot, avicen, maizena, avena, etc., the same thing must be said about all of them: they are in many cases are well tolerated by children, but only after the second or third month of life. Violation of this condition, as well as the rules of hygiene, led to the fact that in 189In Berlin, infants fed formula were 13 times more likely to die than breastfed infants in Berlin in 1999.
The already mentioned Dr. Biedert noted: "The mass of artificial surrogates is not yet able to replace breast milk. Moreover, many of them, which have come into use solely thanks to numerous and loud advertisements, should be recognized as directly harmful." At the same time, the Nestle mixture was considered by many to be the best: both milk and flour for it were made in the environmentally friendly conditions of the Swiss Alps. In the mid-1870s, the company launched another new product on the market - condensed milk. Although it was invented back in 1856 by American Gail Borden, it was Nestlé that made it a popular children's treat. True, the doctors were again unhappy: no one followed the recommendation to dilute condensed milk with water in a ratio of 1 to 10 and only then give it to children. Children fed with condensed milk became fat, anemic and sickly. Henri Nestlé sold the company in 1874. After 140 years, the profit of the largest food producer has reached almost 8 billion euros. nine0005
Nestlé's heels were increasingly being attacked by competitors. In 1896, the Dutchman Martinus van der Hagen invented his own way of drying milk in a bakery. With significantly less flour and sugar, his milk formula quickly gained popularity, laying the foundation for Nutricia's international prosperity. In the United States, baby food was taken over by Clapp's Baby Food and Beech-Nut, and Pablum pioneered the sale of breakfast cereals for children. However, it was Daniel Gerber, a cannery manufacturer from Fremont, Michigan, who gave the real scope to the case. The reason for this was again personal: Sally. the sick daughter of Daniel and his wife, Dorothy, required special nutrition. Having learned how to make mashed vegetables, fruits and meat, Dorothy suggested that her husband start mass-producing it. The advice turned out to be successful, and at 1928 year baby food company "Gerber Prodakst" went on sale.
Its popularity was provided not so much by new products - they were successfully fed to children before, but by a purely American advertising scope. Immediately after entering the market, the company announced a competition for the best advertising, which was won by the artist Dorothy Hope, who painted a portrait of her neighbors little daughter. This Gerber baby has been sold all over the country, appearing in magazines beloved by housewives and on billboards. nine0005
The Gerber family's brainchild flourished even during the Great Depression, when children were even more in need of artificial feeding. The company is still one of the three largest baby food manufacturers in the world, along with Nestle and Heinz, also known for its ketchup. And in the United States, where baby food is consumed the most, Gerber even occupies 70% of the market.
The Soviet Union lagged far behind in this area. Own baby food was not produced here for a long time. The elite could use the products of Nestlé and other Western companies, which were bought for foreign currency. For everyone else, dairy kitchens were intended, open throughout the country back in 1920s. There, milk mixtures, fermented milk products, cottage cheese, juices, mashed fruits and vegetables were made from fresh products. Such kitchens were very useful: the children attached to them received good nutrition even during the years of famine and war. In the 1950s, mass production of baby food began in the country: canned juices and purees, dry milk formulas, cereals and kissels. Twenty years later, in Istra, Voronezh, Novosibirsk, near Moscow, and then in other cities, factories were built that produce liquid mixtures for children, first in glass and then in cardboard containers. Now dairy kitchens did not prepare food, but gave out ready-made jars or bags. nine0005
 "Kazzol and Plasmon"
 in the 1990s, our market was flooded with all the abundance of the world's children's products - milk formulas, kefir, yogurt, cereals. All this is sold in dry, liquid or frozen form and is certainly advertised as the most delicious and healthy food for children. In the competitive struggle, numerous companies adapt to different categories of consumers. For milk intolerant children, especially in East Asia, lactose-free formulas are made, where whey is replaced by no less nutritious soy protein. In New Zealand, Bibikol has developed infant formula from New Zealand goat milk, which they say differs in composition from European goat milk.
Previously, any microorganisms were tried to be expelled from products for children, but today useful bifidobacteria are specially bred in them. Baby food has become so widespread that not only children use it. Hollywood stars go on a diet of puree and milk for other reasons: baby foods are so nutritious that even small portions of them allow you to fill up and not get fat. Products for astronauts were also created at one time on the basis of baby food. Some firms tried to do the reverse operation, but when the "space" tubes fell into the hands of the kids, their contents were squeezed out anywhere but into the mouth. nine0005
Children are special clients. To please them, the food must be not only healthy and tasty, but also bright, which is what producers use to make porridge or mashed potatoes red, orange or green. Sometimes this led to sad consequences. In the 1970s, a scandal erupted in the United States when a major company dyed a strawberry-flavoured children's breakfast cereal with an artificial dye that caused nausea. Thousands of parents called an ambulance - there was a complete impression that the children were vomiting blood. But the biggest scandal arose in the same 70s around the famous Nestle company - it was accused of the death of many babies in "third world countries", in which, due to living conditions, mothers could not use the product correctly, they mixed food with dirty water or pour the mixture into unsterilized bottles.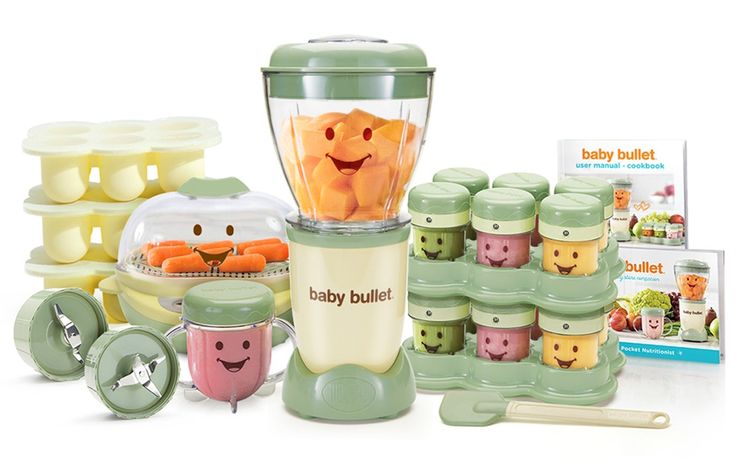 According to UNICEF, an unhygienic artificially fed infant is at least 6 times more likely to die from diarrhea alone than a breastfed infant. nine0005
When a mother feeds her baby, she gives him not only nutrients, but also immunity to many diseases, and, no less important, strengthens the psychological bond with him. Speaking against artificial nutrition, activists from different countries created the World Alliance for Breastfeeding. Under his pressure, the World Health Organization in 1981 adopted the "Code of Marketing of Breast-milk Substitutes", adopted over time by all major manufacturers. It stated that companies should limit advertising and conduct sales of their products with the mandatory participation of medical professionals. True, this applies only to milk formulas, but other types of baby food are under close public scrutiny. nine0005
In 1981, the International Code of Marketing of Breast-milk Substitutes was created to control unacceptable marketing practices. The Code was developed by WHO/UNICEF.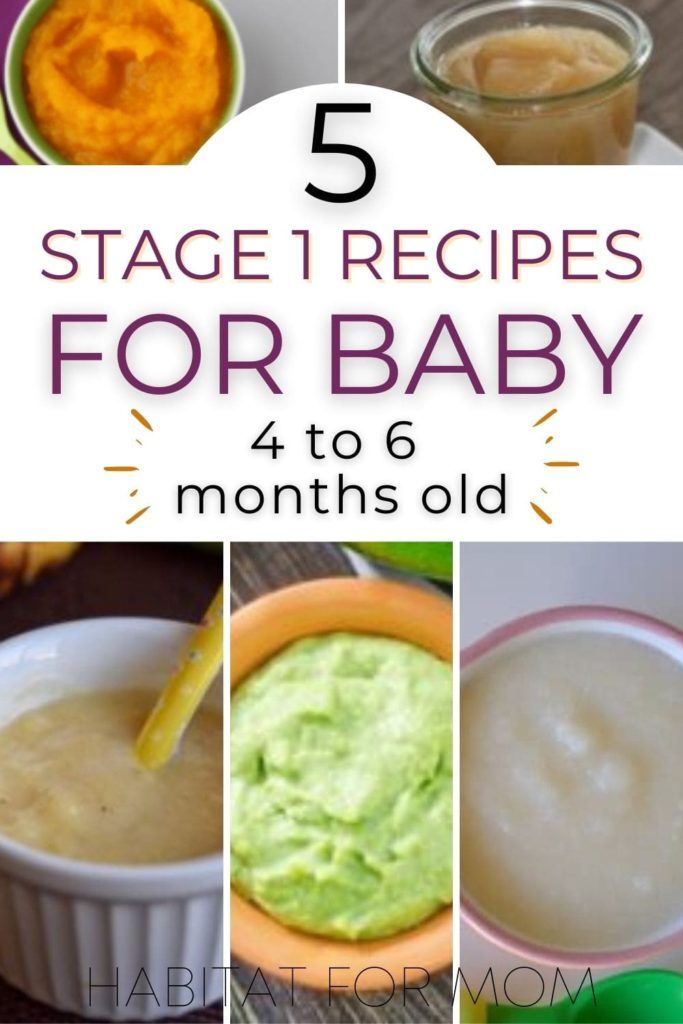 The official author of the code is IBFAN - International Active Baby Food Network. The code was approved by the World Health Assembly by a vote of 118 votes in favor, against 1 (the US refused to sign the code).
The Code is addressed to governments and baby food companies. It is a concise guide to the marketing of breast milk substitutes. Its main task is to protect the lives of children by providing them with the best nutrition - breast milk. nine0005
Products covered by the code include:
- artificial baby milk
- other types of artificial milk
- all types of baby food: juices, purees, soups, pates, etc.
- feeding bottles and teats.
The Code contains the following guidelines:
- Information or educational materials, equipment or products may only be distributed free of charge with the written permission of the relevant authorities. (The company logo may be indicated, but the trademark of the product is not)
- No company materials may be distributed to mothers.
- Health workers should support breastfeeding and encourage mothers to choose to breastfeed. They should help promote the principles of this code.
- Do not use the healthcare system to market artificial breast milk.
- Health system product display media such as posters, booklets, flyers, brochures, feeding bottles, labels, prescription forms, and other artificial nutrition promotional materials may not be used. nine0259
- Representatives of manufacturing companies should not work in the healthcare system, in the field of child care and should not be in contact with mothers.
- Demonstrations of artificial feeding techniques may only be conducted by healthcare professionals in families where there is an absolute medical indication for supplementary feeding. At the same time, information about the risk to the health of the child if the product is used incorrectly must be provided.
- You cannot distribute artificial milk for free or at reduced prices in the health system.
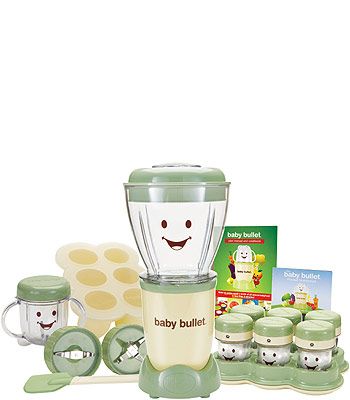 Donations in the form of artificial milk, feeding bottles and other products can only be given to orphanages and similar institutions, but not to hospitals and maternity hospitals.
- Hospitals and maternity hospitals should buy this formula just like everyone else.
- All information provided by health care professional firms should be limited to scientific facts and should not suggest that formula feeding is identical or superior to natural feeding. nine0259
- Promotion of products by healthcare workers, as well as their material and financial incentives, is not allowed.
- Health workers should not distribute artificial milk samples to pregnant women, mothers of infants and young children, or their families.
Summary of the International Code of Marketing of Breast-milk Substitutes
- No advertising of these products to the public!
- No free samples for mothers
- No promotion of this product in health facilities, including free or cheap baby food.