Baby cockatiel hand feeding schedule
Protocols for the hand-raising and care of cockatiels (Nymphicus hollandicus)
Corina Gardner
Introduction
Cockatiels (Nymphicus hollandicus) are native to Australia and were first identified in the mid 1700’s. It is unclear when they were first imported out of Australia, but they were found in Europe in the 1800’s and have been exported to all parts of the world in the last few decades. They have been bred in captivity for over a hundred years now.
Cockatiels are intelligent, gentle and playful birds. They are usually very inquisitive and will thoroughly investigate anything everything that is around them. Individual cockatiels have very distinct personalities, behavior traits, and their own likes and dislikes. For example, grinding its beak indicates that the bird is sleepy and relaxed. These gregarious birds make one of the most popular pet birds today.
Cockatiels are naturally sociable birds and enjoy human contact. Hand-reared cockatiels are particularly easy to tame. Even cockatiels which have not really had very much human interaction but have been introduced into the company of humans adjust very well. Our cockatiels greet us when we get home by whistling and calling out. Most pet cockatiels even enjoy eating when their owners are having their meals. They crave attention and have a distinct call when they don’t want you to walk away from them. They can sometimes be incorrigible. If they are aware that they a particular behavior will annoy you, then that’s precisely what they will do.
General Guidelines for hand-rearing baby cockatiels
Often, young and inexperienced parents may abandon their nests and refuse to feed baby birds. Such a situation would demand immediate intervention and you will have to care for the baby birds yourself. If there happens to be another pair of cockatiels with a brood of chicks of a similar age, then chances are that the parents may accept and care for the abandoned chicks.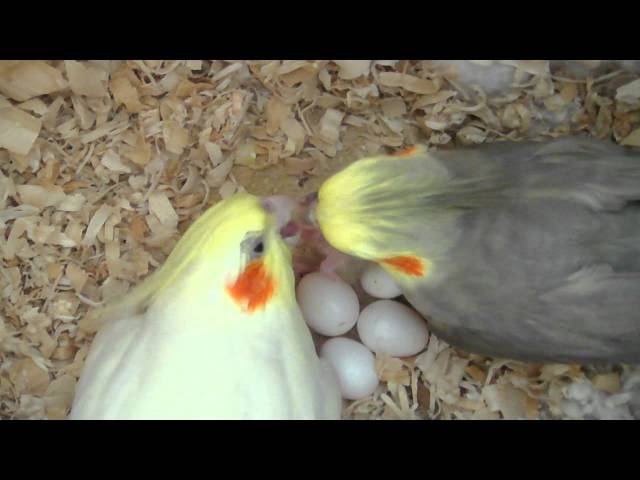 Regrettably, this is seldom the case.
Hand-rearing a baby cockatiel is an extremely challenging and time consuming task that requires absolute dedication and patience. Baby cockatiels, which are also commonly called pinkies, are extremely delicate and fragile and therefore require immense amount of diligence while handling. As this is the most vulnerable part of their lives, special care must be taken to ensure the survival of these baby birds.
Feeding and hygiene
A disposable syringe, which is easily available in most medical stores, can be used for feeding the young birds. If unavailable, then the next best alternative would be to use an eye dropper or a plastic teaspoon. The slender tip of the spoon can be dipped in boiling water and then bent make a funnel, thus making it easy to use for hand feeding.
After feeding, the feeder (spoon, syringe or dropper) must be rinsed with warm water to remove any bacteria. Mild soap or detergent can be used to clean the feeder; however, it must be washed thoroughly so that no soap residue remains.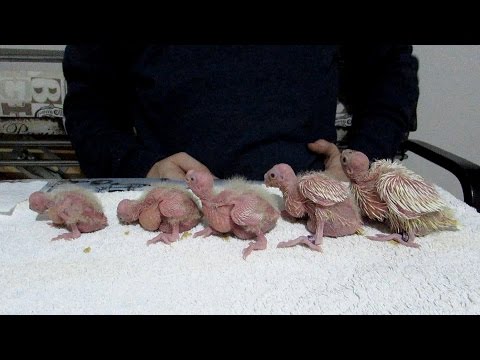
Baby bird formulae, for example, Kaytee Exact, available in most pet stores would be an ideal feed. However, as it is not easily available in India, baby formula like Cerelac can be used instead. If however neither of these is available, then a piece of bread can be crumbled in lukewarm milk and fed to the young birds - but I would only use this as a last resort. The formula must be prepared in a glass container as plastic containers tend to harbor bacteria. The consistency of the formula should be similar to that of a soft pudding – neither too thick, which would make it difficult for the baby to swallow and it may choke, nor too diluted as the baby could inhale the formula into its lungs causing aspiration. The formula must only be heated adequately before feeding the baby. Formula that is too hot will scald the baby bird’s crop, causing crop burn. Crop burn is the scalding of a chick’s crop and esophagus. For the same reason, formula must never be heated in a microwave. On the other hand, formula that is cold will cause sour crop.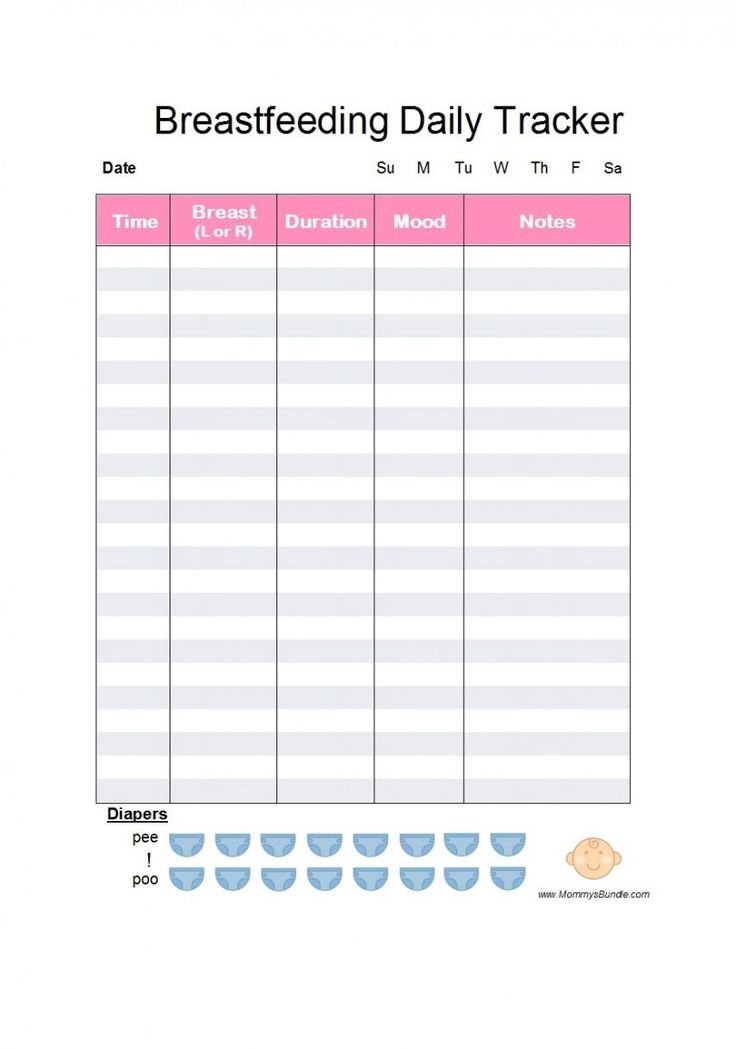 Sour crop is a condition in which the formula in the baby’s crop has gone bad and the contents of the crop has not emptied.
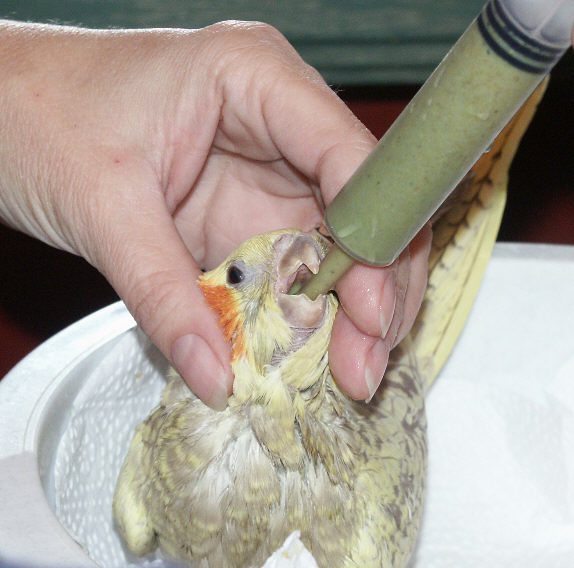
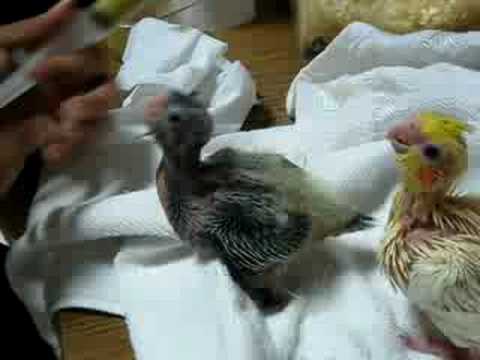
The baby bird can be placed on a napkin or towel on a table or kitchen counter and held gently while feeding. The aim is to emulate the parent bird as much as possible. Parent birds tap on the baby bird’s beak to stimulate the feeding response. So, gently tap the bay bird’s beak with the feeding instrument in a similar manner to encourage the feeding response. The feeding response is when the baby gapes for food, bobbing its head up and down. Parent birds then feed their chicks by inserting their beaks at an angle, through the side of the baby’s mouth. They then regurgitate the food deep into the baby bird’s mouth. Therefore, insert the tip of the feeding syringe at an angle at either sides of the baby’s beak. Press the plunger slowly, stopping every now and then, so as to allow the baby time to swallow. The speed of feeding must never be hastened. Enough time must be allowed for the baby to swallow its food before pressing on the plunger any further.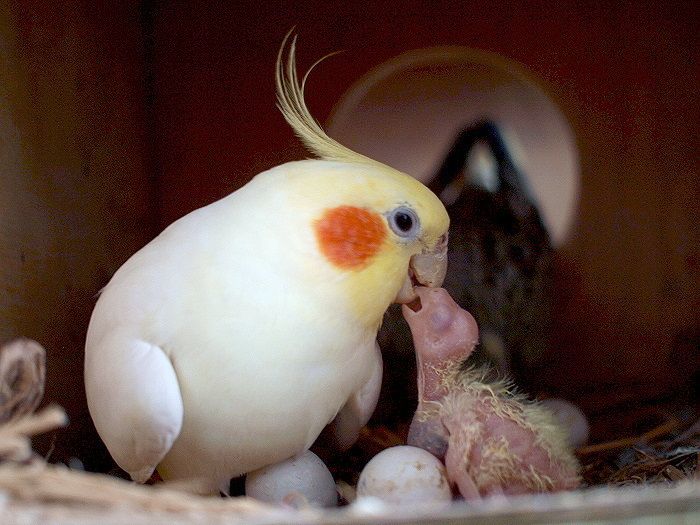 Once its crop is full, not over-extended, and it has had enough to eat, the baby will stop gaping and refuse to open its beak. Feeding must be stopped immediately. Over feeding can cause formula to flow into the throat and down its windpipe, which can be life threatening. The baby must not be forced to feed when it is reluctant to accept food. The beak and feathers of the baby must be wiped gently with a warm, damp cloth after feeding.
1-7 day old baby
New born cockatiels are born totally helpless, eyes closed, pink with a few downy feathers.
Ideally, feeding should start at 6 a.m. and continue until midnight. The baby should be fed every 2 hours. A day old chick would require approx 1 ml of formula per feed, which can be gradually increased to 2 ml by the 4th day and 3 ml by 7th day. It is unnecessary to give the baby any additional water as they receive sufficient fluids in their feed itself. It is unnecessary to feed the baby at night as in nature, parent birds as well as their babies sleep at night.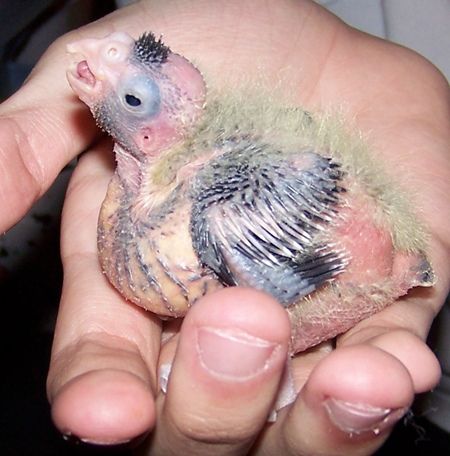
2-3 weeks
Pin feathers begin to erupt in the second week of the baby’s life & the eyes usually open around the 8th -10th day.
The baby can be fed every 3 hours. The feed quantity must be increased to 4-5 ml per feed. Feeding must still begin by 6 a.m., however, the last feed could be given by 10 p.m.
3-4 weeks
The baby still has a few pin feathers.
The formula should now be of a thicker consistency and the feed quantity can be increased to 6 ml per feed. The frequency of feeding can be decreased to a feed every 4-5 hrs. The baby’s crop usually empties within 4 hrs. A crop that remains full or does not empty completely within that time indicates that there is a problem. The crop is a muscular pouch near the throat of the baby bird that is used to store excess food for subsequent digestion.
4-5 weeks
The baby birds start to develop flight feathers by this age and are now called fledglings. They also start foraging (searching for food) themselves by this age. Feed quantity can now be increased to 8 ml per feed and the frequency of feeds can be decreased to 2-3 feeds a day. The weaning process must begin by the time the baby is 5 weeks old.
Weaning foods such as greens, bits of toast and bread, crushed and grated boiled eggs (along with the shell) and cream cracker biscuits can now be offered to the young birds. This mixture is an easily digestible substitute and ideal during rearing of young birds. Mixed bird seeds such as millet (durra), foxtail millet (kheri), finger millet (ragi), sunflower seed, etc. should also be given to the birds.
6-7 weeks
The young bird is quite independent now and it’s time to transfer the bird to a cage. Although they feed well by themselves at this age, they must be watched vigilantly to ensure they are eating well. If necessary, feedings can be continued once or twice a day.
Mixed bird seed, which is available in most pet stores, should also be given to the bird. In the event that bird seed is unavailable then large millet seed (bajra), finger millet (ragi), foxtail millet (kheri), sunflower seed (suraj mukhi), safflower (beni or kardi) seed, pumpkin (kaddu) seed, boiled maize (makki) and soaked gram (chana) can be provided.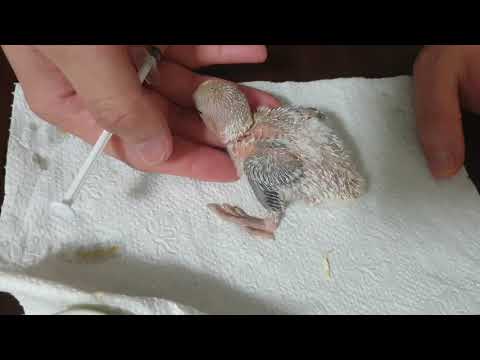 It’s always advisable to offer the young birds entire or un-hulled seeds as hulled seeds tend to decay and mold. Seeding grass, French beans, and carrots are always a welcome treat as well. Green leafy vegetables such as lettuce, mustard sprouts, millet sprouts and fenugreek (methi) leaves is essential along with other weaning foods. By 8 weeks of age, the bird should be completely weaned.
Foods that are toxic for cockatiels include apple pips, avocado (makhanphal), cherries and peaches (aadu). Never give your birds chocolate, as it may make your bird seriously ill.
In the event that the bird suffers an upset stomach or diarrhea, indications of which include watery green droppings, a pinch of Ridol or Kaltin or any other binding tablet can be crushed and mixed in a half container of water and offered instead of plain drinking water.
Grit, which is a mixture of sand and stones, and cuttle-bone, which is rich in calcium and phosphates, should be given to the birds periodically.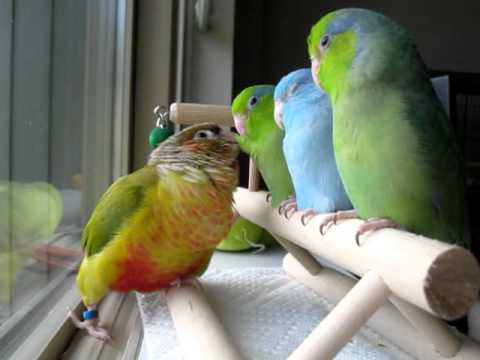 Clean, fresh drinking water must be provided daily. The feed and water containers must never be placed directly beneath perches as the bird’s dropping will foul the contents.
It’s also a good practice to provide a shallow dish for the birds to bathe in. Another option would be to use a spray mister (plant atomizer mister), filled with warm water, not hot water. Many a time you’ll find your bird flapping its wings and hanging upside down from its perch, this usually indicates that the bird wishes to bathe. You will know that he is enjoying his bath when he puffs out his feathers, raises both his wings up and away from his side and leans forward.
Housing the young birds
A shoe-box or small cardboard box with adequate holes for ventilation, a wicker basket or even a small aquarium may be used to house the young birds. The box can be lined with a soft towel at the base and a few layers of tissue papers on top of the towel, making it easy to change the paper towels when dirty.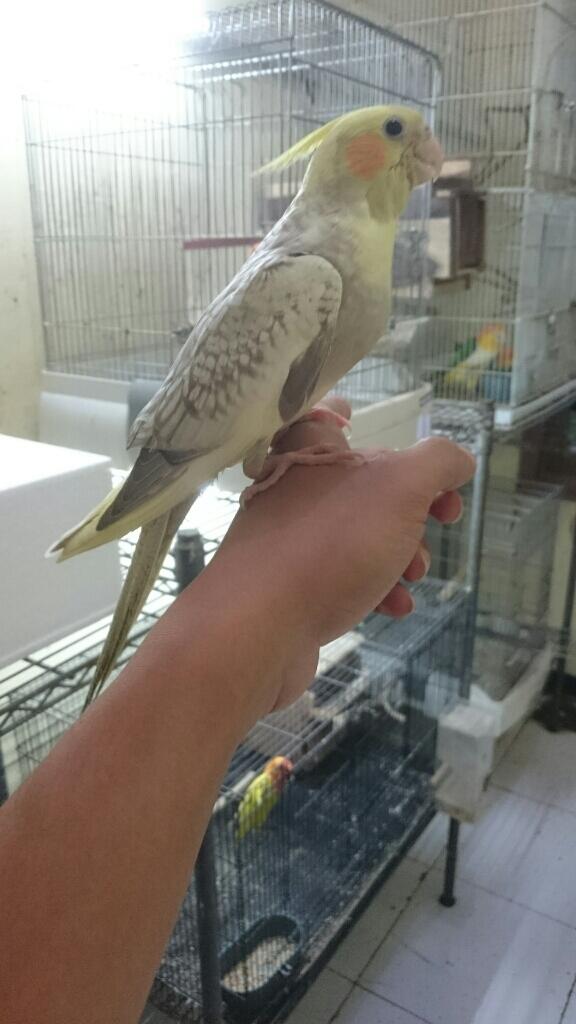 The box must be placed in a warm, dry place, preferably near a source of warmth. A heating lamp, with a light bulb of maximum 40 watts, can be placed above the box. The lamp must be placed at least 12” away from the box. The ideal temperature for the baby birds would be about 35.5° Celsius (or 96° Fahrenheit). Again, it is crucial to be vigilant and ensure that the baby is not being overheated. A clear indication of overheating would be when the baby’s beak is open (as if panting) and wings are held away from its body. On the other hand, if it’s huddled and shivering, it is not receiving enough warmth. At night, partly cover the box with a light towel to keep out the light from the heating lamp and thus enable the baby to sleep.
It must be noted that the purpose of the lamp is to provide warmth alone, and not light, and it must never interfere with the natural light patterns and disrupt the baby bird’s sleep cycle. In nature, cockatiels nest in hollow tree trunks in wooded areas, where not much light enters.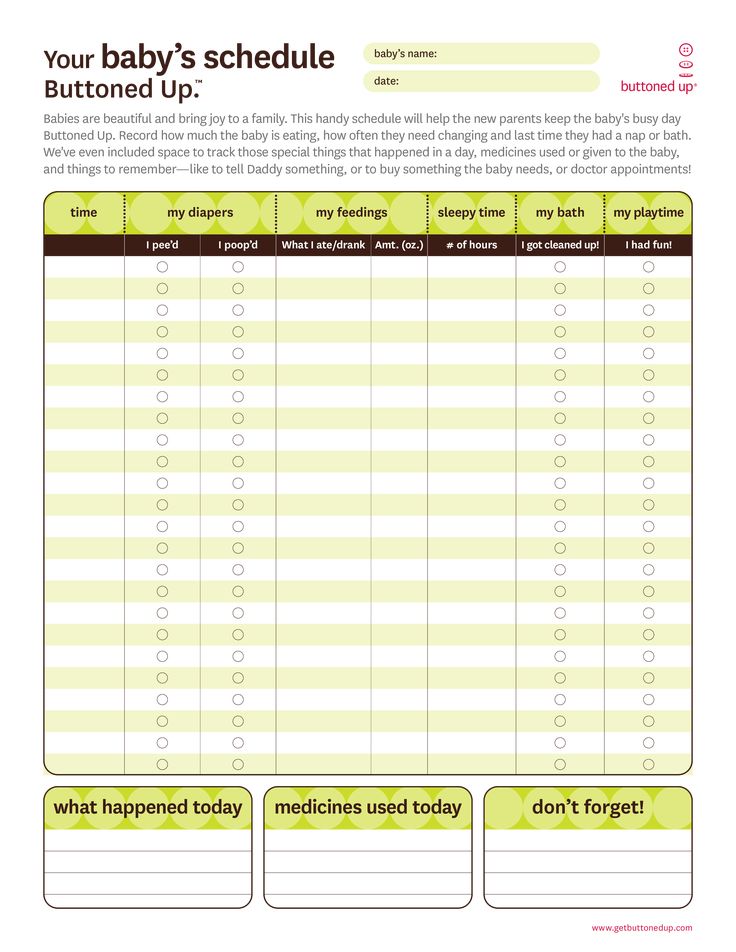 Even when in captivity, the parent bird sits on the baby, shielding it from most of the light. The heating lamp may be discontinued after the baby crosses 2-3 weeks of age and is covered with its first layer of feathers.
Ants are a real danger to baby birds and can fatally hurt them. It must be ensured that there are no ants in the vicinity of the bird.
Once shifted to a cage, it must be ensured that the cages are spacious enough to allow free movement between perches. Perches should be placed just above the floor of the cage so that the bird can easily climb onto them. The cage must be located in a well lighted location with a source of natural light such as sunlight. Avoid exposing the birds to a cold breeze or draught, especially at night, as this causes chills and other health problems.
Fresh, natural branches of Indian lilac or neem (Azadirachta indica)and other trees should be provided as perches as this helps to keep the feet and claws of the birds healthy and strong.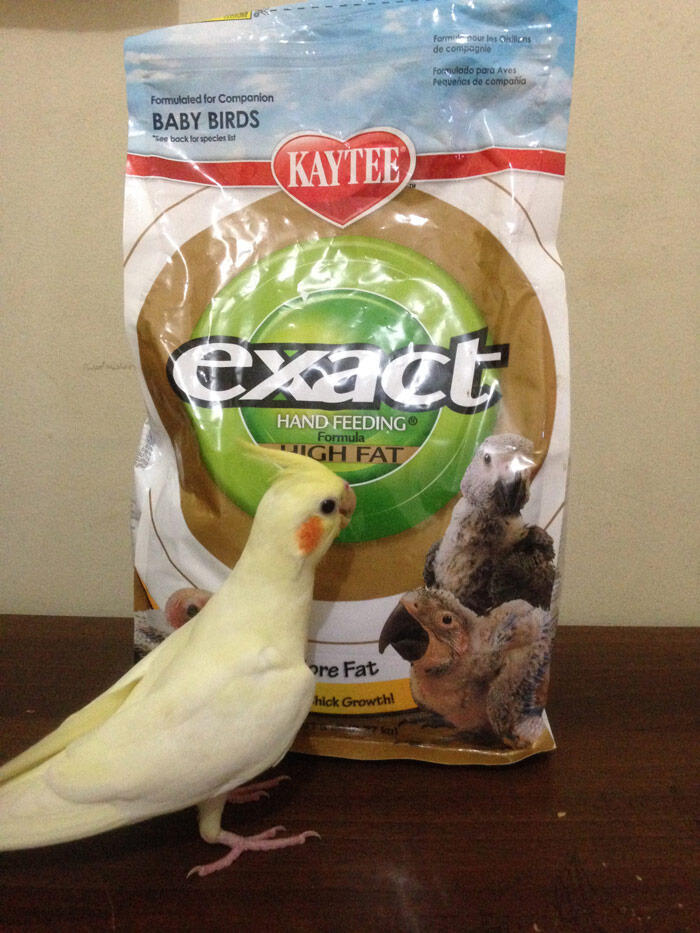 It not only strengthens their jaws and sharpens their beaks but keeps them occupied as well. Birds are otherwise prone to boredom and feather plucking.
It’s advisable to cover the cage with a cloth at night as it gives the bird a feeling of security. If you get too near the cage at night, you might find him hissing. This is a fine demonstration of his protest to your invading his personal space and literally translates as, “don’t get in my face”. Beak-banging is a common male cockatiel trait that indicates he is looking for attention.
Clipping toenails
In the wild, birds’ nails are naturally smoothened out on a range of surfaces but this may not the case in captivity. However, if it transpires that your bird’s nails have grown too long then clipping them becomes inevitable.
Overgrown toenails are likely to get caught on a perch, cage wire, tray or fabric. This can cause deep discomfort, distress and even injury to your bird. Clipping a bird’s nails is a traumatic event at the best of times, both for the bird and the owner, and so it must only be done when the bird’s nails are very overgrown.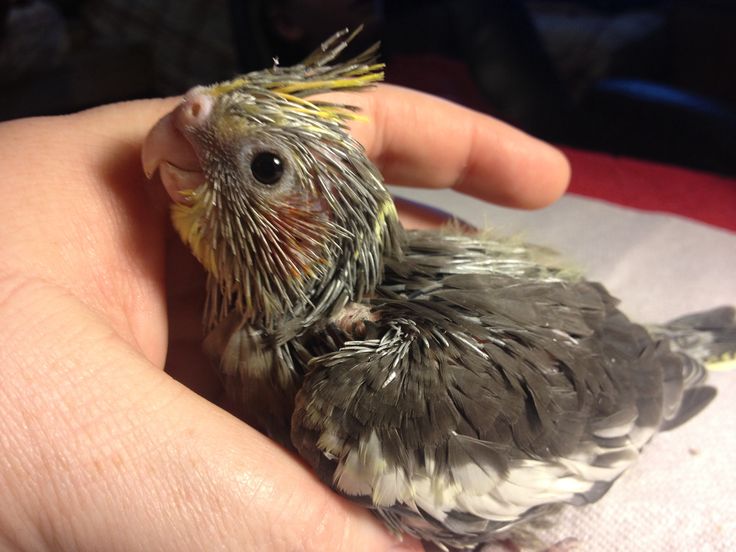
Special nail clippers, which have a rounded edge, should be used to trim the nails of your bird. Take care to only clip the tip of the nail, clipping too much will cause the toe to bleed. If the toe starts to bleed, Nebusulf powder which contains the antibiotic Neomycin, must immediately be applied to the wound.
Sexing Cockatiels
Both males and females look remarkably alike especially until they reach sexual maturity. One way to distinguish between the sexes is that the males sing and whistle while the females don’t. Males have bright orange patches on their cheeks, while females have duller patches. Another distinguishing aspect is that females have pale yellow/white dots on the underside of their wings and yellow/white barring on their tails. Males simply do not have this characteristic.
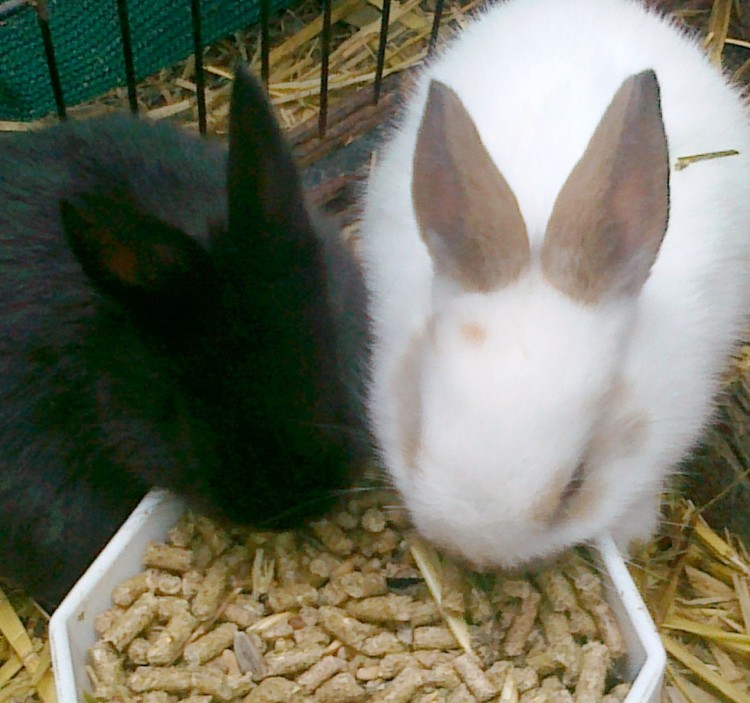
Cockatiels are not generally aggressive and have a good natured disposition. However, in the event that male cockatiels are kept together in a cage, there is a possibility of the dominant male pecking the more timid male, perhaps even preventing it from eating.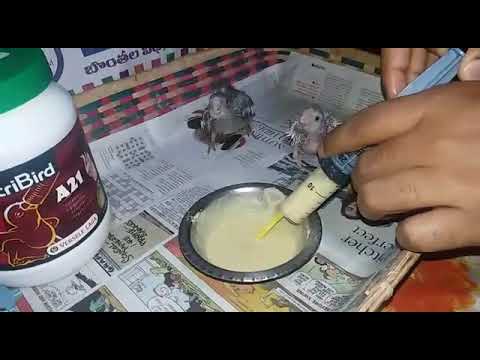 The solution would be a larger cage with two food trays and two water trays. If however, the dominant male continues pecking the timid male, than separate the birds into different cages.
Egg binding
Egg binding is a medical condition when a female bird is unable to expel an egg. Egg binding can pose a serious threat to cockatiels. Younger females are at a greater risk of dying from egg binding. In the event that a female cockatiel is suddenly puffed-up and listless, it is quite likely due to egg-binding.
The female must immediately be placed in a small cage or shoe-box and provided with additional warmth. A heating lamp would be ideal. Castor oil or even cooking oil can be gently applied in to the birds vent or cloaca, with a Q-tip (a cotton bud) to lubricate the area and facilitate the passing of the difficult egg. One drop of castor oil given orally will also help the passage of the egg. If these basic requirements are provided it is unlikely that the bird will suffer any serious health issues.
Breeding
Cages for breeding cockatiels should be an average size of 20”X20”X50”. The nest-box in the breeding cage should be 9”X11”X12” with a 2” opening. The nest-box can be mounted on the outside of the cage. Most cages now come equipped with a small door at the side of the cage which can be used as an entry to the nest-box. If on the other hand birds are housed in aviaries then the box can be placed inside the aviary itself. Nesting material should consist of pine shavings, shredded paper & freshly cut grass.
Cockatiels live for an average of 15-20 years in captivity and breed well in captivity. Males mature by 12 months of age while females mature by 18 months of age. When a female cockatiel is ready to mate she will sit low on a perch with her tail in the air while emitting a peeping sound while males will tap their beaks on the cage to gain the female’s attention. The eggs are laid a week after mating. The eggs hatch after a period of 21 days. Cockatiels usually lay a clutch of 4-8 eggs, twice a year.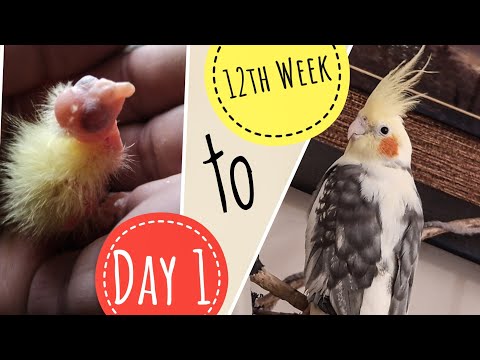
Freeing cockatiels
Freeing cockatiels is just not an option as they will surely be attacked and killed by other predatory birds such as hawks, kites, shikras, crows, etc. as they are vulnerable and unable to fend for themselves. They will also be vulnerable to other predators such as cats, snakes, rats, etc. unless they can find themselves a safe place to roost.
In the wild, cockatiels forage for grain (usually on farms), feed on grass seeds, leaves, vegetables and fruit. Locating such food sources, especially in environments they are not native, would be extremely difficult. Needleless to say, this would be even more difficult in a city.
References
Barrie, A. (1997) Guide to owning a cockatiel. T.F.H. Publications, New Jersey
Grindol, D. (1998) The complete book of cockatiels. Howell Book House, New York
Grindol, D. (2001) Cockatiels for dummies. For Dummies, New York
Mancini, J.R. and Haupt, T. (2008) Cockatiels (Complete pet owner’s manuel).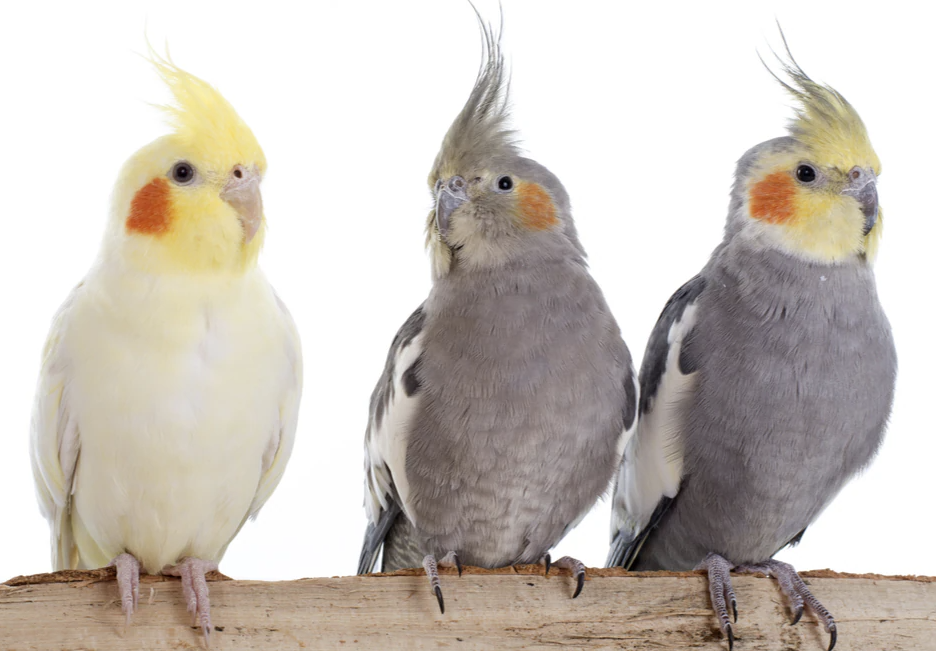 2nd Ed. Barrons Educational Series, New York
Photographs used
Lucy. Female cockatiel.
Available from:
http://www.cockatiel-birds.com/parrot/7055/female_cockatiel
[Accessed: 21/11/2011]
Corina Gardner. Bent spoon feeder.
Corina Gardner. Juvenile cockatiel.
Devna Arora. Disposable syringe feeder.
Brett Donald. Adult male.
Available from:
http://www.flickr.com/photos/bdonald/3032933616/
[Accessed: 23/11/2011]
Dylan Ashe. Feeding a baby cockatiel.
Available from: http://www.flickr.com/photos/ackook/page49/
[Accessed: 23/11/2011]
Dylan Ashe. New born cockatiel.
Available from: http://www.flickr.com/photos/ackook/page49/
[Accessed: 23/11/2011]
Dylan Ashe. 1 week old cockatiel. Available form:
http://www.flickr.com/photos/ackook/504676509/in/photostream
[Accessed: 23/11/2011]
Dylan Ashe. 3 weeks old cockatiel.
Available form: http://www.flickr.com/photos/ackook/page48/
[Accessed: 21/11/2011]
Dylan Ashe.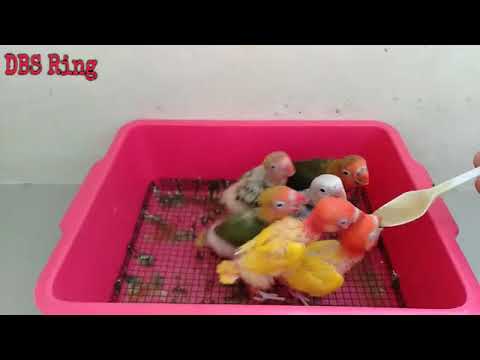 4 weeks old cockatiel.
Available form: http://www.flickr.com/photos/ackook/page48/
[Accessed: 21/11/2011]
Dylan Ashe. 5 weeks old cockatiel.
Available form: http://www.flickr.com/photos/ackook/page47/
[Accessed: 21/11/2011]
Lianne. Enjoying a mist bath.
Available from: http://www.flickr.com/photos/ysaleth/2834585666/
[Accessed: 26/11/2011]
Matrixphere. Cockatiel bathing. Available from:
http://www.flickr.com/photos/matrixphere/73109842/
[Accessed: 26/11/2011]
Ulf Gotthardsson. Cockatiel foraging. Available from:
http://www.flickr.com/photos/ulfgotthardsson/2981225192/sizes/l/in/
set-72157608229228990/
[Accessed: 21/11/2011]
Further reading
Excellent photographs on the entire stage of cockatiel chick development by Dylan Ashe can be viewed through the following links
http://www.flickr.com/photos/ackook/page47/
http://www.flickr.com/photos/ackook/page48/
http://www.flickr.com/photos/ackook/page49/
Cockatiel Mist Bath by 3sugarbeans
http://www.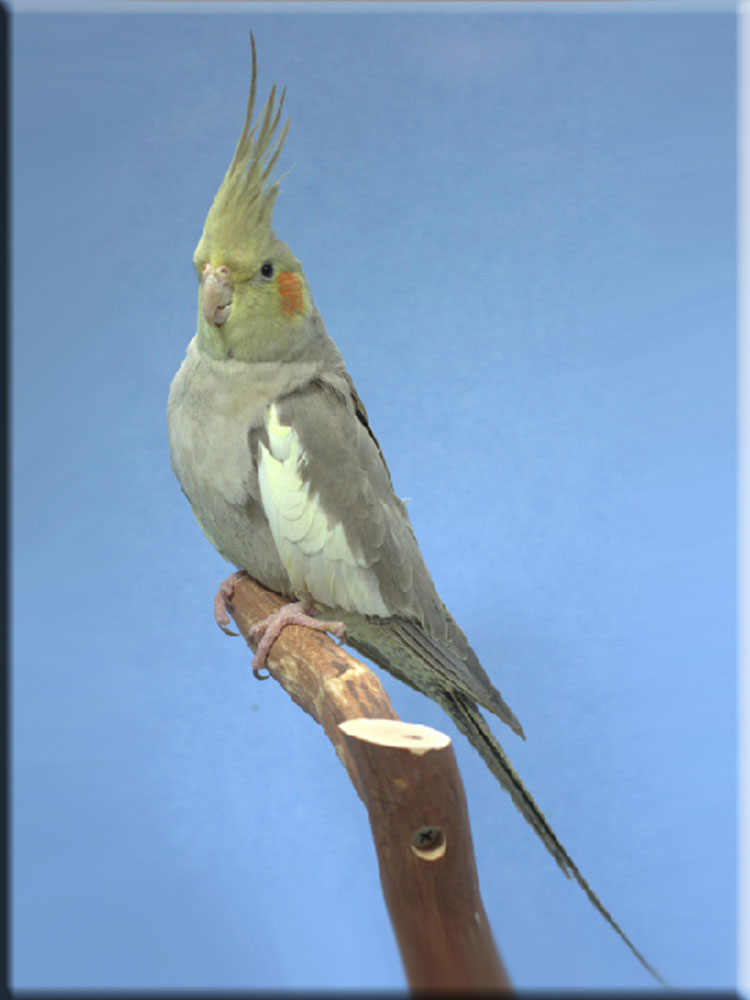 youtube.com/watch?v=pA47Mpn05YQ
Cockatiel Bath Time! by m4tt1600
http://www.youtube.com/watch?NR=1&v=kWCPDMHaeGU&feature=endscreen
Edited by Devna Arora
Published in 2011
Less Is More Handfeeding & weaning Cockatiels
If this is your first time hand-feeding you may feel overwhelmed by what formula the feed, what type of utensil to are best to feed with, what you would put the babies in if you don’t have a brooder. And when you research on the internet each site advises something different, no simple answers…Sheeh!!
Please read my disclaimer.
The first thing to remember is that you do not need high tech ‘state of the art’ brooders or any really fancy or expensive equipment. Evaluate what you do have or what could be used to fit your needs.
Under normal circumstance using the information in this article your handfeeding experience should be problem free. But, just in case I have written another article that covers some uncommon things that a breeder/handfeeder may in rare instances may encounter. It is worth the time to read so you can be aware and avoid them: http://www.ask-noodles.com/uncommon-problems-with-hand-feeding.html
Another decision is what formula to use. There are many brands available. IF you ask for suggestions on what to use you will get a wide variety of answers. The best option is to see what your local bird/pet shop sells, and if they are willing/able to special order if they do not carry the brand you are looking for. You also need to look over the container/bag to see if there is a use by or expiration date. When a formula is old it loses nutritional value and can go rancid which can cause health problems with the baby and/or death. Formula can also be ordered online. I would suggest that you purchase 2 different brands of formula. The reason why is in rare instances a baby may not tolerate or do well and you may have to switch brands for this baby or clutch. My personal recommendation is Roudybush, to have on hand, as a backup formula. It can be stored in the freezer until needed.
Next you will have to decide what to feed the baby with. This article shows all the things that could be used: https://tinyurl.com/Feeding-Utencils
Many breeders can be under the assumption that the more formula you hand feed a baby contributes to a larger bird. I have heard than some breeders will feed as much as 20cc at a feeding, with hopes of striving towards heavier weaning weights. From personal experience I have learned that the amount fed has nothing to do with a heavier weaning weight. The genetic background contributes to larger babies at weaning time. Over-feeding can later be a contributing factor to health issues such as fatty liver, especially if there is a history of this in the family bloodlines. Over-feeding can also contribute to health issues while hand-feeding such as an over-stretched crop, slow crop and/or crop stasis.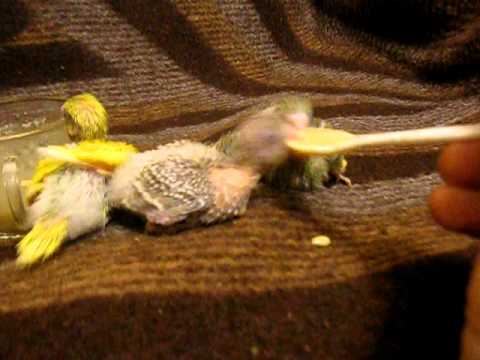 This article will help if you do have slow/sour crop: https://tinyurl.com/Slow-Sour-Crop
Please Note: I have been practicing ‘Less is More’ when I hand-feed since 1995, and have hand-feed several thousand babies this way with excellent results. Many breeders may be resistant to hand-feeding less, because they may think this will lead to thin, underweight babies at weaning. I suggest that you record the daily amount, and weights of how you have always hand-feed. You have a known history and recorded results. Then do a clutch from the same parents as outlined below and compare your results. You will be surprised with the result. In addition, hand-feeding will be problem free, meaning little to no incidents of crop problems, delayed weaning to name a few.
Let's Begin...
I will pull/remove my babies from the nest when they are 3-4 weeks old for hand-feeding. At this age I will be feeding 3 times a day.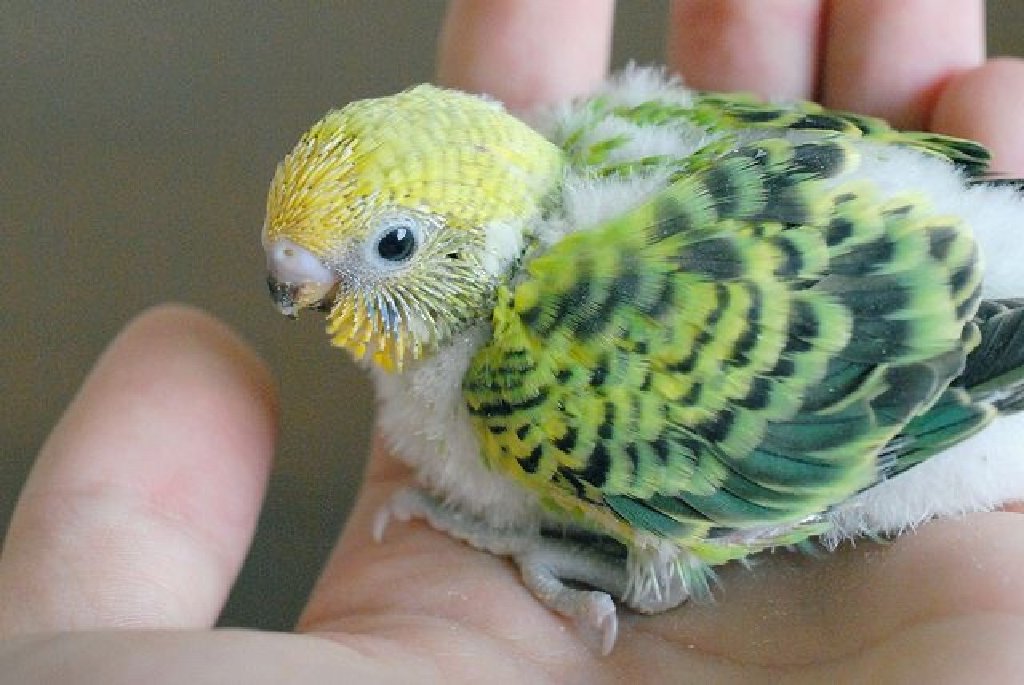
8cc AM,
5-6cc lunch (midday)
8cc PM
I use a 6-6-12 schedule. This means 6 hours between 2 feedings (morning and midday) and 12 hours overnight. My schedule is revolved around when I start the day of the first feeding.
NOTE If your babies are very young please see the illustration (last minute addition) at the end of this article.
Some Guidelines that have worked well for me:
1...Feed 10% of body weight if the baby is under 70 grams in weight. If you don't have a scale that weighs in grams in 1 gram increments. You can find one at an office supply (such as a postal scale)
The formula is 'nutrient dense' meaning it is designed for proper growth. Most mfg. suggests feeding 10-12% body weight for a reason. Feeding them more than what they need/require for each feeding can build up some of the excess fat soluble vitamins in the liver. This is also why additional vitamins should not be added to the formula. Many vitamins are also synthetic and not assimilated properly in the body. In excess they can cause health issues that can mimic many diseases. Vets have also learned that overfeeding can contribute to the bird being prone to liver disease later. Interestingly, overfeeding may be a contributing factor of weight loss, rather that weight gain. WHY? The body is using up energy that could be used towards growth to digest the formula.
Babies that should never be overfed are:
Bloodlines that have a history of liver problems or liver failure.
Short body cavities, and low broad chests.
Stunted babies, or babies with an existing health issue such as yeast and/or a bacterial infection.
Babies with over-sized or stretched crops.
Just an FYI... What most don't realize is that the feeding schedules found on the internet are very general, some may not be species specific, and would be for babies that have no health or crop problems. They are a 'One Size fits ALL' type of info. As a hand-feeder gains experience they will let the babies set the pace on how many feedings per day. ALL/Most info on the internet also specifies that the crop should empty once each day. Doing this can get a new hand-feeder and their babies into some serious crop problems. Writing from personal experience the crop should be empty between EACH feeding. When it does not empty this is the FIRST ALERT that there is a problem going on. If you are only allowing the baby to fully empty just once a day, you may miss the 'Window of Opportunity' to quickly reverse and correct the problem.
NOTE: Never add new food if they baby has not fully digested the formula from the last feeding. The old food should be removed from the crop and the crop flushed before new food is fed. This mini album has an illustration of emptying a crop: http://tinypic.com/a/34uhd/3
And, I'm repeating this by saying to read my article on . Sour/slow crop is no fun to https://tinyurl.com/Slow-Sour-Crop deal with, and its best to be forewarned of problems that 'could' happen and the best way to avoid them.
Overfeeding the baby can also cause trauma to the crop muscle, and also contribute to slow/slow crop. Look at the illustration below. Notice that when the crop is stretched the crop skin hangs lower than the opening into the body, preventing the crop from fully emptying.
The baby will need to be fitted with a crop bra to corrected this. This article has more info on what to do: https://tinyurl.com/y4gbhf7b
2...Formula should be the thickness of baby food applesauce and be the temperature range of 104-106 degrees. The container of mixed formula can be placed in a pan of warm water to help maintain the temperature as shown.
Cool/cold formula can contribute to slower crop movement, and other crop issues.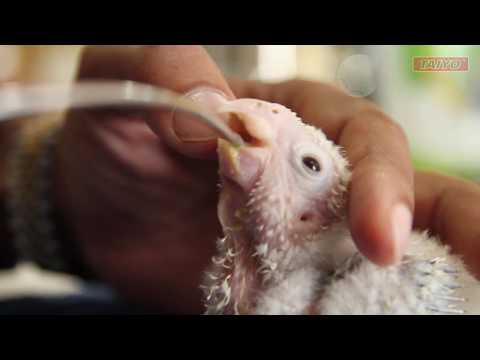
If the formula is too thin/watery the baby is not getting enough nutrients for proper growth. The baby will constantly cry which leads to the temptation to feed it more.
A problem that many breeders may encounter is mixing up too much or too little formula at a time. What I have done is to start off knowing how much I will be feeding each baby. Then I count my babies. If I plan to feed each baby 8cc of formula and I have 6 babies I multiply 8X6 which equals 48. I draw up a total of 48cc of hot water with a syringe into my mixing cup, then mix the formula, let it sit, stir, check the temp (range of 104-106 degrees) and then feed.
Hand positions: http://tinypic.com/a/2rs7l/3
To keep the formula warm I will place the cup into a pan of warm water to help maintain the mixed formulas temperature. In doing this I have had NO waste or excess formula. The excess formula leads to the temptation to later reheat and reuse it which could potentially lead to crop problems. Never save, reheat and reuse formula. Always mix fresh formula for each feeding.
3...Allow the crop to empty between each feeding. Many sites recommend that the crop should fully empty at least once a day. I have found that in doing this is not a good practice because by the time you realize there is a problem going on it may be in an advanced stage, and harder to correct. If the baby has not been overfed, the crop will empty between each feeding. Before a feeding I have learned to place my fingers to the base of the crop to make sure that the babies’ crop is empty. If there is food left in the crop this is the first signal that a problem is developing, such as slow/sour crop, and/or budding yeast that can lead to crop stasis. Crop stasis is when there is no movement from the crop into the intestines.
4…Keep track of the weight of your baby. Always weigh the bird when it is empty. The reason for weighing is also it can be your diagnostic tool to make sure things are fine. Sometimes a baby may appear fine, but start dropping weight rapidly. If so, this is an alert that there is a problem going on.
At the fledgling age you may notice the baby has lost a few grams. This is normal, especially if you have noticed that they are flapping their wings and trying to fly. Once they have taken their first flight they should start gaining back the lost weight.
Some words of caution. Never let a baby fly with a full crop. Allow them to fly before you hand-feed them. If they fly with a full crop and crash land this can cause aspiration if they hit their crop. When this happens the food is forced back up the neck, and if inhaled results in aspiration or respiratory problems. NOTE: If the baby does get aspirated go to the vet. Shown below is what to do if time is critical to save an aspirated baby. Use this remedy for additional 'Supportive Care' as soon as you notice breathing problems resulting from aspiration.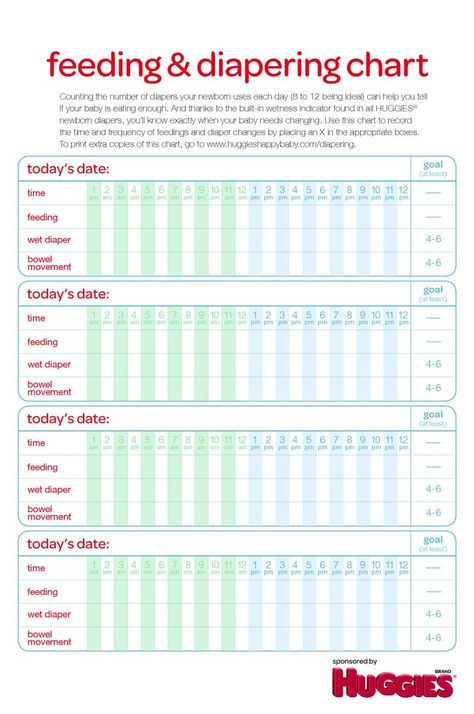 This remedy may also be used in addition to what a vet prescribes.
Another way a baby can aspirate that is less obvious would be several babies in the brooder. This is fine because the babies will share body heat, and it is comforting to them to be in with other babies. What you do not want to see is one baby jumping and climbing on top of another baby. WHY? Because if the baby's footsteps on the lower neck or crop area this can make the formula gush up the neck and into the throat.
OK...Back on topic... I will pull/remove the babies from the nest late afternoon. The first feeding is the night feeding. Sometimes the babies will be so scared they will cry, hiss, and strike at your hand to get you to back off. They can also sense your nervousness, so relax, and speak in a soft, soothing voice to them. Most times the first few feedings are the worst because everything is foreign to them and they have to learn that you are their friend and the source of food. They will not know what a syringe or your choice of the feeding utensil is. When you try to feed them it may be like wrestling an alligator! It may take up to 2 days before they stop struggling with you.
Take a deep breath and gently, yet firmly pick one up with your hand surrounding the shoulder. This online mini album shows how to hold the head and where the formula should be fed: http://tinypic.com/a/2rs7l/3
When hand-feeding a good preventative against possible aspiration is to have a firm grip of the baby's head, and to always feed to the formula into the RIGHT side of the mouth.
A tip for future clutches... I found that if I handled the babies a few times a day when I was doing nestbox checks it help to tame them down. I also would assist feed the youngest in the nest, if needed, and also offer the older babies a taste so that they were used to a syringe or something touching the head and mouth. By the time they were pulled they were calmer and would not struggle/resist being feed.
I start my babies on three (3) feedings a day, 8cc morning, 5-6cc lunch, and 8cc night. The reason why so little is because at this age their crop has shrunk considerably because the parents have already reduced the amount fed. I have learned that ‘Less Is More’ Most of my pet trade babies weaned out at 125 grams on this feeding amount. I did a comparison group of babies and the ones that were hand-fed 10cc per feeding actually did not feel as solid and weaned out at 100-110 grams. Much of the info I have learned has been from observing the frequencies and amounts in the crops while the parents were feeding and/or weaning out a baby. The feeding schedule is more natural to the amounts that a parent bird would feed, and has resulted in some nice healthy babies for me.
When I pull the babies I place them in a big container with pine shavings. Half of the top covered, to help retain body heat. If the baby/babies are fully feathered there is no need for heat, room temperature is fine.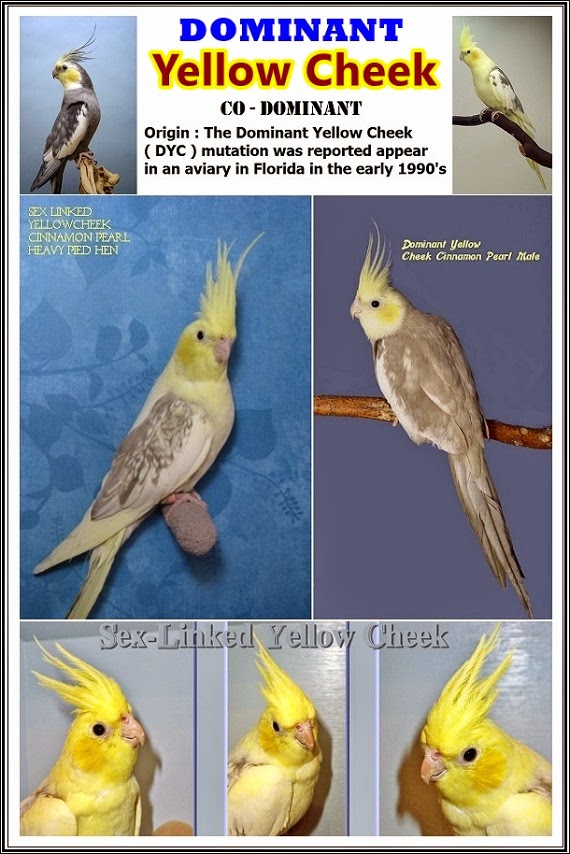
I place a small bowl with seed, and sprinkle some on the bedding near the bowl. I also place millet in with them.
It takes them approx. a week to explore and start nibbling. The container is big enough for them to walk around, explore, and flap wings for exercise.
I write down every day how much I feed per feeding and amount. You can use either a hand-feeding chart or print out a calendar page and use it for entering daily amounts and frequencies of feedings.
Once I start seeing the baby/babies nibble on millet seed, I will daily decrease the middle feeding by 1cc per day, and reduce daily down to 0cc. At 0cc, I will then skip the middle feeding. It is less confusing or traumatic to the baby to do this then to cold turkey and eliminate the feeding.
When they are down to 2 feedings a day I will move them into a cage.
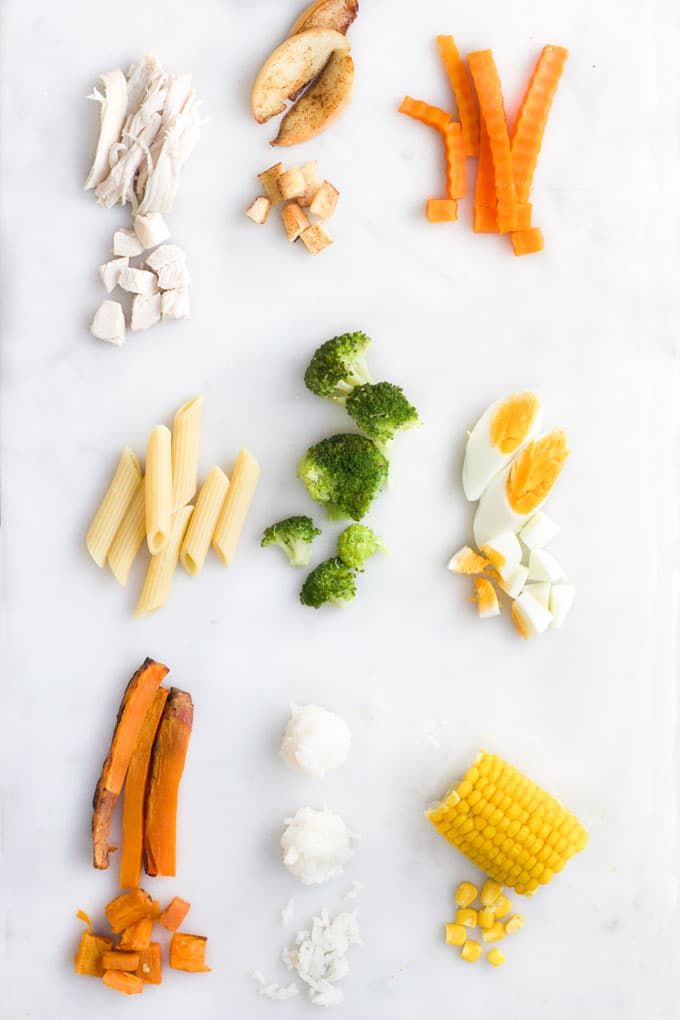
By then I introduce greens, veggies (separate dish) during their skipped lunch feeding time. I have learned that the babies are more apt to try new foods once a feeding is skipped.
Once I see the babies nibbling and eating more on their own I will start decreasing the morning feeding down 1cc per day. Once down to 0, they are down to 1 feeding (night) a day.
I wait a day or so and then start decreasing the nighttime feeding by 1cc a day. When I get down to it reduced to 2-3cc many times they are starting to refuse the formula. If they still want formula hold it at 2-3cc for a week or so, feeling their crop to make sure they also have food in the crop from trying to eat on their own.
Once I finally get to where I am no longer hand-feeding I will make sure that at the normal nighttime feeding I change out food and water so that they have fresh food available, especially for in the morning. I give more millet or other treats they will eat.
IMPORTANT: At their normal bedtime I feel the base of the crop to make sure I can feel food in it. I have learned that cockatiels will pack their crop prior to sleeping so that they food (for energy) to digest during the night.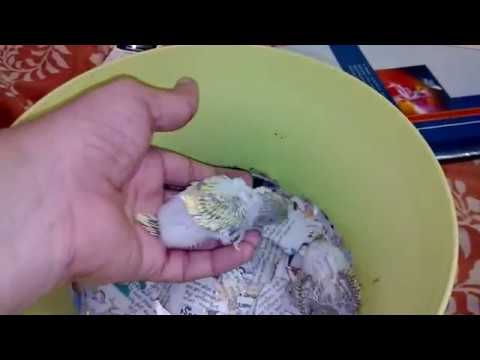 This is also why they have larger droppings first thing in the morning. The crop contents will feel like a beanbag, and range in size from a grape to a walnut in size. I check nightly for a few weeks before I can consider them fully weaned. If a baby refuses feedings and is not packing its crop with food prior to bedtime monitor the weight to make sure the baby is not losing weight. At this age the baby should maintain weight during weaning and weaned.
I have noticed on the internet that it appears the growing trend of advice is that a baby should be weaned at 6-8 weeks of age. Not so, ideally weaning age should be around 10-12 weeks of age. By then the immune system is developed and the baby can better handle the stress resulting from a sale, and is less prone to relapse after the sale.
It sounds long and confusing, but if you write your daily feedings on a calendar, it makes it easy to remember what has been fed and when. It is far better to slowly taper down a feeding than to cold turkey skip a feeding.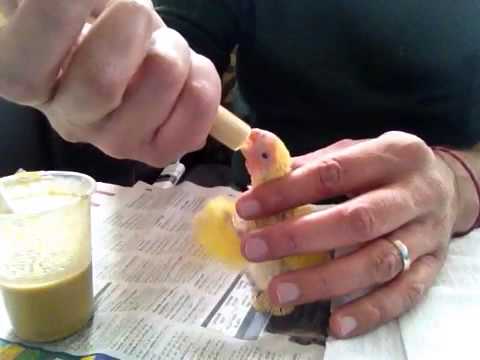
OK, all of the above guidelines would ALSO apply to younger babies, just amounts would be different. You may notice that many sites will list how much to feed at what age. When doing an online search most all charts were the same. For example:
1-5 days---every 2 hours---1-2cc
5-7 days---every 3 hours---2-3cc
8-14 days---every 4 hours---4-6cc
15-24 days---every 5 hours---7-10cc
25-34 days---3 times a day---11-15cc
35-44 days---2 times, AM/PM---11-15cc
45 days to weaning---1 time (evening)---11-15cc
Use my illustration for comparison of age and weight. If the formula mfgs. recommend 10-12% body weight these amounts would be excessive past the age of seven days. It will be very difficult to get 1-2cc into a baby that just a few days old. Feeding more than needed may result in the crop stretching and not fully emptying.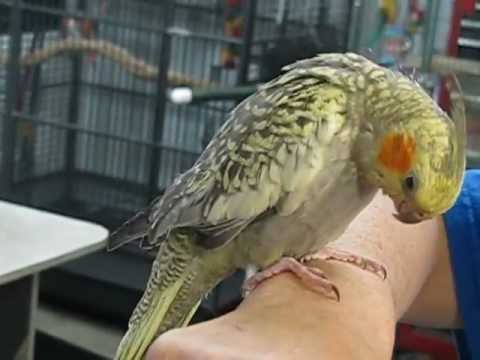 This can lead to slow/sour crop in addition to resorting to using a crop bra to allow stretched crop tissues to heal. Aside from the amounts shown in the example I would like to from 3 weeks and old never go over 10cc. I’ve even seen posted several hand-feeders pushing it to 20-30cc, saying the crop can hold it. Agreed, BUT. From being on Cockatiel groups and forums many of the people having problems are from overfeeding.
As to feeding times the best guideline is to watch and wait for the crop to totally empty before the next feeding. In doing so eliminates the risks of problems.
In summary this has worked well for me. I would hold back the best babies from each clutch as future breeders. What I have noticed consistently is that the next generation weighed out 5-10 grams heavier than their parents at weaning. Each succeeding generation did the same. This was also seen in the nest. By the third generation many were 110-125 grams and up at 2.5 weeks old. Please note that even though my birds were giving me larger babies I held fast to my rule to NEVER feed more than 10cc per feeding.
When I started finding mutations was very difficult. Local breeders had them but they would not sell them. In my location there were many breeders, thus competition was fierce. I bought everything I could and with a year was working with 100+ cockatiels. Most were normal grey with splits. During this time, I had hands on training of genetics and what worked and what didn’t. From my split pairs they gave me a bounty of different mutations in the nest. I held back most of the babies. My goal was to improve each succeeding generation.
Within a few years my flock had grown to several hundred birds. I kept track of all aspects of growth, for example my pet project was long tails. I learned (by plucking and comparing) that it takes up to four years for a cockatiel to obtain actual tail length. Pearls and Pied were my favorite mutations to work with. From them I learned that breeding visual to visual (Like to Like) that the offspring was smaller and not as robust. This article goes into more detail: https://tinyurl.com/Liketo-Like-pairings
With my way of handfeeding I was consistently seeing results but this was only part of my goal. I lusted for but couldn’t afford show quality birds so I had to learn how to develop my own that were visually appealing to my minds eye, were free of any health issues and were reliable breeders and good parents. It was a long process but doable with time and patience. This is something I wrote for other beginners: https://tinyurl.com/for-Proportionate-Birds
In closing I would like to say that if you are going to breed please focus on improving the quality off the offspring over the parents. When I first started out all I heard was if you wanted to have good birds you must buy from show lines. Well I didn’t have the money, did not want to quit, so on to Plan B, and worked with what I had. The birds shown above were where I was at in the late 90’s, early 2000. All shown in my articles and past websites started out with the Less Is More way of handfeeding. I also devised a Less Is More diet for my breeders and other cockatiels, but that is a story for another day.
Copyright © 1993-2019
All rights reserved. No part of this publication may be produced and/or distributed in any form or by any means, or stored in a database or retrieval system, without prior permission by this author.
TERMS OF USE: Use of this work is subject to the following terms except as permitted under the Copyright Act of 1976 and the right to store or retrieve on copy of this work.
You may not decompile, dissemble, re-mix or reverse engineer, reproduce, modify, create derivative works based upon your own re-wording, transmit, distribute, disseminate, sell, publish or sublicense this book/work or any part of it without Susanne Russo’s (email ask.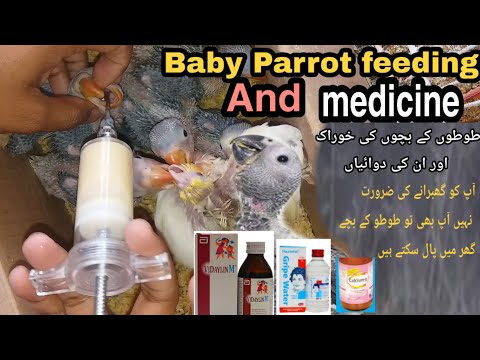 [email protected] )
You may use parts of this work for your own noncommercial and personal use only. Any other use of this book/work/ is strictly prohibited.
Cockatiel chicks: hatching and care
After 18-21 days of incubation, cockatiel chicks begin to hatch from eggs. Usually babies manage to get out of the shell within 24-48 hours after the appearance of the dent. But if that didn't happen, then help is needed.
Newly hatched chicks should have pink skin covered with white and yellow down. If the skin color is pale blue, then the chick has experienced hypothermia and needs your help. Corellas do not immediately feed their cubs, they wait until they are completely dry.
How to clean the nest
Cleaning the cockatiel's nest is very important. The fact is that Corella chicks have practically no immunity, so any dirt in the nest or objects around them can lead to illness and death of the birds.
1. The nest should be cleaned when the parents go to eat. Access to the nest from adult cockatiels must be covered with cardboard. Otherwise, parents can be very aggressive towards you.
2. Prepare a small container, similar to a cockatiel's nest, line it with clean sawdust. Transfer the chicks to a container, remove the remnants of droppings, food and other debris from the nest.
3. Cleaning should be done very quickly so that the parents do not start to worry, and the chicks do not have time to freeze.
4. Please note that the frequency of nest cleaning depends on the age of the chicks. The older the hatched birds become, the more waste remains behind them, therefore, cleaning should be done more often.
Handling chicks
Home raised cockatiel chicks are usually more tame and calm. You can pick up chicks from two weeks of age. Remember to wash your hands thoroughly before interacting with birds. You can hold the chicks in your arms for about 15-20 minutes.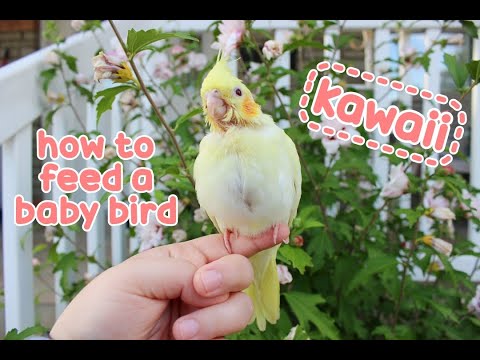 Gradually, if the chicks feel good, the time of communication with them can be increased. Stroke them lightly, talk to them calmly. Please note that if the parents of the chicks are against your communication with the chicks, then it is better to postpone it.
When do cockatiel chicks leave the nest?
Corella chicks show their first interest in the world on the 25th-27th day of their life. They begin to turn their heads in different directions, examining the surrounding objects. The first exit of chicks from the nest occurs 35-40 days after they hatch. Corella feeds her cubs up to 1.5-2 months of age, then they begin to feed on their own from the feeder. When the babies are out of the nest, their father takes care of feeding them. The mother feeds the younger or weaker chicks.
Why do cockatiels pluck their chicks?
Adult cockatiels sometimes pluck the feathers from their chicks. This can be done by one or both birds. Nobody knows why this happens. Scientists call the main reasons:
√ lack of nutrients;
√ psychological factor (jealousy).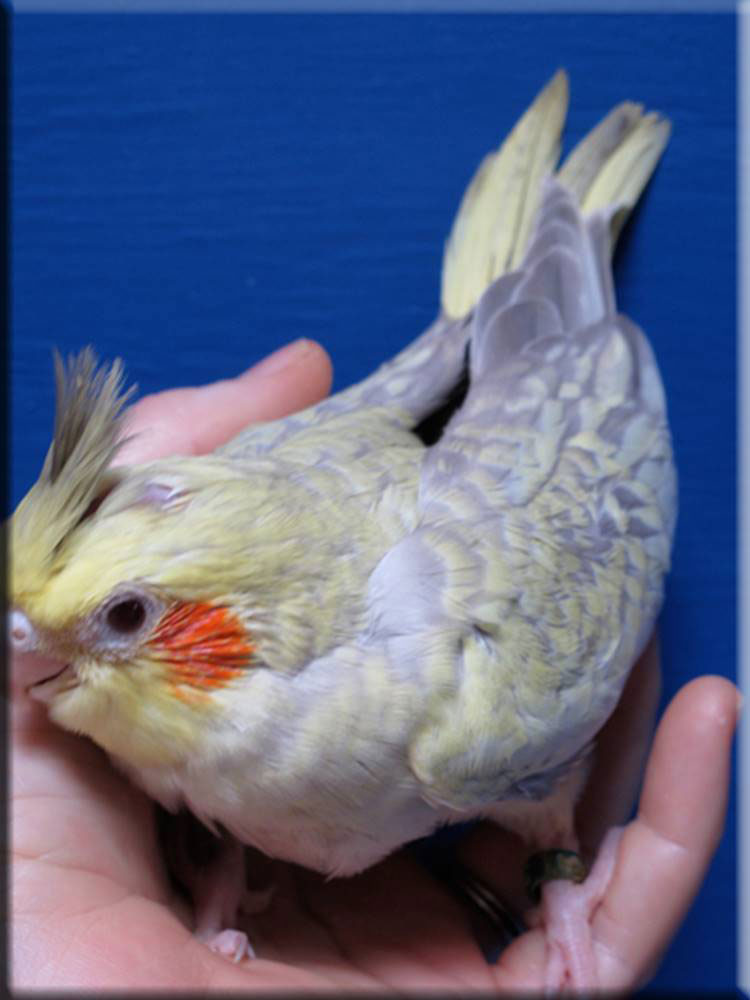
Adults can cause serious damage to their chicks during plucking, so if you notice this, be sure to move the baby to a separate cage.
What to feed budgerigar chicks?
After birth, budgerigars are defenseless, they are completely dependent on their parents. The female feeds and pays attention to each of them, despite the number of offspring and their age difference.
In the beginning, feeding of babies consists of regurgitation by the female of crop milk, which is located in the gizzard. This "milk" is not one substance, it is a yellowish mucus, consisting of very small, almost liquid pieces of food and protein-rich crop milk. A few days after the birth of the chicks, partially digested grain from the goiter is mixed with the "milk".
Photo: parrots4lifeThanks to sprouted grains in the diet of a lactating female, she produces a sufficient amount of crop milk.
Later, as the parrots mature, the older ones are transferred to grain feed. Since the grain is in the crop, the female feeds the grown chicks first, and when the grain runs out, the crop milk goes to the smallest in the family.
During this period, the male constantly provides the female with everything she needs, as she can leave the nest only in the morning and evening, and even then not always. Sometimes the male helps the female and participates in feeding. He also processes grain feed in the goiter, like the female. Thanks to this, the digestive system of budgerigar chicks works like clockwork, they receive the most nutrients, vital enzymes and boost their immunity.
Having flown out of the nest for the first time, young parrots most often remain under the care of the male, as the female is going to the second clutch.
The nutritional value of the parents depends on the owners. It is very important to add and exclude certain products in time.
Feeding a young couple during breeding can be found here.
It happens that breeders have to take on the role of parents of chicks.
Contents
- 1 Reasons for artificial feeding of budgerigar chicks:
- 2 Heating of budgerigar chicks
- 3 There are several options for feeding budgerigars:
- 4 How often to feed budgerigar chicks
Reasons for artificial feeding of budgerigar chicks or failure2: 9008 parents;
- disease of a chick requiring its immediate separation from the feathered family;
- quarantine;
- lack of appetite in the chick, its inability to feed on its own;
- death or illness of parents;
- a large number of chicks, parents can not cope;
- the female is going to the second clutch and her offspring interferes with her.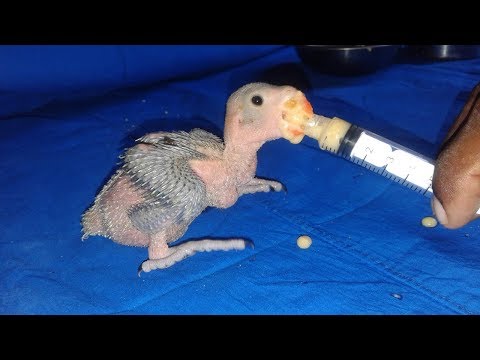
The safe period without food for a newly hatched chick is 12 hours.
This is how long a female can go without feeding her baby. And, in case of a non-standard situation, you should count on this period of time to have time to prepare.
You can offer the chick to another pair or offer the male to feed it. Sometimes the bird accepts the baby and thus takes care of him. But it happens that only you can save the situation.
Photo: ddie gunnAlso, the female is often going to re-lay, her attitude towards the babies may change and you will need to look for additional housing for the young as soon as possible. More often this happens when the chicks are already able to feed on their own, but it happens that the female shows unmotivated aggression early and you need to save the parrots very quickly.
If your chick is only a few days old, then you can only feed with a special factory syringe or a homemade tool. To do this, you will need a 5 ml syringe and a tube that plays the role of a catheter.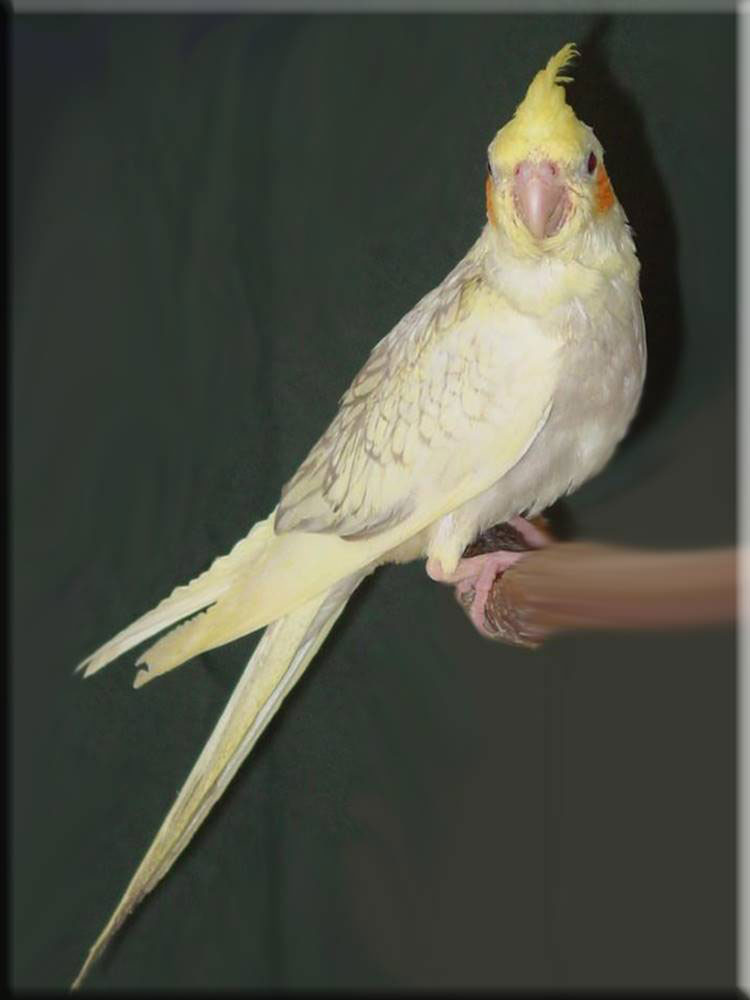 If you have the smallest chicks, then its diameter should not be more than 2.5 mm and it will be made of strong, soft material without sharp edges.
You should get rid of the syringe, for this you need to glow the cap and carefully remove the needle, drill a little more hole in the nozzle and put on the tube. Wrap the thread tightly around the edge of the tube and nozzle from the syringe. With a factory syringe, you don’t have to suffer like that - everything is provided for in the design.
The catheter must be lowered into the crop to a sufficient depth - if it is not installed correctly, the feed may enter the bird's trachea, which will lead to its death.
Therefore, having decided to breed budgerigars, you should already have a feeding syringe available.
Baby budgerigar heating
Also, fledglings require additional heating, which you will have to take care of. Devices that breeders use to keep chicks or sick birds warm are called brooders.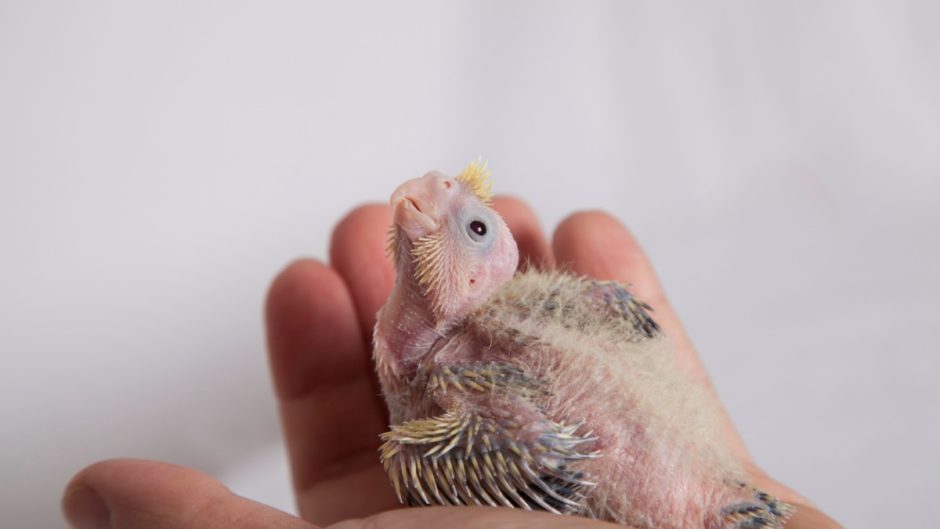 You can buy them or make your own.
The main thing is to be guided by the temperature parameters, since as you grow, the temperature in the room where the parrot is located should decrease.
Chick from a few hours to 4 days - 36 - 36.5°C; 7 days - 34°С; 14 days - 31 - 31.5 ° C; Day 21 - 24°C. Further, the chicks are moved to a box, which is similar in size to a nest box, in such a room the parrots themselves will be able to heat each other.
If you are raising a single chick, keep it in the brooder until day 25, where you lower the temperature to 24°C. Humidity during this period is maintained at 60%, as during masonry.
There are several options for feeding chicks:
Ready mix. Babies need vitamins and nutrients as well as vital enzymes. Therefore, NutriBird A19, a specialized and balanced food for budgerigar chicks, is just right. The mixture must be diluted not boiled, but heated to 39°C with water.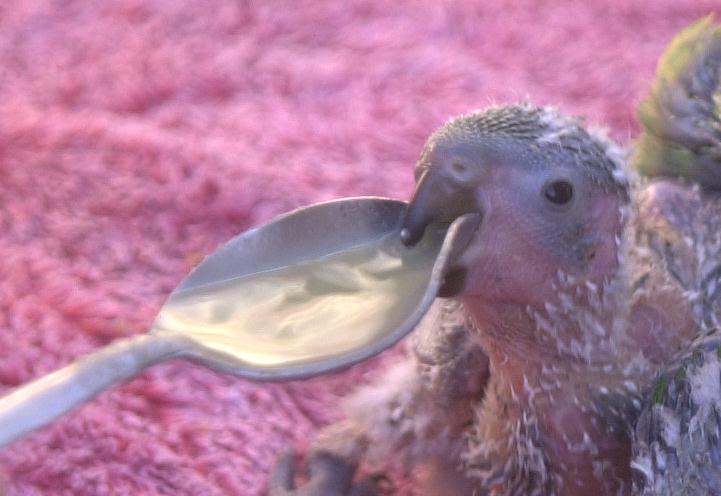 Depending on the age of the chick, you adjust the density of the paste. This is the breeder's most convenient feeding option and one of the best ways to give your chick everything it needs to develop a strong body.
You can buy food for chicks - Padovan Baby Patee Universelle. Some breeders have successfully raised young on it.
Photo: parrots4lifeDonor bird. Professional breeders use donor birds. Using a catheter, they load a grain mixture into the goiter of a bird, which is later pulled out with a probe. This is an unsafe procedure, so only professionals use this method. The main plus is that the substance that is extracted from the goiter of a parrot is a guarantee that the chick will receive all the vital substances for development.
Malt milk. A mixture of sprouted grains with egg. Malt is prepared from germinated grain, which is crushed and diluted in half with water. Then filter through a strainer and add to the mixture.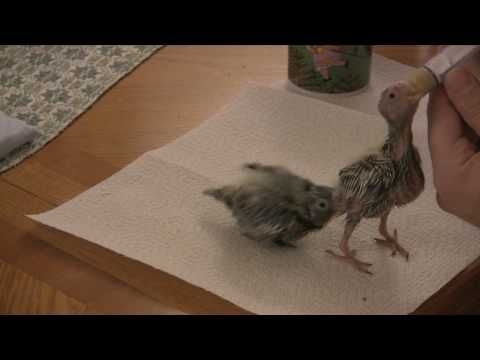 You should end up with a paste at 39°C.
Medical additive Mezim, Festal, etc. to the porridge. The difficulty lies only in the correct concentration and dilution of these enzymes. It is better to use them together with malt milk.
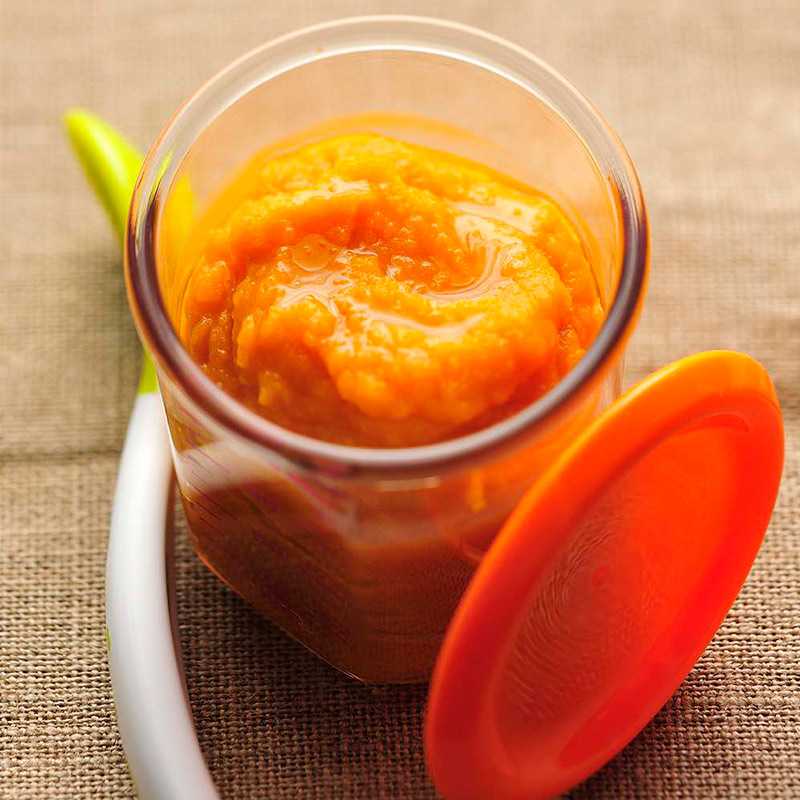
For power base baby budgerigar, you need to cook baby porridge without milk, sugar and salt: you can boil buckwheat, oatmeal or corn porridge. On the third day of the birth of a chick, you can add vegetable juices to its diet: carrot, beetroot and pumpkin. After the chicks are at least 10 days old, in addition to cereals, you can give a little apple, banana, pomegranate and fat-free cottage cheese.
When the chicks are 20 days old, you can switch them to syringe feeding without catheter or even spoon feeding. From these days, add sprouted grains to the diet (pre-crush into pieces).
At the age of 30-35 days, the chicks can switch to dry grain, earlier if there is someone nearby who can show them how. But don’t worry, you don’t need to teach this, the chicks successfully begin to taste the grains themselves when the time comes.
How often to feed budgerigar chicks
The smallest chicks should be fed every two hours, at night every 4 hours. Gradually, six feedings with a break for the night are enough for the parrots.
Photo: Dawnstar AustralisOn the 20th day of life, babies can eat 4 times a day, as they approach 35 days, 3 times will be enough for the chicks.
Babies start to squeak when they are hungry, and the owners, in addition to the feeding schedule, listen to the sounds coming from the cage.
If your older bird is sick, you may need to feed it more frequently.
It is impossible to overfeed a parrot. Do not let the porridge flow out of the beak.
Try feeding them with a spoon, little by little the chicks will get used to it. If among them the eldest is the first to start eating on his own, there will be a chance that he will become an example for the rest of the parrots.