Baby feeding materials
Our Favorite Baby Feeding Supplies for Starting Solids
In this guide:
- Spoons
- Bowls and Plates
- Bibs
- Snack Cups
- Placemats
You don’t need a ton of gear to start feeding solids, but a few key items will make the endeavor much easier… especially bibs, bowls, and spoons.
Lucie feeding AliceSpoons
For Introducing Solids (6 Months+)Good spoons are key to successful feeding. Spoons with little spoon-heads are perfect (I just said spoon-head, heh heh). You may want to try a few different ones to experiment – below are some parent favorites.
If you’re doing finger foods (ahem, the fancy-dancy term for this is baby-led weaning…), you may not need any infant spoons yet (they can’t spoon-feed themselves until later). But it’s not a bad idea to have a few on hand.
Munchkin Infant Spoons ~ $3 for 6
Quick and dirty. These rounded, soft spoon bowls are the perfect size. We’ve used these spoons for years and they’ve never let us down.
OXO Silicone Feeding Spoon ~ $8 for 2
A softer version (for teething babes and whatnot). Made with Stainless steel for durability.
For Self-Feeding (Toddler)Nuby Spoons and Forks ~ $8 for 4-pack (2 spoons & 2 forks)
As your kiddo gets older, you’ll want to start him with a larger spoon head and a thicker fork. Usually made of soft plastic, so as to not hurt themselves, and a non-slip handle, these are the gold standard. (See also: the Munchkin version)
RE-PLAY Spoons & Forks Set ~ $10 for 8 (4 of each)
These BPA-free utensils made from recycled plastic are very durable and will last well into childhood. Pick from a vast range of bright color options.
OXO Tot Training Fork and Spoon Set ~ $8
Training silverware is the next step, just before actual silverware. They still have non-slip handles, but their rounded heads are made of stainless steel.
These ones are the best, IMO, but there are many options to choose from: NUK (spoons and forks or set with knife), Skip Hop, Munchkin, etc.
Bowls & Plates
For Introducing Solids (6 Months+)Start with a bunch of plastic bowls for mixing purees. Simple stacking bowls will do the trick. Don’t even think about anything breakable, since bowl-tossing will be your baby’s favorite sport for the next 12 months or so (yes, I just got nailed in the eye the other day, WTH?).
Munchkin Stackable Bowls ~ $8 for 8
These are our favorite kind – you can never have enough and they’re sold everywhere.
NUK Bunch-A-Bowls ~ $7 for 4
Another parent-favorite, these come with lids to take on-the-go.
For Self-Feeding (Toddler)Of course, you can still use the bowls listed above as your baby grows, however, you may want to also stock up on toddler-friendly bowls and plates.
Munchkin Stay Put Suction Bowls ~ $9 for 3
These really do work! They even suction to the stroller snack tray.
ezpz Happy Mat ~ $25
It’s a placemat and plate in one that suctions to the table: a true game changer for parents. The mat has three compartments for all of the food groups they won’t eat (kidding!) (sort of). Dishwasher safe and easy to travel with.
*Explore the whole collection – including a bowl, mini mat (great for restaurants), and play mat (*this one is so pretty!).
Divided Plate from Target ~ $0.50
Yes, you saw that right => 50 cents! Hands down one of our favorite divided plates — they hold up after years of (ab)use and are dishwasher safe. The sections are the perfect portion size and the walls are just high enough for scoop-training.
P.S. Available in all sorts of sizes and colors.
Bibs
Feeding babies is MESSY, y’all. There’s no getting around it. Some folks opt for shirtless feeding (the BABY, not you, parents), which may save on laundry but will likely require a bath or wipe-down afterward. Personally, I find the dressing/undressing part to be way more work than just throwing on a bib, but whatevs.
Bibs will prevent (reduce?) stains on your baby’s clothes. They come in different shapes and sizes; some bibs simply go around the neck and protect the top of the shirt, while others have sleeves and can be “worn” for more protection. I recommend you get some of both, depending on what’s on the menu that day {i.e., some foods are messier than others}. Alice loved to finger paint her body (and the dog) with hummus, so I was pretty much screwed on those days.
Basic BibsBumkins Bibs ~ $17 for 3
For a simple, basic bib, this is definitely the group favorite. It’s waterproof, comes in cute designs, and is super easy to wash (in the laundry, even). It also has a catch-pocket, which you will come to appreciate. Best of all, you can fold it up into a compact square and easily throw it in your diaper bag.
*Available in sizes: starter (4-9 months), super (6-24 months), sleeved (6-24 months) and junior (1-3 years).
BabyBjorn Soft Bib ~ $19 for 2
Another crowd-favorite. These are super easy to clean, have a deep pocket to catch food, and an adjustable closure to fit a growing baby for many months. These bibs are a bit more sturdy (harder for baby to yank off), but unlike the Bumkins bib, they don’t fold or store as easily.
These will offer more protection, especially around the shoulders and sleeves.
IKEA “KLADDIG” ~ $9
An affordable, quick and dirty favorite is the nickname, “the angry viking child.” *Fits 0-18 months.
Kushies Cleanbib ~ $19
Parents love this simple, SLEEVED waterproof bib. Though, the price has gone up recently…
Hero Bibs ~ $29
Handmade and specifically designed not only to keep your little one clean, but also the highchair. Just tuck it under the top tray or let it hang over the sides. Also great for art projects and will last through the years.
Miscellaneous
Snack cups
Munchkin Snack Catcher ~ $5 for 2
Every parent’s go-to. The lids prevent food from spilling onto the floor but make it easy for kiddos to reach inside and grab their favorite snack.
*If you’re not into plastics, Munchkin also makes a stainless steel version with a lid ($10).
Nuby Monster Snack Cup ~ $7
A fun twist on the standard snack cup. Kids love holding his monster hands. The lid can be tricky to get on and off – but that just means it’s doing its job. 😉
Placemats
Munchkin Silicone Placemats ~ $10 for 2
If you have a table in need of protecting, make sure you have a couple of these on hand. They measure 11 X 15 and are sticky on the bottom so they stay in place. They’re thin, too, so they’re easy to roll up if you need one for an outing, a picnic, etc. Top-rack dishwasher safe.
(No, I don’t work for Munchkin, I just like their stuff). And yes, they are BPA-free.
Back to: Gear Guides
About the Author
Meg Beilsmith Collins started Lucie’s List in 2010 after learning everything about babies the hard way; she is now the Editor in Chief.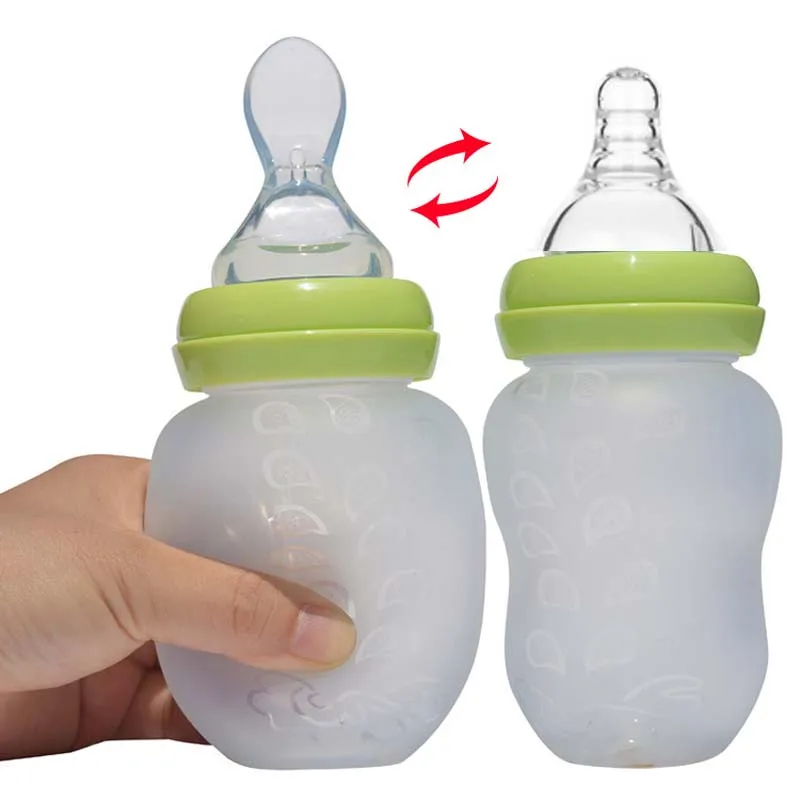 She’s an Industrial Engineer from Georgia Tech and a former car seat technician (CPST) who lives near Clearwater, FL with her husband Rich and daughters Lucie and Alice. She enjoys 90s music, MomFit, camping and anything on the water.
Choosing Bottle-Feeding Equipment - What You Need To Bottle-Feed Your – Baby Care Advice
If your baby displays fussy feeding behavior, you might start to wonder if the bottle or nipple is to blame. How do you know if the equipment your baby is using is the best choice for your baby? This article explains what to look for when purchasing baby bottles and nipples.
Basic equipment- Infant formula.
- Bottles with caps.
- Feeding nipples.
- Bottle and nipple brush for cleaning.
- Insulated bottle carry bag.
- Sterilizing equipment - a large plastic or glass container for chemical sterilization, or an electric or microwave steam sterilizing unit, or just a large saucepan for boiling.

- Knife (to level off milk powder). Plastic is easier to sterilize than metal.
- Measuring jug, with fork or whisk (not necessary if you make up the formula directly in the bottles.
Your choice of feeding nipple is much more important than your choice of bottle when it comes to bottle feeding your baby. The cheapest bottles are just as suitable as expensive ones. Plain shapes are the easiest to clean. Some manufacturers claim their bottles offer 'anti-colic' properties, but there's no proof that this is true.
Glass or plastic?This is really a matter of personal choice. For safety purposes plastic is advisable.
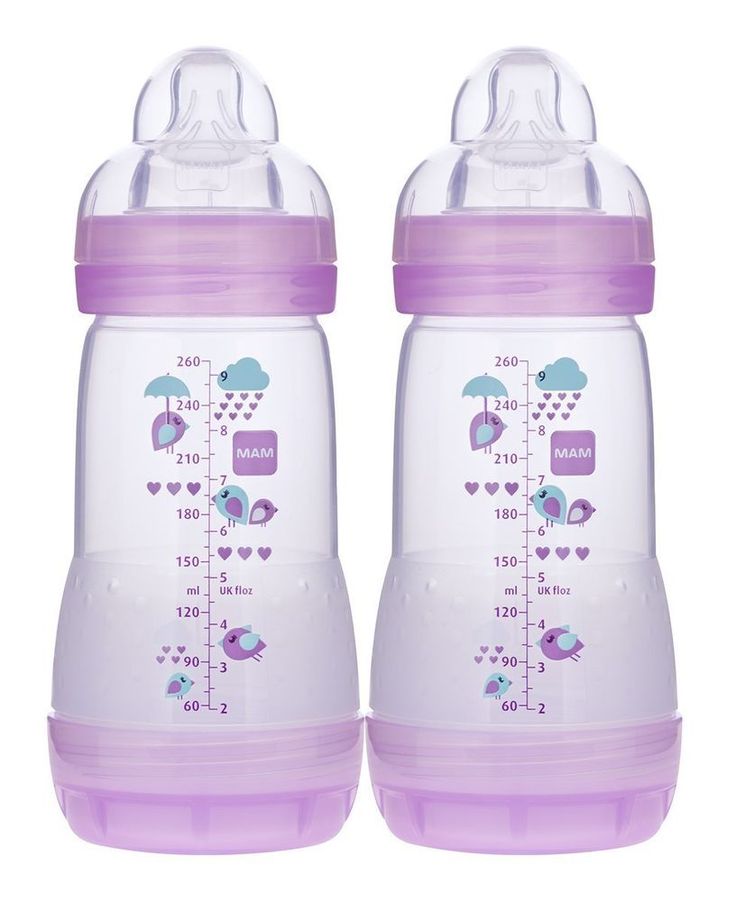
Large or small?Bottles generally come in two different sizes; 4 1/2 oz (120ml) or 9 oz (240ml).
As a newborn, the amount of milk your baby will drink will fit in the small bottles. However, as he grows he will need to be offered larger amounts, which means you may need to use large bottles by the time he's two months old (or sooner). Therefore, it may be more economical to use the large bottles to begin with, as the large bottles should last right up to the time he's ready to drink from a cup.
You will need at least two bottles to allow time for sterilization of feeding equipment. However, if you purchase enough bottles to cover a 24 hour period, you can prepare a whole day's supply in advance. To achieve this we recommend:
- 6 large and 2 small bottles for a newborn.
- 5 or 6 large bottles for a 3 month old.
- 4 or 5 large bottles for a 6 month old.
- 3 or 4 large bottles for a 9 month old.
You can choose from latex or silicone nipples. Silicone nipples are firmer and hold their shape longer. Latex nipples are softer and more flexible. Latex may not last as long as silicone, particularly if you are planning on using a sterilization method that uses any form of heat, such as boiling or steam sterilizing.
You have a choice in nipple shapes - traditional, orthodontic or flat-topped. Although a baby may prefer the shape of one over another, there's no evidence that proves one shape is better than another.
In choosing a nipple, you will be faced with all sorts of marketing ploys claiming a particular nipple "duplicates the shape of a human nipple". This is not true - a synthetic nipple could never duplicate a human nipple... it doesn't need to. Bottle feeding requires a very different sucking action to that required during breast feeding. (This is why many babies have trouble weaning from breast to bottle).
Nipple sizeChoosing a nipple of the right length for your baby is important. If the nipple is too large or long he could gag and vomit. If it's too short, it could be difficult for him to maintain suction and/or he may swallow air while feeding. A nipple that just reaches his soft palate is generally a good length
Nipple speedNipples are also available in different flow speeds. The number and/or size of the holes in the nipple will determine how fast your baby feeds. Younger babies need to feed much more slowly than older babies. (See How long should feeding take? for recommendations times for different ages).
Manufacturers normally provide a guide by labelling packaging and nipples as:
- Birth - 3 months
- 3 - 6 months
- Over 6 months
(Check on the rim of the nipple for this). However, following these guides doesn't guarantee the nipple speed is right for your individual baby.
How many?Finding just the right feeding nipple for your baby may require a little trial and error, so it may be wise to purchase the minimum number possible until you're confident with your choice. Once you have found a nipple that suits your baby, it's best to use the same type of nipple for every feed to avoid confusing him, so you may wish to purchase a nipple for each bottle.
Written by Rowena Bennett
© Copyright www.
 babycareadvice.com 2021. All rights reserved. Permission from author must be obtained to reproduce all or any part of this article. Previous
 Consultations
BOOK NOW
Bottle-feeding Consultation
From $500.00
5.0 / 5.0
62 reviews
Breastfeeding Consultation
From $500.00
5.0 / 5.0
16 reviews
Solids Feeding Consultation
From $500.00
5.0 / 5.0
2 reviews
Sleep Consultation
From $500.00
5.0 / 5.0
1 review
Feeding through a tube and gastrostomy
The article describes the types of gastrostomy, the care of these devices, as well as the rules for feeding a child with SMA through a gastrostomy.
Who needs a gastrostomy?
In palliative pediatrics, a gastrostomy may be placed for a variety of reasons. For example, if a child eats very little and cannot overpower all the necessary amount of food and water, because of this, he does not gain weight, does not grow, and is dehydrated. Or if one feeding takes a long time (for example, one and a half hours), and 5-6 such meals are needed per day. Or if the child does not swallow well and choke, there is a danger of throwing into the respiratory tract and the development of aspiration pneumonia. nine0005
If the above conditions are temporary, a nasogastric tube is placed. If it continues for more than 4-8 weeks without a clear improvement, the need and possibility of installing a gastrostomy should be discussed.
Why can't the probe stand for more than two months?
Prolonged use of a nasogastric tube can lead to various complications: bedsores, infections of the paranasal sinuses, eyes, ear from the side of the probe, reflux of stomach contents into the esophagus, oral cavity and lungs due to a partially open esophageal-gastric opening, aspiration pneumonia. In addition, a rigid probe can permanently injure the gastric mucosa and even cause erosive-ulcerative changes or gastric bleeding in the patient. nine0005
What is a gastrostomy
A gastrostomy is an opening in the abdominal cavity through which a special tube is inserted that connects the outer surface of the abdominal wall and the inner surface of the stomach. This tube is the device through which the child can receive food and water in the right amount and not experience any problems with nutrition and the presence of fluid in the body.
Types of gastrostomy
Photo by Pixabay.com
Balloon and bumper gastrostomy tubes available. All gastrostomies have a range of sizes and diameters, so each child can choose the most suitable one.
Gastrostomy balloon tubes vary in length. Some have a long "tail", others do not have it and are called "low profile". For feeding, a special "tail" is attached to the low-profile gastrostomy tube - an extension for attaching a syringe or feeding system. nine0005
The balloon gastrostomy has one important advantage. You can change it yourself at home without anesthesia. Therefore, if the disease progresses in a child, and parents are thinking about how the child will withstand anesthesia next time, then you need to think about a balloon tube.
The bumper gastrostomy also has its advantages. For example, it is cheaper, it can be delivered for one and a half to two years or more. If the child has hope for an improvement in his condition, then you can put a bumper. Or, on the contrary, there are children with severe scoliosis and difficulties in installing a balloon. They may be shown the installation of a bumper gastrostomy tube. nine0005
In any case, the type of gastrostomy tube should be chosen together with the doctor, taking into account the characteristics of the child.
Photo by Pixabay.com
Gastrostomy feeding
Proper gastrostomy feeding requires boiled water and body temperature food (special food, homogenized porridge or milk formula). The main requirement for food is a liquid consistency, the absence of fibers and lumps, so as not to clog the gastrostomy tube.
From the equipment - two syringes (for food and for water). All things must be clean, they must be prepared in advance and put on a diaper or towel.
If the child has a tail type gastrostomy tube, we feed through it. If it is low profile, you cannot feed directly through it, you must first attach the extension cord.
Next, you need to open the "tail" or extension and insert a syringe into it.
If it is a Janet syringe, then you insert it into the wide part of the gastrostomy tube or extension. nine0005
Photos from open sources
For medicines or liquids, a Luer type syringe is used, but the volume of the syringe must be at least 10 ml. Otherwise, the gastrostomy tube can be damaged by the increased pressure created by the smaller syringe. A Luer-type syringe is inserted into the narrow spout of a gastrostomy tube or extension. Do not confuse it with the exit point for refilling the cylinder.
Photos from open sources
If the food being filled into the syringe has a thick consistency, then a syringe with a wide nozzle of the Genet type and a wide opening on the gastrostomy tube is used. nine0005
Before you start feeding, you need to open the tube itself to check how much food is left in the stomach after the last feeding. And, if there is air, then let it out. If everything is done correctly, then the tube will contain either clear, yellowish, gastric juice, or nothing at all if the child has digested everything.
Next, rinse the gastrostomy tube itself (minimum 10 ml of water), draw up the mixture into the syringe and inject it very slowly into the gastrostomy tube. The minimum feeding time is 15-20 minutes, otherwise reflux, vomiting or belching may occur after eating. If necessary, the feeding time can be increased up to 40 minutes, an hour, etc. nine0005
For convenience, it is better to use conventional syringe pumps, infusion pumps, gravity systems for feeding and water. Or equipment that is specifically designed for feeding. This allows you to free up time and hands of those who are nursing, and the child can even walk in a stroller on the street.
Any gastrostomy insertion should be painless for the child and should not cause any discomfort.
After feeding, it is necessary to take a syringe with boiled water at body temperature (36-37 degrees) and rinse the gastrostomy tube from food. The volume of liquid depends on the age of the child and how he tolerates the volume of liquid. If he is less than a year old, then, as a rule, 10-20 ml are used, if the child is large and he tolerates a sufficient volume of liquid - 30-40 ml. nine0005
Flushing is needed to prevent clogging of the tube: food debris is removed from the inside of the tube and from the outside of the stomach. Rinsing should also be done slowly. After that, the gastrostomy tube is closed and wiped with a clean cloth.
Low profile gastrostomy tube feeding has its own challenges.
First fill the empty extension tube with water to prevent air from entering the stomach. To do this, attach the syringe, open the clamp on the extension, fill the extension with water, close the clamp, attach the extension to the gastrostomy tube, open the clamp and flush the tube, close the clamp, attach the syringe or feeding system, open the clamp. nine0005
Further feeding is carried out as described above.
After finishing feeding, flush the gastrostomy tube through the extension (see above), closing the clamp when disconnecting the feeding system, attaching the extension to the syringe, disconnecting the extension from the gastrostomy. The clamp closes to prevent the contents of the extension from spilling out. Close the gastrostomy tube.
Any gastrostomy insertion should be painless for the child and should not cause any discomfort. nine0030
What can not be done when feeding through a gastrostomy?
Do not use inhomogeneous (non-homogeneous) mixtures for feeding through the gastrostomy tube.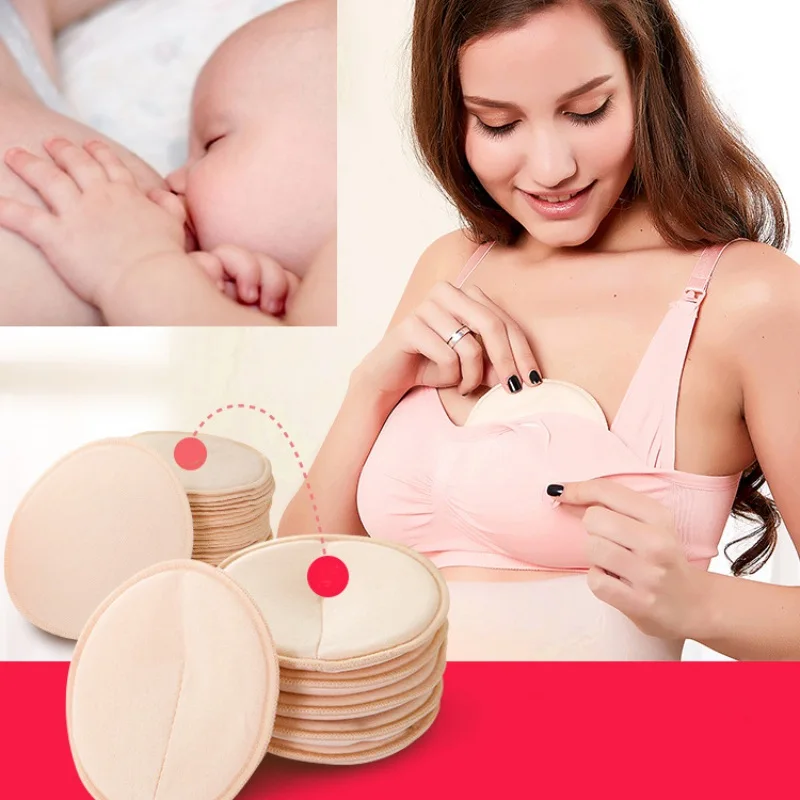 Sometimes parents try to grind something on a blender: meat, potatoes, vegetables, and feed the child, if it is an inhomogeneous mixture of an unnecessary consistency, then it can clog the tube, and you will have to change it to a new one. If there is a balloon tube, then replacing it is quite simple. If bumper, then you have to change under anesthesia in the hospital. nine0005
Do not fill the balloon with various liquids that contain salts, medicines, do not fill with air, because the balloon will deflate too quickly. You must use boiled or distilled (purified water, practically free of impurities and impurities. Obtained by distillation in special apparatus) water.
How to give medication through the gastrostomy?
If medicine is to be given to a child, it must be in liquid form. There are special preparations intended for use through a gastrostomy tube - solutions, syrups, suspensions. If there is no such form, you need to crush the tablet and inject it through the tube, you must be sure that this tablet-water mixture will not clog it. There are drugs that are contained in a capsule in the form of granules. And these granules can settle on the tube wall and clog it. Such drugs cannot be used and cannot be picked out of the tube. If a blockage occurs, you should try to rinse the tube with boiled water, but in no case pick out the granules and do not try to break through the cork with some sharp object. nine0005
The article was prepared on the basis of a video clip by a pediatrician, Ph.D. director for methodological work Natalya Nikolaevna Savva of the Children's Palliative Charitable Foundation “Feeding through a gastrostomy. Helping parents."
This material is for informational purposes only and cannot serve as advertising. Recommendations regarding the individual use of any drug or treatment should be obtained from your doctor. nine0004
Breastfeeding Products | products for breastfeeding |
There are many baby care products, accessories and clothes on the market. But which ones are really necessary for breastfeeding? More on this in our helpful list.
Share this information
If you are planning to breastfeed, the right kit will make it so much easier. However, it is not so easy to understand which accessories are really needed for this, and which ones can be dispensed with. To help you, we have divided the whole breastfeeding period into several stages, as your needs are likely to change over time. In addition, we asked breastfeeding moms for tips and tricks on the most useful nursing accessories. nine0005
Breastfeeding supplies for the early days
The first few days after your baby is born can be stressful, so it's best to prepare ahead of time. Here are some things you're sure to need, whether you're staying in the hospital for a few days or heading straight home:
- nursing bras, nursing night bras and nursing tops;
- nursing nightgowns or pajamas; nine0131 breastfeeding pillow;
- disposable or reusable bra pads;
- diapers;
- nipple remedy for dry skin and cracks;
- shapers* for flat or inverted nipples;
- book on breastfeeding;
- contacts of a lactation consultant, supervising doctor or hotline.
If you are having trouble breastfeeding, your lactation consultant or healthcare provider may recommend the following accessories:
- Nursing pads* if your baby cannot latch on or your nipples are sore. Do not use nursing pads for a long time. If you have any problems or pain, contact your lactation consultant or your healthcare provider.
- Breast pump** to relieve symptoms of breast swelling and/or stimulate milk production.
- Some mums like to use the cooling hydrogel pads*, which provide relief in the early days after delivery, especially when milk begins to flow. nine0132
Nursing Tips
“Pillows help a lot to support your back, legs and arms. I also need bra pads in case of milk leaks, a nursing bra and loose tops for quick access to the breasts (I converted regular quality bras into nursing bras that better support the breasts). And we also used a sling all the time,” advises Zaria, a mother of two from South Africa.
“My number one product was hydrogel pads. They were given to me in the first days of breastfeeding, so I never had sore or cracked nipples. I highly recommend hydrogel pads and buy them for anyone who plans to breastfeed,” shares her experience Camilla, a mother from Australia. nine0005
“You absolutely need someone to bring you something to drink. I kept forgetting to prepare myself a glass of water before feeding!” says Meg, mother of two from France.
Thermos to drink hot while sitting in bed. Delicious food and light snacks. My mother-in-law cooked me amazing beef stew and delicious pancakes (I had to eat well!). A pillow to put the baby on because I didn't have the strength to hold it. A comfortable chair, a nightlight for feeding at night and a pillow to sit on (I had stitches - not a pleasant feeling!) ”advises Felicia, a mother of two from the UK. nine0005
“A caring spouse, girlfriend or grandmother to bring tea and anything else you might need while you sit and feed. And also an e-book to read with one hand!” says Julie, a mom from Spain.
Initial Breastfeeding Supplies
You and your baby will likely get comfortable with breastfeeding in the first couple of weeks. Feeding will occur frequently and take a long time. Here are some tools that will make your life easier and make breastfeeding more comfortable as your milk production begins to stabilize:
- feeding chair;
- breastfeeding mobile application;
- disposable or reusable bra pads;
- breast milk collection pads*;
- Large stock of healthy snacks, drinks and ways to pass the time.
Sooner or later you will get bored with the comfort of home and want to start walking with your baby. For tips on breastfeeding outside the home, see our article on breastfeeding in public. nine0005
Tips for breastfeeding moms
“For me, the most useful things have been breastfeeding bras, disposable bra pads and large diapers to wipe up leaking milk, cover your baby or cover your breasts. With cracked nipples, I saved myself with lanolin cream, and loose tops and cardigans made the feeding process easier, ”says Tatiana, mother of three children from Switzerland.
“I find the most useful accessory to be a good quality U-shaped breastfeeding pillow. I also had a rocking chair, in which, at a certain inclination, it was very convenient for me to feed the child. To relax, I always listened to music,” says Violeta, a mother from Romania. nine0005
“A sports water bottle that doesn't leak even when open so you can put it next to you on a sofa or bed. And also an application to track feedings and remind me which breast I fed last time, ”says Francesca, a mother from the UK.
“Breast milk collection pads that are placed inside a bra to collect leaking milk. I had an overabundance of milk, that was the only way I was saved, ”says Lisa-Maria, a mother of two from Switzerland. nine0005
“I really liked the D-ring feeding cover to cover my baby and not distract him when feeding out. The slightly rocking chair turned out to be a great alternative to outrageously expensive rocking chairs. Reusable bra pads, in my opinion, perfectly absorb milk, and diapers, as it turns out, can be used in a thousand ways. I regret that I didn’t buy the Medela Easy Expression bustier, it would have been much easier to pump with it!” says Camilla, a mother from Australia. nine0005
Breastfeeding accessories for pumping
During breastfeeding, you may need a breast pump to express your milk. The right type of breast pump depends on the individual case and how much milk you want to get. If you plan to express milk regularly, you may also need:
- steam sterilizer, cold water sterilizer, or microwave sterilization bags;
- breast milk storage bags; nine0132
- bustier top for hands-free pumping;
- cool bag.
Breastfeeding Tips
“At first, when I felt like my breasts were about to explode, I used the Medela Electronic Breast Pump** just to get rid of excess milk without overstimulating my breasts.