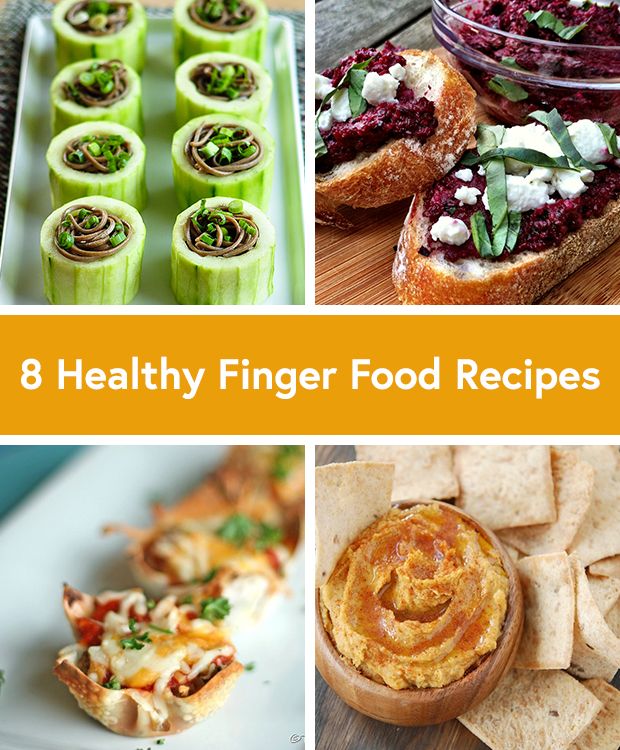
Baby finger food size
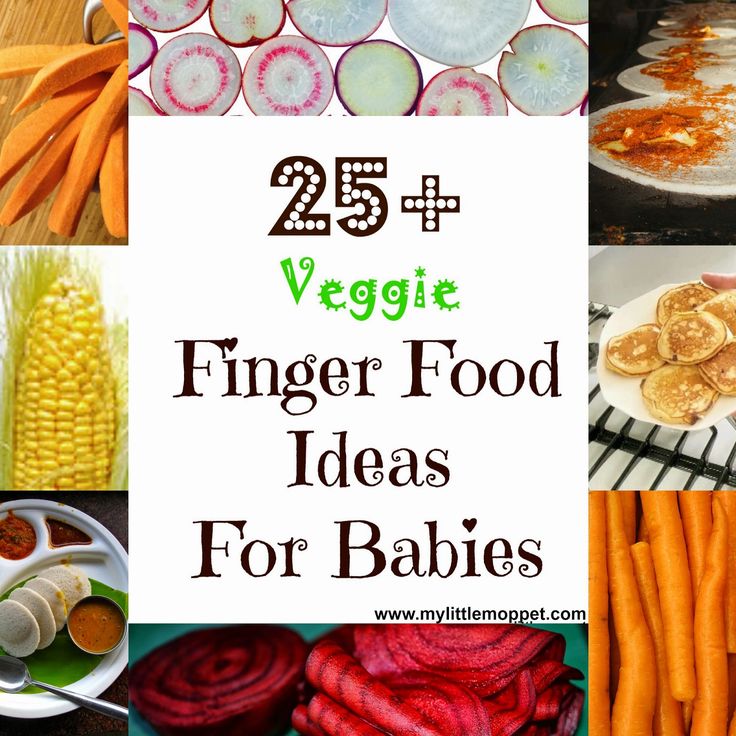
Finger Food For Babies - The Ultimate Guide ・Healthy Little Foodies
All Posts, by Date » Baby Friendly Recipes » Baby Led Weaning Recipes » Finger Food for Babies
Starting your baby on finger foods can be exciting but it can also be an overwhelming and frustrating experience. This Guide to Finger Food for Babies not only gives an extensive list of finger food ideas, but it also answers the questions many parents have when it comes to starting finger foods.
Of all the messages I receive, by far the most are about finger food for babies. Many parents are nervous about choking, unsure when to start and stuck for ideas.
This guide has been a long time coming and has been sitting in my drafts for some time now. Every time I receive an email, asking me about finger foods, I promise myself I will write this resource.
Finally, I have completed it! I do feel, however, that this will be a resource that I return to and continually update as I receive new questions and develop new recipes to add to the list.
When you start your baby on finger food really depends on you, your baby and what method of weaning you have chosen.
- Followers of Baby-led Weaning introduce finger food at 6 months.
- Those following the Traditional Weaning approach, usually introduce finger food around 7-8 months.
As with many aspects of parenting, every baby and parent is different and there is no right time to start finger food. However:-
- You shouldn’t start finger food before 6 months and your baby should be able to sit up independently and hold their head up.
- You shouldn’t wait too long to introduce finger food. By one year, your baby should be eating table food, (the food you are eating in age-appropriate textures (shredded, chopped, etc), and self-feeding with assistance as necessary.
- How many teeth (or lack of teeth) your baby has is not an indication of whether they can handle finger food or not.
 Gums are unbelievably strong.
- You want to offer food that is safe and easy for your baby to pick up and put to their mouth. This will vary depending on the age of your baby.
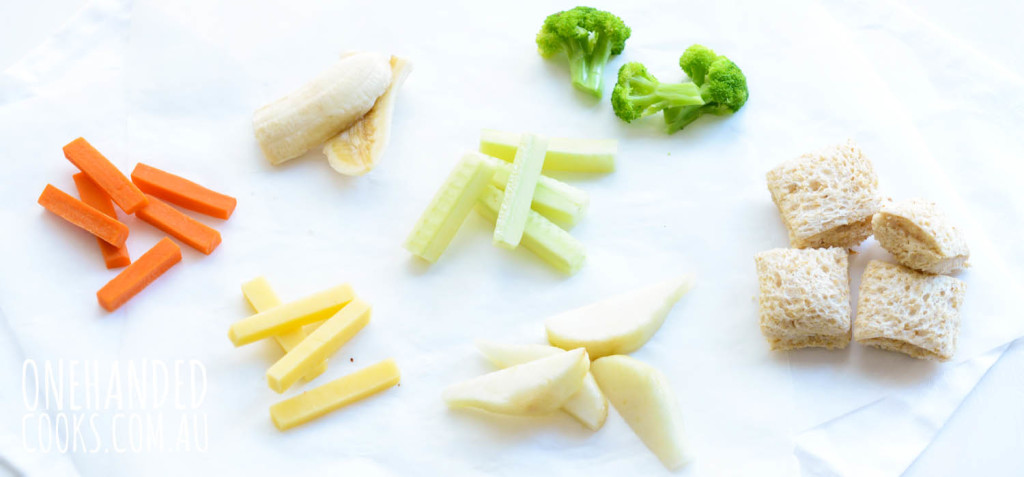
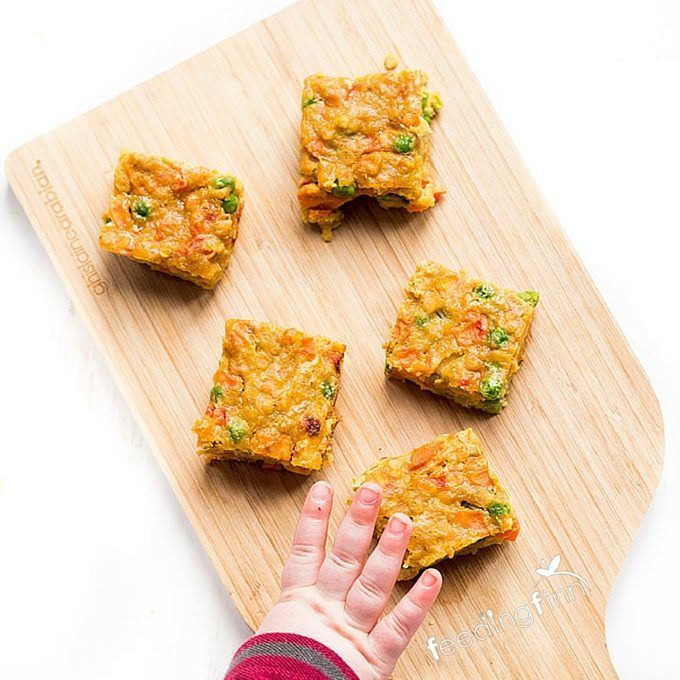
- Younger babies, 6-8 months, generally use their whole hand to pick up food, this means they have to close their hand around a piece of food to hold it. The food should be bigger than the palm of their hand as they can’t open their fist to get to it. Long strips of food work best at this age, around 5cm (2 inches). Offering food that is too small can cause frustration.
- As babies get older, around 8-9 months, they are able to pick up smaller pieces of food, they have usually developed their pincer grasp at this age and use their thumb and forefinger to feed themselves.
- The texture is also something you need to think about, if the food is too soft it will turn to mush when handled.
 If too hard they won’t be able to gnaw on it and could be a choking hazard. You can make food easier to grip by leaving the skin on or by using crinkle cutters to add texture (see below picture).
 - Don’t be afraid of spices and herbs, they are a fantastic way to add flavour and it is good to get your babies used to different flavours from a young age.
- Try different cooking methods, roasting, steaming, sautéing and boiling all can change the texture and way a food tastes. If your baby doesn’t like something steamed, don’t be disheartened, they may love it roasted!
Many parents worry and wonder if their children are eating enough. With purees, it is easy to see what has been eaten but it is a little more blurry when it comes to finger foods and you find pieces of food on the floor or down the chair.
Let your baby decide how much they want to eat. They will naturally manage their own intake and will stop eating when full. Allow them to feed themselves at their own pace.
Offering a well-balanced diet of finger foods will help ensure that your baby is eating the right amount of the right nutritious foods.
Safety Precautions when Offering Finger Food to Babies- Make sure your baby is sitting upright to eat and not slumping or lying about.
- Always ensure eating is done sitting. If you have a mobile baby make sure they are not eating on the run!
- Don’t let anyone except your baby put food into their mouth (watch out for young siblings trying to feed their baby brother/sister.)
- Never leave your baby alone with food, they should always be supervised.
- Don’t offer food that is an obvious choking risk (see list below)
One of the main worries parents have about starting their baby on finger food is choking. Often worries about choking are based on seeing babies gagging on food. Although choking and gagging are related they are not the same thing.
It is very common for babies to gag on food. Gagging is triggered when food touches the sensitive area on the tongue or roof of the mouth. The gag reflex is very reactive in babies as the sensitive point is much further forward in the mouth.
When a baby gags, food that isn’t ready to be swallowed is pushed forward in a retching movement. Although it can be unsettling to watch, babies generally don’t seem too bothered by it.
Choking happens when the airway is partially or fully blocked. When something partially blocks a baby’s airway they will start to cough to clear it. If a baby’s airway is fully blocked and they are truly choking they will be silent as no air can get past the blockage.
This is why it is crucial that you never leave your baby alone with food.
Foods To Avoid / Take Care With- Whole nuts or large pieces of nuts – Avoid, they can get lodged in a babies windpipe.
- Popcorn -Avoid, unpopped and half-popped kernels can get caught in your child’s throat and block their airway.
- Honey – Avoid, honey should never be given to a baby under 12 months. Honey may contain Clostridium botulinum spores which can lead to botulism poisoning.
- Whole fruits with stones (cherries and larger stone fruits) – Take Care, stones should be removed and fruit should be ripe.
- Round Fruits – Take Care, round fruits such as grapes and cherry tomatoes should be cut in half lengthways or quartered.
- Fish – Take care to properly debone. Avoid high mercury fish such as swordfish & king mackerel.
- Meat – Take care to remove small bones and gristle.
- Processed foods – Take care and avoid where possible. Processed food often contain sodium levels too high for babies and can be high in sugar.
- Salt – Take Care and avoid where possible, babies up to 1 yr should have no more 1g of salt 0.
 4g sodium per day. Do not add salt to foods.
 - Sugar – Take Care and avoid where possible, sugar provides empty calories with no nutrients, it also damages teeth.
- “Sticky” Foods – Avoid gummy candies/jellies etc as they can get lodged in your babies throat. Be careful with nut butter as they can be difficult for babies to swallow (don’t offer spoons of it, always spread it thinly on bread etc.)
- Hard Foods – Avoid hard foods such as raw carrots and apples as chucks can break off and are a choking hazard. Soften them by cooking.
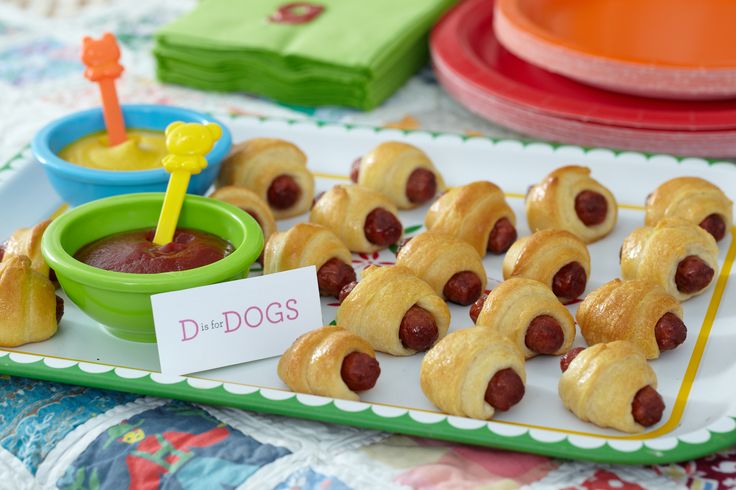
Now onto some ideas! This list is mainly based on what my kids ate and loved. There will obviously be hundreds of other finger food for babies ideas out there but this is a pretty good list to get you started (with over 90 ideas)
The best way to provide a good range of nutrients for your baby is to offer a varied diet. Having a varied diet will also allow your baby to experience different tastes and textures.
Always cut up the food to the size you and your baby are comfortable and have experience with.
Finger Food for Babies That Require No Cooking / Little PrepFast, healthy food with no cooking required!
- Vegetables – Most vegetables need some preparation as they are too hard to offer babies raw and can, therefore, be a choking hazard.
- Cucumber sticks – Served chilled and cut into fingers (great for teething) or diced.
- Fruit – Most fruit is perfect for babies and requires no cooking. Make sure the fruit is ripe as unripe fruit (like nectarines, pears etc) are hard and can be a choking hazard.
- Avocado – mash and spread it, cube or cut into strips.
- Banana – Thin slices can be slippery and difficult to handle. Break into big chunks or leave some peel on as a “handle”.
- Berries (blueberries, raspberries, strawberries, blackberries etc) – All great finger foods, squish/half blueberries if they are large.
- Cherry tomatoes – Cut in half lengthways or into quarters.
- Grapes – Cut in half lengthways or cut into quarters.
- Kiwi – Diced, cut into fingers
- Mango – Diced/cut into fingers
- Melon (all varieties) – Remove seeds and dice/cut into fingers
- Oranges / Clementines / Mandarins – Remove any seeds and cut into small pieces.
- Papaya/ Paw Paw – Ripe, diced or cut into fingers
- Pineapple – Diced or cut into rings (the ring makes a great handle!)
- Pears – Ripe, diced or cut into fingers.
- Stone Fruit (apricots, cherries, peaches, nectarines, plums etc) – Ripe, stone removed and diced/cut into strips.
- Other –
- Cheddar Cheese – Grated or diced.
 (Be careful of the amount you offer as high in sodium)
 - Tinned Beans – Washed thoroughly, to remove as much salt possible, squish/or cut lengthways.
- Tinned Tuna – Flaked. (Check the packaging for sodium levels and other added ingredients.)
- Cheddar Cheese – Grated or diced.
This section is a list of one ingredient foods that need some simple cooking before serving. Experiment with the cooking methods, try cooking with different fats (olive oil/butter) and with different herbs /spices.
- Vegetables – Most vegetables are perfect for babies if cooked and served in a safe way.
- Asparagus – Steam/Roast and cut into bite-size pieces. I did baby-led weaning with my second child and gave them to him as spears.
- Beetroot – Roast/steam and cut into appropriately sized pieces.
 (Can be messy!)
 - Broad Beans – Boil and remove skin,
- Brocolli – Boil/Steam/Roast. Serve in small pieces or florets.
- Carrot – Boils/Steam/Roast. Cut into fries or dice
- Cauliflower – Boil/Steam/Roast. Serve in small pieces or florets
- Capsicum (Bell Pepper) –Roast in strips and serve in strips or cut into appropriately sized pieces.
- Egg Plant (Aubergine) – Roast/Sautee chunks.
- Green Beans –Steam/sautee and cut into small bite-size pieces or strips.
- Mushrooms – Sautee and serve in small bite size pieces or strips.
- Parsnip – This was my youngest’s absolute favourite as a baby. Roast and serve in strips / bite-size pieces.
- Peas – Steam/Boil/Sautee.
- Potato – Steam/Boil/Roast.
 Cut into appropriately sized pieces.
 - Pumpkin – Steam/Boil/Roast. Cut into appropriately sized pieces.
- Squash – Steam/Boil/Roast. Cut into appropriately sized pieces.
- Sweetcorn – Boil/ Steam/Grill. Serve on the cob in small sections (see above picture) or individual kernels.
- Sweet Potato – Boil/Steam/Roast. Serve as fries, wedges or small bite-size pieces.
- Turnip – Boil/Steam/Roast. Cut into appropriately sized pieces.
- Zucchini (Courgette) – Steam/Sautee/Roast. Cut into fingers / bite-size pieces.
- Fruit – Most fruit is safe to serve raw but cook harder fruits to soften them.
- Apple – Baked or sauteed until soft. Cut into appropriately sized pieces.
- Pears – Baked or sauteed like above apple recipe.
 Cut into appropriately sized pieces.
 - Plantain – Grilled/roasted. Cut into appropriately sized pieces
- Other – Other examples that require basic cooking include
- Chicken – All cuts, baked/pan-fried/poached, shredded or diced into small pieces. Thigh meat is less dry and was favoured more by my kids when they were younger.
- Couscous – Boil, clump and squish into a ball.
- Eggs – scrambled, hard-boiled, omelet. Cut into appropriately sized pieces.
- Fish – (white fish, salmon) Baked/pan-fried/microwaved etc, flaked being careful to check and remove bones
- Ground Meat (beef, chicken, pork, lamb or turkey) Sauteed until fully cooked, add in herbs and spices for extra flavour.
- Israeli Couscous – Boil and serve. Larger than regular couscous, my kids love it!
- Lentils – Boil, drain and serve.
- Pasta – Boil, cook and serve plain or with a sauce.
- Prawns / Shrimp – Peeled and deveined and fully cooked. Cut into appropriately sized pieces.
- Rice – Boil, allow to cool slightly then clump and roll into balls
- Toast – Cut into fingers or finely chopped. To with a range of low salt/sugar spreads (hummus, carrot hummus peanut butter, mashed avocado etc)
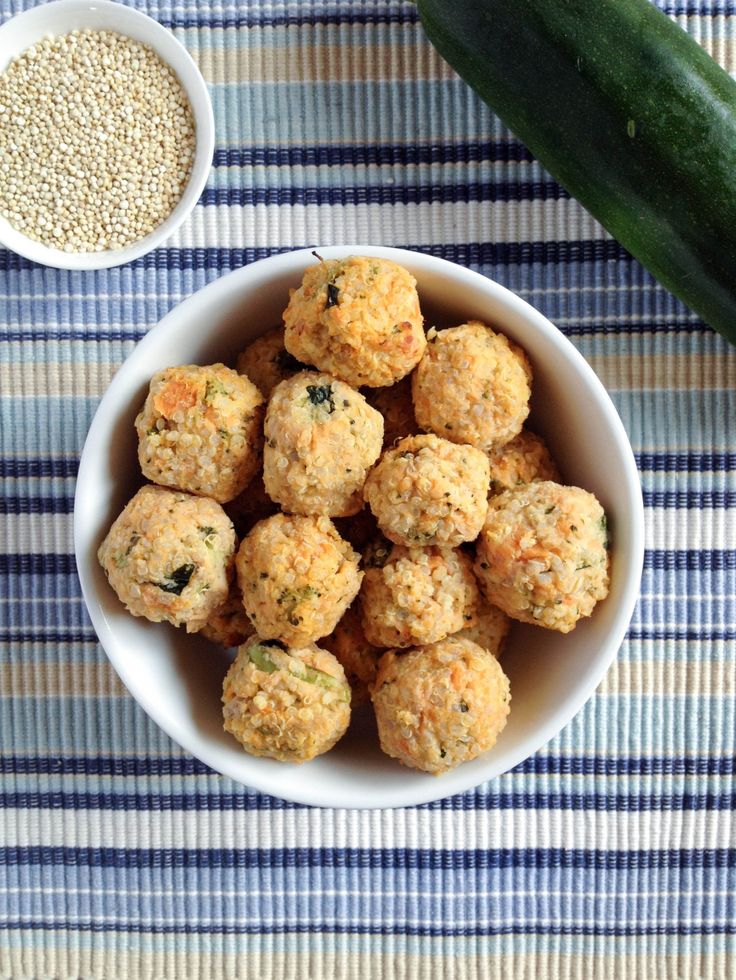
- Quinoa – Boil. I find quinoa harder to clump into balls but adding some grated cheese can help it stick together better.
These are great recipes that both my boys loved as babies (and still do now!). Cut them up into the size your baby has experience with.
I receive a lot of e-mails from parents who have babies with allergies. Next to each recipe, I have detailed if it is Dairy Free (DF), Egg Free (EF), Gluten Free (GF) and Nut Free (NF).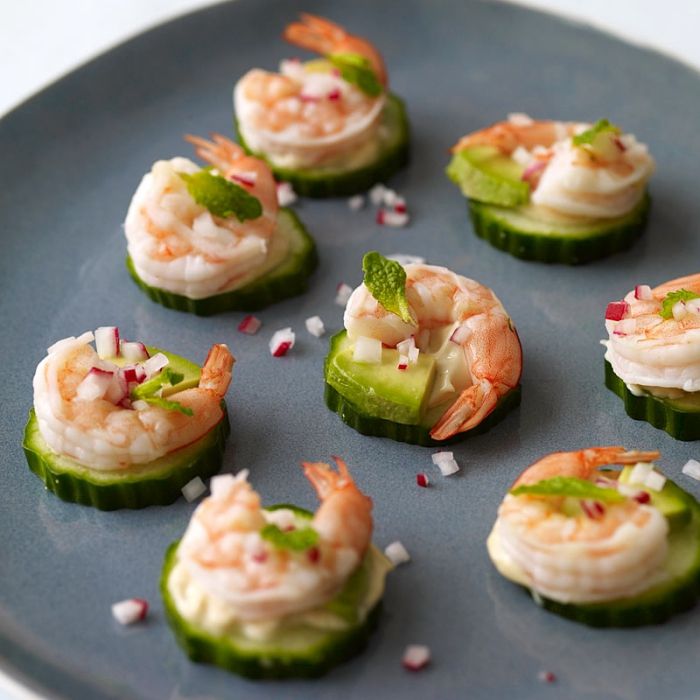
- Savoury Pancakes/ Waffles / Muffins – Easy for babies to pick up and great for packing into lunchboxes for out and about.
- Pea Pancakes (NF),
- Lentil Pancakes (GF, EF, DF, NF),
- Rainbow Fritters (GF, DF, NF)
- Sweetcorn Quinoa Fritters (GF, DF, NF)
- Carrot and Parsnip Fritters (DF, NF)
- Zucchini Bites (NF)
- Sweet Potato Pizza Bases (DF, NF)
- Savoury Muffins (NF)
- Savoury Waffles (NF)
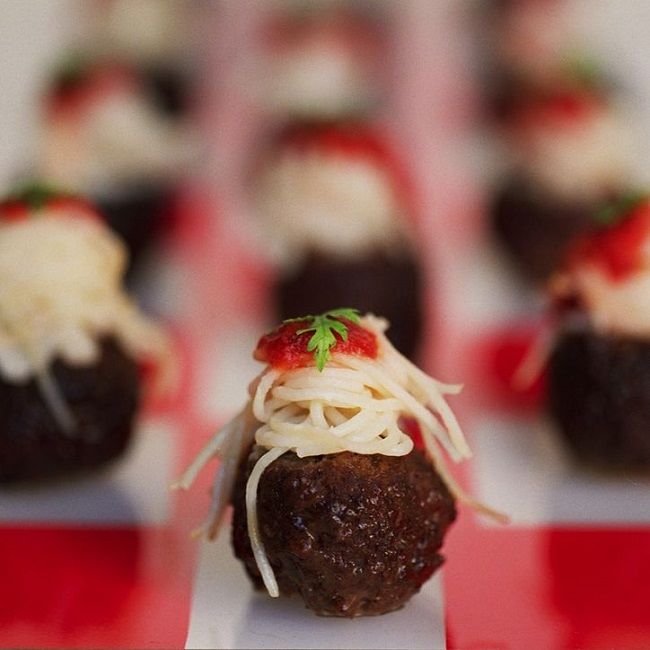
- Balls – Made with different grains or meat, easy to pick up
- Sweet and Sour Quinoa Balls (GF, NF, DF)
- Tomato and Cheese Quinoa Balls (GF, NF),
- Baked Risotto Balls (DF, NF),
- Ginger Lemongrass Chicken Meatballs (EF, NF)
- Fruity Chicken Balls (EF, NF, optional DF, GF)
- Croquettes / Tots / Bakes
- Cauliflower Tots (NF),
- Sweet Potato, Lentil and Carrot Croquettes (NF)
- Bean and Veggie Nuggets (NF)
- Veggie Chickpea Sticks (GF, EF, NF)
- Fish Fingers (DF, NF)
- Curried Lentil Bake (GF, DF, NF),
- Mexican Lentil Bake (GF, NF)
- Eggs – Delicious, easy to pick up egg recipes.

- Egg Rolls (GF, NF)
- Mini Crustless Quiches (GF,NF)
- Tuna Frittata (NF, GF)
- Oats – These recipes are great for breakfast or as a sweet snack and they can all be frozen.
- Porridge Fingers (DF, EF, NF)
- Mango and Coconut Breakfast Bars (DF, NF),
- Fruity Breakfast Bites (NF),
- Raspberry Banana Oat Cookies (EF, NF, DF)
- Plum and Almond Baked Oats (DF),
- Pancakes – Great for little hands, why not try these variations.
- Banana Blueberry Fritters (DF, EF, GF, NF),
- Green Smoothie Pancakes (NF),
- Banana Pancakes (DF, GF, NF),
- Sweet Potato Pancakes (DF, GF, NF)
- Muffins and Cookies – These recipes are sweetened only with fruit, making them great for babies.
- Mini Blender Muffins (NF),
- Fruity Chickpea Cookies (EF, DF, NF)
- Carrot Apple Muffins
- Sweet Potato Truffles (EF, DF, GF)
- Frozen Recipies – Allow your baby to experience different textures, flavours, and temperatures. Warning – will get messy!
- Hidden Veg Popscicles (GF, EF, NF)
- Frozen Yoghurt Bark (GF, EF, NF)
There are so many snacks and finger food for babies and toddlers available on the market. I rarely ever bought them as I never saw the need to.
Always look at the back of the packaging, at the ingredient list. Marketers are very clever at convincing us that something is healthy when it is not.
Fresh ripe fruit is perfect for out and about and many of the above recipes can be frozen and are easy to take out and about.
Do you still have questions? Leave any queries you have below and hopefully, they can be answered.
Disclaimer: This information is intended for general use only. It is not medical advice and is not intended to replace the personalised care and advice given to you by your health professional. I am not a health professional and I do not know your baby. You should always discuss any concerns or questions about the health and well being of your baby, including Baby-Led Weaning and starting solids, with a healthcare professional. Please refer to my full disclaimer for more info.
Meet Amy
Amy Whiteford runs the blog Healthy Little Foodies. She is a mum to two, has a BSc (Hons) Food Science, PGDE Primary Education and a Certificate in Childhood Nutrition. She uses her experience and knowledge to create healthy and delicious recipes for kids. Explore the site for creative ideas, tips, and inspiration! Read more
How to raise a Healthy Little Foodie
Receive family friendly recipes, delivered weekly to your inbox, for FREE! And receive this FREE ebook - "How to Raise a Healthy Little Foodie"
50+ Best Finger Foods for Babies (and Toddlers)
Introducing finger foods to your baby can be exciting and overwhelming! Here is everything you need to know about serving finger foods so that they are safe and delicious!
Jump to:- Baby Finger Foods - FAQ
- Choking vs.
 Gagging
 - How to Serve Finger Foods to Baby
- Finger Foods for 6-8 Month Old Baby
- Finger Foods for 9-11 Month Old
- Finger Foods for 12+ Months
- Best First Finger Foods for Baby
- Real-Life Baby Food Ideas
Baby Finger Foods - FAQ
When is the best time to introduce finger foods to baby?
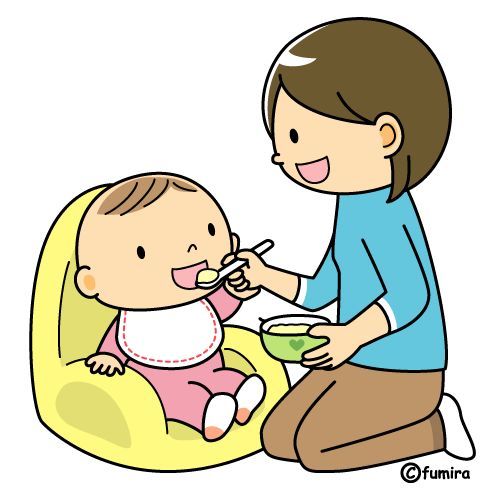
If you've decided to start solid foods by taking the baby led weaning approach, you will be introducing big, soft-cooked finger foods from the start.
If you are taking the traditional weaning approach of starting with purees, you will most likely start offering finger foods around 8-9 months of age when you and your baby feel ready to move forward with texture.
Regardless of which method you choose, the goal is to offer finger foods by 9 months at the latest.
Here is an in-depth post on purees vs. baby led weaning.
When can babies eat textured foods?
As soon as they are ready for solids!
I talk a lot about the importance of introducing a wide variety of flavors AND textures from early on, and that’s because research shows babies are much more willing and open to trying new foods than children between ages 2-8 as food neophobia has been shown to set in during this time (1).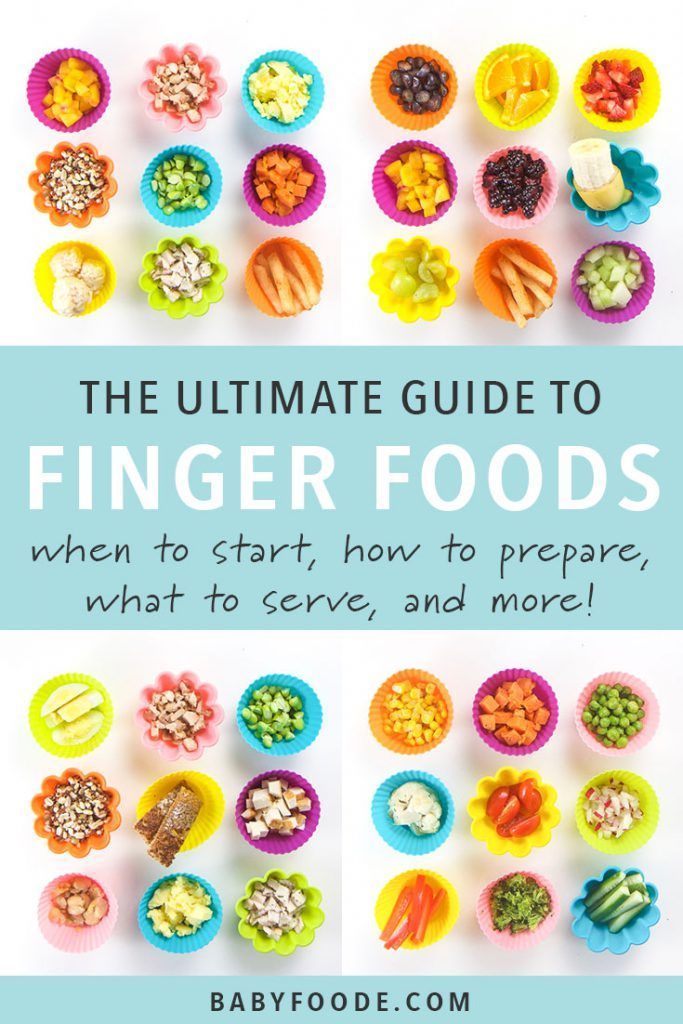
Familiarity is a BIG part of taste and acceptance, and the earlier the exposure to all the different flavors and textures, the greater their acceptance.
If your baby stays on pureed textures for too long, it may be much more difficult to get them to accept different textures later.
In other words, early exposure has a significant impact in shaping food preferences and eating habits that are tracked into childhood and beyond (2).
If you're feeling anxious about offering textured foods from the start and want to take the traditional weaning route where babies are spoon-fed purees or the combination approach (you do you!), here's how to safely move forward from purees to textured foods.
Whatever method you choose, the end goal is to introduce a wide variety of flavors and textures before the age of 1.
Can babies eat finger foods without teeth?
While you might think babies can’t eat foods that aren’t pureed until they have teeth, the reality is they don’t need teeth to enjoy table/finger foods.
I’m not sure if you’re aware of this but we actually chew with our molars, not the front teeth. And if you wait until the molars come in (normally around 12-18 months) to move on to table foods, you would totally miss that critical “window of opportunity” for developing food preferences.
Not to mention, failure to move from purees to textured foods by 9 months may lead to increased risk for feeding difficulties later in life (3).
So how are they able to handle table foods without the molars? With their strong gums! I was totally blown away when I saw them in action!
And it is our responsibility as parents to make sure that the foods are appropriately cooked and served, and that’s what I want to share with you!
Do keep in mind, I’m sharing general timelines & guidelines here. What’s most important is to follow your baby’s lead as every child is so different and they develop at their own pace.
Is your baby 6 months old and up?
Learn all the secrets to starting solids safely while optimizing nutrition!
I NEED IT NOW!
Choking vs. Gagging
Research actually shows that there’s no greater risk of choking with baby led weaning in comparison to the traditional feeding practices (4).
Most important - avoid the choking hazards
for 6-12 months (from the CDC)Keep in mind, choking is different from gagging, which is very common and to be expected. Gagging is a safety mechanism to prevent choking and contrary to how it appears, it doesn’t really bother the babies.
Sit on your hands, remain calm, and let them work through it. Do NOT try to fish out the food from their mouth. Here are some additional tips on how to get through the first month of baby led weaning.
How to Serve Finger Foods to Baby
how to serve zucchini to babiesIn this section, you will learn how to cut and cook the finger foods so they are the appropriate shape and texture according to age.
Finger Foods for 6-8 Month Old Baby
Food shapeCut so that the food is about the size of 1-2 adult fingers pressed together widthwise and the length of an adult pinky finger (or longer).
Contrary to what you might think, serving big pieces of food will actually minimize choking risk and make it easier for your baby to grab with their fist (referred to as the palmar grasp). Initially, everything will likely get demolished, but with practice, your baby will learn to have better control of hand force.
TextureFoods should be firm enough to grasp but soft enough to easily smoosh between two fingers or mash with the tongue on the roof of the mouth.
Roll slippery foods in ground nuts, seeds, flour, etc to make it easier for your baby to pick up. Crinkle cutters can also be very helpful (this tool is great!).
Finger Foods for 9-11 Month Old
By this age, babies are learning to move food side to side within their mouths as well as forward and backward.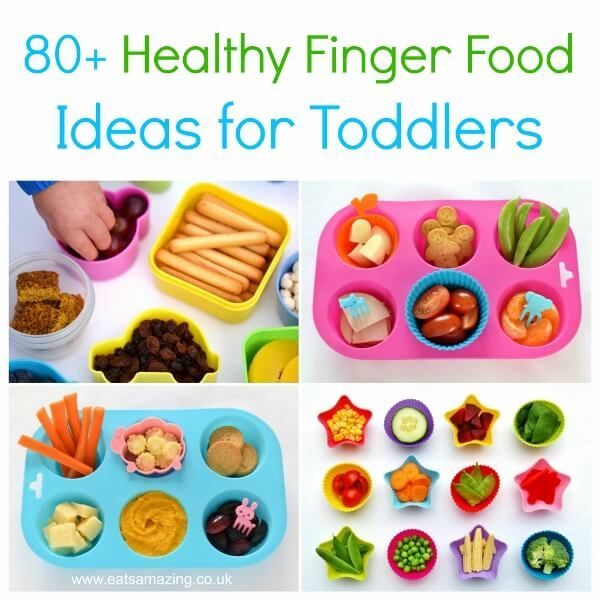 They are also starting to learn the concept of biting (hopefully anyways).
Your baby is mastering their pincer grasp and able to pick up small pieces of food between the thumb and index finger. Therefore, you can begin to cut food into small bite-sized pieces.
But do continue offering larger pieces of food so they can learn to take bites.
TextureYou can start serving slightly firmer foods by shortening the cooking time for veggies, roasting more often rather than just steaming, etc. Depending on the number of teeth your baby has, chewing ability, and your comfort level, you can start offering finely grated raw fruits and veggies.
If your baby constantly turns into a competitive food eater (like mine did), here are some things you can do to help slow them down:
- Help set pace by placing small amounts of food in front of her at a time either directly on the table/tray or a plate. I personally just took the plate away every time his mouth was full and encouraged him to finish chewing before offering his plate again.
 It was tedious but worked well for us.
 - Offer utensils (here are our favorites). Using it requires fine motor skills which will help slow down pace.
You may also be interested in: healthy baby snacks
Finger Foods for 12+ Months
ShapeAgain, try to encourage your child to learn to take bites by not cutting up the food as much. As always, role modeling can do wonders in helping them to learn this new skill.
If your child is continuing to shove food, learn how to teach them to take bites.
TextureYou've done the hard work! At this point your child should be able to handle almost all textures and eating like the rest of the family. Can you start offering crunchy vegetables? Yes! Here's a guide on how to introduce raw vegetables to your little one in a safe and fun way.
Is your toddler becoming picky?
Arm yourself with these strategies that will transform your mealtimes!
YES, PLEASE!
Best First Finger Foods for Baby
Now that you know how to serve the food in an age-appropriate way, here's a master list of specific foods to enjoy with your baby!
Be sure to click on the links for more details on each of the specific foods.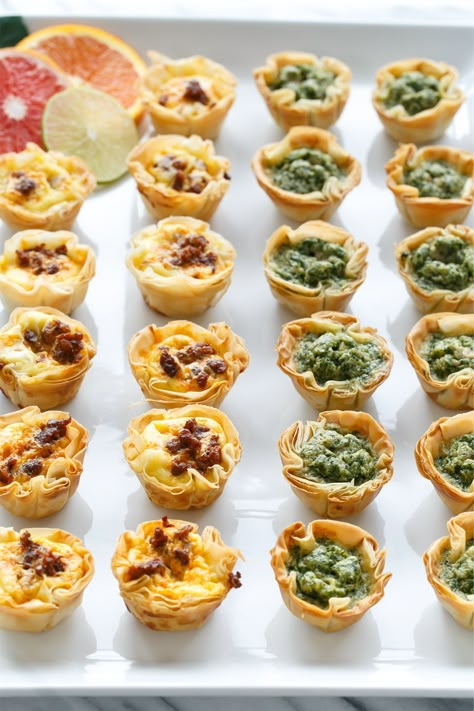
Iron-rich Finger Foods for Baby
Iron is arguably THE most important nutrient for babies and it is one of the primary reasons that we start solids when we do. Be sure to incorporate one of these foods at every meal to help meet their high needs.
- Beef
- Beans
- Chicken
- Eggs
- Lentils
- Salmon
- Sardines
- Shrimp
- Tofu
Related: Top Iron-Rich Foods for Babies and Toddlers
Soft Finger Foods for Baby - Vegetables
- Asparagus
- Beets
- Bell peppers
- Broccoli
- Butternut Squash
- Carrots
- Cauliflower
- Parsnips
- Sweet potato - these sweet potato rounds are so fun!
- Zucchini
And as you see in the image above, do not be afraid to season your baby's food from the start!
Also check out: Vegetables for babies (with 30+ recipes)
Best Baby Finger Foods - Fruits
- Avocado - sliced into wedges or bite-sized pieces
- Apples - serve similar to pears
- Ripe banana - try soaking in peanut butter.
 Be sure to thin it out as globs of peanut butter or any nut butter is a choking hazard
 - Blueberries - smashed
- Grapes - hold off until 9 months and be sure to serve quartered.
- Kiwi - Halves, quarters, bite-sized
- Mangoes
- Melons - large thin rectangles
- Pears
- Peaches
- Strawberries
First foods - Fruits vs. Vegetables
Whole Grains for Babies
Here are some quick and easy ways to incorporate more whole grains into your baby's diet. You will find that a lot of these recipes also contain protein, iron, fruits, and vegetables!
Homemade Baby Oatmeal
Learn how to cook the perfect oatmeal for baby. It's easy, fast, and loaded with vegetables! Serve as is or shape into fingers or balls, baby led weaning style!
Get the recipe
Savory French toast
This savory baby vegetable French toast or eggy bread is an EASY and fun way to use up leftovers.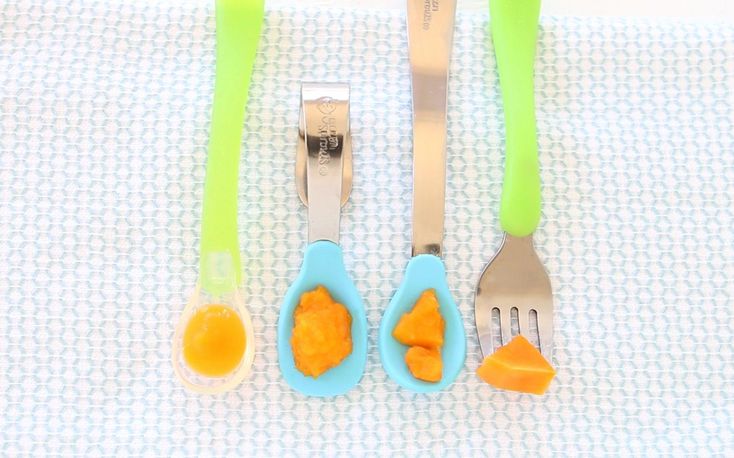 Suitable for babies 6 months and up!
Get the recipe
Baby Banana Pancakes
Made in a blender with simple ingredients, these banana pancakes for babies and toddlers make for a delicious and filling snack or meal. Fluffy and moist, if you are looking for a baby led weaning pancakes recipe, this is it!
Get the recipe
Spinach Pancakes
These green baby pancakes are super easy to make, healthy, and the perfect finger food for baby led weaning.
Get the recipe
Strawberry banana pancakes
Made with simple, healthy ingredients, these strawberry banana pancakes are light, fluffy, and delicious! They contain no added sugar and are a delicious breakfast for the whole family!
Get the recipe
Healthy Blueberry Muffins for Babies
These blueberry baby muffins are sweetened with fruits only and loaded with nutrition! They're soft and moist, making them perfect for babies
Get the recipe
Healthy Beet Muffins for Babies
Made entirely with healthy ingredients, like beans, peanut butter, and no added sugar, these blender muffins can be enjoyed as breakfast, snack, or added to lunchboxes!
Get the recipe
Vegetable Waffles with Peanut Butter
EASY to make, healthy peanut butter vegetable waffles for babies and kids! A great way to enjoy more protein, fat, and veggies for breakfast.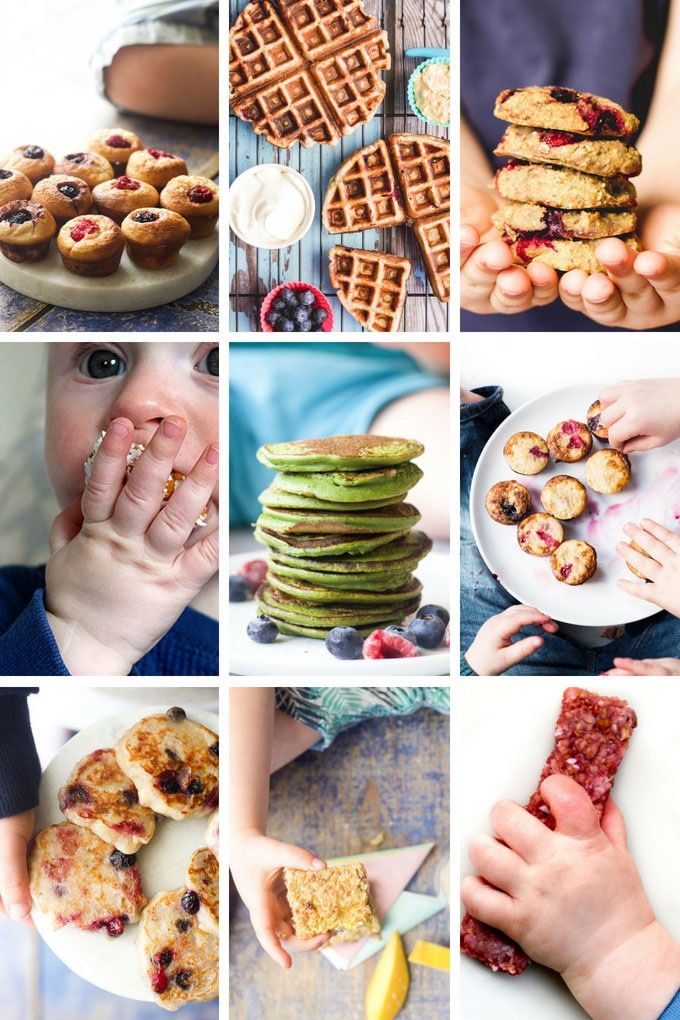
Get the recipe
Savory Baked Oatmeal with Vegetables
This savory baked oatmeal is so easy to make and a great way to enjoy vegetables for breakfast! Perfect for baby led weaning and lunchboxes.
Get the recipe
Healthy Baked Strawberry Oatmeal
Super easy to make, this healthy baked oatmeal recipe with juicy strawberries and bananas is the perfect make ahead breakfast or snack for the whole family!
Get the recipe
Iron-rich baby pasta
A baby pasta recipe that is loaded with iron and vegetables!
Get the recipe
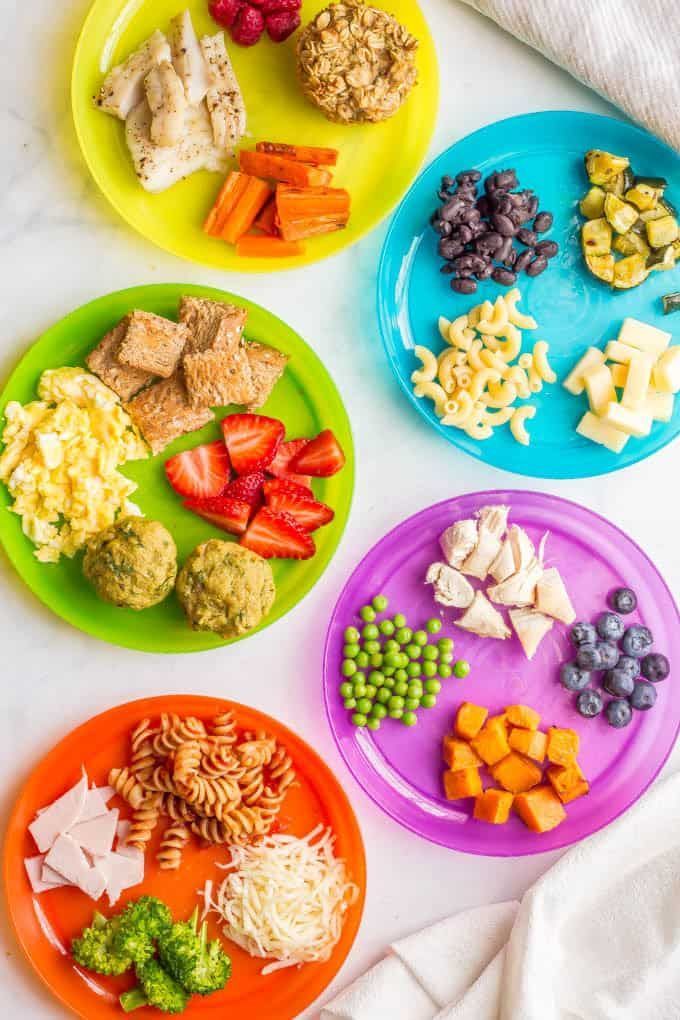
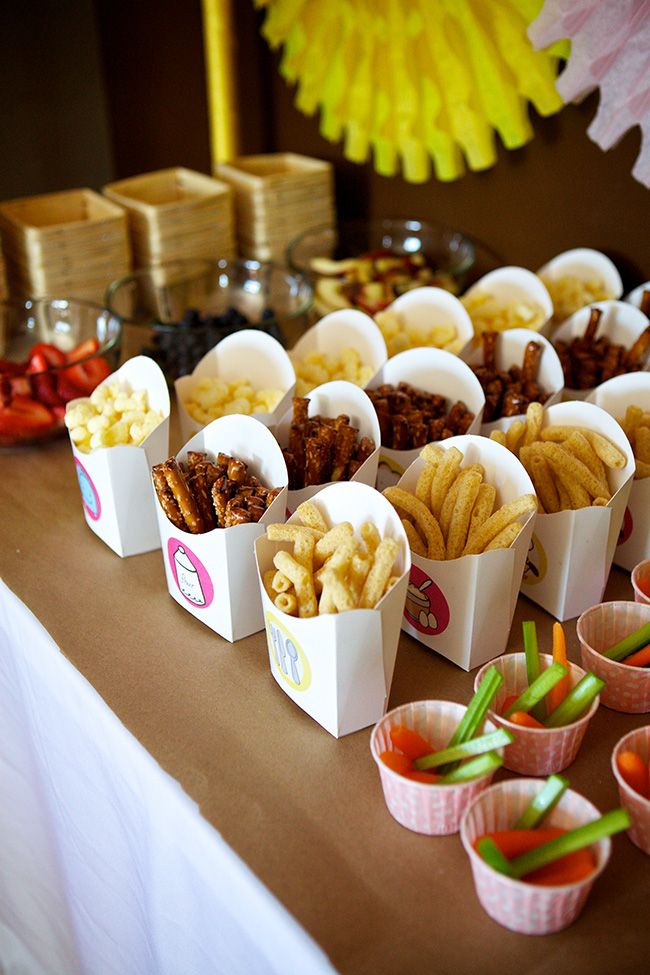
Real-Life Baby Food Ideas
at 7.5- monthsat 10-11 monthsAll the images you see in this article are actual meals I served to my babies.
If you are feeling confused and overwhelmed by what foods to serve, how to prepare foods so they are safe, how to introduce allergens and a wide variety of foods, how to adapt family meals so you don't spend hours slaving away in the kitchen making two separate meals every. single.day, and on and on...
My 3 month program will save you time, energy, money, and sanity!
I’ve done all the hard work for you so all you need to do is follow the daily and weekly game plan and watch the cooking demos for EVERY.SINGLE.MEAL you will make for 3 months. By doing so you’ll be able to serve all the meals you see here plus 130+ effortlessly!
I’ve also heard from so many parents that an unexpected benefit to following this program for their baby was that it encouraged their older fussy eater(s) to start trying new foods and expanding their food choices.
Do you want to minimize picky eating and set a solid foundation for a lifetime of healthy eating habits?
Check out this 3 month mastering self-feeding program! It’s the closest thing to me being in your kitchen
And be sure to follow me on Instagram for more helpful videos!
How to determine the size of gloves - Lifehacker
October 15 Likbez Tips
You will find simple instructions and tips for choosing the perfect gloves.
How to determine the size of gloves
Measure your hand
The size of the right hand and the left hand may vary slightly. Measure the one you usually write with. To do this, wrap the centimeter tape around the palm of your hand at its widest point, along the bones of your fingers, without grabbing the big one. The tape must fit snugly. Bend your hand slightly. Remember what number you got.
If you don't have a measuring tape, use a piece of string instead. Wrap it around your arm, note how long it is, and measure it with a ruler.
If you have very long fingers, then measure the distance from the tip of the middle finger to the first transverse line of the wrist. When buying gloves, check this length with the seller.
Determine your size
Method 1
There are two common glove sizing systems: numeric and alphabetic. According to the first size coincides with the girth of the brush. European manufacturers traditionally use inches to measure. According to the second system, a certain marking corresponds to the volume of the hand: S, M, L, and so on.
Use the chart to determine your size. Choose the number in centimeters that is closest to your measurements.
| Hand girth in centimeters | The size of the gloves in inches | Lamping size of female gloves | Size male gloves | 6 | XXSS 66666666666666666669 | XXSS | 6.5 | XS | XXS |
| 17.8 | 7 | S | xS |
| 19.1 | 7.5 | M | |
| 20.3 | S | ||
| 21.6 | 8.5 | XL | S/M |
| 22.9 | XXL | M | |
| 24.2 24.2 195.5.5.5. | M/L | ||
25. 4 4 | 10 | L | |
| 26.7 | 10.5 | L/XL | |
| 27.9 | 9 2 | 11.5 | XL/XXL |
| 30.5 | 12 | XXL |
If there is no table at hand, translate the centimeters to the duma and determine the dime by formula:
Size in inches = Arm circumference in centimeters ÷ 2.54
Round the resulting number down to 0.5. That is, if your palm circumference is 17 cm, divide it by 2.54. Get 6.69. When rounded up, 6.5 comes out in traditional marking.
Please note that markings may vary slightly between manufacturers.
How to find the perfect gloves
The surest way to choose gloves is to try them on, because even hands of the same size can have different shapes.
- The most important rule is that the hand should be comfortable.
 The right glove does not hinder movement, puts on and takes off without problems, the fingers are completely bent in it.
 - Smooth out the worn glove. If something is tight, dangles, or folds, then it's not your size. The right fit is like a second skin.
- The length of the fingers of the glove and yours must match. This means that there is no empty space inside the glove either between the fingers or at their tips.
- Skin stretches over time. Therefore, if you have a choice between a slightly tight glove and a slightly loose one, choose the one that is tighter.
- The fewer seams on leather gloves, the better: products made from whole leather last longer and stretch more evenly than those made from pieces.
- For winter, it is permissible to buy an accessory half a size larger: this way there will be warm air between the fingers and the material. Let such gloves not sit as flawlessly as autumn ones, but your hands will not freeze.
If it is not possible to try on, then choose gloves that correspond to your size according to the table. Read reviews about the product and the seller first. Make sure your purchase can be returned.
Read also 👠🌂👖
- How to put together a basic wardrobe: a detailed checklist for women and men
- How to choose thermal underwear and stay warm
- 7 most fashionable coats and jackets for women and men
- What caps, hats and berets to wear this fall and winter
- 5 easy ways to find out your ring size
How to find your ring size. — Useful articles — Matter of Life
Do you want to buy a ring, but don't know the size?
We have put together simple ways to help you quickly find out the ring size you need
1. Print this out and cut out the hole with scissors to find out the size.
2.
3.
The ring size is the diameter of its hole in millimeters. Typically, the difference in size is 0.5 mm - i.e. the size is indicated 16.0; 16.5 etc.
Diameter is a line connecting two opposite points on a circle. It is equal to the circumference divided by the mathematical number Pi (Pi is approximately equal to 3.14)
Attention! All "home" methods are, of course, not accurate. Various errors are possible. Therefore, we cannot be held responsible for the accuracy of your ring sizing.
Remember that the ring must pass through the joint. Be sure to take this into account when sizing!
Moreover, keep in mind that the size of the finger varies with the temperature and humidity of the environment and depends on the time of day. The optimal time for sizing is noon. The weather is low humidity and not hot.
The easiest way to find out what ring size you need is to measure it with a ring gauge.
If you do not have time to go to a jewelry store, then you can determine the size of your finger and, accordingly, the ring that suits you in everyday life. There are many ways to do this. Here are some of the most interesting of them.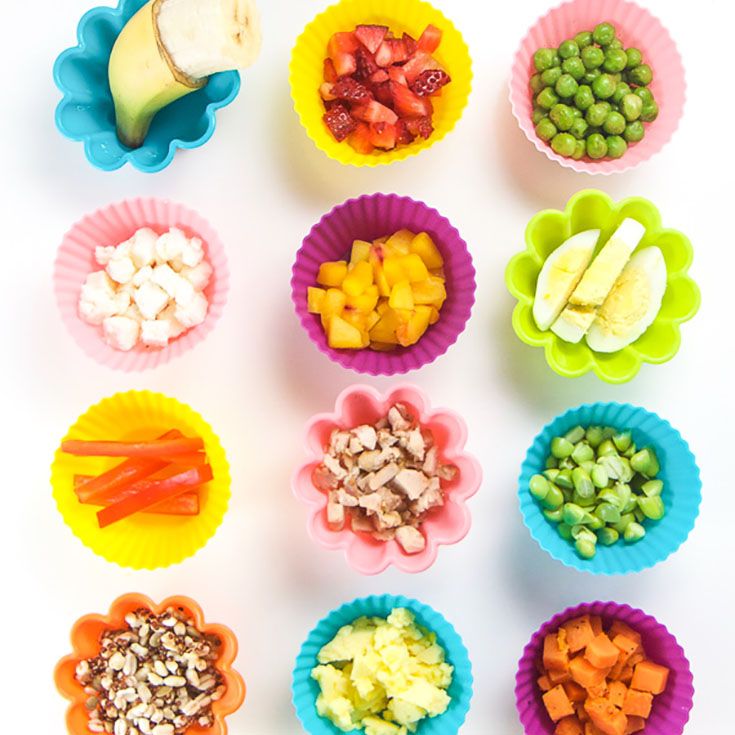
4. Determining the size of the ring using thread
You will need: a sufficiently dense thread (threads used for knitting napkins are ideal), preferably cotton, smooth. Approximately 50 cm - to make it convenient to measure.
Step 1.
Take the thread, carefully wind 5 turns on the finger you need (the width of the "winding" of all 5 turns should be about 3-6 mm). You do not need to wind it tightly, but still the thread should be firmly pressed against your finger.
Step 2.
After wrapping your finger, cross both ends of the thread (without tearing it off your finger) and cut them at the same time with sharp scissors. Or simply mark the intersection of the ends of the thread with a pen or marker, unwind the thread and cut it along the marks.
Step 3.
Measure with a ruler, centimeter or tape measure the length of the thread you cut. Divide the resulting length in millimeters by 15.7. The resulting value is the size of the ring for the finger that you measured.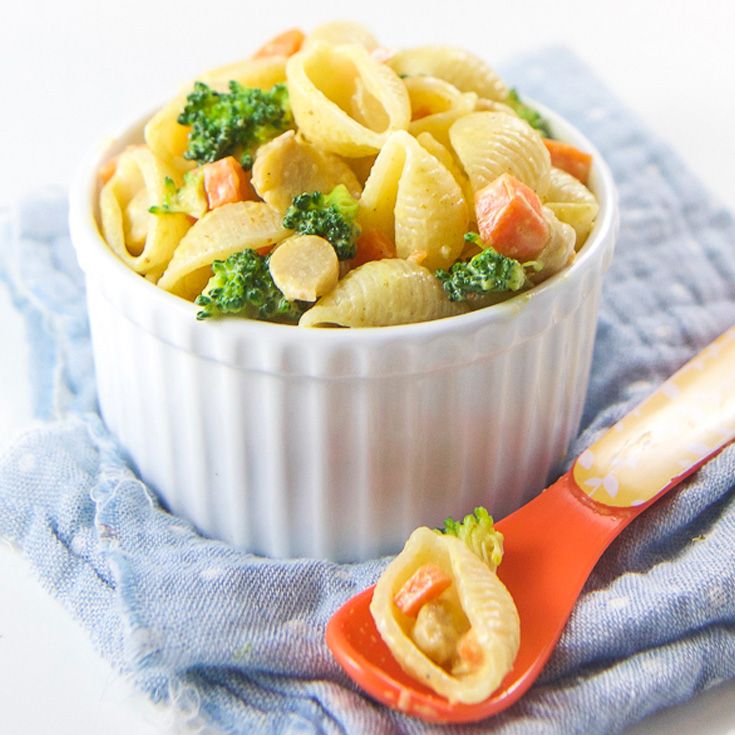
The resulting measurement must be rounded up to half a millimeter. For example, 17.1 to 17.5.
Tip: If you are sizing for a narrow ring (up to 5 mm wide), you can round the resulting size to the nearest value. For example, 17.1 and 17.2 to 17, not to 17.5. Wide rings (6-15 mm.) are better to lay half a size larger.
Determination of the ring size according to the table
Step 1.
Take a strip of paper about 1-1.5 cm wide and wrap it around your finger.
Step 2.
Mark where the strip crosses. Remember - the ring must pass through the joint, so try running the folded strip along the entire length of the finger.
Step 3.
Measure the resulting length with a ruler - this is the circumference - and select the appropriate size using the table below.
| Size (mm) | Diameter (mm) | Ring size |
| 47. | 15.27 | 15.5 |
| 50.80 | 16.10 | 16.0 |
| 52.39 | 16.51 | 16.5 |
| 53.98 | 16.92 | 17.0 |
| 55.56 - 57.15 | 17.35 - 17.75 | 17.5 |
| 58.74 | 18.19 | 18.0 |
| 60.33 | 18.53 | 18.5 |
| 61.91 | 18.89 | 19.0 |
| 63.50 | 19.41 | 19.5 |
| 65.09 | 19.84 | 20.0 |
| 66.68 - 68.26 | 20.  . .
|
 63
63