Baby food bottle crafts
50+ Fantastic Ways to Re-Use Baby Food Jars
Home » Crafts for kids » 50+ Creative Ways to Re-Use Baby Food Jars
Last updated on
22.6Kshares
50+ baby food jar crafts and creative ways to re-use baby food jars so you don’t have to put throw them in the trash.
If you’ve had a baby in recent years, there’s a good chance you’ve acquired quite a collection of baby food jars. Baby food jars ares so cute and chubby, and such a great size. If you’re like me, you find it hard to thrown them away. If that’s the case, your baby food jar collection could be growing at an alarming rate, and you’re probably looking for things to make with all of those jars.
Well, you’re in luck! One of my Facebook followers recently asked for ways that she could re-purpose her baby food jars, and the HH community responded with dozens of great crafts made with baby food jars along with practical ways to use baby food jars in and around the home.
I’ve gathered up their best suggestions and added a few of my own favourite uses for baby food jars, and I’ve come up with this long list of ideas for you.
From the craft room to the classroom to the bathroom and beyond, here are over 50 ways for you to use leftover baby food jars so you don’t have to toss them out.
50+ Baby Food Jar Crafts
Click on the links below to see project details.
Ways to use baby food jars in the classroom or craft room:
- Crayon Caddy: Paint several baby food jars and store co-ordinating, coloured crayons in them.
- Fill baby food jars with water, and set on the art table to rinse paint brushes in.
- Give each student in the class a baby food jar filled with cream, and make homemade butter together.
- Make a mini “ocean in a jar” in a baby food jar. Pretty on classroom window sill or fun to play with.
- Soak dried out markers in baby food jars to make liquid watercolour paint.
- Make and store homemade finger paint in baby food jars.
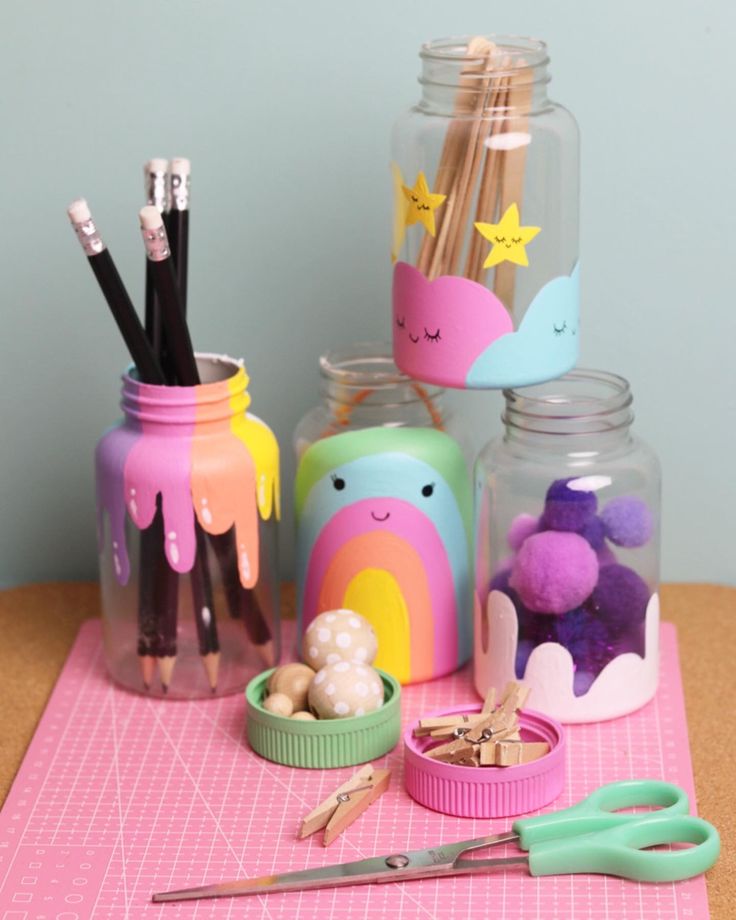
- Baby food jars make great paint and glue pots at the easel. Lids keep them from drying out between uses.
- Punch holes in the lids (with a nail) and use jars to store and dispense glitter.
- Make I-Spy Jars in baby food jars.
- Make collection jars for the preschool classroom.
- Fill with small amounts of water for syringe transfer work trays in preschool or kindergarten
- Paint tall baby food jars with food coloring, water and glue for a frosted look. Store pens, pencils and paintbrushes in them.
Things to make for kids with baby food jars:
- Play dough jars: fill several baby food jars with different colours of homemade play dough for a kids’ gift basket.
- Set some baby food jars out in the rain and make this scented rain paint.
- In the play kitchen: fill baby food jars with flour, rice, lentils etc. Glue the lids on, and kids can pretend-cook with them.
- Bug Jars – wrap a pipe cleaner handle around the top, and go exploring in the yard.
- Make these cute and quirky emoji jars for a kid’s dresser or desk.
- Glue painted toy animals on baby food jar lids, use as party favours.
- Fill with homemade slime or silly putty to put in loot bags.
- Make a tooth fairy jar.
- Teach kids how to manage their allowance with 3 tall baby food jars labeled SPEND, SAVE, BANK.
- Make an advent or countdown calendar.
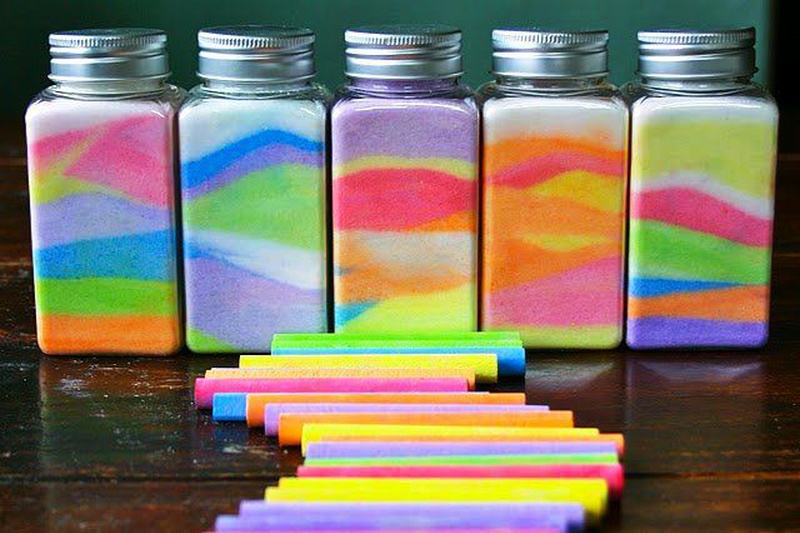
- Fill baby food jars with layers of “coloured sand” (ground sidewalk chalk mixed with salt).
- Use baby food jars to make mini lava-lamps.
Ways to re-use baby food jars in the kitchen:
- Make magnetic spice jars to store on the refrigerator door
- Organize your spice drawer with baby food jars.
- Make Smore’s treats in baby food jars. Hand them out around the campfire or at a party.
- Make a window-sill herb garden with baby food jars.
- Fill baby food jars with condiments for camping or a bbq.
- Sterilize jars and lids, and reuse baby food jars for homemade baby food.
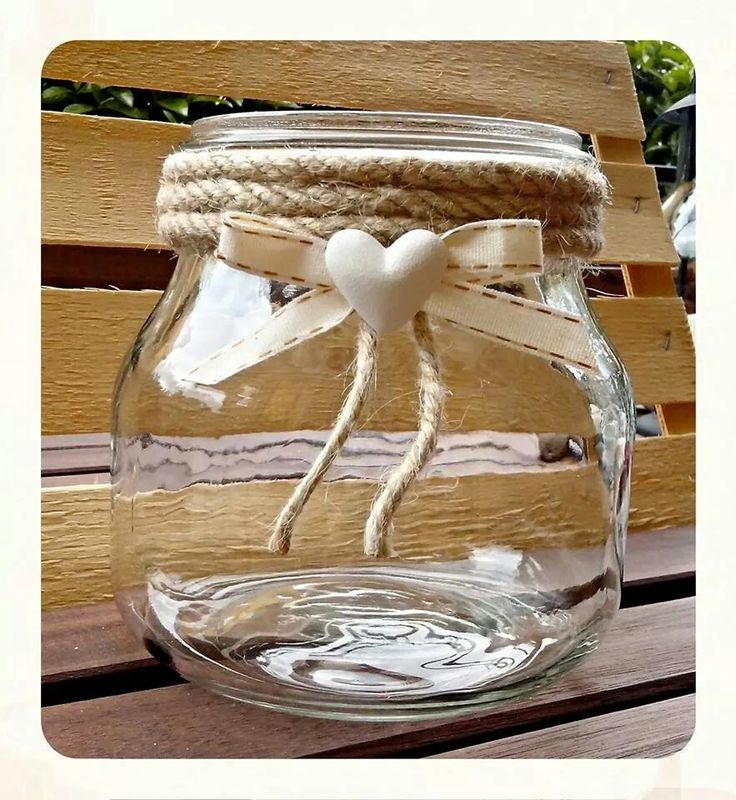 The serving sizes are perfect.
Gifts and party favours to make with baby food jars:
- Baby food jars make great wedding favours. Decorate and place at each table setting.
- These baby food jar lanterns were hung in a tree at an outdoor wedding.
- Make Lego Head Jars as party favours for a Lego party.
- Make mini calming jars for kids or co-workers
- Make a wish jars or dream jars for your family and friends.
- Give a gift of homemade bath salts or sugar scrub in a baby food jar.
- Make these cupcakes in a jar to give to teachers, neighbours and friends.
- Make a craft kit for a child by filling jars with pom poms, sequins, foam stickers, and beads.
- Hot Cocoa in a baby food jar: layer hot chocolate, shaved chocolate and mini marshmallows in a jar. Cover the lid with a swatch of fabric tied with a ribbon.
Other ways to use baby food jars around the home and garden:
- Store pony tail holders, Q-tips, and hair clips in baby food jars on the bathroom counter.
- Make a spill proof nail-polish remover kit with a baby food jar.
- Plant succulents in baby food jars to display on a porch or patio.
- Hang these colourful baby food luminaries from a tree in your yard.
- Baby food jars are great for storing seeds for the garden.
- Make Photo Globes by placing your child’s photo inside a baby food jar.
- Organize your spare change: each jar holds a different type of coin.
- Use baby food jars to hold paper clips, thumb tacks etc. on a desk or in a drawer in an office.
- Travel jewelry keeper for earrings and rings.
- A Mini sewing kit in a baby food jar is great for travel or the office.
- Fill baby food jars with Puffs, fishy crackers, Cheerios, nuts etc. Keep in the diaper bag for the kids.
- Nail the lids of baby food jars to the underside of a shelf to store screws, nails and craft supplies.
- Store several baby wipes in a baby food jar and keep in your purse or diaper bag.
Baby food jar Christmas crafts:
- Turn a baby food jar into a snowman Christmas tree ornament.
- Make festive holiday votive candle holders.
- Make sparkly tea light luminaries in baby food jars.
- Baby food jars make great miniature snow globes.
- Make Reindeer food for Christmas Eve.
What if you STILL have leftover baby food jars?
If you have more baby food jars than you could possibly ever use, even after reviewing all of the ideas, please consider giving your collection to a teacher, a crafter or a daycare provider. Most will be happy to put your little glass jars to good use.
Looking for more crafts to make with your recyclables? Check out:
Re-purposed Denim Craft Aprons
Re-purposed Denim Bibs
25 Creative Ways to Re-use your Keurig’s K-Cups
22 Ways to Re-Use Cardboard Tubes
Follow the Hooligans on Facebook!
Jackie Currie
Jackie is a mom, wife, home daycare provider, and the creative spirit behind Happy Hooligans. She specializes in kids’ crafts and activities, easy recipes, and parenting. She began blogging in 2011, and today, Happy Hooligans inspires more than 2 million parents, caregivers and Early Years Professionals all over the globe.
22.6Kshares
Reader Interactions
Amazing Baby Food Jar Crafts
Published Last Updated / By Sarah Leave a Comment
Have a bunch of baby food jars that you want to repurpose? We’ve looked all over to find the best baby food jar crafts so you can reuse the jars to make fun and beautiful things!
If you have babies or toddlers, you are probably going through a lot of jars of baby food! Maybe you have so many that you can start your own baby food company! Instead of throwing them out, why not make things with them? Since we are always looking for new crafts to make, we decided to look for all the best baby food jar crafts!
Our Easy Bath Paint for Kids fits perfectly into little jars, and DIY Candles is one of our favorite crafts we’ve done recently.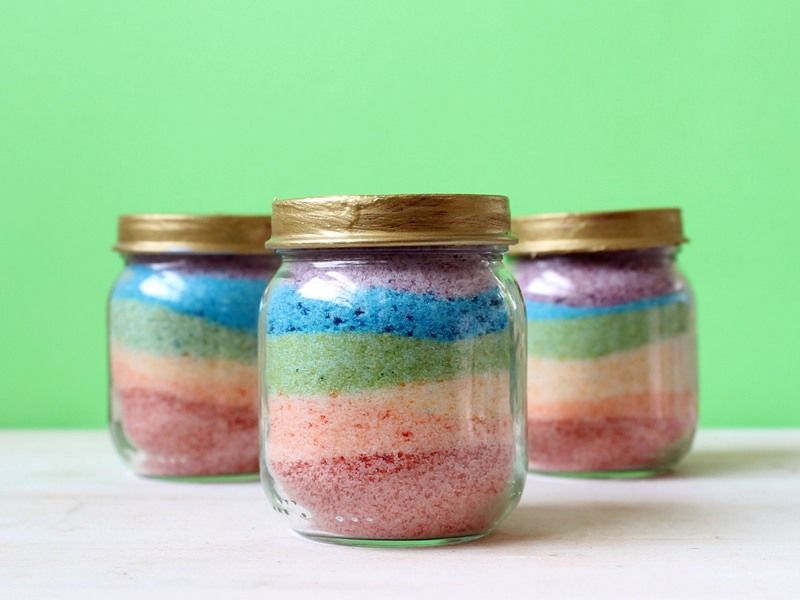 Check out our crafts page for more inspiration!
Tips for Making Baby Food Jar Crafts
- When using glass jars, make sure you clean out the jar and lid thoroughly.
- Glass jars can be used in the oven if making a mini cake or pies in a jar just make sure you remove the labels.
- Do not, however, put jars in the freezer, they may burst.
Baby Food Jar Crafts
codeEmbed
Vases for Flowers
Photo by Beth Liebetrau for Apples & Onions
I love this set of paint dipped jars from Apples & Onions! They are the perfect little vases for those white tulips.
Try making a Wood Vase and Candle holder like Make Life Lovely did! It’s totally gorgeous.
Plant some kitchen herbs in your jars! Herbs look beautiful on kitchen counter and you’ll never have to run to the store for some fresh rosemary or mint!
Baby food jars can also be used for Planting Wheat Berries – I love this idea from See Jane Blog!
Party Favors
- My kids would go crazy for this Unicorn Slime by the Best Ideas for Kids
- How cute are these DIY Bubble Party Favors from Chickabug
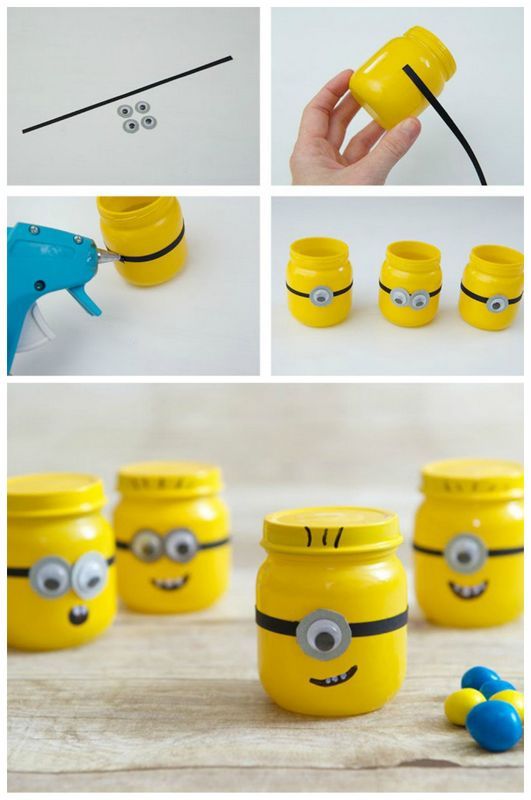
- Crafts by Courtney made these perfect Minion Party Favors
- Butterfly Sippers by Stay-at-Home-ista are perfect for a birthday party and you could personalize them to any party theme!
Desserts in Jars
- We adore these Mini Cheesecakes.
 They look elegant but they are so easy to make!
 - Gimme Some Oven shared these Mini Fruit Crisps and I can’t think of a more perfect summer party dessert!
- Make some Homemade Pumpkin Butter and give it to friends (or keep it all for yourself, I won’t tell!)
- I love these no-bake Mini Grasshopper Pies from A Pretty Life in the Suburbs
I love the idea of having Yogurt Parfaits in mini jars like they did over at Hilldale House. They would be perfect for a baby shower or a brunch party. We recommend having a Yogurt Toppings Bar to go along with little jars of yogurt!
As I mentioned you can bake with these jars, just remove the labels so it doesn’t burn. I love these Rainbow Mini Cakes by Make Life Lovely!
Organizing with Baby Food Jars
These mini pin cushions are from Seasoned Homemaker adorable.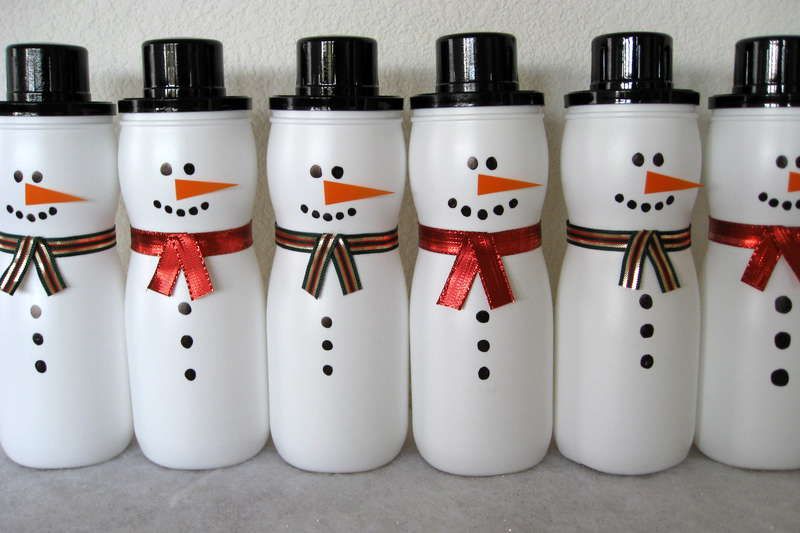 Perfect use for your baby food jars AND fabric scraps!
This under the shelf storage from Craftiness is Not Optional is, well, crafty! I love to see ways to use space that would otherwise be wasted.
This color coded crayon organizer from Monkey See, Monkey Do is awesome!
More Useful Things
- These Gel Air Fresheners by Dream a Little Bigger are so cool! I had never thought of making my own.
- I love this Nail Polish Remover Jar by the genius One Good Thing by Jillee
- How cute are these Picture Magnets by Oh How Crafty
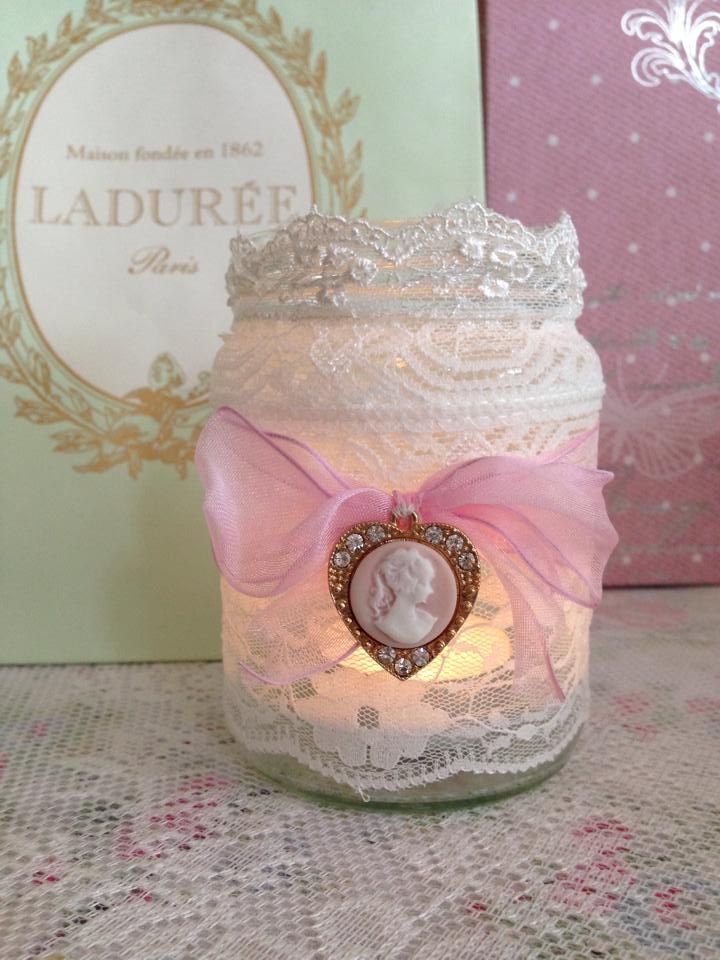
- These Mason Jar Oil Lamps from A Piece of Rainbow are gorgeous and you could totally make miniature versions with baby jars!
Kids Bath Paint
Easy three ingredient bath paints you can DIY in a few minutes. Kids and toddlers will have a blast painting during bath time and they'll even get clean in the process!
SEE THE POST
Mini jars are the perfect size to make bath paint in and the best way to store it, too!
Holiday Crafts
These Halloween Pumpkin Jars from Make It – Love It are absolutely adorable. They can be decor or hold treats in them!
Valentines
I am impressed by these Turtle-y Awesome Valentines at Consumer Crafts. Clever and fun!
These Lego Valentines in Jars are genius. This idea could carry over for other holidays too! They’d make great Christmas gifts for friends or even be great for Easter!
Love these simple Valentines from So Festive!
Easter
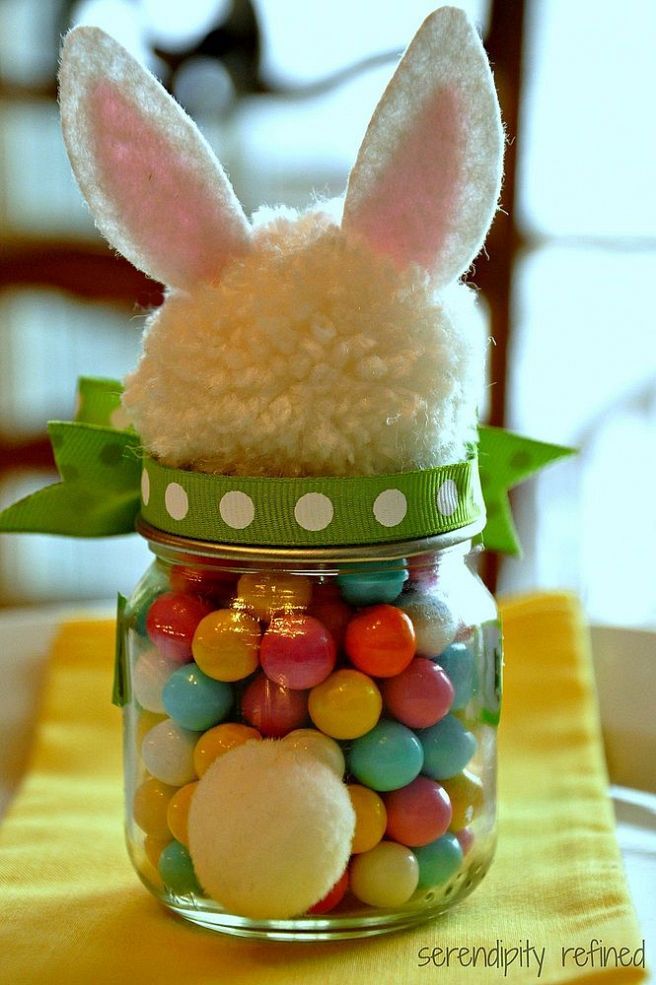
We love these Easter Candy Jars by our friend Amber at Crazy Little Projects
These colorful Topiaries with Jelly Beans in them from Sugar Tot Designs make a fun decoration or Easter gift!
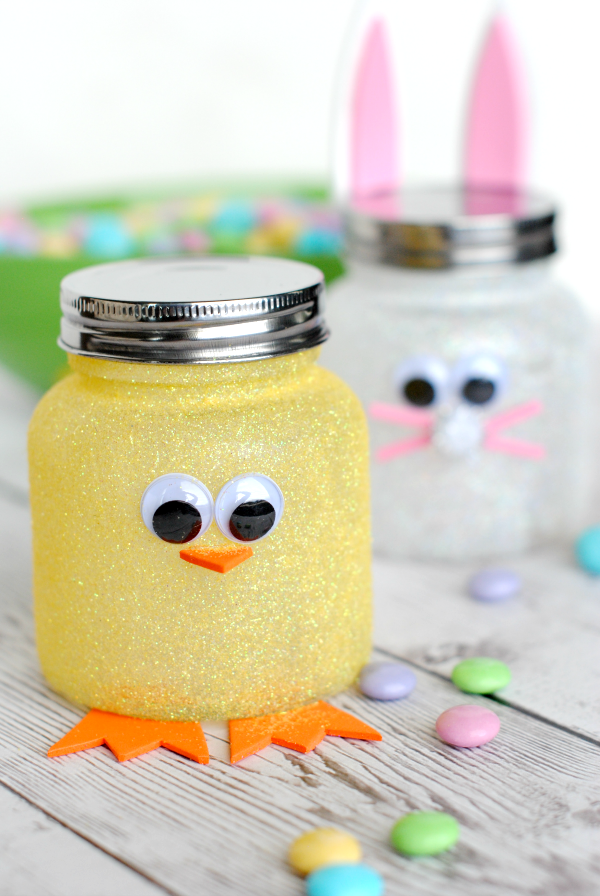
And these Bunny Jars from Making Life Lovely are so cute! All you need is paint and some white felt.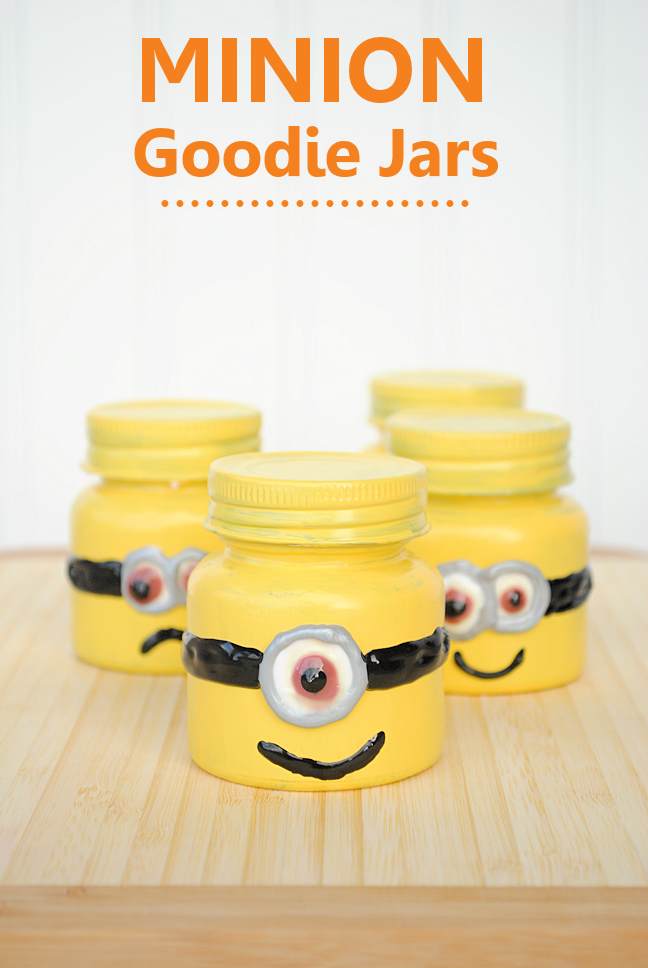
Baby Food Jar Christmas Crafts
Baby food jars are perfect for Christmas crafting because they are the perfect small size for DIY gifts! Try making some Christmas neighbor gifts or DIY ornaments with your little jars!
DIY Candles
How to make DIY candles in baby food jars with soy wax and essential oils. These candles make great Christmas neighbor gifts or party favors!
SEE THE POST
Making your own candles is easier than you think. We love these for neighbor gifts!
This Cranberry Body Scrub gift idea from Alicia Costa is so smart and I imagine it smells really good! I have this on my list of baby food jar Christmas crafts for this year. Watch the full tutorial on Youtube.
My kids would love decorating these Christmas Treat Jars from Amber at Crazy Little Projects.
These easy Mason Jar Lid Ornaments from Salvage Sister could easily be made with baby food lids!
This Luminary Advent Calendar from our friend Taryn Whitaker Designs is ALL THAT.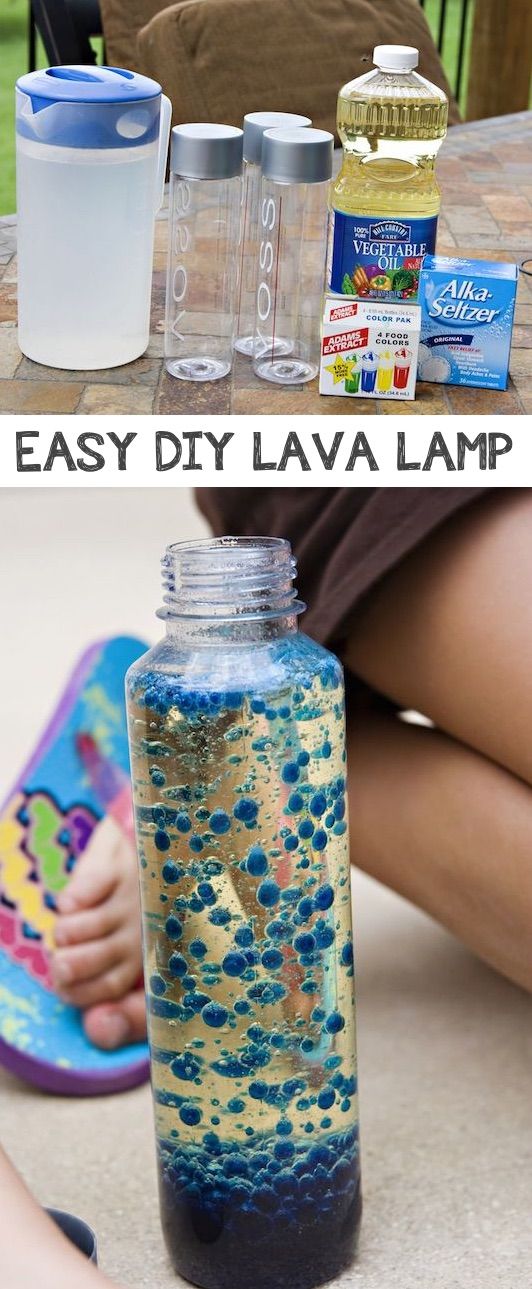 So classy and creative!
This snow globe made out of a jar by Craftaholics Anonymous is so awesome! You could make a bunch of these and give them out as neighbor gifts.
Upcycled Home Decor
I cannot get over this Chandelier by Mother Earth Living.
Or make these Dyed Glass Luminaries from Inspired by Familia – how great would they be out on the patio for summer?
How creative are these Foam Lighthouses from Crafts by Courtney? They would be perfect in a beach house or if you have a nautical vibe going on in your home decor!
That’s it! All of these crafts are really clever. I’m feeling very inspired. You will probably be seeing more baby food jar crafts here at Pretty Providence. Happy eating to babies everywhere!
Pro Tips
- When cleaning out the jars, make sure you remove the baby food labels while they’re wet.
 It’s much easier to remove then.
 - Glass jars can be put in the oven, just make sure the labels are already removed.
- Do not put jars in the freezer, glass can break when frozen.
- Acrylic paint works best when painting glass.
Which baby food jar crafts are your favorite? If you make one, share your creations by tagging us on Instagram!
This post was originally published in August 2013 and has been updated with new ideas, photos, a video and more detailed information.
Reader Interactions
Crafts from baby food jars
Skip to content
Search for:
The kid ate the puree with pleasure, smearing its contents on all surfaces. And the jar was carefully washed out and sent to the shelf to its fellows. What to do with her?
There are a lot of ideas for using glass baby food jars. Website "Mom can do anything!" collected the most interesting of them.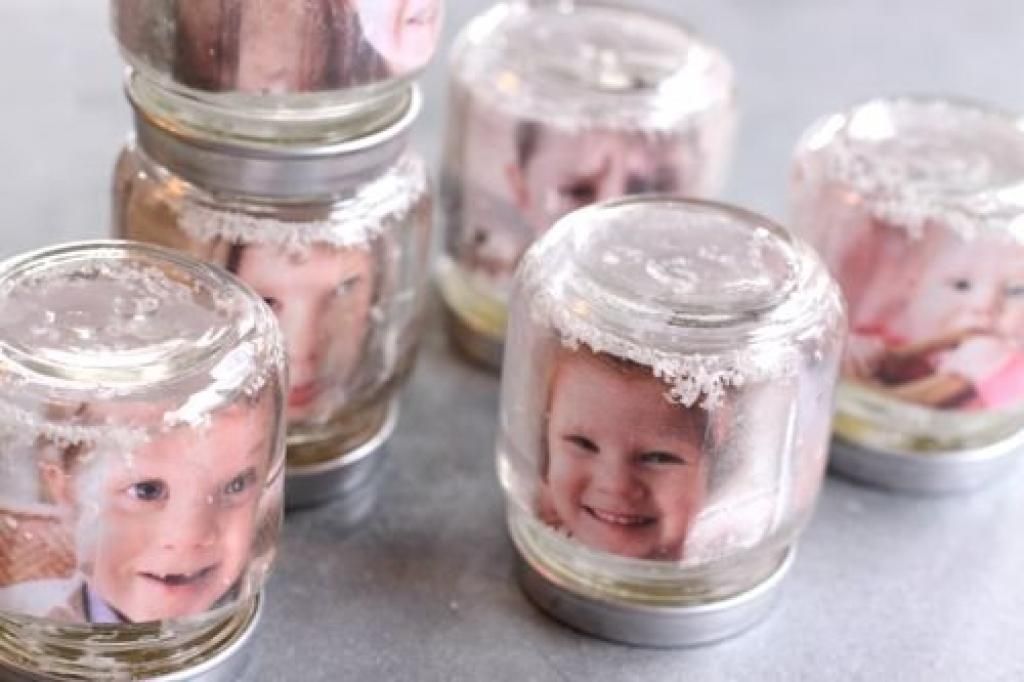 nine0003
- Needle cases. From glass jars it is easy to make such cute pincushions that can fit buttons and other small handicraft things.
- Houses for fairies. If you are fond of modeling, then you should try to make such a delightful house for fairies.
- Aquarium. A jar is a small aquarium for a toy fish. Pour soil inside, install algae - the craft is ready. You can also mold plasticine fish together with your child and place them in a jar. nine0016
- Terrarium. Plant moss and other small, low-maintenance plants inside.
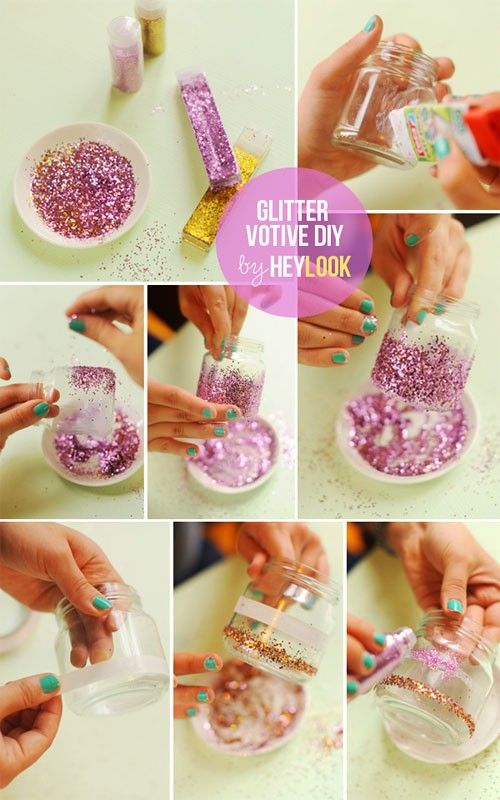
- Decorations for the holiday. Decorate the jars with glitter, make holes in the lids and install decorative elements, letters and numbers. A very original decoration is ready.
- Bird feeder. Few people realize that such delicious drinkers and bird feeders are obtained from an ordinary baby food can. In the sun, they will shimmer with all the colors of the rainbow and delight the eye. nine0016
- Storage for small items.
 From cans, not only beautiful things are obtained, but also very practical. Screw the lids to a wooden surface and you will get very convenient containers for storing small things.
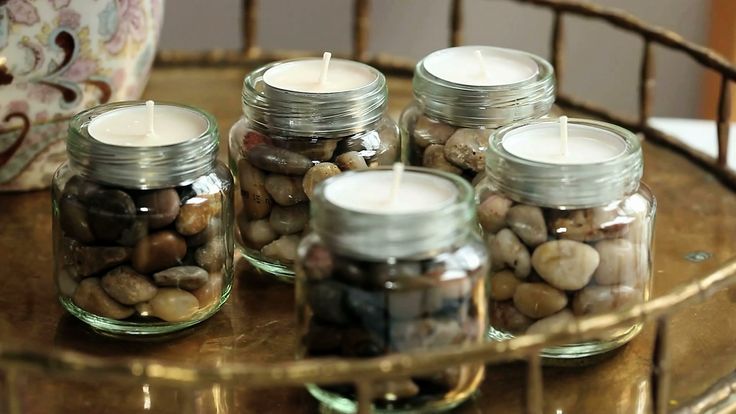
 - Candlesticks for the garden. Buy a lot of small candles, put each one in its own jar and hang them by ropes on tree branches. A beautiful setting for a romantic evening is ready.
- Container for growing onions. Green onions are a storehouse of nutrients that are so lacking in the cold season. Growing such an onion is not difficult. Pour water into the jar, put the bulb on top, in a few days we will get the first shoots. nine0016
- Pots for seedlings. It is convenient to plant parsley, dill and other herbs in small jars.
- Crafts from baby food jars. Such beautiful flowers in pots are easy to make yourself with your children. We circle the palm on a green sheet of cardboard, cut it out, gluing a flower on each finger. We put it in a pot-jar - a beautiful craft is ready. Such flowers will be a great gift for mom or grandmother by March 8th.
- Storage containers. In puree jars it is very convenient to store buttons, beads, beads. nine0016
- Pencil holders.
- Night lamps.
- Snow globe. A can of baby food makes a delicious snow globe. Just stick the figurine on the lid. Pour the baby oil and glitter into the jar, close the lid tightly and shake.
- Gift-treat for guests or children.
- Original frames. Just place photos inside the jar.
- Spice storage. Glass jars with screw-on lids keep spices fresh for a long time. nine0016
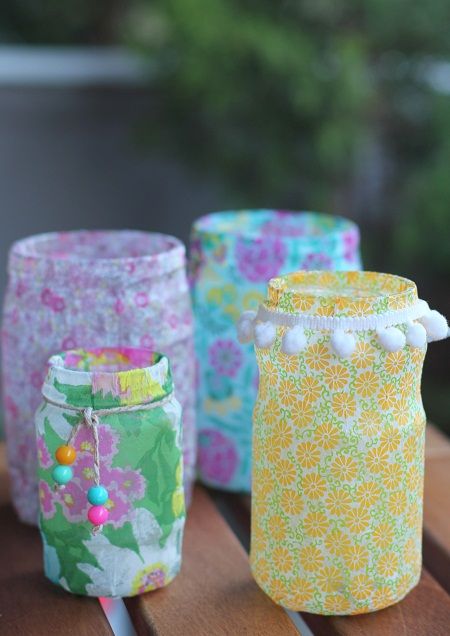
- Vases for flowers. Just dip the jar in the paint and get unusual vases for small flowers.
- Jelly mold. Small jars are great for making jelly. It looks beautiful and appetizing in them, one jar holds one serving, and the screw cap will help keep it in the refrigerator for a long time.
- Portion desserts. In small jars it is convenient to make portioned desserts.
- Refreshing cocktail in a jar.
- Candles. You can read how to make these candles here.
 nine0016
 - Crafts. Small glass jars are a great base for crafts.
- Rubber storage. The advantages of transparent jars are obvious - it's easy to find the right one.
How do you use jars?
Share with friends
How to make a baby bottle out of a jar of yogurt. Amazing crafts from plastic packaging. A beautiful bottle of liquor or any other alcoholic drink can be washed and used as a container for drinking water
Probably every mother at least once bought a jar of baby food: mashed broccoli, prunes, apples and more. The kid ate the puree with pleasure, smearing its contents on all surfaces. And the jar was carefully washed out and sent to the shelf to its fellows. What to do with her?
There are a lot of ideas for using glass baby food jars. Website "Mom can do anything!" collected the most interesting of them.
- Needle cases. From glass jars it is easy to make such cute pincushions that can fit buttons and other small handicraft things.
 nine0016
 - Houses for fairies. If you are fond of modeling, then you should try to make such a delightful house for fairies.
- Aquarium. A jar is a small aquarium for a toy fish. Pour soil inside, install algae - the craft is ready. You can also mold plasticine fish together with your child and place them in a jar.
- Terrarium. Plant moss and other small, low-maintenance plants inside.
- Decorations for the holiday. Decorate the jars with glitter, make holes in the lids and install decorative elements, letters and numbers. A very original decoration is ready. nine0080
- Bird feeder. Few people realize that such delicious drinkers and bird feeders are obtained from an ordinary baby food can. In the sun, they will shimmer with all the colors of the rainbow and delight the eye.
- Storage for small items. From cans, not only beautiful things are obtained, but also very practical. Screw the lids to a wooden surface and you will get very convenient containers for storing small things.
- Candlesticks for the garden. Buy a lot of small candles, put each one in its own jar and hang them by ropes on tree branches. A beautiful setting for a romantic evening is ready. nine0080
- Tank for growing onions. Green onions are a storehouse of nutrients that are so lacking in the cold season. Growing such an onion is not difficult. Pour water into the jar, put the bulb on top, in a few days we will get the first shoots.
- Pots for seedlings. It is convenient to plant parsley, dill and other herbs in small jars.
- Crafts from baby food jars. Such beautiful flowers in pots are easy to make yourself with your children. We circle the palm on a green sheet of cardboard, cut it out, gluing a flower on each finger. We put it in a pot-jar - a beautiful craft is ready. Such flowers will be a great gift for mom or grandmother by March 8th. nine0080
- Storage containers. In puree jars it is very convenient to store buttons, beads, beads.
- Pencil holders.
- Night lamps.
- Snow globe. A can of baby food makes a delicious snow globe. Just stick the figurine on the lid. Pour the baby oil and glitter into the jar, close the lid tightly and shake.
- Gift-treat for guests or children.
nine0015 Original frames. Just place photos inside the jar. - Spice storage. Glass jars with screw-on lids keep spices fresh for a long time.
- Vases for flowers. Just dip the jar in the paint and get unusual vases for small flowers.
- Jelly mold. Small jars are great for making jelly. It looks beautiful and appetizing in them, one jar holds one serving, and the screw cap will help keep it in the refrigerator for a long time. nine0016
March 20th, 2013
It doesn't take much to invent new toys with your child or make simple crafts. Usually enough free time and our imagination. And what to do? - available at hand.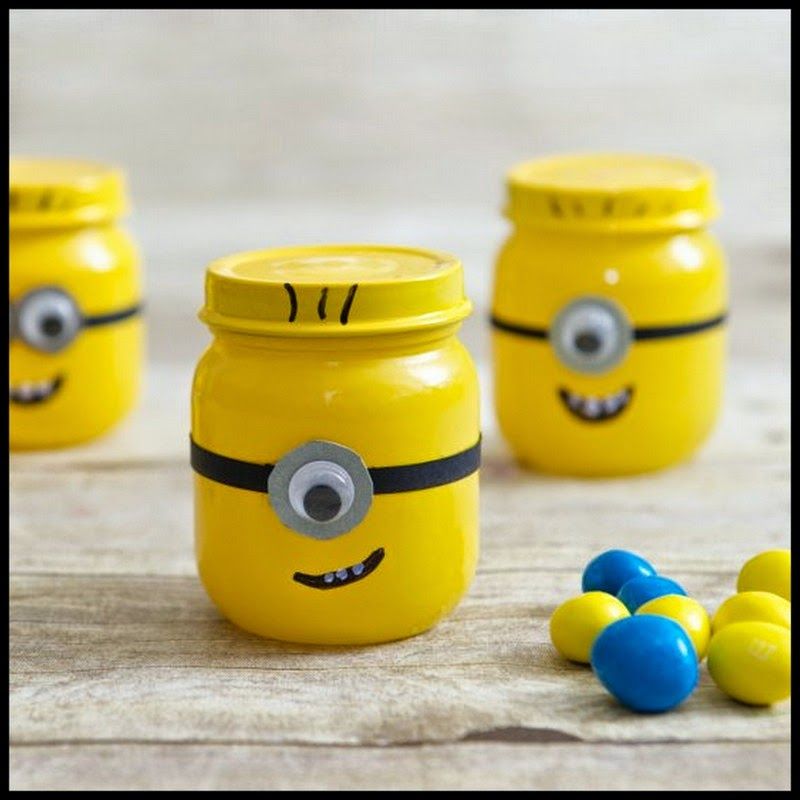 My son and I already have a whole fleet of yogurt jars, and the best ships we have come from viola jars and soft butter. We will devote this review to toys and crafts that you can make with your child from all sorts of "garbage" - boxes and boxes, cardboard, plastic bottles and much more. nine0003
1. Cardboard boxes and boxes
Let's start with crafts from boxes and smaller boxes. Boxes of different sizes regularly appear with each of us (especially during the holidays), but we usually try to get rid of this "happiness" as soon as possible, since it is quite inconvenient to store them. But you can immediately put them into action
Large boxes.
Oversized boxes make amazing toys for kids
Or airplane
Mill house. Detailed master class at the link
Pirate treasure chest. Description
Car parks.
How to make
PIC
or more complex option
PIC
and another castle option
PIC
from smaller boxes nine0144
or such dinosaurs
Pic
Storage boxes
9000
pic
Train with carriages
pic
pic
Aliens
pic
More ideas from cardboard sheets
PIC
PIC
or such
Pic
And here's another knight and princess
If you glue it with decorative paper and decorate, then what is not a gift packaging for all flesh.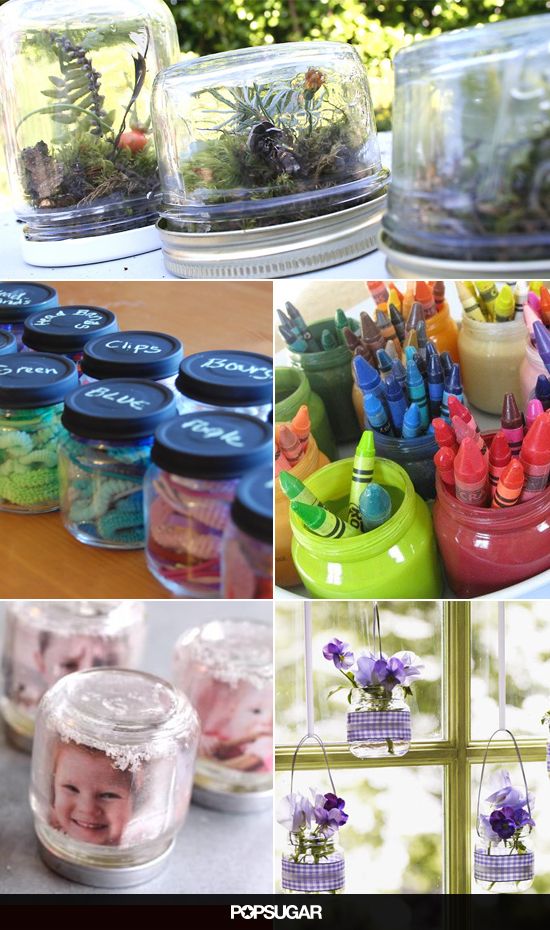 for example
pic
Lamp
pic
And you can also make such an aquarium with your children
pic
Boxes and cardboard are real scope for creativity, if you wish, you can do whatever you want, I think we will return to this topic in the near future, we have something interesting in store
2. Toilet paper and paper towel rolls Octopus
Dergunchiki
PIC
A lot of different animals with patterns can be viewed at
Pic
Binoculars for children or a tender pipe from towels
9000 9000 PICor on children's party to make crowns of princesses
pic
And here is an amazing idea how to make crackers for the holiday. Description
pic
Racing cars
pic
3. Disposable tableware - paper and plastic plates and glasses
For disposable dishes you can also find the original use of
Paper plates is very convenient to paint
And from deep plates, you can make such jellyfish
Pic
or even make a garland for the holiday
PIC
From a plate and a glass you get such a pretty house
pic
Spider Glasses
pic
Cup Dragon
pic
It's very easy and fun to turn ordinary cups into weirdos.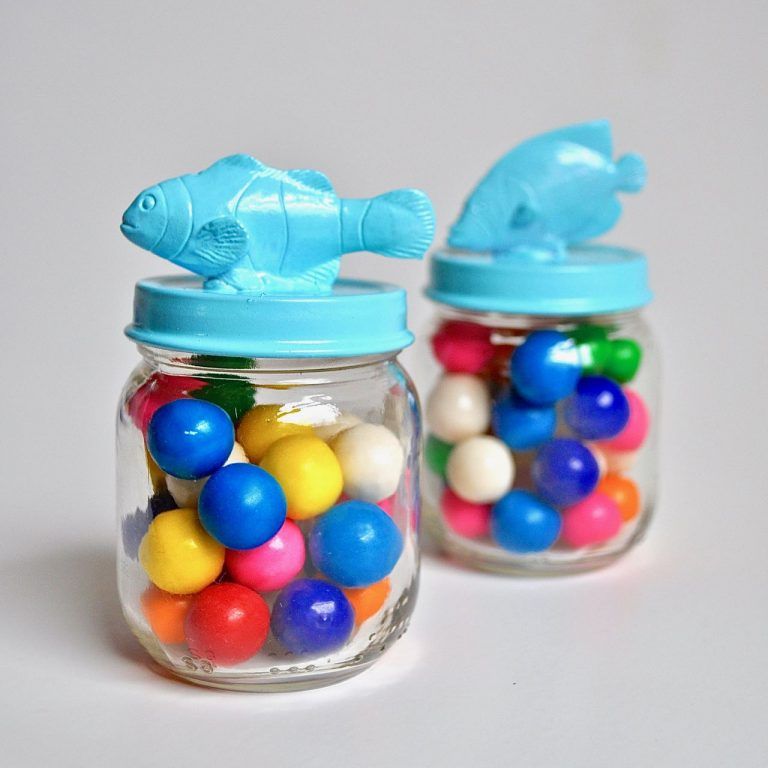 A great idea for children's parties
But the idea of an advent calendar
pic
3
Feeder
pic
For children for a holiday
pic
From bottles and spoons
4
pic
It's fun to germinate grass in small bottles. Just right for Easter
pic
And bottles turn into ...... a rocket, more precisely, into the main attribute
Airplanes and ships from shampoo containers
These are completely simple and pretty crafts of can make from ordinary wooden iceberry
men for puppet theater
PIC
Pic
9000
Pic
and still easy to make the original original puzzle game. nine0003
You can make a whole house
Chests of medical spatulas. Description
6. Straws for cocktails
With these tubes you can draw very interestingly with Mule Bubbles
You can come up with many different games with these tubes.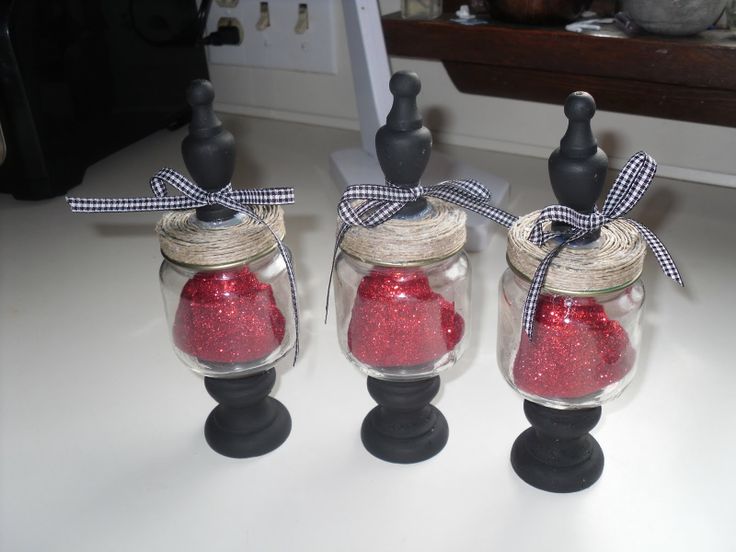 For example, you can arrange "air" football. Roll up a small ball out of paper and use the tube to drive the "ball". By the same principle, you can play who will fly the ball farther or who will get to the finish line faster. This kind of games are very useful, it is a kind of breathing exercises. nine0003
7. Sponges
Even the most ordinary sponge can turn into ....
a garden bed (it's fun to germinate seeds in a large-pored sponge) it was more convenient to draw with such stamps, you can glue them, for example, on a wine cork, as here
0003
8. Wine corks
On the Internet you can find a huge variety of photographs on the topic of cork crafts, but we will limit ourselves to stamps
for flowers
0003
Montrustrik
Game of old towns
Aircraft
here and
BAND with wishes or Smile Box
is such a jar or a box filled with small paper various wishes, pleasant phrases, anecdotes, encouraging mottos or declarations of love.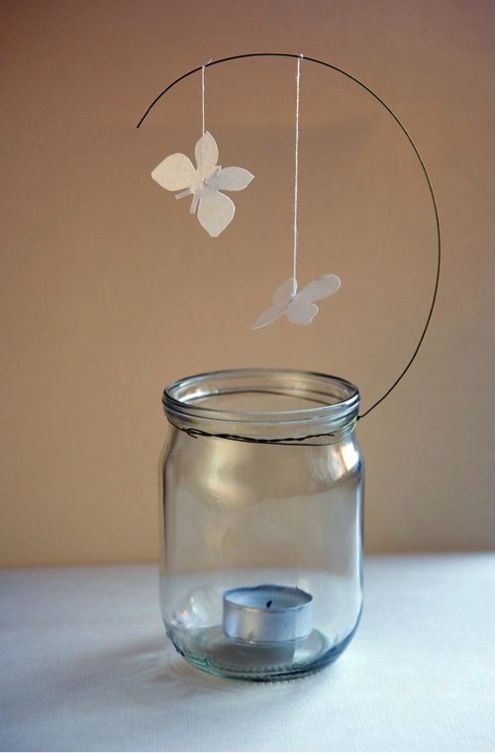
Get a similar jar at home. This is a real generator of daily good mood. nine0003
pic
A snow storm or snow globe, but in this case it's more like a glitter jar. Description
And in summer, for street parties, jars can be used for drinks. They look very unusual and stylish.0004 Send us your interesting finds of handicrafts from what is at hand, and also share with us what you did! This topic is inexhaustible and I think we will return to it more than once
Greetings, creative ladies! Get ready for the fact that the MK will be detailed, and therefore long and tedious. After all, if you are a teapot, then every detail is important to you.
Preamble. The girls from the forum once gave me a bunch of yogurt jars. And a bunch of different rags - pieces, cuts, trimmings, ribbons, lace. I didn’t throw it away, because in a good household everything will come in handy. And then the hands finally reached them. At first it was decided to make a needle bed, after all, this is a necessary item in the household of even the most uneconomic madam, absolutely any woman will come in handy.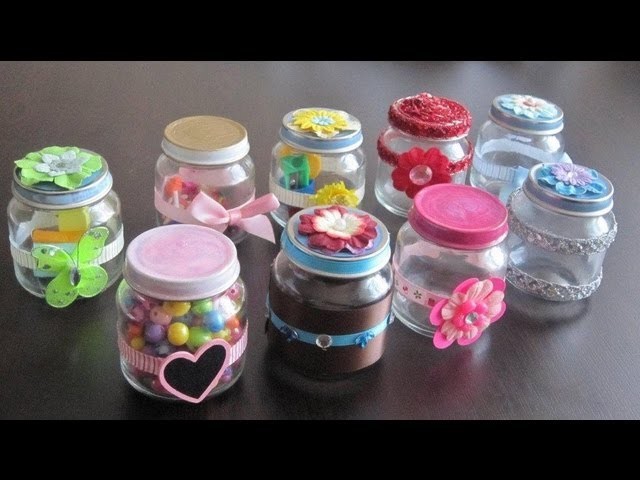 Such a basket, seen in the expanses of the “Handmade” forum, surfaced in my memory, but I did not find a description of the manufacture and MK for it. In general, she did as God put it on her soul. In the process, I realized that the basket can not be filled with foam rubber, then something can be put into it. By the way, I remembered that Easter is in a month, and the eternal question in which package to give colored eggs. I decided that the basket would come in handy ... While I was making the basket for the egg, I came up with the idea that you can make a lid for the basket, then you will get a full-fledged box in which you can not only store jewelry, but also give cash gifts in it. It looks much more aesthetic than the envelope, and then the new hostess can use it as a box, while remembering you with gratitude. While I was making the box, I thought that you can make a stroller box out of a yogurt jar, then it’s not a shame to congratulate your friend on the birth of a child by putting some money inside.
 While I was making the stroller, another idea for the box was born in my imagination. I hope I have enough imagination to make it and I will be able to demonstrate it to you over time. nine0003
1) needle bar
2) basket
3) box-basket
4) casket-carriage
Well, now ambulance or plot, or as they say.
To write less, I had to take more pictures. I myself am in many ways a teapot, so I like that in the MKs that I read, it was clear from the first time how to do it. That is why I write so tediously and in detail. Some of the photos are not very clear, sorry for that. I will write about the materials and tools in the course of the play, because all of them can be replaced with something else, just imagine how you fantasize. nine0003
1) So let's get started. We take a jar of yogurt and figure out where it has and what the handle will be made of. The classic placement is at the widest point of the jar (see photo No. 1 of this item), if you decide to make a stroller-box, you can fix it both on the sides of the jar and attach it to the lid (see photo of the "stroller" of this item).
Handles can be made from non-exotic materials found in almost every home.
A) The surest thing is a good bending PVC-coated aluminum wire. I bought it in the "world of electricians" store, though for other purposes, so I have one on the farm. It bends only under good pressure, so the weight of the box will not sag and deform. And for the stroller I recommend only such a handle. nine0003
We bend a piece of wire in an arc, calculate the height yourself to your taste, and cut it off. We fasten something very sticky. I laid eyes on the domestic adhesive plaster and double-sided tape. That's really what is really difficult to tear off, even if it accidentally gets wet. The appearance of the plaster is unaesthetic, well, no one will ever see it there.
First, I figured out where the handles would be located, cut indentations in the jar with a knife and attached double-sided tape under them. The jar is so fragile that you need to act carefully, otherwise it will crack. If cracked, glue with adhesive plaster for 2 layers. Then I wrapped the ends of the handle wire with adhesive plaster so that they stick well to the adhesive tape. Then I glued a wire handle onto the adhesive tape. And on both sides I fixed the ends of the handle with adhesive tape. nine0003
Now we wrap it with something pretty. In this case, I wrapped it with straps from a piece of a satin nightgown left in the bins. Since the straps were short, I wound them towards each other, and a thickening turned out at the junction. But then I closed it with a bow, and the thickening became completely imperceptible. The ends inside the jar can be glued with glue (I use transparent "Contact") or adhesive tape. She also wrapped the handle with the same fabric that decorated the basket, and wrapped it with a nylon ribbon on top. I also wrapped it with a satin ribbon, and on top with a nylon.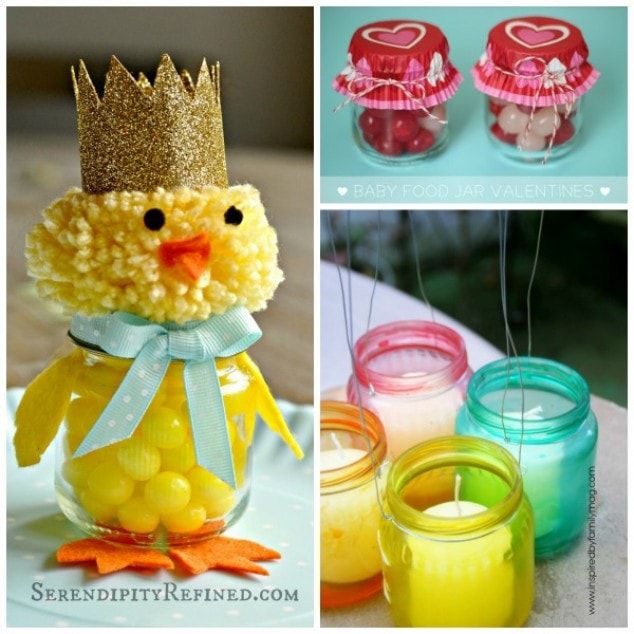 And you can also tie it with a crochet, or according to the macrame principle - with knots. I don't think you will have any problems with this item. nine0003
Straps
cloth and nylon tape
b) If there is no wire, then the handle can be made from a plastic bottle of any color. Or from a plastic jar of shampoo. This is exactly what is in any apartment. Cut off the "bracelet" in the place where there is no narrowing on the bottle, I took it in the middle. Cut off the cut off bracelet, turning it into a rectangle. Cut off a strip of the desired thickness from it. And wrap, as in the case of wire. But keep in mind that the handle will turn out to be quite flexible, this will not work for a stroller, but it’s quite enough for a basket. It can be made less flexible by twisting it in a spiral over the candle. Just twisting, immediately give it an arched shape. And then after processing over the flame, it will then be hard to bend it. nine0003
c) I also had cheap hoop earrings, my sister gave them away because they were oxidized.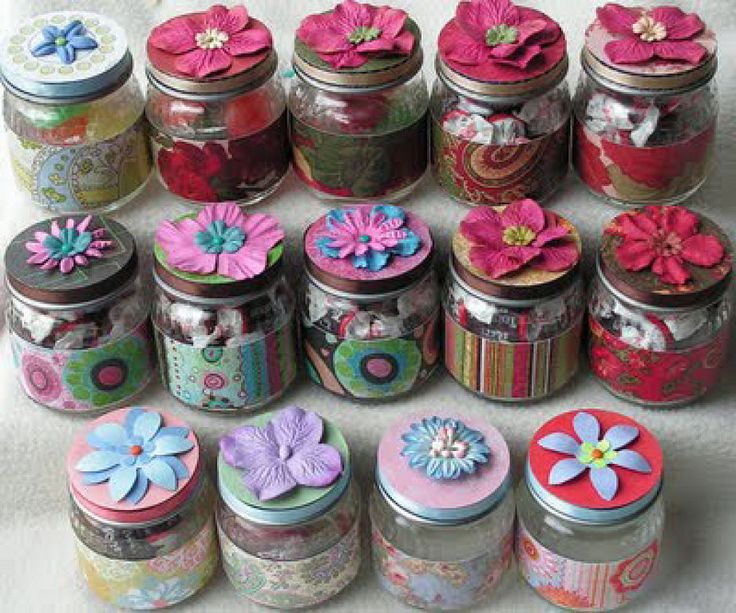 And the handles of the first two baskets I made from them. By the way, they could be painted and not wrapped. I fastened them one from the inside, the second from the outside, making holes in the jar with an awl.
d) you can still come up with a lot of options from which to build a pen. But if you make it out of cardboard, then glue it on both sides with a cloth, it will not allow the cardboard to tear during operation. nine0003
2) Now the outer and inner trim of the jar.
Again, divide into a needle bed and a basket.
a) Pincushion
If we are making a needle bed, then only the outer finish is important to us.
We choose a piece of fabric of such a size that its edges can be folded inward.
Cut out an oval from corrugated cardboard, according to the size of the bottom of the jar. (I cut out 2 pieces at once).
Since I wanted the fabric to fit snugly on the outside of the jar, I glued double-sided tape around the outer perimeter to the jar. I could not glue it with glue, because the fabric was very thin and the glue, seeping through it, gave stains after drying. I sealed the label with a plaster so that it did not shine through the fabric. nine0003
I wrapped the fabric inside and glued it to the bottom. I glued corrugated cardboard on top. Then she wrapped it in organza and tucked the ends inward, gluing them to the corrugated cardboard. From above I pressed down with a second piece of corrugated cardboard.
Now we roll the foam rubber into a tube, wrap it with a cloth and sew it together. Measure the width of the tube first. It needs to be tight in the basket.
Then we stuff the foam rubber into the basket and the needle bed is ready! Decorate the top the way you think is more comfortable and beautiful. Voila! Here is the finished gift. Modest, but tasteful. nine0003
b) Basket
If we are making a basket, then the interior design is no less important to us than the exterior.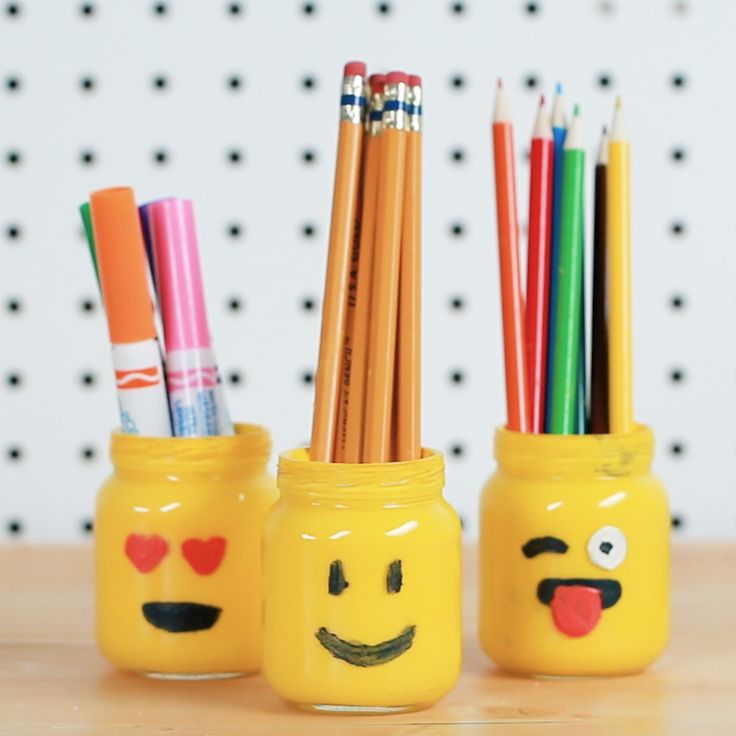
As in the case of the needle bed, I cut out an oval from corrugated cardboard to fit the bottom of the jar. I cut an oval out of fabric a little larger in diameter than an oval out of cardboard. She cut the fabric. I made cuts perpendicular to the cardboard to make it look like the rays of the sun. I glued the rays to the cardboard through one, pulling them a little towards the middle. Waited for it to dry. I glued the remaining rays. The reverse side - this will be our bottom in a jar. nine0003
Now we put the fabric for interior decoration into the basket, distribute it evenly, pour glue on the bottom and press it on top with our new bottom made of cardboard covered with fabric. When the glue has set well, we begin to glue the rag to the edges of the basket at the top in a circle. We do this carefully and gradually, 1-2 cm each. When all the edges are glued to the jar, cut off the excess fabric hanging from the edges. So we got a neat interior design of the basket. I'll tell you a secret, it's a pleasure to work with knitted fabrics, if you compare them with satin ones. nine0003
Exterior design is also not difficult to do, the most important thing is not to stain the fabric with glue. Lay out the fabric on the table. We put the basket in the middle of this piece of fabric. The piece should be of such a size that all edges reach the edge of the jar. Whether it's round or square, it doesn't matter. I have a round one in the photo only because the piece itself was of such a shape.
Gently glue the fabric to the edges of the jar overlapping the interior fabric. Excess that sinks inside, carefully cut off with nail scissors (if there are no thin tailor's ones). Here is the base of the basket. Decorate the edge to hide our glued edges. I covered it with organza on an elastic band. On top of the elastic, I sewed roses from an organza ribbon to match the fabric on the basket. With one needle she sewed roses, with the second she sewed them to the basket. nine0003
Well, here we have one more beauty! You can safely lay down an Easter egg there and go to visit.
In the pink basket, I reversed the order of design, first I decorated the jar on the outside, and then inside. I first pinned the tape with needles, and then slowly glued it.
3) If we want to make a basket-box, then we need a lid. I did it in the same way as in MK on caskets from spools of adhesive tape. For those who have seen it, you can skip this paragraph. For those who do not know, I will write again. nine0080 I took a very thick piece of a cardboard box and cut out two ovals in the shape of the top of the basket. then glued them on. A little, so as not to cut off the excess, we cut the edges, adjusting the size of the lid so that it fits snugly inside the basket along with the fabric that will be covered. Then we cut out a slightly larger oval so that it "lies" on the basket without falling inward, this will be the top of the lid.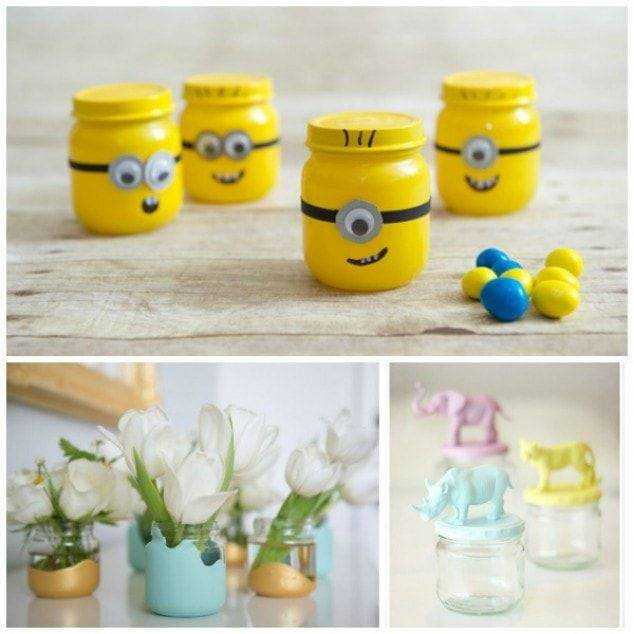 You can see it in the fourth photo.
nine0004 Here I duplicate a piece from MK in round boxes, so instead of an oval in the photo there will be a circle. don't let that bother you. So, we glue both cardboard ovals.
Then glue the fabric to the inside of the oval. On the finished box, you can see that the fabric fits snugly to the bottom and to the ends of the lid.
As it sticks, we tighten the fabric from above, having previously nailed it in a circle. We fix in this position, first tying a knot on a thread, and then gluing the ends of the fabric to the cardboard. On the finished box, you can see that the fabric is gathered on top. nine0003
And decorate the top of the lid, as our artistic taste tells us.
4) I made the stroller according to the same principle. only on the lid I made a frame for the hood of the stroller and covered it with fabric. But I won’t show how I did it yet, because I myself am not yet completely satisfied with the result, in order to advise you with a clear conscience just such a manufacturing option.

