Baby led weaning food prep
Baby Led Weaning Food Prep - baby meal prep
Baby led weaning food prep can help cut out what can be seen as a large time commitment. BLW is a great way to introduce babies to solid foods. But it can be time-consuming to create baby-friendly meals each day. These baby food prep tips will help you prepare BLW food for your little without spending hours each day chopping, steaming, and cooking.
The key to easy BLW food
When I first started baby led weaning with Ryan, I was so excited to get going. I steamed a few sticks of sweet potato and off we went.
And then I did the same thing for his next meal. And the next. As I started adding more and more fruits and vegetable to his diet, each meal took longer and longer.
Soon I was trying to figure out why on earth I had decided to do baby led weaning any way. Those store bought baby foods were looking more and more appealing.
Eventually, I came to my senses. What was I thinking, making each and every meal from scratch? Yes, he was eating bits of what we were eating, which made his meals a little bit easier. But I was very adamant about giving him a wide range of foods and some days I ate the same thing over and over. #momlife, amiright?
Once I started a weekly baby led weaning food prep session, life got so much easier.
We’ve all heard about meal prepping, right? Chop up veggies for the week, make some quick snacks. Maybe all of your lunches, some jar salads, overnight oats.
These little things make your week and your meals healthier and easier. So why don’t aren’t you applying these ideas to baby led weaning food prep?
Baby food prep will 100% make life simpler. The biggest question I got from people about baby led weaning was always the same. “Doesn’t it take so much time?”
And yeah, if you’re making every single meal from start to finish for your baby, it’s going to take a while. But my answer was always no. I just learned to work smarter.
Making baby meal prep easier
For example. Are you steaming some broccoli for yourself or a few florets for baby’s next meal? Steam the whole bag! Throw whatever you aren’t using into a container and use over the next few days. Just pull a few out with each meal. Rinse and repeat, people.
Simple steps for baby led weaning food prep
How to meal prep for baby
- List the essentials.
Make a list of your baby’s favorites that you’d like to make that week.
- Try some new ones.
Add a few new fruits or vegetables that you hope to introduce.
- Note family meals.
Make note of any meals you are having that you could make BLW friendly.
For example, if you’re doing spaghetti and meatballs. Don’t add salt to the sauce until you remove a cup or two for the baby and set it aside. Same with the meatballs – season the meat after you form a few unsalted ones for your little. - Make an emergency stock.
Stock up on quick frozen veggies that you can quickly steam in case of emergency.
Steamer basket
Storage containers
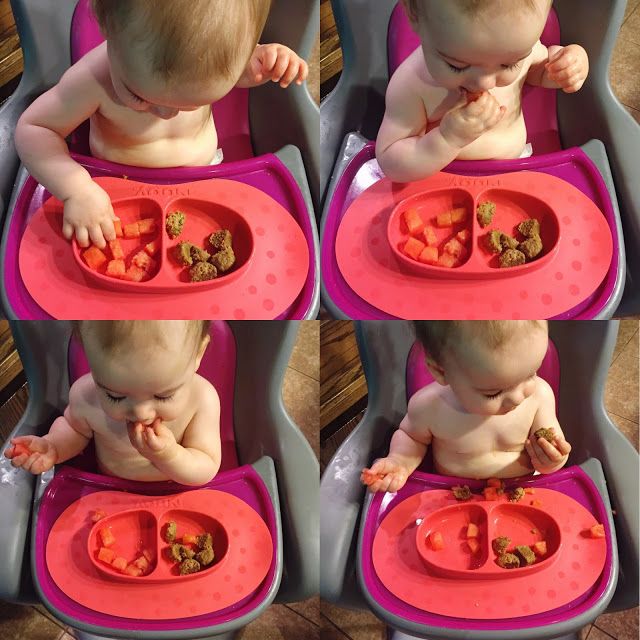
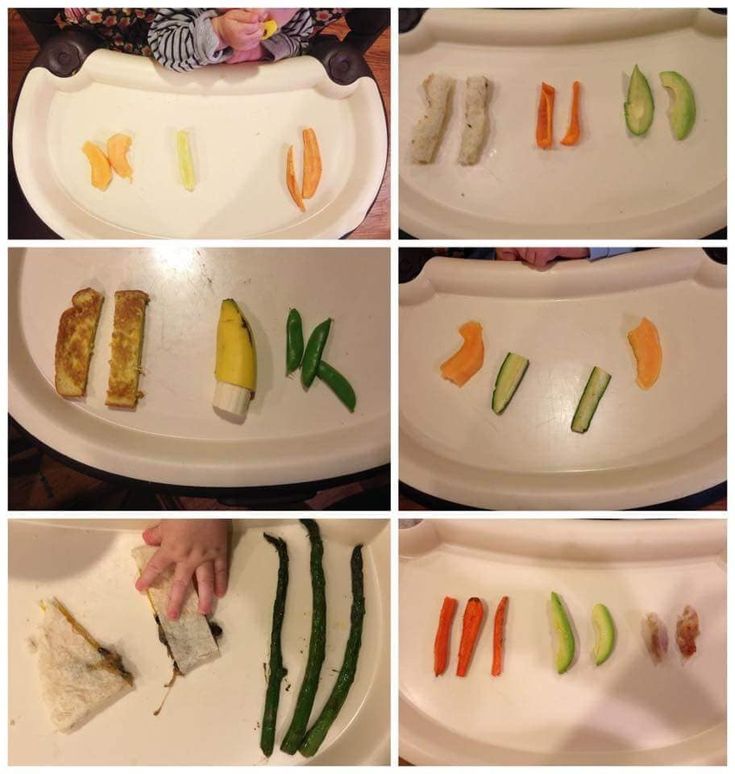
This is what a typical baby led weaning food prep session looked like for me in general.

- Sauteed green beans
- Steamed broccoli and cauliflower
- Frozen then steamed carrot coins
- Steamed brussels sprouts, sliced in half
- Poached chicken, chopped into BLW appropriate shapes.*
- Eggs squares (scramble eggs and pour over cooked veggies in a large pan. Bake until set and cut into sticks or squares.)
- Baby cookies
*this is totally going to depend on the stage of baby led weaning your child is at. I would start with “sticks” and move on to shredded chicken before moving to diced chicken.
Tips for how to cut food for baby led weaning
How long does baby food prep take?
This all took me about an hour and a half, while doing other things like cleaning, dealing with nuggets, and wasting time on Instagram. It really depends on how much you make, though.
Something like steam-in-a-bag veggies will speed this up too! We don’t have a microwave so I have to steam them one by one.
Baby food prep was a real game changer for my family. It took the stress out of something we loved for our family.
I think one of the reasons people are so hesitant to try baby led weaning is because they fear the time aspect. But it doesn’t have to be that way!
Between meal prepping and chopping the (unsalted) ingredients of whatever meal you’re making yourself up into BLW appropriate sizes and shapes, there is little to no time suck in baby led weaning.
Not only that, but you also get the peace of mind in knowing exactly what your child is eat for every single meal – no weird ingredients, no preservatives, no worries about allergies.
Other Baby Food Prep Ideas
- Batch cook and freeze pancakes.
- Chop fresh fruits.
- Wash fresh vegetables.
- Cook meat a crock pot. Remove a portion and freeze the rest.
Do you meal prep? Do you meal prep for your kids? What are your favorite make ahead meals?
If you’re new to baby led weaning, or just want more information on the process, check out the other posts in my baby led weaning series:
Why We Chose Baby Led Weaning
The First Steps
Step 2
First Foods, Fruits and Vegetables
On the Go
Clean Snacks
Benefits of Baby Led Weaning
First Proteins
Pincer Grip Foods
Ultimate Guide to Baby Led Weaning (and Best First Foods)
Learn the basics of how to do the feeding approach known as “baby led weaning” and the best first foods for baby to make starting solids easy and fun.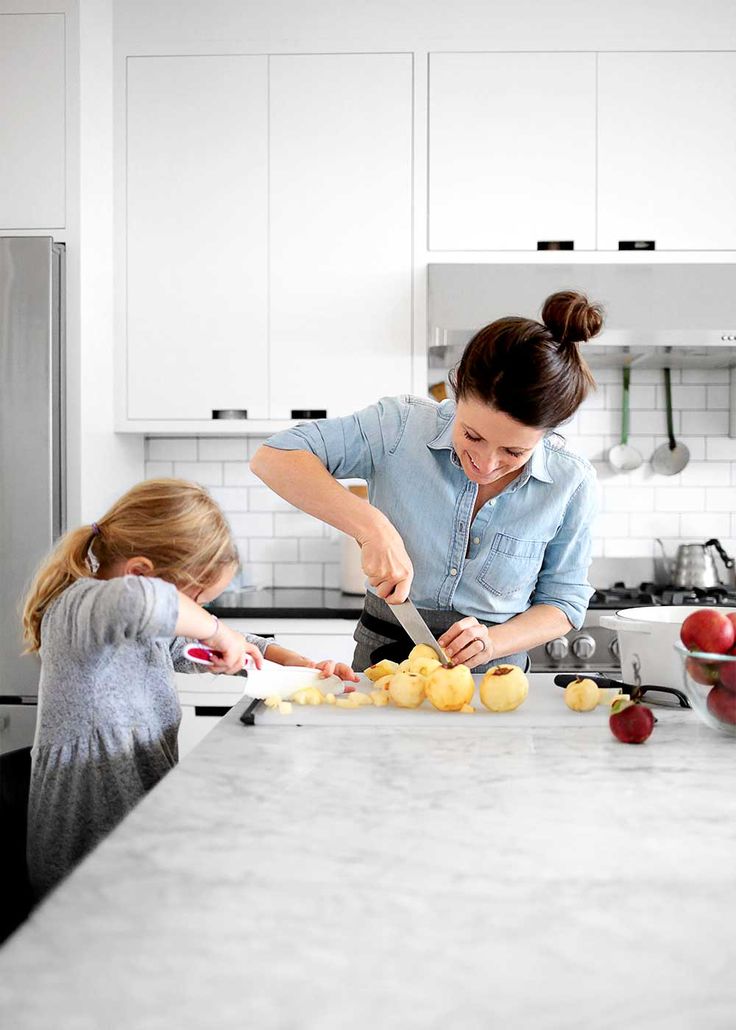 Plus: Learn why it’s perfectly okay to use a combined approach of blw and purees.
Baby Led Weaning
The feeding approach known as “baby led weaning” or “BLW” for short, is a style of feeding infants that allows them to feed themselves right from the start. The food is offered in thick finger-size pieces and is soft and easily squishable between your fingers. This way, the food is both easy to hold but has a low risk of choking.
TIP: This method became popular about a decade ago after the publication of the Baby Led Weaning: The Essential Guide to Introducing Solid Food by UK author Gill Rapley.
BLW Baby
One of the many reasons that people are starting to opt for this style of feeding more and more is simply that it’s easy. In many cases, you can modify foods you’re already making to share with your baby and there’s not always a lot of separate cooking involved. It also allows a baby to have control over what goes into their mouths, which sets a good precedent for letting them eat intuitively from the start.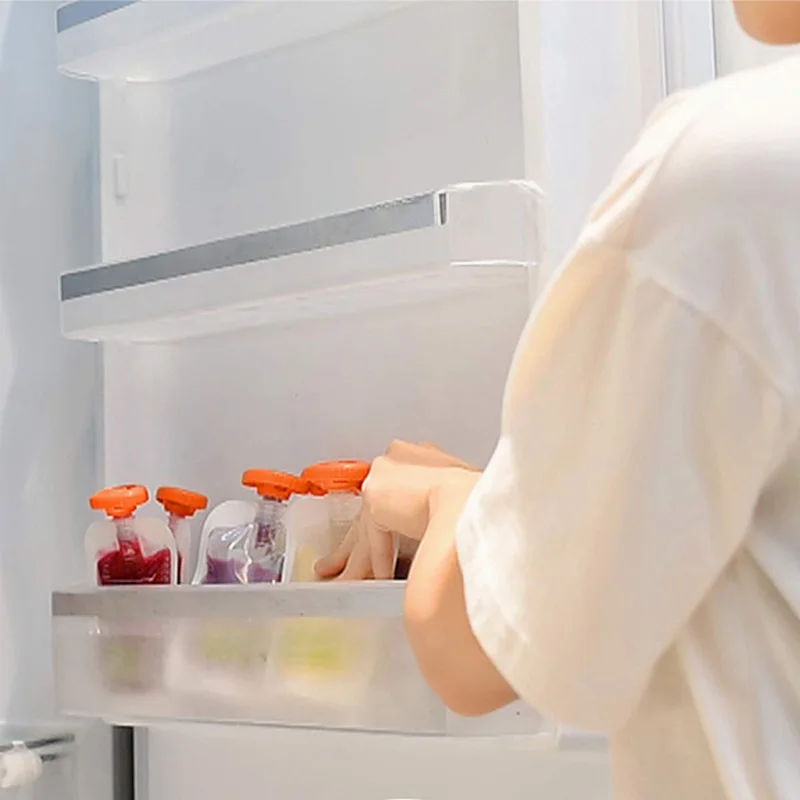
What age should I start baby led weaning?
According to the American Academy of Pediatrics, a baby is ready to start solids with baby led weaning when:
- They’ve doubled their birth weight (at least).
- They can hold their head up well and are starting to sit up unsupported.
- They show signs of being interested in food (watching you eat, reaching for food when you’re eating, etc).
- When you feed them, they are able to move the food around in their mouths—rather than spit it right out.
TIP: Look for a highchair that allows a baby to sit up relatively straight so they can have good posture and better control over their arms and hands.
How to Start Baby Led Weaning
The first time you offer solids is such a fun milestone, so you’ll be ready once you follow these simple steps.
- Make sure baby has hit the milestones listed above to let you know that he’s ready to start.
- Get the highchair ready and adjust the straps and foot rest as needed.
- Plan to introduce water when you start solids. I recommend a trainer cup.
- Choose one food to start with and plan to offer only one food at a time.
- Stop when baby starts to fuss, turns his head away, or shows any other signs of not wanting to continue. It’s usually fairly obvious when they are done!
TIP: If you start offering solids and baby just doesn’t seem interested at all, it’s okay. Take a break for a few days or a few weeks and start again. Each kiddo has their own unique timeline.
Best Tips for Starting BLW
Here are a few more tips to consider and review before you get started.
- Understand the gag reflex. Gagging is different than choking though and is most often a sign that baby is learning to move food around in their mouths—and to get it out of their mouths, which is a skill you want them to have!
- Brush up on the basics of how to know when baby is ready to start solids. (Go back to the top of this post for the signs to look for.
 )
) - Set them up for success with a highchair that allows them to sit up straight and has foot support.
- Sit with them as you offer food.
- Check your own expectations of what will happen and simply allow your baby to take the lead.
- Start with one new food a day or every few days.
- Vary the textures of foods you offer to start exposing baby to many right from the start.
- Offer water in a sippy cup or small open cup.
TIP: Remember that breastmilk or formula will continue to satisfy baby’s hunger for the first few months of eating solids. Do not expect solids to replace milk feedings at this age.
First Foods for Baby
Starting solids with baby led weaning or purees are both perfectly acceptable ways to introduce a baby to solid foods—but the topic can get so heated! There’s a lot of pressure to do it the “right” way and I’m here to say that there isn’t one. You 100% can do one or the other, or combine the two to make it work for your family.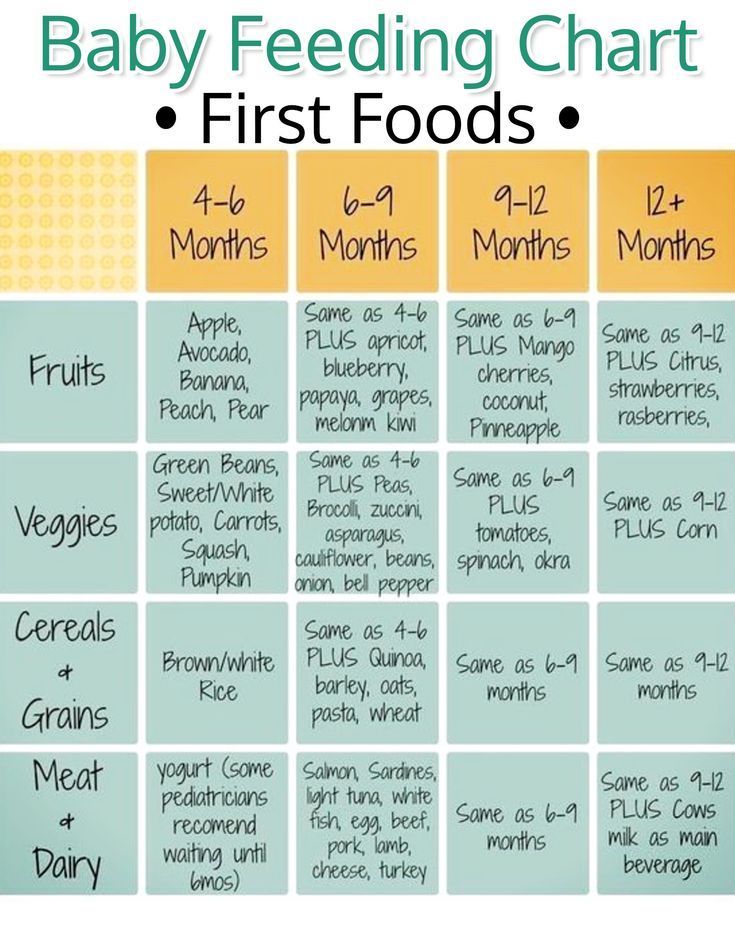 It’s all good!
Remember, the goal with first foods for baby is that they’re introduced to flavors, nutrients, and foods they can easily eat or suck on. It should be an enjoyable milestone for all involved.
TIP: It’s a good idea to get into the habit of offering an iron-rich food since iron stores in babies start to run out around 6 months and they’ll need to start ingesting it in their food.
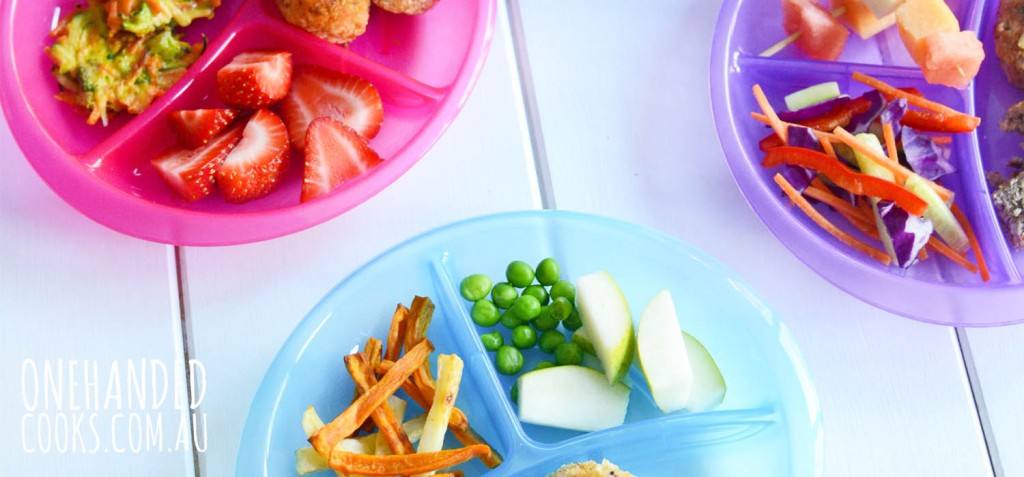
Best First Foods for Baby Led Weaning
Here are some of our favorite first foods to offer baby led weaning style. You want foods to be finger sized so they are large enough that baby can’t force the whole piece into their mouth, and a shape that’s easy for a 6 month old to hold with their chubby little hands. These are some of our favorites.
- Roasted sweet potato wedges
- Roasted apple wedges, skin on to help them hold together
- Roasted or steamed broccoli florets (big enough for baby to hold)
- Melon slices
- Thick mango slice
- Banana with some of the peel still on
- Toast sticks with mashed avocado
- Avocado spears (make sure the avocado is ripe and soft)
- Lamb or beef, on the bone or a large piece for baby to suck on
- Dark meat chicken, on the bone or a large piece for baby to suck on.

TIP: The foods should generally be soft enough to squish between your fingers with the exception of the large pieces of meat. If baby gnaws a piece down into a smaller piece, replace it with a larger one to avoid her putting a chunk of food into her mouth.
Baby Led Weaning Banana
To serve a banana to a baby, wash it well, then slice it in half. Cut off an inch or two of the peel, but leave the rest of the peel on so it’s not slippery for baby to hold. They’ll suck on the top part like a little popsicle! You can also help them hold the banana if needed.
Foods to Avoid Serving While Doing BLW
You want any foods you offer to a baby while doing baby led weaning to be soft enough to squish between your fingers and safe for them to eat and digest. Plan to avoid:
- Anything hard, sticky, or crunchy (like raw apple or carrot, whole nuts, crackers, or a big spoonful or nut butter)
- Added salt
- Cow’s milk (which is difficult for kids under 1 to digest; plain yogurt is fine though)
- Added sugar (they simply don’t need it)
- Honey (to avoid a risk of botulism)
- Super slippery foods that would be hard for baby to hold (which can be frustrating)
TIP: Always sit with your baby and watch them try to eat. They are your best guide for making adjustments to the foods you serve.
Baby Led Weaning and Choking
There are many parents who dislike this method of feeding because it often sounds like a baby is choking. And while there are surely some incidences of choking, what’s more likely is that a baby will occasionally gag on a piece of food that gets into their mouth that they weren’t expecting.
But remember: Gagging is a sign that baby is doing what she needs to in order to move the food around in their mouth as they learn to eat. It usually sounds more dangerous than it actually is.
TIP: If the sound of gagging really freaks you out, you’re not alone. Consider offering more preloaded spoons with purees to start your journey more slowly.
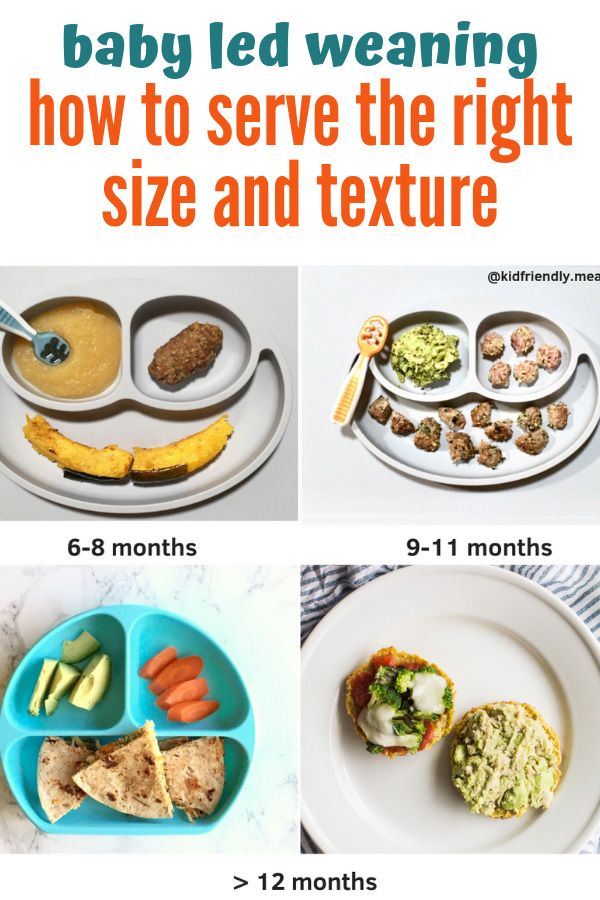
How to Cut Foods for BLW
You generally want the food to be big enough that it would be difficult for baby to put the entire thing into their mouths. Here are some specifics:
- Foods that are roughly the size of a finger, so about a 4-inch stick.
- Foods that are easy for the baby to pick up—they can’t pick up small pieces until closer to 9 months when they develop the ability to use their fingers in what’s known as a “pincer grasp”.
- Foods that aren’t too slippery—so you can wash and leave some of the peel on fresh foods like bananas, avocado, kiwi, and mango.
TIP: You can also go even bigger if you’re worried about size. Think half of a slice of bread or a big chunk of watermelon.
Will my baby actually eat much food with BLW?
Probably not at first. There will likely be more tasting of the food than eating of it and that is totally fine. They will still rely on breast milk or formula at this age for their main nutrition, so don’t expect them to suddenly start eating full meals. (They’ll get there in a few months, but it takes time!)
Do babies need teeth for baby led weaning?
No! Gums are super strong and front teeth aren’t used for chewing—that happens when the back molars come in. Teeth really have nothing to do with whether or not a baby can eat solids.
TIP: Learn more about what to expect from teething here.
Can you mix baby led weaning and purees?
Absolutely! I think it’s a great idea to mix the two methods simply because it gives you many more options for foods and allows the baby to experience more textures. I recommend allowing babies to feed themselves preloaded spoons—so you put the puree on a spoon, then hand it to them to actually put the spoon into their mouth—so they still have control over what goes into their mouths.
TIP: Feeding some purees is also helpful if you’ll be sending food with a baby to daycare since the care provider may not have experience with blw.
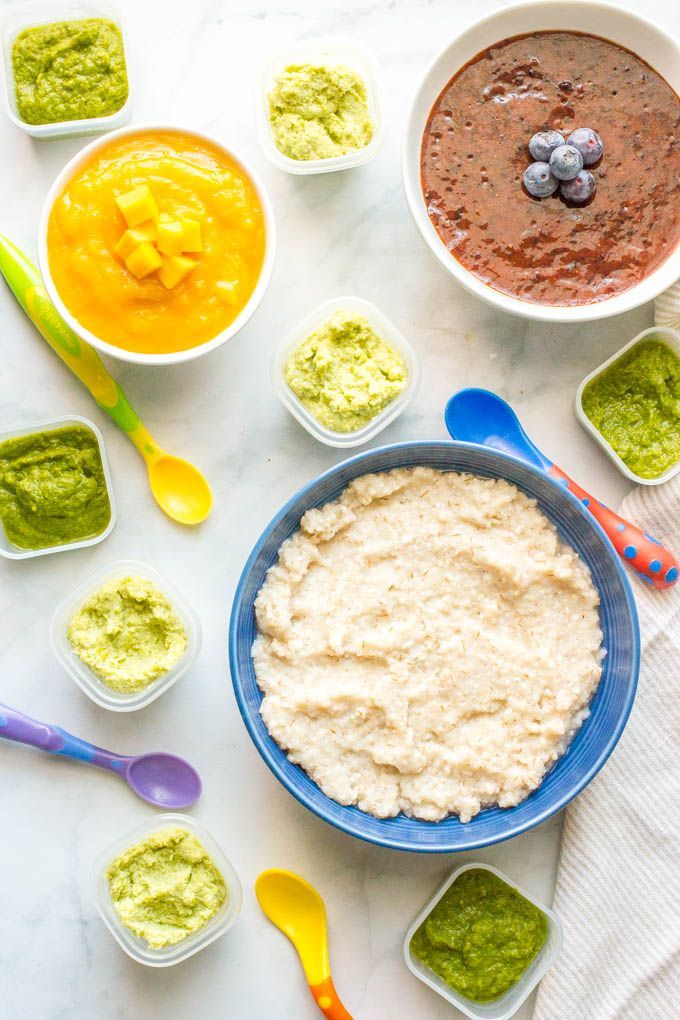
Best First Foods for Baby: Purees
Here are some of our favorite purees to start offering baby when they’re ready to start solids. Remember: There’s no evidence that says that you need to start with vegetables versus fruits, so go with something that tastes good to you. Start with single foods pureed smooth and offer just a little at a time on a spoon.
- Mashed roasted sweet potato puree
- Mashed avocado puree
- Mashed banana puree
- Butternut squash puree
- Applesauce, unsweetened
- Mashed pea puree
- Oatmeal baby cereal (with added iron)
TIP: One of my favorite baby food companies is Amara Organic Baby Food, a company using a nutrient protection technology that makes organic purees just as good as homemade. I love how easy they are to use when I need a shortcut and that they have fun baby-led weaning recipes on the side of every box! (paid affiliate link)
How do I know when baby has had enough?
If your baby is eating and then starts to turn her head away or just refuses to open her mouth, she’s done! Babies may also start to fuss if they’ve had enough. Learning this new skill takes time and babies can become tired fairly quickly into the process, so don’t expect them to always eat very much or to last very long at the table. This stage is about exploration!
How to Let Baby Self Feed Purees
I love offering purees on a preloaded spoon. To do this, the parent, puts some of the food on the spoon and hands it to baby. Then baby can bring the food to their mouth all by themselves. This gives you some of the same advantages of baby led weaning, but can be more comfortable for many parents.
Remember, you can mix what you offer, going back and forth between purees and blw finger foods, so you can offer the same food two different ways to let baby explore. The main goal is to avoid forcing baby to take more bites than they want to, which can sometimes happen with purees.
Baby eating peanut butter toast stickWhen to Introduce Potentially Allergenic Foods
In recent years, guidelines have been updated on when to introduce potential allergens including peanuts, eggs, and shellfish, so unless you have a family history of a food allergy, you can go ahead and introduce them soon after baby starts eating solids. In fact, research is showing that introducing these foods early can actually protect baby from developing an allergy. Talk to your pediatrician if you have concerns.
TIP: Thin unsweetened peanut butter with water to form a very thin Peanut Butter Puree until it’s about the consistency of regular yogurt and offer a very small amount on a spoon or spread on a toast stick.
What does a baby led weaning meal look like for months 7 and 8?
Until a baby is closer to 9 months and is able to pick up smaller pieces of foods, but after they have gotten the hang of one food at a time, I try to offer 1-2 foods they can feed themselves and one puree. This offers them a chance to ingest more via the puree but still feed themselves a range of textures. You can do more or less food following the lead of the child.
TIP: My Baby Food Chart has loads of with ideas for blw foods and purees by month.
Recipes for Every Stage of Starting Solids
If you’re ready to start solids with baby, or you’re just curious what it looks like to do a mix of baby led weaning and purees, check out my Yummy Baby Food cookbook. It goes stage by stage with specific foods to start in each, with simple recipes and easy feeding tips.
Listen to a recent podcast episode to hear about some of the basics of BLW with our guest Megan McNamee, MPH, RDN, CLT, and a Registered Dietitian Nutritionist specializing in pediatric nutrition who runs Feeding Littles.
I’d love to hear any questions you have with BLW or if your baby had a first food that I didn’t list here. Please comment below to share your experience!
Prep Time 5 minutes
Total Time 5 minutes
Author Amy Palanjian
Cuisine American
Course Dinner
Calories 28kcal
Servings 1
Banana
- ▢ 1 small ripe banana with peel on
Roasted Sweet Potato
- ▢ 1 small sweet potato + 1 teaspoon olive oil
Roasted Apple
- ▢ 1 small apple + 1 teaspoon butter or neutral oil
Roasted Broccoli
- ▢ 1 cup broccoli florets + 1 teaspoon olive oil
Sauteed Green Beans
- ▢ 4 green beans 1 teaspoon olive oil
Melon
- ▢ 1 small piece watermelon or cantaloupe
Avocado Toast
- ▢ 1 slice whole grain bread
- ▢ 1 tbsp ripe avocado
Avocado Spear
- ▢ ⅛ ripe avocado
Lamb or Beef
- ▢ 1 lamb chop, roast, or steak
Pan-Seared Chicken Thighs
- ▢ 1 chicken thigh
- ▢ 1 tsp olive oil
- ▢ 1 garlic clove, optional
Banana with some of the peel still on
Cut a banana in half.
 Use a knife to gently cut around the peel about 2 inches down, leaving some of the peel on so that the banana is easy for baby to hold and less slippery.
Roasted Sweet Potato Wedges
Preheat oven to 400 degrees and line a rimmed baking sheet with foil. Wash and dry the sweet potato. (You don't need to peel it.) Cut in half, then cut lengthwise into strips. Cut each strip in half again until each is about 1/2-inch thick. Slice in half horizontally if the sweet potato is very long. (Each strip should be about the size of your finger.) Place into a bowl and toss with the olive oil. Spread onto prepared baking sheet and roast for 22-25 minutes or until soft. Let cool slightly and serve.
Roasted Apple Wedges
Roasted Broccoli Florets
Preheat the oven to 400 degrees F. Place the broccoli onto a rimmed baking sheet and toss with the olive oil, coating and mixing well until all of the florets are a little shiny and coated with oil.
 Roast for 15-18 minutes or until tender. Let cool slightly and serve.
Sauteed Green Beans
Warm the oil in a large skillet over medium heat. Add the green beans and stir. Cover and cook for about 8 minutes. Remove cover and taste one to see if it’s soft enough. Cook for an additional minute or two as needed.
Melon slices
Avocado Toast
Avocado Spears
(Make sure the avocado is ripe and soft): Cut a thick strip of avocado and offer to baby. You can leave the peel on if that makes it easier for baby to hold (just wash it first).
Lamb or Beef
Prepare a roast, steak, or chop without salt and with butter or olive oil until cooked medium well. Offer a thick slice at least the size of your finger or a drumstick.
Pan-Seared Chicken Thighs
Warm 1 tablespoon olive oil or butter in a large skillet over medium heat. Add the chicken thigh and top with a few slices of fresh garlic, if desired.
 Cover and cook for 4-5 minutes. Remove cover. Flip over and cook for an additional 4-5 minutes uncovered or until a meat thermometer registers 165 degrees F.
- Add spices like garlic powder, cinnamon, cumin, oregano, or any other non-spicy flavor you like to make these more interesting.
- Offer just one piece at a time when starting out.
- If baby gnaws a piece down into a smaller piece, replace it with a larger one to avoid her putting a chunk of food into her mouth.
- Store any leftovers in an airtight container in the fridge for 3-5 days. Reheat briefly if needed.
- Remember that it's normal for babies to take time to actually ingest the food. Part of the process is exploring all of the senses related to the experience of eating.
Calories: 28kcal, Carbohydrates: 2g, Protein: 1g, Fat: 2g, Saturated Fat: 1g, Polyunsaturated Fat: 1g, Monounsaturated Fat: 2g, Sodium: 6mg, Potassium: 75mg, Fiber: 1g, Sugar: 1g, Vitamin A: 23IU, Vitamin C: 2mg, Calcium: 2mg, Iron: 1mg
Tried this recipe?Rate in the comments and tag @yummytoddlerfood on IG!
10 rules for making safe baby food for your baby
About nutrition
- Photo
- Ibrakovic / iStock / Getty Images
AAP) and the World Health Organization (WHO) recommend exclusive breastfeeding for six months, after which complementary foods begin.
 But it may happen a little earlier or later. Signs of a child's readiness include:
 -
Good head control and sitting with little support.
-
The baby may turn away, push the bottle or the breast away to let you know that he is full and has finished eating.
-
The baby is shortening the intervals between feedings and it seems that breast milk or formula is no longer enough for him.
-
And the most important clue: when you eat, your child looks down at you and seems to be begging for food with his eyes (or maybe even snatching it out of your hands).
2. Don't get hung up on what food to give first
There is no one food to start with - even pediatricians can disagree. Most recommend that parents start with the simple whole fruits and vegetables that the family is accustomed to eating—bananas, apples, peas, zucchini, carrots, or potatoes.
You can boil or roast your favorite fruits or vegetables until soft, then mix them with enough breast milk, formula or water to get a runny consistency.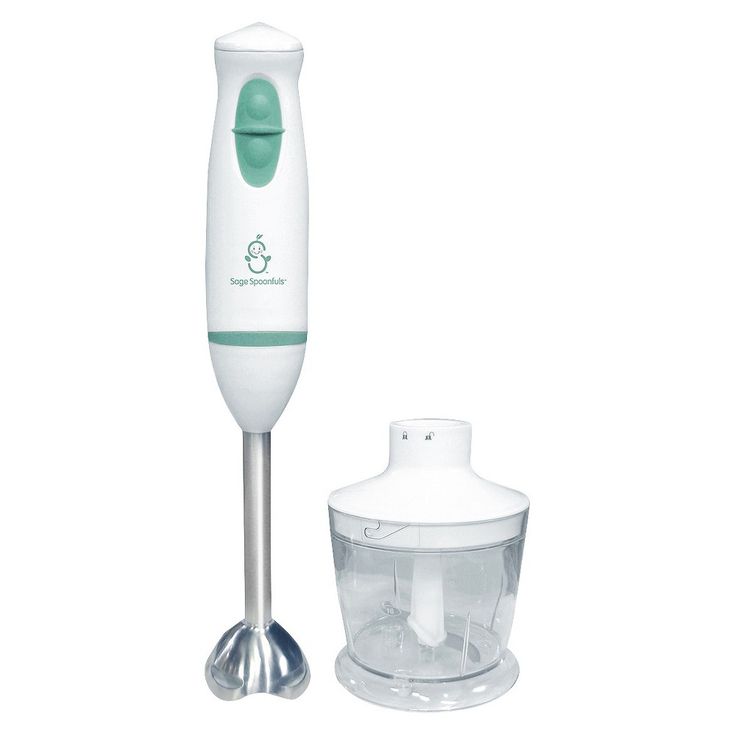
It is advisable to follow the rule: give the child one new product for 3-5 days, so that in the event of an allergic reaction, it would be easier to identify the "culprit". As soon as the child begins to eat one food well, you can move on to another, or to new combinations of foods that he has already tried. For example, give your child mashed bananas for 3 days, and then you can switch to baby oatmeal with bananas.
- Photo
- blyjak / iStock / Getty Images
3. Avoid certain foods until the baby is 1 year old
Due to the risk of botulism, honey or foods containing honey should not be given to the baby. You should also avoid unpasteurized foods: milk, undercooked meat, eggs, fish or poultry. The child can eat yogurt. However, whole milk should be introduced into the diet after one year, as it is not as nutritious as breast milk or formula and is low in iron.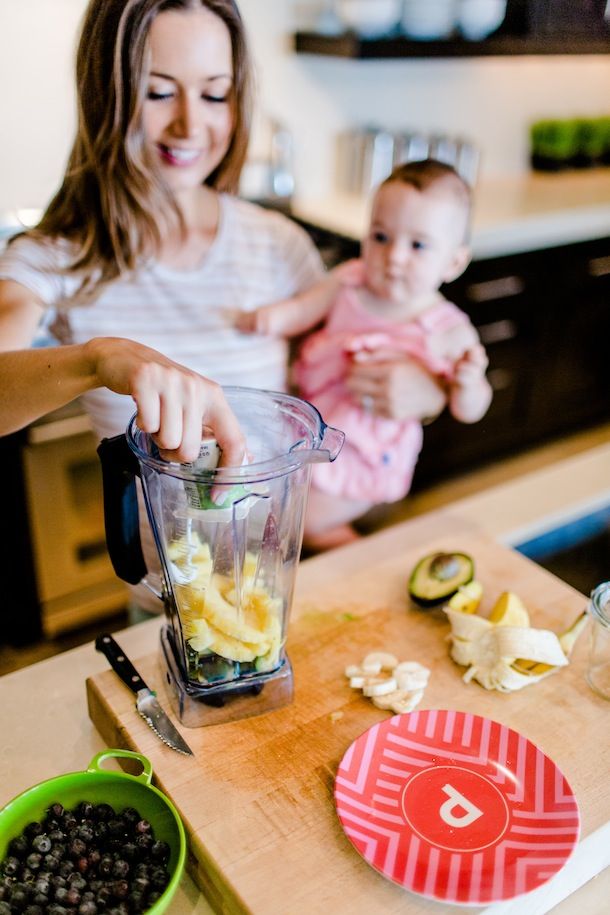
4. Don't waste your money on fancy kitchen equipment
There are many gadgets for making baby food. They are expensive and will only be needed for a short period of time. Instead, just use what you already have on hand—a hand blender, immersion blender, or food processor.
5. Store Food Properly
Strained fruits and vegetables can be stored in the refrigerator for up to two days, and in the freezer for up to one month. Keep vegetable purees in the refrigerator for no more than a day, and in the freezer for a month. The same applies to strained meat, poultry, fish and eggs.
6. Store food in ice cube trays
It is convenient to freeze puree in ice cube trays. Each cube contains 2 tablespoons of puree—the perfect serving size to start with. After freezing in the tray, you can transfer the cubes to labeled freezer bags and put them in the freezer.
- Photo
- Getty Images
7.
 Be sure to feed meat
 Meat is an excellent source of protein and iron. If you decide to make your own baby food at home, you can mix boiled meat (beef, chicken, or turkey) with breast milk, formula, or another puree (such as mashed potatoes) until it's the consistency of soup, without chunks. Older children can be given pieces of minced meat. It is important to avoid meats with a higher salt content, such as bacon and deli.
The iron stores that a baby is born with are depleted after about 4-6 months. Therefore, iron-fortified baby cereals or mashed meats are an important complementary food for breastfed babies.
8. Don't worry if you don't have time to cook
Homemade baby food can be easy! Make a banana or potato puree. In addition, you can get by with a store option.
9. Don't put off allergenic foods
Pediatricians used to advise to postpone the consumption of highly allergenic foods until the age of one. A new study shows that it is important to give your child such food as early as possible. Pediatricians now recommend doing this when the baby is 6 months old. Recall that highly allergenic foods include milk, eggs, soy, wheat, peanuts, tree nuts, fish and shellfish.
10. It's important to know the signs of an allergy
Remember and learn the signs by which it is clear that a baby is developing an allergy.
-
external : swelling of the mouth or tongue, swelling of the eyes, itching all over the body, single urticaria or urticaria all over the body, exacerbation of eczema;
-
digestive: vomiting or diarrhoea;
-
respiratory: cough, choking, wheezing or difficulty breathing.
-
cardiovascular: bluish lips, mouth or fingers, or weak pulse.
Lida Buslaeva
Cooking and recipes for complementary foods for infants in their first year of life
CHILDREN'S FOOD. CHILDREN'S DISHES
| Description products and dishes | Age, months | |||||||
| 6 | 7 | 8 | 9 | 10 | 11 | 12 | after year | |
| Fruity puree ml. | 5-30 | 40-50 | 50-60 | 60-70 | 80-90 | 90-100 | 100 | 100 |
| Vegetable puree, g. |
| 5-30 | 40-50 | 50-60 | 60-70 | 80-90 | 90-100 | 100 |
| Kasha, city |
| 50-100 | 100-150 | 150 | 150-180 | 180-200 | 200 | 200 |
| Curd, city |
|
| 10-30 | 30-40 | 40-50 | 50 | 50-80 | 80-100 |
| Yolk, pcs. |
|
|
| 0.25 | 0.5 | 0.5 | 0.5 | 0.5 |
| Meat puree, g. |
|
|
| 5-30 | 50 | 60-70 | 70-80 | 80 |
| Kefir, etc. fermented milk products ml. |
|
|
|
| 100 | 100-150 | 150-200 | 200 |
| Whole milk ml. |
|
|
|
|
|
|
| 100 |
| Fruit juices ml. |
| 5-30 | 40-50 | 50-60 | 60-70 | 80-90 | 90-100 | 100 |
| Fish puree, g. |
|
|
|
| 5-30 | 40-60 | 70-80 | 80-100 |
| Bread (wheat), g. |
|
| 3-5 | 5 | 5 | 5-10 | 10 | 10-15 |
| Rusks, cookies, g. |
|
| 3-5 | 5 | 5 | 5-10 | 10 | 10-15 |
| Vegetable oil, g. |
| 1-3 | 3 | 3 | 5 | 5 | 6 | 6 |
| Creamy oil, g. |
|
| 1-4 | 4 | 4 | 5 | 5 | 6 |


This complementary feeding schedule is only a guideline and can be modified by your doctor to suit your child's needs.
Breastfed and developing children should not be introduced to complementary foods until they are 6 months of age!
Up to 6 months, a baby needs mother's milk, and only one. There should be no complementary foods, no juices until the child reaches 6 months. After 6 months, the introduction of complementary foods is mandatory, but against the background of continued natural feeding.
Breastfeeding continues until the baby refuses to breastfeed, but for at least 12 months. Forcibly weaning the baby from the breast is strongly NOT RECOMMENDED. The time will come when the baby will give up the breast on its own.
Mixed (breast milk + formula supplemented) or bottle fed infants are introduced to complementary foods 2-4 weeks earlier than breast fed infants. This is due to the fact that children receiving mixtures, especially soy (if they are allergic to cow's milk proteins), experience the need for additional nutrients earlier than others.
In children with unstable stools, it is better to postpone the introduction of fruit juices and purees to a later date, and as a dietary correction, it is better to use mixtures in their diet that have a fixing effect due to the presence of a small amount of rice in their composition.
Infants with insufficient weight gain and unstable stools, as well as children born prematurely, can be recommended cereals as the first complementary foods.
If there is a tendency to anemia, meat puree is introduced earlier.
ABOUT MANK
Often mothers have a question: why is it now not recommended to give semolina to babies at least up to a year (better, up to 3 years), although they used to start complementary foods with it?
Drawback #1: semolina "eats" calcium
The fact is that there is phytin in semolina, and phytin contains phosphorus, which binds calcium salts and prevents them from entering the bloodstream. The level of calcium salts in the blood of a person should be constant - about 10 mg per 100 ml of blood serum. As soon as there are fewer salts, the parathyroid glands "withdraw" them from the bones and send them into the blood. Only here in children there is not so much calcium in the bones, besides, children grow quickly, they really need it. It turns out that semolina deprives them of calcium.
If there is not enough calcium in the body, muscles and the heart do not work well, blood coagulates worse. A striking example of a lack of calcium is the increased excitability of nerve cells and the appearance of convulsions. Therefore, children who are heavily fed semolina (2-3 servings a day) often develop rickets and spasmophilia.
Parents may have questions. And what, other cereals also bind calcium? Yes, but to a lesser extent than semolina. That is why doctors now recommend feeding babies first vegetable puree, and then meat. Will vitamin D help in this case? After all, it promotes the deposition of calcium in the bones. To this I answer this way: those doses of vitamin D that are needed with proper nutrition are not sufficient for a child growing by leaps and bounds (namely, this is how it grows on semolina). The more weight, the more calcium and vitamin D are needed.
Why doesn't semolina harm adults? Why do we eat bread several times a day and do not lose calcium? We, adults, do not eat so much porridge relative to our weight, and our need for calcium is much less than that of children. But if you eat only semolina, a lack of calcium will also affect an adult: osteoporosis will occur - increased bone fragility.
As for bread, phytin in it loses its ability to bind calcium under the action of acid, which is formed in yeast dough. Many scientists believe that those peoples who did not master the production of sour bread and ate unleavened wheat or barley cakes could not create powerful, developed civilizations. “Rice” civilizations (there is little phytin in white rice), on the contrary, turned out to be viable.
Deficiency #2: not everyone is gluten tolerant There is a lot of gluten in semolina. This protein is also called gluten. It is gluten that gives elasticity to dough and soft splendor to bread. But many people do not tolerate gluten, it causes celiac disease in them - a severe hereditary disease that occurs in about one in 800 Europeans. Gluten and proteins similar to it are found in five cereals: wheat, rye, oats, millet (millet) and barley.
Under the influence of gluten in patients with celiac disease, the intestinal mucosa becomes thinner and the absorption of all nutrients, especially fats, is disturbed. The disease manifests itself when a small child is given semolina (less often - oatmeal) porridge. The chair becomes plentiful, mushy or liquid, light, with a shiny (fatty) surface. The child stops gaining weight, his stomach increases, and the muscles, on the contrary, decrease.
If the disease manifests itself at an older age, the child complains of abdominal pain, bowel dysfunction, but the disease does not manifest itself as violently as in infancy. I must say that gluten can cause another disease - allergies. It also manifests itself as a disorder of the stool.
The diagnosis of celiac disease is not difficult to make - it is necessary to do a biopsy of the intestinal mucosa. And then - a diet: all products with gluten are excluded for life. We will have to give up bread and flour products, cereals (except buckwheat and rice) and all products that include flour - boiled sausages and sausages, sauces, canned fish in tomato ...
After all, even 200-500 mg of gluten per day is enough to disrupt intestinal absorption. Parents are usually shocked by such a verdict. But in vain. If a child up to a year or two has never eaten bread, buns and semolina, he will not be drawn to them.
It is also not recommended to rush to introduce dishes from such cereals as barley, oatmeal and millet into complementary foods, as they lack trace elements and many other useful substances. In addition, a harmful substance, gliodin, was found in these cereals. It is a mucopolysaccharide, which is found in the shell of some cereals and causes necrosis (death) of the intestinal villi, due to which nutrients are absorbed.
Many studies have shown that the previously widely promoted health benefits of oatmeal are greatly exaggerated.
TIP. Buckwheat porridge is the first to be introduced into complementary foods - the most useful of all cereals. And throughout life, it should be on the table at least 3-4 times a week.
For the correct formation of the child's body in the diet, there should be enough animal products (milk, dairy products, meat, a little later, from 9 months old, and fish), as well as animal fats (70-80% of the total amount of fat), which are carriers of fat-soluble vitamins A and D necessary for a person.
Sugar syrup, 100%.
NOTE. Sugars are a large group of substances. Healthy natural sugars are fructose and glucose.
Sucrose is the main cause of dental caries and an effective immunosuppressant, therefore it is highly undesirable in the diet of people of all ages. In all recipes where sugar is indicated, use fructose, a very healthy natural sugar (glucose is less desirable, because it is absorbed by the body too quickly, sucrose in the diet is unacceptable).
Take 100 g of sugar and 50 ml of water.
Sugar is poured into a saucepan, poured with hot water.
Stir and boil over low heat for 10 minutes.
Then it is filtered through several layers of boiled or sterile gauze.
You should get 100 g of syrup.
If it turns out less, add boiled water to the desired volume.
The finished syrup is poured into a sterile bottle and closed either with a sterile nipple without a hole, or with sterile cotton wool.
Store it for 2-3 days and use it to prepare baby food.
Refined sugar and granulated sugar are not recommended to be used directly for the preparation of mixtures.
If the sugar cube does not dissolve, it can enter the infant's respiratory tract, causing severe coughing or even choking.
SuperCook.RF
Salt solution 25%
Take 25 g of salt and 100 ml of water.
Salt is poured into a saucepan, poured with hot water and boiled.
10 minutes on low heat, then filtered.
If the solution is less than 100 ml, you need to add boiled water and boil again.
Salt solution is added at the rate of 3–5 ml, or from 0.5 to 1 teaspoon, per 200 g of food.
SuperCook.RF
Kefir
You can cook it in two ways.
According to the first method, sourdough from kefir fungi is used.
First, they are revived: they are poured with water at room temperature or heated to 25–30 ° C.
They take 5 times more water than fungi, and change it 2-3 times a day for 2 days, until the grains increase 4-5 times and become almost white.
Then the fungus is poured with pasteurized or boiled milk at a temperature of 23–24 ° C.
Milk in relation to the volume of kefir fungi is taken 10 times more. Daily milk is replaced with fresh milk.
During the day, milk-filled fungi are shaken.
When the fungi begin to float, the milk foams when shaken and coagulates after 8-10 hours.
We can assume that the leaven is ready.
It is drained through a sieve, the fungi are washed well with boiled water, completely freed from clots of curdled milk and again poured with cooled boiled milk.
Kefir is prepared like this.
Pasteurized or boiled milk cooled to 24°C is poured into sterile bottles, 5% sugar syrup and starter are added at the rate of 10 ml of starter per bottle.
The bottles are closed, shaken and left for 10–12 hours in a room at a temperature of 18–20°C.
After the formation of a clot, kefir is transferred to a refrigerator or a cooler place with a temperature of 3 to 12°C.
While kefir is being prepared, the bottles are isolated from daylight if possible, as it destroys vitamins.
One-day kefir is ready a day after fermentation.
Young children are recommended to give two-day yogurt, if there are conditions for its storage at a temperature of 3–10 ° C.
If kefir is stored at room temperature or the child has a tendency to constipation, he should be given one-day kefir.
After 3 weeks, the sourdough should be renewed.
Kefir can be prepared using ready-made kefir as a starter: boiled and cooled to 20–24 ° C milk and 2 tablespoons of daily kefir are poured into each bottle.
The bottles are carefully corked and stored at room temperature for 24 hours in winter, 10-14 hours in summer.
Then it is put in the cold, after which the kefir is ready for use.
SuperCook.RF
Fresh apple juice
Wash fresh apples without stains, pour over boiling water, peel, grate, transfer to sterile gauze folded in half, squeeze the juice with a stainless steel spoon.
You can use a juicer.
SuperCook.RF
Cherry juice, plums
Ingredients
Cherries, plums - 100 g.
Yield - 50 ml.
COOKING
Sort cherries (plums), wash thoroughly, pour over with boiling water, free from stones, put in sterile gauze, squeeze with a stainless steel spoon.
SuperCook.RF
Blackcurrant, raspberry, lingonberry, blueberry juice
Ingredients
Berries different - 100 g.
Yield - 50 ml.
COOKING
Select ripe unwashed berries, rinse in running water, pour over boiling water, squeeze the juice through a juicer or sterile gauze, pour into a sterile bottle.
SuperCook.RF
Juice from orange, tangerine, grapefruit
Ingredients
Various citrus fruits - 100 g.
Yield - 60 ml.
COOKING
Wash the ripe fruit, pour over with boiling water, cut across and squeeze the juice with a glass juicer or divide the peeled fruit into slices, remove the seeds and squeeze the juice through sterile gauze, add sugar syrup to taste.
SuperCook.RF
Carrot juice
Ingredients
Carrots - 100 g.
Yield - 40 ml. .
COOKING
Thoroughly wash the carrots with a brush, peel, pour over with boiling water, grate on a fine grater, squeeze the juice with a juicer or twist through sterile gauze.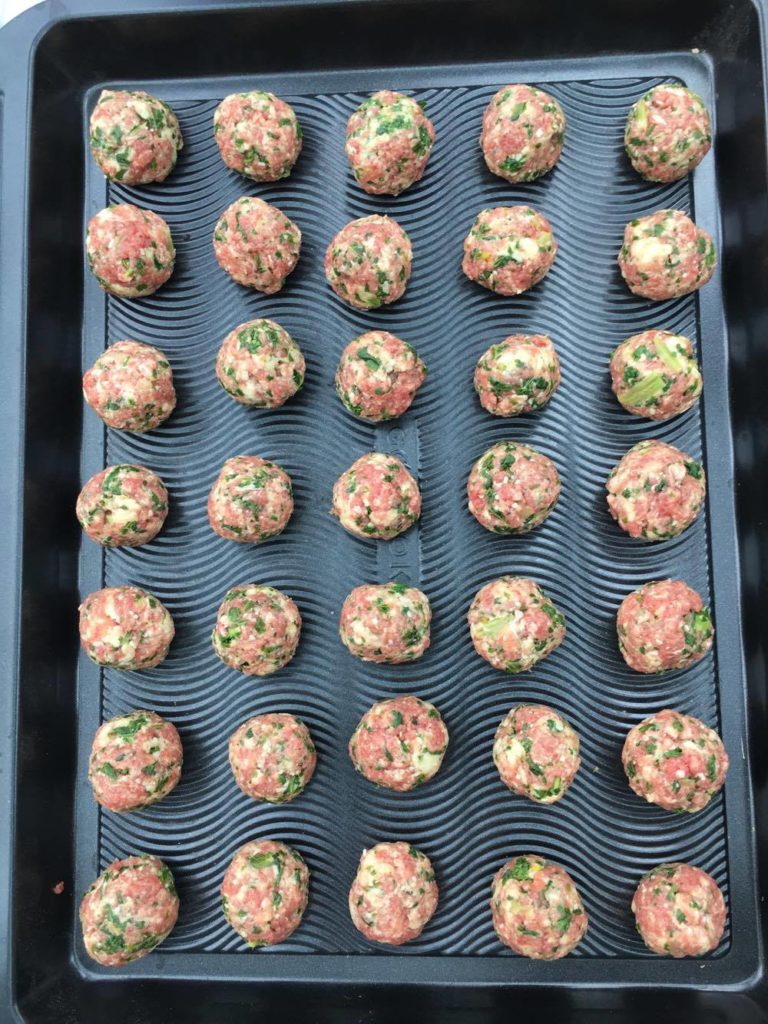
If the carrots are not sweet enough, you can add a little sugar syrup.
SuperCook.RF
Tomato juice
Ingredients
Tomatoes - 100 g.
Yield - 60 ml.
COOKING
Wash ripe, spotless tomatoes, pour over with boiling water, cut into four parts, mash, squeeze the juice through a juicer or sterile gauze.
SuperCook.RF
White cabbage juice
Ingredients
White cabbage - 100 g.
Yield - 35–40 ml
COOKING
Wash the cabbage, peel it, wash it again, pour boiling water over it, chop it thinly, lightly salt it, crush it with a stainless steel spoon, put it in gauze or a juicer and squeeze out the juice.
SuperCook.RF
Apple puree (pears)
Ingredients
Apples (pears) - 50 g.
Exit - 40–45 g.
COOKING
Ripe, without spots, apples (pears) thoroughly wash, pour boiling water over, peel off a thin layer, grate on a fine grater.
SuperCook.RF
Cherry (plum) puree
Ingredients
Cherries (plums) - 50 g.
Exit - 40 g.
COOKING
Sort ripe cherries (plums), rinse in running water, pour over boiling water, remove pits, rub with a stainless steel spoon through a sieve, separating the skin.
If the fruits are sour, add sugar syrup to taste.
SuperCook.RF
Carrot puree
Ingredients
Carrots - 100 g, milk - 25 ml, vegetable oil - 3 g.
Yield - 100 g.
COOKING
Thoroughly wash the carrots with a brush, peel, cut into pieces, pour boiling water until covered, simmer over low heat until tender and the water boils completely.
Rub hot carrots through a sieve, add warmed milk, a little salt and boil for 2-3 minutes.
Add vegetable oil to the finished puree.
SuperCook.RF
Puree from different vegetables
Ingredients
Various vegetables - 80 g, potatoes - 20 g, milk - 25 ml, vegetable oil - 3 g.
Yield - 100 g.
COOKING
Rinse various vegetables (carrots, cabbage, pumpkin, beets, turnips), peel with a brush, chop, put in a saucepan with a little water, simmer under the lid, making sure that there is water at the bottom of the saucepan all the time (add only boiling water), bring to half-cooked, add peeled coarsely chopped potatoes and simmer until tender.
Rub hot vegetables through a sieve, add hot milk, salt a little, beat well, bring to a boil.
Add vegetable oil to the finished puree.
SuperCook.RF
Mashed potatoes
Ingredients
Potatoes - 100 g, milk - 40 ml, vegetable oil - 3 g.
Yield - 100 g.
COOKING
Wash the potatoes thoroughly, peel, boil until cooked in a small amount of water, rub hot through a sieve, beat well, add hot milk, a little salt, bring to a boil, add vegetable oil to the finished puree.
SuperCook.RF
Cauliflower puree
Ingredients
Cauliflower - 100 g, vegetable oil - 3 g.
Yield - 100 g
COOKING
Peel the cauliflower, remove the green leaves, rinse, divide into small balls, pour boiling water until covered, simmer under a tightly closed lid until cooked and the water boils away.
When hot, rub through a sieve, add hot milk, a little salt, boil for 1-2 minutes.
Add vegetable oil to the finished puree.
SuperCook.RF
Cauliflower and zucchini soup
Ingredients
Cauliflower - 50 g, zucchini - 50 g, yolk - 1/4 pc. , Butter - 3 g.
Yield - 100 g
COOKING
Peel the cauliflower and zucchini, cut into small pieces, pour boiling water, cook under a tightly closed lid until tender, drain the broth into a separate bowl, rub the hot vegetables through a sieve, combine with the broth, salt a little and bring to a boil.
Season the finished soup with butter, mashed yolk of a hard-boiled chicken egg.
SuperCook.RF
Spinach puree
Ingredients
Spinach - 100 g, wheat flour - 5 g, milk - 50 ml, butter - 3 g, sugar syrup - 2 g.
Yield - 100 g.
COOKING
Peel the spinach, remove the root parts, rinse thoroughly in running water, leave in a colander so that the water is completely glassed, transfer to a saucepan, simmer over low heat in its own juice for 10–15 minutes (until soft), rub through a sieve, season with white sauce ( dissolve the butter, fry wheat flour in it, add hot milk and boil for 5-7 minutes, add a little salt, bring to a boil).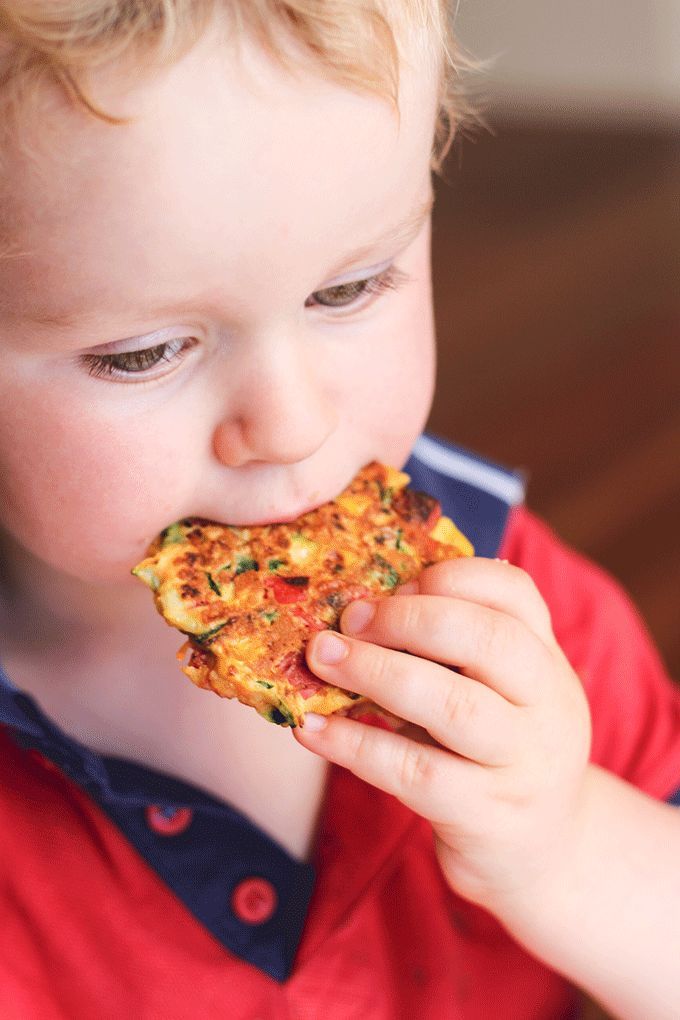
Season the finished puree with butter and sugar syrup.
SuperCook.RF
Semolina porridge five percent
Ingredients
Semolina - 5 g, milk - 50 ml, water - 80 ml, sugar syrup - 3 ml, butter - 3 g.
Yield - 100 g.
NOTE.
Semolina porridge is not recommended for children under 3 years of age due to its high gluten content. But here it all depends on the individual tolerance of gluten. Some small children eat semolina with pleasure and without any harm to themselves.
If a child refuses semolina, in no case should you insist.
If, after semolina, a child has increased gas formation in the intestines or other digestive disorders, the child's condition worsens, semolina should be strongly abandoned.
COOKING
Pour sifted semolina in a thin stream into boiling lightly salted water, cook over low heat with stirring for 15-20 minutes, add hot milk, sugar syrup and bring to a boil.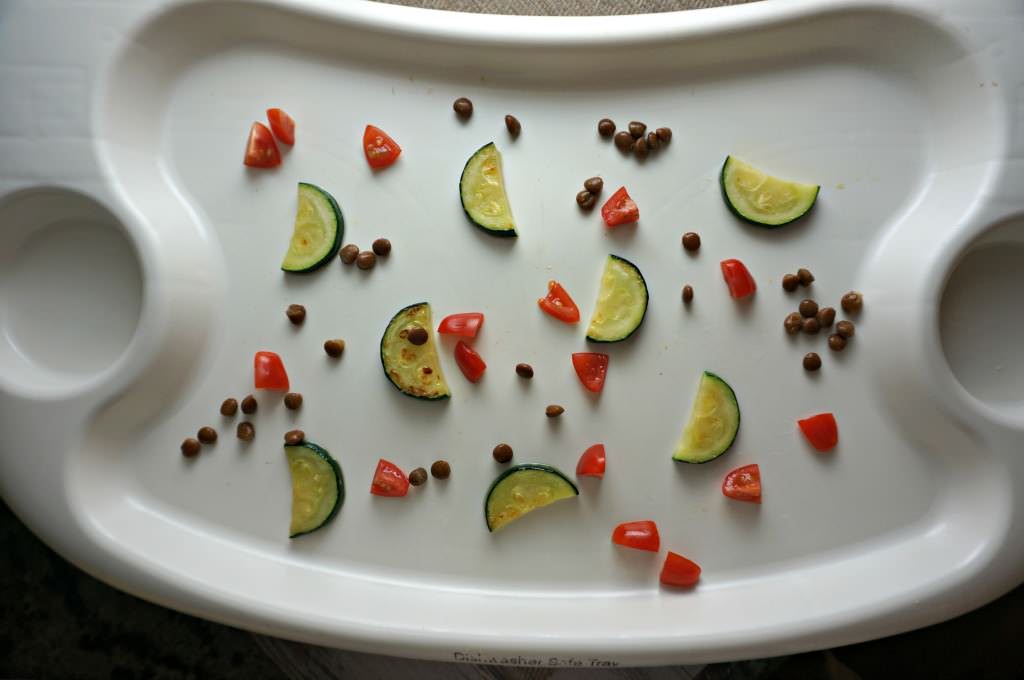
Add butter to the finished porridge.
SuperCook.RF
Semolina porridge ten percent
Ingredients
Semolina - 10 g, milk - 100 ml, water - 25 ml, sugar syrup - 3 ml, butter - 3 g.
Yield - 100 g.
See NOTE to the previous recipe "5% Semolina Porridge"
COOKING
Boil water with half a serving of milk, add sifted semolina, cook over low heat for 15-20 minutes with constant stirring, salt a little, add sugar syrup, the remaining warmed milk, bring to a boil.
Add butter to the finished porridge.
SuperCook.RF
Oatmeal porridge ten percent
Ingredients
Oatmeal - 10 g, milk - 100 ml, water - 20 ml, sugar syrup - 3 ml, butter - 3 g.
Yield - 110 g.
COOKING
Bring the milk to a boil, pour in the oatmeal diluted in cold boiled water with constant stirring, cook for 2-3 minutes with continuous stirring, salt a little, add sugar syrup, bring to a boil.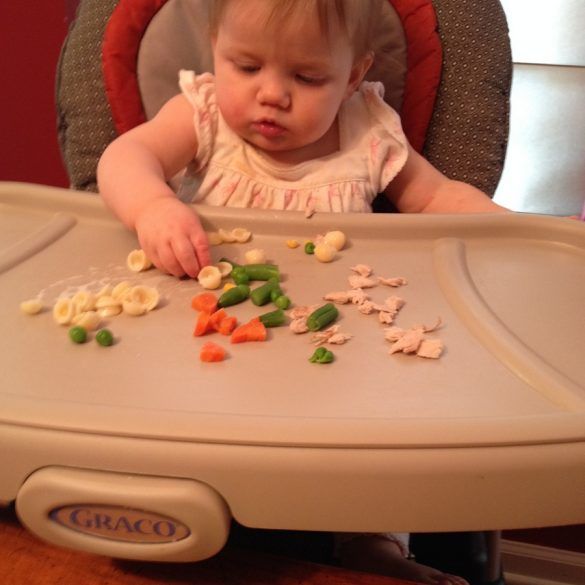
Add butter to the finished porridge.
SuperCook.RF
Porridge mashed buckwheat
Ingredients
Buckwheat - 10 g, milk - 100 ml, water - 30 ml, sugar syrup - 3 ml, butter - 3 g.
Yield - 100 g.
NOTE.
Buckwheat porridge is the healthiest of all cereals. Therefore, buckwheat porridge must be on the child's table at least 3-4 times a week.
COOKING
Pour pre-sorted and washed buckwheat into boiling water with stirring, cook over low heat for an hour.
Rub the boiled porridge through a sieve, add hot milk, a little salt, sugar syrup and boil for another 2-3 minutes while stirring.
Add butter to the finished porridge.
SuperCook.RF
Porridge “pink”
Ingredients
Semolina - 10 g, milk - 100 ml, water - 30 ml, sugar syrup - 3 ml, butter - 3 g, carrot (tomato) juice - 30 ml.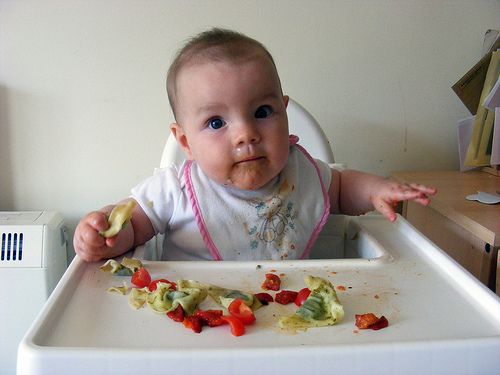
Yield - 100 g.
See above NOTE to the recipe "5% semolina porridge".
COOKING
Pour juice from fresh carrots or tomatoes into ready-made, slightly cooled 10% semolina porridge, mix thoroughly.
SuperCook.RF
Rice porridge with fruit puree
Ingredients
Rice flour - 10 g, milk - 100 ml, water - 20 ml, sugar syrup - 3 ml, fruit puree - 30 g, butter - 3 g.
Yield - 130 g.
COOKING
Pour rice flour diluted in cold water into boiling milk with continuous stirring, cook for 5 minutes.
At the end of cooking, add a little salt, add sugar syrup, fruit puree, bring to a boil.
Add butter to the finished porridge.
SuperCook.RF
Meat puree
Ingredients
Beef meat - 40 g, water - 50 ml, butter - 3 g.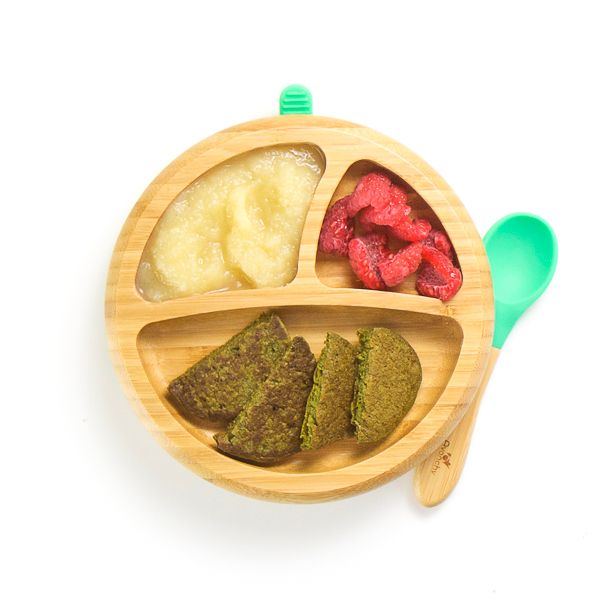
Exit - 50 g.
COOKING
Cut the meat into small pieces, add water and simmer until soft.
Turn the cooled meat twice through a meat grinder, then rub through a fine sieve, add broth, salt a little, bring to a boil, add butter, mix thoroughly, remove from heat.
SuperCook.RF
Steamed meat cutlets
Ingredients
Beef meat - 50 g, water - 30 ml, wheat bread - 10 g.
Exit - 50 g.
COOKING
Pass beef meat through a meat grinder, mix with bread soaked in cold water, pass through a meat grinder again, adding cold water.
Form cutlets from the resulting mass, put them in one layer in a bowl, pour half the broth and simmer under the lid until cooked for about 30-40 minutes.
SuperCook.RF
Chicken soufflé
Ingredients
Chicken meat - 60 g, milk - 30 ml, yolk - 1/4 pc.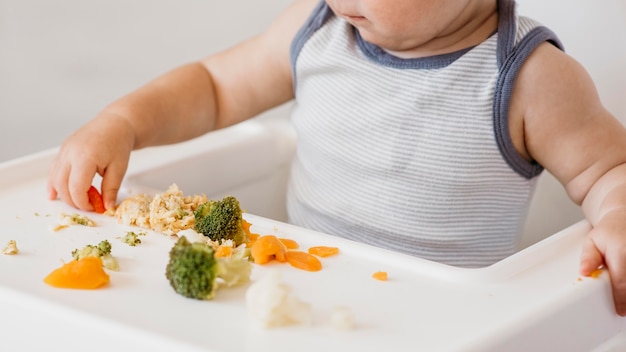 , butter - 2 g.
Exit - 50 g.
COOKING
Pass the chicken meat through a meat grinder, salt a little, add raw yolk, mix thoroughly, put in a frying pan, greased with oil, and bake in the oven for 30-35 minutes.
SuperCook.RF
Fish meatballs
Ingredients
Fish (cod) - 60 g, wheat bread - 10 g, yolk - 1/4 pc., vegetable oil - 4 g.
Exit - 50 g.
COOKING
Free the fish (fillet) from the skin, pass it together with bread soaked in cold water through a meat grinder, add the yolk, salt a little, add vegetable oil, beat everything together with a mixer or spatula.
Form small balls from the resulting lush mass, put them in a saucepan, half fill with water and put in the oven or on a very low fire.
Simmer for 20-30 minutes.
SuperCook.RF
Kefir cottage cheese
Ingredients
Per 100 g: kefir - 600 ml.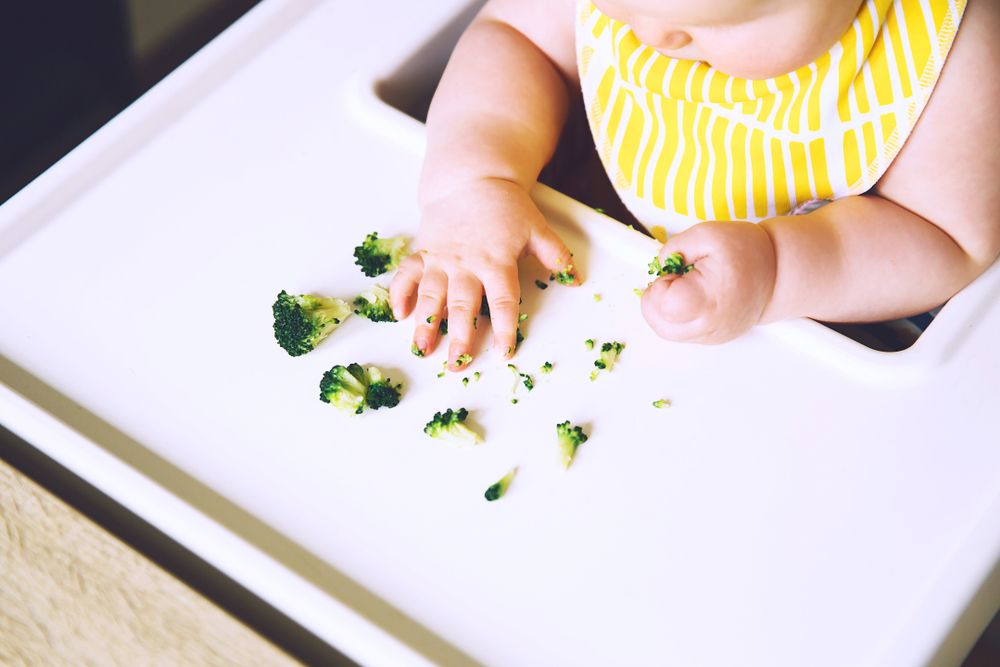
COOKING
Pour the kefir obtained in the dairy kitchen or kefir "Children's", prepared at the dairy, into an enamel bowl and put on the smallest fire.
When a clot forms on top, fold it onto a sterile gauze to drain the serum.
It turns out fresh and tender cottage cheese.
SuperCook.RF
Curd calcined
Ingredients
Per 100 g: milk - 600 ml, calcium lactate - 2.4 g, calcium chloride 6 ml of a 20% solution.
COOKING
Add calcium lactate or calcium chloride solution to cold pasteurized or boiled milk, stir and heat to a boil, then immediately remove from heat and cool to room temperature for better whey separation.
The resulting unleavened cottage cheese is thrown onto a sterile sieve covered with sterile gauze, squeezed out and placed in a sterile boiled glass jar.:strip_icc():format(webp)/kly-media-production/medias/2992735/original/089261700_1576038746-shutterstock_1066912214.jpg)
SuperCook.RF
Infusion of peeled dried rose hips
Ingredients
Per 100 ml: rose hips - 5 g, water - 95 ml, sugar syrup - 5 ml.
COOKING
Rose hips without a core are washed with cold water, rubbed, poured with boiling water in an enamel bowl and boiled under a lid for 10 minutes.
Then, in the same container, infuse for 3 hours at room temperature, filter through a dense sterile cloth into a sterile vessel.
Sugar syrup is added before use.
It is used during the day, otherwise a significant part of vitamin C is destroyed.
SuperCook.RF
Infusion of whole rose hips
Ingredients
Per 100 ml: rose hips - 10 g, water - 96 ml, sugar syrup - 5 ml.
COOKING
Rinse the fruits with cold water, pour boiling water in an enamel bowl and boil under a lid for 10 minutes, then let it brew for 24 hours at room temperature, strain through a dense sterile cloth into a sterile vessel, add just boiled sugar syrup, mix thoroughly, pour into sterile bottle and stopper.