Baby solid food stage 1
10 Baby Food Purees (Stage 1)
This post may include affiliate links. Thank you for your support.
Everything you need to know about making stage 1 baby food, including 10 recipes for tasty purees that are perfect for introducing solids.
Introducing solids to your baby is such an exciting milestone but it can also be an overwhelming time with lots of questions. When is your baby ready for solids? Which foods should you start with? And how do you make homemade baby food?
I’m here to make sure you have all the information you need! Plus sharing 10 baby food purees to give you some ideas of where to start if you’ve decided to make your own baby food.
When To Start Solids
Most pediatricians recommend babies start solids between 4-6 months, but you know your baby best so trust your gut and do what feels right to you (with guidance from your pediatrician)!
I have a great guide for introducing solids to babies where I outline the basics and share my approach, but just to recap, here are some signs that your baby is ready to start enjoying solid food:
- Baby can hold their head up in an upright position without too much bobbing
- Baby can sit up with (or without) support
- Baby has lost the tongue thrust reflex
- Baby puts their hands or toys in their mouth
- Baby has shown interest in food such as leaning forward and opening their mouth or trying to grab food you’re eating
How to Introduce Solid Food to Baby
Once you’ve decided that your baby is ready to start solids, it’s go-time. There are different approaches to this including baby led weaning, where you skip purees all-together and let your baby feed themselves with finger foods from the start and traditional weaning, which starts with pureed (or blended) foods.
With Olivia I did a hybrid approach where the first few foods we introduced where purees and then we started with a few finger foods when she seemed ready. I go into more detail on this in my introducing solids post.
To be honest, if you’re planning to do baby led weaning this post probably won’t be that helpful because it’s focused on how to make a variety of single ingredient purees.
What is Stage 1 Baby Food?
If you decide to use purees, you’ll quickly notice that baby food is labeled by three stages. Here is a breakdown of what these different stages mean:
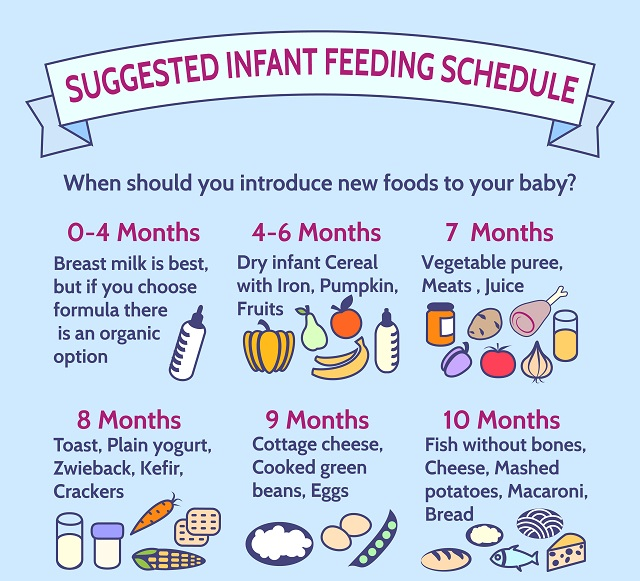
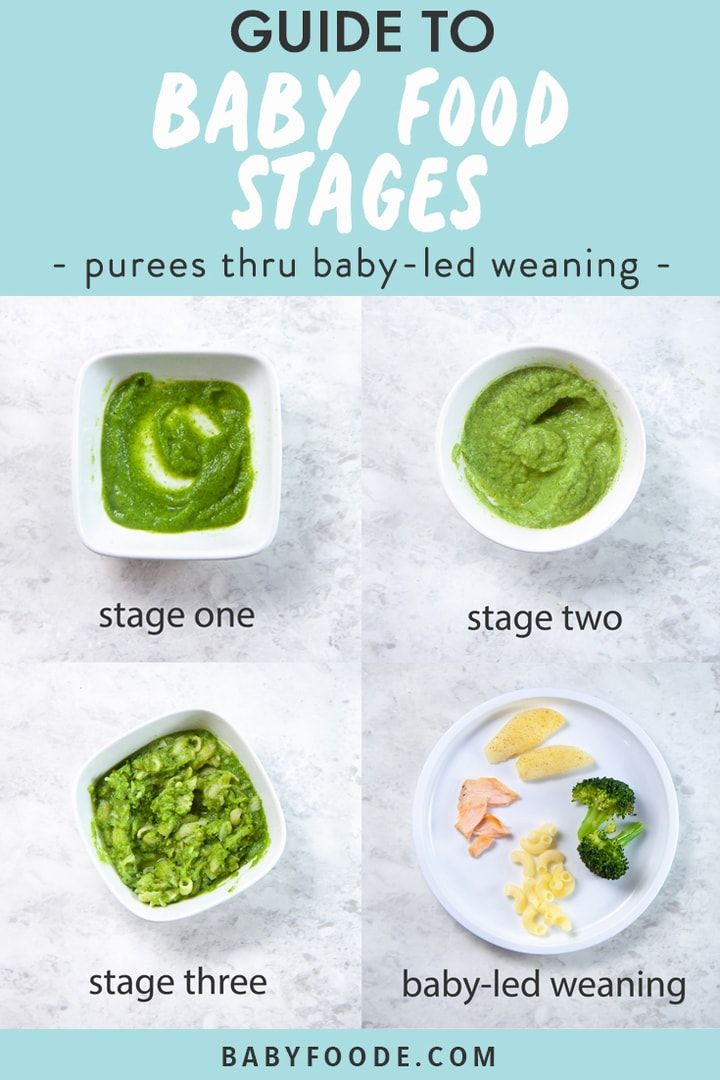
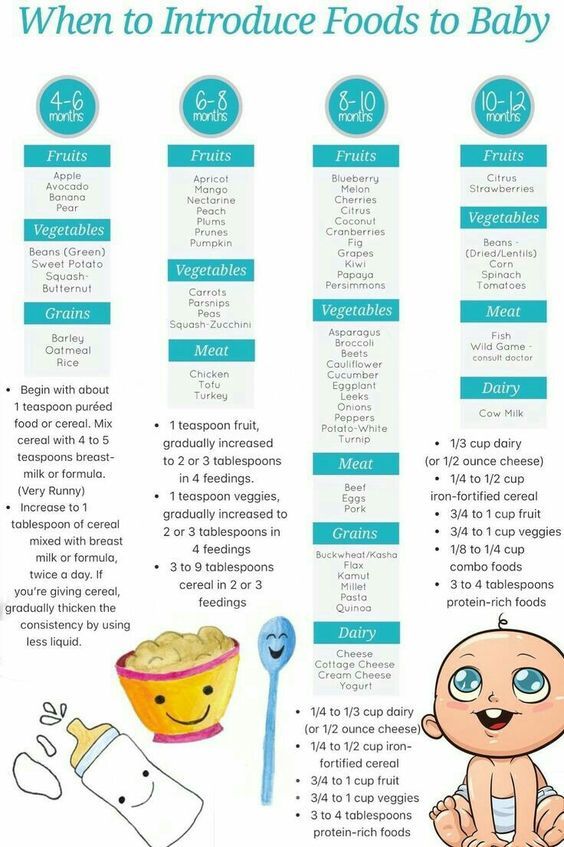
- Stage 1 (4-6 months) – single ingredient foods that are pureed into a very thin consistency with no chunkiness whatsoever that can be served with a spoon.
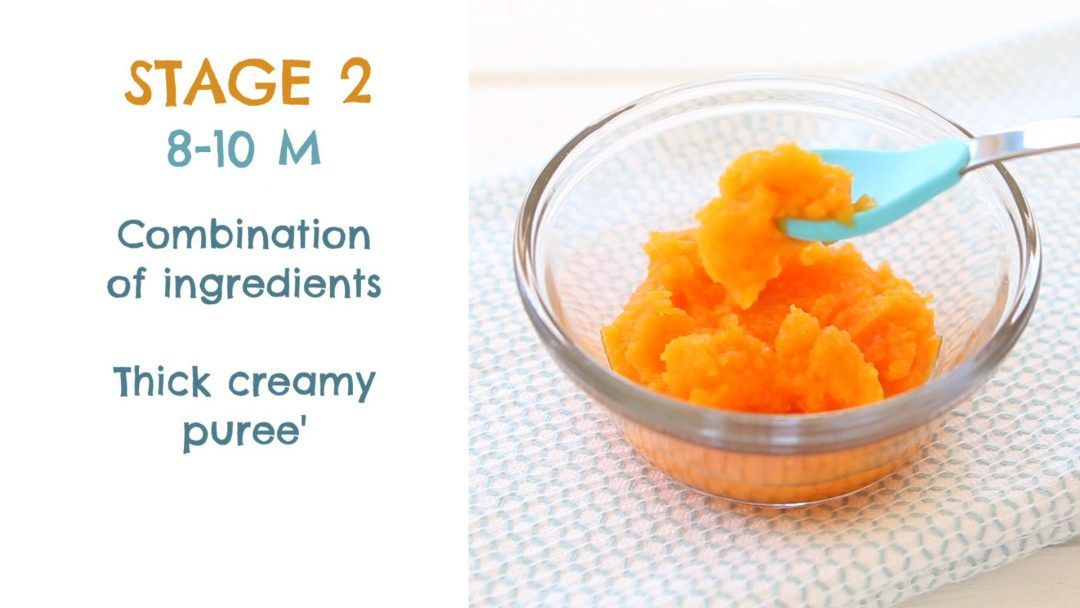
- Stage 2 (around 6-8 months) – slightly thicker consistency and typically includes food combinations and the addition of spices like cinnamon, nutmeg, turmeric, mint, basil, etc. See my stage 2 baby food combos.
- Stage 3 (around 9-12 months) – thick blended foods with chewable chunks or small cut up pieces of easily chewed food.
Best First Foods for Baby
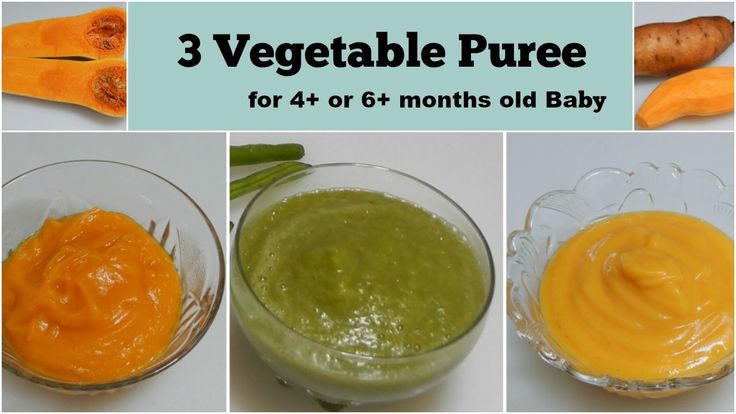
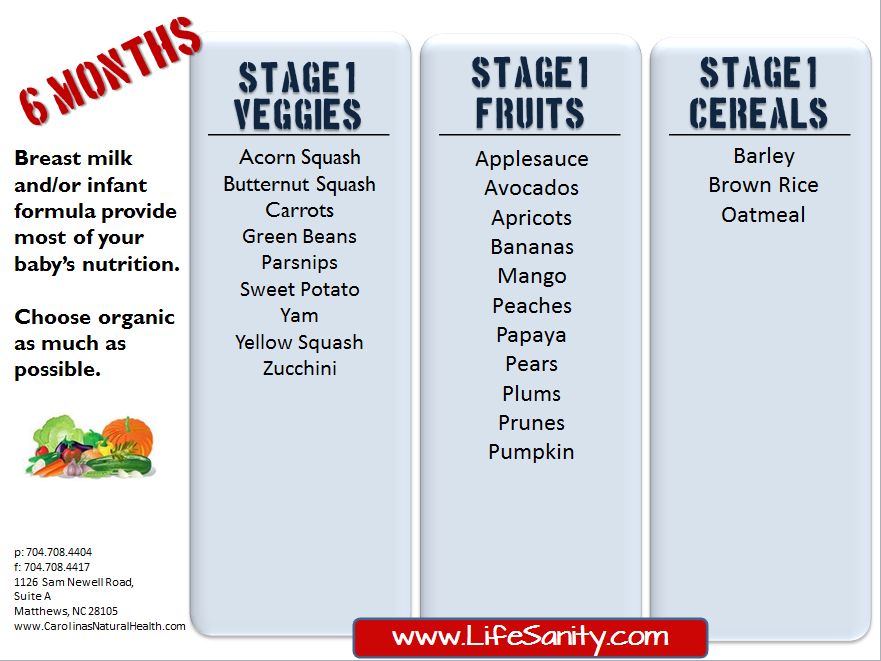
Solid foods can be introduced in any order, but most pediatricians recommend starting with a single-ingredient food that is easy to digest like pureed sweet potato, carrot, banana and/or avocado. Other options include pureed meats, poultry, beans and iron-fortified baby cereals like rice cereal or oatmeal.
You just want to be sure the first few foods are pureed super smooth and almost a liquid consistency. You can easily thin purees with breastmilk or formula.
As baby gets more practice with eating you can reduce the amount of liquid and offer purees with a thicker texture.
Food Allergies and Known Allergens
When introducing foods it can be helpful to introduce only one food every three to five days so you can watch for any signs of allergic reactions. A reaction could show up almost immediately or a few days after so it’s recommend to introduce one food at a time when starting out so you can track what may be causing a reaction in your baby. Reactions include: hives or rashes, itching, shortness or breath or more serious reactions like vomiting or swelling of the lips and tongue.
It’s also helpful to be mindful about common allergens. Foods like diary, eggs, peanuts, tree nuts, wheat, soy and shellfish should be introduced gradually after less allergenic foods have been tolerated. The previous recommendation was to wait on these foods, but that as since changed and in fact, delaying the introduction of these foods may increase the risk of a child developing allergies.
One food that is off limits until a baby is at least 1 year old is honey because of the risk of infantile botulism.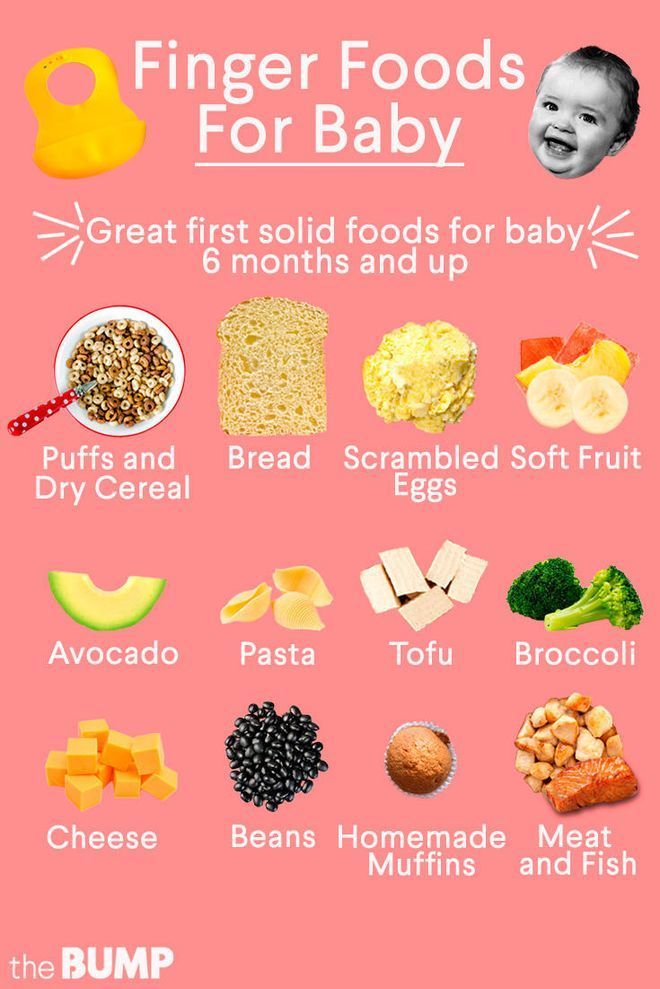
How to Make Homemade Baby Food
We covered when and what foods to start with. Now lets talk how to make a basic baby food puree! Don’t fret, it’s super easy. Here’s the basic process:
- Prep: you’ll want to start by ensuring your fruit or vegetable of choice is thoroughly cleaned. Even if you’re using organic fruits and vegetables, you’ll want to washed and dry your produce! Once the produce is clean, you’re ready to peel and chop into chunks. You can skip this step for some fruits or veggies.
- Cook: some foods like banana and avocado don’t need to be cooked, but many do. For cooking, you can steam, boil or roast. I recommend using a fork to test that they’re tender and soft.
- Blend: place cooked food into a blender or food processor and blend until smooth (or the consistency you desire), adding liquid (breast milk, formula or water) as needed.
That’s it! You’ve just made a homemade baby food puree!
Best Tools For Making Homemade Baby Food
You really don’t need any fancy kitchen appliances, but there are a few tools that will come in handy when making homemade baby food.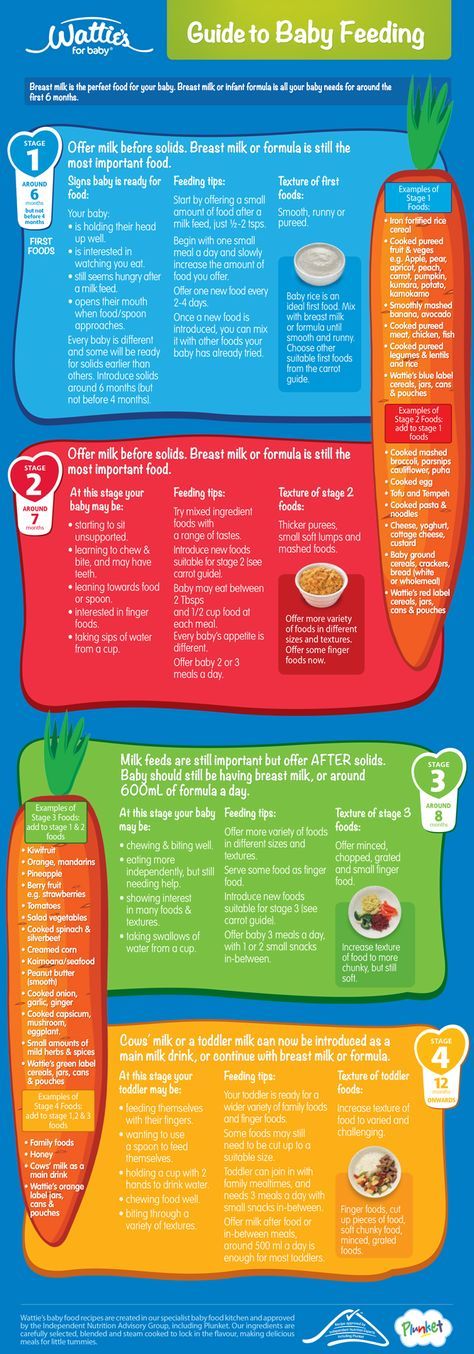
- Steamer basket – Steaming is one the easiest ways to cook foods for making purees and having a steamer basket is key. I have a really basic steamer basket that fits in most pots, but I also use the steamer basket that comes with my Always Pan.
- Blender – I’ve been using my Vitamix blender and love how smooth it makes the purees. You can also use a food processor or an immersion blender.
- Silicone ice cube trays – In the beginning I really liked to make large batches of pureed food and pour it into a silicone ice cube tray with a lid to freeze for later. It was perfect when babies aren’t eating big portions because each cube is about 1-2 ounces.
- Freezer bags – Once you have frozen cubes of puree you can transfer them to a freezer-safe bag. I love reusable Stasher bags for this.
- Storage containers – As soon as you start making homemade baby food you realize that you need lots of little containers.
 A friend loaned me a bunch of plastic storage containers for keeping homemade baby food and I also invested in these glass containers that are freezer safe.
 - Permanent markers – When storing and freezing baby food you’ll want to label everything with the name of the food and the date.
- Baby food maker – if you’re looking for an all-in-one solution that steams food and blends it there are some cool gadgets (like the BEABA Babycook) that make homemade baby food a breeze!
10 Stage One Baby Food Purees
Ready to get started making some stage 1 baby food purees? Here are 10 easy recipes to get you started. These are the purees I used in the early days with Olivia. She loved all of these, but there are a ton of other purees you can try including pear puree, apple puree (aka applesauce), bean purees (like chickpea or lentil puree) and even chicken puree.
Sweet Potato
Sweet potatoes are a powerhouse vegetable! They’re packed with fiber, vitamins, minerals and antioxidants and babies love their sweet flavor.
4.10 from 10 votes
Sweet Potato Puree
Sweet potato puree is so easy to make. Just bake your sweet potatoes, peel and blend until smooth! It's a great first food for babies, but can also be used in baking recipes, mixed into oatmeal, added to smoothies or served as a side dish.
View Recipe
Carrot
Carrots are low on the allergy scale and easily digested by a tiny tummy. They are high in beta-carotene, an antioxidant that converts to vitamin A in the body, which is crucial for eye health and overall immune function.
4.10 from 43 votes
Carrot Puree
How to make carrot baby food by cooking and blending carrots into a smooth and creamy puree. Carrot puree make a great stage 1 starter food for babies.
View Recipe
Avocado
Avocados are high in heart-healthy fats as well as fiber, vitamins, minerals and antioxidants! They’re incredibly nutritious and super easy to prepare.
5 from 3 votes
Avocado Puree
Avocado is great first food for babies. It contains healthy fats, it’s easy to blend and it’s delicious. Make it in your food processor or blender or simply mash!
View Recipe
Banana
A great first food to introduce to babies, bananas are naturally soft and mushy, easy to digest and loaded with vitamins and minerals. The best part? You don’t need to cook them!
5 from 2 votes
Banana Puree
Fresh banana puree is a great first food and baby will love it because it tastes sweet! Easily make it by mashing or blending ripe bananas.
View Recipe
Peas
Peas are naturally sweet and pack a punch with nutrition, containing a variety of vitamins, minerals and antioxidants. They are also high in protein, with 4 grams per half-cup serving. Fun fact, peas are actually a legume!
5 from 5 votes
Pea Puree
Pea puree is a great first food when introducing solids to babies and all you need is a bag of frozen peas and a blender or food processor!
View Recipe
Butternut Squash
Technically a fruit, butternut squash is packed with fiber, vitamins and minerals.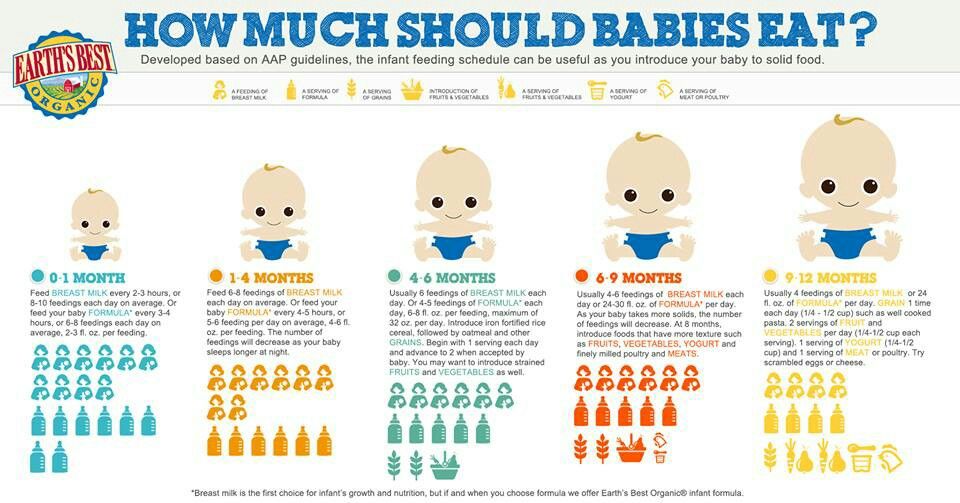
No ratings yet
Butternut Squash Puree
Make butternut squash puree at home with this simple recipe! Just scoop the seeds, roast, blend and use in recipes that call for butternut squash puree. It's also a great first food for babies!
View Recipe
Peach
Peaches are naturally sweet and perfect for introducing baby to solid foods. They are rich in many vitamins, minerals and antioxidants.
5 from 4 votes
Peach Puree
Peach puree is so easy to make using fresh peaches! It's a great first food for babies, but can also be used as a topping or mix-in for breakfast, dessert and drink recipes.
View Recipe
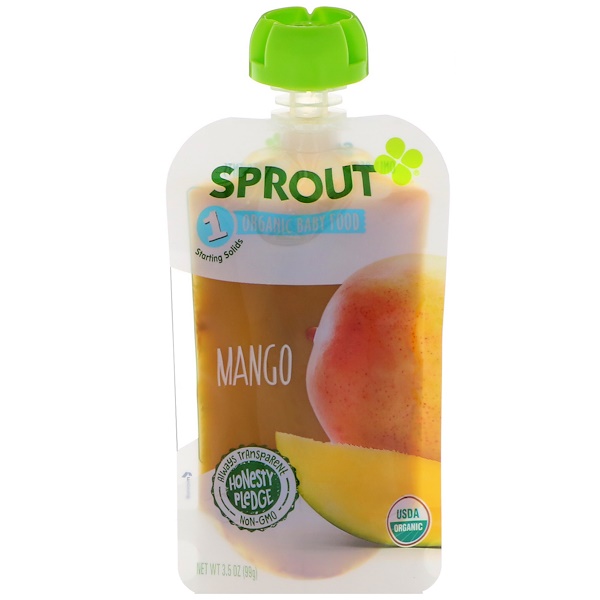
Mango
Rich in vitamins, minerals and antioxidants, mango is especially high in vitamins A and C. They also contain a group of digestive enzymes called amylases which help little tummies just starting with solid foods.
5 from 3 votes
Mango Puree
How to make a delicious mango puree out of fresh (or frozen) mango.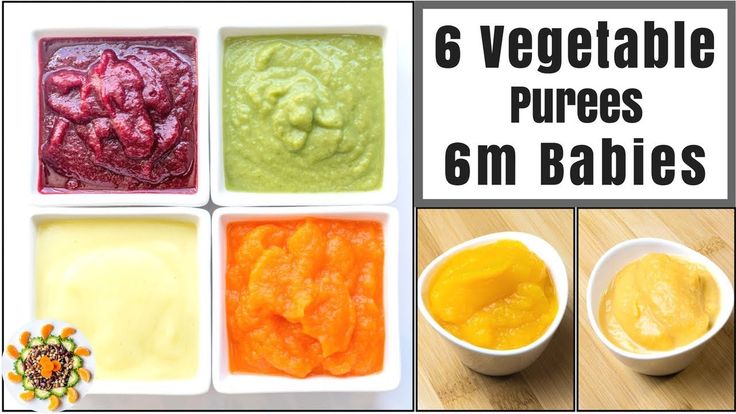 It's perfect for serving to baby or to use in recipes.
View Recipe
Blueberry
Small but mighty! Blueberries are known as a superfood. Superfoods are usually plant-based and rich in nutrients that are beneficial to your health such as vitamins, minerals, healthy fats and fiber.
5 from 3 votes
Blueberry Puree
Blueberry puree is full of antioxidants and vitamins and makes for a quick and easy first food for baby! It can also be used as a topping or mix-in for breakfast, dessert and drink recipes.
View Recipe
Strawberry
Strawberries pack quite a health punch! They are low calorie, taste delicious and are a great source of vitamins, minerals and plant compounds.
5 from 2 votes
Strawberry Puree
Strawberry puree is easy to make and naturally sweet with no added sugar! Use it in baked goods, drinks or as baby food.
View Recipe
How to Store Purees
Freshly pureed baby food should be stored in the fridge and used within 3-4 days.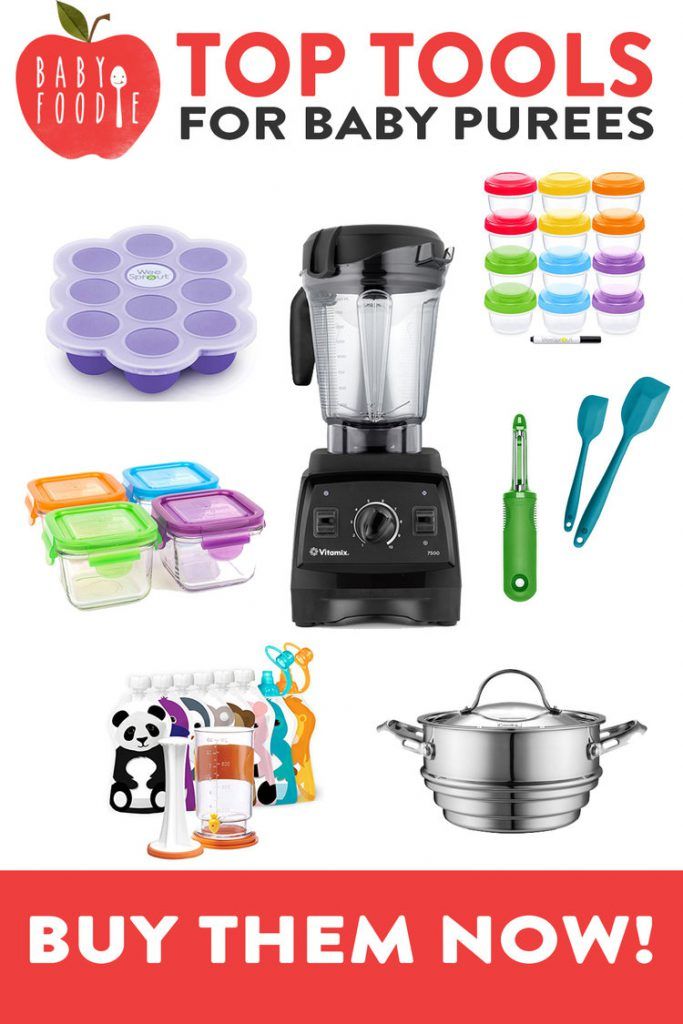 For longer storage, I recommend freezing purees in an airtight container. I like using silicone ice cube tray or freezer safe jars because they make it easier to thaw smaller amounts for serving to babies.
How to Thaw Frozen Puree
I recommend thawing frozen purees in the fridge the night before you want to use them. In a pinch, you can also thaw it quickly with a warm water bath. It thaws quickly if you’re defrosting a small amount to serve to a baby.
FAQ
Can I store homemade baby food purees?
Yes! Making large batches of purees and storing them in the refrigerator or freezer makes feeding baby homemade purees a breeze.
Can you freeze homemade purees?
Freezing baby food that has been made with frozen fruit or vegetables is fine, as long as you have cooked the frozen foods first. Do not refreeze foods that have thawed without cooking. I recommend labeling baby food with the ingredient and date before you place them in the freezer.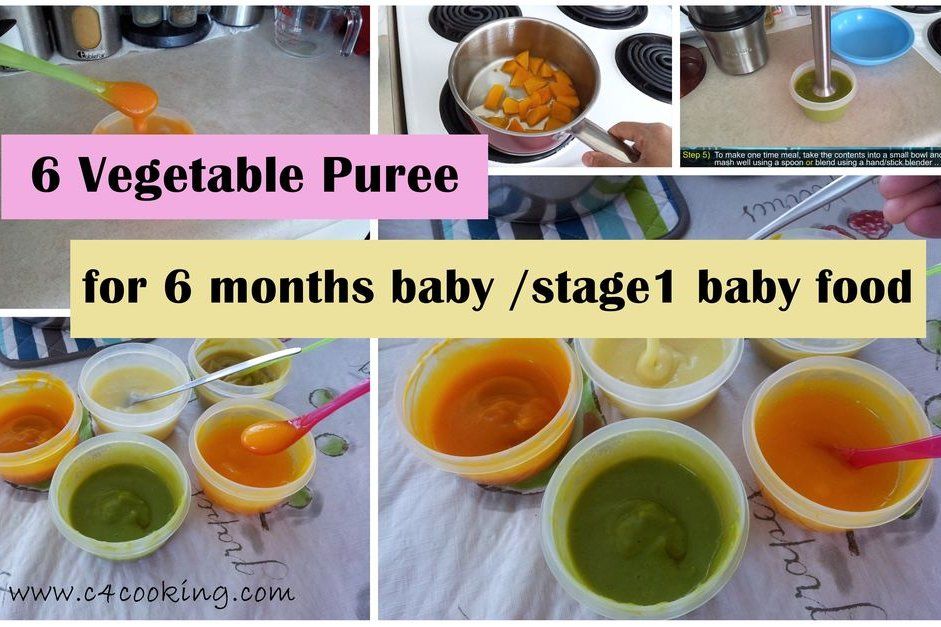
Can you freeze baby food made with breast milk or formula?
If you are freezing baby food that has been mixed with fresh breast milk you’re fine! However, you should not freeze baby food that has been mixed with previously frozen breast milk. Once frozen breast milk has been thawed, it should never be re-frozen.
If you are using formula, it should be okay to freeze baby food that has been mixed with it. Most formula companies don’t recommend freezing formula, but you’re using such a small amount.
You can also freeze the baby food purees without adding any liquid. You can then thaw the baby food puree in the fridge overnight and then thin the food to the desired consistency with breast milk or formula right before serving.
This post about freezing baby food has a ton of great insight and tips.
Should I use organic fruits and vegetables?
I recommend using organic produce when possible, though I realize this isn’t always in the budget.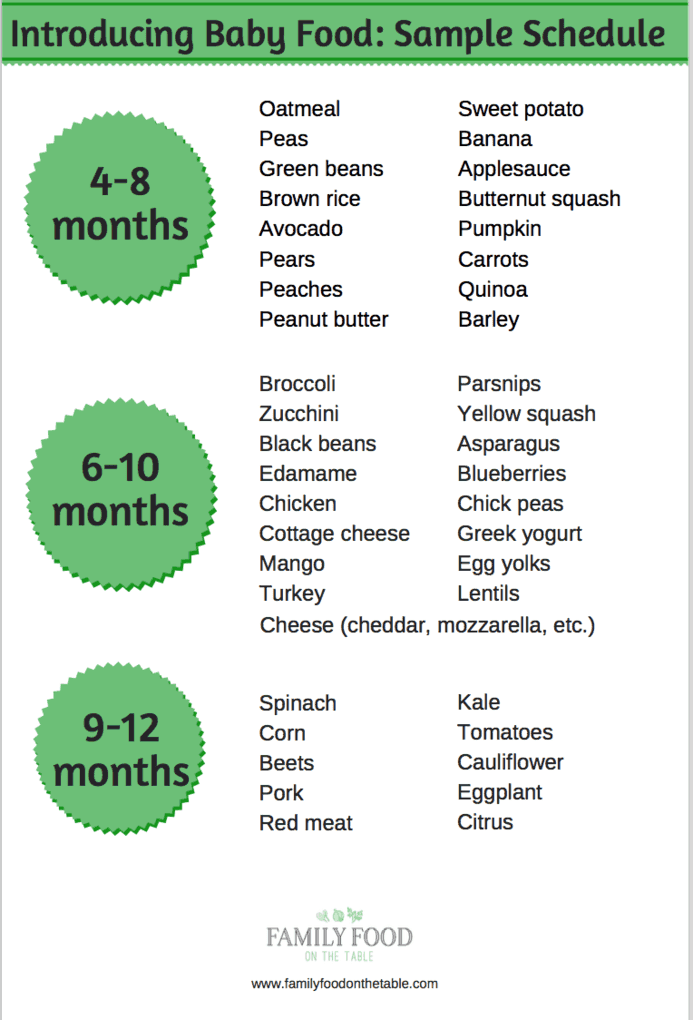 Either way thoroughly rinsing your fruits and vegetables is an important step whether they’re organic or not.
This list of the dirty dozen fruits and vegetables from the EWG is a good guide if you can only budget for some but not all organic produce.
Is it safe to thin baby food with cow’s milk?
From a nutritional point of view, most doctors recommend waiting to introduce babies to cow’s milk until one year of age. If you need to thin your puree you can use breast milk, formula or plain water.
What is the difference between stage 1 and stage 2 baby food?
Stage 1 purees are very thin with no chunkiness and are single ingredients. Stage 2 baby foods can be more elaborate with food combinations as well as chunkier textures.
More Recipes for Resources
- Baby Pancakes
- How to Make Oatmeal For Babies
- Baby (+ Toddler) French Toast
- Applesauce
- Baby Yogurt Melts
- 6 Baby Food Combinations (Stage 2)
Be sure to check out all of the baby food recipes here on EBF.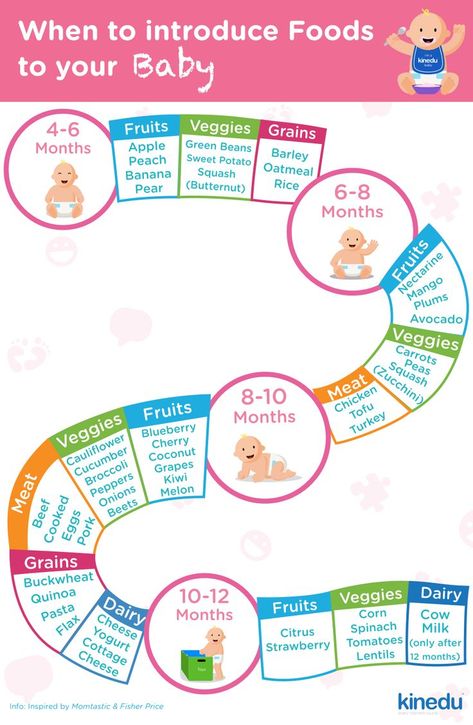
Sweet Potato
- ▢ 2 cups steamed and peeled sweet potatoes
- ▢ water breast milk or formula to thin
Carrot
- ▢ 1 lb steamed and peeled carrots
- ▢ water breast milk or formula to thin
Avocado
- ▢ 1 avocado
- ▢ water breast milk or formula to thin
Banana
- ▢ 1 banana
- ▢ water breast milk or formula to thin
Pea
- ▢ 2 cups cooked peas
- ▢ water breast milk or formula to thin
Butternut Squash
- ▢ 2 cups steamed and peeled butternut squash
- ▢ water breast milk or formula to thin
Peach
- ▢ 3 ripe peaches
- ▢ water breast milk or formula to thin
Mango
- ▢ 2 ripe mangoes
- ▢ water breast milk or formula to thin
Blueberry
- ▢ 2 cups blueberries
- ▢ ½ cup water
Strawberry
- ▢ 2 cups strawberries
- ▢ water breast milk or formula to thin
Add veggies or fruit into a high powered blender or a food processor.
 Blend and add liquid until you reach the consistency you desire. You can make the purees smooth and thin for young babies or thicker and chunkier for older babies.
Serving: 1sweet potato | Calories: 75kcal | Carbohydrates: 17g | Protein: 1g | Sodium: 48mg | Potassium: 292mg | Fiber: 3g | Sugar: 4g
Nutrition information is automatically calculated, so should only be used as an approximation.
blender
food processor
Additional Info
Course: Baby Food
Cuisine: Baby Food
Keyword: stage one baby food
Did you make this recipe?Mention @eatingbirdfood and tag #eatingbirdfood!
GFGluten-FreeDFDairy FreeVVeganVGVegetarianPPaleo
Avocado Puree for Babies
GFGluten-FreeDFDairy FreeVVeganVGVegetarian
Blueberry Puree
GFGluten-FreeDFDairy FreeVVeganVGVegetarian
Strawberry Puree For Babies
GFGluten-FreeDFDairy FreeVVeganVGVegetarian
Pea Puree For Babies
About Brittany
Hey there, I’m Brittany, the creator of Eating Bird Food, holistic nutritionist, health coach and personal trainer. Whether it’s for my meal plans, my favorite recipes or just because you want to feel good, I’m so happy you’re here.
More about Brittany
Get a free 3 day Clean Eating Meal Plan
Subscribe to our list and get your free printable PDF of the 3 Day Clean Eating Meal Plan and Shopping List
Please enable JavaScript in your browser to complete this form.Name *
Email *
How to Make Carrot Baby Food (Carrot Puree)
This post may include affiliate links. Thank you for your support.
How to make carrot baby food by cooking and blending carrots into a smooth and creamy puree. Carrot puree make a great stage 1 starter food for babies.
A couple weeks ago I shared all about introducing solids to baby, my approach with Olivia and what foods we’d tried so far. Honestly, I had no intentions of sharing baby food recipes, but I’ve been having so much fun making it for Liv and everyone has seemed really interested so here we are.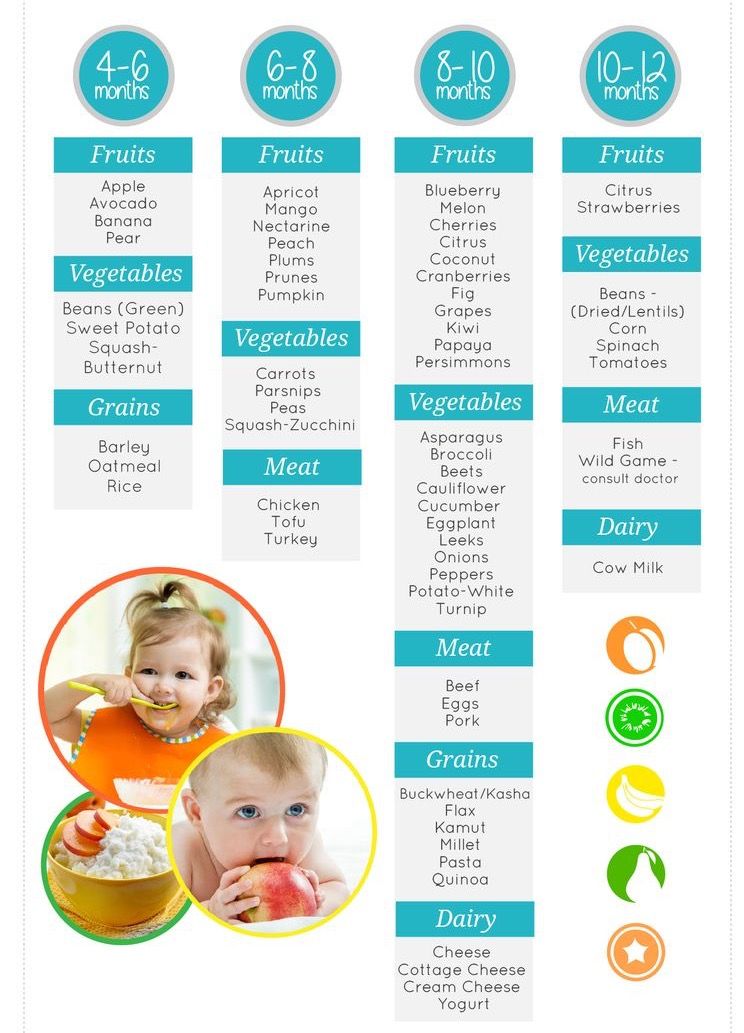
For this first post, I thought I would share a simple recipe for an easy stage 1 food for babies 4 month and up, homemade carrot puree.
Like sweet potato and winter squash, carrot puree makes a great stage 1 food for babies because it can easily be pureed until thin. Carrots are also low on the allergy scale and easily digested by a tiny tummy.
Olivia’s first food was sweet potato puree and then avocado, but carrots came quickly after these two foods.
Homemade Baby Food
Let me start by saying that I know homemade baby food isn’t always an option and that’s okay. When we were on vacation I bought a couple baby food pouches for Olivia. She gobbled them up. That said, the majority of her food is homemade because I really enjoy cooking and making food for Liv has been really fun for me. I also like knowing that she’s eating fresh, nutrient-rich food that’s been made with love. That might sound corny, but it’s true.
When researching how to make homemade baby food I also researched how shelf-stable baby food is made.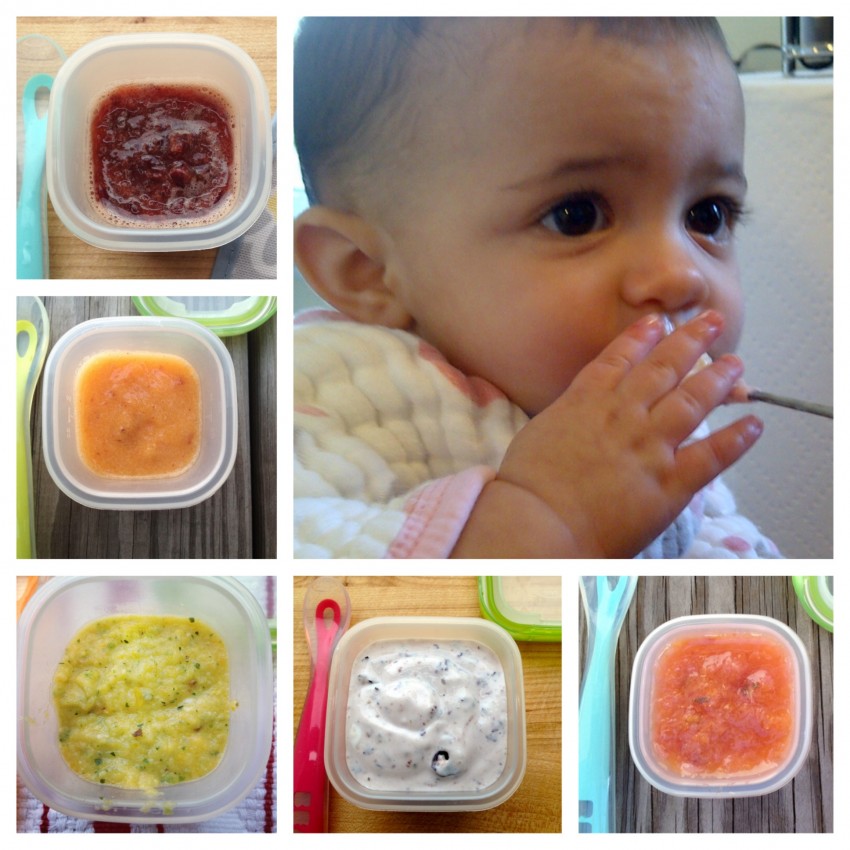 The shelf-life of jarred store-bought baby food is 2 years, which means you could be feeding your baby shelf-stable food that’s older than they are! Isn’t that wild to think about?!
And while I haven’t tasted store-bought carrot baby food, I imagine that this homemade carrot puree tastes way better!
Carrot Nutrition for Infants
Carrots are a such a nutritious first food! They are high in beta-carotene, a red-orange antioxidant that converts to vitamin A in the body. Vitamin A is known to boost eye health and support the immune system. Carrots also contain vitamin C, iron, calcium and fiber, which can be helpful for normal bowel movements in babies.
What Kind of Carrots to Use
I like to use fresh, organic whole carrots. Just wash the carrots well and peel them before chopping and cooking. I know it’s an extra step, but I do recommend peeling them to remove any dirt particles and/or pesticide residue. I also think removing the peel of the carrots makes them taste better.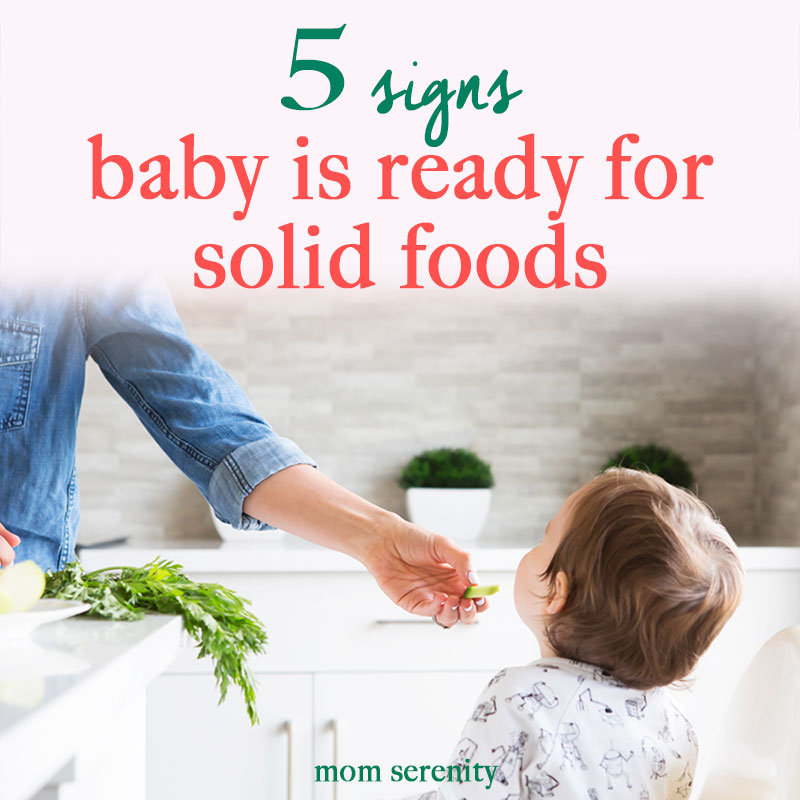 They taste super earthy to me when the peel is on. You can also use baby carrots, which makes the chopping process faster because they’ve already been peeled.
I personally like to buy organic foods for making homemade baby food, but also realize this isn’t an option for everyone so buy what you can afford.
How to Make Carrot Puree- Peel and chop carrots.
- Cook the carrot chunks by steaming, boiling or roasting.
- Transfer cooked carrots to a blender or food processor. I’ve been loving my Vitamix for blending up baby food. It gets the purees super smooth!
- Blend until smooth, adding breast milk, formula or water to thin – the carrot puree will likely be a bit too thick for stage 1 eaters without adding some sort of liquid to thin the puree. I like using breast milk or formula for extra nutrients, but you can use water as well (water used for the steaming or boiling process works great).
- Let carrot puree cool and serve right away or portion into storage containers or ice cube trays for later use.
- Carrot puree an be stored in the fridge for 3 days or in the freezer for 3 months.
How to Store Carrot Baby Food
Once you have the carrot puree blended to the consistency you want, let the mixture cool and then transfer into BPA-free storage containers or into an ice cube tray. I’ve been using silicone ice cube trays and these 4 oz glass storage containers. The ice cube trays are great for younger babies who aren’t eating as much volume because you can defrost one cube at a time. While the 4 oz jars are great for older babies who are eating more than 1 oz at a time.
We had the ice cube trays on hand and I just recently bought the WeeSprout glass storage containers that are specifically for baby food. I like that they have measurements on the side of the jars and that they’re glass instead of plastic (no worry about BPA). They are also freezer, dish-washer and microwave-safe. Plus they come with colorful lids that you can write on with a dry eraser marker to note the item and date.
The fresh carrot puree will keep in the fridge for 3 days and in the freezer for up to 3 months.
Don’t Forget to Label
I highly recommend labeling any baby food you make before storing! It’s amazing how quickly you forget what day you prepped the food once it goes into the fridge or freezer. #mombrain
How to Reheat or Thaw Frozen Carrot Puree
To thaw frozen pureed carrots, I recommend taking the jar out of the freezer the night before you want to use it so it can defrost in the fridge overnight. If you need to use it right away, you can thaw it using a water bath. Some people will recommend microwaving the frozen puree using the defrost seating but I prefer these two methods:
- Defrost in the refrigerator: Place frozen puree cubes into a jar or baby’s serving dish, cover, and place in the refrigerator overnight. If you stored the puree in a jar or storage container, simply place the jar the fridge.
- Water bath: Place frozen pureed cubes in a small container and set in another larger container with warm water.
 Replace the water as needed. Once defrosted, portion the food into individual bowls, cover, and refrigerate until serving.
Be sure to use any of the defrosted food within 48 hours of being defrosted and do not re-freeze.
Baby Food Combinations with Carrots
Once your baby is ready for stage 2 foods that are combinations, you can blend different fruits and veggies into the carrot puree. Here are some ideas of foods and spices that pair well with carrots.
- Green veggies – peas, broccoli, green beans, zucchini, spinach
- Orange veggies – butternut squash, sweet potatoes
- Fruits – apples, peaches, pears
- Carbs – brown rice, lentils, quinoa
- Protein – beef, chicken
- Herbs and Spices – cinnamon, ginger, cardamom, cumin, paprika, nutmeg, curry, mint
More Baby Food Recipes and Resources
- Baby Oatmeal
- Introducing Solids to Baby
- 6 Baby Food Combinations (Stage 2)
- Sweet Potato Puree
- Avocado Puree
- Butternut Squash Puree
- Pea Puree
- Peach Baby Food
- Banana Puree
- Smash Cake
- Banana Pancakes For Babies
- Baby Yogurt Melts
- ▢ 1 lb fresh organic carrots
- ▢ 1/4 – 1/2 cup breast milk formula or water, to thin
- ▢ spices or herbs of choice optional
Peel carrots and chop into chunks.
 Try to make the carrot chunks around the same size so they will finish cooking around the same time. The smaller the chunks, the faster they will cook.
Fill a pot with about 1 inch of water, add carrots to a steamer basket and place inside of the pot. Bring water to a low boil, cover with lid and steam carrots for 15-20 minutes, or until fork tender. The cook time will depend on the size of your carrots.
Once carrots are tender remove pot from heat and allow carrots to a cool a bit before transferring to a blender or food processor. Puree carrots in the blender or food processor, adding liquid (breast milk, formula or water) as needed to get the desired consistency. If using water, the water leftover from steaming or boiling the carrots works great.
Transfer carrot puree into storage containers and store in the fridge for 3 days or freezer for 1 month.
- You can boil or roast the carrots instead of steaming. See my tips in the blog post above.
Serving: 4oz | Calories: 62kcal | Carbohydrates: 14g | Protein: 2g | Sodium: 116mg | Fiber: 4g | Sugar: 9g
Nutrition information is automatically calculated, so should only be used as an approximation.
Additional Info
Course: Side
Cuisine: Baby Food
Keyword: carrot baby food
Did you make this recipe?Mention @eatingbirdfood and tag #eatingbirdfood!
VVeganVGVegetarian
10 Baby Food Purees (Stage 1)
GFGluten-FreeDFDairy FreeVVeganVGVegetarianPPaleo
Avocado Puree for Babies
GFGluten-FreeDFDairy FreeVVeganVGVegetarian
Blueberry Puree
GFGluten-FreeDFDairy FreeVVeganVGVegetarian
Strawberry Puree For Babies
About Brittany
Hey there, I’m Brittany, the creator of Eating Bird Food, holistic nutritionist, health coach and personal trainer. Whether it’s for my meal plans, my favorite recipes or just because you want to feel good, I’m so happy you’re here.
More about Brittany
Get a free 3 day Clean Eating Meal Plan
Subscribe to our list and get your free printable PDF of the 3 Day Clean Eating Meal Plan and Shopping List
Please enable JavaScript in your browser to complete this form.Name *
Email *
Complementary foods: the main stages - ZdorovyeInfo
How to teach a baby to switch from breastfeeding to solid, "adult" food? Things to remember when weaning a baby
Stage 1: Age and basic skills
Experts recommend introducing solid foods at 4-6 months of age. Just at this time, the baby loses the tongue thrust reflex, which is important for breastfeeding or bottle drinking, but interferes with the intake of solid food. If your little one is already sitting well with support and showing interest in adult food, it's time to introduce complementary foods.
Stage 2: Moving from puree to chunks
First, the child needs to get used to eating food and not drinking it. Introduce new foods slowly. This will take several weeks. It is best to start with pureed bananas or avocados. You can also buy ready-made baby food at the store - starting with a thin puree and moving first to a thicker puree, and then to a puree with pieces. Even in the absence of chewing teeth, children cope with such food by grinding it with their gums.
Stage 3: Ability to sit in high chair
If the child is ready for solid food: holds his head, can sit upright with support, it is time to put him in the high chair. The seat belts and high chair tray keep the baby upright.
Step 4: Ability to eat with your hands
Between 7 and 11 months old, if your child wants to eat something, he grabs it from your hand. If you are not afraid of general cleaning, you can let your child play with food earlier. At first, children scoop food with their palms. A little later, they learn to pick up food and objects with two fingers. Offer him a plate with finely chopped pieces of food: pasta, cooked vegetables (carrots, peas, zucchini), chicken meat cut into pea-sized pieces.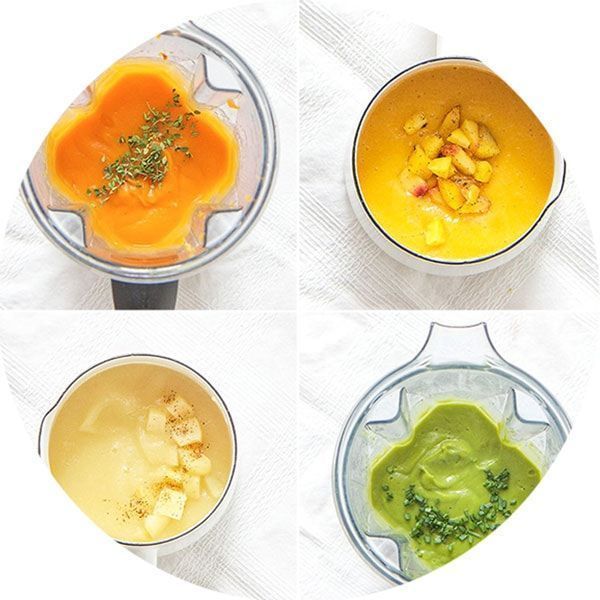
Step 5: Learning to use a spoon
Once your baby gets used to being spoon fed, he tries to grab it and put it in his mouth on his own. Give him a soft-tipped spoon at dinner, and feed him from the second. He will get used to holding the spoon himself, and will not snatch yours.
As soon as he learns how to use a spoon, give him yogurt, puree or cottage cheese - let him learn. Before lunch, put your baby in a waterproof bib and put a mat under the high chair.
Stage 6: Fish and eggs
It is better not to give eggs or fish until the child is one year old. However, if you do not have hereditary allergies, you can try and see the reaction of the baby.
Step 7: When to give water to your baby
Babies do not need water during their first year of life. They get all the water they need from breast milk or baby food. A baby should not be given water at all until six months old: it fills his tiny ventricle too quickly, leaving no room for the nutrients necessary for his growth.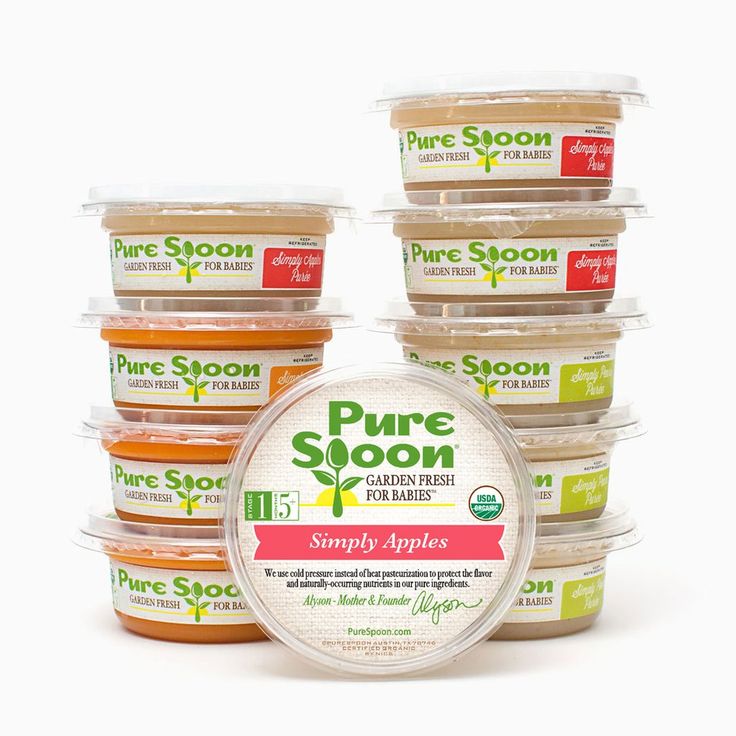 If your six-month-old baby, seeing how you drink water, shows interest in it, let him try. However, water should not replace breast milk or baby food.
Stage 8: Learning to eat independently
It takes a while for a child to learn to eat with a spoon and fork. He will master this art not earlier than in a year. Be patient. Let the thought comfort you that you will not have another chance to be photographed with oatmeal in your hair.
How to transition your baby from mashed potatoes to regular food
The introduction of solid foods with pieces improves satiety and teaches the baby to chew, prepares him for the transition to the common table and trains speech skills. We are discussing how to transfer a child to solid food with puree and at the same time not provoke a refusal to eat, which can lead to health problems, with a pediatrician, medical consultant of the SMART-MAMA project, Polina Aleksandrovna Kizino.
— Polina Alexandrovna, why do you start with pureed foods first?
- Classic complementary foods are introduced around 6 months or earlier.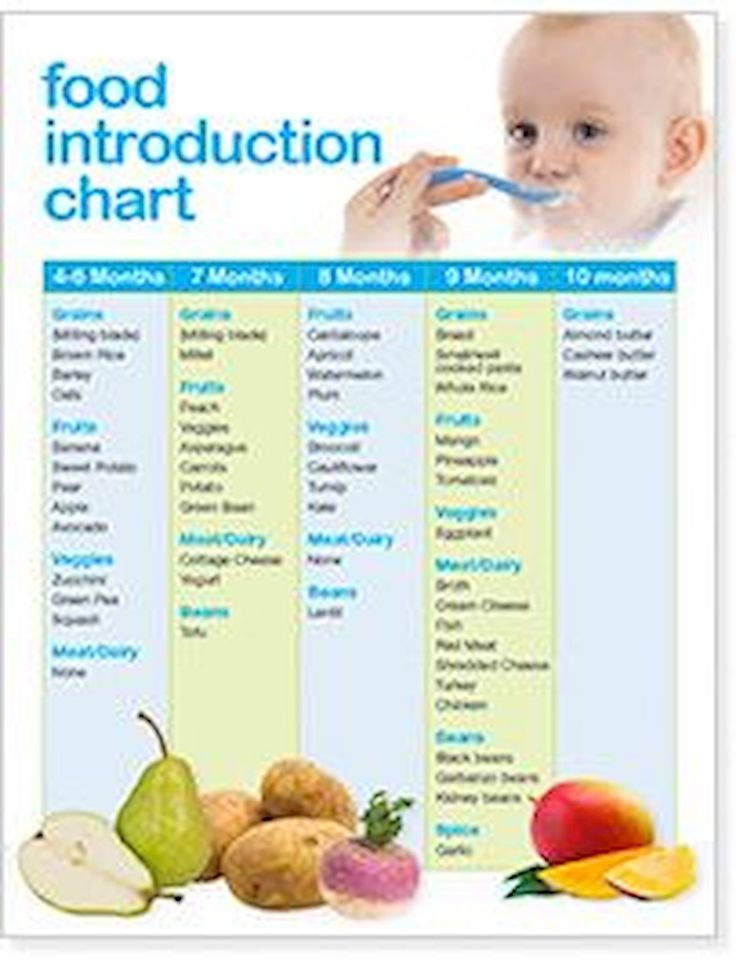 At this age, it is quite difficult for babies to coordinate the work of all the muscles of the oral cavity and chew hard pieces. Other than breast milk or formula, the baby has not tried anything yet. Therefore, if you give him hard pieces right away, he may not figure out what to do with them. In addition, for good absorption and easier swallowing, of course, pureed food is more suitable - cereals or mashed potatoes.
If, for some reason, a child begins to receive complementary foods at 7-8 months (that is, later than the recommended 4-6 months), it is acceptable to introduce products with very soft and small pieces, similar to mashed potatoes. Even if a child swallows such a piece without chewing, it will happen without discomfort and does not threaten to refuse food with pieces in the future.
— What should be the consistency of food in the first year of a baby's life?
- At the stage of introducing the first or second complementary foods, the nutritional consistency is required to be homogeneous, that is, completely homogeneous, without pieces, veins of vegetables or cereal flakes. As the baby matures, he is already able to eat vegetables mashed with a fork. Gradually, the pieces may become harder and larger. However, even if the baby eats pieces, this does not mean that homogeneous foods should be immediately excluded when learning to chew. He can get both.
— Why is solid food obligatory for children under one year old?
- It is necessary to transfer a child to solid food only because he will not eat homogeneous purees and cereals all his life. And as soon as the physiological ability to chew appears, the baby begins to chew soft food, even if he does not yet have teeth. If the baby remains on homogeneous food and does not learn to chew, then it will be difficult for him to switch to other foods, he will not want to eat in a new way.
When chewing, the oral apparatus develops: jaws, muscles, teeth. The skill of chewing is closely related not only to the maxillofacial system and food processing, but also to the formation of bite and the development of speech in a child.

— When should I take my child to a shared table with hard food?
- This happens differently for all children, but on average about 7-8 months. At the same time, solid pieces do not mean those products that need to be gnawed, but precisely what is different from homogeneous food.
All changes in the child's diet are introduced gradually. Imagine if he suddenly bites off a large piece that he cannot chew and starts swallowing - as a result, there is a risk of severe choking and choking. Or, at best, experience discomfort, so you don’t want to try this product again. In order not to provoke such situations, all transitions in a child's life must be carried out very smoothly.
— How do parents know when a child is ready for solid food?
— Apart from the age and positive reaction of the child to the proposed product, there are no other signs. Even teeth will not be a readiness factor for solid foods. But if parents delay the introduction of solid pieces and a child at 9-10 months old is not yet familiar with them, then he will not want to eat this and will demand mashed potatoes.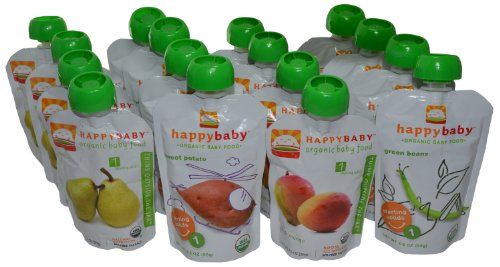
Constant choking on food, spitting up, restlessness of the baby are adverse reactions to the introduction of solid food. It makes sense to consult a pediatrician.
Remaining undigested food in the stool may be normal and should not be a concern for parents. In order for food to begin to be fully absorbed, the body needs time to adapt to complementary foods. It is important to monitor the condition of the baby.
— How to transfer a child to a common table if he refuses solid food?
- Unfamiliar and "unpleasant" foods should be offered at the start of a feed while the baby is still hungry. If the baby starts breakfast or lunch with his favorite dish, then, having been a little full and realizing that he got what he wanted, he, of course, will refuse other food.
It is necessary to interest the child in literally all suitable ways:
- demonstrate interest in the product by example, praise its taste;
- offer "baby" food from your plate;
- put food on a pretty children's plate;
- beautifully decorate food on a plate, make “pictures”;
- praise for the pieces eaten.
All this does not distract from the process of eating, like cartoons, and does not disguise eating as a game. The food will be interesting for the child, and he will get pleasure and satisfaction from what he eats.
Praise from parents is especially important for babies older than one year. For the sake of keeping the parents happy, the child is sometimes ready to do something that he does not like.
— What food to offer first and what does the child's menu depend on?
- This can be any food, and not necessarily new dishes. But you need to gradually change the density and hardness of food, the size of the pieces. To help in getting to know the pieces, but not with chewing, a nibbler can. Let not all children love it, but this accessory is important for the safety of the child: with it, the baby will not swallow too large a piece and will not choke.
How to start introducing solid food
| Products | Familiar products, but no longer homogeneous, but of a different consistency - you just need to mash the vegetables with a fork, grind them larger, chop a piece on a fork or invite the baby to take the vegetable with his hand and bite off him on his own. |
| Quantity | Look at the reaction of the child, his desire and ability. |
| Consistency | The softness of the product should be the same as, for example, a ripe banana, so that when swallowing, even without chewing, the baby does not experience pain, gag reflex and other unpleasant sensations. Subsequently, the food becomes more and more solid. |
| Administration order | One new product is administered over three to four days to monitor response. Moreover, it should be exactly the same for the same product in both hard and soft form. |
| Piece size | Start with pieces about the size of a pea. You need to pay attention to how the child will chew the boiled "peas" of food. With their softness, there is practically no risk of choking and it is unlikely that a piece will get stuck. |
— How often should there be hard pieces in the diet? A child can eat only homogeneous purees all day, and then all day - only pieces. In addition, food chopped in different ways can be mixed in one dish, but so that the baby understands that in the spoon he has not only mashed potatoes, but also pieces. Then he will count on what he will have to chew. Food should be washed down - WHO recommends the mandatory introduction of water at the start of complementary foods.
- Rusks, bagels or whole fruits - when can they be introduced?
- Hard crackers and fruits can be in the diet for up to a year, but at a time when the baby still has no or few teeth and he will definitely not bite off, but lick or procrastinate treats. The child rubs boiled potatoes, carrots, broccoli well with gums, but cannot chop solid foods from the adult menu. It is right to give them in pedagogical complementary foods in order to introduce the baby to different tastes.
Be aware that when the incisors appear, the child may bite off a large enough piece that he cannot chew. Therefore, it is better for parents not to take risks if they cannot control the size of the pieces.

