Best feeding products for baby
Dietitian's list of best baby feeding products
When you are just about to start solids with your baby, it may seem like you need all the latest baby feeding products and baby food gadgets available on the market.
But after introducing solids to three babies of my own and helping hundreds of parents to do the same my recommendation is to buy less rather than more.
For example, although the market is overflowing with baby feeding products like baby food steamers/blenders, your baby will not need purees for more than a few weeks. She may not need them at all if you decide to jump right into finger foods.
So unless it is something you can use it to prepare meals for the family later on down the road, spending your money on a gadget designed specifically to prepare baby food may not be necessary.
But while you do not need everything there is in your local store or on Amazon, some baby feeding essentials will make a world of difference.
Here is a list of baby feeding products I recommend to have ready when you are starting solids with your baby. I used most of them myself and recommended them to many families.
If you would like to get the whole framework and all the steps to start your baby on solids using the mixed approach, check my Stress Free Solids program – it’s completely online and has videos of babies eating both finger foods and purees, in addition to recipes, schedules and the latest scientific advice on introducing allergens.
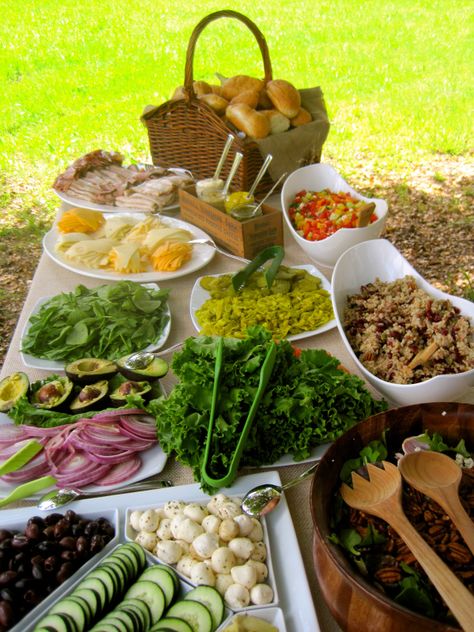
For Cooking and StoringSteamerA simple stainless steel or silicone steamer may be all you need to steam food for your baby and for the whole family. And I guarantee that you will be using this steamer for a long time after your baby does not need it any more.
If you are looking for something more durable, get a two-in-one sauce pot and steamer like this Farberware model.
Farberware Classic Pot and Steamer InsertCheck on Amazon
OXO Grips Silicone SteamerCheck on Amazon
TWO-PACK vegetable steamer basket setCheck on Amazon
BlenderIf you do not own one, I highly recommend investing in a brand that you like. Even if you decide to skip purees with your baby, a good blender is such a magical kitchen appliance.
You can use it for making smoothies, pureed soups, blending sauces, stirring batters and even for making your own baby cereal or nut flour.
it’s very important to remember that your baby will not need smooth purees for more than 2 weeks after you start solids, since you will need to keep upgrading the texture all the time in order to boost the development of his skills and help him to self feed. I go through all the steps and the stages in my Stress Free Solids program, so you know exactly what your baby needs to be learning to do right now.
My absolute favorite is Blendec – I have been using mine for years and years and it still works like new. But if you are not planning any heavy duty blending projects, less expensive options like Ninja Professional Blender or Hamilton Beach Smoothie Smart Blender can do the job when it comes to baby food.
Some of the baby specific food blenders that can also steam food are Baby Bullet System and Phillips Avent Combined Baby Food Steamer and Blender.
Check on Amazon
Baby Bullet SystemCheck on Amazon
Avent Combined Food Steamer and BlenderCheck on Amazon
Crinkle cutterThis little gadget makes holding slippery finger foods easier for the little hands. I used it to cut mango, zucchini, avocado, pears and other finger foods.
Beyond the starting solids stage, this handy tool can be used to cut vegetables before roasting or steaming or to create pretty shapes for your fruit salad.
Huji Crinkle Cut Knife Knife SerratorCheck on Amazon
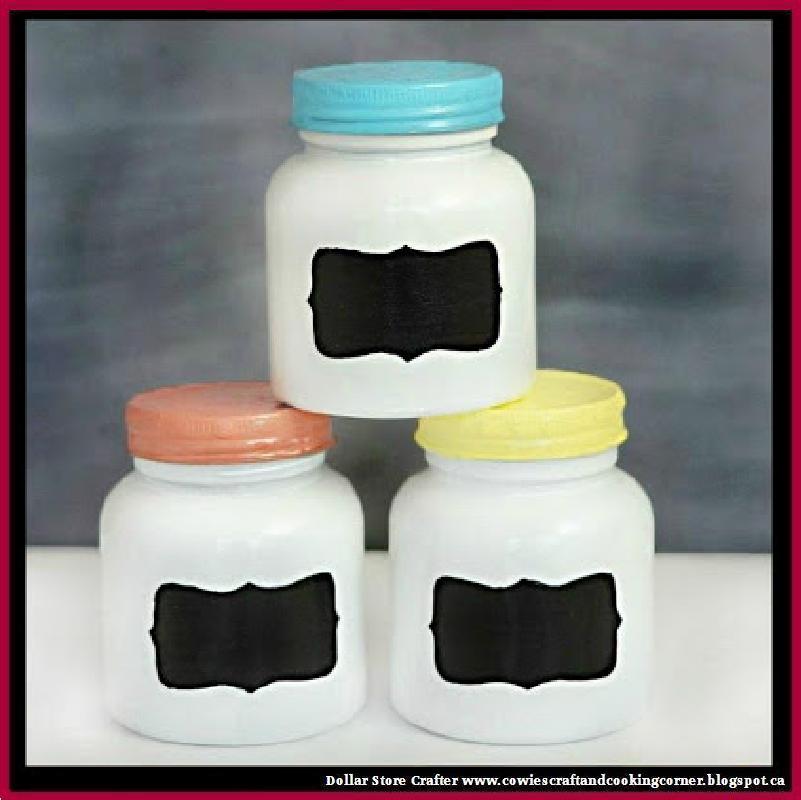
Freezer Containers and BagsFreezing baby food will save you lots of time and stress. You can freeze the food in cube containers, then empty the cubes into a zip lock bag, mark the date and name and store the bag in the freezer.
To thaw, leave a few cubes in your fridge for a few hours or overnight.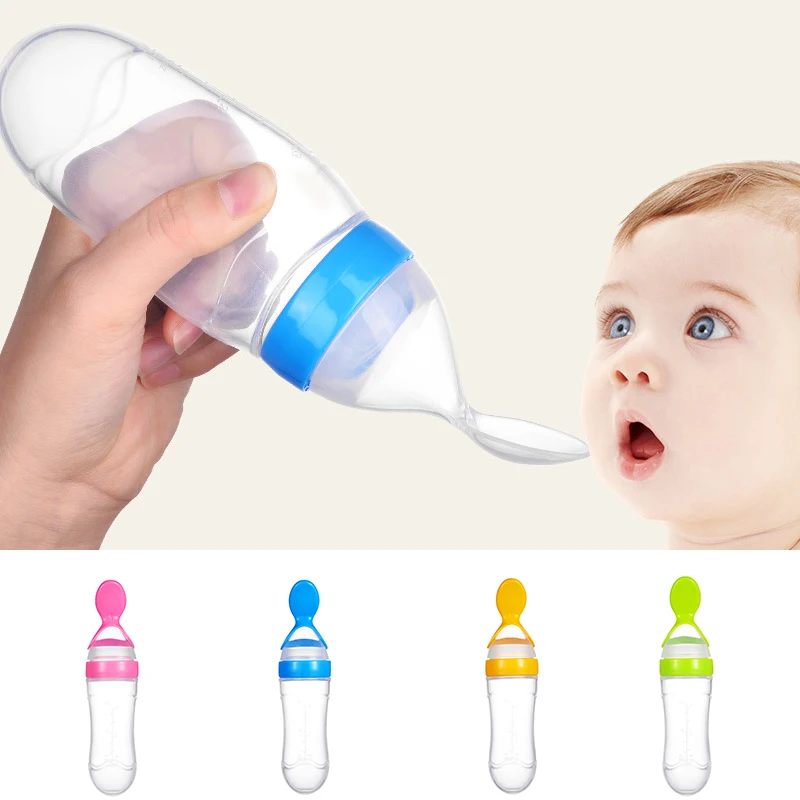
I like Oxo Tot Baby Food Freezer Tray because I could use it to make ice cubes long after my kids stopped eating purees and it is easier to store in the freezer due to its rectangular shape.
Here is how I used to store my baby’s purees:
OXO Tot Baby Food Freezer TrayCheck on Amazon
ZipLock Double Zipper Freezer BagsCheck on Amazon
Baby Feeding Proudcts for Eating
High chair and booster seatA good highchair is definitely something your baby needs to safely and conformably eat solids. When choosing your model, make sure that it meets the following requirements:
- easy to clean
- has minimal crevices
- makes it easier for your baby to sit straight
- has a safety harness which is also easy to clean
- has a foot stool – many hook on chairs do not have one
- has a tray at the level of your baby’s elbows when he is sitting in the chair
- the tray can be removed so the baby can join the family at the dinner table
- the seat provides extra support around the hips and trunk
I bought a second hand Stokke for my last baby and loved how easy it is to clean it and how it “grows” with my baby so it can used for many more years.
At first I used a baby insert and a lining that allowed my baby to be safe and snug when eating and after I removed both, she is still super comfortable sitting in it at 2.5 years.
I love that you can adjust the height of both the seat and the foot rest so it is usable for older children and provides good support for eating.
But when I did research for my sister who had a baby recently, I found this Phil and Teds high chair and decided to give it a try.
Aside from the the obvious benefits like being very easy to clean and having a foot rest, it can also be converted into a comfy low chair small children can use. And it costs just a fraction of the price of Stokke!
Other chairs I was considering were OXO Tot Sprout High Chair, Mamas and Papas Juice High Chair and Baby Bjorn highchair. These are all the new generation high chairs that are a breeze to clean, have foot rests and do not have a reclinable back. Remember that your baby needs to be sitting upright in order to be safe when eating.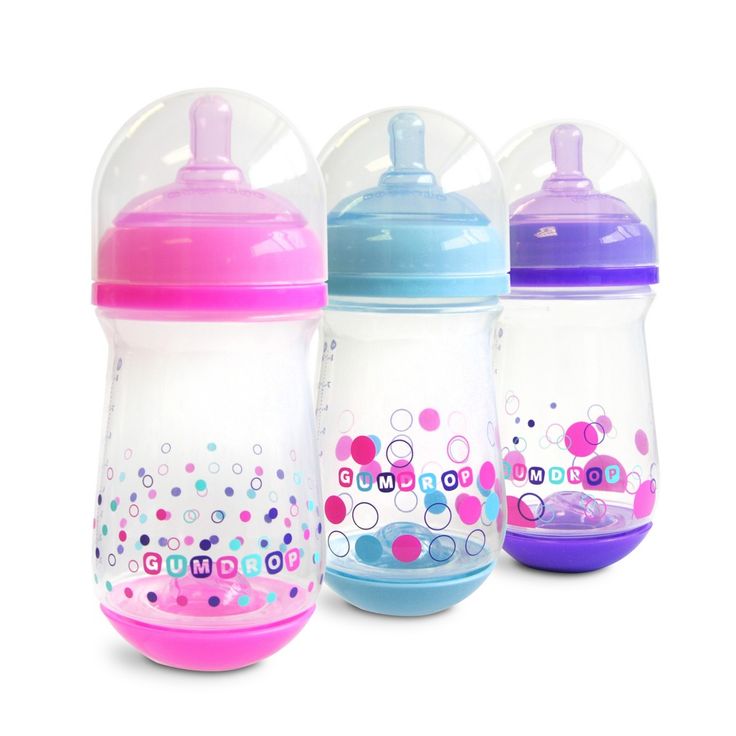
IKEA’s Antilop high chair is a popular option I hear a lot about in parenting groups but I do not recommend it often because it does not have foot support although it is very inexpensive and seems very easy to clean.
Stokke Tripp TrappCheck on Amazon
Phil&Teds Poppy High ChairCheck on Amazon
OXO Tot Sprout High ChairCheck on Amazon
Mamas and Papas Juice High ChairCheck on Amazon
Baby Bjorn Highchair
Check on Amazon
Booster seatsTo help your baby eat comfortably when on a go, you may consider getting one of the booster seats that can be strapped securely to a chair in a restaurant or friend’s house. Below are a few options I recommend.
I used Fisher Price Healthy Care Booster with my baby number 3 and it was easy to adjust to chairs in restaurants and tote around when we were traveling.
You would not believe the number or restaurants in Spain that do not have high chairs for babies!
Fisher Price Healthy Care BoosterCheck on Amazon
Summer Infant Sit’n Style BoosterCheck on Amazon
OXO Nest Booster SeatCheck on Amazon
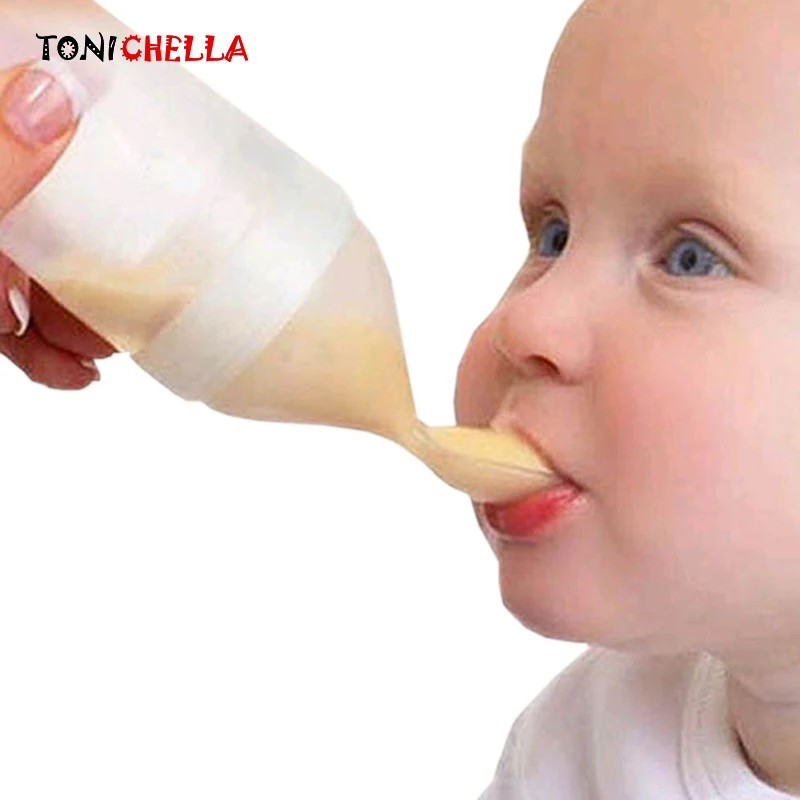
SpoonsIf you plan to feed your baby purees, I would recommend getting a few spoons with longer handles.
To practice self feeding, your baby will need spoons with shorter handles.
Spoons for feeding your babyThere are many different models on the market and I would suggest that you choose ones which are BPA free and have a flat tip to make first feeds easier.
Later, as your baby gets better at scooping food off the spoon, you can pick one with a deeper tip.
Here are a couple I was using with my baby.
Munchkin 6 Piece Lift Infant SpoonsCheck on Amazon
Nuby 4-Pack Hot safe Feeding SpoonsCheck on Amazon
Spoons for self feedingAs your baby starts practicing self feeding with a spoon, it is time to switch to one that is lighter and has a shorter handle.
My number 1 recommendation for a novice self feeder would be a Num Num prespoon, because its unique design allows baby to self feed just by dunking it in puree, no scooping skill is required.
Nuby Set is perfect for little hands and I like the fact that it includes both spoons and forks. All my kids learnt to eat with a fork before they were able to manage a spoon.
Num Num PrespoonCheck on Amazon
Nuby 4-Pack Spoons and ForksCheck on Amazon
Feeding Mats and Bowls with SuctionA bowl with suction or a silicone mat that sticks to the table will help prevent a lot of mess and make self feeding easier. I like EzPz mat, it made mealtimes with my baby so much more enjoyable.
It also comes in a smaller size, perfect for a high chair tray or when traveling. I have been taking our mat to all our trips in the last 2 years, it has a priority space in our suitcase.
It sticks to the table and is quite heavy so you do not need to worry about plates and bowls flying around the kitchen.
I also like how it helps little ones feel confident feeding themselves because scooping food from bowls molded in a heavy piece of silicone is much easier than from a flat tray or a plate.
I have also been using bowls with suction for my first two kids and you can see a couple of options below.
But honestly, I do not think that they can beat the convenience of a feeding mat. My baby really enjoyed seeing a variety of food on her mat and I did not have to worry about her tipping anything over.
A bonus for picky toddlers – a feeding mat with divisions does not allow the food to touch!
Ez Pz MatCheck on Amazon
Boon Catch Plate with Spill CatcherCheck on Amazon
Munchkin Stay Suction BowlsCheck on Amazon
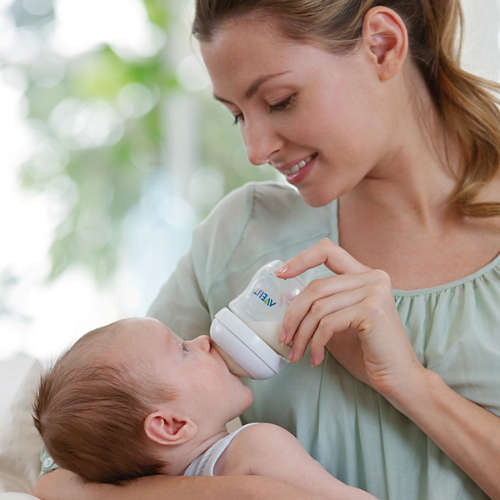
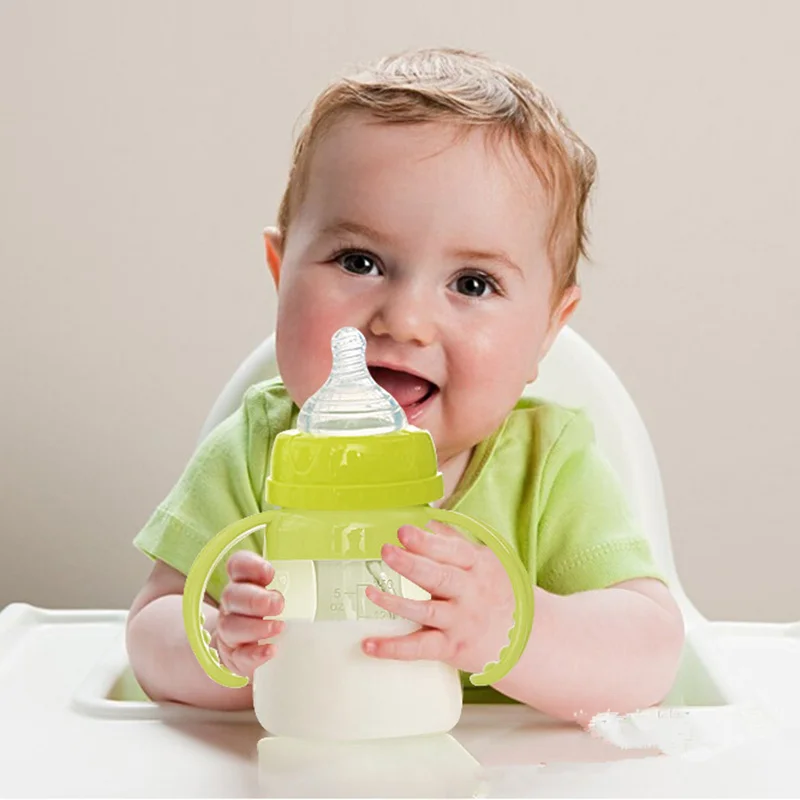
CupsDid you know that you can use a small open cup to serve a little bit of water with solid feeds from as early as 6 months?
And that although sippy cups are very popular, dentists and feeding specialists have been recently raising the topic of sippy cup overuse?
Aside from limiting the development of oral motor skills, using sippy cups frequently and for a long time may lead to grazing on milk or juice. Grazing definitely does not help kids’ appetites or dental health.
In my view, sippy cups are a good option for a very short period of time while your baby is transitioning to an open or straw cup but they are not mandatory.
You may be amazed how quickly your baby learns to drink from an open cup if you allow him to practice from the start. I used and really liked BabyCup. It fit perfectly my 6 month old’s little chubby hands. You can also use any small light cup you may have in the house.
Some parents I know have been successfully using these Munchkin Miracle 360 Trainer Cups to help their babies transition to an open cup.
Straw cups are very handy when you are on a go but most babies cannot handle them before 8-9 months. Here is a great article by Alisha from Your Kids Table about how to transition your baby to straw cup.
So I would suggest that you give your baby a small light open cup with a very small amount of water to practice drinking from about 6 months, introduce a straw cup at 8-9 months and use sippy cups only occasionally, as a transitional tool, or avoid them altogether.
Check on Amazon
Munchkin Miracle 360 Trainer CupCheck on Amazon
Munchkin Click Lock Flexi Straw Trainer CupCheck on Amazon
Healthy Sprouts Silicone Sippy LidsCheck on Amazon
Baby Feeding Products for Minimizing the MessIt is impossible to avoid the mess when you are starting solids with the baby, but there are a few ways to at least minimize it.
BibsLong sleeve waterproof bibs are the best invention ever, especially if your baby self feeds. Do not bother with those made of flimsy cotton or other fabric, you need some hard core water proof solution for the messes that are to come.
These bibs will protect numerous outfits that may end up hopelessly stained otherwise. I used mine for feeding first and when the baby did not need them at mealtimes anymore, we started doing messy crafts in it!
Small bibs will protect your baby’s clothes when you are spoon feeding or at later stages, when your baby is confidently self feeding with a minimal mess.
Check on amazon
Bumkins Waterproof Sleeved BibCheck on Amazon
Waterproof silicone bib, set of 2Check on Amazon
Bumkins Waterproof SuperBib 3 PackCheck on Amazon
Floor MatFloor mat is a must-have baby feeding product if you have a carpet in the feeding area. I did not have to use one because I either had hard floor or tiles in the kitchen when my kids were babies but here are a couple that may save you a lot of scrubbing.
Nuby Floor MatCheck on Amazon
Kenley Baby Splat Mat For Under High ChairCheck on Amazon
Let me show you how to feed your baby using the mixed approach, so you can be guided by your baby and not by a rigid philosophy.
JOIN HERE
Our Favorite Baby Feeding Supplies for Starting Solids
In this guide:
- Spoons
- Bowls and Plates
- Bibs
- Snack Cups
- Placemats
You don’t need a ton of gear to start feeding solids, but a few key items will make the endeavor much easier… especially bibs, bowls, and spoons.
Spoons
For Introducing Solids (6 Months+)Good spoons are key to successful feeding. Spoons with little spoon-heads are perfect (I just said spoon-head, heh heh). You may want to try a few different ones to experiment – below are some parent favorites.
If you’re doing finger foods (ahem, the fancy-dancy term for this is baby-led weaning…), you may not need any infant spoons yet (they can’t spoon-feed themselves until later). But it’s not a bad idea to have a few on hand.
Munchkin Infant Spoons ~ $3 for 6
Quick and dirty. These rounded, soft spoon bowls are the perfect size. We’ve used these spoons for years and they’ve never let us down.
OXO Silicone Feeding Spoon ~ $8 for 2
A softer version (for teething babes and whatnot). Made with Stainless steel for durability.
For Self-Feeding (Toddler)Nuby Spoons and Forks ~ $8 for 4-pack (2 spoons & 2 forks)
As your kiddo gets older, you’ll want to start him with a larger spoon head and a thicker fork. Usually made of soft plastic, so as to not hurt themselves, and a non-slip handle, these are the gold standard. (See also: the Munchkin version)
RE-PLAY Spoons & Forks Set ~ $10 for 8 (4 of each)
These BPA-free utensils made from recycled plastic are very durable and will last well into childhood. Pick from a vast range of bright color options.
OXO Tot Training Fork and Spoon Set ~ $8
Training silverware is the next step, just before actual silverware. They still have non-slip handles, but their rounded heads are made of stainless steel.
These ones are the best, IMO, but there are many options to choose from: NUK (spoons and forks or set with knife), Skip Hop, Munchkin, etc.
Bowls & Plates
For Introducing Solids (6 Months+)Start with a bunch of plastic bowls for mixing purees. Simple stacking bowls will do the trick. Don’t even think about anything breakable, since bowl-tossing will be your baby’s favorite sport for the next 12 months or so (yes, I just got nailed in the eye the other day, WTH?).
Munchkin Stackable Bowls ~ $8 for 8
These are our favorite kind – you can never have enough and they’re sold everywhere.
NUK Bunch-A-Bowls ~ $7 for 4
Another parent-favorite, these come with lids to take on-the-go.
For Self-Feeding (Toddler)Of course, you can still use the bowls listed above as your baby grows, however, you may want to also stock up on toddler-friendly bowls and plates.
Munchkin Stay Put Suction Bowls ~ $9 for 3
These really do work! They even suction to the stroller snack tray.
ezpz Happy Mat ~ $25
It’s a placemat and plate in one that suctions to the table: a true game changer for parents. The mat has three compartments for all of the food groups they won’t eat (kidding!) (sort of). Dishwasher safe and easy to travel with.
*Explore the whole collection – including a bowl, mini mat (great for restaurants), and play mat (*this one is so pretty!).
Divided Plate from Target ~ $0.
 50
50Yes, you saw that right => 50 cents! Hands down one of our favorite divided plates — they hold up after years of (ab)use and are dishwasher safe. The sections are the perfect portion size and the walls are just high enough for scoop-training.
P.S. Available in all sorts of sizes and colors.
Bibs
Feeding babies is MESSY, y’all. There’s no getting around it. Some folks opt for shirtless feeding (the BABY, not you, parents), which may save on laundry but will likely require a bath or wipe-down afterward. Personally, I find the dressing/undressing part to be way more work than just throwing on a bib, but whatevs.
Bibs will prevent (reduce?) stains on your baby’s clothes. They come in different shapes and sizes; some bibs simply go around the neck and protect the top of the shirt, while others have sleeves and can be “worn” for more protection. I recommend you get some of both, depending on what’s on the menu that day {i.e., some foods are messier than others}. Alice loved to finger paint her body (and the dog) with hummus, so I was pretty much screwed on those days.
Bumkins Bibs ~ $17 for 3
For a simple, basic bib, this is definitely the group favorite. It’s waterproof, comes in cute designs, and is super easy to wash (in the laundry, even). It also has a catch-pocket, which you will come to appreciate. Best of all, you can fold it up into a compact square and easily throw it in your diaper bag.
*Available in sizes: starter (4-9 months), super (6-24 months), sleeved (6-24 months) and junior (1-3 years).
BabyBjorn Soft Bib ~ $19 for 2
Another crowd-favorite. These are super easy to clean, have a deep pocket to catch food, and an adjustable closure to fit a growing baby for many months. These bibs are a bit more sturdy (harder for baby to yank off), but unlike the Bumkins bib, they don’t fold or store as easily.
Wearable BibsThese will offer more protection, especially around the shoulders and sleeves.
IKEA “KLADDIG” ~ $9
An affordable, quick and dirty favorite is the nickname, “the angry viking child.” *Fits 0-18 months.
Kushies Cleanbib ~ $19
Parents love this simple, SLEEVED waterproof bib. Though, the price has gone up recently…
Hero Bibs ~ $29
Handmade and specifically designed not only to keep your little one clean, but also the highchair. Just tuck it under the top tray or let it hang over the sides. Also great for art projects and will last through the years.
Miscellaneous
Snack cups
Munchkin Snack Catcher ~ $5 for 2
Every parent’s go-to. The lids prevent food from spilling onto the floor but make it easy for kiddos to reach inside and grab their favorite snack.
*If you’re not into plastics, Munchkin also makes a stainless steel version with a lid ($10).
Nuby Monster Snack Cup ~ $7
A fun twist on the standard snack cup. Kids love holding his monster hands. The lid can be tricky to get on and off – but that just means it’s doing its job. 😉
😉
Placemats
Munchkin Silicone Placemats ~ $10 for 2
If you have a table in need of protecting, make sure you have a couple of these on hand. They measure 11 X 15 and are sticky on the bottom so they stay in place. They’re thin, too, so they’re easy to roll up if you need one for an outing, a picnic, etc. Top-rack dishwasher safe.
(No, I don’t work for Munchkin, I just like their stuff). And yes, they are BPA-free.
Back to: Gear Guides
About the Author
Meg Beilsmith Collins started Lucie’s List in 2010 after learning everything about babies the hard way; she is now the Editor in Chief. She’s an Industrial Engineer from Georgia Tech and a former car seat technician (CPST) who lives near Clearwater, FL with her husband Rich and daughters Lucie and Alice. She enjoys 90s music, MomFit, camping and anything on the water.
Detailed list of all foods for the first 90 days of introduction of complementary foods for a child.
Download the table of complementary foods in PDF format:
- Zucchini.
 Zucchini puree contains only 24 kcal per 100 grams of finished product. Proteins -0.6; fat - 0.3; carbohydrates - 4.6. Contains calcium, magnesium, vitamins A, C, B6 and iron. To save vitamins, we will prepare the first puree for a child for a couple. Zucchini cooks quickly, 10 minutes is enough. The first serving is 5 grams (a teaspoon), even less, at the tip of a spoon. We'll give you a taste of the new flavor. Take a small circle of zucchini (we choose the smallest, youngest baby zucchini, the puree will be sweet), wash well (you don’t need to clean and remove the seeds from young zucchini), cook for 10 minutes for a couple and grind through a sieve. Let the child try. The feeding temperature should be around 40 degrees. DEFINITELY try the puree yourself before giving it to a child! Not bitter, not sour, are there any strange aftertastes that may indicate a poor quality vegetable? We offer zucchini for 5-7 days according to the scheme: 5 grams - 10 grams - 20 - 40 - 60 - 60 - 60.
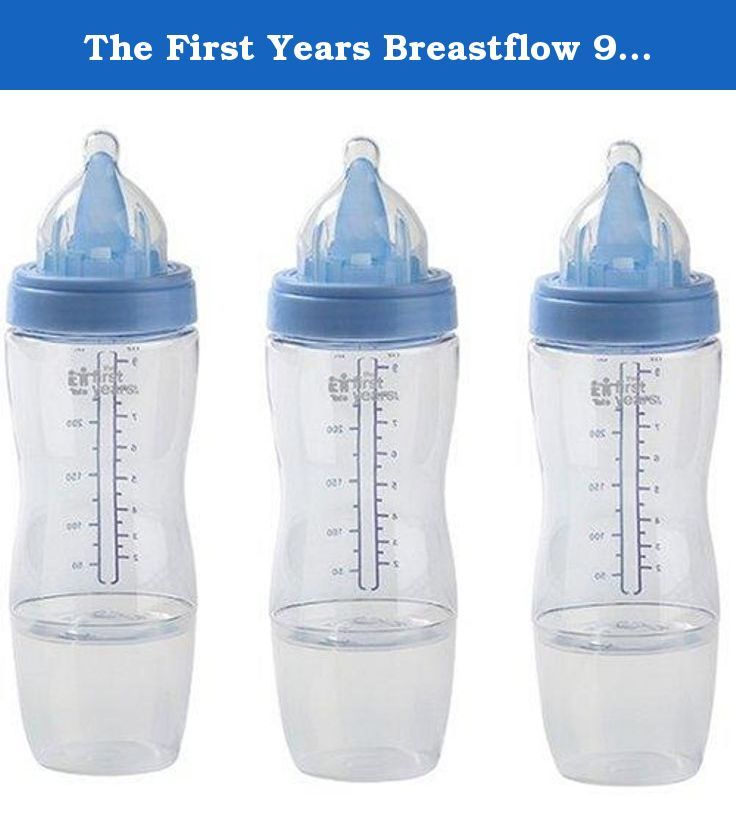 The zucchini has passed the test! Let's put it aside for now and move on to the next product.
 - Cauliflower. Cauliflower puree contains 33 kcal per 100 grams of finished product. Proteins, fats and carbohydrates, respectively: 1.6 / 0.7 / 5.4. Contains calcium, magnesium, iron, vitamins C and B6. To save vitamins, we cook for a couple. We divide the cabbage into small inflorescences, cook for 15 minutes. Grind the first portion (5 grams) on a sieve, prepare large portions with an immersion blender with the addition of boiled baby water, so that the consistency is the same as that of the zucchini. Cabbage, unlike zucchini, contains less water, so it needs to be added. We give according to the scheme: 5-10-20-40-60-60-60. Recall that it is not necessary to give all 7 days, five days will be enough to test for allergens.
- Broccoli. For 100 grams of finished puree 34 kcal. Proteins 2.8; Fats 0.4; Carbohydrates 6.6. Broccoli contains a lot of vitamin A, as well as calcium, magnesium, iron and vitamin C.
 We prepare mashed potatoes according to the same principle as cauliflower.
 - Buckwheat porridge. From vegetables to cereals. It's time to try the cereals. Previously, it was recommended that babies start complementary foods with cereals if they are not gaining weight well, or start complementary foods before six months. But it's all MYTH! Well, the baby will not start gaining better if instead of a portion of fatty milk he receives 60 grams of lean porridge cooked in water. Yes Yes! The first cereals are dairy-free, sugar-free and gluten-free! It is important! For the first test, it is still recommended to introduce special baby cereals, which are sold in stores. Why? Because cereals for children's cereals are not treated with rodenticides, unlike ordinary cereals on store shelves. Yes, and making flour from ordinary buckwheat and cooking 5 grams of such porridge will not be so easy as pouring half a teaspoon of prepared store-bought baby porridge with water, stir and give to the baby.
 Therefore, we suggest buying a pack of special children's dairy-free buckwheat for the first try and cook it according to the cooking method indicated on the package.
 - Rice porridge. Same as buckwheat: dairy-free, gluten-free, salt-free and sugar-free. We look at the energy value on the packaging.
- Corn porridge. This porridge is the most high-calorie of the three, so it is still better to introduce it as the third one. The scheme is still the same as with vegetables: 5-10-20-40-60-60-60 (the last two days are optional). When the volume of any of the cereals reaches 40 and 60 grams, you can add a little already introduced vegetables to it (also up to 40 grams), so that the porridge is not too viscous and monotonous for the child (“in a dry bag”, as we usually say).
- Pumpkin. Puree and pumpkin will already contain 88 kcal per 100 grams of the finished product. Thus, we gradually raise the calorie content of products.
 Proteins / fats / carbohydrates - 1.7 / 6.2 / 6.3. We clean and cut it into cubes, steam the pumpkin, about 15 minutes. Puree is introduced as before 5-10-20-40-60-60-60. For portions of 40 and 60 grams, you can try to give it together with the already tested porridge and bring the total volume up to 100 grams.
 - Apple. It's time to taste fruit. Why weren't they introduced earlier? Because, from birth, a child has a love for sweets, and if you start complementary foods with fruits, then there is a high probability that you will eat vegetables yourself later. We start complementary foods from the most tasteless foods incrementally. The finished puree contains 85 kcal per 100 grams of the finished product. How to cook: wash, peel, cut apples and send to a double boiler or cook in boiling water for 10 minutes (a couple more vitamins will be preserved). Scheme 5-10-20-40-60-60-60. By the way, with regard to fruits, a dose of 60, maximum 80 grams for a child up to a year is quite sufficient.
 If we then increase the portions of vegetables and cereals, then we will leave the fruits. A large amount of sugar is not good for a child. Up to 40 grams we give applesauce as a separate dish, from 40 grams and more we mix with cereals. Now we will gradually increase the volume and replace breakfast with porridge with fruit, seasoned with a small amount of butter (at the rate of 2 grams of butter per 100 grams of porridge).
 - Rabbit. It's time to introduce meat! At this point, the baby should be about 8 months old. It is recommended to start with a rabbit, as this is the most dietary meat. How to cook: we twist the meat in a meat grinder, form small meatballs and weld them a little in boiling water. It’s good if you have a kitchen scale at home and you can immediately prepare meatballs for the required 5-10-20-40 and 50 grams. We throw the boiled meatballs into a colander so that the glass is excess water and they cool, then we freeze. Our semi-finished product is ready! The first 5 and 10 grams are given separately.
 Boil or steam again and grind with a blender. Starting from 20 grams, grind together with the introduced vegetables. Now you can gradually increase the portions and replace lunch with vegetables and meat seasoned with a small amount of vegetable oil (at the rate of 1 teaspoon per 100 grams of vegetables). Meat, unlike all other products that are necessarily introduced in the first half of the day, is introduced at lunchtime.
 - Prunes. We prepare mashed potatoes in the same way as from apples, but first, prunes need to be washed, peeled and soaked for a couple of hours in water, then steamed and chopped with a blender. Portions are the same as for an apple: 5-10-20-40-60-60-60. Starting from 40 grams, mix with porridge.
- Turkey. We choose the fillet and give it according to the principle of the rabbit.
- Pear, banana, apricot, peach, plum. We introduce these fruits one by one according to the same principle as we introduced apple and prunes.
So, we have sorted out the safest products for the baby! Selected according to our climate, according to their energy value, composition and vitamin content. To put together a correct balanced diet, you need to know some WHO (World Health Organization) recommendations for complementary foods:
- At 6-8 months, the child should receive 60% kcal from breast milk and 40% kcal per day from complementary foods ;
- At 9-11 months, the baby should receive 45% kcal from breast milk and already 55% kcal per day from complementary foods ;
- The volume of the baby's stomach is approximately equal to 30 ml/kg of the baby's weight;
- At 6-8 months, smoothly go to 2 meals based on complementary foods (breakfast and lunch) and the minimum energy density of the meal should be 0.9 kcal / g for breastfeeding or 1.7 kcal / g for artificial feeding;
- Protein requirements for babies 6-9months 1.
 25 g/kg body weight;
 - Fat should make up 30-40% of the daily calorie intake of the entire diet.
Download the PDF feeding table:
Ribricapoprome Malyuk
90,000 The best products for child feed10
The first feeding of her favorite child is responsible and serious, because every good mother knows perfectly well. that it is proper nutrition that can provide a child with good health from the very first months of life. When the baby was just born, young parents do not have any particular problems with the variety of the children's menu, but when his age begins to approach the mark of 4-6 months, it is still worth thinking about additional food items.
The fact is that it is at this age that the child activates the need for additional vitamins, minerals and energy, which are no longer enough in breast milk or formula.
As a rule, parents immediately have a lot of fair questions: When to start? What are the best foods for baby food? How many to start? Many of these questions are of great concern to young mothers, fortunately, you are not the first and you are not the last, so everything will gradually fall into place.
Contents
- 1 When to start complementary foods?
- 2 Where is the best place to start?
- 3 Which foods can be given first?
When to start complementary foods?
As we have already said, the most favorable age for such an important task is 4-6 months, and the lower limit is most often reserved for formula-fed babies, and the upper limit is for children who are fed exclusively with mother's milk.
It is impossible to start earlier, because at an earlier age the child is neither physiologically nor mentally ready to receive denser food. Later - also not desirable, because, in this case, the child may have difficulty adapting to food other than milk.
What is the best place to start?
The most common products in the vastness of Russia and the CIS countries that are used for first feeding are vegetables, namely zucchini, cauliflower, broccoli and pumpkin.
In general, the golden rule always applies here, which applies to all babies in the world - the first to give those vegetables that are most typical for your area, in addition, it is important that they are dim, although there are exceptions. Experts recommend starting such experiments only if the child is absolutely healthy, he should not be (or has already been) vaccinated in the next week.
The first complementary foods are always introduced before breastfeeding, usually starting with a very small portion, no more than 1-2 tablespoons, increasing the volume every day, provided that there are no adverse reactions from the baby.
For example, if after any product rashes, redness of the cheeks, stool changes, vomiting, nasal congestion appear, then most likely you need to reduce the portion or completely exclude this product from the diet for 1-2 months.
Also, do not think that the baby will be very enthusiastic about what you offer him, most likely, after the first spoonful, he will cringe, spit out and refuse a new portion. This is normal, because his taste buds have not yet had time to get used to and adapt to new tastes. So, it is quite possible that you will have to show considerable perseverance, but the game is still worth the candle.
Which foods can be given first?
As we have already said, it is believed that vegetables are the safest and most useful for the first feeding, another option is cereals, less often fruit purees or fermented milk products (kefir, cottage cheese). It is more difficult to introduce vegetable puree than the same cereals, because it is not easy for a child to switch from sweet breast milk to an unsweetened vegetable, but a little sugar is usually added to cereals (the manufacturer or the parents themselves), which the baby likes much more.
However, those who have problems with stools (constipation), as well as excess weight, should start with vegetables, because they contain a lot of fiber, vitamins, and other useful components. Porridges are recommended for underweight children, as well as unstable stools.
Zucchini . The most popular complementary food in Russia, because it is a very delicate and tasty vegetable. It is rich in vitamins A and C, belongs to hypoallergenic products, and also retains all its beneficial properties well even with very long storage.
That is why it is convenient to introduce them into the diet, both in summer and winter, in addition, this vegetable is well rubbed through a sieve and boils quickly. Zucchini strengthens the immune system well, and therefore is indicated for children who often get sick.
Cauliflower . Another product with a low degree of allergenicity, rich in vitamins and minerals, unlike the same white cabbage, does not provoke increased gas formation. It strengthens blood vessels well and improves metabolism, however, it is not the most convenient vegetable in terms of storage and preparation for consumption.
Pumpkin. Another traditional first food product is a very delicate and healthy vegetable, rich in fiber and vegetable oils, which have a good laxative effect. It is rich in vitamin D, and belongs to low-allergenic products, however, it can provoke carotene jaundice, so it must be administered with caution.
Carrot.