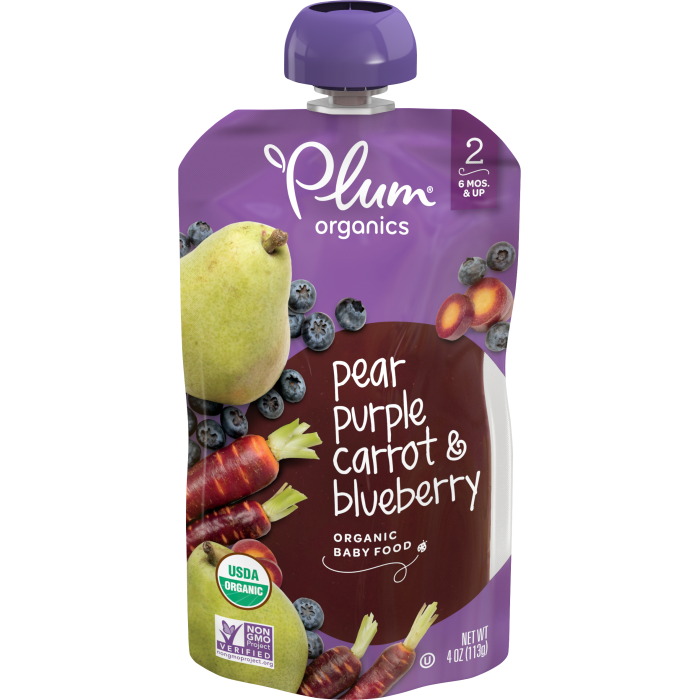
Can you freeze pear puree baby food
Easy Pear Puree (Plus Flavor Combos and Freezing Tips)
Learn how to make the EASIEST Pear Puree for your baby or toddler with a super simple method and the best flavor. Plus easy flavor combinations and freezing tips!
Pear Puree
I love making simple baby foods with basic kitchen tools I already have and fresh produce. This puree recipe is so easy and so delicious that every time I made it for my third kiddo, his older sisters wanted some too! It’s delicious when pears are at their peak in North America in late summer and in fall, though you can make it any time of the year with ripe pears.
Is Pear Puree good for babies?
Pear Puree is a simple baby food that has fresh flavor, as well as fiber that can be helpful for little digestive systems. It’s a healthy early food that babies and toddlers can continue to enjoy as they grow. You can serve it with a spoon or in a reusable pouch like a Squeasy Gear.
Ingredients You Need
To make this simple recipe, all you need is pears. This is best when the pears are just ripe and give a little to the touch and are fragrant. I like using Bartlett pears best, though any kind will work. You may want to peel them first if using a pear with a thicker skin such as Bosc to ensure a smooth final texture.
Step-by-Step Instructions
Here’s a look at the simple process involved in making this recipe. Scroll down to the bottom of the post for the full information.
- Dice the pears, leaving the skin on and discarding the core.
- Add to a pot with water.
- Cook until soft.
- Blend until smooth.
TIP: You can make this puree thinner or thicker, depending on the age of your baby and the amount of water you add. You could even leave it a little chunkier to make a Stage 2 baby food if desired.
How do you steam pears for babies?
To make this recipe with a steamer, simply place the diced pears into a steamer basket fitted inside of a medium pot filled with 2 inches of water. Bring water to a simmer over medium heat, cover, and cook for the same amount of time. Use some of the cooking water to help blend the pears.
How to Store Pear Puree
You can store the final puree in small airtight containers in the fridge or freeze into small portions to have later. The batch is a nice size so you can have a few portions for this week and a few to freeze for a future week if you’d like. (But not so much that you’ll never use it all!)
Why did my Pear Puree turn brown?
Pears are one of the fruits that oxidize when the skin is broken and oxygen meets the surface of the flesh. This can cause them to turn brown. But in making this puree, I leave the skins on, which helps blend the final puree into a light and pale color. If you’re at all worried about the color if your puree, you can add a teaspoon of fresh lemon juice.
Can you freeze Pear Puree?
It’s so easy to freeze Pear Puree that I almost always freeze some of each batch that I make for future easy meal components. I like to spoon some of the puree into a silicone ice cube tray, freeze, then transfer the cubes to zip top freezer bags for longer term storage. Find all of my baby food storage tips here.
Tips for Making the Best Pear Puree
- To store in the fridge: Let cool and portion out into small airtight containers and refrigerate for up to 5 days.
- To freeze: Portion into a silicone ice cube tray and freeze overnight. Transfer to a zip top freezer bag and freeze for up to 6 months. Thaw in the fridge.
- Any kind of pear will work, though ripe pears that give just slightly to the touch is best.
- If you use brown Bosc pears, peel them before cooking as the skin tends to be tougher and may not blend totally smooth.
- Add a pinch of cinnamon or ground ginger for additional flavor.
- Add 1 teaspoon unsalted butter for richness and fat.
- I haven’t had my Pear Puree turn brown, but if you’re at all worried, you can add 1 teaspoon fresh lemon juice.
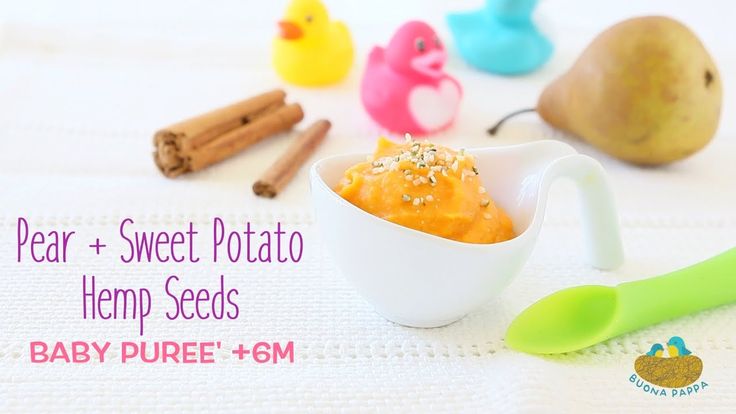
- Blend with Peanut Butter Puree, Sweet Potato Puree, Bean Puree, Avocado Puree, Banana Puree, or any other homemade baby food you like for additional combinations.
I’d love to hear your feedback on this recipe if you try it for your family, so please comment below. I love hearing how things go in your kitchens so thank you in advance!
Prep Time 5 minutes
Cook Time 12 minutes
Total Time 17 minutes
Author Amy Palanjian
Cuisine American
Course Baby Food
Calories 61kcal
Servings 6
- ▢ 4 cups diced ripe pears
Bring 1 cup water to a boil in a medium pot. Add the pears and reduce heat to medium-low. Cover and cook for about 15 minutes, or until the pears are very soft when poked with a knife.
Use a slotted spoon to transfer pears to a blender. Add ½ cup of the cooking water to the blender and blend, starting on low and working up to high, until very smooth. If the puree is thicker than desired, add a bit more water.
Let cool and serve or store for future meals.
Vitamix Blender
Silicone Ice Cube Tray
Reusable Pouch
- To store in the fridge: Let cool and portion out into small airtight containers and refrigerate for up to 5 days.
- To freeze: Portion into a silicone ice cube tray and freeze overnight. Transfer to a zip top freezer bag and freeze for up to 6 months. Thaw in the fridge.
- Any kind of pear will work, though ripe pears that give just slightly to the touch is best.
- If you use brown Bosc pears, peel them before cooking as the skin tends to be tougher and may not blend totally smooth.
- Add a pinch of cinnamon or ground ginger for additional flavor.
- Add 1 teaspoon unsalted butter for richness and fat.
- I haven't had my Pear Puree turn brown, but if you're at all worried, you can add 1 teaspoon fresh lemon juice.
- To make this recipe with a steamer, simply place the diced pears into a steamer basket fitted inside of a medium pot filled with 2 inches of water.
 Bring water to a simmer over medium heat, cover, and cook for the same amount of time. Use some of the cooking water to help blend the pears.
Blend with Peanut Butter Puree, Sweet Potato Puree, Bean Puree, Avocado Puree, Banana Puree, or any other homemade baby food you like for additional combinations.
Calories: 61kcal, Carbohydrates: 16g, Protein: 1g, Fat: 1g, Saturated Fat: 1g, Polyunsaturated Fat: 1g, Monounsaturated Fat: 1g, Sodium: 1mg, Potassium: 125mg, Fiber: 3g, Sugar: 10g, Vitamin A: 27IU, Vitamin C: 5mg, Calcium: 10mg, Iron: 1mg
Tried this recipe?Rate in the comments and tag @yummytoddlerfood on IG!
Pear Puree Baby Food | The Picky Eater
By Anjali Shah on
This post may contain affiliate links. As an Amazon Associate, I earn from qualifying purchases. Please read my disclosure.
Creamy, naturally sweet, baby pear puree is a healthy, wholesome first food for your baby. Pears are a stage one baby food that most babies enjoy on the first bite. This easy, homemade puree is an excellent source of fiber, which helps to relieve constipation, and Vitamin C, which helps keep baby’s immune system strong! The best part? It requires only 2 simple ingredients and is ready in 5 minutes!
Homemade pear puree is a simple baby food recipe that will quickly become a staple in your baby’s diet!
Made with nutrient rich, naturally sweet steamed pears, it’s delicious all on its own or can be combined with a variety of other baby food purees as your baby gets older.
It might seem complicated to make your own baby food at home, but I promise it’s so easy and takes about the same amount of time as going to the store and buying baby food!
👩🍳 Why This Recipe Works
🥘 Ingredients
📖 Pear Puree Combinations For Baby
🔪 How To Make Pear Puree Baby Food
❓Recipe FAQs
💭 Expert Tips
🥣 More Baby Food Recipes and Tips!
📋 Recipe Card
Of course, there will be times when you’re on the go and need a healthy pre-made option for your little one.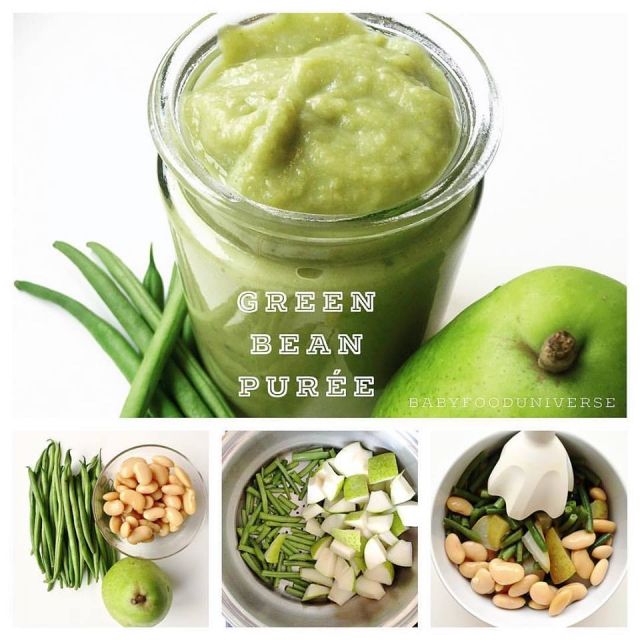 And in those cases, I’d recommend buying one of the pouches on my list of the healthiest baby food pouches.
But if you make this in bulk and freeze it in ice cube trays, you’ll be able to have healthy baby purees available for weeks at a time with minimal prep!
I love this baby pears recipe because it’s one of the first fruits I gave to my own kids, and it’s a great way to introduce your baby to fruits and solid foods overall.
👩🍳 Why This Recipe Works
- Stage 1 first food
- Budget friendly
- Healthier than store bought
- Naturally sweet, no added sugar
- Super smooth texture
- Many different ways to customize
- A favorite among babies
- Only one ingredient plus water
- An excellent way to relive constipation in baby
- Full of vitamins and nutrients
- Best pear puree recipe ever!
Latest Recipe Video!
🥘 Ingredients
This simple recipe calls for just one ingredient, plus water! See the recipe card below for more details on instructions and nutritional information.
- Organic Pears: Ripe pears are the main ingredient you need! When I make this recipe I use Bosc or Bartlett pears. Bosc pears have a brown skin, a long neck, and a long curved stem. They are excellent for cooking and have a sweet and juicy flavor. Bartlett pears are green in color. They are crunchy, and more tart than a Bosc pear, and have a slightly more gritty texture.
- Water: Use filtered water to thin out the puree.
📖 Pear Puree Combinations For Baby
You can make so many recipes using pear puree! Here are some of our favorite puree combinations:
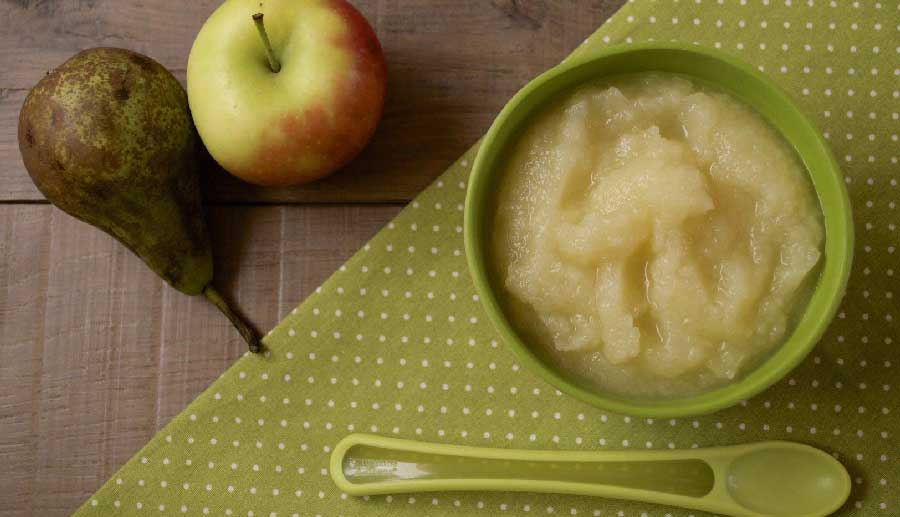
- Apple Pear Sauce: Apple and pear puree is a deliciously sweet combination! Use 2.5 apples + 2.5 pears (instead of 5 pears), and follow the exact same method for making regular pear baby food.
- Pear And Prune Puree: Add up to 10 organic dried prunes to this recipe along with the pears. You may need slightly more water.
 Follow the same method below. Alternatively, you could make plain prune puree separately, and then just mix it with the pear baby puree once both are made!
 - Avocado And Pear Puree: To make pear and avocado puree, simply add fresh avocados and a squeeze of lemon juice into the blender with the pear mixture. I recommend starting with 1/2 an avocado. You may need slightly more water.
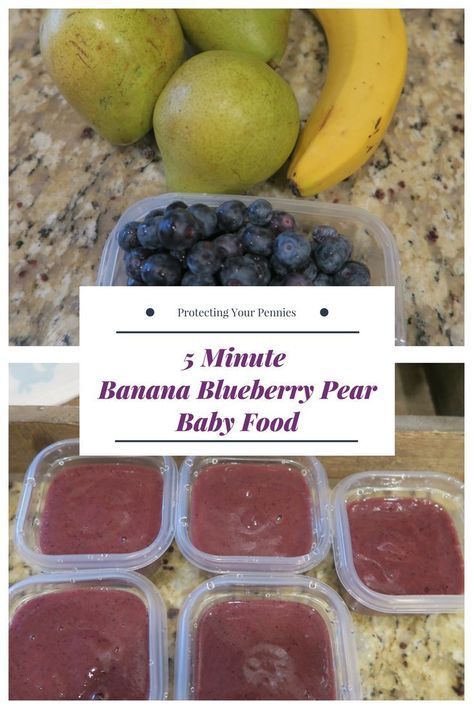
- Pear And Banana Puree: Add 1/2 to 1 whole banana into the blender with the pear mixture and blend until smooth.
- Mix It With Greens: Puree pears can be an easy way to get your baby to eat their greens! Try mixing pears with pea puree, broccoli and spinach puree, or green bean puree to help your baby to accept less sweet vegetables in their diet.
- BLW Pears (Baby Led Weaning Pears): For older babies, you can turn pears into a baby led weaning food! Just cut pears into bite sized pieces or mash the pear and serve it as a chunky pear sauce recipe for your baby to eat as finger foods.
- Add Spices: There are actually quite a few spices that go with pears! Thanks to their natural sweetness, pears work nicely with warm spices such as cinnamon, nutmeg, or cloves. Sprinkle a small amount of spice (1/8-1/4 tsp) to your puree for added flavor.
- Add Fresh Herbs: Feel free to add fresh herbs for more flavor. I suggest mint, chives, rosemary, tarragon, thyme or basil.
🔪 How To Make Pear Puree Baby Food
Preparing pears for baby is super easy! Here’s how you do it:
Prepare the Pears: Wash fruit. Cut the juicy pears in half and remove seeds and stem. Cut each half into 6 pieces.
Boil Pears: Put pear slices and water into a large pot. Turn the burner on high and cover with a lid. Once the mixture comes to a boil, turn heat down to low and simmer, covered, for 20-30 minutes, stirring occasionally until the pears are soft.
Puree Pears in Blender: Pour the pears and water you cooked them in into the blender. Puree until smooth. Let cool, then serve these baby pears, or store in the fridge or freezer.
Alternative Preparations For This Homemade Pear Baby Food Recipe
How To Make Steamed Pears: If you prefer not to boil your pears you can steam them. Roughly chop 5 pears. Place the cubes into a steamer basket over 2 inches of boiling water for 8-10 minutes or until tender and soft. Then puree baby food pears in your blender.
How To Make Roasted Pears: Remove the core and seeds. Slice your pears into cubes. Place on a baking sheet lined with parchment paper. Roast at 425 F for 30-40 minutes. Remove the pears from the oven. Add to a blender with water, and blend this easy pear sauce until smooth.
❓Recipe FAQs
What are the health benefits of pears? Is pear puree healthy?
Pears have so many health benefits, and pear puree is healthy for babies (and adults too!) Here are some of the health benefits of pears:
** High in dietary fiber, improves digestion
** Can help relieve constipation in baby
** High in Vitamin C (which helps with immunity) and Copper
** Rich in antioxidants
** Good source of vitamin K which helps with baby’s bone development
When can baby eat pears?
You can introduce your baby to pears as early as 4 months. Introducing solids to your baby is a personal choice. Some do it as early as 4 months, and some wait until 6 months.
When you introduce pears to your child is dependent on their growth, development, and your pediatrician’s guidance.
For younger babies, I recommend making this puree into a very smooth consistency, while older babies can enjoy a chunkier consistency.
How do you serve pear puree to baby?
You can serve this pureed pear recipe in a variety of ways! Mix it with other fruit or veggie purees, or serve with a sprinkle of warm spices like cinnamon, nutmeg, pumpkin pie spice, or ginger. You can also mix this easy pear puree with oatmeal or yogurt for a more filling meal!
Do you need to peel pears for baby puree?
No, you do not have to peel pears for babies before cooking, and pureeing. The skin of the pear holds a lot of nutrients, and when it is cooked down and pureed it blends in with the rest of the fruit.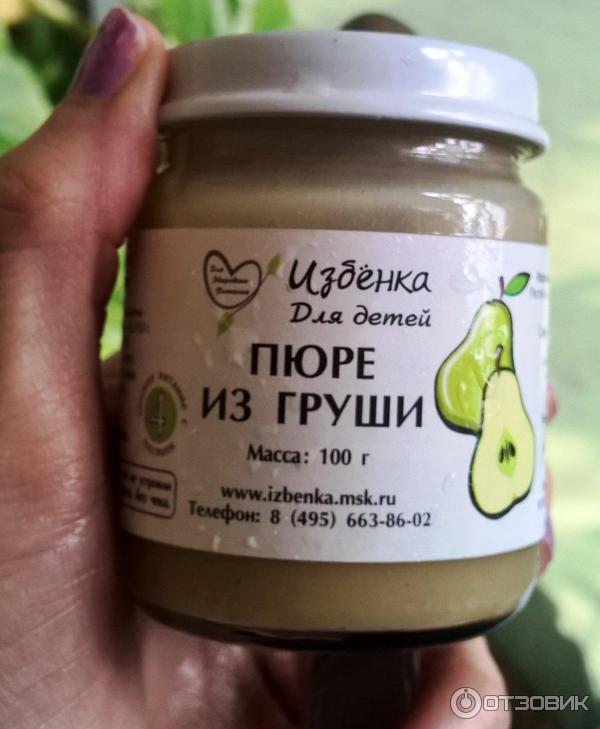 Just be sure to remove the core and the seeds.
Do you have to cook pears before pureeing?
Yes! In general, even for older babies, pears can be quite tough, and babies do not yet have the ability to fully chew them.
If you are introducing this homemade puree with pears for the first time to a baby betweeen 4-6 months of age, you need to cook the pears and make a puree. You must cook them down, and puree before serving to your baby to avoid the risk of choking.
If you are using this recipe for an older baby, I still recommend cooking the pears down, but you can mash them or give your baby bite sized slices or cubes to gum.
How do you store pear puree for baby? Can you freeze pears?
You can store pears baby food in either the fridge or the freezer. Here’s how:
In The Fridge: Let the puree cool completely, then transfer to an airtight container.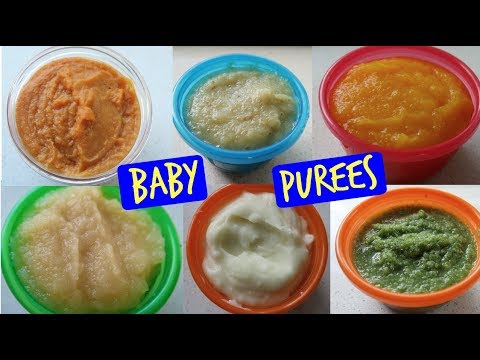 It will keep for up to 4 days in the fridge.
Storing for the Freezer: Pour into ice cube trays. Allow to cool, wrap and cover with saran wrap or cover tray with an ice cube tray cover, and freeze overnight. The next day, pop the cubes out of the ice cube tray, and store in a zip-lock freezer safe bag, with all air pushed out. Label with date and contents. You can store the frozen cubes in the freezer for up to 4 months.
Thawing Pear Puree: Thaw in the fridge the night before use, or thaw by putting the pear ice cube in a bowl over a bowl of hot water on the counter to defrost. Serve at room temperature
Do pears need to be organic?
Yes, when you’re making pureed pears for baby, it’s best to buy organic pears, because pears are on the dirty dozen list. This means that they have some of the highest levels of pesticides among all of the fruits and veggies available at the store.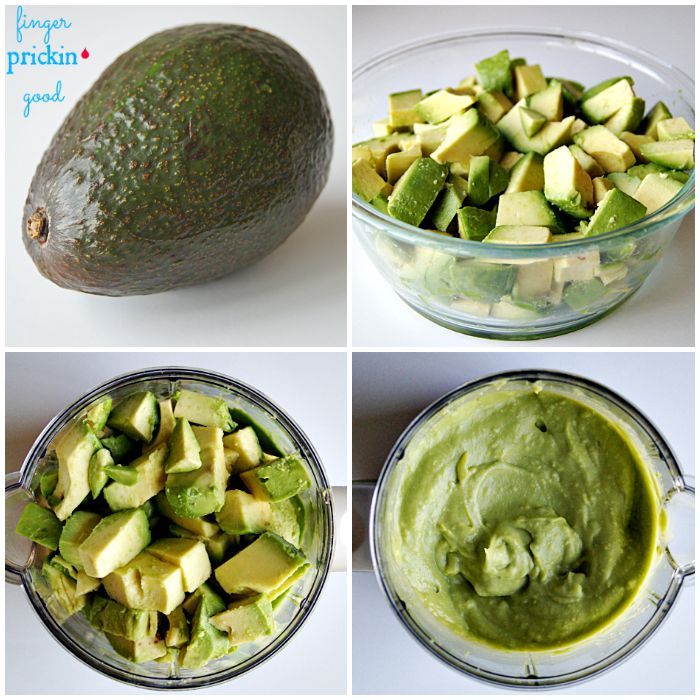
What are the best pears for baby food?
The best type of pear for baby food are either Bosc Pears or Bartlett Pears. They are the sweetest and have the softest flesh when ripe. Anjou Pears and Comice Pears will also work, they may just not be as sweet!
💭 Expert Tips
- Leave the skin on. No need to peel the pears before boiling. Keep the peel on to increase the nutrient content.
- Don’t serve raw pears to your baby. They won’t be able to mash it in their gums.
- For best results, use a great blender to ensure that your puree turns out super smooth with no lumps. I used our Vitamix to puree large quantities at the same time – which was super convenient. You don’t need a “baby food maker” – any great blender will do. And if you have a Vitamix you can use it for so many other things besides baby food!Have the proper tools ready and available. You’ll need a steam basket and a blender.
- To keep pear puree from turning brown, you can add a squeeze of lemon juice, or just freeze it immediately after making it.
- Use durable, covered, ice cube trays for freezing. You can use silicone ice cube trays or plastic trays, just make sure they have a cover for easy storage and to prevent freezer burn.
🥣 More Baby Food Recipes and Tips!
- Green Bean Puree
- Sweet Potato Puree
- 10 Easy Baby Food Recipes for Beginners
- Zucchini and Apple Puree
- Butternut Squash Puree
- Pea Puree
- Superfoods for Babies and Recipe Ideas
Love this Baby Food recipe? Please leave a 5-star rating 🌟 in the recipe below and/or a review in the comments section further down the page!
You can also FOLLOW ME on FACEBOOK, TWITTER, INSTAGRAM, and PINTEREST to see more delicious, healthy, family-friendly food, and if you have any questions, I’m here to help!
📋 Recipe Card
Print Recipe5 from 8 votes
Pear Puree For Baby (Pear Baby Food)
Creamy, naturally sweet, baby pear puree is a healthy, wholesome first food for your baby. Pears are a stage 1 baby food that most babies enjoy on the first bite. This easy, homemade puree is an excellent source of fiber, which helps to relieve constipation, and Vitamin C, which helps keep baby's immune system strong! The best part? It requires only 2 simple ingredients and is ready in 5 minutes!
Prep Time10 mins
Cook Time30 mins
Total Time40 mins
Course: Baby Food
Cuisine: American
Diet: Gluten Free, Vegan, Vegetarian
Servings: 12 ounces
Calories: 42kcal
Author: Anjali Shah
- ▢ 5 organic pears
- ▢ 6-8 oz water for a thicker puree, use less water (and adjust water as needed)
- ▢
Regular Blender
- ▢
Covered Ice Cube Trays For Freezing
- ▢
Chopping knife
- ▢
Cutting Board
- ▢
Wash fruit. (Any type of pear will do – I use Bosc or Bartlett).
- ▢
Cut pears in half and remove seeds and stem. Cut each half into 6 pieces.
- ▢
Put pear and water into a large pot. Turn the burner on high and cover with a lid.
- ▢
Once the mixture comes to a boil, turn heat down to low and simmer, covered, for 20-30 minutes, stirring occasionally until the pears are soft and can be pureed.
- ▢
Blend in a blender, puree until smooth.
- ▢
Pour into ice cube trays, allow to cool, wrap/cover, and freeze.
- ▢
Thaw in the fridge the night before use, or thaw by putting the ice cube in a bowl over a bowl of hot water on the counter to defrost.
https://youtu.be/4-mNxFhGsZgVideo can’t be loaded because JavaScript is disabled: Pear Puree Baby Food (https://youtu.be/4-mNxFhGsZg)
- 1 ice cube = 1 oz of food
- Stage 1 baby food recipe
- Spice up your baby’s food! To pear puree, you can add a pinch of ginger powder, a pinch of cinnamon, or even a bit of mint.
- Will keep frozen for up to 4 months. Will keep in the refrigerator for 3-4 days.
- Leave the skin on. No need to peel the pears before boiling. Keep the peel on to increase the nutrient content.
- Don’t serve raw pears to your baby. They won’t be able to mash it in their gums.
- For best results, use a great blender to ensure that your puree turns out super smooth with no lumps. I used our Vitamix to puree large quantities at the same time – which was super convenient. You don’t need a “baby food maker” – any great blender will do. And if you have a Vitamix you can use it for so many other things besides baby food!Have the proper tools ready and available. You’ll need a steam basket and a blender.
- To keep pear puree from turning brown, you can add a squeeze of lemon juice, or just freeze it immediately after making it.
- Use durable, covered, ice cube trays for freezing. You can use silicone ice cube trays or plastic trays, just make sure they have a cover for easy storage and to prevent freezer burn.
Adapted from BabyLove
Calories: 42kcal | Carbohydrates: 11g | Protein: 1g | Fat: 1g | Saturated Fat: 1g | Sodium: 1mg | Potassium: 86mg | Fiber: 2g | Sugar: 7g | Vitamin A: 19IU | Vitamin C: 3mg | Calcium: 7mg | Iron: 1mg
Pear Puree: How to Make Homemade Pear Puree
AnyutaN - Feb 21st, 2017
Categories: Puree
Tags: Pear puree
Pears are an ideal fruit for the first feeding. They are hypoallergenic and do not cause bloating in children. Adults, along with kids, also love to enjoy delicate pear puree. A selection of recipes presented in this article will please both children and adults.
Ingredients: Pear, citric acid, sugar
Time for laying: All year
9000
- 3.1 Natural puree for the winter
- 3.2 Puree with sugar and citric acid
- 3.3 Puree with milk and pear0022
Choosing pears for mashed potatoes
For adults, mashed potatoes can be prepared from absolutely any variety of pears. The main thing is that the fruit is as ripe as possible. In case of a lack of natural sweetness, the workpiece can be flavored with granulated sugar.
When it comes to feeding your baby, you need to take the choice of raw materials more seriously. Pear varieties with green skins will not cause allergies. Preference should be given to fruits with juicy and tender pulp. Such properties are possessed by fully ripe varieties Williams, Komis and Conference.
In addition to varietal diversity, attention should be paid to the integrity of the skin. It must be undamaged. Fruits should not have dents, traces of rot or wormholes.
Pear puree for first feeding
Baked fruit
Well-washed pears are cut in half and the seed box is removed. Right with the skin, the fruits are sent to the oven, heated to 180 degrees. After 15 minutes, the pulp will completely soften and can be scraped out with a dessert spoon.
Instead of an oven, you can roast pears in the microwave at the maximum power setting. The cooking time is reduced by 5 times! The pear will be ready for further processing in 3 minutes.
The softened pulp is ground through a sieve or punched with a blender until smooth. If the puree is too thick, then it is diluted with clean boiled water.
Boiled fruit
Rinse the pear thoroughly under running water and peel. Then each fruit is cut into two parts and freed from seeds. The slices are crushed into small cubes or strips. Fruit slices are folded into a saucepan and poured with a small amount of water. Cook the mass under a tightly closed lid over medium heat for 10 minutes. The finished pieces are removed from the bowl with a slotted spoon and ground to a homogeneous consistency. The broth can later be used to prepare a delicious vitamin compote or jelly.
With natural apple juice
The technology of making this puree differs from the previous recipe only in that the pear is boiled not in water, but in freshly squeezed apple juice. Such puree is offered to the baby at a later date of complementary feeding.
Recipe for children's pear puree without cooking, see the video from Golder Electronics channel
Pear puree for the winter in jars
Natural puree for the winter
citric acid.
Fruit is boiled and ground in a blender. The homogeneous mass is again put on fire and boiled for 10 minutes. In the meantime, sterilize the container. The hot mass is placed in containers and covered with boiled lids. Tightly twist the jars only after 20 minutes of sterilization in a water bath.
Puree with sugar and citric acid
- pears - 1 kilogram;
- granulated sugar - 250 grams;
- water - 2 tablespoons;
- citric acid - 1/3 teaspoon.
Pieces of peeled pears are placed in a thick-walled saucepan. Add water to the cut. The container is put on fire and stewed under the lid for 15 minutes.
The boiled mass is crushed until smooth. Add sugar and acid to it. Before packing in jars, the puree is kept on fire a little more, 5 minutes will be enough. Tightly twisted jars are covered with a warm blanket and left for a day.
For more information about this recipe, see the video from the channel "Family Menu"
Pear puree with milk
- pears - 1.5 kilograms;
- milk 3.5% fat - 1.5 liters;
- granulated sugar - 1.5 kilograms;
- water - 50 milliliters;
- soda - 5 grams.
Peeled pears are cut into random pieces, poured with water and put on fire for 1 hour. After boiling, add the right amount of sugar and continue heating the mass. When the fruit slices are well boiled, soda and milk are added. Bring the workpiece to a boil over high heat, and then reduce the heat to a minimum. Cook puree for 3 hours.
After the specified time, the mass is crushed with a blender to a creamy state, heated again on fire for a couple of minutes, and sent to sterile jars. Before being sent for long-term storage, the containers are slowly cooled under several layers of terry towels.
The taste of this puree is similar to condensed milk, with a distinct pear aroma.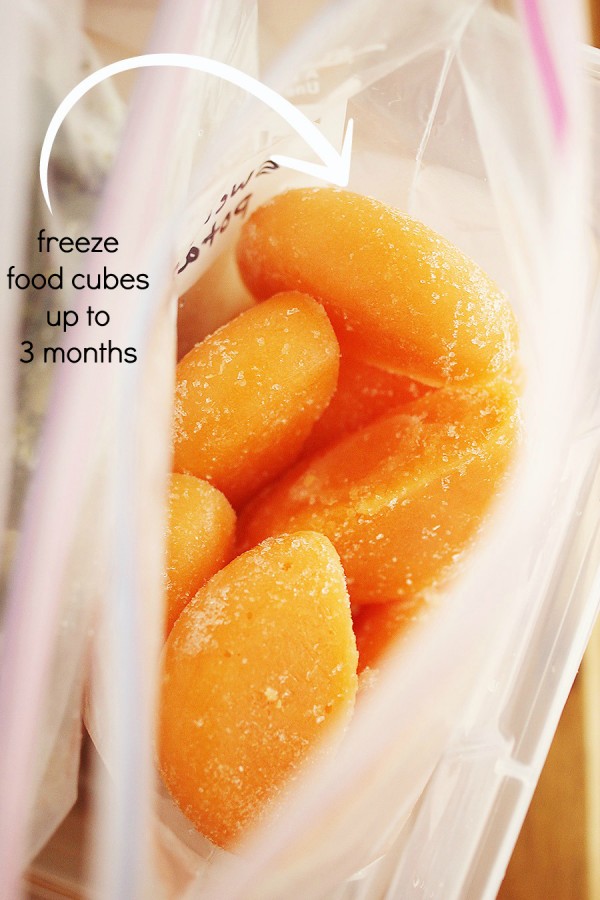
Julia Niko in her video will talk about how to cook apple-pear puree in a steamer
How to freeze puree
Freezing can be used instead of the usual preservation. To do this, a preservative - citric acid - is not added to the puree, and the amount of granulated sugar is reduced, or completely excluded.
It is best to freeze puree in portioned doses. To do this, you can use small containers with a volume of 150 - 200 grams. Molds for baby puree should first be doused with boiling water. Puree for complementary foods is best frozen in silicone molds designed for making ice.
Tweet
Fragrant preparations from pears for the winter
Pumpkin puree: cooking methods - how to make pumpkin puree at home
Delicious peach puree for winter
Strawberry puree: storage in jars and freezing - how to make strawberry puree for the winter
Plum puree: homemade plum puree recipes
Every year I freeze pears for the winter.
 It's very easy if done right: sharing my methods | Lifestyle
 How fleeting summer is! How quickly his fine sunny days pass! So fast that it is not always possible to fully enjoy its warmth, as well as the taste and aroma of its gifts. Those who want to enjoy tender, wonderful summer fruits or vegetables throughout the year can take my advice. Nothing complicated, I suggest just freezing them. How to do it? In this article, I will share with you several methods.
How to keep this wonderful fruit for a long time?
Like many other berries and fruits, pears are excellent for freezing. For lovers of pies, pies, desserts, etc. you can safely freeze these sweet and juicy fruits and enjoy them all year round.
The texture and color of a ripe pear is preserved by soaking it in a solution of vitamin C (ascorbic acid) after peeling. Then everyone can decide what to do: freeze the fruits by placing them in a sweet syrup, in the form of a puree, or simply cut them into pieces and leave them dry. You can apply maximum imagination, any way will keep the fruit fresh and tasty.
Which varieties are used?
It is recommended to use seasonal pears for freezing, harvested during the mass harvest. In late autumn or early winter, winter varieties are also sold - they are also used for freezing.
When choosing ripe fruits, please note that most frozen pear varieties, such as Seckel, Comice, Bosc and Anjou, do not change color when ripe. Bartlett, when ripe, changes color from green to yellow.
How to choose pears?
The fruits must be firm, intact, free from dents or spoilage. If softer specimens come across, then they can be used for making and freezing mashed potatoes.
To determine the ripeness of the fruit, connoisseurs recommend gently squeezing it with your fingers around the stem. The flesh at the stem should be slightly soft. If this is not the case, another fruit should be chosen. The pear should not be too soft in the middle: an overripe fruit is not suitable for freezing.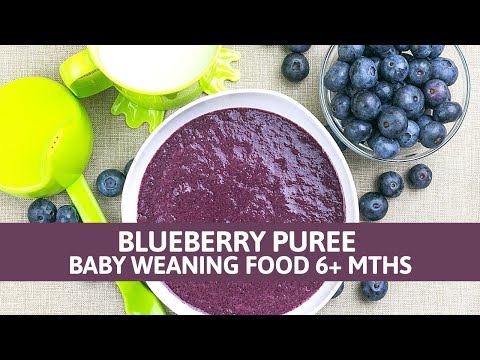
How to clean fruits?
To wash off the dirt, the fruit is held under cool running water. Then they are placed on a rack and, using a hinge or a Y-knife, the peel is removed, which can either be simply thrown away or used, for example, in the production of liquor as a flavoring. If the pear is so soft that it is difficult to remove the peel from it, it is not recommended to freeze it.
Processing
Each fruit is then cut in half with a knife. Using a spoon, remove the core with seeds. You can also remove the stems if you like. When processing pears, you must try not to remove too much pulp from them. Then the fruit is cut into pieces of any size.
Vitaminization
Next, the fruits are soaked in vitamin C. This is necessary so that they do not lose their color during freezing. 3.8 liters of water (cold) are poured into a large container and 1 tsp is diluted in it. vitamin C (crystalline ascorbic acid). Peeled pears are placed in the solution and kept in it for at least ten minutes (longer if possible). Crystalline ascorbic acid can be replaced with six 500 mg vitamin C tablets.
Method number 1: how to freeze pears in syrup?
Syrup in which fruits are frozen can be of different levels of thickness:
- Light: dissolve one and two thirds of a cup (333 grams) of sugar in 4 cups of water (950 ml).
- Medium: two and a half cups (533 grams) of sugar dissolved in 4 cups (950 ml) of water
- Thick: four cups (800 grams) of sugar dissolved in 4 cups (950 ml) of water.
All fruits are placed in a large saucepan, ingredients for the syrup are added and boiled in it over medium heat for 1-2 minutes. In this case, the sugar should be completely dissolved. The foam is carefully removed with a spoon.
How to place fruits in a container?
Place the chilled pears in clean freezer containers and pour in the syrup (enough to completely cover the fruit). Wide-mouth containers should have 1.3-2.5 cm of empty space. If a container with a narrow neck is used, about 1.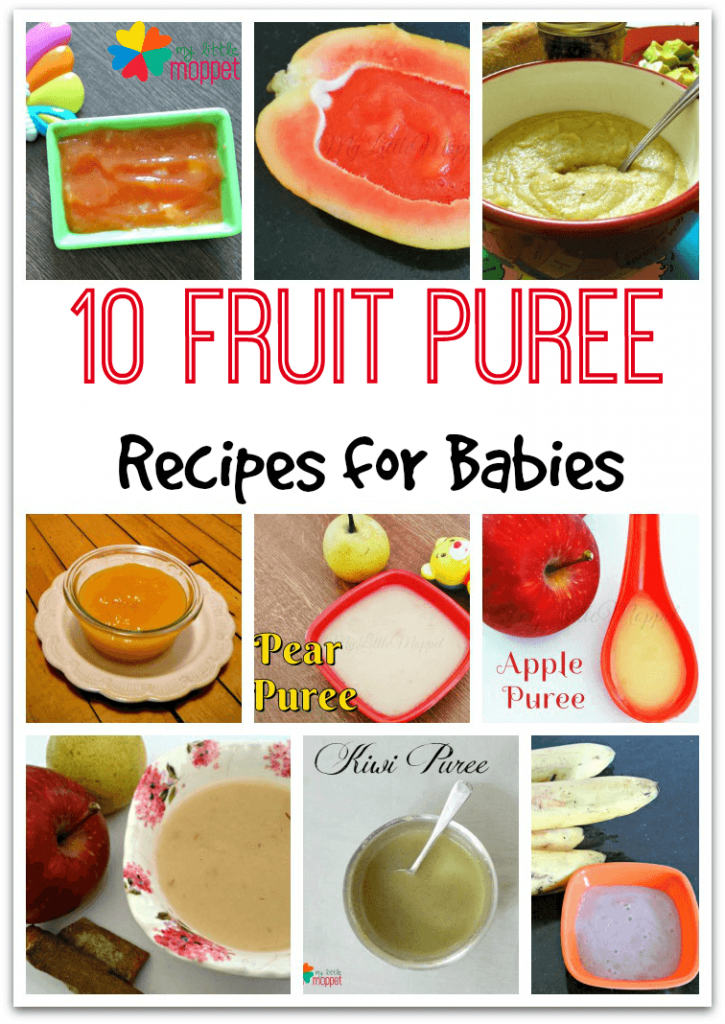 9-3.8 cm should remain free to the top. You should not forget to wipe the edges of the containers before closing them.
Recommendation
Pears keep for about a year in containers. Experts recommend labeling dishes with the date of freezing. To defrost fruits, they are transferred in a container from the freezer to the refrigerator and left overnight.
Method #2: Freeze Dry
Use a baking sheet that can be easily placed in the freezer. A sheet of parchment paper is spread on it. Pears are taken out of the vitamin solution, placed in a sieve placed in the sink to free them from excess liquid. Then the fruits are laid out on a sheet so that there is a little free space between them.
If the pears come into contact during freezing, they will stick together into a ball. If you wish to slightly sweeten the fruit, 100 grams of granulated sugar is added to each liter of the product. Next, the sheet is placed in the freezer and left for two hours (depending on the size of the pieces). It is best to leave the pears in the freezer overnight.
About freezing in airtight bags
Special freezer bags of any size can be used for freezing, which are filled with pear pieces and removed as much air as possible before closing.
If fruits are to be used for different purposes, place them in bags of different sizes. For example, you can fill several sandwich bags with the product to measure a small amount of pears for a smoothie.
Bags label and store frozen fruit in the freezer for 10-12 months. Defrost the fruits by transferring them overnight from the freezer to the refrigerator.
Method no. 3: how to freeze pear puree?
250 grams of ripe fruits are peeled, cut into cubes, put in a saucepan, add one tablespoon of water and one tablespoon of sugar. Cook over low heat for 15-20 minutes, stirring regularly. When the fruits become soft, turn off the fire and grind the pears to a puree state using a blender.
The finished puree is cooled and laid out in jars, disposable cups and small containers, leaving some free space.