Cleaning baby brezza food maker
Frequently Asked Questions | Baby Brezza Canada
Common Cleaning & Maintenance Questions for Baby Brezza Products
- How do I clean or descale the Baby Brezza Formula Pro Advanced?
-
- To clean or descale, hand-wash all components with lukewarm water and mild soap.
- Make sure all parts are dry and reassemble machine, leaving powder container completely empty.
- Fill the water tank with 20oz Distilled Water and run a 10oz cycle.
- Add a cup of distilled white vinegar inside the water tank with 12oz of water and run another 10oz cycle.
- Discard remaining vinegar/water solution, and wash tank with mild soap and water, and refill with 20oz distilled water.
- Run another 10oz cycle to rinse out internal tubes of any vinegar residue.
- Repeat steps 4-6 if concerns persists.
-
- How do I clean or descale the Steam Tank for my Baby Brezza One Step Baby Food Maker or Food Maker Deluxe?
- We recommend regular cleaning of the Steam Tank to prevent damage to the machine from mineral deposits.
The frequency of cleaning will depend on the type of water you are using and how much mineral deposit build up forms. Always unplug before cleaning. Put 1/3 cup white vinegar and 1/3 cup distilled Water in machine and let sit overnight. Pour out vinegar and water solution (refer to user manual for proper emptying instructions). Refill Steam Tank with purified water, plug in machine and run “Steam” cycle for 10 minutes. Let Steam Tank cool and scrub with a cleaning brush if necessary. Rinse with purified water to eliminate any remaining vinegar taste. Empty tank and fill with clean water before cooking.
- We recommend regular cleaning of the Steam Tank to prevent damage to the machine from mineral deposits.
BABY BREZZA PRODUCTS
Baby Brezza Formula Pro/Formula Pro Advanced
- How do I find the formula setting for my Formula Pro?
- Use the formula settings finder which will help you find the setting for the formula you’re using. Click Here for Formula Pro Settings Finder. We have two Formula Pro models so please choose the one that you’re using.
 If you have any problems, you can contact Baby Brezza Customer Service for assistance.
- Use the formula settings finder which will help you find the setting for the formula you’re using. Click Here for Formula Pro Settings Finder. We have two Formula Pro models so please choose the one that you’re using.
- How do I set up my Formula Pro powder container?
- For a quick reference set up guide, contact Baby Brezza Customer Service for assistance or consult the product manual. We recommend following the complete instructions in the user manual.
- How do I know which Measuring Insert or Measuring Wheel Setting to use?
- For a complete list of Formula Powders and their correct Measuring Inserts or Measuring Wheel Settings, click here. If your powder is not listed, please contact Baby Brezza Customer Service for assistance.
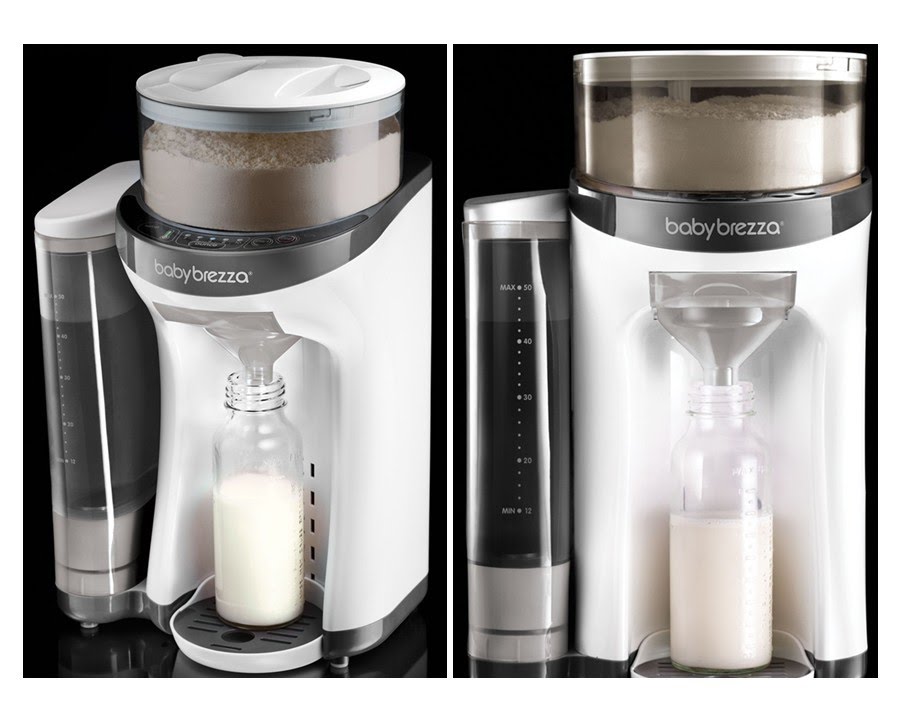
- My Baby Brezza Formula Pro is dispensing more formula than indicated on the ounce selector on the control panel. Why?
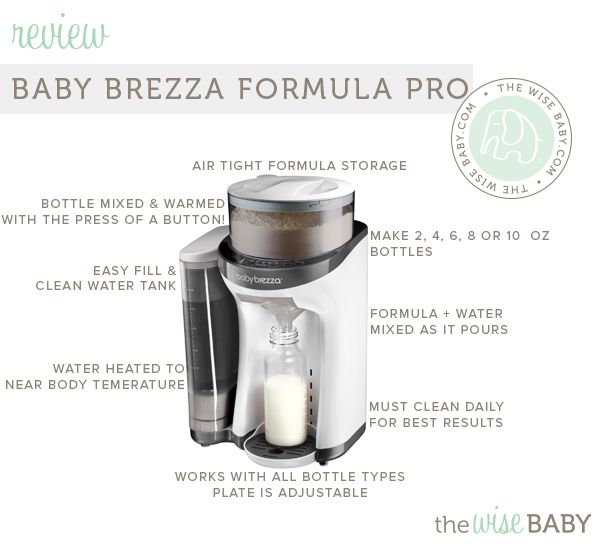
- The ounce size on the Formula Pro control panel indicates water volume only. When powder is added to the water, the volume is increased, just like when you make a bottle by hand.
 The final volume of mixed formula is expected to be a little over the ounce amount indicated on the control panel. If the amount of formula is significantly higher than the ounces you are expecting, please contact us.
- The ounce size on the Formula Pro control panel indicates water volume only. When powder is added to the water, the volume is increased, just like when you make a bottle by hand.
- My Baby Brezza Formula Pro is dispensing less formula than indicated on the control panel. Why?
- Clean the Funnel to make sure formula powder isn’t clogging the machine. Contact customer service if the problem persists.
- How do I prevent mold from growing in the Baby Brezza Formula Pro?
- As with any food preparation product or food storage container, proper maintenance and cleaning is required to make sure that your Baby Brezza Formula Pro stays clean. In addition to the regular cleaning recommended in the instruction manual, we recommend that care be taken when pouring formula powder into the powder container. After pouring powder into the container, check to make sure that no powder has spilled in the area next to the water tank, and clean any excess powder with a damp cloth.
 Also make sure that all parts of the powder container are completely dry before assembly. Mold should not grow in Formula Pro when properly cleaned and dried.
- As with any food preparation product or food storage container, proper maintenance and cleaning is required to make sure that your Baby Brezza Formula Pro stays clean. In addition to the regular cleaning recommended in the instruction manual, we recommend that care be taken when pouring formula powder into the powder container. After pouring powder into the container, check to make sure that no powder has spilled in the area next to the water tank, and clean any excess powder with a damp cloth.
- Monthly cleaning and preparation for long term storage - Baby Brezza Formula Pro Advanced
- Monthly Descaling Instructions
You can leave the formula powder in the powder tank during the descaling process. - To prevent mineral scale on the water heater inside your Baby Brezza Formula Pro® Advanced, follow these easy steps:
- Remove the water tank, empty it and fill it with 20oz/600ml distilled vinegar & 20oz/600ml of purified water.
- Place the water tank on the base of the machine & place a cup larger than 10oz/300ml under the funnel.
- Select “10oz/300ml” with the “oz/ml” button, then press the “water only” button to dispense.
- Empty the cup, place back under the funnel, then press the “water only” button again to dispense another 10oz/300ml.

- Now unplug the machine, remove the water tank, and empty it. Let the machine sit for 4 hours.
- Wash, rinse and fill the water tank to the max line with purified water, then place it back on the base.
- Plug in the machine, place a cup to catch 10oz/300ml water and use the “water only” button to run a 10oz/300ml cycle. Dispose of the water dispensed in the cup and then repeat this step to run the entire tank of purified water through the machine. When the “Low Water” indicator turns on, you’re done rinsing.
- Refill the water tank with purified water and return to normal use.
- Long Term Storage Instructions
It is extremely important to clean the machine and remove all formula powder residue before storage.
If you’re going to store your Formula Pro® Advanced for later use, or will not use it for a while, please follow the instructions below:- Remove the powder container parts, funnel, funnel cover, drip tray and water tank from the base.

- Wipe the base with a clean damp cloth and make sure to remove any and all formula residue. Dry the base well.
- Empty the powder container, wash all powder container parts, dry thoroughly, reassemble, & reinstall on the base.
- Follow the Monthly Descaling Instructions shown above, steps 1-7 only. Do not remove or refill the water tank after step 7.
- Now place a cup to catch 10oz/300ml water under the funnel, then press & hold the “water only” button for 5 seconds. Water will dispense continuously until the machine is completely empty, then stop automatically.
- Unplug the machine, remove the funnel, funnel cover and water tank, dry them both thoroughly and reinstall them on the machine.
- Your machine is now ready for storage. Pack the machine in its box or enclose it in a bag to keep it dust free.
- Remove the powder container parts, funnel, funnel cover, drip tray and water tank from the base.
- Monthly Descaling Instructions
- Monthly cleaning and preparation for long term storage - Formula Pro Original
-
- Remove powder container from the Formula Pro base and set aside.
- Make sure the funnel is properly connected to the base of the Formula Pro.
- Place a container 20oz or larger under the funnel to catch water.
- Fill the formula pro water tank with 10oz of water and 10oz of vinegar.
- Plug in and turn on the Formula Pro.
- Press and hold “ounce”, “stop” and “start” buttons simultaneously.
- Continue to hold all 3 buttons until the entire solution of water and vinegar are flushed through the machine.
- Rinse the water tank and refill with 20oz of purified water and hold “ounce”, “stop” and “start” buttons to rinse any remaining vinegar from the machine.
- Unplug the machine, remove the funnel, funnel cover and water tank, dry them thoroughly and reinstall them to the machine.
- Your machine is now ready for storage. Pack the machine in its box, or enclose it in a bag and keep it dust free.
- Remove powder container from the Formula Pro base and set aside.
-
- There is mineral build up in my Baby Brezza Formula Pro.
 How do I clean?
-
- Please hand-wash all components with lukewarm water and mild soap.
- Make sure all parts are dry and reassemble machine, leaving powder container completely empty.
- Fill the water tank with 20oz distilled water and run a 10oz cycle.
- Add a cup of distilled white vinegar inside the water tank with 12oz of water and run another 10oz cycle.
- Discard remaining vinegar/water solution, and wash tank with mild soap and water, and refill with 20oz distilled water.
- Run another 10oz cycle to rinse out internal tubes of any vinegar residue.
- Repeat steps 4-6 if concerns persists.
-
- Do I need to clean the Baby Brezza Formula Pro/Formula Pro Advanced after every 4th bottle?
- Yes it’s very important to clean the machine after every 4th bottle or when the clean funnel indicator light turns on. Unfortunately, formula can build up on the funnel during mixing because formula by nature likes to clump with water.
 If the formula builds up too much, it can affect how much formula drops from the powder container into the mixing funnel, affecting the machine’s accuracy. By removing the funnel after every 4th bottle and wiping the underside of the formula container, you can clean any formula build-up and ensure the machine works accurately. One suggestion to make cleaning easier is to purchase a spare funnel. That way, after every 4th bottle, you can remove the funnel that needs to be cleaned and insert your spare funnel that’s clean. Click here to shop for a spare funnel for the Baby Brezza Formula Pro Advanced.
- Yes it’s very important to clean the machine after every 4th bottle or when the clean funnel indicator light turns on. Unfortunately, formula can build up on the funnel during mixing because formula by nature likes to clump with water.
Baby Brezza Formula Pro/Formula Pro Advanced
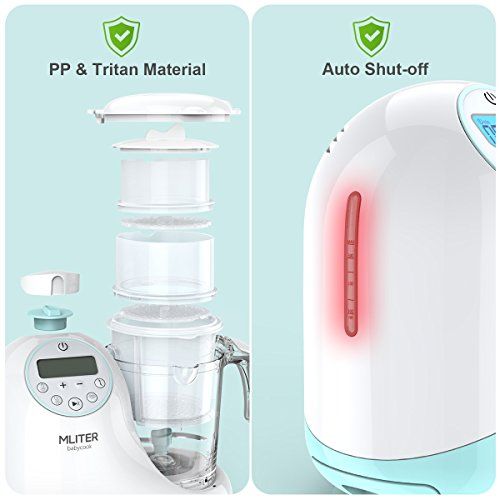
- Are the Baby Brezza One Step Baby Food Makers BPA and Phthalate Free?
- Yes, the Baby Brezza One Step Baby Food Makers are BPA and Phthalate Free.
- Are the Baby Brezza One Step Baby Food Makers dishwasher safe?
- The bowl and blade are top rack dishwasher safe.
 The drive shaft should always be removed before washing.
- The bowl and blade are top rack dishwasher safe.
- How do I clean the Steam Tank for my Baby Brezza One Step Baby Food Makers?
- We recommend regular cleaning of the Steam Tank to prevent damage to the machine from mineral deposits. The frequency of cleaning will depend on the type of water you are using and how much mineral deposit build up forms. Always unplug before cleaning. Put 1/3 cup white vinegar and 1/3 cup distilled water in machine and let sit overnight. Pour out vinegar and water solution (refer to user manual for proper emptying instructions). Refill Steam Tank with purified water, plug in machine and run “Steam” cycle for 10 minutes. Let Steam Tank cool and scrub with a cleaning brush if necessary. Rinse with purified water to eliminate any remaining vinegar taste. Empty tank and fill with clean water before cooking
- What are the capacities of the Baby Brezza One Step Baby Food Makers?
- The bowl of The Baby Brezza One Step Baby Food Maker Deluxe holds 3 ½ cups, and the Glass Food Maker holds 4 cups.
- The bowl of The Baby Brezza One Step Baby Food Maker Deluxe holds 3 ½ cups, and the Glass Food Maker holds 4 cups.
- Do I need to peel fruits and vegetables before using in the Baby Brezza One Step Baby Food Makers?
- We recommend peeling fruits and vegetables for young babies. We recommend checking with your pediatrician before offering any new foods, including fruit and vegetable peels and skins, to your child.
How To Clean Baby Brezza Food Maker
Contents
Spread the love
How To Clean Baby Brezza Food Maker
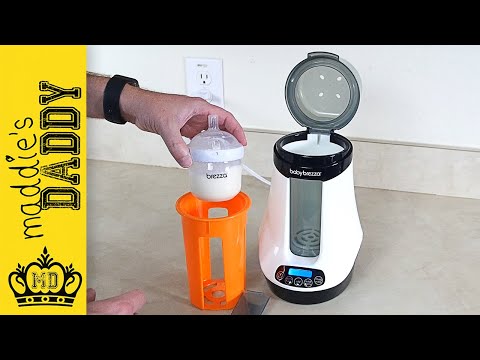
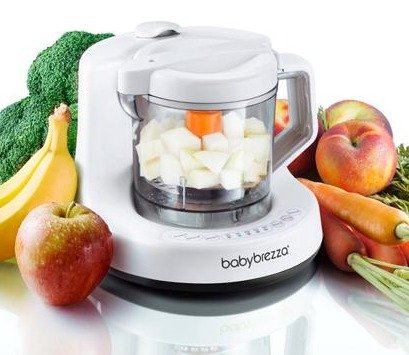
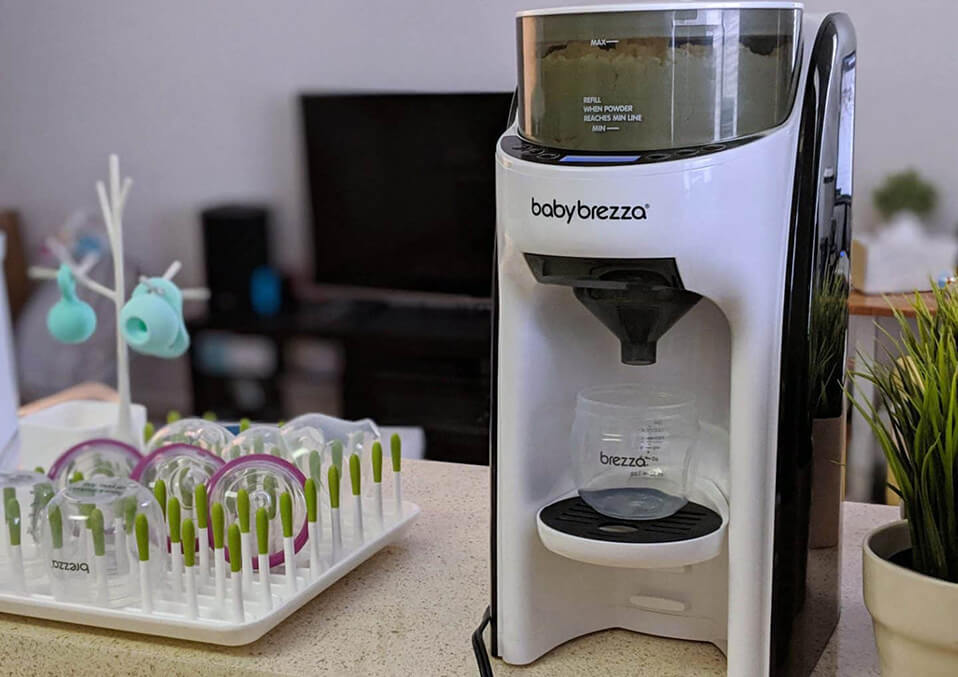
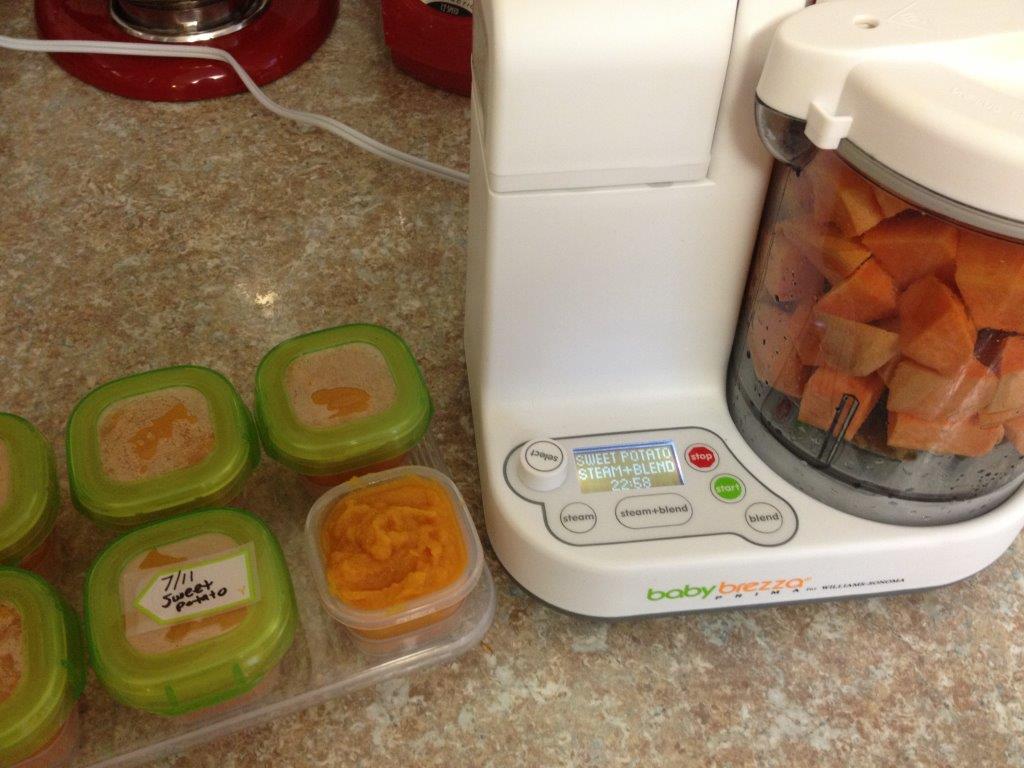
Baby brezza one-step baby food makers are a quick solution to your homemade baby food. Its easily accessible compartments let you utilize and clean it without any hassle. In this write-up, we’ll describe to you how to clean a baby Brezza food maker step by step in this article!
Speaking of the baby food makers, a brezza baby food processor can automatically steam and blend food within five minutes. As babies are prone to find purees the best delicious meal, now you can easily make any kind of them using this one-step baby food maker!
However, using the brezza food processor often does leave you with a cleaning task.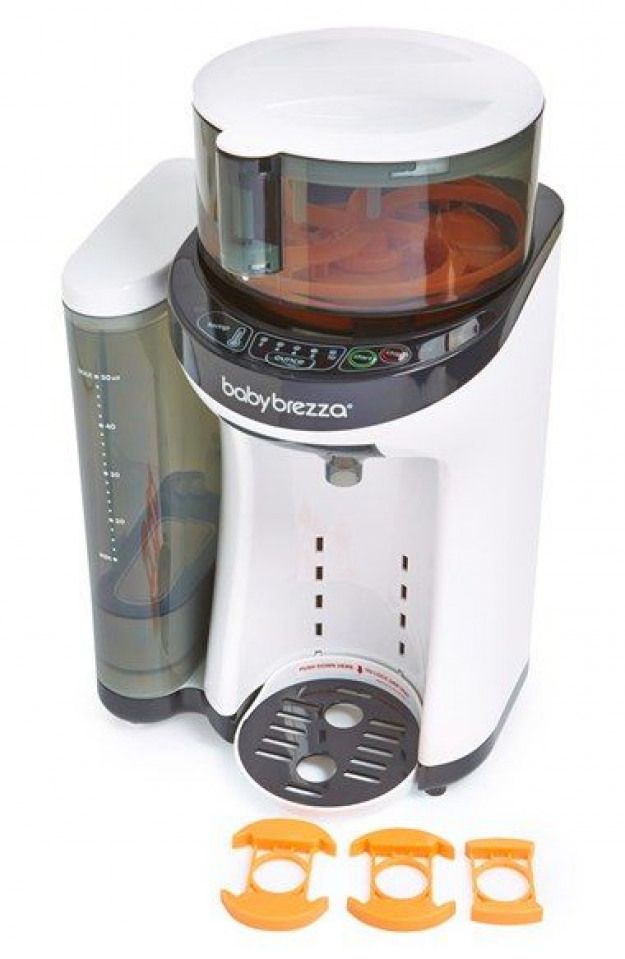 To ensure your baby is getting a healthy meal, there’s no substitute for cleaning the food processor. Therefore, you should clean it at least twice a month following this step-by-step process.
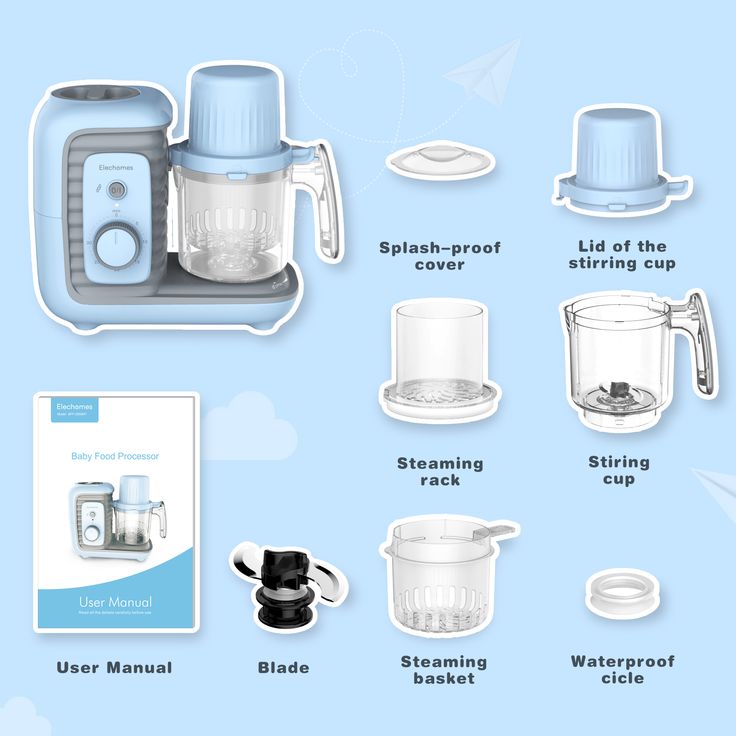
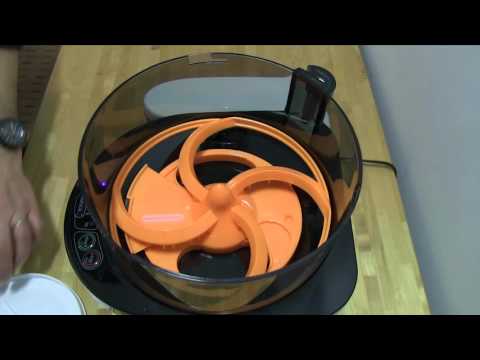
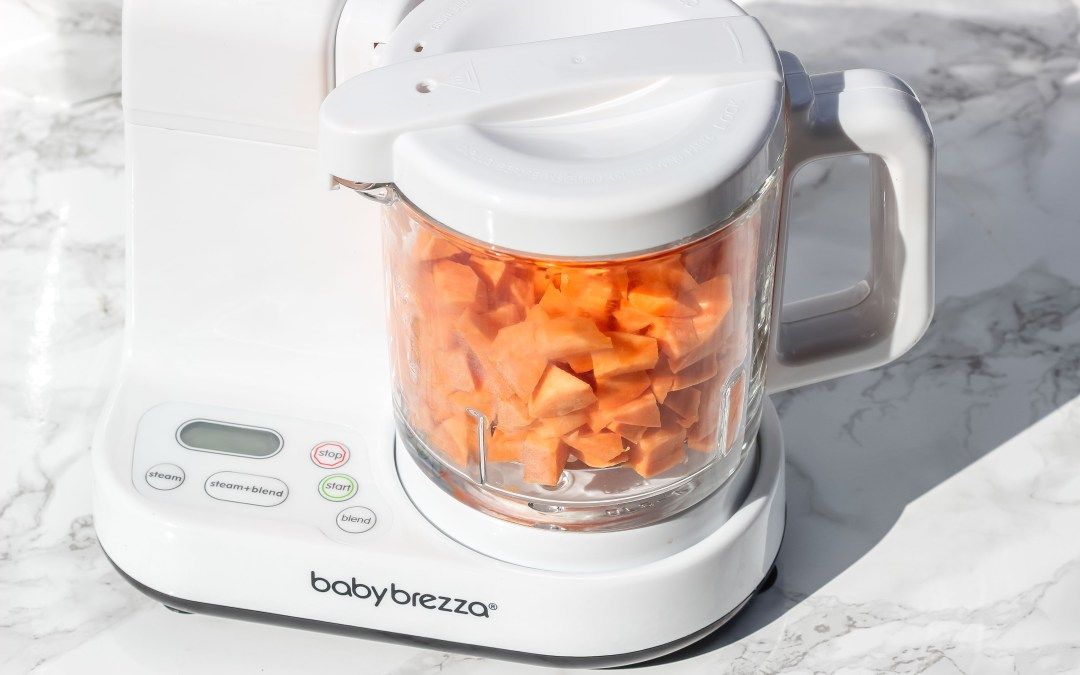
Cleaning the baby brezza baby food maker is nothing too complicated as it might seem. Its easy manufacturing makes the disassembling process trouble-free. From the viper bade to the steam tank, you can remove each part, clean them, and store them in a safe place!
For detailed instruction on baby brezza food makers cleaning, let’s dive into the whole process given below.
Make Sure There’s No Leftover FoodBefore cleaning the baby brezza, make sure there are no leftover foods inside the bowl. Leaving too much leftover food in the bowl can block its funnels to deep cleaning. Furthermore, one of the main reasons why bacteria accumulate in the baby food processor is this.
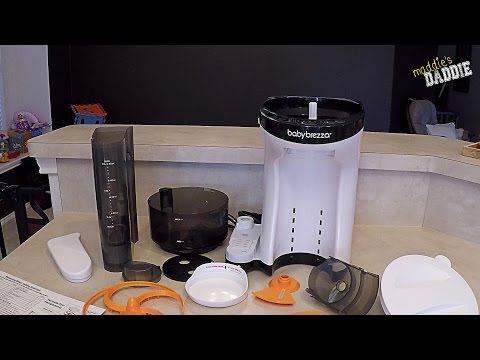
Disassemble ItDisassembling the baby brezza is an easy step that you can find on its manual.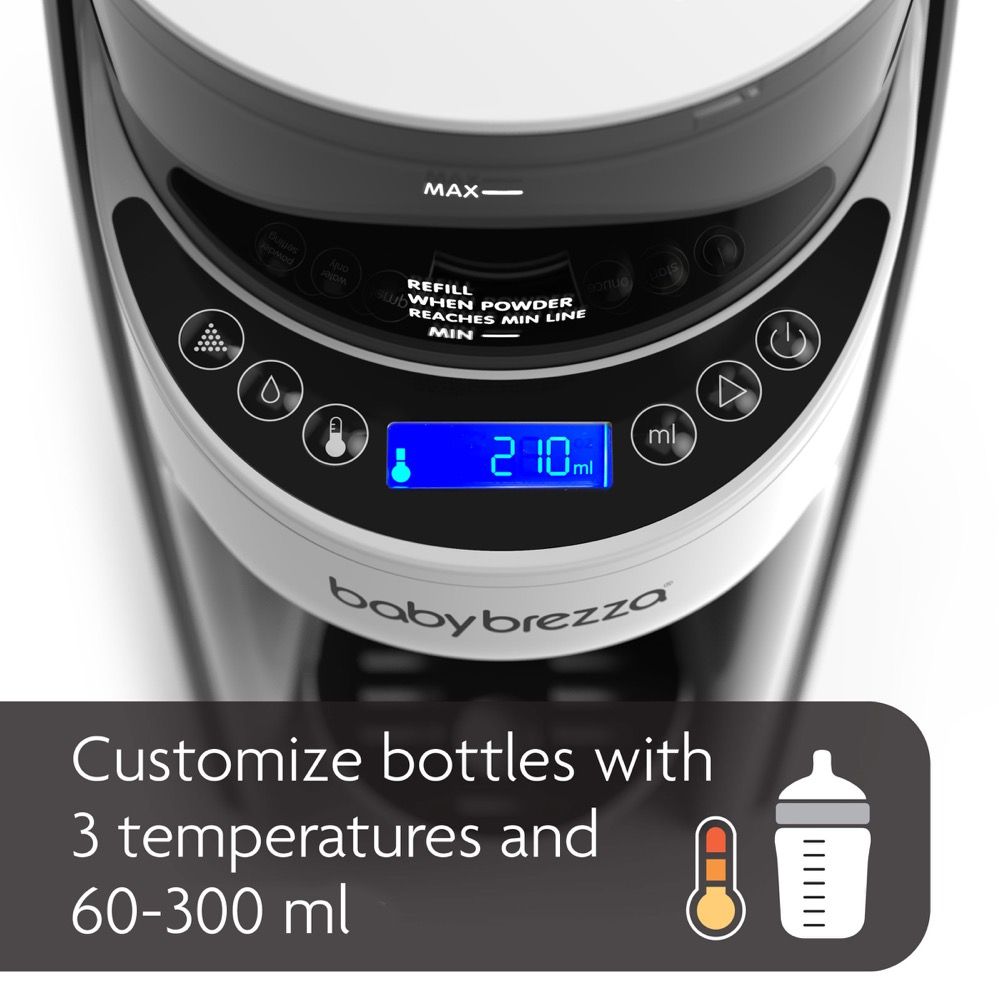 However, not every time it’s possible to have the manual in reach, you should remember these steps to disassembling it.
First, push down the release button and detach the water tank from its base. Then, get the water tank cap removed and tilt the base a little. It will rinse out the leftover water inside and give you space to clean it.
Cleaning the MachineAs you disassemble the water tank, move forward to clean each part of the machine. And to deep clean the baby brezza, you can use the vinegar and water mixture formula. Get 1/3 cup of water and vinegar poured into the food processors’ steam tank. Make sure you’re working with distilled water. Then keep it overnight to deauthorize the build-up minerals of the blender.
Once done, pour out the vinegar mixture and refill the steam tank with purified water. Purified water helps not to build excessive minerals inside the baby food makers. So, make sure you always get filtered water for cleaning.
After refilling, plug in the machine and run a 10-15 min steam cycle. It will remove the germ substances easily. After that, rinse the machine with fresh water to eliminate any leftover vinegar taste.
After you have completed cleaning the steam tank, it’s time to clean its other parts. Get the removable water tank base and use a damp cloth to clean it. After some time, rinse the base with purified water. Tilt the base a little to remove any excess water.
Furthermore, get the bowl, bowl lid, and blade to clean them with dishwasher soap. Always avoid using an abrasive sponge on them. It’s best to use mild soapy water to clean these items safely.
Important Cleaning Tips- Always unplug your machine before cleaning.
- Keep the bowl, bowl lid, and blade clean after each use.
- Use purified water to clean the parts.
- Never apply the dishwasher or rinse heavy water on the driveshaft.
- Avoid using vinegar mixture or another cleaning agent to the base.

- Clean the funnels, bowl, bowl lid, and baby food pouches before and after each use.
- You can also clean the steam tank on a regular basis as that will remove the potentiality of minerals build up inside the baby food processor blender.
- Never get your hands on any chemical descaler to deep clean the baby brezza.
For several reasons, cleaning your baby’s food maker is important. After all, you want your child to get a quick meal yet healthy one. For example, if you don’t clean the food processor on a regular basis, it can develop harmful substances inside. Bacteria or other harmful things can befall that affect the health of your child.
Hence, cleaning your baby brezza food maker is an important step. It ensures the cleanliness and safety of your baby’s food as well as keeps the food taste delicious. The Baby Brezza Food Maker has been designed with accessible dishwasher-safe compartments to any difficulty cleaning the machine.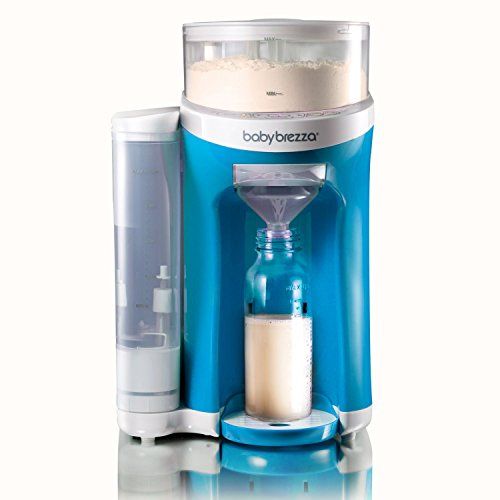
Baby brezza food maker is a one-step solution to making your baby homemade food. Following the busy schedules of every parent nowadays, this baby food processor blender allows them to make their baby food within minutes.
This all-in-one baby food maker has unique features, unlike any other machine. Its function is easy to maneuver and offers you extra food pouches to store leftover foods! And if you keep the machine cleaned regularly, it can give you service for a couple of years.
However, to ensure your baby gets the healthiest food, the baby brezza has launched a wide range of food processors in their collection. Each of those is designed with a unique feature. Yet you should choose the baby brezza food maker for your use!
Key TakeawayThe Baby Brezza Food Maker is the best way for new parents to give their babies a healthy start in life. Its patent-pending system takes out all of the guesswork and makes baby food preparing formula as easy as boiling water.
But, during the food maker cleaning, you might be wondering what kind of water to use. We recommend using filtered water in addition to tap water. This will help prevent buildup inside the machine over time.
However, unfiltered water may still work adequately within reasonable limits. But if at all possible, filtered water should be used for the best results.
Find Related Articles
- Baby Brezza Food Maker For 2021
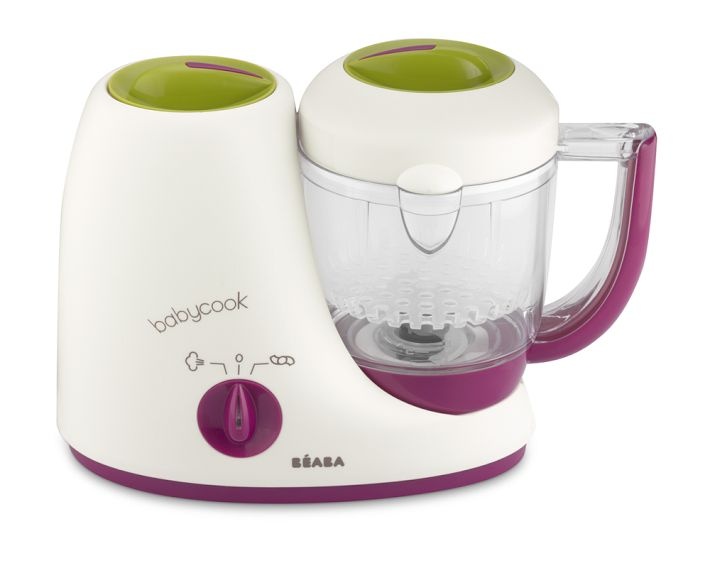
- Baby Brezza vs Beaba Babycook | Reviews & Guide
- Top 08 Best Baby Food Maker For 2021 | Review & Buying Guide
- How To Use Beaba Babycook Food Maker
- Best Baby Food Maker Wirecutter for 2021
- Author
- Recent Posts
Saif Nobel
Author at Best Baby Food Maker
Hi, I am Saif Nobel. I’m a Professional Review Blogger. I research various products for clients and my blog visitors. Through my review, I want to help users to select the right product before buying it.
Latest posts by Saif Nobel (see all)
Baby Brezza Formula Pro Advanced Dispenser Instructions for Use
report this ad
report this ad
Baby Brezza Formula Pro Advanced Dispenser
CONGRATULATIONS ! Thank you for purchasing Baby Brezza Formula Pro® Advanced. In doing so, you have chosen the most unique and innovative manufacturer of on-demand infant formula on the market. At Baby Brezza, we've developed Formula Pro® Advanced to help parents save time and hassle when it comes to feeding their babies. nine0003
IMPORTANT SAFETY INSTRUCTIONS
- Read all instructions before use.
- Do not touch hot surfaces.
- To reduce the risk of electric shock or personal injury, do not immerse cord, plug, or appliance in water or any other liquid.

- This appliance is not intended for use by persons (including children) with reduced physical, sensory or mental capabilities, or lack of experience and knowledge, unless they have been carefully supervised and instructed in the use of the appliance by a person responsible for their safety. Close supervision is required when any appliance is used by or near children. Supervise children so that they do not play with the appliance. nine0018
- Switch off and unplug the appliance when not in use, before assembling or disassembling parts, and before cleaning. To disconnect, grasp the plug and pull it out of the socket. Never pull on the power cord.
- Do not use any appliance with a damaged cord or plug, or after the appliance has malfunctioned, been dropped or damaged in any way. Contact the manufacturer at the customer service telephone number for information on inspection, repair or adjustment. nine0018
- Use of attachments not recommended by the appliance manufacturer may result in fire, electric shock, or injury.
- Use on a level surface and make sure there is no debris under the unit and that the rubber wheels are in contact with the surface.
- Domestic use only. Do not use outdoors.
- Do not let the cord hang over the edge of a table or counter or touch hot surfaces.
- Do not place on or near a hot gas or electric burner or in a hot oven. nine0018
- Do not misuse the appliance.
- Do not attempt to operate the machine without water in the water tank.
- This appliance has a polarized plug (one socket is wider than the other). To reduce the risk of electric shock, this plug is designed for single-ended connection to a polarized outlet only. If the plug does not fully fit into the outlet, reverse the plug. If it still does not fit, contact a qualified electrician. Do not attempt to modify the plug in any way. nine0018
- The short power cord is designed to reduce the risk of tangling or tripping over the longer cord. Longer detachable power cords or extension cords are available and can be used if care is taken when using them.
 If you are using a machine with an extension cord, make sure the cord matches the machine's electrical rating. The extension cord must be positioned so that it does not hang over the countertop or countertop where it can be pulled on by children or accidentally tripped over. nine0018
 - Make sure the formula is at a safe temperature for the baby before serving.
- Avoid contact with moving parts. Never remove the powder container, powder container lid, funnel or water tank while the machine is running.
- Do not disassemble or open the base of the machine. When using electrical appliances, basic safety precautions should be followed, including the following:
WARNING:
- Adjustment and cleaning are critical to the performance of your Formula Pro® Advanced. Please follow all instructions properly.
- Always use distilled or boiled water cooled to room temperature.
- Never pour boiling/hot water into the water tank.

- Unboiled tap water and/or unsterilized baby bottles have the potential to harm your baby. Use purified water suitable for preparing infant formula. nine0018
- Prepare only one bottle at a time, feed immediately and follow all instructions carefully.
- Do not store the rest of the formula mix. If your baby was born premature, low birth weight, or immunocompromised, consult your pediatrician before using this device.
Caution: Do not disassemble anything yet. Complete these steps before doing anything else.
- Place the Formula Pro® Advanced on a counter or other flat surface and turn it upside down. nine0078 Remove the water tank from the back of the machine, wash it with warm soapy water and rinse thoroughly, then dry.
- Fill the water tank with bottled water suitable for infant formula or boiled water cooled to room temperature.
- Place the water tank back on the base, turn the machine so that it faces you, and then plug it in.
 The machine will turn on and the LCD screen will light up.
 - The device will beep once to let you know that it is on. You will also see the LCD turn on. If the LCD screen does not light up when connected to the network, press the power button to turn on the device. nine0018
Now let's wash the inside of the car.
- Take a cup or bottle larger than 10 ounces and place it under the funnel.
- Press the "oz" button on the control panel several times until "10 oz" appears on the LCD screen.
- Now press the "Water only" button on the control panel. Formula Pro® Advanced delivers 10 ounces of water.
- Dispose of spilled water or use it to water plants.
You can now turn off and unplug your machine, remove all parts shown on the next page and set up your new Pro® Advanced Formula. Read the part names on the next page, then proceed with the setup on the following pages.
Formula Pro®Advanced Parts
Disassemble and wash all parts (except base) and dry thoroughly. Assemble as shown on pages 5 and 6.
Disassembly Tip:
Installation instructions
Setup and cleaning videos available at babybrezza.com/video.
- After washing these parts by hand, make sure they are completely dry before reassembly.
- Assemble funnel and funnel cover. Then insert the funnel assembly into the funnel compartment by sliding it up and then in.
- Place the axle on the base as shown.
- Now place the powder container on the base with the printed marking facing you. nine0018
- Place the measuring wheel in the powder container with the flat side down on the axle. Make sure the holes in the measuring wheel are in the same position as shown above.
-
- Place the front edge of the locking cap into the recess inside/front of the powder container, UNDER THE TOUCH.
- Align the hole in the lock cap over the axle. It won't lie perfectly flat.
- Make sure the lock cap and measuring wheel look like the picture shows.
 nine0018
 - Now place the stirrer on the shaft and push hard until you hear a click. Make sure the agitator clicks into place and does not lift easily.
You are now ready to add the powder and make your first bottle.
Preparing the first bottle
- Carefully pour the powder mixture into the powder container. Wipe up any spilled formula powder.
- Check that the powder is between the MIN and MAX marks on the powder container. nine0018
- Place the powder container lid on the powder container and turn clockwise until it stops. This will activate the safety switch and lock the powder container to the base. To remove the powder container, turn the cap counterclockwise.
- Place the drip tray on the base to match the height of your bottle. Adjust it so that the neck of the bottle is as close to the funnel as possible. Press the tray firmly against the base to set it in place. Now let's review the controls on the next page.
 nine0018
Formula Pro®Advanced Control & Operation
To remove all water from the machine, press and hold the Water Only button for 5 seconds. Water will flow continuously until the machine is empty.
Temperature Indicator Symbols
Powder and Water Parameters
Warning Symbols
Formula Pro® Advanced will not operate if any of these symbols are lit on the LCD. nine0003
Make sure your Formula Pro® Advanced is plugged in and turned on.
- Press the powder setting button several times to select a setting from 1 to 10. It is very important that you select the correct setting for the brand and type of your mix. Go to babybrezza.com/FPA to find the correct powder formula setting.
- Press the ounce button several times to select the ounces of water you want to dispense. The size of an ounce indicates only the volume of water. It does not include the amount of powder added during mixing.
 nine0018
 - Press the temp button to select the temperature.
= Slightly warmer than body temperature
= Body temperature
= Room temperature
The temperature indicator will flash when heated and stay on when the set temperature is reached. - Press the "Start" button to dose the mixture. Formula pro will remember the setting and ounce size even if it is unplugged or
is off. You don't have to choose a powder setting every time you make a bottle. You can always change the ounce size or powder setting by pressing the buttons again. nine0018 - Formula Pro® Advanced will dispense powder and water together and then automatically stop when dispensing is complete. Some clumping may occur with some formula
powders are inherently difficult to mix with water. - PLEASE NOTE: The level will appear higher than the selected ounce size due to added powder volume and/or bottle labeling differences.
Example : 4 oz. of water plus volume of powder is approximately 4.5-4.75 oz. depending on the type of powder you formulate. nine0018
 - Check for lumps and shake or stir the bottle if necessary. Check the temperature and feed the baby. Add the powder when the stirrer arms are visible. This is very important for the exact measurement of the formula.
Easy Daily Cleaning Instructions
It is EXTREMELY IMPORTANT to clean the funnel after every 4 bottles made. This will ensure accurate dosing of Formula Pro® Advanced. Always make sure funnel and funnel lid are COMPLETELY DRY before reassembling. nine0003
- Remove the funnel and funnel cover by pulling out and down.
- Wash funnel and funnel lid with warm soapy water and rinse well. Dry completely before reinstalling.
- Wipe the powder dispenser opening on the underside of the powder container using a dry paper towel or soft dry cloth.
Offer to make cleaning easier
To make daily cleaning even easier, you can purchase an additional funnel and funnel cover. nine0011 BabyBrezza.com You can then replace the spare funnel with the funnel you want to clean. NOTE: You will still need to wipe the powder dispenser opening as shown in step 3.
PLEASE NOTE: You do not need to remove the powder container or powder container parts for daily cleaning.
Monthly Cleaning Instructions
Thoroughly clean Formula Pro® Advanced once a month. Please watch the setup and cleaning video at babybrezza.com/video .
- Hand wash all parts shown above in warm soapy water, rinse well and dry thoroughly.
- Wash the water tank by hand with warm soapy water, rinse well and dry thoroughly.
Monthly descaling instructions
You can leave formula powder in the powder reservoir during the descaling process.
To prevent mineral buildup on the water heater inside your Formula Pro® Advanced, follow these simple steps:
- Remove the water tank, empty it and fill it with 20 ounces of distilled vinegar and 20 ounces of purified water.
- Place the water tank on the base of the machine and place a cup of more than 10 ounces under the funnel.
- Select 10 oz using the Ounce button, then press the Water Only button to dispense.
- Empty cup, place back under funnel, then press Water Only button again to dispense another 10 oz.
- Now unplug the machine, remove the water tank and empty it. Leave the car for 4 hours.
- Wash, rinse and fill the water tank up to the max mark with purified water, then place it back on the base.
- Turn on the machine, place a cup to draw 10 oz of water and use the Water Only button to start the 10 oz cycle. Dispose of the water poured into the cup, and then repeat this step to run the entire tank of purified water through the machine. When the "Low Water Level" indicator lights up, flushing is complete. nine0018
- Fill the water tank with purified water and return to normal use.
Long Term Storage Instructions
IT IS EXTREMELY IMPORTANT to clean the machine and remove all powder mix residue before storing.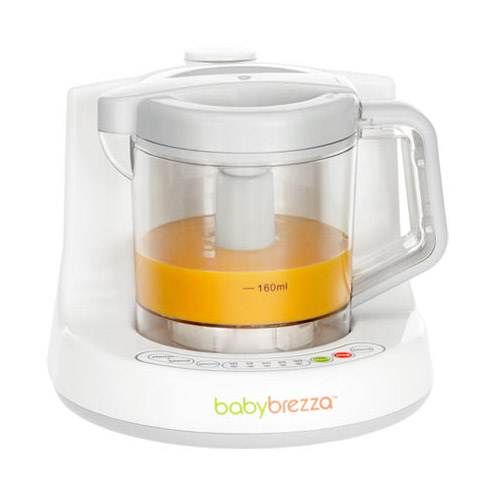 If you are going to store Formula Pro® Advanced for later use or will not be using it for a while, follow the instructions below:
- Remove the powder container parts, funnel, funnel lid, drip tray and water tank from the base . nine0018
- Wipe the base with a clean cloth and be sure to remove all residues of the mixture. Dry the base well.
- Empty the powder container, rinse all parts of the powder container, dry thoroughly, reassemble and place back on the base.
- Follow Monthly descaling instructions on page 12, steps 1-7 only. Do not remove or fill the water tank after step 7.
- Now place a cup to draw 10 oz of water under the funnel, then press and hold the Water Only button for 5 seconds. Water will flow continuously until the machine is completely empty and then stop automatically. nine0018
- Unplug the machine, remove the funnel, funnel lid and water tank, dry them thoroughly and put them back on the machine.
- Your machine is now ready for storage.
 Pack the machine in a box or place it in a bag so that it is dust-free.
Error codes
In the unlikely event of an electrical component failure or interruption of operation, the following codes will be displayed on the LCD screen. Pressing and holding the power button will clear the code and operation should return to normal. If the code returns or cannot be reset, please contact Baby Brezza Customer Service. nine0003
Troubleshooting
| condition | Possible cause | Possible remedy |
| Machine is offline. | Make sure the plug is securely inserted into the socket. | |
| Machine not included. | Press the power button to turn on the machine. | |
| Funnel removed or not fully inserted. nine0309 | Insert the funnel or push the front of the funnel until it is flush with the machine.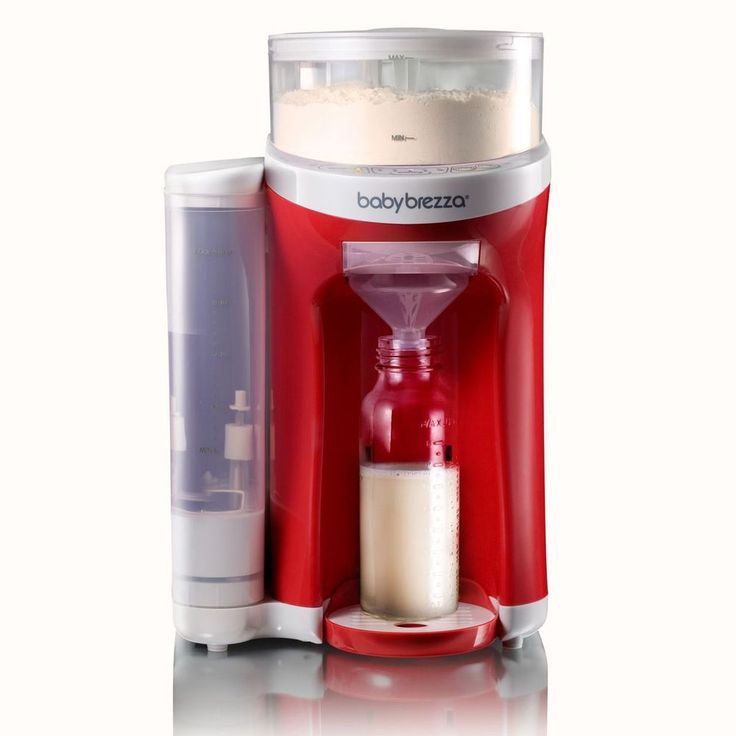 | |
| Water level below "MIN" line. | Add more water to the water tank. | |
| Powder container removed or not fully installed. | Check that the powder container is correctly placed on the base. | |
| Powder container lid not fully closed. | Turn the powder container lid clockwise to close completely. See page 7, step 3 for details. | |
| The lid of the powder container is placed backwards. | Make sure the tab on the edge of the powder container lid is facing the rear of the machine and is engaged with the safety switch. See page 7, step 3 for details. | |
| The water in the water tank is too cold. (The temperature symbol on the LCD flashes) | Wait for the water to heat up. | |
| The water in the water tank is too hot. (Temperature symbol flashes on LCD) | Wait for the water to cool down. | |
Dispensing mixture temperature too low. | The water has not yet reached the correct temperature. | Wait for the heater to heat up the water. Make sure the selected temperature symbol is on and not flashing. |
| Funnel does not fit completely into funnel compartment. | Funnel lid not seated directly on funnel and/or not fully lowered. | Align the tab on the front of the funnel lid with the groove in the funnel and press the funnel lid fully. nine0309 |
| Clean funnel symbol on, Formula Pro beeps when start button is pressed. | Funnel and opening on the underside of the powder container require cleaning. | Follow the steps on page 7 to clean and dry the funnel and opening on the underside of the powder container. |
| Too much powder dispensed. | Locking cap not installed correctly. | Check the locking cap and make sure the front edge is locked under the tab in the powder container. nine0010 See page 4, step 6 for details. |
| Incorrect powder setting selected. | Make sure you select the correct setting number for your powder type. For details go to: babybrezza.com/settings | |
| Not enough powder. | The powder level in the powder container is too low. | Fill the powder container with more powder. |
| The car was not properly cleaned. | Disassemble, wash by hand, dry all parts completely and reassemble. | |
| Silicone scraper not installed correctly. | Check that the silicone scraper is installed correctly. | |
| Incorrect powder setting selected. | Go to: babybrezza.com/fpa to confirm your powder brand and type settings, then select the correct setting using the Powder Settings button on the control panel. nine0309 | |
| Does not drain water. | The water tank is not fully installed. | Lower the water tank completely onto the base. |
| Accumulation of powder on funnel lid and underside of powder container. | Frequent use without cleaning the bottom of the powder container. See page 7, step 3 for details. | Clean funnel, funnel lid, and bottom of powder container every 4 vials. |
If you are unable to resolve the problem using the troubleshooting table above, do not return Formula Pro® Advanced to the store. Please contact Baby Brezza Customer Service at 1-888-396-6552 or visit babybrezza.com for videos.
Documents / Resources
| Baby Brezza Formula Pro Advanced Dispenser [pdf] Manuals Formula Pro Advanced Dispenser, Formula Pro Advanced, Formula Pro Dispenser, Formula Pro, Pro Advanced, Pro Advanced Dispenser |
Recommendations
- How to use Formula Pro Advanced - video help | Baby Brezza
- Baby Brezza | Children's products and essentials that make it easier to raise children
- Formula Pro Settings - Baby Brezza Settings | Baby Brezza
- Formula Pro Settings - Baby Brezza Settings | Baby Brezza
030-05-0137 One Step Food Maker Deluxe
Instructions for use
Deluxe One Step
3 TECHNICAL DATA
4 How to use-Clean all parts before first use
5 Cooking and handling
6 Filling the food bag
7 Cleaning
8 Cleaning food bag
9 Removing and replacement of drive shaft
10 Solution of problems
11 Elements of control + indicators
12 Limited guarantee 1-Year
13000 13
13. 1 Recommendations
14 Related Messages
IMPORTANT SAFETY PRECAUTIONS
Basic safety precautions should always be followed when using electrical equipment, including the following:
- Read all instructions before use.
- Do not touch hot surfaces. Use pens or pens.
- To reduce the risk of electric shock, do not immerse cord, plug, or appliance in water or any other liquid.
- This appliance is not intended for use by persons (including children) with reduced physical, sensory or mental capabilities, or lack of experience and knowledge, unless they have been closely supervised and instructed in the use of the appliance by a person responsible for their safety. Careful supervision is required when any appliance is used by or near children. Children must be supervised to ensure that they do not play with the appliance. nine0018
- Turn the appliance off and then unplug it when not in use, before assembling or disassembling parts, and before cleaning.
 To disconnect, grasp the plug and pull it out of the socket. Never pull on the power cord. Make sure the appliance is OFF when not in use, before putting on or taking off parts, and before cleaning.
 - Do not use any appliance with a damaged cord or plug, or after the appliance has been damaged, dropped, or damaged in any way. Contact the manufacturer at the customer service telephone number for information on inspection, repair or adjustment. nine0018
- Use of accessories not recommended by the device manufacturer may result in fire, electric shock, or injury.
- Use on a level surface and make sure that there is no debris under the device and that the rubber pads are touching the surface.
- Domestic use only. Do not use outdoors.
- Do not let the cord hang over the edge of a table or counter or touch hot surfaces. nine0018
- Do not place on or near a hot gas or electric burner or in a hot oven.
- Special care must be taken when moving an appliance containing hot liquids.
- Do not misuse the appliance.
- Do not use the machine without food in the bowl.
- This appliance has a polarized plug. To reduce the risk of electric shock, this plug is designed to fit into a polarized outlet only one way. If the plug does not fit fully into the outlet, reverse the plug. If it still does not fit, contact a qualified electrician. nine0078 Do not attempt to modify the plug in any way.
- Make sure the machine is switched off before unplugging.
- Use a short powder cord to reduce the risk of tangling or tripping over the longer cord.
Extensions are available that can be used if handled with care. - If you are using a machine with an extension cord, make sure that the cord matches the electrical rating of the machine. The marked electrical rating of the set of cords or extension cords must be at least the same as the electrical rating of the appliance. nine0078 The extension cord must be positioned so that it does not hang over the countertop or tabletop where it can be pulled on by children or accidentally tripped over.
- Be careful when mixing and keep your hands away from the lid or top of the machine to avoid accidentally spilling hot liquid.
- After use, the surface of the heating element is exposed to residual heat.
- Make sure food is at a safe temperature before serving. nine0018
- Avoid contact with moving parts. Never remove the cover while the blade is moving.
- The blade has 4 cutting edges and is sharp. Handle with care. Install and remove by holding the top of the plastic stand. The bowl must be in place before changing the blade.
- Do not disassemble or lubricate the drive shaft.
- The appliance is designed to process small amounts of food and is especially recommended for the preparation of baby food. nine0078 The appliance is not designed to cook a large number of foods at the same time.
- Do not grind hard foods with this machine. Use the steam + mix function for hard foods such as carrots and potatoes.
Use the mixing only function for soft foods such as bananas and berries.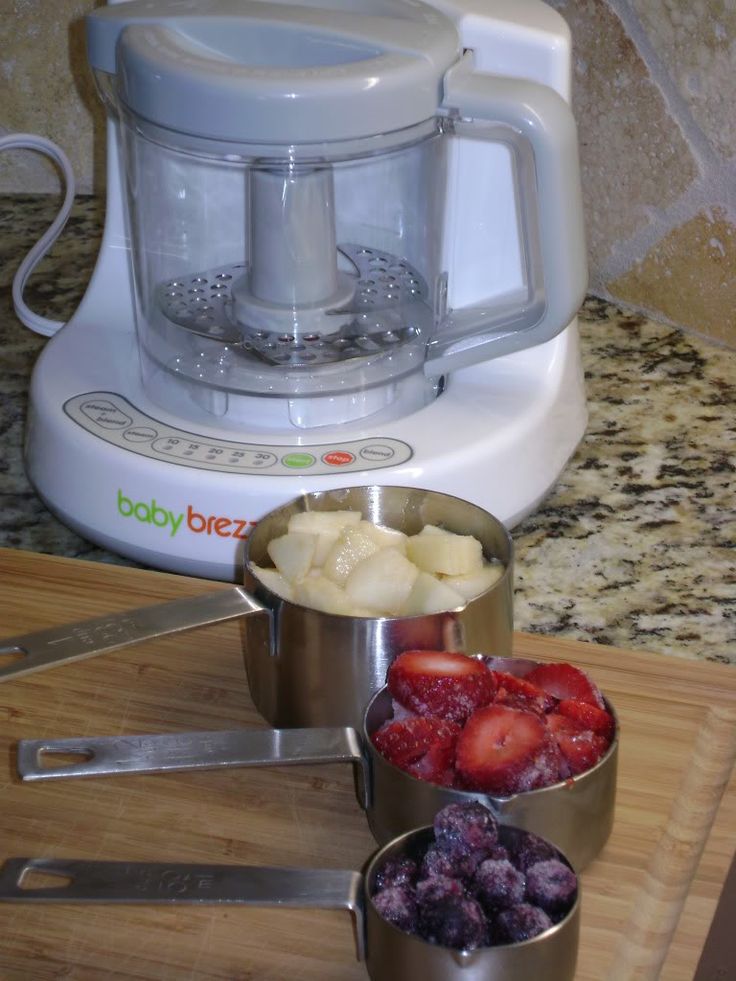
- To disconnect from the power supply, press the stop button to disable any function and remove the plug from the socket.
- Unplug power cord before serving. Do not leave the cord out of the reach of children. nine0018
In addition, the instructions are also available in an alternative format, such as on the web site or upon request by the user in a format such as DVD or For an electronic copy of this manual, please contact our after-sales service center.
Proper disposal of this product. This marking indicates that the products must not be disposed of with other household waste. To prevent possible harm to the environment or human health from uncontrolled waste disposal, recycle it responsibly to promote the sustainable reuse of material resources. To return your used device, use the return and collection systems or contact the retailer where you purchased the product. They can hand over this product for environmentally friendly recycling. nine0003
Meet the Deluxe One Step Baby Food Maker
Safety Switch Function
If the bowl lid is open or the bowl is removed from the base during operation, the machine will automatically turn off and beep quickly. If the lid and bowl are replaced within 5 seconds after being removed, the machine will restart, otherwise it will return to standby mode.
Overheat protection
If the steam chamber becomes empty during operation, the heater will turn off and the machine will emit 5 short beeps. Add water to the water tank to restart work. nine0003
Technical data
Model: BRZ00141
Engine capacity: 150W
SUBMITAGE: 220-240V 50 ~ 60Hz
Current: 3.5a
Power of the heater: 4000 all parts before first use
NOTE: Limit cut meat to 120 grams to ensure all meat reaches a safe internal temperature of 75°C. Always check the readiness of the meat before serving. nine0078 ATTENTION! Do not block the blade by turning it or pressing it.
CAUTION! Always make sure the drive shaft and drive shaft gasket are correctly inserted into the bowl before steaming or mixing. Using the machine without a drive shaft and gasket will result in water damage to the base.
To attach the lid to the bowl, position the lid as shown above, then turn it counterclockwise. Make sure the tabs on the lid line up with the slots on the front of the bowl, handle, and base of the machine. nine0003
Lid and bowl installation
Cooking and control
Steam + Blend - automatic mixing after steam cooking.
Press repeatedly until the desired cooking time is selected. Each press increases the steam time by 5 minutes. The maximum time is 30 minutes.
Press to start the steam + mix cycle. After the steam cycle is completed, the mixing cycle will continue for 30 seconds, after which the machine will turn off. nine0078 For a smoother consistency, press and hold to blend more. Make sure the bowl lid is fixed on the bowl. Do not remove the cover while the blade is moving.
Steam only
If you want to steam without an automatic mixing cycle, press repeatedly until the desired steam time is selected.
Press to start the steam cycle. The machine will beep 3 times and turn off when the steam cycle is complete.
Mix only
Make sure the bowl lid is locked onto the bowl. Press and hold until the desired consistency is reached.
Do not remove the cover while the blade is moving.
Reheat and defrost
Use the steam function to reheat and defrost. See Steam Instructions above only.
Filling the food bag
Cleaning
- Always unplug the appliance before cleaning.
- Clean the appliance, food bags and easy-fill funnels before and after use. nine0018
- The bowl, blade and bowl lid are dishwasher safe* and can also be washed by hand in warm soapy water.
 Never use abrasive sponges to clean machine parts.
 - The stainless steel heating plate can be cleaned with an abrasive sponge to remove mineral deposits.
- Never wash the drive shaft in the dishwasher.
- Base and cardan shaft should be wiped with damp cloth only.
- We recommend cleaning the steam tank regularly to prevent damage to the machine due to mineral deposits. The frequency of cleaning will depend on the type of water you are using and the amount of mineral deposits. Always turn off the power before cleaning. Put 1/3 cup of white vinegar and 1/3 cup of distilled water into the machine and leave it overnight. Pour out the vinegar and water solution following the instructions below. Replenishment
- Steam tank with purified water, turn on the machine and run the "Steam" cycle for 15 minutes. Rinse with purified water to remove any remaining vinegar taste. Before preparing new recipes, drain any remaining water and fill it with purified water.

- Never use chemical descaling agents in the machine.
- To remove unwanted water from the steam tank, water tank or lid, see the diagram below.
- Any other service must be performed by an authorized service representative. nine0078
Food bag cleaning
- Food bag and funnel for easy filling are mounted on the top shelf and are dishwasher safe.
- Wash food bag thoroughly with soap and water.
- Do not use harsh abrasives to clean food bag or easy fill funnel.
- Allow parts to dry before storing.
Removing and replacing the drive shaft
Remove the drive shaft from the bowl before washing in the dishwasher. See illustration. nine0078 To remove the drive shaft, turn the handle on the bottom of the bowl counterclockwise. and pull out. Wipe the drive shaft with a damp cloth. Never wash the drive shaft in the dishwasher. Do not lose the driveshaft gasket while tilting. To replace the drive shaft after cleaning, insert it into the hole in the bottom of the bowl and turn it clockwise. fix in place *.
Always ensure that the drive shaft and drive shaft gaskets are properly inserted and locked in place to prevent damage to the bowl and base. nine0003
Troubleshooting
| condition | Possible cause | Possible remedy | 9034Add water to water tank |
| Safety tab on Bowl Ud not fully inserted into Bose | Make sure bowl lid is turned counterclockwise arrows as far as possible, and the safety tab on the bowl lid is fully inserted into the base. nine0309 | |
| The machine is offline. | Connect Baby Brezza. | |
| Machine stops during operation | Steam tank dry Noche* will emit 5 short beeps to indicate that the steam tank is dry) | Add water to the water tank. |
The protective tab on the bowl lid has been detached from Bose. | Make sure the bowl lid is rotated as far as possible counterclockwise and the safety lug on the bowl lid is fully inserted into the base. nine0309 | |
| The final consistency of the puree is not smooth | Foods cooked in a row are not chopped enough before steaming | Cut food into smaller pieces, about 1/4″-1/2″ per ml, before putting them in a bowl. |
| Low water content in raw food. | Add more water, formula, breast milk or other liquid after steaming and beat longer. nine0309 | |
| Cannot remove blade from driveshaft | Blade is in lowered position, driveshaft pins locked in place. | Fix the bowl back on the machine. Gently pull up the center knife post while turning counterclockwise. |
| Scohng in the steam tank | Mineral rich water is used all the time | Clean the steam tank following the instructions on page 5. |
Controls + Indicator Icons
1-Year Limited Warranty
Our products come with warranties that cannot be excluded under the Australian Consumer Law.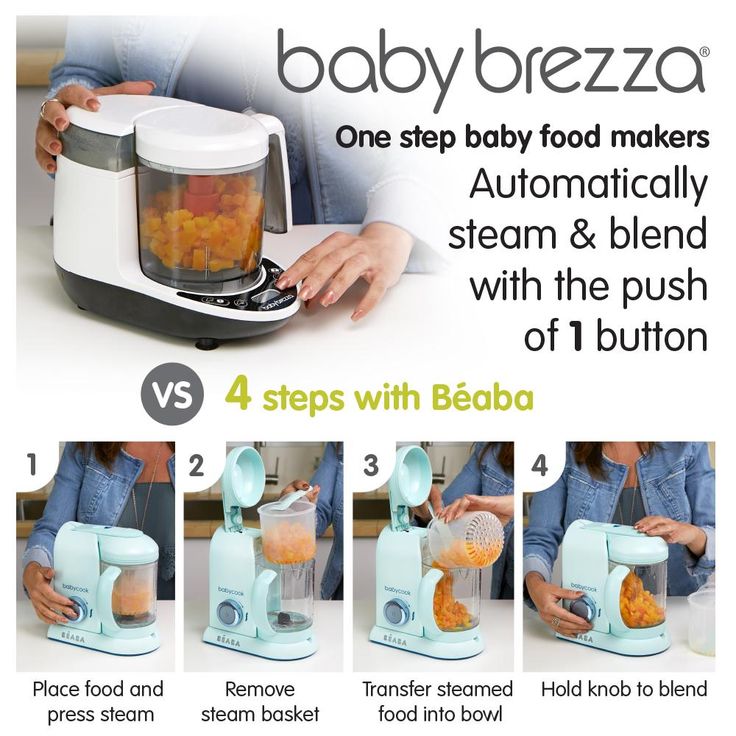 You are entitled to a replacement or refund for a major failure and compensation for any other reasonably foreseeable loss or damage. You are also entitled to have the product repaired or replaced if the product is not of acceptable quality and the failure is not serious. nine0078 The limited warranty applies only to products purchased from authorized resellers. Purchased through an unauthorized reseller.
This warranty is available to consumers only. You are a consumer if you have Baby Brezza Formula Pro purchased at retail for personal, family or home use. Except as otherwise required by applicable state law, this warranty does not apply to retailers or other commercial buyers or owners. We warrant your Baby Brezza Formula Pro to be free from defects in material or workmanship under normal domestic use for one year from the date of original purchase. The purchaser will be required to present the original proof of purchase in order to receive warranty benefits. If you do not have confirmation of the date of purchase, the date of purchase for the purposes of this warranty will be the date of manufacture.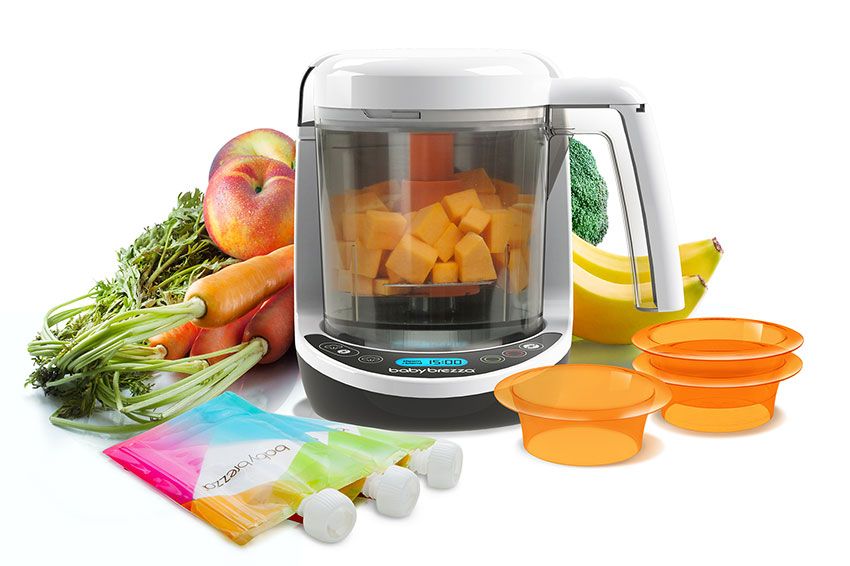 If your Baby Brezza Formula Pro proves to be defective within the warranty period, we will repair it or, if we deem it necessary, replace it. nine0078 Contact customer service to obtain warranty service.
Player Support
If you are having problems with the BabyBrezza Formula Pro Advanced, visit babybrezza.com/pages/international to find your local customer support representative.
| Distributed in Australia CNP Brands 82 Maribirong Street, Footscray, Victoria 3011 Customer Service 1300 667 137 E: [email protected] W: www.cnpbrands.com.au | Distributed in New Zealand. from Wainhouse Distribution 2-6 Argyle Street, Morningside, PO Box 41-014 St. Lux, Auckland, New Zealand Customer Service 0800 567 5000 E: [email protected] |
This product may be protected by one or more of the following documents, including US Patent No.