Disposable feeders for babies
11 Best Baby Bottles (2023 Reviews)
No two moms are the same, and neither are their babies. We all have different needs when it comes to feeding our little ones, but wherever you are, there’s a bottle to make your life easier.
Whether you plan to breastfeed, stick to formula, or use a combination of both, baby bottles are sure to become an essential part of your everyday life — and there’s a whole world of choice out there!
Will you go with glass, plastic, silicone, or even stainless steel? What nipple size will work best for your baby’s stage of development? How can you clean and store baby bottles properly?
If these questions feel overwhelming, I get it. We’ll answer all these and more, plus show you the 11 best baby bottles we could find to keep your little one happy, healthy, and strong.
Our Top Picks
We love honesty! Mom Loves Best earns a commission through the following hand-picked links at no extra cost to you.
Image
Model
Product Comparison Table
Features
Best All Round
Comotomo Natural Feel
- Mimic breast shape and feel
- Super easy to clean
- Dual vents prevent colic & gas
Check Price
Best for Breastfed Babies
Nanobebe Breastmilk
- Warms up to two times faster
- Stackable thus saves space
- Easy to clean
Check Price
Best for Preemies
Philips Avent Newborn
- Perfect size for preemies
- Anti-colic feature
- Slow nipple speed
Check Price
Best for Gas
Dr. Brown’s Original
- Clinically proven to reduce colic
- Preserve essential vitamins
- Fits most breast pumps
Check Price
Best Baby Bottle for Formula
PopYum Anti-Colic
- Anti-colic nipples and vents
- Variety of options
- Comprises of only 5 parts
Check Price
Best for Travel
Playtex Nurser
- Simple liner system
- Mimics breastfeeding experience
- Anti-colic and anti-gas
Check Price
Best for Exclusively Pumping
Medela Collection
- Comes with six bottles
- Affordable price
- Bigger bottles available (8oz)
Check Price
Best Stainless Steel
Pura Kiki Stainless Steel
- Safe, eco-friendly, easy to wash
- Lasts for years
- Compatible with other leading brand
Check Price
Best Glass Bottle
NUK Simply Natural
- Doesn't leak
- Very affordable
- Anti-colic air system
Check Price
Best for Toddlers
NUK Disney
- BPA-free plastic
- Holds up to 10 ounces
- Fun Disney design
Check Price
Table of Contents
- Our Top Picks
- The Best Baby Bottles of 2023
- Do I Need Baby Bottles?
- Types of Baby Bottles
- How to Choose Baby Bottles
- Finding the Perfect Nipple Size
- When Will My Baby Need a Bottle?
- How to Transition to a Bottle
- Do I Need a Baby Bottle Warmer?
- How Do I Store Baby Bottles?
- How Do I Clean Baby Bottles?
- Baby Bottle FAQs
The Best Baby Bottles of 2023
Here are 11 great baby bottles to consider.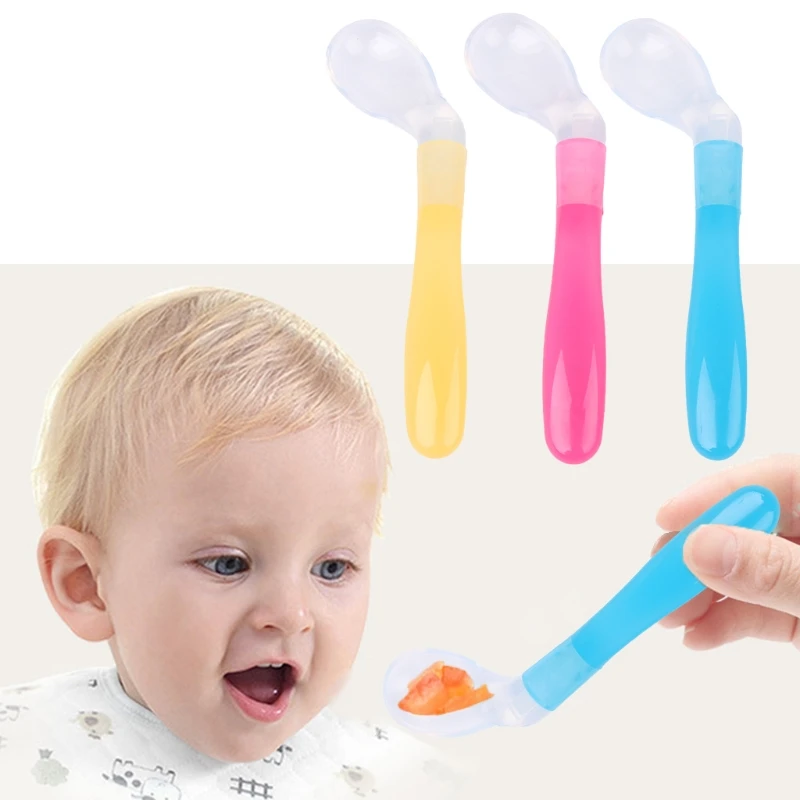
1. Comotomo Baby Natural Feel Baby Bottle
Best All Round Baby Bottle
View on Amazon
View on Walmart
View on Target
View on BuyBuyBaby
Comotomo’s Natural Feel bottles are specifically designed to mimic the natural nursing process. The nipples are shaped like a woman’s breast with a wide mound your baby can easily latch onto. You can choose from multiple flow options, but the standard “slow flow” nipple has a single hole to help your baby learn how to suck and swallow.
One of the features we love for breastfed babies is the silicone material. It’s designed to be soft and squeezy so your baby can hold it comfortably and feel like they’re still close to mom. If they have a hard time getting the milk out, a little squeeze from you will help it flow again.
The silicone is 100 percent free from risky plastics including BPA, PVC, and phthalate.
If you have exclusively breastfed your baby or have had a difficult time transitioning to a bottle, the soft, natural feel of this bottle may be just the thing you need.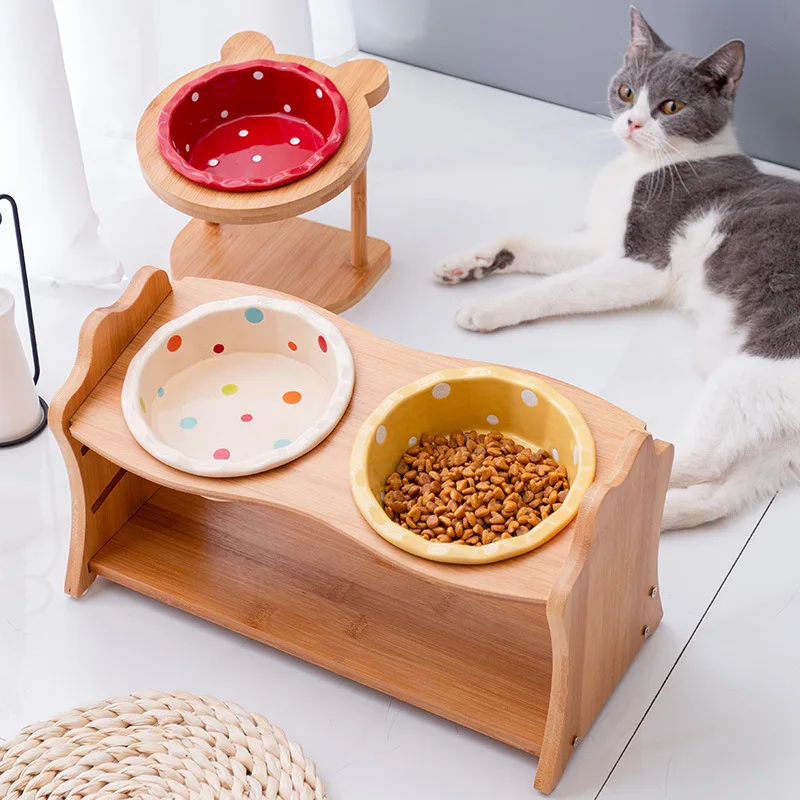
This bottle also comes with dual anti-colic vents, an extra-wide neck for easy cleaning, and an anti-leak locking system. All of the materials are dishwasher safe and can even be put in boiling water for extra sterilization.
The standard bottle holds 5 ounces of liquid and comes with a cap. You can also get an 8-ounce bottle, but it will come with a “medium flow” nipple with two holes instead of one.
Pros
- The nipple has a wide base to mimic the shape and feel of your breast.
- Silicone bottle can be squeezed and feels soft like your skin.
- The wide neck makes the bottle super easy to wash.
- Dual vents prevent colic and gas.
Cons
- No measurement markings to keep track of milk flow and consumption.
- Anti-leak lids need to be on extra tight or leaking may occur.
2.
 nanobebe Breastmilk Baby Bottles
Best Bottle for Breastfed Babies
View on Amazon
View on Nanobebe
One of the latest rages in the bottle industry is to produce bottles for babies, like Nanobebe does, that look like a real breast. That solves a dilemma for moms who need to switch between breastfeeding and bottle feeding.
If a bottle looks more like a breast, your finicky baby won’t be likely to refuse it. And if they decide they prefer the bottle, they might not object if you try to switch back to the breast because the bottle will look and feel similar to your breast.
You’ll notice when you look at Nanobebe bottles that the shape is remarkably similar to a breast. The bottom of the bottle curves inward, making it comfortable for you to hold.
The design also helps with faster warming and cooling to preserve nutrients and prevent the growth of bacteria.
Pros
- This bottle warms up to two times faster than some other brands.
- It also cools up to two times faster when you put it in the refrigerator.
- Looks like a breast if you’re trying to trick your baby by visuals alone.
- The curved bottom design allows you to stack them, which saves you cabinet space.
- Easy to clean.
- Helps prevent nipple confusion.
Cons
- The design of the bottle makes it difficult to get all the milk out of the bottle with some creative positioning while holding your baby.
- There can be some leakage issues if you aren’t careful.
3. Philips Avent Newborn Bottle
Best Bottle for Preemies
Check Price
The Philips Avent line is one of the leaders in the baby bottle industry, and one reason we love them is because of their specific bottle for newborns and preemies.
Each only holds four ounces, which is perfect for your preemie. You won’t end up throwing any milk away as you would if you had larger bottles that your preemie baby couldn’t finish in one feeding.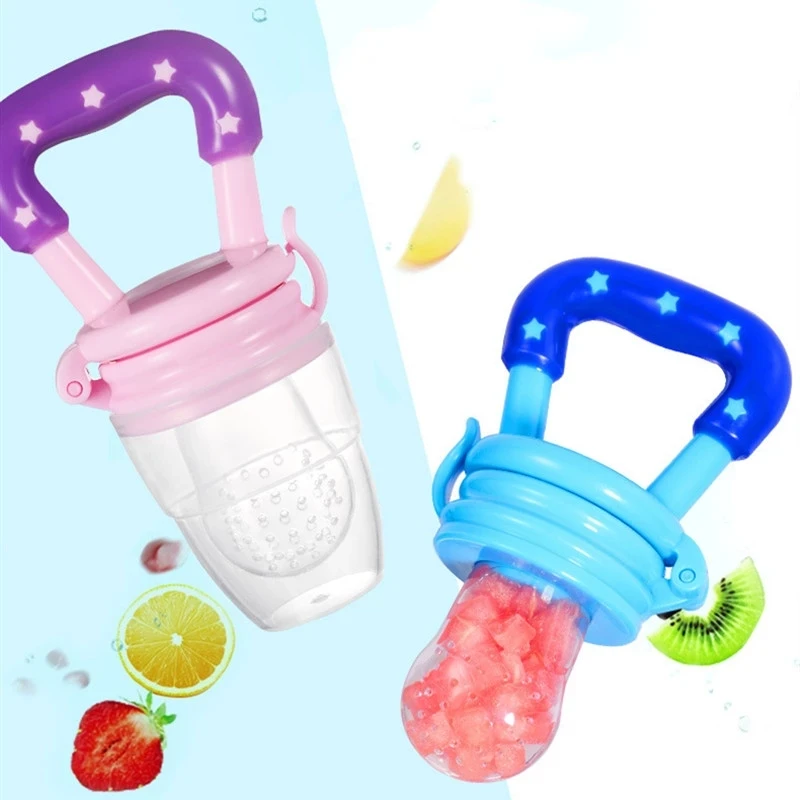
The bottle uses an anti-colic system built into the nipple and doesn’t contain extra parts that are hard to take apart or difficult to clean. This will be appreciated by moms worried their babies are taking in air when drinking, but who also don’t want any extra washing up to do.
However, the reason we love this preemie bottle is the unique nipple design. Not only does it resemble the breast, but it also has a shorter nipple and a very slow flow for controlled feedings, plus the “comfort petals” inside stop it from collapsing. Combined, these features ensure your small baby gets the milk they need without being overpowered.
These bottles are BPA-free and have a wide-neck opening that makes it easy to fill without spilling. They can go in the dishwasher and be sterilized.
Pros
- Perfect size for preemies.
- The anti-colic features reduce the amount of milk that gets spit up.
- The slow nipple speed won’t overwhelm your new baby.
Cons
- You can’t get the last little bit out of the bottle without holding it straight up.
4. Dr. Brown’s Original Bottle
Best Bottle for Gassy Babies
Check Price
Ask any mom who’s had a baby with colic and chances are she knows all about Dr. Brown’s bottles. A staple in many households, their patented venting system has been clinically proven to reduce colic, spit-up, burping, and gas (1). They also preserve the essential vitamins in your breast milk, which can deteriorate upon exposure to air in conventional bottles.
How does it work? The internal vent system eliminates vacuum pressure and reduces oxidation caused by air bubbles. Air routes through the internal vent system to bypass the milk and give your baby a comfortable feeding experience.
The vent system is also designed to work with the silicone nipple, which has a slow flow for more controlled feedings.
Dr. Brown’s Original Bottles are made of BPA-free plastic and silicone. We love that the bottles attach directly to most of the best breast pumps without needing any extra bottles.
If your baby has colic or gas, we definitely suggest trying out Dr. Brown’s. They may also be a good choice for babies who still breastfeed regularly since this brand consistently earns good reviews when it comes to avoiding bottle confusion. Dr. Brown’s boasts that it is similar to breastfeeding because both don’t have any extra air in the milk.
The original bottle holds 4 ounces, but other size options are available; each bottle features convenient measurement markings.
Pros
- Clinically proven to reduce gas, colic, spit-ups, and burping.
- Helps preserve essential vitamins for the baby’s health.
- Slow-flow nipple allows for paced feeding.
- Fits most breast pumps for easy pumping and storing.
- Helps prevent nipple confusion.
Cons
- It requires extra work when cleaning the vent system.
- Measurement markings can be hard to see.
5. PopYum Anti-Colic Baby Bottles
Best Baby Bottle for Formula
View on Amazon
View on Walmart
View on BuyBuyBaby
View on Popyum
If you’ve ever used formula, you know it’s not easy, like many people assume. While it may be easier than breastfeeding in some ways, it can be harder in many other ways.
Think of all the measuring and mixing you constantly have to do! You have to make sure you always have sanitized bottles at the ready, that you’ve packed enough formula in your diaper bag, and that the milk is always at the right temperature.
If your baby doesn’t get fed right away, this can lead to an unhappy baby, which equals an unhappy mom.
That’s why we like this bottle from PopYum. They have a funnel which makes it super easy to load the formula into the bottle. Then it also stops the formula from falling into the water chamber.
With only one hand, you can prepare a bottle.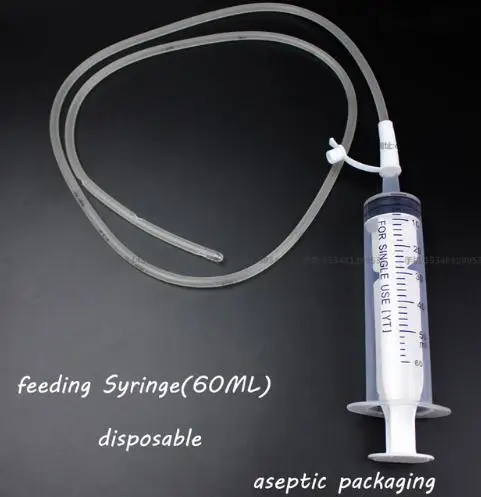 The bottle stores the formula and water separately so you can set up the formula in the bottle for later. Then, when you need the bottle, simply press the bottle’s buttons, shake it up, and then it’s ready for your baby.
If you’re a breastfeeding mom, you might also want to have a look at this cool bottle. It’s great for breast milk since you can isolate it at the bottom of the bottle. In addition, it won’t touch the nipple or vents until you’ve pressed the buttons.
Pros
- Anti-colic nipples and vents can relieve colic symptoms.
- Easy to prepare bottles one-handed so that you can hold your baby in the other arm.
- Available in five and nine-ounce bottles.
- Only five parts included, which is much less than some other options.
Cons
- Some babies struggled to get milk out, while others got milk too fast.
- Many parents found the bottles leaked.
- Not very durable, which is disappointing considering the high price.
- The nipples are short and wide, which many babies didn’t like.
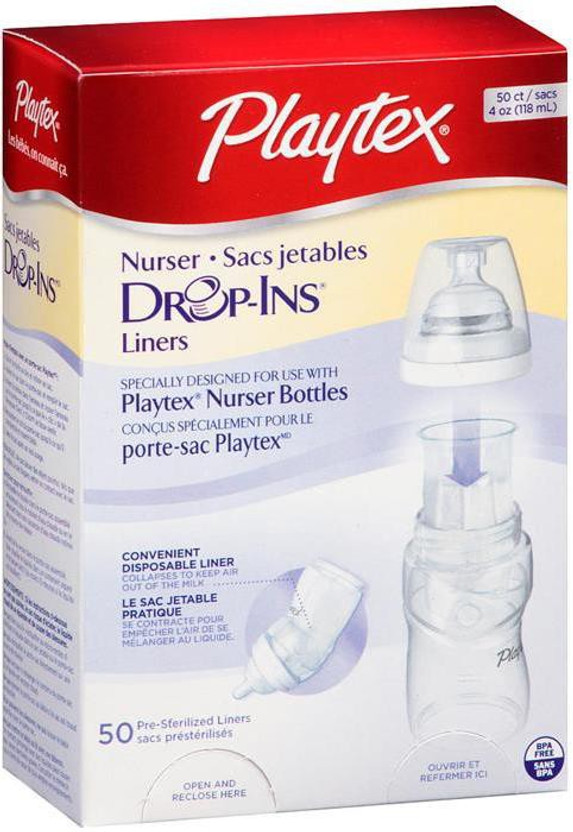
6. Playtex Nurser with Disposable Liners
Best Baby Bottle for Travel
Check Price
If there’s one way to keep things neat and clean while you travel, it’s disposable liners. Once your baby is done feeding, simply throw the liner away. The bottle stays clean and you don’t have to worry about anything lingering in your diaper bag and smelling bad.
Playtex has made a super simple liner system: all you have to do is drop the liner into the bottle and you’re good to go. The bottles have a special lip at the top to catch onto the bottle, so you don’t have to worry about it slipping down or moving.
Then, just fill up the liner, screw on the nipple lid, and the bottle is ready.
When you’re done, all you have to do is remove the liner and dispose of it. We understand there are a lot of eco-friendly moms out there, but don’t worry — the liners are recyclable. (In the plastic bag recycling bin at grocery stores, not the regular recycle bin).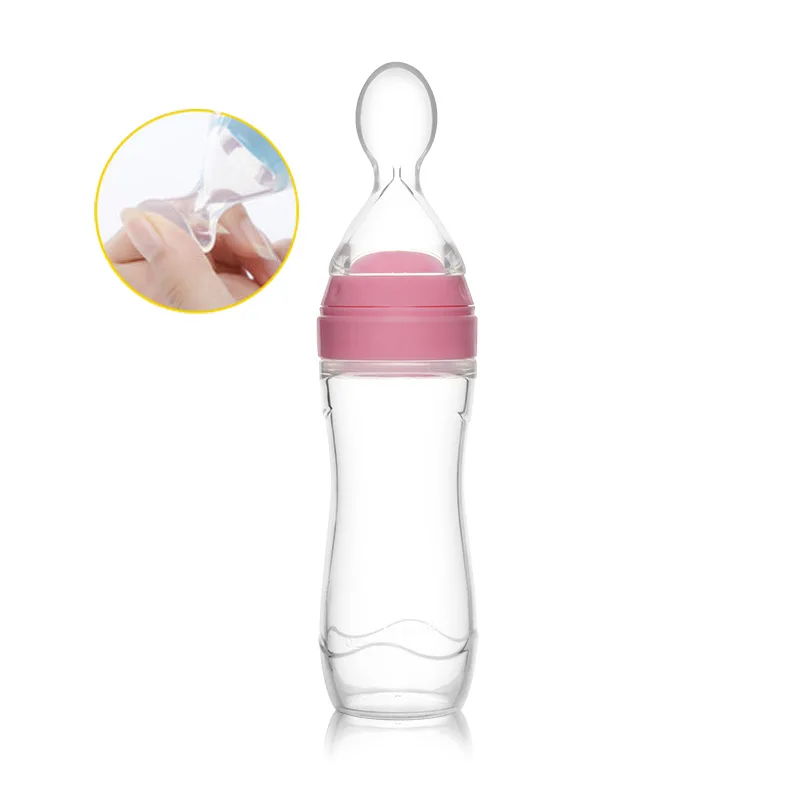
One of the reasons we really like these is because they weren’t just designed to make life easier; they actually improve your baby’s feeding experience. This is because the soft liner collapses down as your baby feeds, so the flow mimics a natural breastfeeding experience. And prevent air bubbles from mixing with the milk.
Both the bottle and the liners are made from BPA-free, PVC-free and phthalate-free plastic. The liners have even been pre-sterilized so you can open them up and add them to the bottle without extra steps.
Pros
- Simple liner system is easy and quick to use everyday or while traveling.
- Liner is designed to mimic the breastfeeding experience.
- Anti-colic and anti-gas.
Cons
- Saving the bags to recycle at a grocery store can get irritating.
7. Medela Breast Milk Collection Bottles
Best Baby Bottle for Exclusively Pumping
View on Amazon
View on Walmart
View on BuyBuyBaby
How much milk do you produce? How much milk does your baby actually drink each time they feed?
Chances are, there will always be a difference between the two.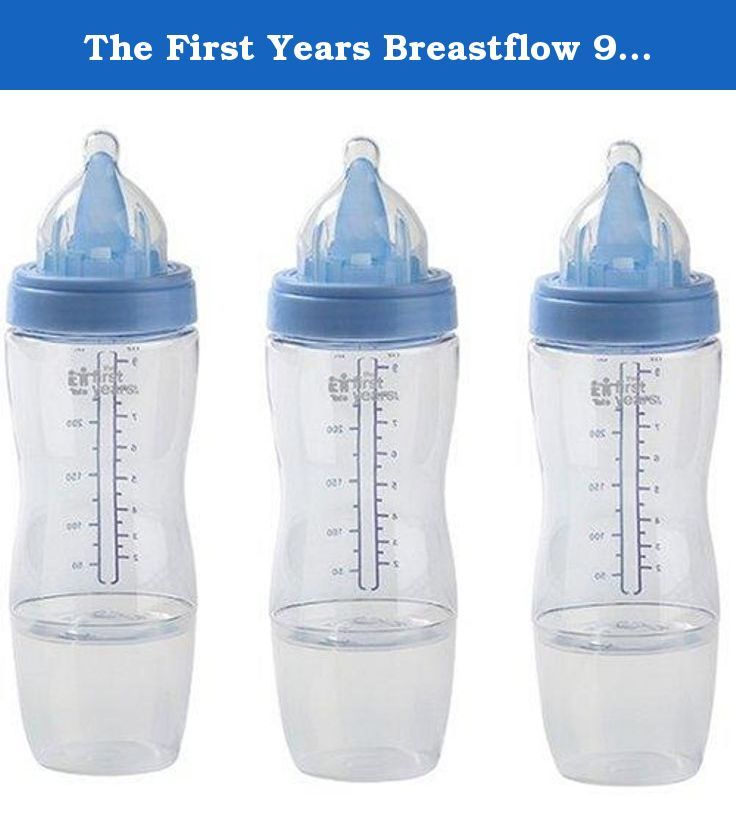 That’s why a mom who breastfeeds needs to make sure they have a collection of bottles on hand to store that difference.
One of our favorite picks is from Medela. These collection bottles are affordable and come in a six-pack and are great to use when you’re exclusively pumping. They’re the number one physician-recommended breastmilk storage product in the United States.
Each BPA-free bottle holds five ounces and comes with a screw-on lid to keep the milk safe in the refrigerator or freezer. These plastic baby bottles have been designed to retain the breastmilk’s beneficial properties, even after storage.
The feature we like most for pumping moms is the versatility. All Medela bottles are designed to work with a variety of breast pumps so you won’t have to worry about purchasing a different pump if you already have one.
This kit doesn’t come with nipples, but the bottles are compatible with Medela nipples and collars and some other brands of nipples may work, too.
They can go in the dishwasher and the millimeter markers let you know exactly how much you’ve pumped. They’re easy to clean and hold up better in the refrigerator than disposable bags because they aren’t as prone to ripping or leaking.
Pros
- Since it comes with six bottles, you’ll have a lot of total storage space.
- The millimeter markers remain even after repeated washing.
- Affordable when compared to other bottle sets.
- Bigger bottles available (8oz).
Cons
- Some moms have complained about how thin these bottles are.
- No way to write on or label the bottle.
8. Pura Kiki Stainless Steel Infant Bottle
Best Stainless Steel Baby Bottle
Check Price
Bottles are essential for a certain period and then, once your baby grows, you suddenly find yourself with a bunch of bottles to store away in the back of the cabinet.
This bottle from Pura helps solve that problem. It has a unique bottle evolution system: simply trade out the silicone lids to adapt the main base to your child’s needs.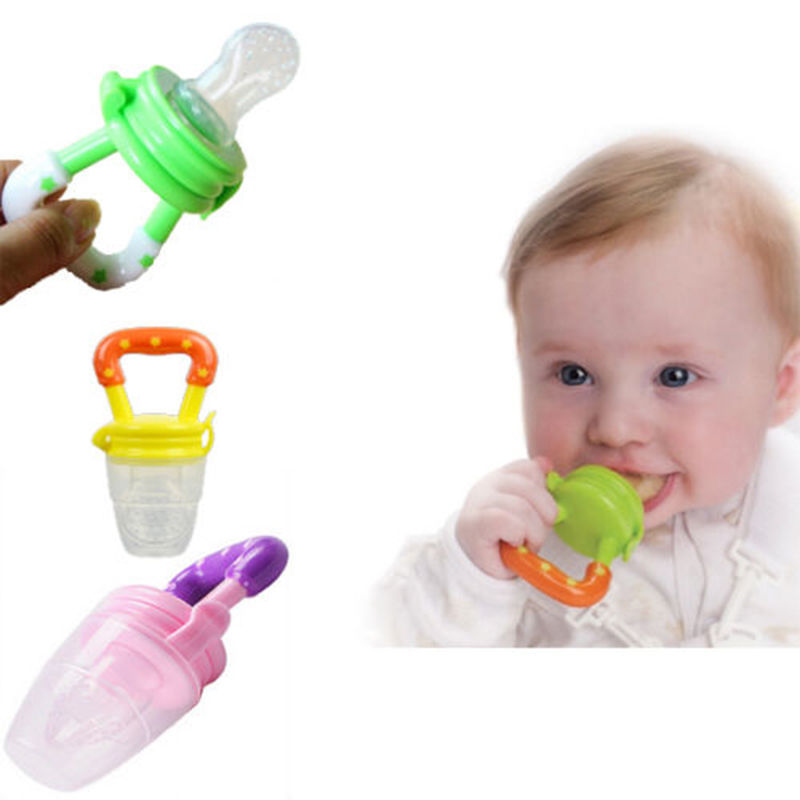 It starts off as a bottle, but can then be used as a sippy bottle, straw bottle, a regular sports bottle, or even a snack container.
You might think this means its performance as a baby bottle is just so-so, but rest assured you’ll get everything you need with this model.
Because it’s stainless steel, you eliminate the risk of chemicals seeping in as you might experience with plastics. Plus it won’t break when dropped. Even though the stainless steel is lightweight, the bottle also has a tapered design and included silicone sleeve to add grip and make it easier for your baby to hold.
The wide neck more closely resembles breastfeeding and, better yet, makes it compatible with most other nipples from leading brands. The included nipple has a medium flow anti-colic valve design.
We love that this bottle is good for your baby, good for the environment, and good for your pocketbook. If you’re looking to cut down on the number of bottles in your home and get more use out of the baby products you buy, this is a great choice.
Pros
- Stainless steel is safe, eco-friendly, and easy to wash.
- The bottle evolution system lets you use the product for years instead of months.
- Compatible with many other leading brand bottle products.
- Silicone grip and a tapered design make it easier for the baby to hold.
Cons
- You need to buy other accessories to change the bottle’s function.
- A little on the larger size, so small babies may struggle to hold it themselves.
- Can’t see the amount in the bottle, measurements are on the inside.
9. NUK Simply Natural Glass Bottles
Best Glass Baby Bottle
View on Amazon
View on Walmart
View on BuyBuyBaby
NUK bottles are a classic choice, beloved by moms for years, and it’s easy to see why. These bottles are easy for your baby to hold, but very hard to break.
Glass baby bottles are popular because they can be cleaned and sanitized easily and are completely free of the dangerous chemicals found in many plastics. NUK meets those requirements but takes it one step further.
With only three pieces – the body, the ring and the nipple, each bottle is easy to assemble and disassemble during feedings. Plus, the entire thing can be put in the top rack of your dishwasher for stress-free sterilization.
They can hold 4 ounces of liquid and have a one-piece integrated advance anti-colic system.
Pros
- Easy to clean, but hard to break.
- BPA-free and dishwasher-safe.
- Affordable price for parents on a budget.
- Designed to mimic the breast thus great for transitioning from breastfeeding to bottle-feeding.
- Integrated valve system in the nipple.
Cons
- The glass doesn’t freeze well and may crack if put in the freezer.
10. NUK Disney Bottle
Best Bottle for Toddlers
Check Price
Keep your toddler happy and entertained with these fun Disney-themed bottles.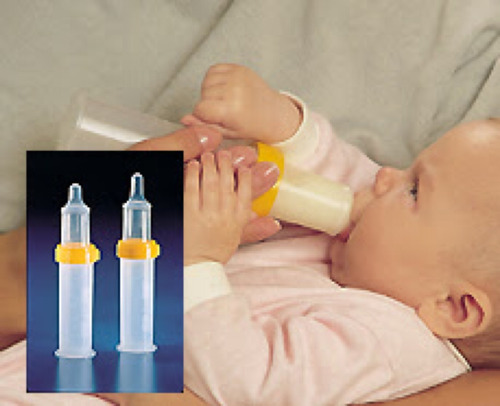
The pack includes three Mickey Mouse bottles with orthodontic nipples and an angled top. This will help your baby use the correct tongue and mouth position while drinking. The hourglass nipple shape lets your toddler’s lips close in a way that cuts back on how much air they swallow.
The asymmetrical design will encourage the right jaw positioning to avoid developmental problems which are a risk for children who use bottles past the age of one.
Toddlers will love the fun design and parents will like that this bottle holds 10 ounces of liquid so they won’t have to be refilling it constantly.
The bottles are BPA-free and can be cleaned in the dishwasher. These have an anti-colic air system built into the nipple so your toddler won’t have as many digestive issues.
We like these baby bottles for moms with multiple kids because they work for both babies and toddlers, so you’ll save money by not buying a separate set of bottles for everyone.
Pros
- The nipple design is great for supporting your growing child’s development.
- Holds up to 10 ounces, perfect for a toddler’s appetite.
- Fun Disney design will keep your toddler smiling.
Cons
- For best results, you have to line up the anti-colic symbol under your baby’s nose while drinking — that’s hard to control with toddlers.
- Your toddler may quickly transition to a sippy cup, making the nipple less useful.
11. Sassy Baby Food Nurser
Best Bottle for Cereal
View on Amazon
View on Walmart
View on BuyBuyBaby
Help your baby transition from bottles to solid foods with this unique set. You get two bottles in each pack; one with a traditional nipple and the other with a small spoon attached.
Using them in conjunction can help your baby become accustomed to spoon-feeding while also having a nipple with a large enough opening to allow baby cereal to flow through.
This is a great bottle for babies transitioning to solid foods for a few reasons. First, the vacuum disk keeps air out while encouraging the cereal to flow out of the nipple without clogging. Second, you simply press the bottom of the bottle to load some cereal onto the attached spoon.
No matter which lid your growing baby uses, they will have easy access to their food. If they struggle with the spoon, let them use the nipple bottle for a bit. You can slowly add the spoon into their routine as they get used to the food.
You can use it for other thicker foods too, for example, yogurt or applesauce if your baby is a fan. We like this because it means you get a lot of use out of the bottle as your baby grows.
These bottles were designed for babies six months and up. Each one holds approximately four ounces of food and is made of BPA-free plastic, but both the spoon and the nipple are made of silicone.
Pros
- The spoon-bottle can handle the thickness of cereal, unlike other nipple bottles.
- You can teach your baby the basics of spoon-feeding with this bottle.
- The spoon is soft like a nipple so it won’t hurt a baby’s teeth or gums.
- Comes with a hygienic lid.
- A portable way to carry homemade baby food.
Cons
- For the first few attempts, the plunger on the spoon bottle is hard to push up.
- These aren’t fun to hand wash.
Do I Need Baby Bottles?
At first glance, it may seem like you only need to be concerned about baby bottles if you don’t plan on breastfeeding.
However, we think all moms should be prepared to use bottles for a number of reasons:
Proper early nutrition is a top priority for every mom. Get the most from your baby bottles by doing a little research to find which type is best for you and your baby.
Types of Baby Bottles
There are 10 main types of baby bottles on the market, each designed with some specific benefit in mind.
- Plastic Baby Bottles: Plastic is one of the most common baby bottle materials and it is a great option for moms looking for something durable. Overall, plastic baby bottles are inexpensive, widely available, and they are typically BPA-free.
- Glass Baby Bottles: Glass is one of the safest materials to use and also some of the easiest to clean.
- Stainless Steel Baby Bottles: Easy to clean and can’t shatter or break.
- Breastfeeding Bottles: Breastmilk bottles are specifically created to mimic the natural nursing process as closely as possible.
- Anti-Colic Bottles: Designed to prevent air bubbles from passing through the milk to your baby.
- Preemie Bottles: Premature babies have some special needs due to their size and development.
- Exclusive Pumping Bottles: Have millimeter markers to let you know exactly how much you’ve pumped and also act as storage containers.
- Cereal Baby Bottles: Help your baby become accustomed to spoon-feeding while also having a nipple with a large enough opening to allow baby cereal to flow through.
- Toddler Bottles: These bottles are designed for older children as their diet gradually evolves.
- Travel Bottles: Designed specifically for families who are on-the-go.
Can’t decide which one is for you? One of the great things about baby bottles is that you can get a whole selection for a variety of situations.
How to Choose Baby Bottles
Regardless of what bottles you’re thinking of purchasing, you want to make sure they meet a few basic requirements first. If the one you’re looking at meets some or all of these five criteria, you can be pretty confident it’s a quality pick.
BPA Free
BPA stands for bisphenol A, and is an industrial chemical used to make plastic. Research has found some of the chemicals can leach into your food or drinks if they are in containers made out of BPA (4).
If you choose plastic baby bottles, make sure they are BPA-free to prevent any chemicals from getting into your baby’s milk. All BPA-free bottles should say so on the packaging or in the product description.
Easy to Wash
Newborn babies need a lot of sustenance to support their growing bodies. On average, babies need anywhere between 8 to 12 feedings a day. This can lead to a lot of dirty bottles!
So, make sure you look for bottles that are easy to connect and clean. Ideally, they should have a simple design without too many nooks and crannies for milk to dry in and mold. We also love bottles that can be put into the dishwasher.
Venting System
Nothing is as miserable as a baby with gas or colic! The air they swallow gets trapped in their digestive tracts, making them very uncomfortable (5). And we all know that if a baby is uncomfortable, mom will be too.
One of the primary culprits of gas is a baby bottle that aerates milk and fills your baby’s belly with millions of tiny bubbles. That’s why you want one with a venting system to prevent air from getting trapped inside the milk, helping you avoid painful gas and colic.
Measurement Marks
Nursing and feeding your child can feel like a science sometimes, especially if your baby is facing any health issues. Accurately track how much milk you produce and how much milk your baby drinks with a bottle that has measurement marks.
Be careful though! Recent studies have shown a good percentage of baby bottles with measurement marks are inaccurate. Make sure to read the reviews on a product first to see what other moms say about the measurement accuracy.
Pumping Compatible
More than 80 percent of moms begin by breastfeeding (6). However, it can be emotionally and physically demanding, and at some point, you may want a break. It’s convenient to pump directly into a bottle and go out for the evening or even just errands solo (it can feel like a mini-vacation!) Whether this means the bottle can attach directly to the pump or is simply designed to make storing breast milk easier, it’s helpful to make sure the bottle is pumping compatible.
Finding the Perfect Nipple Size
Just as important as the bottle you choose is the nipple size. The nipple size controls the flow of milk out of the bottle. Younger babies generally need slower-flowing nipples while older babies and toddlers need faster-flowing nipples.
There are as many different nipple sizes and types as there are bottles. However, most will fit into three categories: slow, medium, and fast (7). They may also be labeled with numbers, such as stage 0 (newborn), stage 1 (1+ months), stage 2 (3+months), and stage 3 (6+ months).
Each nipple you purchase, whether it comes with a bottle or not, should have an age range and flow speed listed. Your baby doesn’t need to match this exactly, but these are usually helpful guidelines to consider. Slower is typically better for breastfed babies.
Related Reading: Tommee Tippee Closer to Nature Review: Are the Closer to Nature Bottles the Best?
When Will My Baby Need a Bottle?
The truth is, there is no right or wrong answer. Every mom and baby is different.
You can breastfeed exclusively for the first six months before introducing solid foods. You can also use formula in a bottle from the day they are born. What you choose is up to your health, what your baby needs, and your personal preferences.
Bottles provide freedom to a new mom, especially after breastfeeding has been established. Being able to leave your milk for your baby with a different caregiver allows you to go back to work, go shopping, or simply have a break.
According to the American Academy of Pediatrics, it’s best to try and have your child weaned from the bottle by the time they turn one. The older your child gets, the harder it will be for them to give up the bottle.
How to Transition to a Bottle
It is common practice for a mom to start off breastfeeding and then slowly transition to a bottle as their child grows. This process can be tricky!
Here are five tips to help you make the transition:
- Use breast milk inside the bottle. If you’re transitioning to formula starting off with your milk in the bottle helps the baby use the bottle because it’s milk they are used to.
- Find a bottle with a slow-flow nipple. These are designed to imitate the suckling effect during breastfeeding and prevent nipple confusion.
- Find a bottle with a wider base. It will feel more like your breast and be easier to latch on to.
- Choose a bottle made of soft silicone or one that has a silicone cover. Your baby is used to your soft skin and silicone can help replicate that experience.
- Choose relaxed feedings to try a bottle. If your baby is super fussy and upset, they may be more likely to reject a bottle. Choose a time when they’re more relaxed and happy.
If your baby constantly rejects bottles, try looking at both the bottle itself and what’s inside it. You may have to try a few different bottles to find one your baby likes.
Something to consider for your registry is a baby bottle sample pack.
Do I Need a Baby Bottle Warmer?
Some babies like a warm bottle! To warm the milk, simply place the filled bottle into a container with hot water, which will heat it through evenly.
You can also purchase baby bottle warmers that will keep track of the temperature and take some of the guesswork out of the process. After all, you do not want to give your baby a bottle that’s too hot and scald them.
Warning
Never heat a baby bottle up in the microwave. Microwaves heat unevenly, which could leave hot spots that could burn your baby.
How Do I Store Baby Bottles?
Empty baby bottles should be cleaned, dried, assembled, and stored in a protected environment such as a kitchen cabinet (8).
If your bottle is filled with breast milk or formula and hasn’t been used for a feeding, it can be stored in the fridge or freezer. The length of storage time will depend on the type of liquid in the bottle and what the bottle is made of.
If your baby has already had a portion of the bottle, it needs to be used within two hours or disposed of (9).
How Do I Clean Baby Bottles?
So, how can you clean your baby’s bottles properly?
Baby bottles are made from a variety of different materials with different care instructions. Some can be placed in the dishwasher, while others can’t. Most are safe to be put in the top rack of the dishwasher, but always confirm this by reading your bottle’s care instructions first.
Pro Tip
However you clean your baby’s bottle, make sure to completely disassemble it. Some bottles have smaller parts that need to be cleaned with a bottle brush too.
Every once in a while, it’s also a good idea to fully sanitize your baby bottles. You don’t need to do it after every use, but we suggest sterilizing bottles before you use them for the first time and after your baby has been sick.
The easiest way to sanitize them is to boil them in hot water for approximately five minutes. If your bottle can’t be boiled, look into buying one of the best bottle sterilizers.
We suggest only purchasing bottles that can be washed in the dishwasher and easily sanitized.
Baby Bottle FAQs
Can Baby Bottles Cause Ear Infections?
Bottles themselves don’t cause ear infections. However, your baby may get one if they use a bottle while they’re flat on their backs. This is because the milk may enter the eustachian tube, a canal that connects the ear and the throat, increasing your baby’s risk of infection (10).
Prevent ear infections by keeping your baby as upright as possible when they use a bottle, especially if they’re self-feeding.
Are Baby Bottles Allowed on Airplanes?
You can carry bottles of breast milk or formula onto airplanes. Anything containing a liquid may be subject to testing and examination, so make sure you’re using easy-to-open, clear containers.
According to the Transportation Security Administration, bottles filled with more than 100 millimeters (3.4 ounces) of milk can be inside your carry-on and you don’t need to put them in any plastic bag (11). You’re also allowed to have a variety of ice packs to keep the bottles cool, and needn’t actually be traveling with your child at the time.
Can Baby Bottles Be Recycled?
You will need to check what your bottles are made of before you try and recycle them. Today, many types of plastics and glass can be recycled; take a look at the bottle itself, especially on the bottom, for the recycle symbol.
If you can’t find any information from the bottle or the packaging, check out the product listing online or contact the company for more information.
Can Baby Bottles Be Reused or Donated?
Baby bottles are safe and easy to reuse or donate as long as they don’t have any cracks or missing parts. All you have to do is sterilize them thoroughly.
If you don’t have another child you can save the bottles for, consider contacting your local women’s or refugee shelter to see if they are in need of bottles.
Can Baby Bottles Expire?
Most bottles can last indefinitely as long as you take good care of them. However, it’s normal for wear and tear to occur. If you notice any of the following signs on the bottle or the nipple, you may want to get rid of it (12):
- Cracking, chipping, or breaks.
- Swelling or other signs of a distorted shape.
- Thinning.
- Discoloration.
- Fast pouring of milk through the nipple.
When Do Babies Hold Their Own Bottles?
Most babies begin to hold their own bottles between 6-10 months. It all comes down to your child’s fine motor skills.
If your arm is getting tired, consider finding a bottle specifically designed to be gripped by your baby.
Feedback: Was This Article Helpful?
Thank You For Your Feedback!
Thank You For Your Feedback!
What Did You Like?
What Went Wrong?
Cleft Feeding Instructions - Seattle Children's
Why do babies with clefts have problems with feeding?
Babies with clefts have trouble with feeding because it changes how parts of the mouth are formed and how they work and fit together.
- Cleft lip makes it hard for babies to make a good seal around the nipple.
- Cleft palate makes it hard to create suction because the mouth cannot be closed off from the nose.
Normally, a baby pulls the nipple into their mouth and makes a seal with the lips around the nipple. When the baby sucks and swallows, the back of the roof of their mouth (soft palate) rises up and closes off the mouth from the nose. This creates suction and holds the breast or bottle nipple in the mouth, and the baby sucks to draw out milk.
How do I feed my baby with cleft lip?
Babies with only cleft lip can usually be fed by breast or regular bottle. Our nurses and infant-feeding specialists can help you make sure your baby gets a tight seal around the nipple.
Breast-feeding
- During breast-feeding, the soft breast tissue often will fill the opening in the lip and/or gum line. This seals off the mouth and lets your baby create enough suction.
- Sometimes it helps to hold a finger across the cleft while your baby feeds.
- Swallowing noises and normal weight gain are signs that breast-feeding is going well.
- If your baby is "noisy" with feeding, making clicking or kissing noises, they may not have enough suction.
Bottle-feeding
- If you bottle-feed your baby, feeding may work better using special bottles or nipples with a wider base.
- When starting a feeding, hold your baby in a slightly upright position.
- Touch the baby's lower lip with the nipple.
- When the baby latches on, direct the nipple slightly downwards.
- Try to keep the nipple in the center of the baby's mouth. Do not let it slip up into the cleft.
How do I feed my baby with cleft palate?
Babies with cleft palate usually need special bottles and techniques to feed well, whether or not they have cleft lip. It is rarely possible to breast-feed or use a regular bottle.
With cleft palate, a baby cannot create suction to get milk out of the breast or bottle.
A baby who is put to the breast may look like they are latching on and sucking well. But they are using up energy and getting little or no milk.
If you planned to breast-feed, we encourage you to express your milk and feed your baby using a special bottle.
Breast milk is considered the most ideal food for all babies. There are added benefits for babies with cleft palate, such as fewer middle ear infections.
Often, mothers who were looking forward to breast-feeding feel great sadness at the loss of this experience. We encourage you to acknowledge this loss and seek support. We can help with feeding techniques to help you maintain closeness with your baby.
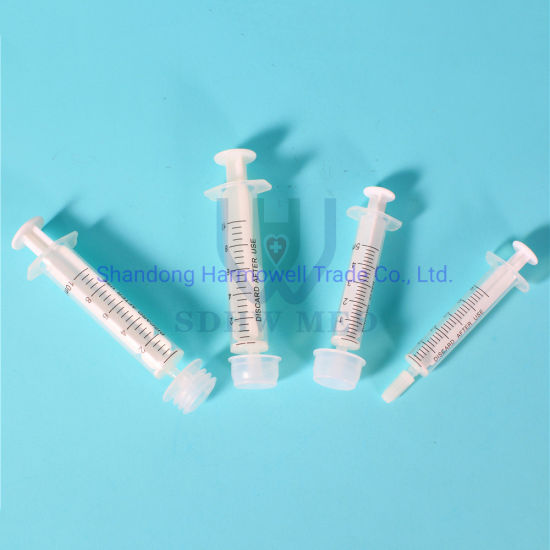
What kind of bottle should I use for feeding with cleft palate?
There are 4 types of bottles for feeding babies with clefts:
- Cleft Lip/Palate Nurser by Mead Johnson
- SpecialNeeds Feeder by Medela
- Pigeon feeder with one-way valve
- Dr. Brown’s Specialty Feeding System with one-way valve
The Pigeon nipple with one-way valve can be used with any bottle.
The Cleft Palate Foundation website has a video on feeding your baby and information on how to order supplies online.
Cleft Lip/Palate Nurser by Mead Johnson
Cleft Lip/Palate Nurser
by Mead Johnson
The Cleft Lip/Palate Nurser by Mead Johnson is a low-cost, soft, squeezable bottle.
We suggest that you replace the long yellow nipple that comes with the bottle. Use any shorter, softer nipple.
- Before using the bottle for the first time, put some water in it and practice squeezing the liquid out of the nipple. This will help you get a feel for how firmly you need to squeeze.
- When you squeeze the bottle, the liquid should flow easily but not too fast.
- As your baby begins to suck, squeeze the bottle with a firm, steady pressure to the count of "squ-e-e-ze-2, 3." Relax your squeeze on the 2, 3 count. This pauses the flow of milk.
- You should only squeeze when your baby is sucking. Watch your baby closely and listen for swallowing sounds.
- If your baby pauses to breathe, you should pause also. If your baby is getting milk out of the bottle, you should see air bubbles in the milk.
- If you forget to stop squeezing the bottle when your baby pauses, your baby may cough and sputter. Just take the nipple out of the baby's mouth for a moment and let them settle.
Then continue feeding.
If sputtering happens throughout the feeding, call the Craniofacial team for advice: 206-987-2208. Most parents quickly learn to adjust squeezing to their baby's sucking rhythm.
SpecialNeeds Feeder
SpecialNeeds Feeder
The SpecialNeeds Feeder by Medela has a one-way valve that keeps milk in the nipple. It does not require suction.
This bottle used to be called the Haberman feeder.
Sometimes babies can get milk from this feeder themselves by pushing the nipple against their gum line. The nipple is soft-sided. For many babies, it works best for the parent to squeeze the bottle to match their baby’s rhythm of sucking and swallowing (as described earlier for the Mead Johnson nurser).
There is a “Y” cut in the nipple. Turning the nipple in the baby’s mouth changes the orientation of the “Y” cut in the baby’s mouth. This varies the rate of flow. The nipple has 3 lines that indicate which flow rate is in effect.
Dr. Brown’s Specialty Feeding System with one-way valve
Dr. Brown’s Specialty
Feeding System
You can buy Dr. Brown’s Specialty Feeding System with one-way valve through Amazon. The Dr. Brown’s bottles sold in stores do not have the one-way valve.
Dr. Brown’s Specialty Feeding System uses a bottle with a one-way valve at the base of the nipple to keep the nipple full of milk. It does not require suction.
- When the baby bites or compresses the nipple, milk flows into their mouth and not back into the bottle.
- The one-way valve ensures that there is always milk in the nipple.
- The baby controls the rate of the feeding.
Pigeon feeder
Pigeon nipple with one-way valve
The Pigeon feeder has a nipple with a one-way valve. The nipple can be used with any bottle.
The nipple comes in 2 sizes. The smaller size has a slower flow. It is best for newborns.
The larger, faster-flowing nipple works well for babies 6 weeks and older.
The Pigeon nipple with one-way valve works by compression only. No squeezing is needed.
- A plastic one-way valve that fits into the nipple keeps milk in the nipple. Place the valve with the flat side toward the tip of the nipple.
- When your baby begins to suck, milk flows easily. Your baby controls the flow of milk.
- The nipple has a firm side that goes against your baby’s gum line and a softer side that goes on their tongue.
- A small notch near the rim of the nipple serves as an air vent. This notch should be under your baby's nose when feeding. This puts the nipple correctly in your baby’s mouth.
- Tightening the nipple slows the flow of milk. Loosening it makes the flow faster.
- If the nipple collapses, loosen and retighten it.
The Cleft Palate Foundation website has information on how to order these supplies online.
How do I care for the bottles and nipples?
All of these bottles and nipples can be hand washed in hot soapy water. Rinse and allow to air dry.
Do not boil the bottles or parts. Do not wash them in the dishwasher or put them in a microwave. They may soften and start to leak.
How do I express breast milk for my baby?
If you want to express breast milk for your baby, we recommend a hospital-grade electric breast pump with a double pumping system.
Birth hospitals have pumps for mothers to use in the hospital. You can rent or buy a breast pump for use at home. Insurance can cover rental or purchase of a breast pump for a baby with a cleft palate.
At first, pump at least 8 times in 24 hours, including at least once during the night. After several weeks of frequent pumping, most mothers make enough milk by pumping about 6 times a day. Tips for pumping breast milk (PDF).
How much should my baby eat?
Newborn babies begin with frequent feedings of very small amounts of milk (1 ounce or less). Over time, they increase the amount they can take.
By 2 weeks of age, a baby needs at least 2 to 2. 5 ounces of milk per pound of weight each day. For example, a 3-week old baby who weighs 9 pounds should have at least 18 to 22.5 ounces of breast milk or formula in 24 hours.
A feeding session should take no longer than 30 minutes. If it takes longer, your baby is working too hard and burning calories needed for growth.
We recommend weighing babies weekly until they show a normal rate of growth. Usually this happens in 4 to 6 weeks.
How often does my baby need to eat?
During the first month of life, a baby will feed 8 to 12 times per day — every 2 to 3 hours. A baby this young usually feeds at least 2 times during the night.
At 2 to 4 months, a baby will feed 6 to 8 times per day — every 3 to 4 hours.
How will I know if my baby is gaining enough weight?
A baby usually loses weight the first week of life. The loss is usually 5% to 10% of their body weight. Your baby should regain this weight by 2 weeks old.
At first, we expect your baby to gain 5 to 7 ounces per week. At 4 to 6 months old, the rate of weight gain slows. Your baby should gain about 3.5 to 4.5 ounces per week.
What if my baby is not gaining enough weight?
Sometimes babies with cleft lip and palate have difficulties taking enough breast milk or formula to grow.
Ask your medical team for advice. They can give you an approved recipe for adding formula powder to breast milk or regular formula. This gives your baby extra calories, protein and vitamins. Talk to your healthcare team before doing this.
What about starting solid foods?
Babies with clefts can start solid foods at the same age as other babies. Most often, this is at 4 to 6 months.
Experiment to find the right consistency for solids. It needs to be just right so your baby can eat without the food coming out their nose. This is not harmful to your baby. Sneezing will usually clear the food out of the nose. Most babies learn quickly to get the food down their throats rather than out their noses.
Can my baby drink from a cup?
Cup feeding can also be started at the usual age, 8 to 12 months. Cups with plain lids can help limit spills. Do not use spill-proof cups with valves. These require that baby create suction to get any fluid.
See the Cleft Palate Foundation website for a video on feeding your baby and information on how to order supplies online.
Do-it-yourself feeder: help to the feathered defenders of the garden.
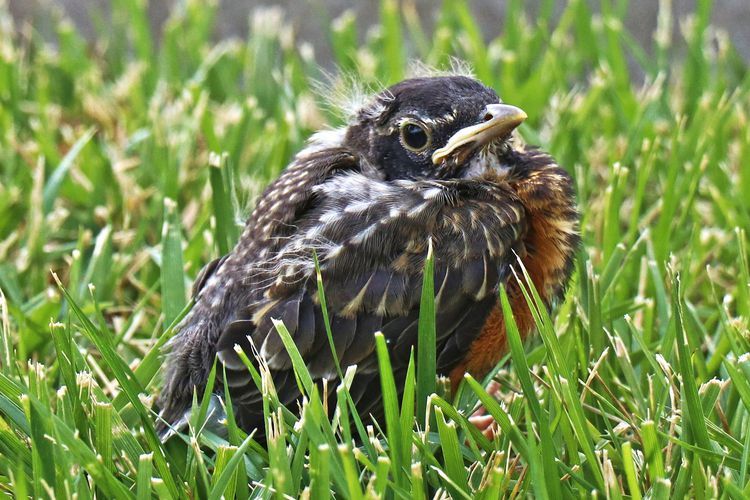
Winter is coming. A little more, and a snow blanket will cover the ground, and the temperature will drop to minus values. We made sure that the plants in our garden successfully overwinter. Now it's time to think about helping the birds, which protect trees and bushes, beds and flower beds on our estates from numerous pests in spring and summer. With the establishment of snow cover, it becomes more and more difficult to get food for birds that winter with us, and do not fly south. And, if at least one bird feeder is regularly replenished with bird food in each estate, many more birds will successfully survive the winter and chirp merrily in our gardens in the spring.
The main problem for birds in the winter is not the cold, a feather coat copes with it. It is more difficult to maintain a high body temperature, which in healthy birds is about +40 ° C. The colder it is outside, the more the bird loses heat. In order to produce it in sufficient quantities, feed must be in abundance. It is not easy for birds to find it in winter, and even in conditions of short daylight hours. And the help of people will be very helpful.
Regulars of bird canteens
In winter, there is no shortage of visitors in the feeding troughs arranged by people. The regulars of such canteens are tits and sparrows. The titmouse is a dexterous bird, it will master any feeder, even the so-called “sheller” - food suspended in a net or strung on a rod. Feed your tits, and in spring and summer they will look after your garden. A pair of tits is enough to protect as many as forty fruit trees. Birds will collect all the pests from them when they feed the chicks. (And they feed them about 350 times a day!)
Titmouse, puffballs, Muscovites, bullfinches, nuthatches, jays, robins, pikas and waxwings also fly to the feeders. Crows, jackdaws and magpies will not keep you waiting.
Feeders for every taste
The easiest solution is to buy a ready-made feeder. Manufacturers offer a variety of models made of plastic, wood and other materials. But you can make a dining room for birds on your own. Firstly, in this case, you will save money on the family budget, since the feeder can be made from improvised materials, which are in abundance in every home. Secondly, making a feeder can be an exciting time spent together with children, who, along with working skills, will receive a lesson in kindness, so that caring for our little brothers from childhood becomes the norm for them. And, thirdly, making a feeder will provide an opportunity to show creative imagination and create a useful thing that will also decorate your garden.
Bird feeder Umbrella 25x32x24cm wood
We offer several ideas for bird feeders. Perhaps you will use some of them or come up with your own model.
We use waste containers
Plastic bottles
The simplest feeders can be quickly made from containers that are left over from some foods and drinks. For example, excellent feeders will be obtained from plastic bottles of different capacities. If you glue a small plastic bottle, for example, on silicone sealant to a plastic saucer, having previously made several holes in the walls in its lower part and filled the container with a mixture of grain, sunflower seeds and oatmeal, you will get an automatic feeder that will not need to be replenished every day. The food on the saucer will be added gradually, as the birds eat it. The feeder can be hung anywhere or mounted on the branches of a tree or tall bush. The design can be supplemented with a round roof, which can be cut out of cardboard or other material and fixed at the neck of the bottle.
Silicone sealant MASTERTEKS PM universal 290ml transparent, art. 9610081/9612911
Comfortable feeders are obtained from five-liter plastic bottles with handles. In the lower part on the sides, you just need to make a few holes through which the birds can get inside and gain access to the food. You will pour the treat. So that the birds do not get hurt and see the entrance well, it is better to paste over the sharp edges of the holes with adhesive tape or, for example, masking tape. The bottle can be hung by the handle. In addition to the vertical version of such a feeder, there is also a horizontal one, in which more birds can use the feeder at the same time.
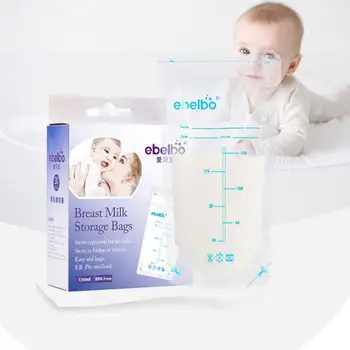
Milk or juice cartons
Tetrapacks are a good material for making bird feeders. After the bag is freed from the product, it must be rinsed well and dried. After that, the upper part is glued again, a cord can be inserted between the glued halves, on which it will then be easy to hang the feeder on a tree. A square hole is made in the lower part from one side. It is necessary to retreat 3-4 centimeters from the bottom, so that the food placed inside is not blown out by the wind and the birds are not raked. If you want to give such feeders a more aesthetic appearance, you can paint or style them, for example, under a birdhouse, by inserting a hole made in the wall from the side of the slot and sticking a perch stick into it. The "slopes" of the roof can be pasted over with thin twigs.
Can feeders
Another economical and practical solution. For them, tin cans from stew, compotes, tomato paste, etc. are suitable. The top cover must be carefully completely cut off with a can opener. The sharp edges of the tin can be trimmed with a hammer so that the birds are not in danger. Such feeders are hung on ribbons, ropes or thin chains. If you paint the jars on the outside in a different or, conversely, one color, then such feeders will also become an original decor for your garden.
Bird table
This simple version of the feeder is an open area with small sides. Its base can be made of plywood or trimming a planed thin board. The size can be any, at your discretion. To prevent the food from being blown away by the first gust of wind, you need to make bumpers, fixing them around the perimeter of the base with small nails or screws. Such a table can be mounted on a pole, the height of which, on the one hand, should protect the birds from dogs, and on the other hand, allow you to easily replenish food supplies in the bird canteen. You can also fix such a table on a tree.
Cleaver
Such a feeder can be made from a metal mesh, bending it in the form of a pocket and fixing it on a fence or barn wall. A grain mixture can be placed inside such a cage. Prepare it as follows:
-
Prepare 150-200 grams of solid coconut oil or animal fat - beef or pork, about 300 grams of a store-bought poultry grain mixture or homemade, and 1 tbsp. a spoonful of vegetable oil.
-
Melt the coconut oil or fat in a saucepan, pour the mixture into it and add the vegetable oil.
-
Form a briquette and let the food harden.
This food will especially appeal to tits, sparrows and finches.
Second life for kitchen utensils
Perhaps you have accumulated dishes that you do not use, or other kitchen utensils - conduct an audit, and fantasy will tell you how to find a useful use for them. For example, a wicker basket with a lid will make an excellent feeder and harmoniously fit into the garden landscape. From the cover you will get a canopy over the feeder, which can be fixed on pillars made from a thick tree branch.
Even a spiral whisk will do, which has been preserved since Soviet times and has become unnecessary after the advent of electric blenders and mixers. It can also become a feeder if you hang it by the handle on a thick branch, and put bacon or slices of white bread into the coils of the spiral.
Weaving a wicker feeder
A cute feeder can be woven from improvised materials. For this, for example, a vine of girlish grapes, which is often found in country estates, is suitable. You can also cut flexible willow twigs with pruners somewhere on the river. As a basis, you can take a cut of a planed board or a round and thin saw cut of a log. Nail eight (or more) long and fairly thick rods with small carnations to it on the sides at equal distances. From below, braid them thinner like wattle, making a side 5-6 cm high. Then tie the upper ends of the rods into a bundle and braid with thin willow shoots or a vine from above so that a wicker roof forms over the feeder. After that, the feeder can be attached to a tree or put on a pole and filled with food.
Twig cabin
By cutting branches of the same diameter, you can assemble a beautiful feeder-hut from them. If you have patience, you can even connect the branches using the log house technique by cutting grooves along the edges of the branches. The base can be made square or rectangular by cutting it out of a board or plywood. On it you need to fix several crowns of "logs" - branches, making a side. Instead of columns, make corners from branches using the log house technique and cover them with a gable roof of thinner branches. This feeder looks very nice and lasts a long time.
Where to place bird feeders
Feeders can be installed on garden trees, hanging them from a thick bough or fastened to the trunk, but in such a way as to be able to easily replenish food supplies. At the same time, you need to think about the safety of those for whom you are trying. Dogs should not reach the feeder. Alas, we will not be able to protect birds from cats that climb trees beautifully. But at least choose such models of feeders that will not become a trap for birds. If there are cats nearby, let the feeder be as simple as possible so that the bird can fly away from it in any danger.
If the bird dining room is placed so that it can be seen from the window, then you can watch the birds, it will be a great pleasure. But you should not install a feeder near the house - feathered friends are not neat, and the area around the feeder will be littered with leftover food and bird droppings.
Since the feeder constantly contains different products, their leftovers can deteriorate, becoming breeding grounds for bacteria and parasites. It is necessary to monitor the condition of the feeders, periodically clean them so that the birds that fly to them do not pick up any dangerous infection here.
How to fill the feeder
First of all, these are all kinds of cereals. Birds can be given rice, wheat, oats and oats, barley, corn, millet. Cereals are given both raw and boiled. It is better to mix several types or buy ready-made grain mixture for birds.
Many birds like sunflower seeds: they are high in calories, they are high in fat, therefore they serve as an excellent source of energy. Before pouring sunflower seeds into the feeder, put a couple of handfuls in a plastic bag and go over it with a rolling pin to roll out the dough. After such processing, it will be more convenient for the birds to peck them.
To increase the calorie content of the feed, you can periodically add raw lard and meat to it, include fat in the feed. It is better to mix it with cereals. But do not overdo it with their quantity, fats should be given little by little. An excess of them can harm the liver of birds.
You can put in the feeder and bread, but only white. Black varieties of bread are contraindicated for birds; its use can lead to the death of birds as a result of intestinal volvulus. White bread is given both separately and as an ingredient in homemade feed mixtures. It consists of white bread and sunflower seeds, which are poured with vegetable oil and frozen. You can add a little low-fat cottage cheese and chopped eggshells to such food.
Bird feeder for a plastic bottle
What is prohibited?
The general requirements for bird food are that it cannot be salted, fried, seasoned or spices added. It is impossible to offer spoiled foods to birds: stale, moldy food, rancid fat, stale grain.
Salty foods are prohibited, since in birds salt is excreted from the body only by the kidneys. Salt excess will lead to their failure and death of birds. The birds themselves are illegible in food, so take a responsible approach to filling the feeders.
Under the ban and such cereals as millet. It does not have a shell, which is why the grain in a humid environment quickly oxidizes, accumulates toxins and bacteria dangerous to birds. Do not put potatoes in the feeder. Raw potatoes contain solanine, which is deadly for birds, while boiled potatoes contain too much starch, which negatively affects digestion.
It is not recommended to pour dry or wet food for dogs and cats into bird canteens. It contains undesirable yeast and soy for birds.
what types are there, what materials can be made, how to fill them, examples of feeders
It is very difficult for small birds to feed themselves in winter. One feeder can save up to 50 bird lives during the winter. In the article we will tell you how to make a feeder from improvised materials with your own hands with diagrams and photographs together with children. We will give practical recommendations for installing and filling the feeder with food.
Audio version of the article "HOW TO MAKE YOUR OWN BIRD FEEDER" The audio tag is not supported by your browser. Download. HOW TO MAKE A BIRD FEEDER WITH YOUR HANDS
Content
Why feed the birds in the winter of
What should be the feeder, when and where to install it
- suspension
- Site
- LOTKIC feeders or house
- Lushchilka
- Bunker
- Wooden feeder
- Plastic bottle feeder
- Box feeder
- Peeler net feeder
Ecological feeders
- Bird cookies
- Cupcakes with gelatin or lard
- feeders made of vegetables, fruits and nuts
Original ideas of bird feeders: photo
than fill the feeder
Make a child to make a wanderer for wintering birds. It can be hung in a park, in a forest or even on an open balcony. You will be able to feed and visit your feathered friends all winter long. In the article we offer classic and original ideas for performing at home.
Why feed birds in winter
All birds have a very fast metabolism, which means that in winter, with high energy costs, they need to eat almost continuously. In one frosty night, a bird can lose up to 10% of its weight trying to keep warm.
But it is much more difficult for birds to renew their reserves in winter: insects have hidden, and seeds and berries are under snow and ice. In addition to this, daylight hours are getting shorter, so you need to look for food faster, but this does not always work out. Did you know that from 1 to 3 small birds out of 10 survive until spring? And this is due to lack of food. Small birds are especially affected: bullfinches, tits, sparrows. Large birds, for example, rooks, crows, magpies, endure winter much easier and get food easier.
You can significantly help the birds survive the winter by filling the feeders with grain and lard. Birds remember where the replenished feeders are located, settle nearby and fly to the "dining room" regularly.
Creating feeders with children is one of the classics. This is taught to boys in labor lessons, and before that - by parents. Such an activity develops empathy in children, they begin to take care of animals and birds, and take responsibility. For example, children can remind their parents to grab some bird food before every outing. In addition, by feeding birds, you can learn a lot about birds: which of them are migratory and which are wintering; what they eat; how they look; how they sing. If the child is old enough, then taking care of the birds during the winter can become a real project, during which he will write down all the results, draw conclusions. In addition, the manufacture of the feeder itself is a creative activity that requires perseverance and well-developed motor skills.
What should be the feeder, when and where to install it
Birds can be fed all year round. If you are making a summer "dining room", then it can be open. In this case, you just need to remember to change the contents of the feeder in time, especially after rain. Here is an interesting option for decorating your garden - a mug and a saucer.
You just need to glue the mug to the saucer, tie the wire and hang the structure on a tree. Birds will be happy to fly into your garden for tea drinking and decorate it with their singing.
But wintering birds need feeding most of all during frosts. Colds come in central Russia already in early November and continue until the end of March. All this time it is worth adding food and keeping the feeders clean, as they can be covered with snow.
Where to place the feeder? If you live in a private house and want to attract titmouse to your garden, then choose trees that are tall enough with thin branches so that cats do not show interest in food. In the city, you can organize a dining room for birds in the park, in the courtyard of an apartment building, and even on your own balcony. However, think in advance about whether such a neighborhood will bring you trouble, because the birds may not be too neat. Try to hang the product in places where there are no drafts, and even better if there is a small visor.
Here are a few suggestions for creating a feeder:
- Do not use too bright and shiny materials, they will scare away birds.
- Food should be visible and not hidden deep, as birds use their sight to find food.
- High sides, a roof and a few medium-sized bird holes are the structural elements that will protect against rain and other forest animals. But sometimes you can deviate from this "classic", for example, if you plan to hang a feeder under the visor.
- Feed should not spill too much on the ground, especially if you set up a feeder in the forest. This can attract ferrets and other predators, and birds will definitely not like this neighborhood.
- For coloring, you need to take only water-based paints, they are safe for birds.
There are many types of feeders: from plastic bottles and from wood; durable and disposable; original and stylish and not very beautiful, but practical. Regardless of what design you decide to make with your child, most importantly, do not forget to pour food in time and clean the feeder from softened food and snow. And when spring comes, don't forget to take it off the tree.
We offer you feeder ideas in different materials. All of them differ in shape and method of attachment - suspended, stationary and others. Let's see how the main varieties differ.
Hanger
A mesh bag with food, a cone with fat and cereals or just pieces of lard - all these treats are hung on a branch. The easiest to make, short-lived, but effective for tits, bullfinches and waxwings.
Platform
Flat surface without a roof. The main advantage is that the birds see food from a distance. Great for sparrows, siskins, buntings, greenfinches and songbirds.
Tray feeders or house
Platform with sides and roof. If you make part of the structure out of plastic, then not only baited birds will fly in, but also flying by. If you make a house with a perch, then it is suitable for pigeons, waxwings, jays, nutcrackers
Peeler
The design assumes a net from which the bird will hatch grains. Suitable for crossbills, jays, nutcrackers.
Bunker
Small, solid base and roof, this allows for single feeding. You can arrange automatic feeding. Tits, small spotted woodpeckers, buntings and other birds, except for sparrows, will be able to eat.
How to make a feeder
Wooden feeder
A wooden house is the most durable version of a “dining room” for birds. If the tree is covered with paintwork, then moisture is not terrible for it. Typically, feeders of this type are installed permanently, nailed to a tree or pole. Such a house perfectly protects food from precipitation and sparrows. Sparrows are very shy, so at the slightest danger they fly up. If there is a roof, they first have to move to the side and then up, so sparrows very rarely fly into wooden houses to feed. The only disadvantage of a standard house is high ventilation, so it makes sense to make one or two sides solid.
When creating a house, you have a lot of variability.
Various materials can be used (see what you have left after the repair), for example, solid wood blocks, glued plywood, clapboard. The design can also be very different.
The photo shows a diagram with the dimensions of the most elementary wooden house with a flat roof, a wide platform and sides on all sides.
Here is another diagram, already made of plywood:
There are many ways to modernize the house. For example, make a gable roof. Or make walls with windows instead of open space. Such houses will better protect the birds from the wind.
Here is a diagram of such a house:
Of course, tools and an equipped place are needed to create wooden feeders. If there are no such conditions, then it is problematic to make a wooden feeder.
Although, the masters offer this option. Instead of bars, take the usual packaging cardboard. It has crepe paper inside.
It is necessary to glue the sheets of cardboard so that the direction of the corrugated paper inside changes. Then you can do without tools only with scissors and glue.
This version of cardboard wood is less durable, but with proper paintwork treatment, the structure can last 2-3 seasons.
Sometimes you can find very beautiful wooden feeders, which obviously took a lot of time and effort to create.
Another option to make a wooden house without tools or shavings is to buy a kit. It has wooden parts that need to be assembled according to the scheme and, if desired, painted. A child can cope with such work even without the help of adults.
When assembling a wooden house, pay attention to the following. The closed design assumes that only baited birds will eat. If you want to attract the attention of birds, then you need to decorate the house. For example, you can put a branch of mountain ash on the roof, hang a rope from dried rose hips. Just don't overdo the decoration. Too bright or shiny colors and materials, on the contrary, repel birds.
Plastic bottle feeder
If you walk through the yards, you can conclude that this is one of the most common ways to feed birds.
Indeed, plastic bottle feeders have many advantages:
- An affordable material that is easy to work with even for children. For manufacturing, special tools and building materials are not needed, the “dining room” will be ready within a day.
- Lightweight material, so the feeder can be hung on thin branches.
- Protected from drafts and precipitation.
- Transparent walls give birds a good view, so they can see attractive food from afar.
- The material is resistant to moisture, wind and wear.
The main disadvantage of such feeders is that, unfortunately, they are often no longer replenished and left hanging on trees. Such abandoned and devastated feeders look very unattractive.
We offer several types of plastic bottle feeders. But first, let's give general recommendations when working with this material:
- Plastic is slippery, making it difficult for birds to stay on the surface. The best way out is to equip the structure with wooden perches.
- At least two through holes. It is best to make the holes large so that the birds do not perceive the feeder as a trap.
- Cover the edges of the hole with adhesive tape or duct tape. So it will be more convenient for the birds to move inside, and the person will not be cut on the edges.
- If the bottle is lying horizontally, it is desirable to make the “roof” opaque so that the birds do not have difficulty flying out.
Let's take a look at some of the best plastic bottle feeder ideas.
Option 1: hanging classic feeder
If you have a five-liter bottle, step back 7 cm from the bottom and cut out 2 windows on two opposite sides. The diameter of the holes is about 10 cm. During work, you can use a clerical knife. At the bottom of the jar through the holes, you can pour a dry grain mixture.
Use an awl to make a hole in the lid for the wire. From the inside, a wire can be hung to the lid, on which a piece of unsalted fresh fat will be put on. And outside the wire in the center of the lid will serve for hanging on a branch.
If only a one and a half liter bottle was at hand, then one large window can be made. Be sure to seal the edges with tape. You can attach such a feeder to a tree by the neck.
Option 2: hanging feeder with perches
The previous method of creating a feeder is the easiest and fastest. But if you want a more durable and bird-friendly design, add one or more perches. First, the wooden perches help the bird stay on the bottle. Secondly, they make the structure heavier, the container will not fly up from the wind and scatter grain.
Use a hot nail to make holes in the plastic opposite each other. Pass one or two perches through them. It can be bamboo sticks, pencils or ordinary branches. The perches should be 2-3 cm below the windows so that the birds can sit comfortably and peck.
To prevent snow from getting into the feeder, when cutting windows, you can leave the plastic and bend it like a visor. Such a roof also needs to be pasted over with electrical tape or adhesive tape.
Option 3: simple feed hopper
Ordinary feeders should always be filled with food. And if it started to rain or snow obliquely, then they need to be cleaned, the remnants of damp food removed so that mold does not appear. You can go the other way and make a self-replenishing bunker-type feeder. By the way, she looks very nice.
They are very easy to make. We will need a plastic one and a half liter bottle and two wooden spoons for cooking.
Two holes need to be made for one spoon: one is narrow, the second is a little wider, here the “dining room” itself will be located, and the grain needs space to get enough sleep.
Arrange the spoons at different levels and exit in opposite directions. Don't make the holes too high or the food won't spill out too early, even if the feeder is half full.
The spoon has two functions. It is convenient for birds to sit on it, like on a perch. And also in its recess grain will accumulate, as in a plate.
If you don't have cooking spoons, use regular pencils. They need to “pierce” the bottle through, but both holes must be narrow so that the pencils sit firmly.
In this case, the pencil only functions as a pole. And the birds will feed themselves from small holes in the bottle.
Holes can be made with a heated nail. They should be very small so that the grains do not spill out spontaneously.
When the feed hopper is ready, fill it with grain mixture through the neck, tie off the thread and screw on the lid. The bottle can be hung from a tree.
The second option for a simple plastic bottle feed hopper is to use a plate. Tightly glue a plate of durable plastic to the bottom of a one and a half liter bottle. You can do this with liquid nails. At a distance of 2-3 cm from the bottom, cut centimeter holes in the walls of the bottle. Through them, the grain will spill out onto a plate, where wintering birds will fly to eat.
Feeders with a simple hopper system have two noticeable drawbacks:
- Grain often spills onto the ground, which can attract a flock of sparrows and even small predators.
- Snow and rain will easily wet grain left on spoons or plates.
Both of these problems can be solved by improving the design.
Option 4: complex silo feeder
The concept of this feeder is simple - one bottle contains feed and it is inside a second larger bottle. So the food gradually spills out, but at the same time it is always protected from precipitation and from spilling onto the ground.
For example, you can take one can of liquid soap or building primer. It must be rinsed very well from the inside and dried. One wide window is cut out on a wide wall. The bottom of the bottle is cut off, and 3-4 small holes are cut near the lid at the narrowing of the neck.
The bottle must be inserted into the large container so that it is exactly under the lid of the canister. Since the bottom of the bottle is cut off, the grain can be poured into it through the canister lid. To prevent the bottle from falling, secure it to the canister with a wire.
But more often two five-liter bottles are used. One of them needs to be cut in half, removing the narrowed part with the neck. Stepping back from the bottom 5-7 cm, you need to cut out several windows, process the edges.
The second bottle should be filled with grain, and a few holes should be cut near the cap itself. A whole bottle is inserted into the cut one with the neck down. The neck should fit snugly against the bottom of the cut bottle. Make perches if you wish.
It remains only to hang the structure. You can do it in two ways:
- Wrap the ropes around the bottom bottle. The top will just fit tightly on top.
- Fasten the cap and bottom of the second bottle with wire. In this case, to replenish the grain, you will need to turn the entire structure over to unscrew the lid. And for hanging, you can, for example, make two opposite holes at the bottom of the top bottle and stretch a rope through them.
You can use bottles of different sizes - 1.5 and 5 liters.
At the same time, the most common hanging feeder with high sides and windows, optionally with visors and perches, is made from a five-liter bottle. And a small bottle is inserted inside with the cut bottom up.
Bottles can be fastened with wire. You can fill the inner bottle through the neck of a five-liter bottle.
If a five-liter bottle was not found, a similar design can be made with any two containers, different in volume.
Here's how a liter bottle fits into a 2 liter bottle.
Finishing with plastic bottle feeders, it is worth noting that the main measure will remain the imagination. Decorate the feeders as you and the child want, but, most importantly, so that functionality does not suffer. A small selection of photos to see how you can decorate and upgrade a plastic bottle feeder:
Feeder from a box
To create feeders, boxes are taken from liquid products - from kefir, milk, juice. These cardboard boxes are sealed with polyethylene and foil, so they are strong enough to last through the winter.
Box feeders are especially good because they can be made by the child himself from start to finish. After all, to work with cardboard, you need not the most difficult tools to use - scissors, pencils, a ruler. The second advantage is that cardboard boxes are easy to color with felt-tip pens, which makes the process of making a “canteen” even more fun.
Feeder manufacturing steps:
- Wash and dry the milk or juice bag.
- 5-7 cm should be set back from below. This height of the sides is enough so that the food does not crumble and does not get wet.
- Use scissors to make an oval or rectangular hole. You should get one or two windows opposite each other.
- Finish the edges with electrical tape.
- Poke through the box with a plastic or wooden stick to make perches.
This feeder can be painted with felt-tip pens and covered with a layer of adhesive tape on top so that it does not lose its appearance and remains even more durable. Photo-ideas of feeders from the box:
Can be adapted to feeder and other larger boxes, for example, from under shoes or household appliances. The manufacturing technique remains the same, just the "dining room" will be much larger. And you need to think about the fact that most packaging boxes are not designed for contact with water, so they must be taped or painted.
Mesh Peeler Feeder
This feeder provides constant access to food, but it must be taken out of the net with the beak. The design is successful in many ways:
- Feed does not fall on the ground, and we have already told you how harmful it can be.
- Two or three birds can peck at the feeder at once, but this does not form a flock, as happens with sparrows.
- Pleasant appearance – concise, even stylish.
- Durability.
- Feed does not need to be constantly replenished. A full grid will last for several months.
The disadvantages include the fact that not every food is suitable. Usually sunflower seeds or peanuts are poured there. Both must be without roasting and without salt. Peanuts can be left in their skins. And if the mesh is large, then for the peeler you need to make special compressed layers of feed. Small grain will simply fall out of such a feeder.
The most common version is the cylinder. The design is similar to a lantern, it looks very good in the garden. You need to take materials and tools for work:
- Choice of two clay saucers, old plates or plastic lids from round containers.
Diameter approx. 15 cm.
- Metal construction or plastic garden net with meshes 5 mm in diameter.
- Ties.
- Rope or heavy rope.
- Tools: wire cutters, drill.
Roll the net into a roll that fits the flat inside of the saucers in diameter. Connect the sides with ties, and process the edges at both ends with wire cutters and turn inward. Drill holes in the center of the saucers. Now string the first saucer, net, and then the second saucer onto the cable, wire or rope. From below you need to make a strong knot. Above is not required. The top cover can be opened to pour grain.
If you take a grid with a larger mesh, you can make feeders for fat. So cats or other predators will not be able to encroach on them. You can also put nuts or homemade cookies from grains and gelatin in such mesh houses, we will talk about them below.
But the simplest version of a mesh feeder is a bag made of a string bag. You can put apple slices or nuts in it.
Eco feeders
Eco feeders are not durable. They "end" as quickly as the appetite of birds is great.
But besides this shortcoming, they have solid advantages:
- They do not harm nature. Only edible or rapidly degradable materials are used. No plastic, paint, metal or glass.
- They do not spoil the appearance of the garden or yard. A big problem for the city is abandoned, neglected feeders made of bottles or boxes. They spoil the view of the trees and add work to the janitors.
- Easy to do with your own hands, even with children. Bird biscuits may be the first self-made "baking" without baking for a child.
- It is convenient for birds to peck at these hanging feeders.
- The ecological feeder does not need to be removed in the spring, especially if you use ropes made of completely natural fibers, no synthetics.
The simplest, fastest and most beneficial option for birds is hanging lard. Any animal fat will work, including natural butter. But fat is cheaper, so it is more often chosen. Make sure that the lard is raw and without any seasonings, including without salt.
Animal fat is a very high-calorie food, and this is exactly what you need in winter. Pieces of lard can simply be planted on tree branches. Or make a “kebab” out of them on a bamboo stick. You can hang a piece on a rope, nail it to a tree trunk - there are a lot of ways to fasten it.
But there are vegetarian birds, they prefer grains and berries. For them, you can hang a dried sunflower hat or an ear of corn on a tree. Corn is better to take with small grains.
Another simple version of the eco-feeder is a “barbecue” or beads made of berries. In winter, birds especially like twigs with rowan berries, dried hawthorn, and pieces of fresh apple. You can alternate berries with nuts and dried fruits. Shelled peanuts are great.
Bird Biscuits
Don't be afraid, no baking is required of you, but the birds also want something sweet. Honey will help us with this.
Take your packing (corrugated) cardboard and draw and stencil shapes, eg bagel, heart, star. Make a loop with a needle and thread.
Make a glue mixture by mixing 1 egg, 1 teaspoon honey, 2 tablespoons oatmeal and a pinch of flour. Let it swell for half an hour. Coat the cardboard blank with this mixture on both sides. Add the rest of the mixture to the grain. Grain mass stick around the workpiece and put your cookies in the refrigerator for 2-3 hours.
By the way, instead of a mixture of honey and eggs, you can melt butter and mix it with grains. Such cookies will be even more high-calorie.
True, butter is not cheap, but it should never be replaced with margarine, it is dangerous for birds. In cold weather, the butter will harden quickly and will attract birds.
Gelatin or lard cupcakes
If you have silicone cupcake liners in your kitchen, you can do without cardboard. The recipe for gelatin cupcakes is simple. You will need to dissolve 30 grams of gelatin in 300 ml of water. When the gelatin swells, add 500 grams of the grain mixture with crushed nuts and oatmeal to the bowl.
Pour this mass into molds, do not forget to attach the rope for fastening. Or you can stick a straw for drinks so that a hole remains, and only after drying, insert the thread. The mixture needs at least 2 hours to set in the refrigerator. Then you can pull the cupcakes out of the molds.
Melted lard can be added instead of gelatin. Such a feeder will be more high-calorie, but at the same time it may begin to melt at a positive temperature. If your weather in winter is about zero, it is better to choose gelatin.
You can also coat an ordinary pine cone with this mixture. Perhaps this is an even simpler and more environmentally friendly option. And it looks very pretty. You can even make a structure out of cones or hang them like a garland on trees.
Vegetable, fruit and nut feeders
The same grain mixture with the addition of lard or in dry form can be placed in a natural container. A simple open hanging feeder can be made from a pumpkin, an apple or an orange.
By the way, pumpkin seeds and pulp are very useful for birds. But they don't like citrus. But if you use only the peel, carefully removing the pulp, then the smell will not prevent the birds from eating. An apple, like a pumpkin, will also be eaten completely.
Coconut shells are suitable for grain mix. The main problem is to carefully split the coconut itself. Then the shell can be filled with a mixture of grain and butter, it will harden, which will prevent the food from spilling out.
Nutshells nailed to a flat vertical surface look very interesting. First, the nut itself will be in the shells, and then you can fill them with a grain mixture with lard.
Original ideas for bird feeders: photo
If you start creating a bird feeder with imagination, you can use a wide variety of materials. Literally everything that is at hand, for example, excellent bunker-type feeders will come out of a transparent glass bottle.
In general, any old utensils can be used as a feeder - a kettle, a tea set, spoons, ladles, pots, a flower pot and tin cans, everything will be used. Here's what it might look like.
Here are some more feeder ideas made from scrap materials: ice cream sticks, corks, egg tray. You certainly wanted to throw them in the trash!
How to fill the bird feeder
The main principle is to feed, but do no harm. Therefore, first we list what is absolutely impossible: everything is salty, smoked, with the addition of preservatives, dyes, any food additives. Rye bread can also cause intestinal upset in birds. It is better to give white, and dried, and even better to do without bakery products at all.
Can be poured into the feeder:
- Fresh unsalted lard.
- Butter, full-fat cottage cheese (not milk or margarine).
- Wheat, rice, oatmeal, millet, barley, corn, split peas.
- Sunflower, pumpkin, flax seeds.
- Apples, dried fruits, mountain ash, hawthorn, wild rose.