Diy baby chick feeder and waterer
Homemade Chick Waterer • The Prairie Homestead
When I was meandering through the aisle of the feed store the other day, I almost grabbed one of those plastic chick waterers. I knew we were going to be needing one soon, since the coop is clean and shiny and the chicks are set to arrive in a couple weeks.
But of course, my craziness innovative, frugal mentality won out, and I decided I would challenge myself to create my own chick waterer from materials I had at home.
After several conversations with my scientifically-minded husband regarding the laws of physics, I scrounged up various plastic containers and began to conduct experiments.
Let’s just say I should have payed more attention to our conversations, as I ended some with some flooded counters and sopping wet dish towels.
Anyway. I do believe I have mastered the elusive chick waterer. I am excited to share my findings with you, in hopes of saving you several physics lessons and wet kitchen floors.
First off, here is what I came up with after treasure hunting around my home:
My intial idea was to repurpose this old parmesan cheese container for the top portion. I then cut the bottom off of a plastic gallon jug to make a “dish” that is around 3 inches tall.
However, after some trial runs, I found that the parmesan container didn’t work because the lid did not seal securely enough.
So I found a 48 oz lemon juice bottle instead. I highly recommend using a bottle that has a small cap, since it’s important that the container holding the water be airtight.
I then poked a small hole, about the diameter of a pencil, near the bottom of the jug.
I used a hot glue gun to attach the bottle to the tray. I didn’t want to use any sort of glue that might leach into the water and harm the chicks.
And now you are ready to fill ‘er up. The tray should fill until the hole is covered, and then stop.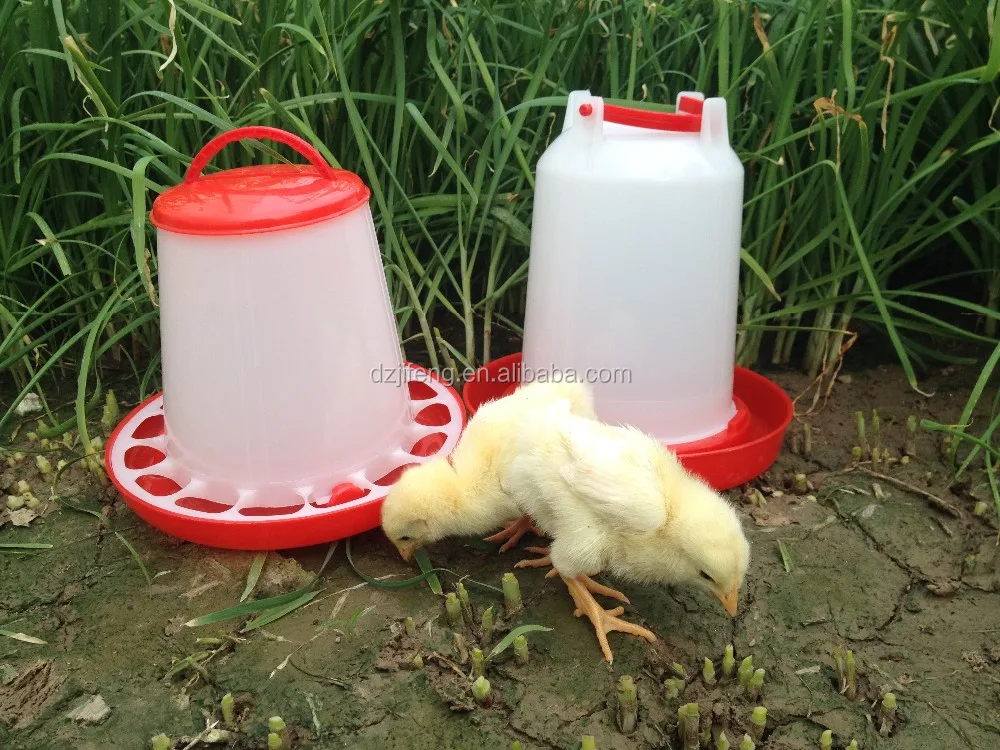 When the chicks drink, the bottle should slowly release water to provide fresh water at all times. A self-refreshing waterer is more ideal than an open pan, since it prevents the chicks from taking a bath or drowning. And we don’t want that.
Ready to make your own?
Homemade Chick Waterer Notes
- There are numerous options when it comes to raw materials. Dig through your recycling box, garbage can, or pantry to see what will work. The bottom tray needs to be several inches larger in diameter than your water container. Some ideas could include: milk jugs, yogurt tubs, gallon jugs, large plastic water bottles, etc.
- Make sure to thoroughly wash everything before assembly and don’t use any container that might have had substances that would be toxic to the chicks.
- The container that you choose to hold the water must have a lid and be air tight.
- Be mindful of where you place the hole.
 If it is too high, the tray will overflow. If it is too low, the water level might be unreachable for the chicks.
- If the water does not want to flow, try increasing the size of your hole.
Of course, these same principles could be applied to a larger scale to make a full-sized chicken waterer. If Prairie Baby was older, this would have made a great science experiment. But as of right now, she is more interested in trying to chew on the containers. Oh well, maybe eventually. 😉
Have you ever made a homemade chicken waterer? What materials did you use?
14 DIY Chicken Waterer And Feeders Ideas You Can Make Easily
Published: · Modified: by Allison · This post may contain affiliate links · This blog generates income via ads
Chickens love to create a mess while taking water on any domestic farm. Conventional waterers get dirty with contaminating particulates, causing deadly effects.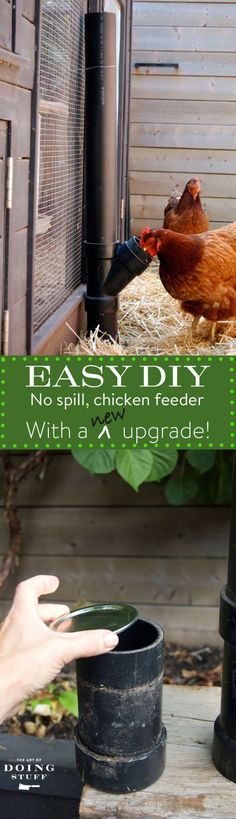 And you’ll have to make frequent checkups for refill, cleanup & decontamination.
Why not start framing the chicks with some modern household methods? There are several convenient ideas available on DIY chicken waterer. Check the list for narrowing down the options to utilize some of your invalid, useless materials.
1. Reshaped Empty Jug Waterer
Cutting an empty milk jug can give sufficient depth for holding enough water. The idea is elementary, requiring no additional details on words/pictures.
Looking into the standstill pictures, you’ll probably know what to do or how. Make sure the opening is reasonably large without featuring any sharp edge.
Click for more details
2. Baby Chicken Waterer
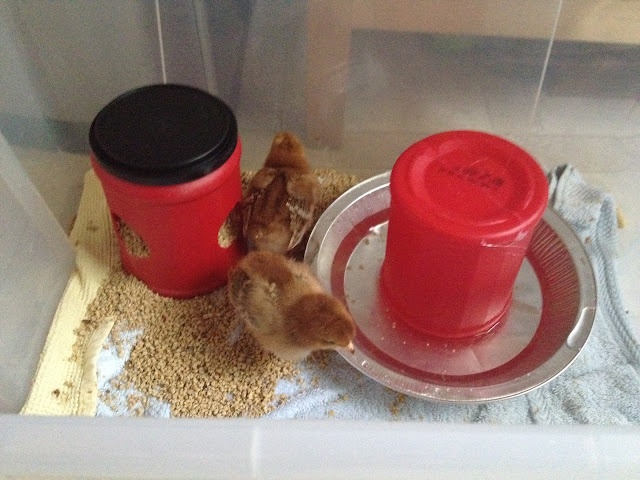
Even the smallest chicks need water but require particular caution. Likewise, you can’t think of any heightened or somewhat deep sources of water for newbies.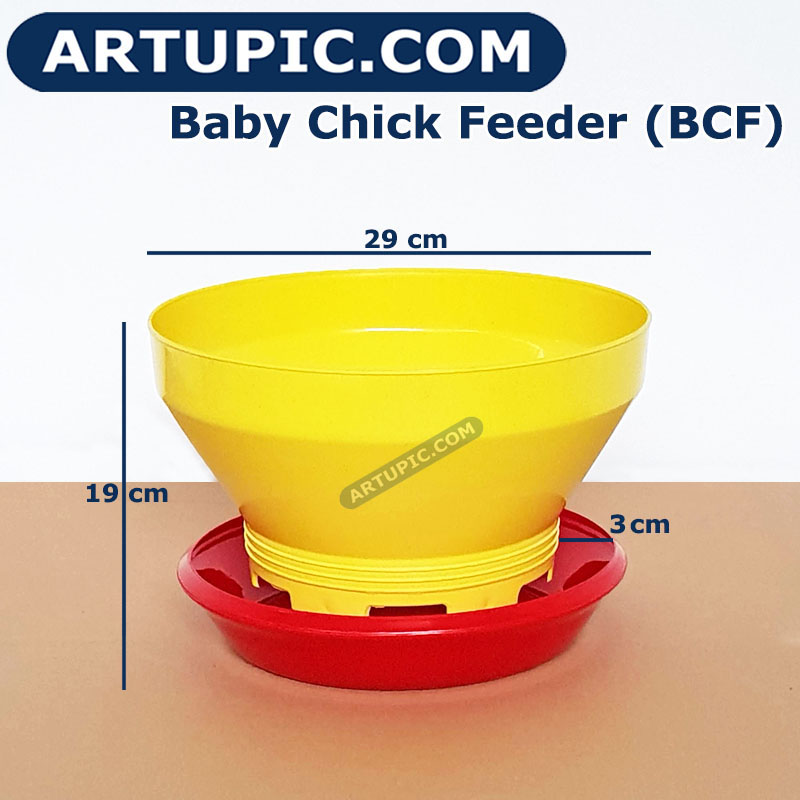
National Geography captures the ultimate trick of providing cute, small, baby chicks. The design is similar to the universal 5-gallon bucket watering system. But it utilizes a small container resting on a shallow plate to hold the water.
Onscreen numbered steps reveal the job in simple words with understandable commands. Poking some holes before filling the water will prep the system.
3. Homemade Automatic Waterer
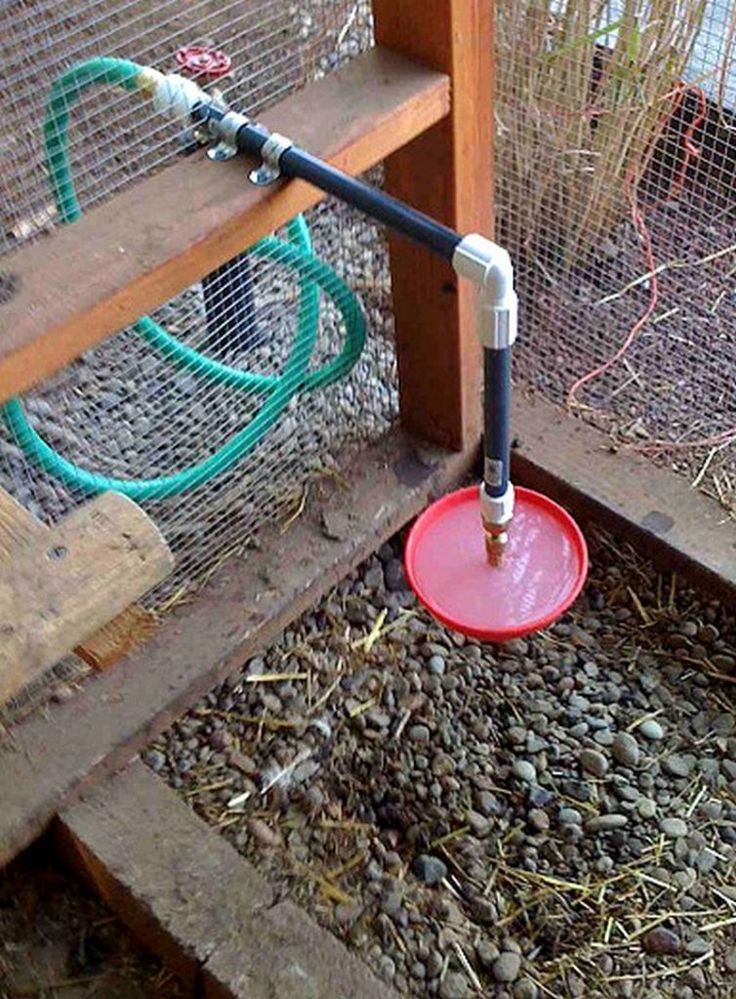
The project comes delightfully simple with no time-consuming steps or costly purchase. It gives an immediate backup for delivering water in the absence of the owner.
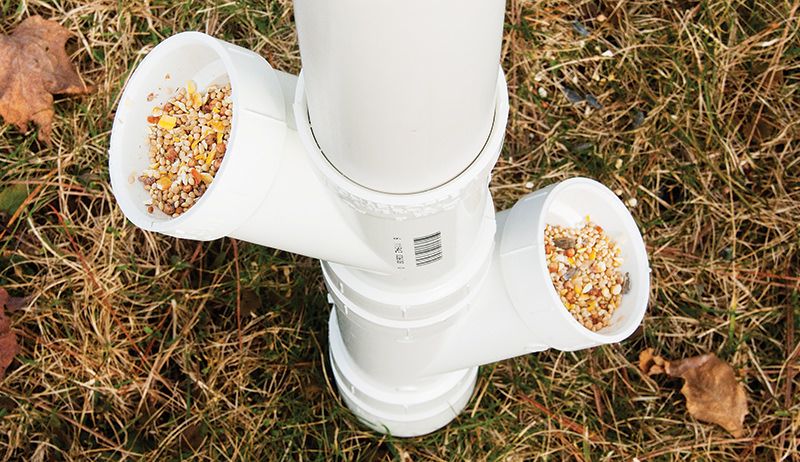
Trickle irrigation tubing through a reasonably sized PVC pipe can accommodate the facility. A 6” pipe, measuring 18” long rests on two coops to serve the water. And you can easily extend or shorten the requirement based on your farm facility or flock number.
Paying attention to the inlet flow with the outlet is specifically crucial for its design. The words should explain the entire assembly without taking much of your time.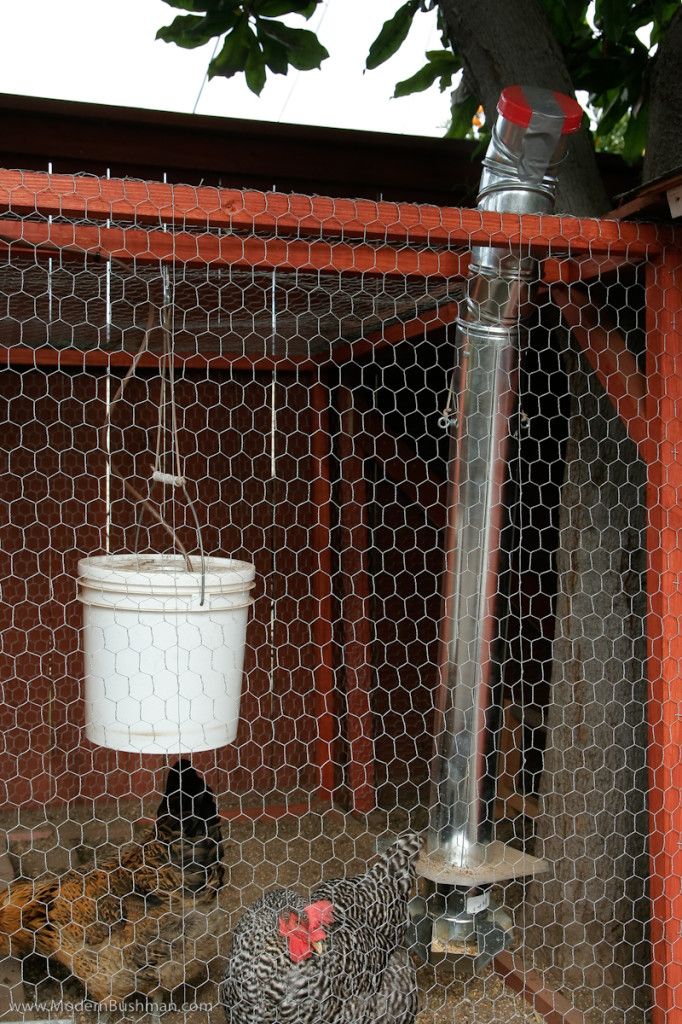
Click for more details
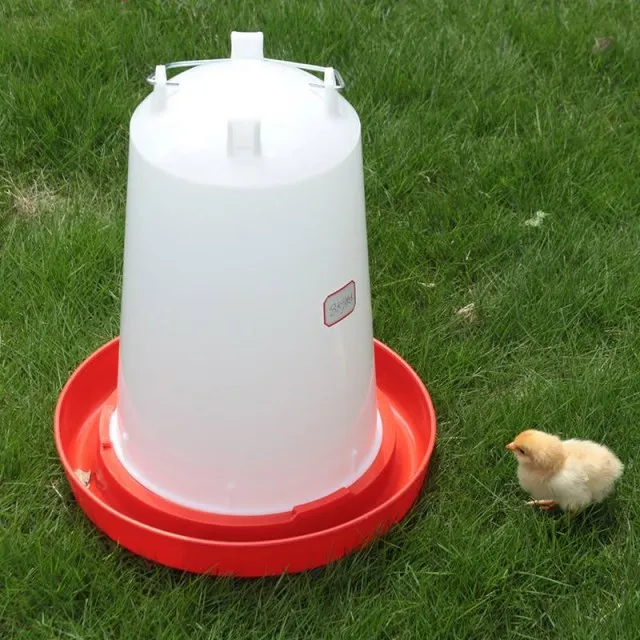
4. Basic Watering Facility
It appears more like an amateur homemade experiment on available resources. The tutorial utilizes plastic containers instead of a typical bucket or other materials.
You just need to open a hole right on the bottom of an empty plastic bottle. Place the modified container over a slightly larger plastic cap/pan/plate to fill the bottle with water. The outcome looks like a miniature version of standard DIY bucket waterer projects.
No doubt, the facility can meet immediate requirements for a limited number of chickens. Therefore, you’ll have to consider a larger facility for an entire flock.
Click for more details
5. Nipple Dripper Waterer
Using a nipple dripper can specifically eliminate the chances of water contamination. And the video comes with a simple yet functional project on a watering system.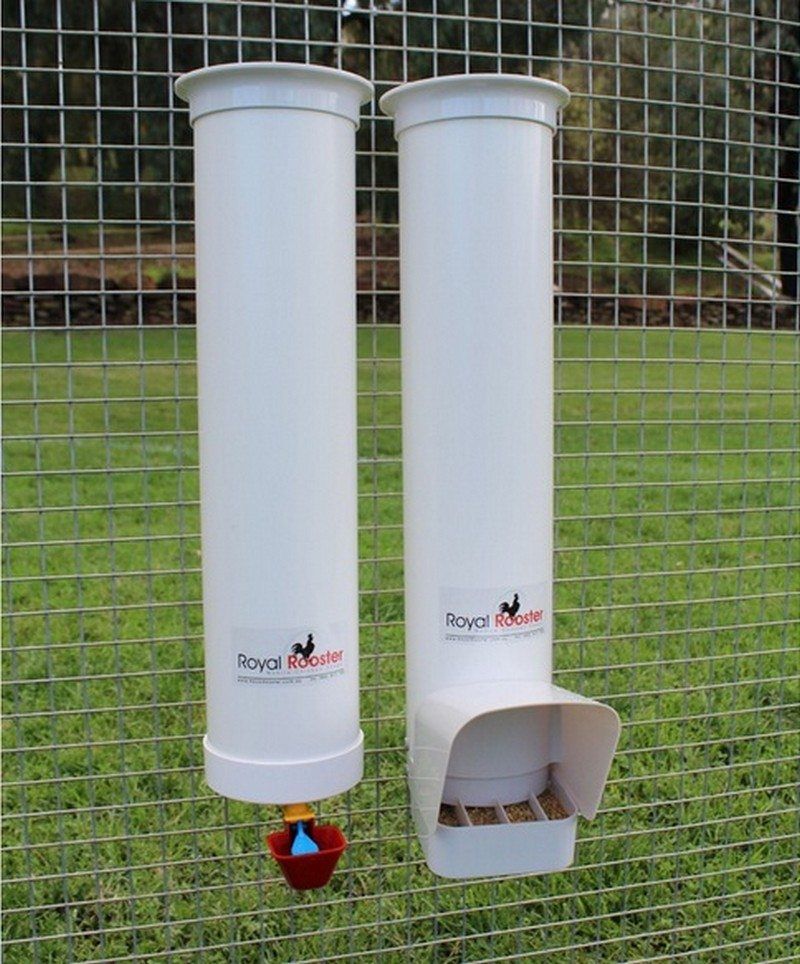 Live commentary will keep you engaged in the demonstration, explaining all steps on site.
The intended design features a reasonably sized water container with a drilled PVC pipe. You just need to insert the nipple drippers for feeding the chickens. Obviously, you can use different numbers of drippers, container capacity & facilitation on the flock size.
6. Automated Watering System
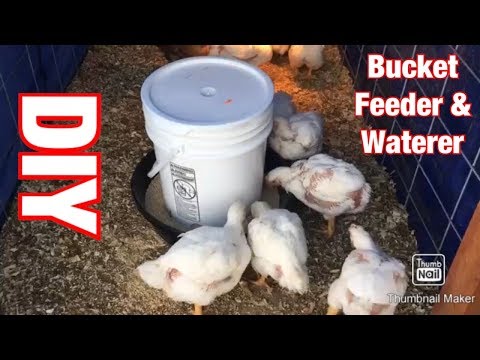
Spending a mere $5 will solve a great deal of work on your chicken farm. Apart from filling the thirst, the supportive assembly helps with the improvement of health.
The mainframe consists of one 5-gallon bucket resting on an oil pan or ground feeder. Electric drill with drill bit will induce holes for allowing the water to flow. There comes no defined section on the process; the presentation keeps an incredibly simplified notion.
Some very peculiar, useful & essential considerations come within the explanation. Among the sentences, you’ll find standstill pictures of the entire processing.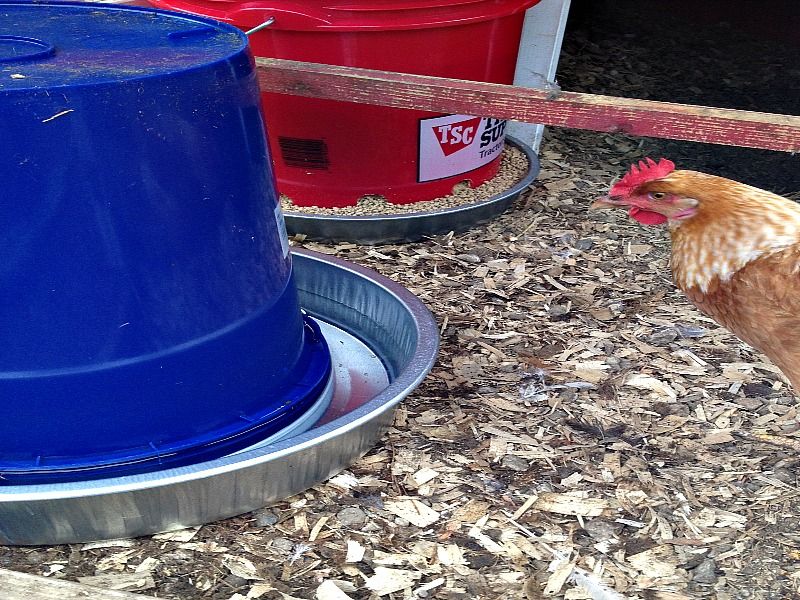
Click for more details
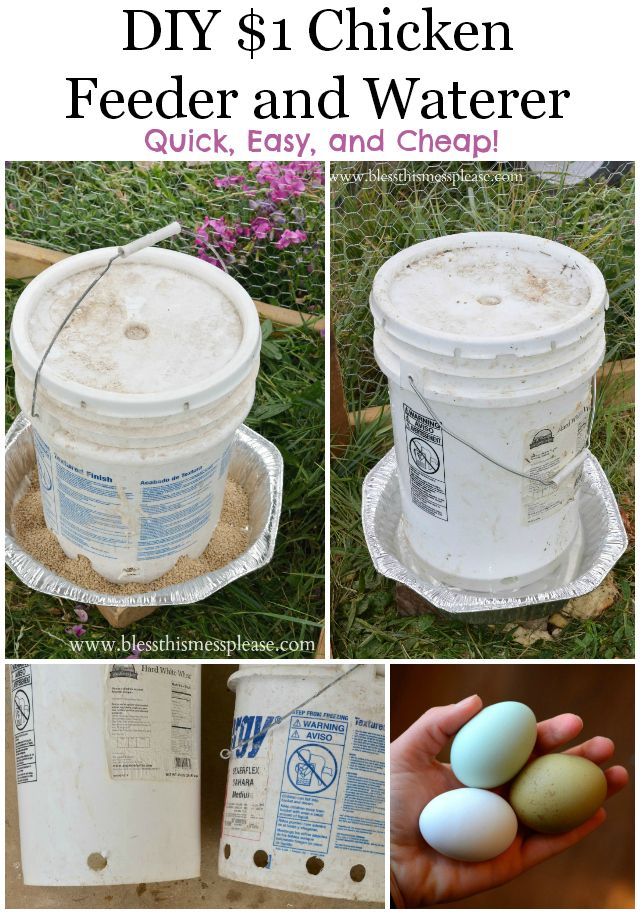
7. Cheap Waterer + Feeder
Though the subject specifically implies waterer, you can solve the feeding issue simultaneously. Standard 5-gallon bucket cover for both, letting you save further effort. Simple words without additional details appear to cover the basics.
As it happens, you’ll have to manage the supplies to keep the processing simple. The article already comes in separated segments – one for the feeder & one for the waterer. But preparing the bucket follows precisely the same method concerning with the drilling portion.
Integration of some convenient pictures will let you catch the implementations precisely. You just need to continue with the written information for absolute clarity. And the approximate cost remains close to $1, with leftover buckets.
Click for more details
8. Discarded Bottle Waterer
Shape the leftover empty bottles into a functional waterer for chickens. The video tutorial reveals the hacks of attaching two empty Coca-Cola bottles.
Like the video, two different sized bottles can make a perfect joint. Cutting half of one bottle’s horizontal side will open the watering trough. Connecting the larger bottle with the cut one through a glued cap will suffice the assembly.
Of course, the system can facilitate only a limited number of chickens at a time. You’ll have to think of something else for accommodating an enormous flock.
9. Effective Waterer Solution
It’s definitely one great way to make your farm more useful, functional & clean. The solution overcomes almost all the drawbacks of other ground-based waterers. In simple words, you can sigh a breath of relief from frequent refills or cleanups.
Joining some PVC pipes of a certain size will assemble the watering structure. It explicitly includes nipples to feed the whole flock without any discrimination. The idea comes incredibly efficiently, covering for baby, newbie & young chickens.
It starts with a complete layout, followed by optional steps for further enhancement. The article appears pretty long, featuring a good number of pictures. The images captured the whole process, explaining the task visually before the audience.
Click for more details
10. PVC Watering Container
Keep the chickens watered without any chance of an overturned water container mess. The simple yet mechanical DIY project lets you build a reliable watering structure.
There are only eight steps, covering from the needed supplies to finishing touches. Of course, the job requires a good number of basic hardware for the assembly. You just need to take measurements for making precise cuts, shaping the beams & establishing joints.
Likewise, the tutorial includes a satisfying number of pictures for each step. With the simply worded sentences, you can easily understand the sequence on the first attempt.
Click for more details
11.
 Self-Operating Water Trough
Introducing a simple watering trough is indeed the simplest solution. Assembling some common plumbing materials will provide a satisfactory watering feature.
Minimal background speech supports the introductory portion only. But the assembly appears in a time-lapse video depiction, capturing the entire implementation. The design utilizes two end caps on a half-cut PVC pipe (lengthwise) to shape the horizontal trough.
Rain barrel will collect the water; otherwise, you’ll have to put water by yourself. Attaching a standard garden hose should automate the facility during the rainy season.
12. Secured Chick Waterer
Everything you need to know about chicken waterer comes for the last DIY tutorial. The introduction starts with the limitations of popular, simple & practiced watering facilities. Right there, you should feel the necessity of introducing something more secure.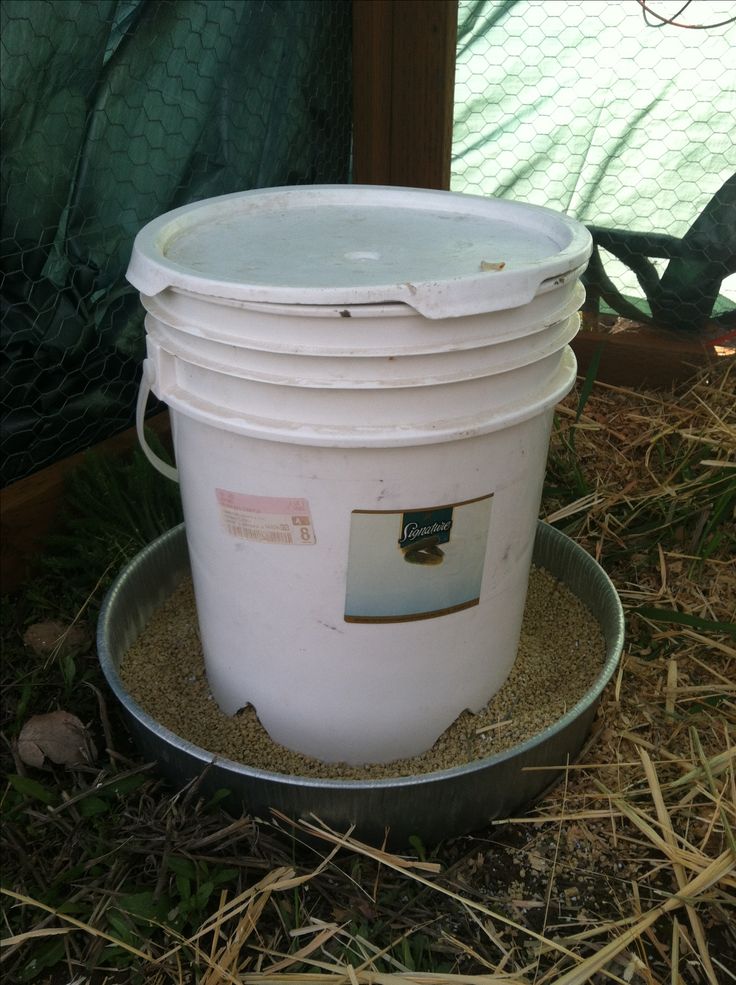
And the content includes several specified segments to cover the implementation. From materials to the mechanism, the guidance provides all the details within simple words. And structuring the intended waterer appears a straightforward task for any enthusiast.
It also reveals the tricks of getting your chickens attached to the new system eventually. The grit feeder will cover your feeding job, easing the whole management. You’ll get to utilize all the tips for ensuring maximum output from the designed system.
Click for more details
13. Winterized Waterer Design
Decreased winter temperature may end up freezing the watering system. The specialized project lets you save the flock from getting suffered from thirst.
Of course, the article provides guidance on the available methods than steps. It perfectly suffices the supporting title potion – ‘From Buy to DIY’. You just need to match your resources with the idea towards the implementation.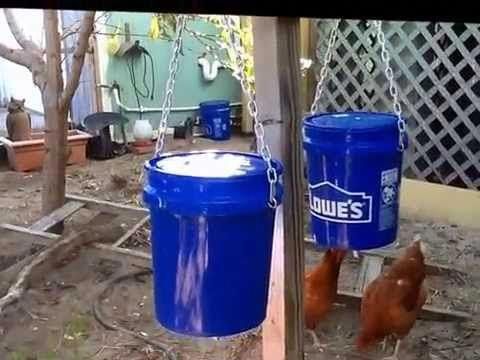
There are several ways to ensure the liquidity of freshwater in the shivering cold. Improving some readymade tools will help you to maintain a heated water flow.
Click for more details
14. Functional PVC Waterer
Upgrade your overall skills on DIY projects with innovative implementation. The featured job comes very funny, incredibly functional & reasonably satisfying.
It requires a mere 5-min long modification on a standard sized PVC pipe. You should lock the downside end with a flexible cap to prevent leaks from the bottom. Installing ⅔ readymade poultry water cups will serve the liquid to your chicken.
Floating water level indicator saves your hassle on regular checkups. Integration of copper without polluting the water will keep the system free of algae growth.
Conclusion
From the simplest to reasonably tedious, the article covers the useful ones.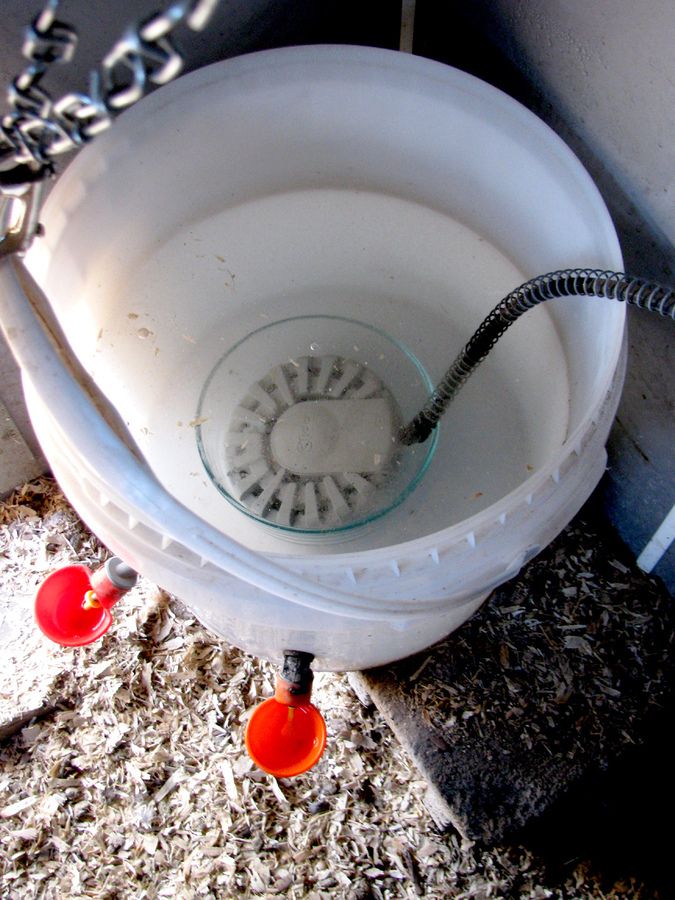 You just need to spend some of your time with all the options. Right there, you can quickly determine which method suits your interest.
Reader Interactions
Do-it-yourself feeder for chickens from improvised materials: photo and video
01/28/2022 18 788 2 0 Chicken coops, cages and feeders
so that it is comfortable for the birds. There are ready-made products that can be purchased in stores, but it is much more pleasant to make a feeder yourself. How to do it? What materials will be needed? All this and much more in our article.
Content:
- 1
Medical from improvised materials
- 2
Plastic bottle
- 2.1
Tools and materials
- 2.2
9000 9000
- 2.1
-
0
- 3.1
Tools and materials
- 3.2
Step-by-step instructions
- 3.1
- 4
Photo gallery
- 5
Video “Chicken feeders”
Feeder made from local materials
Feeders for chickens have different modifications. They depend on the types of feed supply, and the position of the structure itself in the cage. For example, they are divided by size, how they are attached, or how you will serve food.
Here is their classification:
- floor;
- wall-mounted;
- suspended;
- tray.
Making a product with your own hands is very simple.
General rules for creation:
- Little chickens must not be able to climb into the food bowl, otherwise they will leave their droppings there and will not eat food.
- The design itself should be comfortable in everyday use.
- The volume of the structure should be enough for all the chickens and preferably for the whole day, and most importantly, the size should be such that there is enough space for everyone to eat.
There are many types of homemade feeders from scrap materials, here are a few:
- Feeder based on a plastic sewer pipe. It can be left lying around for example after repair, or you can buy it at any store.
 And the assembly process is very simple and within the power of any craftsman. To do this, you will need a pipe with a sufficient diameter, a plastic pipe tee, a cap to fit the pipe and a file to cut it all.
 - You can also make a feeder using a small bucket left over from ice cream, for example.
- They are also of the bunker type, to create them you need a bucket of construction mixtures, not metal, for example, a sectional dog bowl, and most importantly, a very sharp knife.
- Ordinary canteen, made very simply, a hole is cut in a simple, for example, 5 liter plastic canister.
- For the more experienced, there is a plywood fixture, its production will take you more time and effort, but the reliability of this design will serve you for more than one year.
- With plastic, we can make many different feeders.
Next, we will tell you how to make a feeder from a plastic bottle.
Plastic bottle feeder
DIY bottle feeder for chicks is an easy solution for beginner poultry farmers.
This method is the most popular and easily accessible, you can do it too, and now we will tell you how easy it is.
Tools and materials
To get started on creating a design based on a plastic bottle, we need things that are at hand in every home:
- An eggplant with a capacity of 2 to 10 liters, at your discretion.
- Metal bowl, preferably a large basin.
- We also need a plastic funnel.
- And the most important thing is a hammer and up to 20 nails.
- We will also need a very sharp knife, which we mentioned earlier.
Step-by-step instructions
- On the bottom of your chosen bottle, cut a few holes. It is with the help of them that the food will get enough sleep for our chicks.
- Next, take the nails and heat them up, then insert them on the bottom of the bottle at the same level with the basin in order to delimit the approach of the chickens to the dish. The main thing is that the gap between the nails should be exactly for one bird.
- We attach a funnel-shaped dish to the neck, with the help of which the food will evenly fill the bottle. All this is shown in the photo below.
That's it, this feeder should be enough for 20-25 chickens, it remains only to place it in a cage with livestock.
Loading ...
Automatic chicken feeder
It is very important to provide chickens with good nutrition from the very beginning and the main thing is that it be on a constant basis, that is, at any time of the day, an automatic feeder will help us with this.
Tools and materials
We need:
- sharp knife;
- 1.5 or 2 liter bottle;
- food bowl, one and a half times the width of the chosen bottle;
- screw.
Step by step instructions
- Cut off the bottom of the bottle.
- Cut off the neck about 7 cm from the edge.
- Cut out holes so that the feed can flow evenly.
- Punch the cap with a screw.
- We connect them as shown in the photo.
Everything can be filled with food and put on your chicks. Feed should be enough for the day and you do not need to check every five minutes for its availability.
Here we have told you one of the intricacies of poultry farming. In the video below, we have selected several more types of feeders to create at home, which will certainly interest you.
Photo gallery
- photo 1. Chickens eat food
- photo 2. Feeding for feeding chickens
- photo 3. Chicken and plastic feeder
- photo 4
- Photo 5. Chickens in a cage eating food
- Photo 6. Dimensions of a homemade structure for chickens
- 1 Types of feeders
- 2 Basic requirements for a feeder
- 3 Most popular designs
- 4 Vacuum automatic drinker for chicks and indoo
- Grooved . The feeding trough has a restrictive removable lattice and several departments for a forage. Thanks to this, it becomes possible to fall asleep several types of food at once.
 It is easy to take care of such models, as they are installed outside the cages. This design is used to feed adult chickens.
 - Tray . This model is suitable for feeding small chickens. The container has a flat shape, and its edges are equipped with sides. They protect the food, preventing the birds from taking it all over the cage.
- Bunker . The daily rate of feed is poured into a closed bunker, which supplies grain gradually, during the day.
- Economy . Birds love to rake and scatter food around the house. To prevent this from happening, the container is protected with special devices. Nets, jumpers, sides and various turntables not only allow you to effectively regulate the consumption of feed, but also protect the feeders from getting various debris and droppings into them.
- Care . The light and collapsible container is easier to care for.
- Strength . The material from which the feeders are made must not be deformed. The container is securely fixed so that it does not turn over on its side from a large number of chickens.
- Cut one bottle into two equal parts. The upper part with the neck can be thrown away, and in the lower part we cut several identical holes around the perimeter. Their size should correspond to the size of the chicken's head.
- To prevent the birds from getting hurt on the cuts of the holes, their edges are carefully processed.

- We put the second bottle into the finished container and fix it. The bottle is placed upside down, the bottom is cut off from it first.
- The container is covered with a bowl after pouring the feed. This is necessary so that atmospheric precipitation and various debris do not get inside.
- Use a utility knife to make the required number of holes in the bottom of the bucket.
- A bowl is attached to the bottom of the tank. Screws are used as fasteners.
- Feed is poured into the tank and closed with a lid. It protects the food container from chickens.

- First, prepare a design drawing. According to the drawing, the front and back parts are cut out of plywood. The size of the front part is 40 × 50 cm, the back is 40 × 40 cm. They are connected by two side walls. In this case, the side elements must have a conical shape. The size of the lid is made a few centimeters wider than the top of the container.
- All parts are fixed with clamps and screws.
- To prevent various discrepancies from appearing during the assembly of the product, the first step is to create a design drawing. It indicates the exact dimensions of the bottom, side and end walls, as well as the beam. For example, the bottom size is 15 × 100 cm, while the two side walls are 8 × 100 cm in size, the width of the end parts is 15 cm, the length of the top bar is 100 cm, and its width is 3 cm.
- We transfer the data from the drawing to a wooden material. We cut out each part and carefully connect it with fasteners. Nails or screws are used as fasteners. If gaps remain at the joints, food will spill out through them.

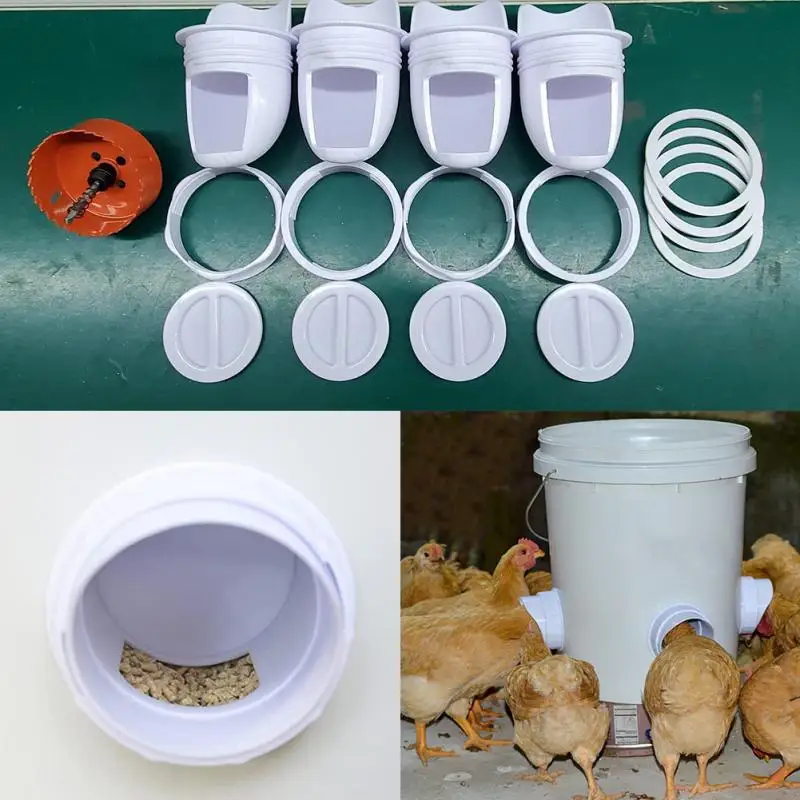
- Vertical design . The product is assembled from three pipes of different diameters and a tee. We take a pipe 20 cm long. We fasten a tee on one side of the workpiece, and put on a plug on the other. It will serve as the bottom of the structure. The hole from which the chickens will peck food is made from a 10-centimeter piece of pipe. It is attached to the side elbow of the tee. The third pipe (70 cm) is installed on the remaining opening of the tee. The finished structure is fixed with brackets on the wall of the chicken coop.
 Feed is poured into the pipe and closed with a plug. This will protect it from contamination.
 - Horizontal design . For the product you need a pipe 1 meter long. In the middle of the pipe we cut out one longitudinal hole or many small ones, and close its edges with plugs. The design is installed on wooden legs, which are made from wooden bars. The feeder and legs are fixed with self-tapping screws.
- Fill the bottle with water and screw on the cap.
- Wire is used to make a frame that is attached to the wall of the house.
- Insert a water bottle upside down into the frame.
- Place a bowl under the container, leaving a small gap.
Video "Chicken feeders"
This video describes the creation of several types of feeders from plastic containers.
types, requirements, how to make a bunker, vacuum drinker out of a plastic bottle, wood, PVC pipe
Every poultry farmer knows that raising chickens is a troublesome task that requires a lot of money.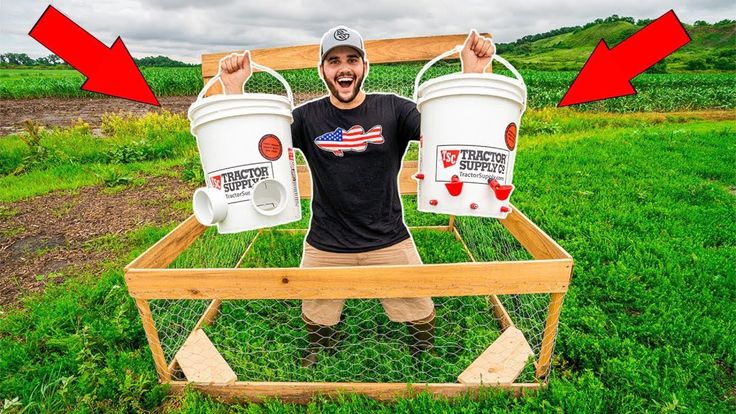 The purchase and rational consumption of feed is the main concern of the farmer. Appropriate feeders will help to greatly reduce his costs. Convenient factory-made automatic feeders are expensive; to save money, you can make a container for feeding birds yourself. To figure out how to make a chicken feeder with your own hands, you need to consider all types of products.
Contents
Types of feeders
Homemade feeders are distinguished according to the material from which they are made and according to the method of feeding. According to the type of feeding, there are:
Feeders are made of wood, plastic and metal. The material is selected depending on the type of feed. Wooden structures are suitable for dry feed, compound feed, grain and mineral supplements. For wet feed - plastic products, since dried food residues are easier to wash off plastic. Grass bins are made of metal.
Feeder basic requirements
Easy care, durability and economical use of feed are the minimum requirements that any feeder must meet.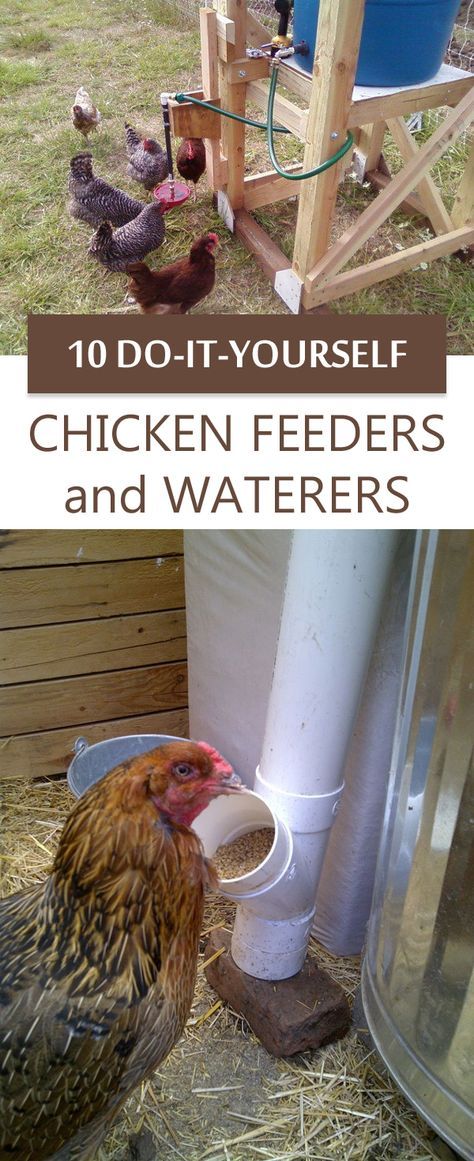
It is important to observe the correct dimensions of the feeders. With a small capacity there will be poor access to food. Because of this, weak birds will not be able to break through to feed between stronger individuals.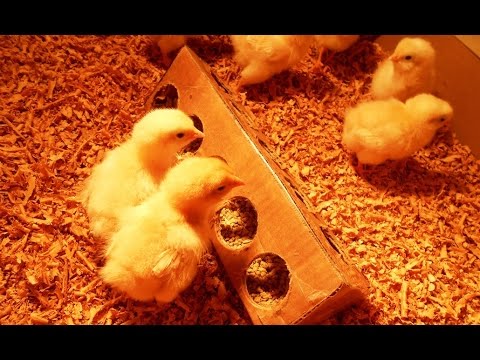 But the main task of the feeders is to feed all the chickens. When creating a structure, you need to know that for one chicken there is 0.5 mm of space in the feeder, for an adult bird - 100 mm.
Most Popular Designs
Feeders for chickens and hens are made in several ways from any material at hand. You can use simple plastic bottles, sewer pipes and more.
From plastic bottles
The easiest way to make a homemade feeder is to use 5 liter plastic bottles. To make, you will need 2 bottles, a knife and a flat bowl.
If the hole is cut several times larger, the feeder can be used as an automatic drinker for dogs.
From plastic bucket
For the manufacture of a plastic bucket with a lid and a sectional bowl. The size of the bowl should be larger than the diameter of the bucket.
The compact bucket feeder is ready. A certain amount of feed is automatically poured into the bowl. For small chickens, you can make a small nibbling feeder according to the same principle. A mayonnaise bucket is used as a base.
Automatic hopper feeder
You can make your own automatic bird feeder from plywood and steel sheet.
To protect against the development of bacteria and parasites, the container is treated with an antiseptic.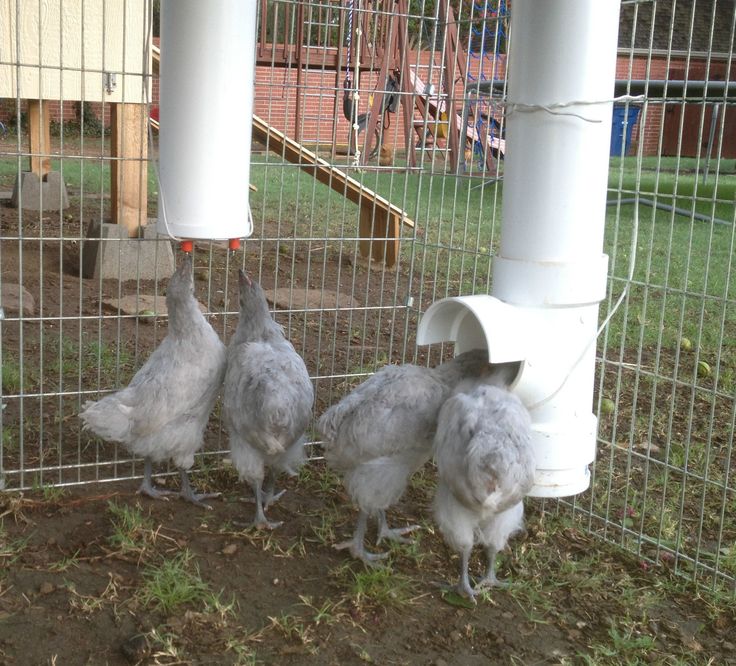
Simple wooden model
For a large number of birds, a wooden feeder is made, similar to a trough. This model is particularly strong and durable. Two types of food can be laid here: dry and wet. The structure is assembled from massive boards.
Feeder needs regular cleaning and cleaning which is its only drawback.
PVC pipe model
Chicken feeders made of plastic pipes are considered the most reliable and capacious. You can fill about 10 kg of feed in them, and the wall mount will prevent the container from tipping over. With the help of sewer pipes, vertical and horizontal feeders are made. Finding material is not difficult, as it is sold everywhere and has a low cost.
The disadvantage of pipe feeders is that they are difficult to clean.
Greenery feeder
To prevent broilers from dragging grass all over the cage, a green feeder is made from metal mesh and plywood. Fine mesh is folded into a ring , joining the edges. Plywood is used as the bottom. The top of the container is covered with a lid. Due to the convenient design, dry grass is easy to replace with fresh herbs.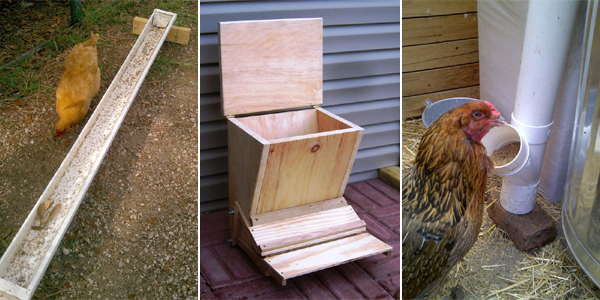
Vacuum drinker for chicks and indoo
There are birds that need to drink plenty of water every day. These include ducks and Indians. A self-made vacuum drinker for chickens will help provide birds with water. It has a simple design. Use plastic bottle and shallow bowl as material.
Indow drinker ready , just unscrew the lid and water will flow into the bowl.
Drinker heater
Drinkers for ducks must be heated in winter. Otherwise, with the advent of cold weather, the birds may be left without water. Very often, at sub-zero air temperatures, drinkers begin to freeze. It is possible to do the heating with your own hands if the house is equipped with electricity.