Feeding baby parrot with syringe
Psittacine Pediatrics: Housing and Feeding of Baby Parrots
Introduction
Hand-feeding baby birds is an vital part of any successful aviculture operation. Psittacine eggs that are artificially incubated or babies pulled from their parents at a young age, must be hand-fed for three to five months. Hand-fed birds make tamer companions and increase production if the parents re-clutch. Breeding pairs may neglect all or the youngest of their babies or they can cannibalise them. With these pairs there is no choice but to pull the babies and hand-fed.
Most exotic birds kept in captivity, such as psittacines and the many types of “soft bills” are altricial that is their young are hatched blind, helpless in food gathering and are unable to thermoregulate. Since poultry are precocial, little information on their relatively easy care is directly useful for parrots. Aviculturists have by trial and error methods, developed procedures to successfully raise hatchlings right from hatching.
Hygiene and Baby Movement
Nursery management must have as the main goal disease prevention. With chicks lacking fully developed immune systems, normal gut flora just becoming established, and parent pairs previously exposed to many different organisms, stress due to poor feeding or inadequate environment can quickly lead to disease. The nursery usually has a concentration of such susceptible individuals so there is greater chance of an epornitic occurring here, crippling the cash flow of an operation.
The flow of babies within a nursery can reduce the chances of cross-contamination. There should be no mixing of parent raised babies, even if the parents appear perfectly healthy and have been with the breeder for many years. Subclinical carriers of Psittacine beak and feather disease, polyomavirus and other diseases may transmit these vertically (via the egg) but with greater probably horizontally (directly) to babies in the nest. If these babies are pulled and not properly handled within the nursery, significant mortality could result.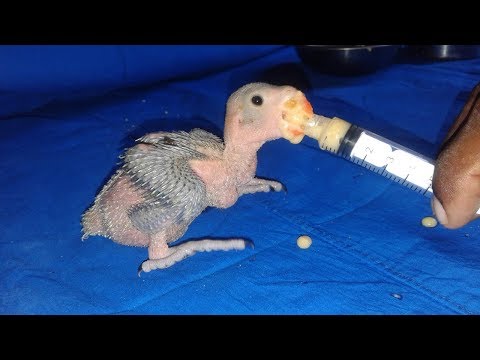 Increasing the number of hatchlings from artificially incubated eggs can minimize the chance of parent birds infecting their offspring.
If parent fed chicks are to be hand-fed they should be pulled from the nest box before three weeks of age or the time of emergence of pin feathers on the wings. Older chicks will be stressed for the first few days in the strange nursery and may not want to be fed. However once they are hungry enough, usually about 12 hours later, they will accept hand-feeding.
Chicks to be hand-fed should be pulled from the nest box before three weeks of age or the emergence of pin feathers on the wings.Hands must be cleansed before and also between feeding and handling different babies and clutches. Disposable latex gloves can be changed between each group of babies or allow hands to be wiped with a disinfectant without irritating skin. Babies should not be removed from their containers unless necessary and a clean paper towel placed under each baby when weighing.
Food Preparation
A fresh batch of formula should be mixed up for each feeding. This is more hygienic and convenient since food does not need to be stored. To properly prepare the diet for feeding, a balance for weighing formula and accurate volumetric container for water should be used. Use accurate measuring devices, clean utensils and stir the food well.
Cooking time will vary slightly with model of microwave oven and type of container. Plastic containers seem to cool the food slower than ones made of glass. The final temperature of the food, just before feeding, should be slightly warmer than human body temperature or about 40°C (100°F). Be careful not to overheat the food as burning the babies can occur if the food contains hot spots or is only a few degrees too hot.
Table 1-
Water/Dry Mash Ratio of hand-feeding Formula
| Age of baby | Amount of dry mash | Volume of Water | |
| Hatching to 2 days | 1 tbs = 9 g (15 cc) volume rario 1:5 weight ratio 1:7 (12.  5% Solids) 5% Solids) | 72 ml | |
| 3 days to weaning | 1/2 cup = 64 g (120 cc) volume ratio 1:2 weight ratio 1:4 (20% Solids) | 240 ml |
Formulas for young babies, up to day two to four, should be significantly more diluted, about 5 to 10 percent solids. These young babies may also develop better on less rich diets having lower fat and protein and more easily digested carbohydrates (another area requiring research). Older babies should receive formula with a solid content in the 20 to 30 per cent range which usually results in a consistency a little thinner than apple sauce. Do not assume that such a texture represents the correct nutrient density as thickeners can make a formula with low dry matter levels appear much denser. Formula can be maintained at the correct feeding temperature by setting it in a bowl of hot water.
Formula food preparation for hand feedingMethods of Feeding
There are several possible techniques of feeding young parrots.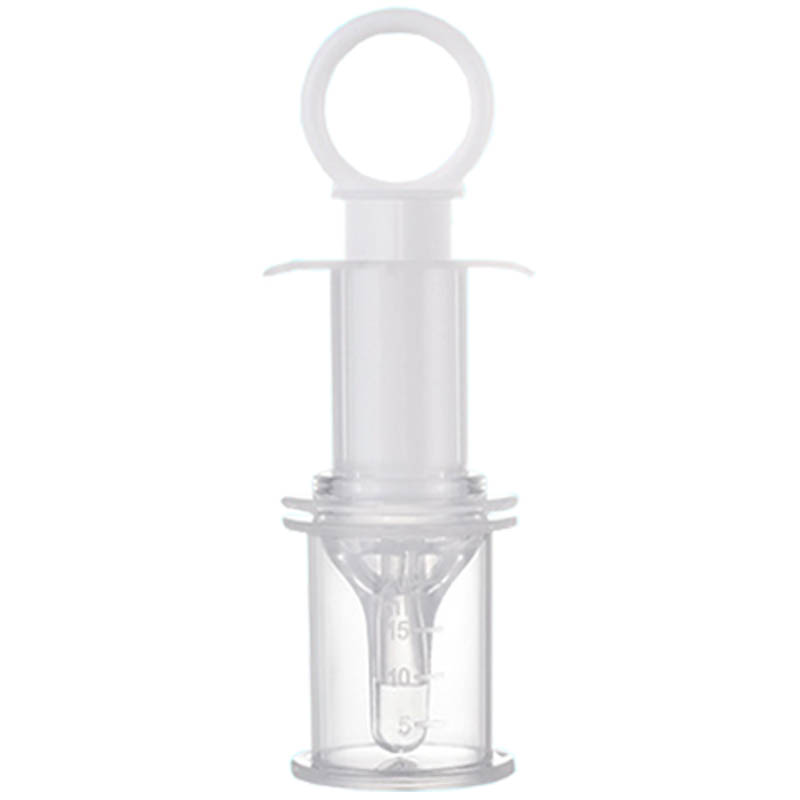 Psittacine chicks produce a feeding response when the commissures of the beak are touched. This bobbing action closes the glottis and food passes into the crop. A bent teaspoon can be used to feed the formula but this can be a messy and time consuming way of feeding. Spoon feeding may produce a tamer bird because of the increased handling and is the preferred method of feeding of some of the most experienced aviculturists in the world (Low, 1987). However, there may be a greater chance of disease transmission with spoon feeding as the spoon is repeatedly touching the baby’s mouth and then dipped into the formula thus contaminating the food for the other babies.
Small plastic pipettes are used by some breeders to feed younger babies. Since these pipettes can only hold a few ml of food they require many repeated dippings into the food container with the same potential for disease spread as with spoons.
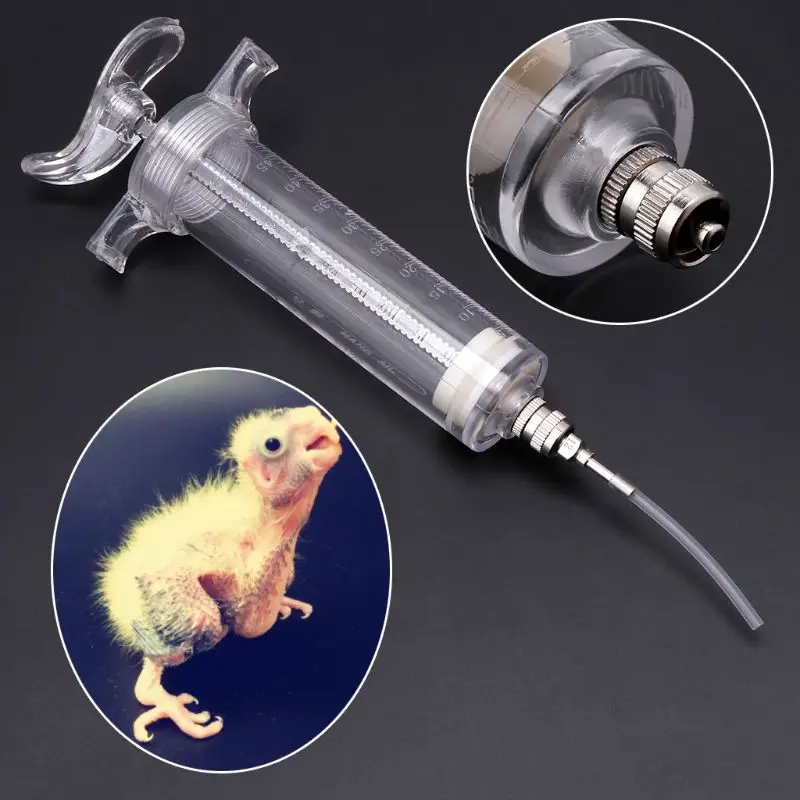
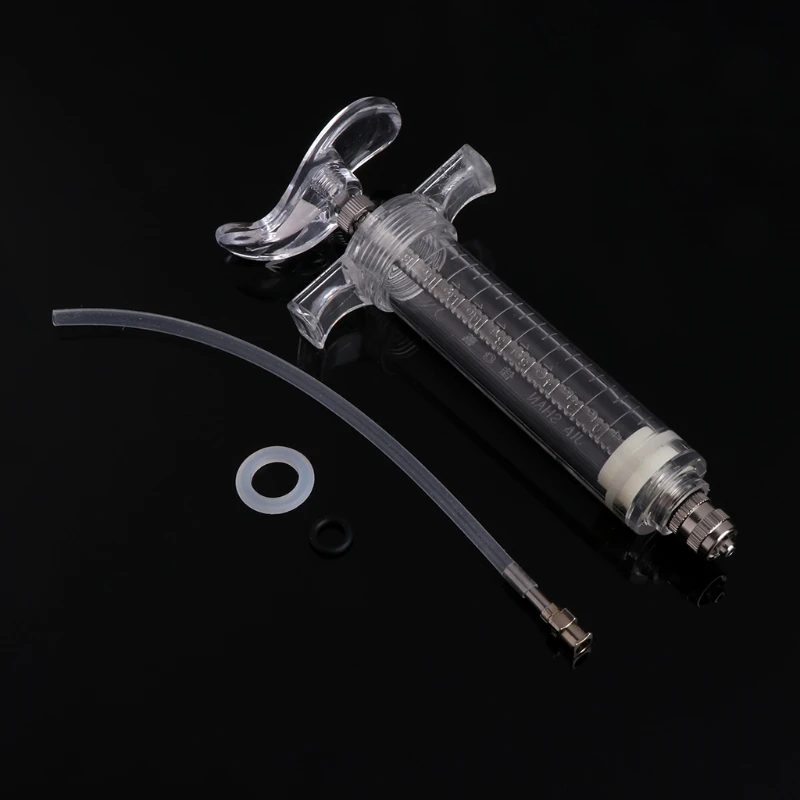
Catheter tipped syringes of various sizes are becoming popular instruments in feeding baby birds.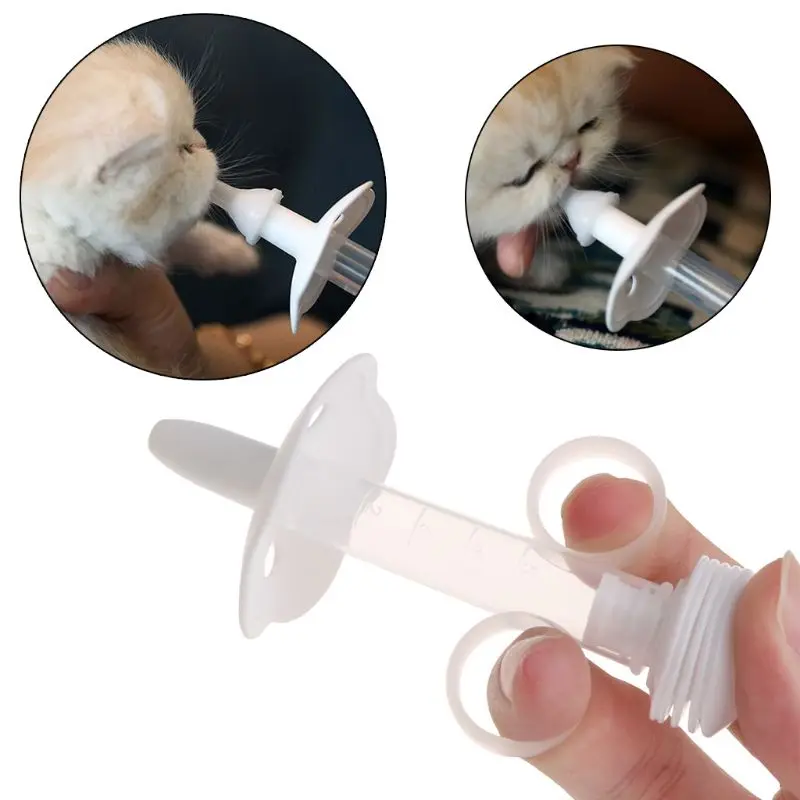 Syringes can be used to slowly dribble the food into the mouth of the bird. Syringes allow the measuring of the amount of food fed and are easier to use. Silicone rubber and “O” ring syringes last longer than black rubber ones. Better still are syringes with no rubber gaskets and simply a concave round end. Soaking in tamed iodine disinfectant between feedings.
Syringes are usually used to shoot the food into the crop of the bird. Hold the baby’s head loosely by placing a finger on both sides of the beak and the back of the head. Place the tip of the feeding syringe into the left side of the birds mouth and once the bird gives a feeding response (head pumping) shoot the food towards the back of the head. This procedure is relatively safe but requires some practice before it is done without a mess. The advantage of syringes is that a separate one can be used for each clutch of babies so that if one pair produces diseased offspring it doesn’t spread to the other babies.
A short soft rubber tube can be attached to the tip of the syringe which can then be placed further back into the mouth to prevent food going down the trachea. However this may have a behavioral effect on the baby and may prolong the weaning process since this is the least natural of all the feeding methods.
Fill the crop well without over stretching it and allow it to completely empty between feedings. Do not confuse the small pouch of loose skin around an empty crop as a crop that still contains food. Babies have looser skin around the crop to allow it to stretch out. Sick babies are more likely to aspirate themselves and the crop becomes flaccid. These babies should be placed in small containers, like disposable plastic cups, which hold them up prevent them from falling on their crop. Feeding frequency or gut transit time is dependent on the percent solids of the formula, its digestibility and caloric density. Babies less than 3 days old get fed six times a day and older ones 4 times a day.
Metal feeding tubes are only necessary when force feeding sick birds.
Whatever implements are used they should be disinfected between feedings and replaced periodically. Some aviculturists boil syringes in large pressure cookers or in regular pots but more commonly cold disinfectant baths are used to soak feeding equipment. Gluteraldehyde based products appear the strongest disinfectants however quartenary ammonium compounds or iodophors are acceptable under normal conditions. Phenol based disinfectants are very irritating to skin and chlorhexidines do not effectively kill pseudomonas bacteria which are common in wet environments and water. At HARI we lost several two month old cockatoos to pseudomonas when we used chlorhexidine to disinfect syringes. The bacteria were cultured directly from the syringes and upon close examination colonies could be seen in the corners of the syringe shafts.
HOUSING BABIES
Brooders and Containers
There are as many different and successful baby brooders as there are hand-feeding formulas.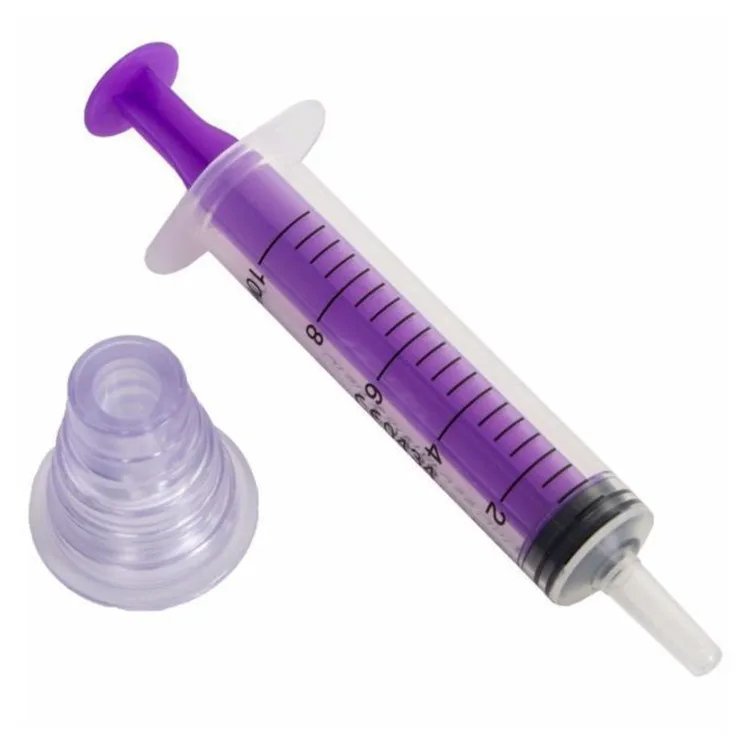 Some are homemade wooden boxes with electric elements or lights to keep the babies warm. Others are adapted metal game chick brooders or glass aquariums with custom made heaters to partially cover the top or bottom of the tank. Brooders set up with heating pads often result in cooked babies, thermal injuries or cold babies since precise, constant temperature maintenance is difficult (Stoddard, 1988). Another problem with homemade or adapted brooders is their usual lack of humidity control. Human baby incubators and specific commercial baby bird brooders have more accurate temperature and humidity control but are difficult to obtain or can become expensive when many babies have to be housed.
Brooders should be relatively small as an important part of disease prevention with babies is to keep clutches separate and this is limited with large brooders. They should provide constant, even heat that can be finely adjusted, be well ventilated, easily cleaned and have a water receptacle to add humidity.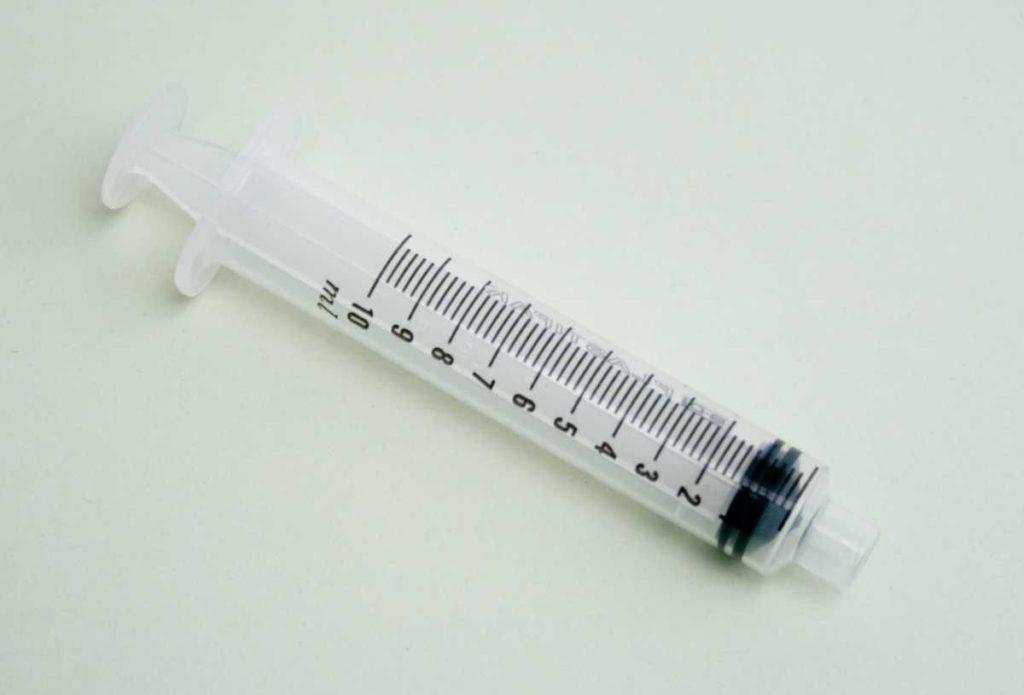
One set-up which meets many of these requirements uses small aquariums to contain babies which is then placed a much larger aquarium or plastic pan filled with about three or four inches of heated water. The water is maintained at 40°C (100°F) with a submersible thermostat aquarium heater. Salt should be added to the water to keep down the growth of pseudomonas and other pathogenic bacteria. Evaporated water must be replaced so that the horizontally laid heater remains submerged.
Bedding
Young babies, less than two weeks of age, can be kept on paper towels in plastic cups, re-used yogurt containers or small aquariums. Babies should be sitting on clean and dry bedding which is therefore changed at each feeding. This may not provide firm enough footing for some birds which should be transferred onto paper or wood shavings or towels to avoid splayed legs. When babies are two-three weeks old, we transfer the babies to a small plastic containers that contain a few layers of newspaper under a few inches of wood shavings.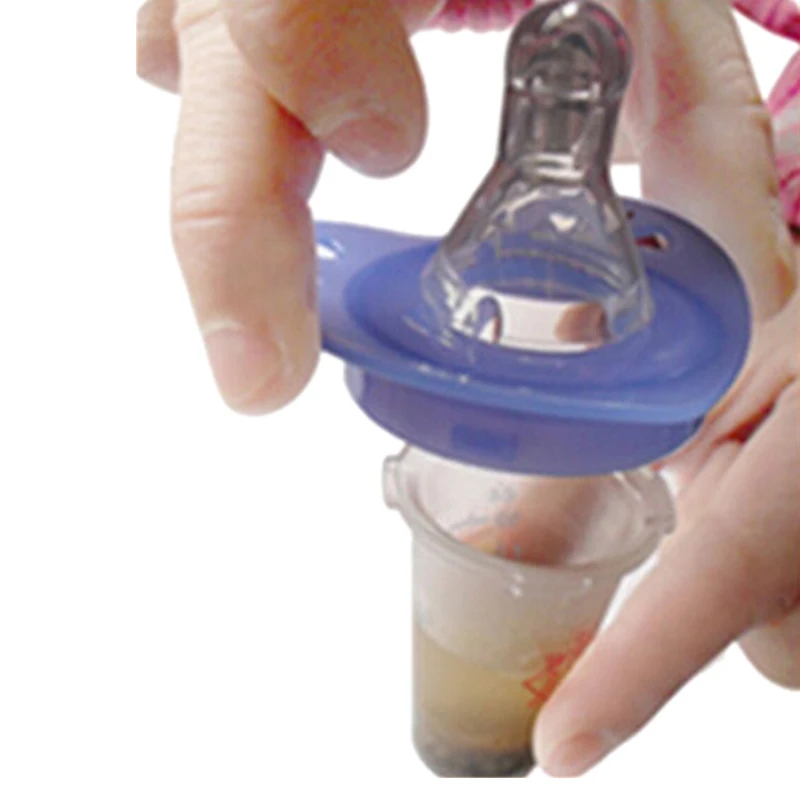 Corn cob, walnut shell and pellet type bedding are not popular or losing favour with aviculturists because of various drawbacks.
Some babies may have a tendency to eat shavings, perhaps as a result of other complications such as calorie deficient diets or excess heat. Using towels has the advantage of being able to clearly see the baby’s droppings but the feet and feathers can get caked up with feces and time and energy must be spent on washing towels. Disposable diapers are expensive and wasteful. Babies stay cleaner when they are kept on processed paper product or shavings.
Temperature
The ambient temperature and humidity of baby altricial birds must be regulated. Young, up until they are feathered out, need supplemental heat above room temperature to thrive and even survive. Chilled babies, either because of neglectful parent birds or power failure to the brooder heater, will deteriorate quickly. These chicks may die later even after being warmed up. Nursery room temperature should be kept warm between 78 and 82 degrees fahrenheit.
The brooder temperature for recently hatched chicks can remain at the hatching temperature of 35.0°-36.5°C (96°-98°F) for the first few days. Once the baby is eating more solid food, at about 2-3 days of age, it should be kept at a lower temperature of 33.5°-35.0°C (92°-96°F) depending on the species and its metabolism. From there up to about two weeks of age babies should be in an environmental temperature of 32.0°-33.5°C (90°-92°F) (Table 2). If temperatures are to high the chick may exhibit panting, unrest, hyperactivity and have dry, reddened skin (Clubb and Clubb, 1986). Cold temperatures may result in death, poor gut motility, crop stasis or other digestive disorders, failure to feed or beg, inactivity or shivering (Clubb and Clubb, 1986).
Table 2-
Approximate Brooder Temperature
| Age | Temperature °C | Temperature °F |
| Hatch to Day 2-3 | 35.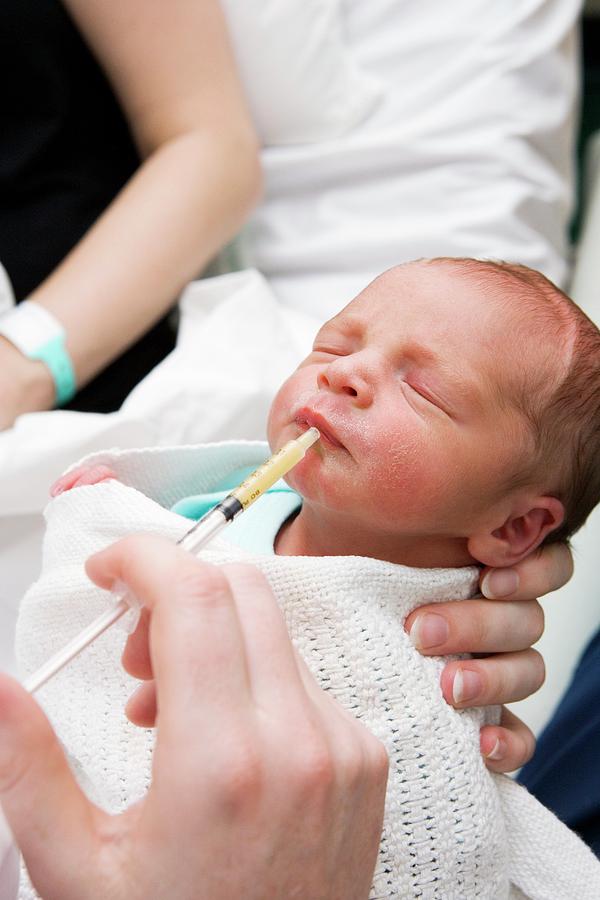 0-36.5 0-36.5 | 96-98 |
| Day 3 to Day 14-21 | 31.1-34.0 | 88-94 |
| 3 weeks to Weaning | 25.0-30.0 | 76-86 |
Humidity
Natural nesting cavities in wooden tree trunks probably have a high relative humidity. Moist droppings from any babies within them will add to this, resulting in an environment of high humidity. These are unfortunately not the humidity levels found in most nursery brooders (Clipsham, 1989b). Most babies are traditionally raised on dry heat with heating pads, light bulbs or electric coils.
A range of 55-70% humidity produces quieter, fatter babies with a greater growth rate than those kept at levels of 15-35% (Clipsham, 1989b). Ambient humidity for hatching eggs and hand fed chicks can be increased by increasing nursery room humidity and, more effectively, by using containers of water as a source of both heat and humidity. A small aquarium submerged in and surrounded by a water bath heated by a submersible aquarium heater is very effective for eggs and up to one week old babies.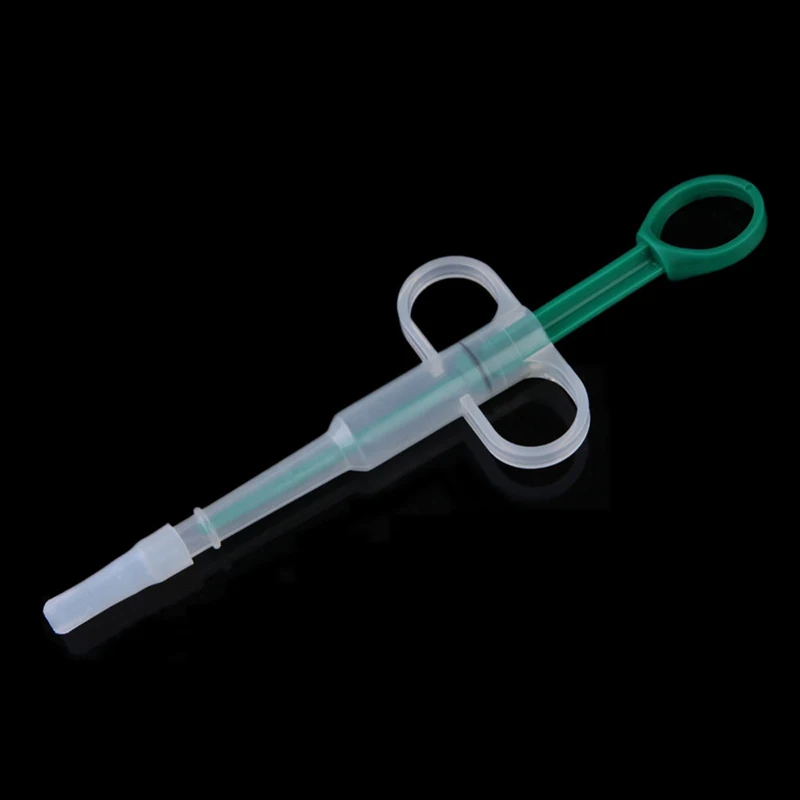
Identifying the Chicks
Babies must be properly identified in order to follow the linage and pair unrelated birds in the future. If considerable numbers of birds are being raised it becomes difficult to maintain the identity of similar babies from different parents. Several companies make closed leg bands in many different sizes. These bands can only be slipped to the birds leg when their feet are a small size. The best time to apply the bands is at about 2 – 3 weeks of age. Place the three larger toes through the appropriate sized band and then slide the band over the small inside toe which is held back against the foot.
Microchips implants are now available but are not yet commonly used for identifying baby birds.
Record Keeping and Growth Rates
The goal of any exotic aviculture venture is to raise healthy babies with minimum losses. Thus achieving the fastest growth rates possible on a particular formula are not as critical as the proper development of the baby.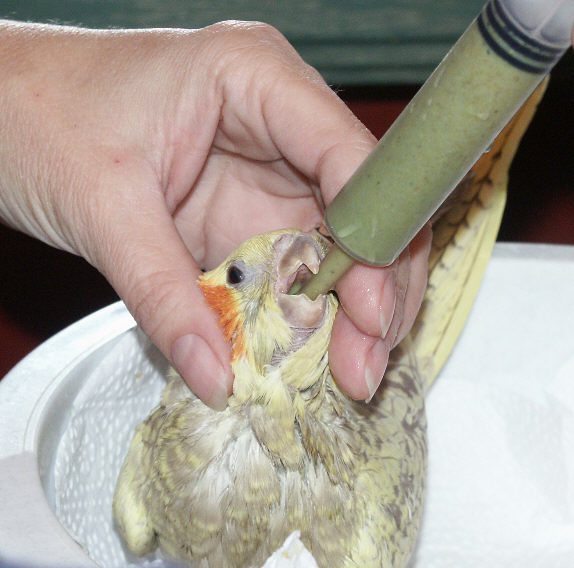 Average weight gains for the particular diet being used do help to monitor the development of individual babies. Weights taken each morning before the first feeding are less influenced by residual food still in the gut of the bird from the previous feeding as babies are usually allowed to empty over night. The time between feedings should slowly lengthen as the baby gets older but any sudden slow down in digestion is an indication of illness.
Stoddard (1988) monitors the health and development of young babies by the;
- Plumpness of the toes, wings and rump.
- Skin colour – should be a flesh-toned pink.
- Skin texture – should be translucent and soft.
- Anatomical symmetry – malnourished babies often have thin feet, toes, and wings as well as a disproportionately large head.
Flammmer (1986) lists other physical characteristics of nestling psittacines.
Complications
1 – Crop Stasis
The crop should completely empty between feedings.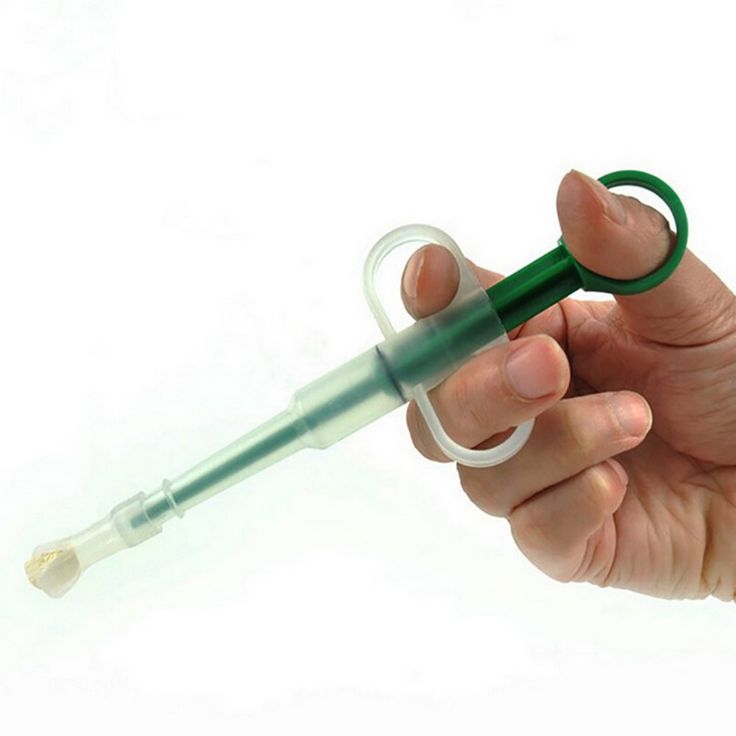 Food that remains in the crop too long may “sour” and provide an excellent growth media for opportunist bacteria and fungi.
Hard lumps may form in the crops of some babies if the solid matter of the hand feeding formula separates from water. Treatment consists of feeding a little warm water and massaging the crop/lump until it is dissolved. The next feeding should consist of diluted formula following which the crop should be back to normal.
Your avian veterinarian should be consulted immediately should the crop content not empty as a crop wash can be performed by an experienced pediatric care technician or veterinarian to remove the soured content and the chick evaluated to determine what is the cause of the crop disorder and possible medical or therapeutic intervention.Under feeding may result in result in some babies ingesting bedding material. In a case of eclectus parrots ingesting wood-shavings they all died due to the gizzard damming up, preventing normal digestion (Smith, 1985).
2 – Crop Burn
If the temperature of the food is greater than 41°C (105°F) it may scald the crop and cause necrosis and fistulation (Giddings, 1986). Even with careful mixing and cooking some of the most experienced facilities may burn babies’ crops by feeding hot formula. Microwaves are usually used when overcooked food is fed. Hot areas within the food may go undetected even with a thermometer. It is best to let the formula stand for a minute, mix well and double check the temperature.
3 – Constricted Toes
Avascular digital necrosis or “big toe” is seen in baby macaws, eclectus and african greys. A ring of fibrous tissue may be initiated by rapid loss of body fluids from a crack of skin and encircles the toe leading to a constriction (Clipsham, 1989b).
Higher ambient humidity levels are reported to decrease this problem (Clipsham, 1989b; Joyner, 1987).
4 – Aspiration
On several occasions very young, less than 3 days old, weak babies were accidentally aspirated at HARI.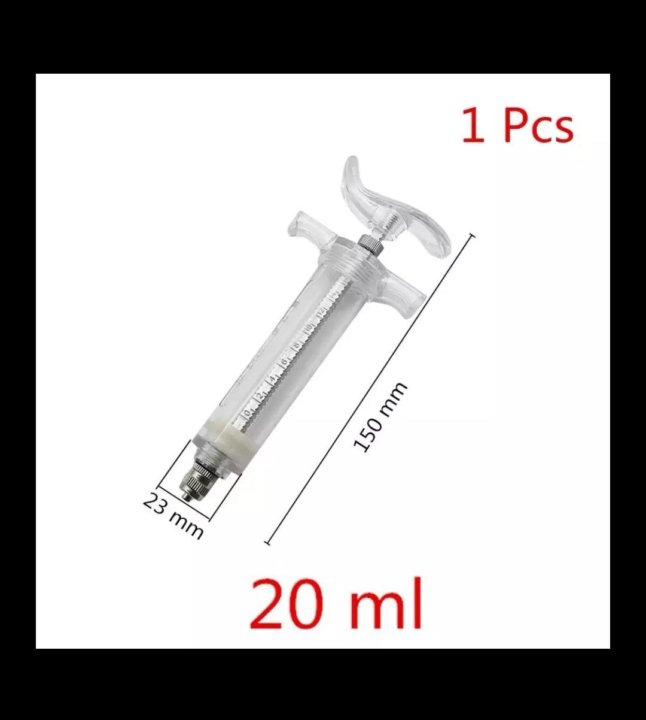 This may have been due to poor feeding responses and force feeding. It is also possible to drop a baby onto its full crop resulting in the food being forced out and into the buccal cavity. The baby, not expecting food at that time may aspirate it. Feeding older birds by a tube placed into the crop will decrease the likelihood of aspiration in the more difficult species to feed (Joyner, 1987), such as 2 month old cockatoos.
5 – Beak Deformities
At HARI a lateral beak deformity has occurred in a baby macaw and an ingrown upper beak in a cockatoo. These types of deformities have been observed with other aviculturists (Joyner, 1987; Clubb and Clubb, 1989). The etiology of these deviations is not known but may be related to unnatural feeding methods or poor nutrition. The rapid growth and strong feeding response of macaws may exacerbate any deviations in growth.
6 – Bacterial, Fungal and Viral Diseases
Gram negative bacteria such as E. coli, Klebsiella sp., and Pseudomonas sp., are commonly considered pathogens and are often associated with disease (Clubb and Clubb, 1986). The “normal” aerobic alimentary tract flora for baby psittacines may include Lactobacillus sp., Staphylococcus eipdermidis, Streptococcus sp., Corynebactrium sp. and Bacillus sp. (Drewes, 1983). Candidiasis, caused by Candida albicans, is a yeast infection, usually of the crop. It is often a secondary problem associated with slowing of gut transit time. Digestive function may be upset by bacterial infections or blockage of the crop opening with foreign matter such as bedding substrate. Food which remains in the crop too long may begin to ferment leading to a “sour crop”. Dietary causes of a slow down in the digestive tract include food too cold, food with inadequate moisture content or ability to hold water (gelatin quality), food too high in fat or protein or too low in fiber.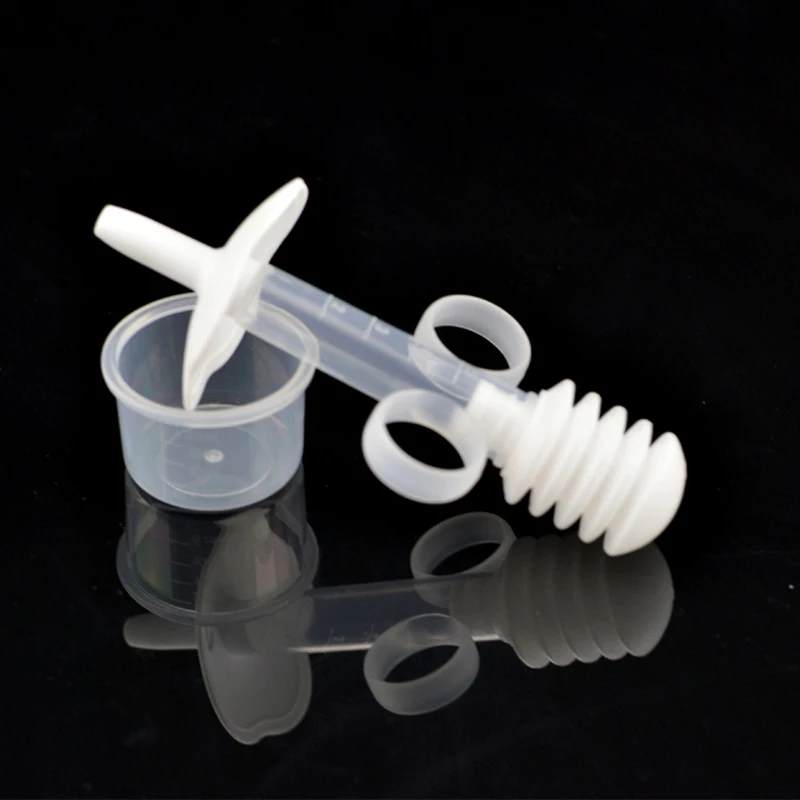 Babies will often vomit if one of these is not quite right.
Abnormally high Candida infections in Palm Cockatoos may have been due to the simple sugars in the sweetened applesauce and sugar ingredients of the diet used by the New York Zoological Society (Sheppard and Turner, 1987).
Viral diseases can be prevented by only handfeeding incubator hatched babies and leaving parentally hatched nestlings with their parents. A separate nursery for babies exposed to parental feedings could be another alternative.
Weaning
Weaning appears not to be a learned process and occurs at a certain age which is not affected by external stimulation of hunger (Roudybush, 1986). Cockatiel chicks which reach a higher maximum weight sooner also wean earlier than chicks which do not gain more than their normal adult weight (Roudybush, 1986). Babies may lose weight (up to 10-15%) during weaning although keeping weight on them is probably better for birds to be shipped out unweaned.
When the babies have about an inch of blood left in their wings they are transferred to a cage which has small openings on the bottom wire for the babies to walk on comfortably.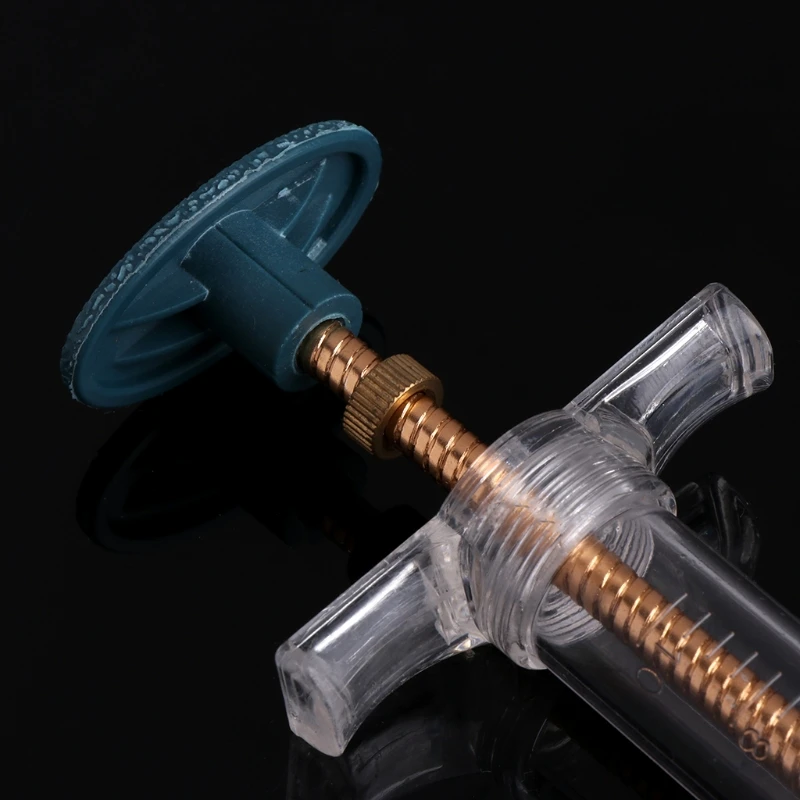 Perches should initially be near the bottom of the cage for the uncoordinated fledglings.
Once babies have absorbed the blood in their wing feathers they are ready to be placed into a cage. The cage should be large enough to allow the birds to exercise their wings. Perches are better placed near the bottom of the cage where young birds first spend most of their time. A cup of formulated parrot food, moistened with hot water, appears to be easier for babies to wean onto than seeds or hard vegetables. This cup must be made fresh daily (or more often in hot climates) to avoid spoilage and should be placed near where they perch.
To assist in weaning, feed a little amount of formula with a spoon from the cup that the birds should begin to eat from. Additional syringes of food should be given two or three times a day so they do not lose do much weight but avoid always feeding when babies beg or this behaviour may increase.
Potential for Breeding
There is concern that hand-rearing imprints the birds on humans and they will therefore not be suitable for breeding when they become sexually mature. Third generation breeding of Amazona leucocephala by Ramon Noegel indicates that this is not the case. Hand-reared birds often mature and breed in a shorter period than it takes wild-caught adults to settle down. Captive raised birds lack the stress that causes wild birds not to breed or abandon their nests.
If the babies birds are to be kept for breeding it is probably better to raise them in groups rather than individually.
Research with cockatiels has shown that early rearing experience is important for males to learn characteristics of the opposite sex, and for males and females to learn characteristics of nest-sites (Myers et al., 1988).
Care of Baby Parrot
Environment
A newly arrived baby parrot should be kept in a warm and quiet place for the first few weeks. A young bird needs to rest during the day and a busy environment may exhaust it. This stress weakens the immune system which may result in disease(s).
Provide your bird with a cage big enough so it can fully expand its wings and perhaps jump between perches.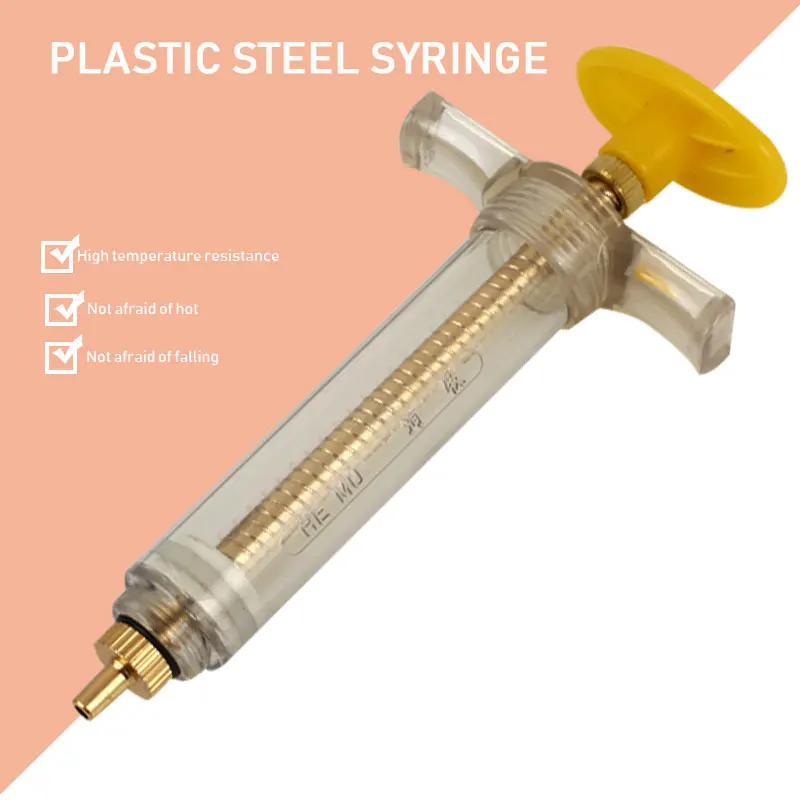 Parrots like to climb around their cage and like its security when they rest. Place several toys in its cage, to avoid boredom and change these regularly.
When outside of its cage, you can put your bird on a T perch but this should not be its only territory, since it cannot move around much.
Feeding
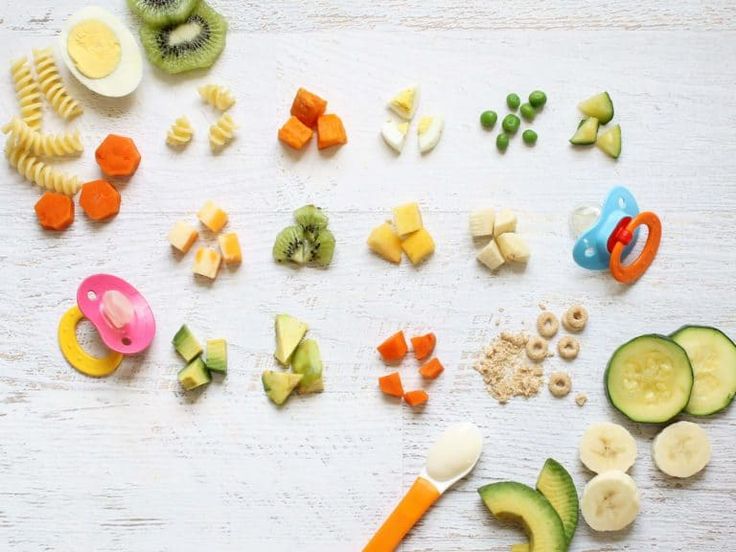
A sudden change of diet could lead to weight loss and digestive upset with subsequent problems, so, it is best to continue with the same diet.
If the baby bird is not weaned, follow the directions on the leaflet of the Tropican hand-feeding formula and provide three food bowls to the baby: one filled with dry Tropican granules, one with soft Tropican moisten with warm water, and a bowl of fresh water. Moist food spoils very fast; so be sure to clean the bowl twice a day. Always use the same bowls for your baby birds unless bowls used by another bird has been thoroughly disinfected.
Exercise
The bird should be allowed out of its cage to interact with people and to exercise each day.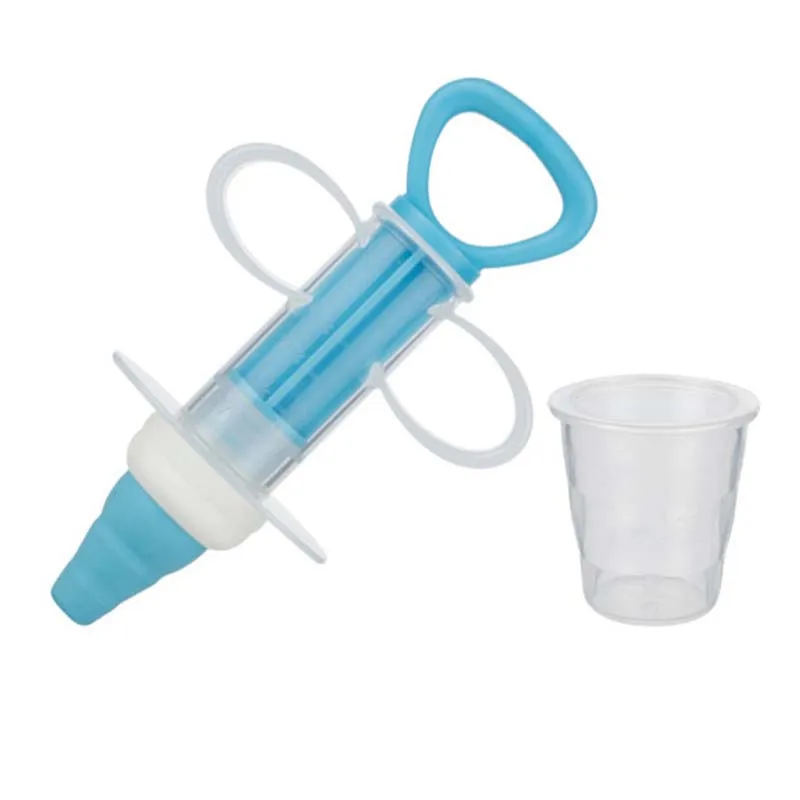 Play with the baby every day but do not spoil it too much initially or it will demand this attention later. Do not leave doors or windows open or go outside with an unclipped bird. You can clip the wing feathers but when doing this for the first time, ask someone who is familiar with clipping.
Medical Care
Captive bred birds are not used to the microorganisms carried by a wild caught exotic bird and you should avoid the contact between the two. Species susceptible to Pacheco and Pox diseases should be vaccinated against them if they will be in places with other birds at proximity such as in a pet shop, veterinary clinic, boarding facility or bird shows.
If your bird shows one or several of the following symptoms, it may be sick: sleeping during its usual peak activity, not eating or eating less than usual, diarrhea and feathers puffed up. In that situation, contact immediately your usual avian veterinarian. Isolate the bird. Keep it warm (30°C – 86°F) and try to give it some food.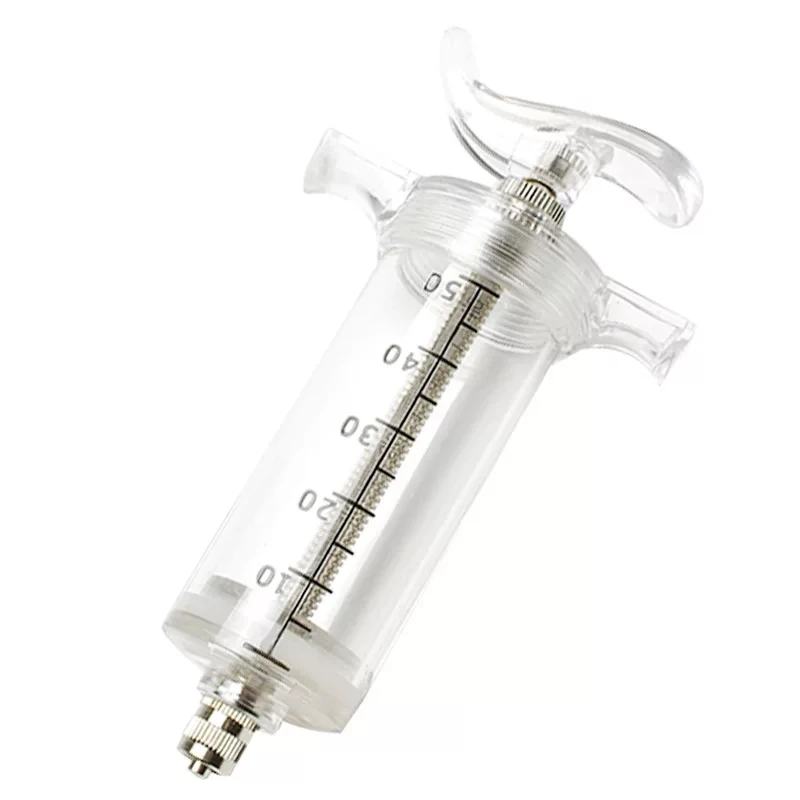
References
BUCHER, T.L. (1983). Parrot eggs, embryos, and nestling: patterns and energetics growth and development. Physiol. Zool. 56 465-483.
CACCAMISE, D.F. (1975). Growth rate in the Monk Parakeet. The Wilson Bulletin 88 495-497.
CLIPSHAM, R. (1989a). Pediatric management and medicine. Avian Veterinarians. 1:10-13.
CLIPSHAM, R. (1989b). Preventive Aviary Medical Management. Proceedings of the American Federation of Aviculture Veterinary Seminar, pp 15-28.
CLUBB, S. L., and CLUBB, K. J. (1986). Psittacine pediatrics. Proceedings of the Association of Avian Veterinarians pp 317-332.
CLUBB, S.L. and CLUBB, K.J. (1989). Selected problems in psittacine pediatrics. Proceedings of the American Federation of Aviculture Veterinary Seminar, pp 29-35.
DREWES, L., and FLAMMER, K. (1983). Preliminary data on aerobic microflora of baby psittacine birds. Proceedings of the Jean Delacour/ IFCB Symposium on Breeding Birds in Captivity, pp 73-81.
FLAMMER, K.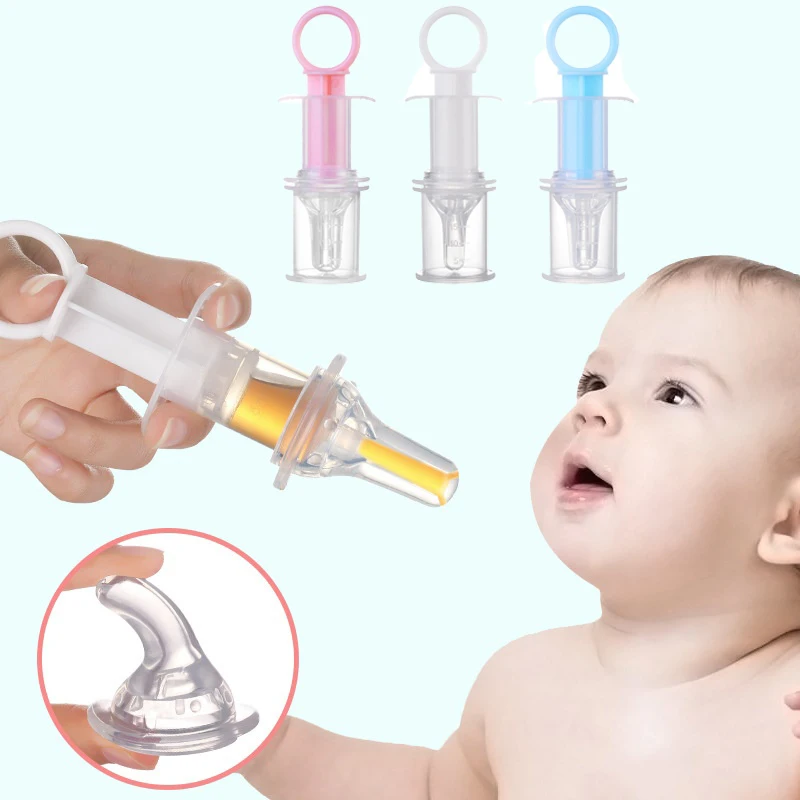 (1986). Pediatric medicine. In: Clinical Avian Medicine and Surgery: including aviculture. Eds. G. J. Harrison and L. R. Harrison, W. B. Saunders Company, Philadelphia, pp 634-650.
GIDDINGS, R. F. (1986). An avoidable cause of crop necrosis in nestling cockatiels. Veterinary Medicine 81:1025-1026.
JOYNER, K.L. (1987). Avicultural Pediatrics. American Federation of Aviculture Veterinary Seminar pp 22-33.
JOYNER, K.L. (1988). The use of a lactobacillus product in a psittacine hand-feeding diet; its effect on normal aerobic microflora early weight gain, and health. Proceedings Association of Avian Veterinarians pp 127-137.
LOW, R. (1987). Hand-Rearing Parrots. Blandford Press. Dorset, U.K.
MOSTERT, PETER (1989). Personal communication.
MYERS, S.A., MILLAM, J.R., ROUDYBUSH, T.E. and GRAU, C.R. (1988). Reproductive success of hand-reared vs. parent-reared cockatiels (Nymphicus Hollandicus). The Auk 105:536-542.
SHEPPARD, C. and TURNER, W. (1987). Handrearing Palm Cockatoos.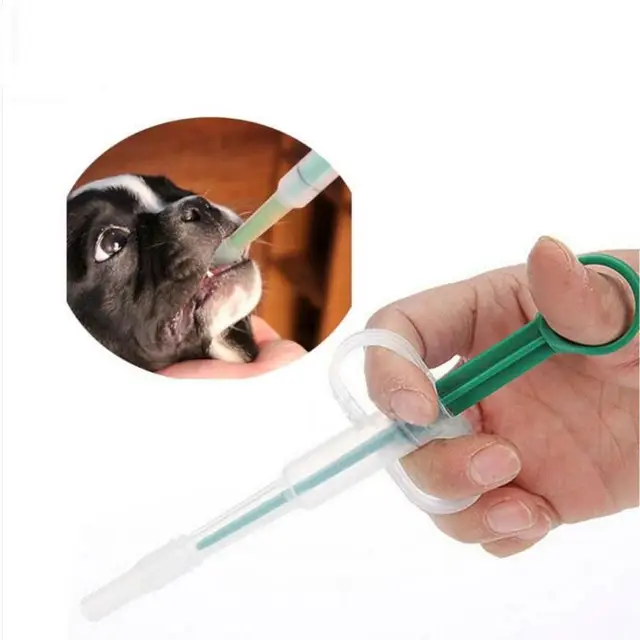 AAZPA Annual Proceedings pp. 270-278.
SILVA, T. (1989). A monograph of endangered parrots. Hand-rearing. Silvio Mattacchione and Co., Pickering, Ontario, pp 23-26.
SMITH, G. A. (1985). Problems encountered in hand-rearing parrots. In: Cage and Aviary Bird Medicine Seminar, Australian Veterinary Poultry Association. pp 71-77.
SMITH, R.E. (1986). Psittacine beak and feather disease: a cluster of cases in a cockatoo breeding facility. Proceedings Association of Avian Veterinarians pp 17-20.
STODDARD, H.L. (1988). Avian Pediatric Seminar. Avian Pediatric Seminar Proceedings (Supplement) pp 1-19.
TAKESHITA, D.L., GRAHAM, L. and SILVERMAN, S. (1986). Hypervitaminosis D in baby macaws. Proceedings Association of Avian Veterinarians pp 341-346.
THOMPSON, D.R. AND BARBER, L. (1983). Successful techniques for hand raising young psittacine birds. Proceedings of the Jean Delacour/ IFCB Symposium on Breeding Birds in Captivity, pp 171-178.
By Mark Hagen, M. Ag.
Ag.
Director of Research
Handfeeding Techniques - A New Breakthrough For Our Birds
Over the years, the science of handfeeding our birds has largely remained unchanged. By 'our', I mean the world full of people who spend long hours, day in and day out, tirelessly making sure our little feathered charges are clean, warm, dry and full. There are several methods in current use now. Some old handfeeding methods are still used in other places in the world because more current feeding tools or information are simply not available.
Thirty years ago, on a trip deep into Mexico, I remember a street vendor patiently chewing up some corn and bread, and, removing it from his mouth, balling it up in his fingers and handfeeding it to a young Mexican Red Headed Amazon (also known as a Green Cheeked Amazon). He had no spoon, and no syringe available to him. He had probably been doing this sort of thing for years. Who knows how well his birds tolerated this somewhat unsanitary method...I only saw one bird on that entire trip.
More modern methods, those with which we are most familiar here in the states, range from tube feeding to syringe feeding, pipette feeding to spoon feeding. There are some drawbacks to each type.
Tube feeding, in my opinion, is something that should not be done unless a bird was so compromised that it was unable to feed. I would think that this would be the most severe form of feeding, and should be reserved for very, very sick birds. Tube feeding (or feeding from a squirt-type ketchup bottle) can also go terribly wrong very quickly, as an inexperienced person can easily get the tube into the lungs and kill a bird. There is no reversing a lung full of food. There is only one reason to have a tube and syringe attachment in your medicine cabinet, and that would be to remove food from a crop that is in a medical "static crop" state. For most bird feeders, that procedure would be performed under the supervision of a veterinarian. I have done it successfully, the end of the tube is inserted into the crop, and the crop is flushed with a baking soda solution and it's contents withdrawn. Conditions would be that a bird has a fungal or bacterial infection, and in removing the indigestible crop contents, the recovery can be hastened. This is safer than crop "milking." The end of the tube has several openings in the last 1/2 inch, on 4 sides, so it will not 'vacuum' itself on to the crop wall.
Syringe feeding is a bit better method, but the tendency to feed too fast is readily apparent. I have heard of people who jammed it back too far into the mouth, and filled up the opening in the back of the top of the beak, killing their baby. It was really not any fault of their own that the baby died. Even the most conscientious person who is feeding around the clock gets tired, and can make a very regrettable mistake.
There are many long time periods of feeding every two hours around the clock,, and it is hard to not make a mistake. .If you accidentally press the plunger too fast, you can aspirate them. Bits of food that will not pass the exit hole of a syringe easily can cause you to explode the food all over when it finally dislodges. What a mess! A syringe is not able to be placed in the front of the beak, and must be used from the side. This increases the chance for crooked beaks. Syringes are difficult to clean, and when they are repeatedly boiled for sterilization, tend to wear out quickly. They also can get mixed up from baby to baby, assuming the handfeeder is using one syringe for each baby.
Pipettes are similar to syringes, and are used for babies when they are very tiny, and as long as they are discarded after use, are alright until a bird can be put on our new method of feeding. Pipettes do have some advantages over syringes in not being a 'plunger' type unit. They are also very soft on young mouths.
Spoon feeding can be the messiest method, and is the most satisfactory for most hookbills so far. Once mastered, it is easy and fast. It can be a problem for many people to find someone who can correctly bend spoons to fit all the different size mouths ; fortunately we are also precious metal fabricators, and have the tools to bend our own spoons quite easily.
There is a method which is easier, more natural, faster, and more sanitary than any of the other methods. We have been spoon-feeding for a lot of years, and finally found this new method. We were looking for a way to feed that would prepare the babies to be successful breeding birds. Neither the tube, syringe or spoon method provided the necessary physical contact or stimulation that is needed.
We primarily feed macaws and conures, with a few cockatoos. If I have to artificially incubate, I start the babies on pipettes. Just as soon as they are big enough to do it, I change to small three-ounce paper cups. If the babies are parent reared, they are started on cups the moment they have the first handfeeding in the nursery. It takes them only one or two feedings to 'get it' right. This is in sharp contrast to babies who must be fussed with several times to get used to the other methods of handfeeding. The stress of transition from nestbox to nursery is also lessened.
I had been putting the formula in a community bowl, and spooning out the formula into the little 3 ounce cups, one for each baby, and then one spoon for each baby. The spoons kept falling over, as the cupful of food was not heavy enough to keep them upright. I was balancing the cup-and-spoon against the incubators, and it was impossible to control. Then Geoffrey looked at what I was doing, and told me just to eliminate the spoons and just use the cups!. I shaped the cups a little like a beak tip, and it worked quite well. This was really easy.
The babies reacted so well to the cups in their mouths, the food went down so fast and easy, I wondered why we had not thought of it before. The smallest babies, with beaks about 1/2 inch long, were fed from one single cup each. Slightly larger babies had to have two cups, stacked together, so that the cups
would not collapse. The largest macaws needed three cups stacked together, so they would be reinforced enough to stand the pumping action. The distinct advantage here is that food is never transferred from one baby to another,and the method is cleaner, quicker, and completely disposable.
In our collection, we have some syringe fed breeding birds. These birds will lay and incubate well, but they will not feed their babies. If I do not intervene, their babies will die. The parent birds simply do not understand how to feed, as they never had the experience of 'pumping' or beak to beak contact when they were being fed.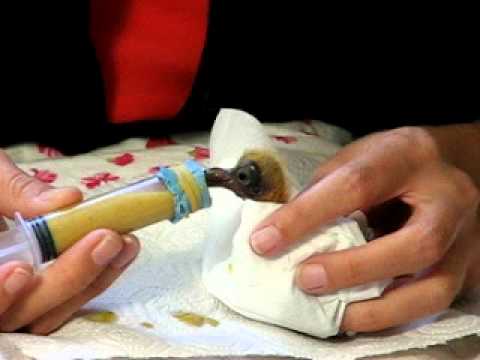 The cup method also emulates this. With this new method, babies get an excellent substitute feeding experience very close to what a beak-fed bird gets; touch on both top and bottom and sides of the beak for stimulation.
To begin feeding, the cup is placed 3/4 of the way back into the mouth, and the response is very quick and strong. It takes about 30 seconds to feed a macaw this way. They enjoy it so much it is sometimes hard to get them to let go of the cup! Everyone knows that if you touch a baby on both sides of his beak, you can get a feeding response. The cup does just that...touches on both sides of the beak, so it feels just like mom feeding. Babies fed this way should respond to their own babies begging, and feed them in turn. After all, if we raise generation after generation of birds that do not know how to feed, we are being counterproductive for aviculture. I estimate how much to put in the cup by the crop size, and for the first few times, it would be better to have to refill the cup than to put too much in.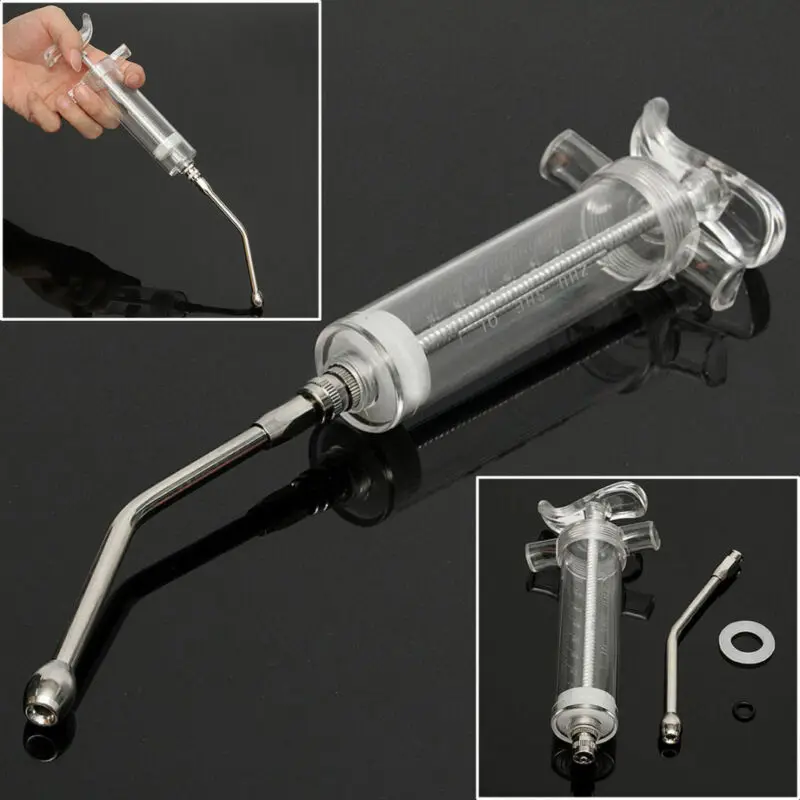 Rare would be the bird that wont be a little piggy and gobble. I am right handed, so I make a 'horseshoe' shape with my left hand, and place it over the bird's shoulders. I am not holding their head or beak, or squeezing my fingers around their neck... just restraining them from rushing forward. I can feed FROM THE FRONT OF THEIR BEAK so I have reduced the possibility of beak deviations. It is thought that some beak deviations can result from handfeeding from the side of the mouth. I have the bird on a heavy towel, on a table, and the cup held pretty firmly in my other hand. Just place it in the beak, and they will do the rest. There is definitely a rhythm to this, it is pump, pump and pump!. Practice it without anything in the cup if you like, and your babies will show you how they react. I am sure that this will make baby season just a little bit easier for all of us. All the best
How to treat a parrot? Learning to give medicine to a parrot in its beak.
Contents:
- 1 What are the methods of administering (giving) medicine to parrots?
- 1.1 Injections.
- 1.2 Giving preparations in the beak.
- 1.3 Can medicines be given in drinking water?
- 1.4 How to give medicine with food?
- 2 How to give drugs in the beak so that you yourself do not die from stress and do not be left without a finger?
- 2.1 How to catch a parrot?
- 2.2 How to hold a parrot?
- 2.3 How to give medicines in the beak?
- 2.3.1 What to do if the parrot does not open its beak and does not want to drink from a syringe?
- 3 When should I contact my veterinarian? Signs of problems in the treatment of a parrot.
- 4 How NOT to give drugs in the beak.
The parrot fell ill, the veterinary "ornithologist" prescribed treatment, it is necessary to give medicine in the beak, but how to do it right? I will talk about this and a few other useful things in this article.
The treatment of any bird, including a parrot, consists of three main parts:
— Normalization of living conditions: social environment, cage, lighting, humidity.
— Normalization of the diet. Many articles have already been written about this and many more will be written, but the principle is simple - the bird's diet should be as diverse as possible both in composition and in the way of "serving dishes" to the bird.
— Giving medicines (after the examination of the bird). And this is where most parrot owners have their biggest problem: how to give medication to a parrot that screams, beats and bites?
I note that a responsible owner begins to think about this issue immediately after purchasing the bird, since at least a course of anthelmintic drugs must be carried out in any case, moreover, twice a year.
What are the methods of administering (giving) drugs to parrots?
There are two ways to give medicine to a bird: injections (parenteral method of administration, i.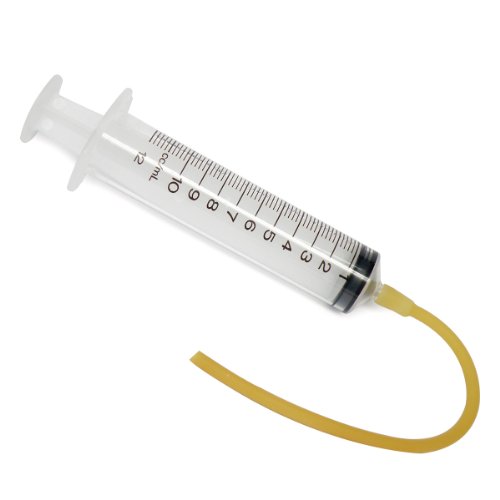 e. injections) and giving the drug in the beak (oral method of administration). Each of these methods has its own indications (i.e., the conditions under which one or another method of giving drugs is more optimal, possible).
Injections.
It is technically easy to give injections, but first you need to be instructed by a bird doctor, be able to hold a bird, and have the courage to give injections. Everything seems to be simple, but with long-term treatment (even if performed correctly), necrosis of the pectoral muscle develops from injections in the bird, which externally appear as sores on the skin. This is a serious problem, the consequences of which have to be dealt with for many more years. Therefore, most often, when treating parrots and other birds, medicines are given in the beak.
Giving drugs in the beak.
Giving drugs into the beak of a parrot is a technically more difficult task than injections, because few people know how to properly hold a parrot (the parrot actively resists, bites, yells).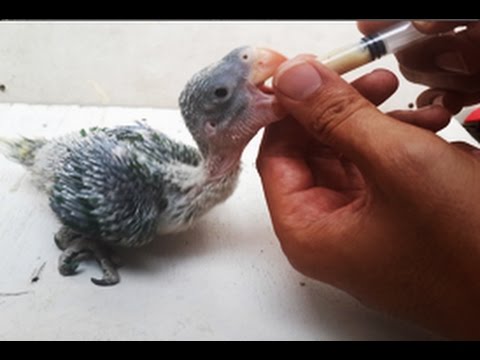 And most importantly, if the solution is not poured into the beak correctly, then aspiration will occur, i.e. the solution will enter the trachea, bronchi and further into the lungs (it looks like a parrot choked). This is a very dangerous situation. A bird can die within a few minutes if a lot of the drug enters the trachea at once. But even if the volume of the aspirated drug is very small, this will lead to the development of tracheitis (inflammation of the trachea), and / or pneumonia; in this case, if measures are not taken immediately to prevent the development of inflammation, then the birds die from aspiration pneumonia in a few weeks or months; in addition, the measures themselves, to prevent the consequences of getting into the trachea, may not always be sufficient due to the anatomical features of the respiratory system of birds.
vkdoc.ru
Aspiration is the main danger that exists when giving drugs to a parrot in its beak.
Can medicines be given in drinking water?
After such a terrible warning, the question arises - are there any ways to treat a parrot when the drugs are given completely safely? Yes, there are, and this is giving drugs in food. I am not considering now the addition of drugs to drinking water, since the class of drugs that can be given in drinking is very small (such drugs should be effective on the one hand, on the other hand, safe if the dosages are significantly exceeded - after all, it is not known how much water the parrot will drink). And if you give the medicine in food, then it’s easy to see if the bird has received the right amount of the drug.
How to give medicine with food?
The simplest examples of such a summer residence are the introduction of solutions into berries and fruits (for example: into grapes, cranberries, mountain ash, pieces of peach, watermelon, apple). An excellent technique - the dosage can be strictly observed, you can be sure that the bird has exactly received everything that was prescribed by the bird doctor. The beauty! - but figs))) Because most parrot owners do not eat juicy fruits, vegetables, berries before the first illness (and, accordingly, before the first appearance at the bird doctor). These owners do not even know what to feed the birds, and as a result, when a bird is sick, it will not suddenly eat berries and fruits that are unfamiliar to it. Bams! Here it is, another minus of ignoring the methods of active socialization of parrots.
In addition to berries, fruits and vegetables, medicines can be given in mashed potatoes ( it turns out that potatoes can be given to parrots both raw and boiled, and in the form of mashed potatoes (without milk) ), in yogurt, cottage cheese ( fermented milk products can be given to parrots! - so ... here they stop reading the article and fall off with an angry cry in public "AAAA first bricks, avocado, mango, oak - now also kefir!!!" ), in juices (and then they shout nizya-nizya, in juices there is sugar) , in a solution of honey ( is also tin - there are those who are afraid to give honey to birds ), in cereals (well, everything seems to be mimi, people like to give cereals to parrots; and this is perhaps the only plus of having cereals in the diets of parrots - cereals are well suited for the treatment of parrots ), in feed mixtures for feeding parrots ( there are more and more fosterlings -: (pichalka ).
Well, if you teach the bird to eat something from a spoon in advance, you will it’s easier when you need to give something unnoticed by the bird. But even if you are super responsible and deal with the bird, it eats juicy food, fruit purees and potatoes, it may turn out that the bitterness of the preparations cannot be masked by anything and a smart bird will refuse eat delicious yogurt with an antibiotic added. By the way, don’t be afraid – after you stop adding something to yogurt, the parrot will start eating it again. imo.
How can you give drugs in the beak so that you yourself do not die from stress and do not be left without a finger?
You can completely avoid stress in a parrot during treatment only if you have previously worked with a bird, your bird knows the commands, and you know the bird, do not be afraid to hold it in your hands because you already know how to hold it in your hands, - in this ideal case, neither the bird is worried, nor you. How good. By the way, parrots are even trained to take blood from a vein; here is a video of such an example: a hyacinth macaw is trained to give a wing for taking blood. Fiction? No, just good bird training. See:
Now another case. The bird is sick, and you have no idea how to keep it, what kind of commands are there, you yourself would not faint from the cries of a parrot. It is important to remember here that the owner has much more stress from any manipulations with the bird than the parrot itself. Therefore, we pull ourselves together and take step number one - catch the bird.
How to catch a parrot?
Step number one - catch the bird. It does not matter that your parrot screams and rushes about (since you have reached such a life, then you have no choice) - it is important to do everything as quickly as possible. In the case of Jacos, Amazons, cockatoos, aratingas, necklace and Alexandrine parrots, a terry towel is suitable, and in order to catch a macaw, a blanket or a thick jacket is suitable.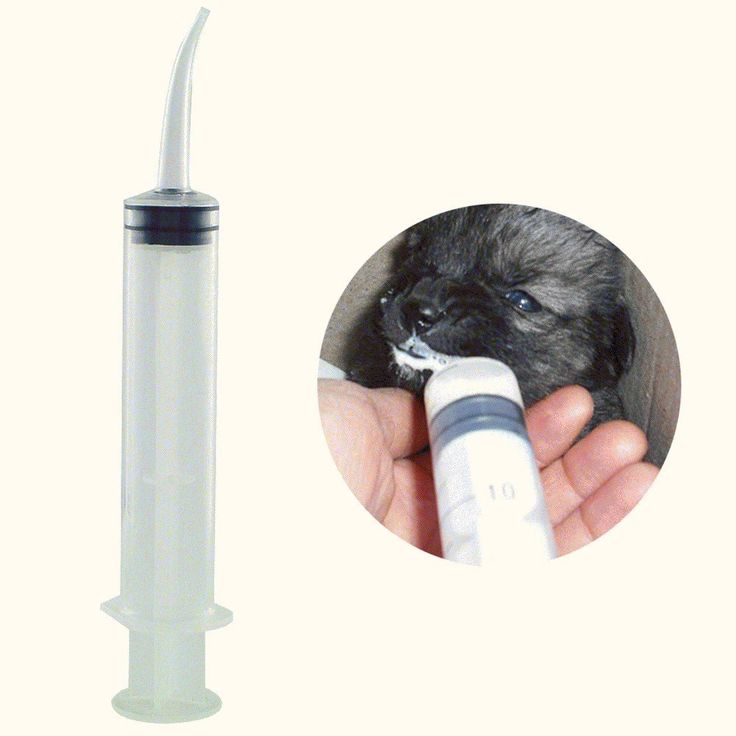 Budgerigars, cockatiels and pyrrur are more convenient and faster to catch with your hand. Gloves are good only if they are comfortable, and if they are thick mittens, then they will only prevent you from catching a parrot.
How to keep a parrot?
Step number two - fix the bird in your hand. After the parrot is caught, first of all, you need to fix its head. Even if you wrapped the parrot in a towel and only its head sticks out - it (the head) needs to be fixed, otherwise everything around will be tarred with medicine, the syringe will be eaten, and the bird will choke.
The fixation of the head for all types of parrots (from small budgies, lovebirds, to cockatoos and grays) is the same. So, the rule of three fingers. To do this, you will need three of your fingers and a bird's head. You put your index finger on top of the parrot's head so that your finger almost touches the cere. Use your thumb and middle fingers to grab the head of the bird under the cheeks so that your fingers rest on the corner of the parrot's lower jaw.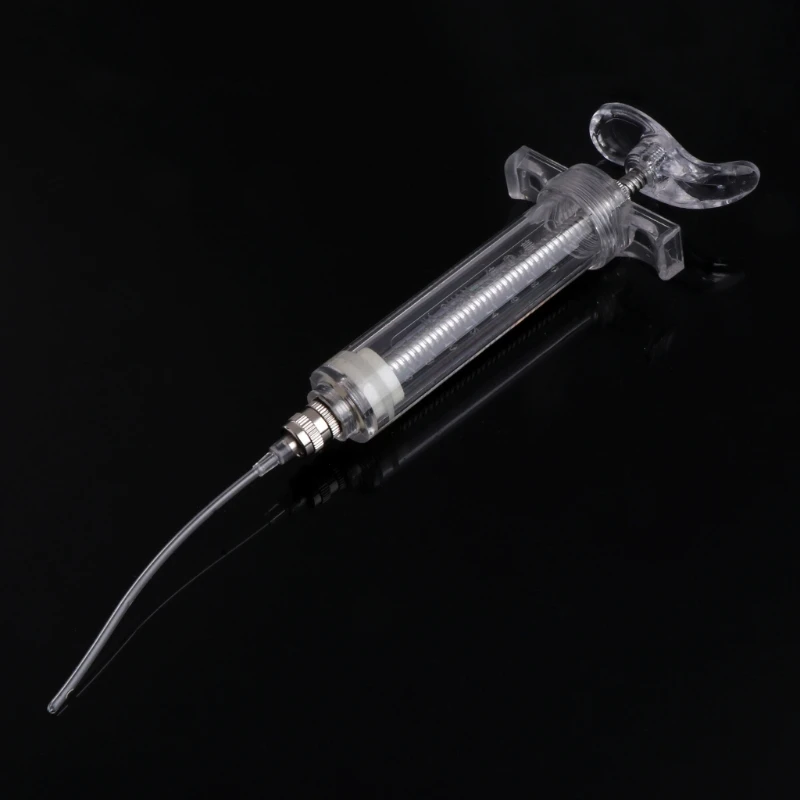 Remember that your fingers do not just lie in these three planes, but they firmly fix the head. Do not be afraid, with such a grip even a budgerigar cannot break its neck, you will not damage the bird at all.
The body of the parrot is either in a towel or completely lies in your palm (in this case, you additionally fix small parrots with your little finger, which presses the paws and folded wings).
Only after you have firmly grasped the head of the parrot in your hand, you can begin to inject drugs into the beak. If the head slips out, then take a break, intercept it again correctly. It is the reliable fixation of the head that is the guarantee that the bird will not choke, choke, choke and bite you.
How to give drugs in the beak?
Step number three - we give medicines. The first few times, while the parrot has not yet figured out what you want from him and why you put the syringe to his beak, he himself grabs the tip of the syringe with the solution and, fiercely chewing it, expresses everything that he thinks about this.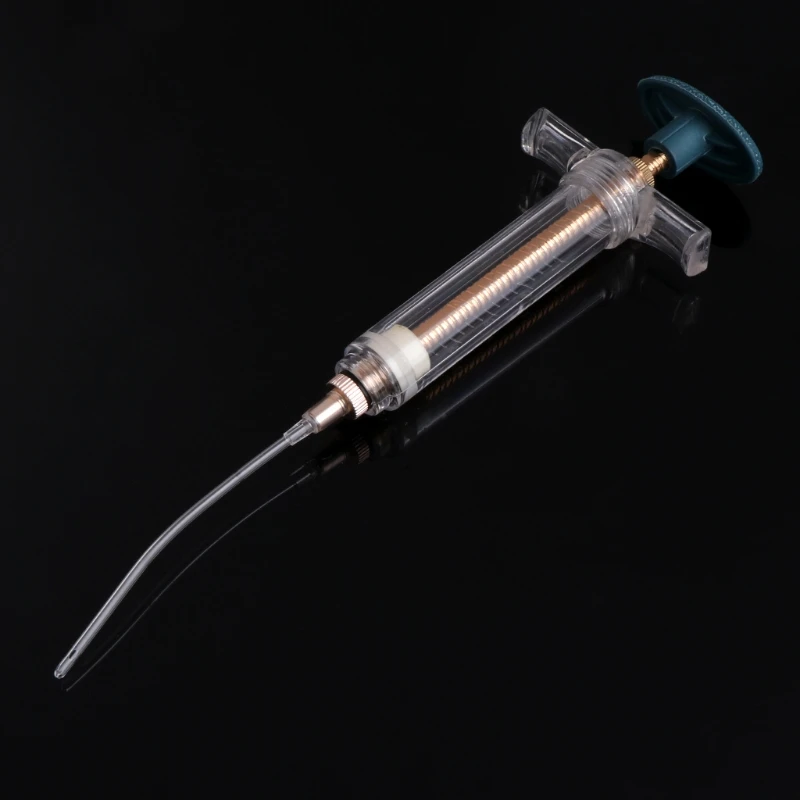 Your task is not to get confused, but to do your job: slowly squeeze the drug into the parrot's beak. It is important to inject the drug slowly, without jerking, so that the angry parrot has time to swallow. In this way, you can give even the most bitter preparations several times, then the parrot will realize that this is exactly your goal, and will not react to the brought syringe.
What to do if the parrot does not open its beak and does not want to drink from a syringe?
In this case, you just need to put a drop of the drug in the corner of the beak, or put the tip of the syringe in the corner of the beak, and SLOWLY inject the solution. Oh miracle!!! The drug itself is absorbed into the depths of the parrot's beak. Bingo!!
You will enjoy this consequence of the surface tension of liquids for a couple of days at most - then the next challenge! You seem to have given a full portion of the medicine, and the parrot (as soon as you let it go or just loosened the grip of your fingers) spat it all out !!! It turns out that everything that you just gave him with such difficulty, the parrot scored in the lower jaw and spat - your hands dropped.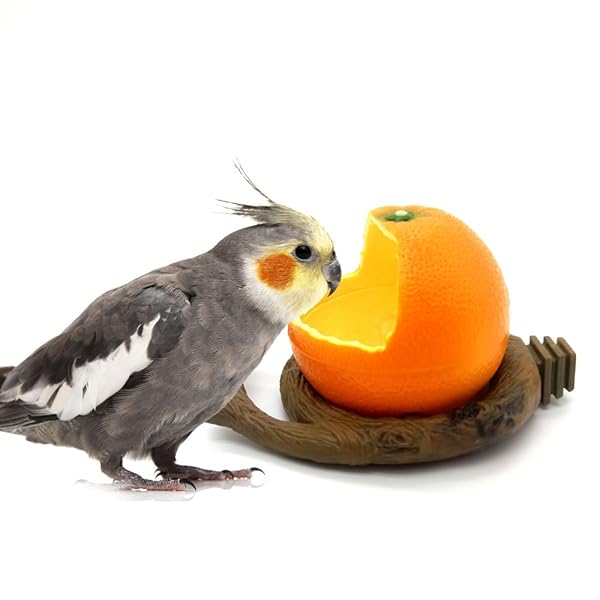
So, the parrot picks up drugs in its beak and spits. Your actions: during the introduction of drugs into the angle between the upper and lower jaws , you need to take breaks and scratch the mandible . Not a single parrot, parrot, parrot - can withstand such deceit; even the most fiercely hating parrot, when “pocheson”, will surely make a movement with its tongue and swallow everything that it held in its beak. This is what you need - immediately, without delay, in small portions, continue to squeeze out the remaining drug from the syringe. IMPORTANT! Do not collect a full submandibular solution; portions should be small!
Here is a video that shows very clearly how to treat a parrot and how to properly give drugs in the beak. Pay attention to the movement of the bird's tongue, this is a sure sign that the bird is swallowing solutions and not fooling you:
When should you contact the veterinarian? Signs of problems in the treatment of a parrot.
If the solution gets into the nose and bubbles out of the nostrils, this is unpleasant, but most often it is not dangerous for the parrot.
If the parrot coughs, sneezes, hiccups, makes some sounds, hangs its wings after giving the drug - URGENTLY contact your bird doctor. Remember that it is better to disturb your doctor once again than to waste time!
Beak syringes MUST be WITH REMOVABLE NEEDLE. Never try to water a bird with a syringe needle! Most often, insulin syringes are used to treat birds, although large syringes of 2, 5, 10 ml are also used to give large volumes of solutions. Regardless of the volume of the syringe, the size of its tip (cannula) is the same for all syringes.
How NOT to give drugs in the beak.
Do not try to open the bird's beak with one or both hands in an attempt to stuff a syringe into it.
Do not insert the syringe from the side between the upper and lower beak and use it as a lever to open the beak.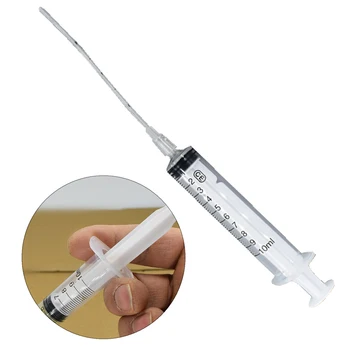
Do not squeeze the beak from the sides so that the parrot opens it.
Do not blow drug powder into the beak.
You can't ask a friend to open the parrot's beak so that you fill in the preparations.
Do not put on rope loops under and above the beak to open the beak.
Do not use glass pipettes for parrots larger than cockatiels.
If you have any questions about how to treat a parrot at home - write questions in the comments.
Sincerely, veterinarian, bird doctor "not an ornithologist at all" Valentin Kozlitin.
What to feed budgerigar chicks?
After birth, budgerigars are defenseless, they are completely dependent on their parents. The female feeds and pays attention to each of them, despite the number of offspring and their age difference.
In the beginning, feeding of babies consists of regurgitation by the female of crop milk, which is located in the gizzard.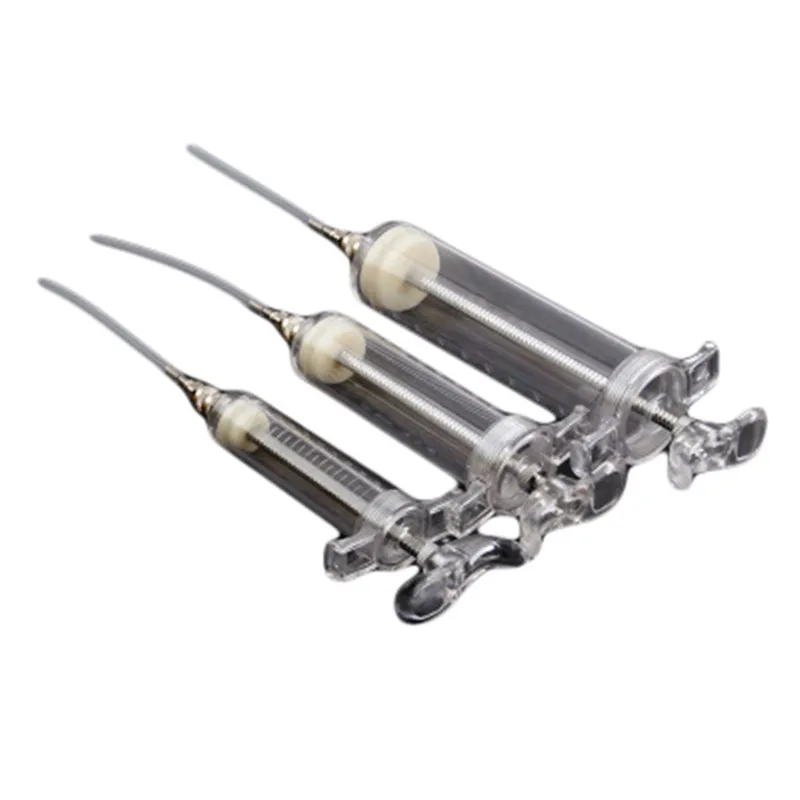 This "milk" is not one substance, it is a yellowish mucus, consisting of very small, almost liquid pieces of food and protein-rich crop milk. A few days after the birth of the chicks, partially digested grain from the goiter is mixed with the "milk".
Thanks to sprouted grains in the diet of a lactating female, she produces a sufficient amount of crop milk.
Later, as the parrots mature, the older ones are transferred to grain feed. Since the grain is in the crop, the female feeds the grown chicks first, and when the grain runs out, the crop milk goes to the smallest in the family.
Photo: Bika During this period, the male constantly provides the female with everything she needs, as she can leave the nest only in the morning and evening, and even then not always. Sometimes the male helps the female and participates in feeding. He also processes grain feed in the goiter, like the female. Thanks to this, the digestive system of budgerigar chicks works like clockwork, they receive the most nutrients, vital enzymes and boost their immunity.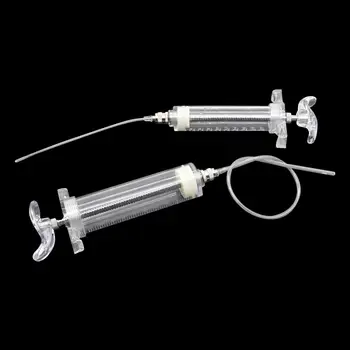
Having flown out of the nest for the first time, young parrots most often remain under the care of the male, as the female is going to the second clutch.
The nutritional value of the parents depends on the owners. It is very important to add and exclude certain products in time.
Feeding for a young couple during breeding can be found here.
It happens that breeders have to take on the role of parents of chicks.
Contents
- 1 Reasons for artificial feeding of budgerigar chicks:
- 2 Heating of budgerigar chicks
- 3 There are several options for feeding budgerigars:
- 4 How often to feed budgerigar chicks
parents;
- disease of a chick requiring its immediate separation from the feathered family;
- quarantine;
- lack of appetite in the chick, its inability to feed on its own;
- death or illness of parents;
- a large number of chicks, parents can not cope;
- the female is going to the second clutch and her offspring interferes with her.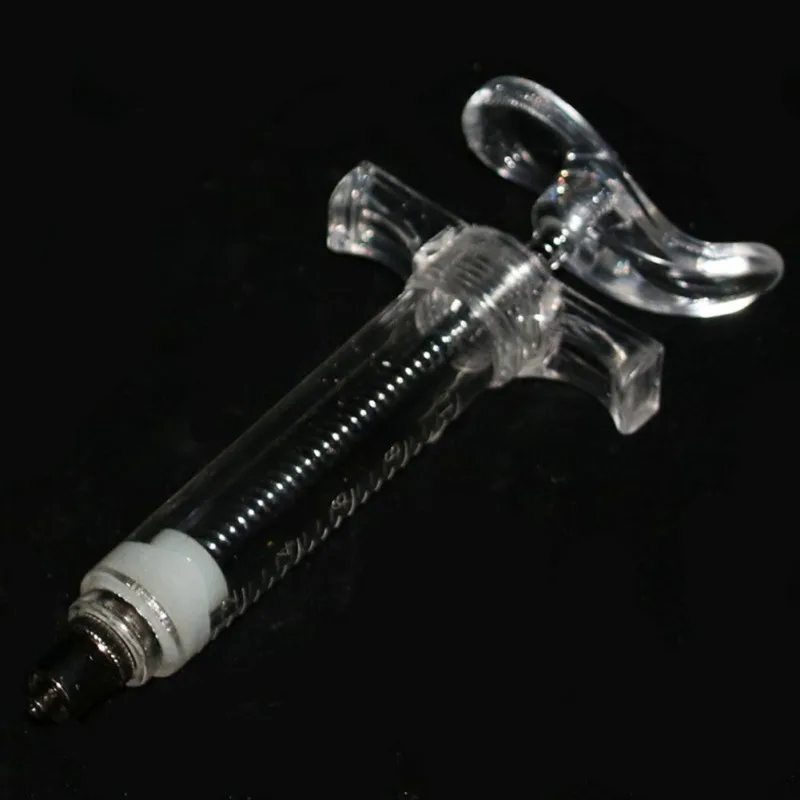
The safe period without food for a newly hatched chick is 12 hours.
This is how long a female can go without feeding her baby. And, in case of a non-standard situation, you should count on this period of time to have time to prepare.
You can offer the chick to another pair or offer the male to feed it. Sometimes the bird accepts the baby and thus takes care of him. But it happens that only you can save the situation.
Photo: ddie gunnAlso, the female is often going to re-lay, her attitude towards the babies may change and you will need to look for additional housing for the young as soon as possible. More often this happens when the chicks are already able to feed on their own, but it happens that the female shows unmotivated aggression early and you need to save the parrots very quickly.
If your chick is only a few days old, then you can only feed with a special factory syringe or a homemade tool. To do this, you will need a 5 ml syringe and a tube that plays the role of a catheter.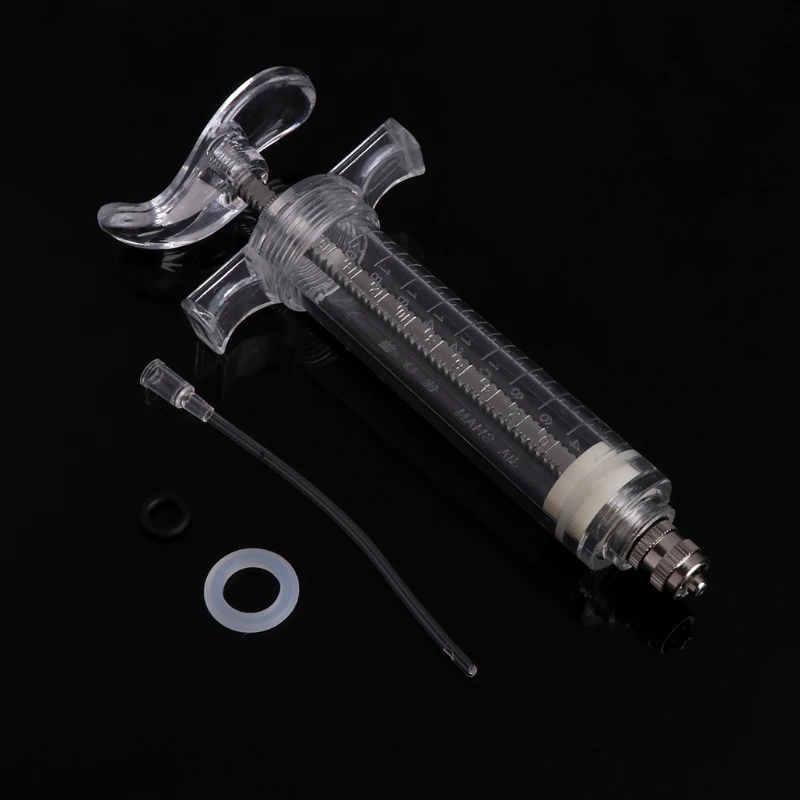 If you have the smallest chicks, then its diameter should not be more than 2.5 mm and it will be made of strong, soft material without sharp edges.
You should get rid of the syringe, for this you need to glow the cap and carefully remove the needle, drill a little more hole in the nozzle and put on the tube. Wrap the thread tightly around the edge of the tube and nozzle from the syringe. With a factory syringe, you don’t have to suffer like that - everything is provided for in the design.
The catheter must be lowered into the crop to a sufficient depth - if it is not installed correctly, the feed may enter the bird's trachea, which will lead to its death.
Therefore, having decided to breed budgerigars, you should already have a feeding syringe available.
Baby Budgerigar Heater
Also, fledglings require additional heating, which you will have to take care of. Devices that breeders use to keep chicks or sick birds warm are called brooders.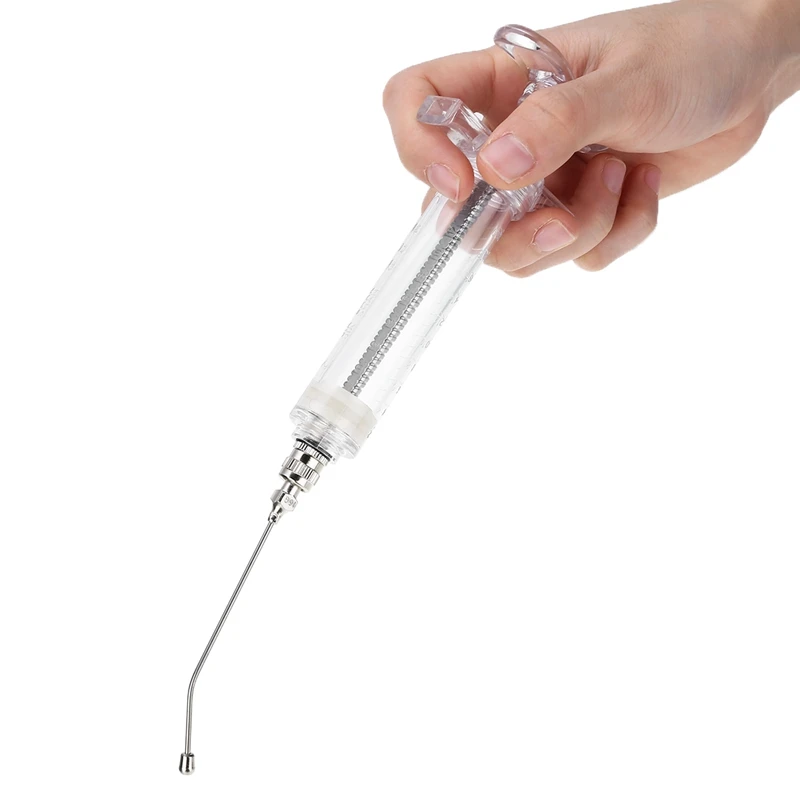 You can buy them or make your own.
The main thing is to be guided by the temperature parameters, since as you grow, the temperature in the room where the parrot is located should decrease.
Chick from a few hours to 4 days - 36 - 36.5°C; 7 days - 34°С; 14 days - 31 - 31.5 ° C; Day 21 - 24°C. Further, the chicks are moved to a box, which is similar in size to a nest box, in such a room the parrots themselves will be able to heat each other.
If you are raising a single chick, keep it in the brooder until day 25, where you lower the temperature to 24°C. Humidity during this period is maintained at 60%, as during masonry.
There are several options for feeding chicks:
Ready mix. Babies need vitamins and nutrients as well as vital enzymes. Therefore, NutriBird A19, a specialized and balanced food for budgerigar chicks, is just right. The mixture must be diluted not boiled, but heated to 39°C with water.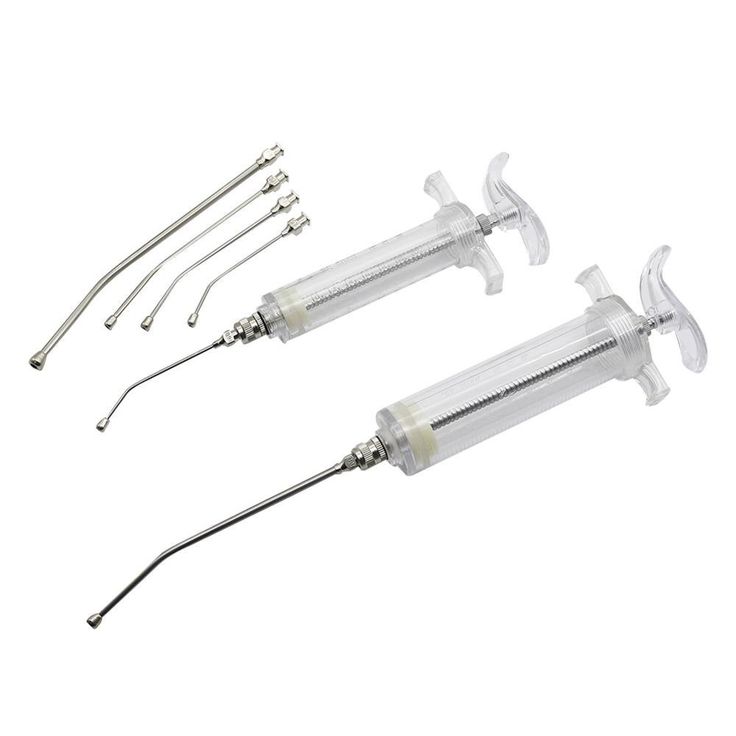 Depending on the age of the chick, you adjust the density of the paste. This is the breeder's most convenient feeding option and one of the best ways to give your chick everything it needs to develop a strong body.
You can buy food for chicks - Padovan Baby Patee Universelle. Some breeders have successfully raised young on it.
Photo: parrots4lifeDonor bird. Professional breeders use donor birds. Using a catheter, they load a grain mixture into the goiter of a bird, which is later pulled out with a probe. This is an unsafe procedure, so only professionals use this method. The main plus is that the substance that is extracted from the goiter of a parrot is a guarantee that the chick will receive all the vital substances for development.
Malt milk. A mixture of germinated grains with an egg. Malt is prepared from germinated grain, which is crushed and diluted in half with water. Then filter through a strainer and add to the mixture.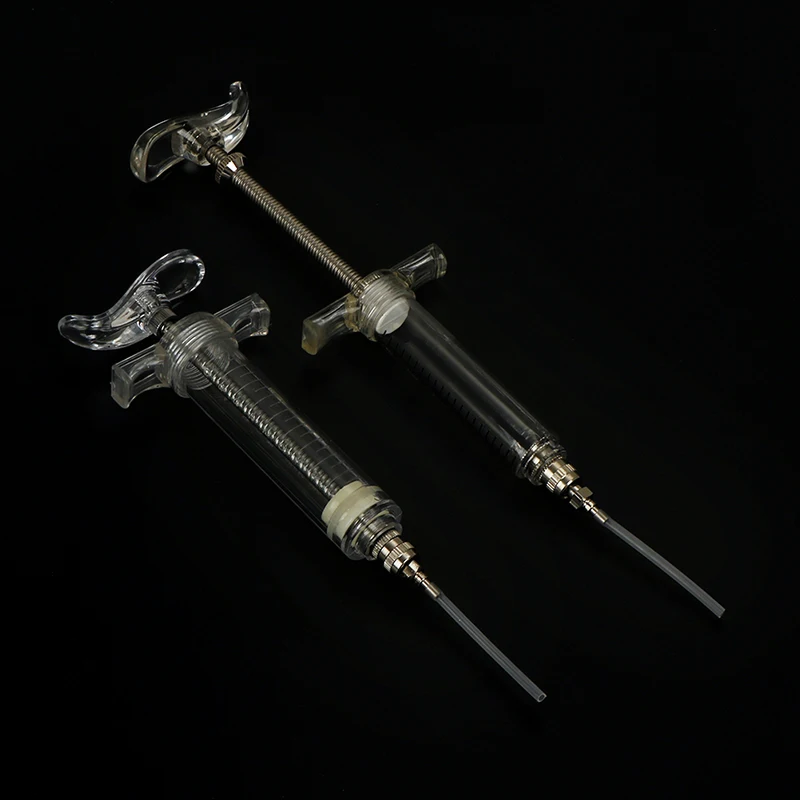 You should end up with a paste at 39°C.
Medical additive Mezim, Festal, etc. to the porridge. The difficulty lies only in the correct concentration and dilution of these enzymes. It is better to use them together with malt milk.
For power base budgerigar chick, you need to prepare baby porridge without milk, sugar and salt: you can boil buckwheat, oatmeal or corn porridge. On the third day of the birth of a chick, you can add vegetable juices to its diet: carrot, beetroot and pumpkin. After the chicks are at least 10 days old, in addition to cereals, you can give a little apple, banana, pomegranate and fat-free cottage cheese.
When the chicks are 20 days old, you can switch them to syringe feeding without catheter or even spoon feeding. From these days, add sprouted grains to the diet (pre-crush into pieces).
At the age of 30-35 days, the chicks can switch to dry grain, earlier if there is someone nearby who can show them how.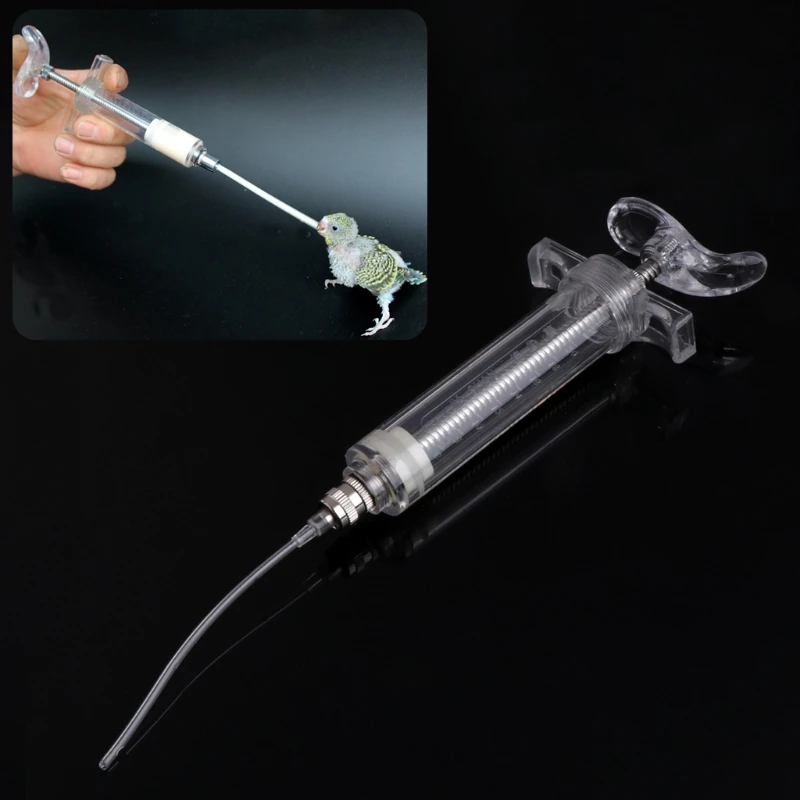 But don’t worry, you don’t need to teach this, the chicks successfully begin to taste the grains themselves when the time comes.
How often to feed budgerigar chicks
The smallest chicks should be fed every two hours, at night every 4 hours. Gradually, six feedings with a break for the night are enough for the parrots.
Photo: Dawnstar AustralisOn the 20th day of life, babies can eat 4 times a day, as they approach 35 days, 3 times will be enough for the chicks.
Babies start to squeak when they are hungry, and the owners, in addition to the feeding schedule, listen to the sounds coming from the cage.
If your older bird is sick, you may need to feed it more frequently.
It is impossible to overfeed a parrot. Do not let the porridge flow out of the beak.
Try to feed them with a spoon, gradually the chicks will get used to it. If among them the eldest is the first to start eating on his own, there will be a chance that he will become an example for the rest of the parrots.