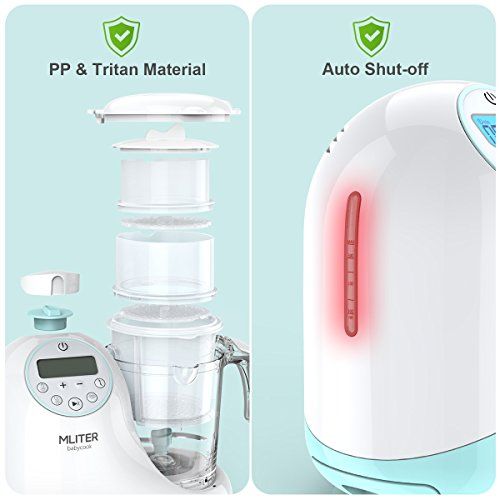
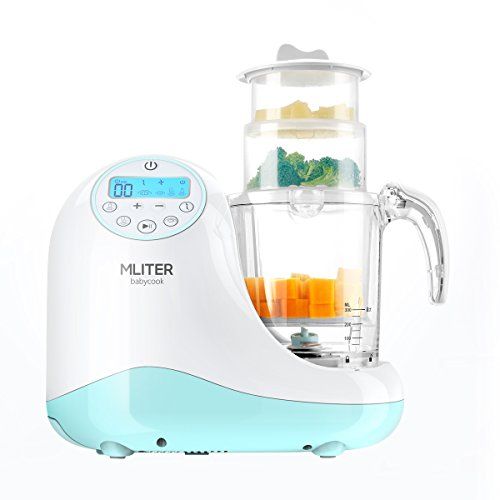
Food steamer to sterilize baby bottles
Baby Food Steamer & Sterilizer
Get an extra boost with these products
250 watts
magic bullet Kitchen Express
$79.99
nutribullet Blender
$149.99
1000 watts
nutribullet Pro 1000
$119.99
Features.
You've got options.
Cook fresh food for warm purées, defrost batch-cooked baby food, and sterilize bottles, pacifiers, and beyond; this versatile steamer does it all.
Set and steam.
With 5 steam settings and a built in timer, you can easily cook fresh fruits, vegetables, and more in minutes. Homemade baby food made simply and quickly.
Defrost and enjoy.
Take batch-cooked baby food from frozen to ready-to-eat in minimal time, without any extra mess.
Sterilize in a snap.
Sterilize baby bottles, pacifiers, nipples, utensils, teethers, toys, and more.
Cleans like a dream.
Less mess, less stress. All components are dishwasher-safe for quick and easy cleanup.
Enhance your nutribullet.
Baby Turbo Steamer Reviews.
Baby Food Steamer & Sterilizer FAQs
Yes, the nutribullet Baby® Turbo Steamer comes with a sterilizing tray and is great for sterilizing pacifiers and toys.
With the nutribullet Baby® Turbo Steamer, you can be sure that your baby’s pacifiers, small toys, bottle nipples, and bottle rings are clean as can be and safe for your baby.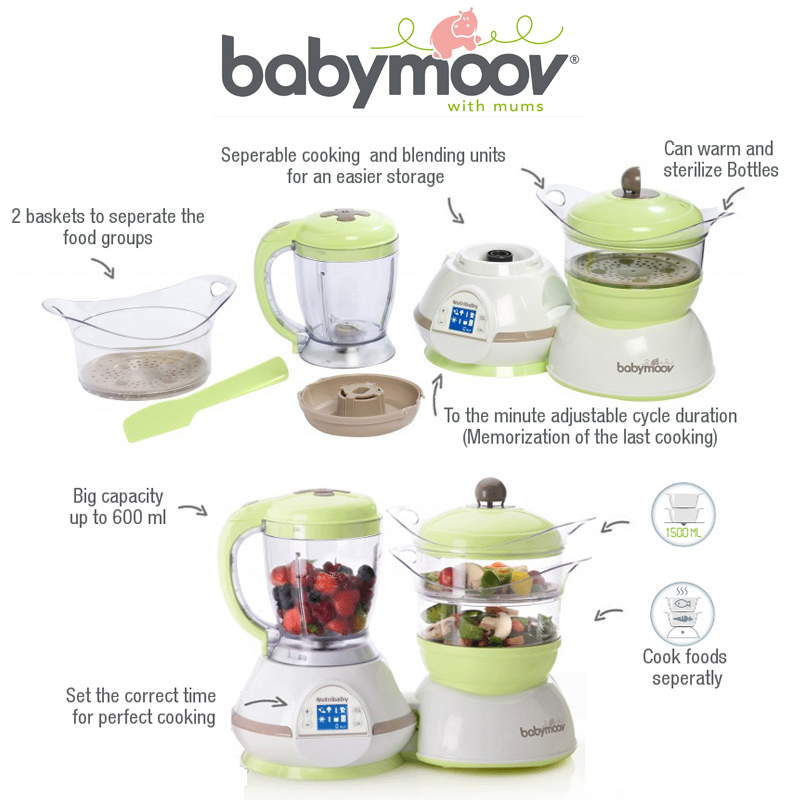 You’ll first add a full cup of water to the water tray and place the white sterilizer tray onto the steamer base. Next, you’ll place the items to be sterilized on the white sterilizer tray, cover with the lid, set to Setting 5, and then simply wait for the “beep” to indicate your items are finished sterilizing.
Much like boiling water, steam sterilization destroys harmful microorganisms, such as bacteria and spores, by exposing them to high temperatures for a specified period of time.
Yes, the nutribullet Baby® Turbo Steamer comes with two defrosting trays for defrosting previously prepared frozen foods. Remember - always test the temperature of the food before feeding your little one.
Microwave heating often results in uneven food temperatures where one area of the food is still cold and another area is very hot. These hot spots can be dangerous because they can easily burn a baby’s mouth. With the nutribullet Baby® Turbo Steamer, defrosting baby food has never been easier.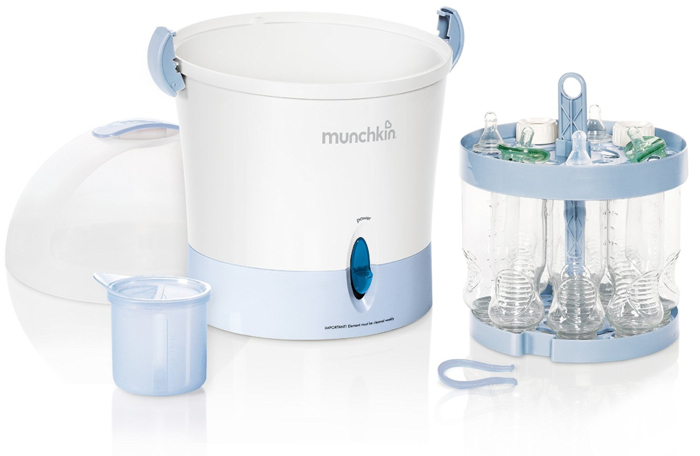 Simply add a full cup of water to the water tray, pop frozen nutribullet Baby® servings into the blue defrosting trays, set the defrosting trays onto the blue steamer tray, cover with the lid, set to Setting 5, and then simply wait for the “beep” to indicate your items are finished defrosting.
With the nutribullet Baby® Turbo Steamer, steaming your baby’s favorite foods couldn’t be easier. With the blue steamer tray, a little water, and just a few minutes – you can have deliciously steamed ingredients in a cinch. You’ll first want to rinse, as well as peel, pit, and core all fruits and vegetables before steaming. Then, you’ll simply add the recommended amount of water to the water tray (listed in your nutribullet Baby® Turbo Steamer User Guide), place the food on the blue cooking tray, cover with the lid, select the proper setting (also listed in your nutribullet Baby® Turbo Steamer User Guide), and wait for the “beep.” It’s as simple as that!
The nutribullet Baby® Turbo Steamer comes with a measuring cup with graduations, so you know exactly how much water to use.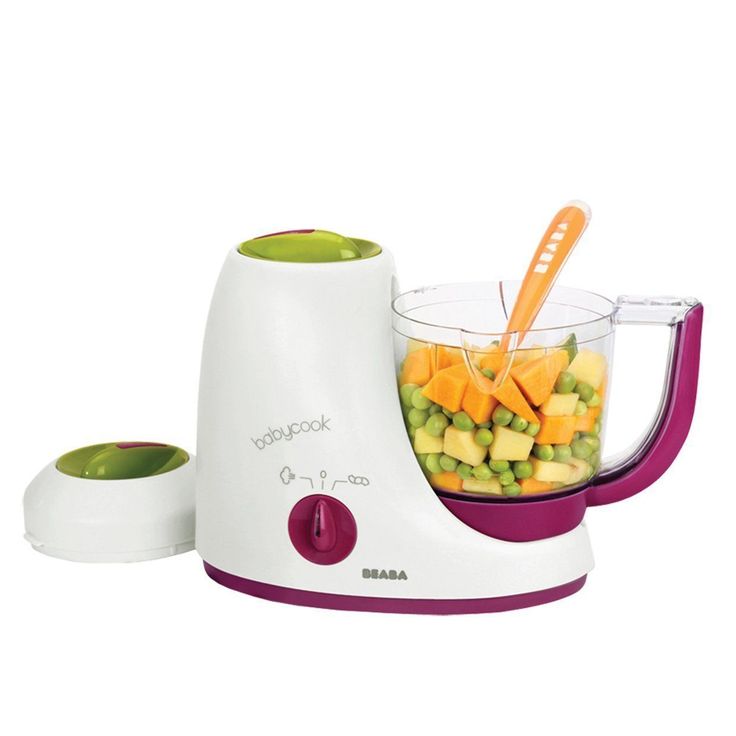 It also comes with a guide that indicates the amount of water as well as which setting to use for various foods. Each setting has a pre-programmed steam time.
First, wash, peel, and dice a medium sweet potato into ½” thick pieces. Next, add a full cup of water to the water tray in your nutribullet Baby® Turbo Steamer. Place the blue cooking tray on the base and place the diced sweet potato on the cooking tray. Cover with the lid, set to Setting 5, and simply wait to hear a “beep” to indicate your food has finished steaming. It’s that easy!
Yes, the nutribullet Baby® Turbo Steamer comes with an egg tray that will allow you to prepare up to 6 eggs at a time. Remember - always test the temperature of the food before feeding your little one.
SEE ALL FAQS
11 Best Baby Bottle Sterilizers (2022 Reviews)
You won’t be able to protect your baby from everything out there, but you can absolutely take steps to make sure they aren’t drinking germs along with their milk.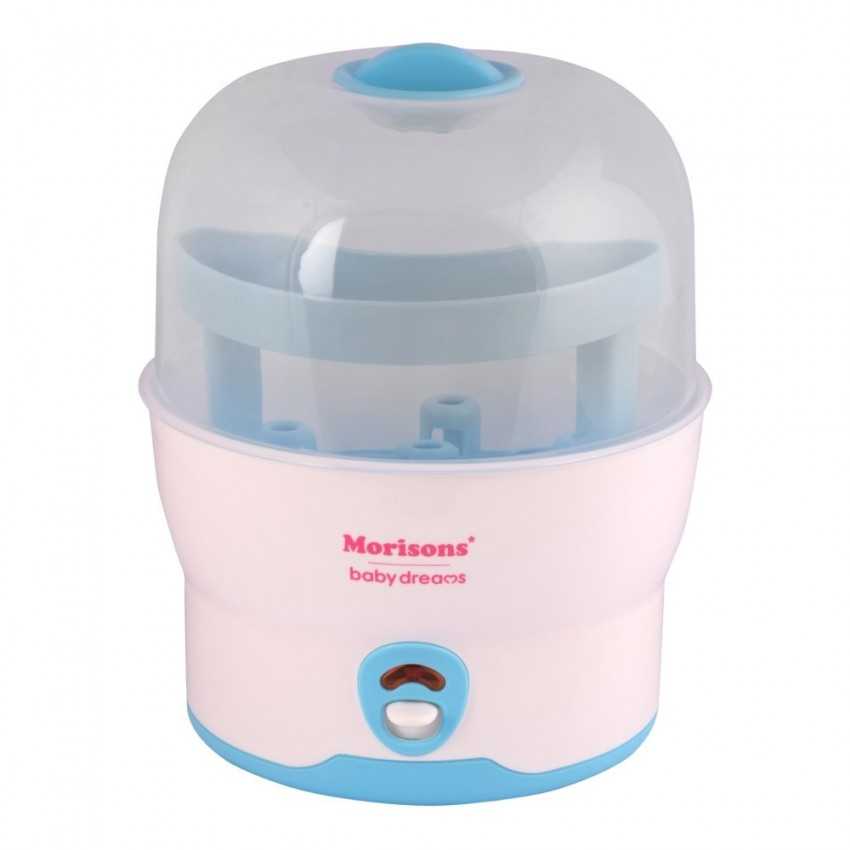
The best baby bottle sterilizers can kill 99.9% of bacteria in minutes.
To help give you some peace of mind, we’ve rounded up our favorite sterilizers to ensure your baby’s bottles are as germ-free as possible.
Our Top Picks
We love honesty! Mom Loves Best earns a commission through the following hand-picked links at no extra cost to you.
Image
Model
Product Comparison Table
Features
Best All-In-One Sterlizer
Papablic Baby
- Can handle very large loads
- Dries bottles thoroughly
- Quicker sterilization cycle
Check Price
Best Easy to Operate Sterilizer
Dr. Brown's
- Includes several accessories
- Cycle indicator
- Comes with an accessory tray
Check Price
Best Value for Money
Philips Avent Microwave
- Cheaper than other options
- Sterilize four bottles at a time
- Sterilizes in under 2 minutes
Check Price
Best Electric Sterilizer
Tommee Tippee
- Easy to clean and store
- Cools down rapidly
- Has HEPA filter
Check Price
Best for Small Spaces
Philips Avent 3-in-1
- Takes up less kitchen space
- Kills 99.
 9% of germs and bacteria
 - Automatic shut off feature
Check Price
Best UV Sterilizer
Wabi Baby Touch
- Uses UV rays to dry and sterilize
- Multiple setting options
- Eliminates 99.9% germs and bacteria
Check Price
Best for Breastfeeding
Baby Brezza Dryer Machine
- Fits every size and shape
- Multifunctional
- Sterilizes various breastfeeding utensils
Check Price
Best Steam Sterilizer
Bololo Steam Sterilizer and Dryer
- Accommodates variety of bottle brands
- Fits up to 12 bottles
- Safe filtration system
Check Price
Best Microwave Sterilizer
Nanobébé Microwave
- Most affordable microwave sterilizers
- Multi-purpose steamer
- Heat-resistant rubber handles
Check Price
Best Steam Bags
Medela Micro Bags
- Very affordable
- Convenient, compact, easy to use
- Portable design for trips away
Check Price
Table of Contents
- Our Top Picks
- The Best Baby Bottle Sterilizers of 2022
- Do I Need to Sterilize My Bottles?
- Different Ways to Sterilize a Bottle
- How to Choose a Baby Bottle Sterilizer
- Baby Bottle Sterilizer FAQs
The Best Baby Bottle Sterilizers of 2022
Here are 11 excellent baby bottle sterilizers to consider.![]()
1. Papablic Steam Sterilizer and Dryer
Best All-In-One Baby Bottle Sterilizer
Check Price
If you’re serious about sterilization and your little one is a bottle feeding champ who goes through tons of bottles, you might like the unit from Papablic. It’s a bit like a tiny dishwasher for all your bottles and accessories.
This sterilizer is large and fits up to 11 bottles inside, and the internal trays can be reorganized depending on what you want to clean. Add water, turn the dial, and after 45 minutes you’ll have perfectly clean and dry bottles you can use immediately. There are different settings, however, so you could also opt for a quicker sterilization cycle.
Pros
- The sterilizer can handle very large loads.
- Dries bottles thoroughly so they’re ready to use.
- Just turn on and go with minimal fuss.
Cons
- This is an extra-large, tall unit and may just be too clunky for many moms.
- Some feel the quality is lacking for a substantial price.

2. Dr. Brown's Deluxe Bottle Sterilizer
Best Easy to Operate Baby Bottle Sterilizer
Check Price
Dr. Brown’s sterilizer takes just around 7 to 9 minutes to sterilize its content.
It’s easy to operate – all you do is add the water and a measuring cup is included in the package too. Put the bottles in and press a button. Moms who go through a lot of bottles may appreciate that it can accommodate six standard-sized bottles at a time. It has a cycle indicator and an auto-shut off feature for safe hassle-free sterilizing.
Pros
- Includes several accessories.
- Has cycle indicator.
- Comes with an accessory tray for easy organization.
Cons
- Can only sterilize six bottles at max.
3. Philips Avent Microwave Steam Sterilizer
Best Budget Baby Bottle Sterilizer
View on Amazon
View on Target
This plastic product is BPA-free, inexpensive and effective.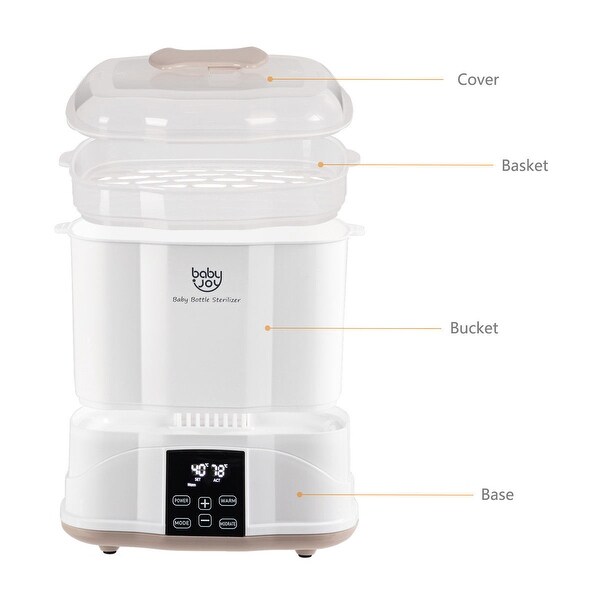 In under two minutes, it kills 99.9 percent of the bacteria that could harm your baby. It can hold bottles, breast pump parts, and feeding accessories. It fits into most microwaves, and if you keep the lid closed until right before you need the items inside, everything will stay sterilized for 24 hours.
Moms will appreciate that this unit is easy to pack for weekend getaways, and it won’t take up much storage space at your house. It doesn’t involve any complicated instructions – anyone can figure out how to use it.
Pros
- Cheaper than other options on the market.
- Can sterilize up to four bottles at a time.
- Sterilizes in under 2 minutes so your bottles are ready to use in no time.
Cons
- The size of this sterilizer may be too large for many microwaves, at around 11 inches in height.
- Some moms have reported that the lid melts in the microwave.
4. Tommee Tippee Electric Steam Sterilizer
Best Electric Baby Bottle Sterilizer
Check Price
This unit may be the perfect choice for someone who wants to sterilize a lot of bottles at once.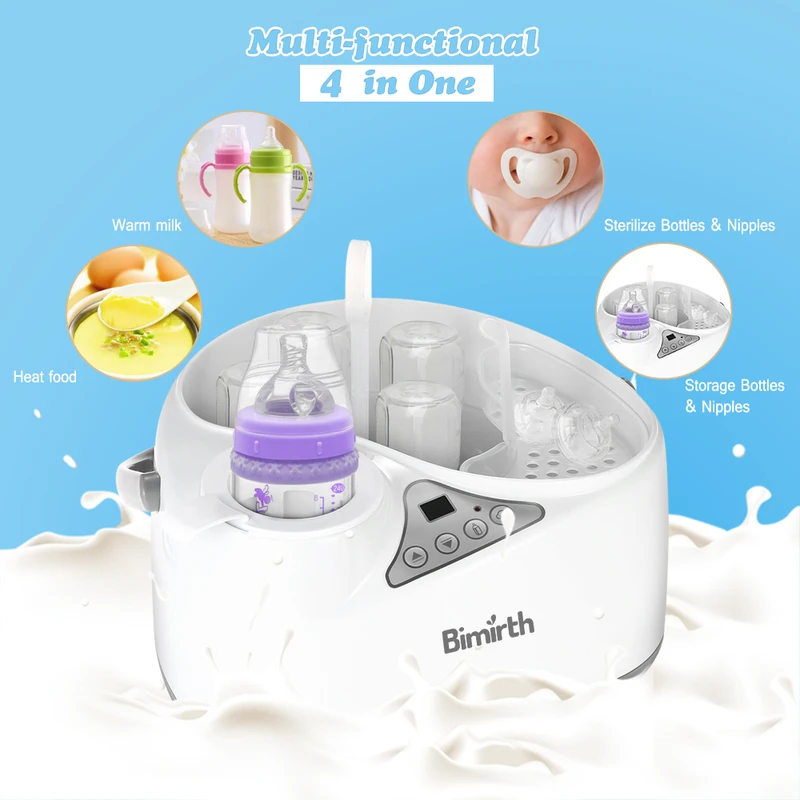 It can hold an entire day’s worth of bottles at one time. In just ten minutes, all the sterilizing you’ll need for any given day will be done.
This sterilizer will kill 99.9 percent of the germs that can harm your baby. Because it has a space-saving design, moms with limited counter space may like that it doesn’t seem too big given how many bottles it holds. Plus, the lid can be flipped over to serve as a germ-free place to prepare bottles.
Pros
- Easy to clean and store.
- Cools down rapidly so you can get the bottles right away if you need them.
- It can clean six bottles at once.
- BPA-free plastic for the health of your family.
Cons
- It can get a strong plastic smell when heating up.
- Needs to be frequently descaled, especially if you’re in a hard water area.
5. Philips Avent 3-in-1 Electric Steam Sterilizer
Best for Small Spaces Baby Bottle Sterilizer
Check Price
This 3-in-1 sterilizer kills 99. 9 percent of harmful germs and bacteria on bottles without using any chemicals that could harm your little one.
It has an adjustable modular design so you can fit a variety of bottles or nursing accessories inside. At most, it fits up to six 11-ounce bottles. We love the design because it takes up less kitchen space.
This machine uses electric steam for sterilization, which only takes six minutes. It also features an automatic shut-off for speed and to prevent overheating. You can even keep the objects sterile for up to 24 hours if you don’t remove the lid after you’ve run it.
To use, just add water to the base, fill the compartment up, shut the lid, and press the button. If you’re limited on space and need a sterilizer that works quickly, this is a great choice.
Pros
- Takes up less kitchen space and fits various bottle shapes with an adjustable size rack.
- Uses electric steam to kill 99.9 percent of germs and bacteria.
- Has an automatic shut-off feature.
Cons
- Condensation forms during use, so it makes a watery mess when you take the lid off.
6. Wabi Baby Touch Sterilizer & Dryer
Best UV Baby Bottle Sterilizer
Check Price
Did you know you can harness to power of UV rays to sterilize almost anything? Well, you can and this special touch panel, dual function sterilizer, and dryer harnesses that power to make your life easier.
Place your bottles inside and with the single touch of a button start the drying and sterilizing process, which takes approximately 30 minutes. After removing the bottles, wipe them down with a clean cloth. The dual UV bulbs eliminate 99.9 percent of E. coli, Salmonella, Staph, and other harmful bacteria safely and efficiently.
One reason we love the idea of UV rays is the versatility. Not only can you sterilize your baby bottles, but you can safely dry and sterilize practically anything, including jewelry, sunglasses, breast pump parts, and even electronic devices.
Choose from a dry setting, a UV sterilizing setting, or both. This is a great investment for moms with a lot they want to sterilize and dry.
Pros
- Uses UV rays to dry and sterilize, so you can put almost anything in it.
- Has multiple setting options.
- Effectively eliminates 99.9 percent of germs and bacteria.
Cons
- Takes at least 30 minutes to sterilize, so it’s not great if you’re short on time.
7. Baby Brezza Baby Bottle Sterilizer
Best Baby Bottle Sterilizer for Breastfeeding
View on Amazon
View on BuyBuyBaby
View on BedBath&Beyond
View on Walmart
When you breastfeed, a lot of things change. Suddenly, your schedule revolves around your little one. Many moms who breastfeed also use bottles to store excess milk to ensure their production and flow is maintained while preventing infections and swelling.
This baby bottle sterilizer system is perfect for breastfeeding moms because it allows you to dry and sterilize everything. It fits up to six bottles of any size or shape and can also be used on breast pump parts. Sterilization takes only a few minutes and if you can leave it for longer all of the excess condensation will be dried up with one of the multiple drying settings.
All of the parts are 100 percent BPA-free and can keep items sterilized for up to 24 hours if the machine is not opened. It has an automatic drying mode you can set up, as well as an auto shut-off function.
Pros
- Great for sterilizing everything you use to breastfeed, not just bottles.
- Fits every size and shape of the bottle.
- Multifunctional.
Cons
- While you can put different breast pump parts inside, it can be hard to make things fit properly.
8. Bololo Electric Steam Sterilizer and Dryer
Best Baby Bottle Steam Sterilizer
Check Price
This steam sterilizer offers versatility – it can be used for bottles, pacifiers, and small toys. It was designed to allow steam to reach deep into the bottle, which creates more thorough sterilization.
Moms might like that this unit has a built-in drying rack. The trays can be taken out of the sterilizer and placed on the counter to allow the bottles to air dry. This sterilizer has a unique HEPA filtration system, which may be reassuring to parents who are worried about exposing their baby to harmful chemicals and pathogens.
Pros
- It can accommodate a wide variety of bottle brands.
- Fits up to 12 bottles.
- The built-in drying rack can hold a variety of items.
Cons
- Some parents have doubts about the product durability.
9. Nanobébé Microwave Sterilizer
Best Microwave Baby Bottle Sterilizer
Check Price
This is one of the most affordable microwave sterilizers available so it’s perfect if you’re on a budget.
Moms who have heard horror stories about their friends being burned by microwave sterilizers may appreciate that this unit has heat-resistant handles that may make moms feel safer taking this sterilizer out of the microwave.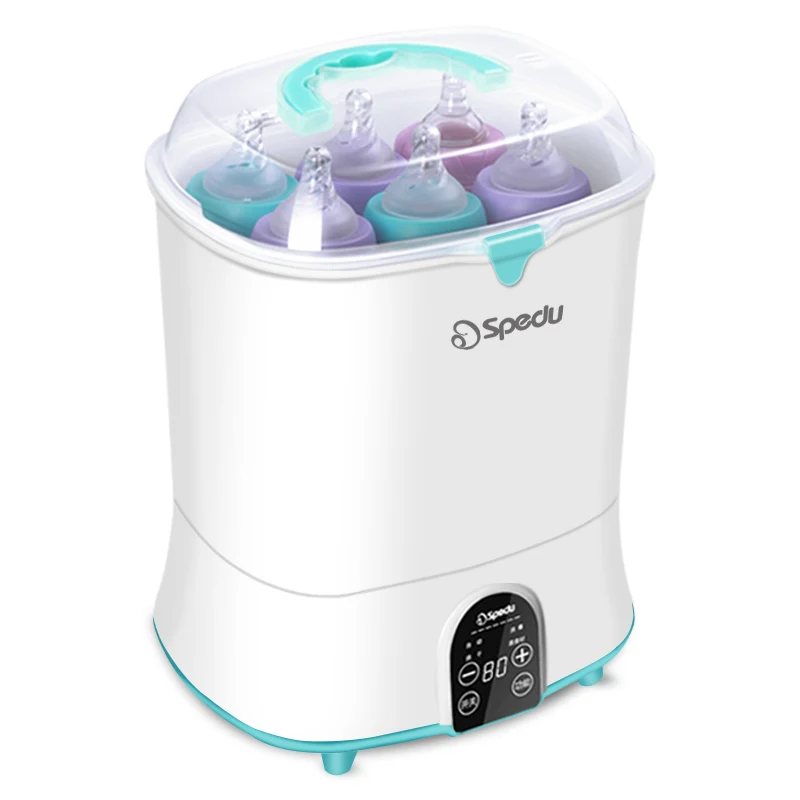
Parents who want a multi-purpose steamer should like that this unit can also be used on pacifiers, teething rings and small toys. It fits all standard-sized microwaves and comes with tongs to help ensure the safe removal of the hot bottles.
Pros
- Adjustable pegs to faciliate various items for sterilization.
- Works for both wide-mouth and standard size bottles.
- It works in as little as four minutes, so it’s great if you need a bottle in a hurry.
Cons
- The pegs do not fit too snugly at the base.
10. Medela Micro Steam Bags
Best Steam Bags
View on Amazon
View on Walmart
Medela steam bags are a godsend, and sanitize bottles quickly, easily and thoroughly. All you need is a microwave (even a small one) and a little water. The box contains 12 bags that can each be reused 20 times before the seal starts to lose its integrity.
Like other sterilizers, they kill 99.9 percent of germs and best of all: you can keep them sealed until the bottles are needed.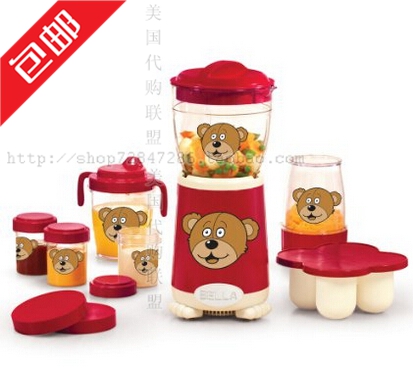 You can toss in breast pump shields, nipples, dummies, feeding accessories and more and they’ll get a burst of cleaning steam as well. These take up barely any room – they’re great for use at home but work just as well on trips, as long as you have access to a small microwave.
Pros
- Very affordable, even more budget-friendly than microwave steamers.
- Convenient, compact and super easy to use.
- Portable design which makes them great for trips.
Cons
- Some moms dislike that there’s no handle to grab the hot bag from the microwave.
- Despite claims, these bags might melt breast pump tubing.
11. Papablic 5-in-1 Ultra-Fast Baby Bottle Warmer
Best Portable Baby Bottle Sterilizer
Check Price
While the product is a baby bottle warmer, we double-checked that it too can sterilize baby bottles. Actually, it has five functions. It can be used for steady warming, sterilizing, fast warming, food heating, and defrosting. The Papablic sterilizer removes 99.99 percent of germs and bacteria so your baby’s bottles are as clean as they can be.
With this sterilizer, you can clean bottles, and because it only weighs 1.96 pounds it would be easier for you to bring this while traveling.
It can clean bottles, pacifiers, toys, and nipples. So, once you’ve done the bottles, use it for other items around the house.
It takes a minimum of three minutes for the sterilization process.
Pros
- Auto-shutoff feature.
- Multifunctional.
- Can accommodate almost any baby bottle brands and materials.
- Sterilizes bottles, pacifiers and nipples.
Cons
- Can sterilize one item at a time.
Do I Need to Sterilize My Bottles?
Sterilizing bottles isn’t a necessity, but it’s a step many mothers still choose to take.
A baby’s immune system is fragile for the first year. When you’re a new parent, it feels like germs are everywhere and there’s nothing you can do to avoid exposure — people love to touch and hold your baby.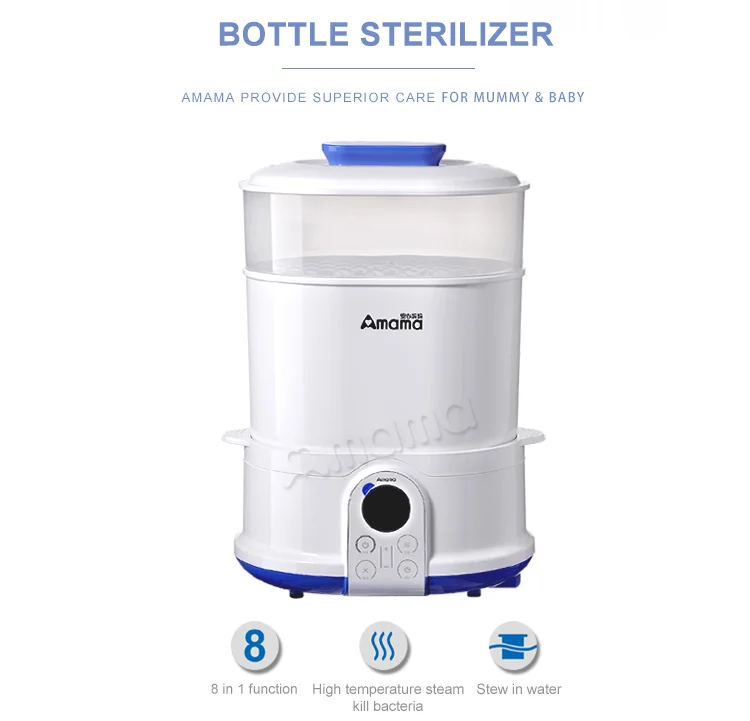 But since nobody likes being labeled a paranoid mommy who won’t let people around her baby, you’re often left ignoring that inner voice telling you to watch out for germs.
While you can’t stop all the germs caused by the doting friends and family members who want to hold your baby, at least you can make sure her bottles aren’t making her sick.
Sterilizing bottles is easy, and it cuts back on the mountain of germs your baby is introduced to daily — and that’s always a good thing in my book. I know I can’t wrap my children in bubble wrap and keep them safe from everything, but if sterilizing bottles prevents even one illness, I think it’s worth it.
Different Ways to Sterilize a Bottle
There are several ways to sterilize bottles and nipples, some easier than others.
1. Boiling
The way our moms sterilized bottles was to boil them in water on the stove in a pan. The method is simple: immerse each item thoroughly in boiling water for at least 10 minutes. This is cheap and relatively easy to do, although it can wear down bottle nipples with time, so be sure to check them for cracks once in a while.
While boiling is a perfectly good way to sterilize, I’ve always avoided it. I use plastic bottles, and I didn’t like the idea of boiling them because I wasn’t confident that harmful chemicals wouldn’t leach out when heated.
2. UV Light
UV bottle sterilizers are one of the newest methods for sterilization and use ultraviolet light to kill germs. If you go this route, be prepared to pay dearly – these units cost several times what you’d pay for an electric or microwave sterilizer. Though they work well, the cost puts them out of reach for those of us who aren’t prepared to skip a car payment to afford one.
Pros
- Effectively kills 99.9% of germs, viruses and bacteria.
Cons
- Relatively expensive.
3. Cold Water Sterilizing Solution
This method requires you to immerse your bottles and accessories in cold water in which you’ve dissolved a substance that will kill bacteria.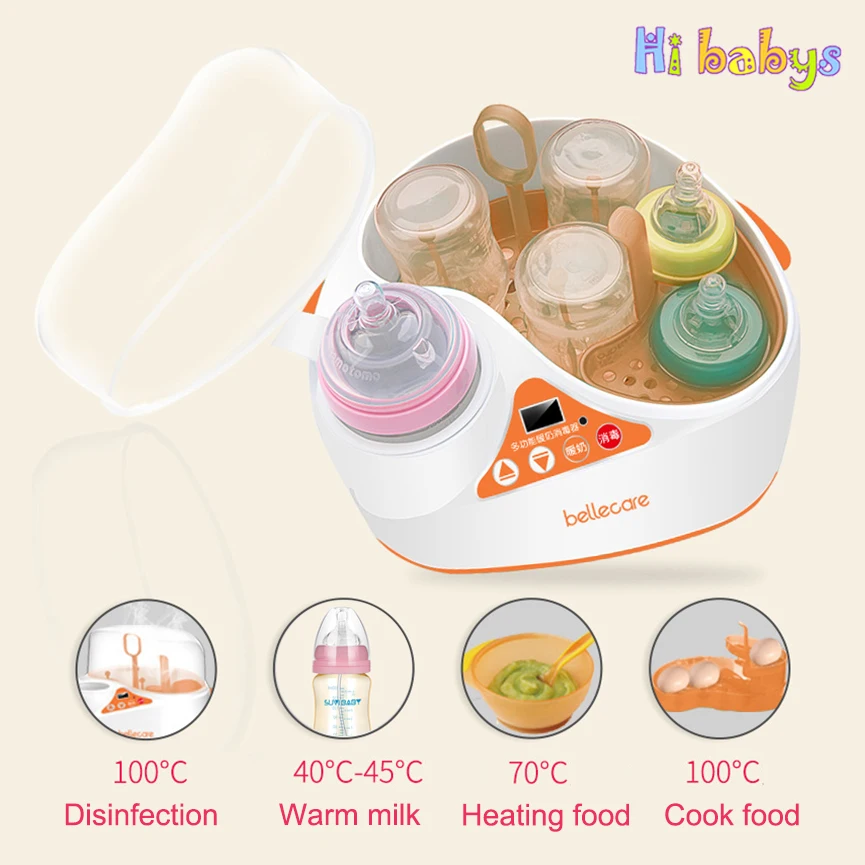 The sterilizer usually comes in a dissolveable tablet form that can be used to sanitize just about anything, not just bottles.
Pros
- This method is affordable
Cons
- A little environmentally unfriendly.
- Perhaps not as thorough as other methods.
4. Steaming
Times have changed since we were babies, and there is a simpler way to do things today. You can now use steam to sterilize bottles, either with an electric steam sterilizer or a microwaveable one as shown below.
Microwave steamers
These steamers are simple in design. To use, simply fill with water and place in the microwave for a few minutes to generate sterilizing steam.
Pros
- They’re typically cheap and easy to use.
- They can be taken on trips and used anywhere there’s a microwave.
Cons
- They may scald you when you remove them from the microwave.
- Some models may end up melting more delicate items.
- Microwaveable steamer bags are cheaper still but may require a little more practice to use. They are, however, the best choice for travel.
Electric steamers
Plugin and sterilize your bottles with the press of a button.
Pros
- They’re pricier than microwave sterilizers.
- Some parents find them more thorough.
- A few models come with a handy drying function.
Cons
- These kinds of sterilizers offer more variability in size, price, and design, as you get a whole appliance dedicated just to bottle sterilization.
- Bigger units can hog the kitchen counter space.
- If you live in a hard water area, these will need to be descaled regularly.
How to Choose a Baby Bottle Sterilizer
Here’s what to look for when buying a good electric steamer/sterilizer to keep everything sterile for your little one.
Ease of Use
Some sterilizers are easier to use than others. We recommend electric baby bottle sterilizers if you’re looking for something simple to operate. If you find yourself scratching your head over the instructions or the number of buttons, move on in your search to find something more straightforward.
The Size
You want the unit to be large enough to fit all your bottles. Mothers who are breastfeeding and only use bottles occasionally can get by with a small unit that holds just a few bottles.
You’ll find lots of different sizes available. Some hold a couple, while others can hold up to a dozen!
How Many Bottles It Sterilizes at Once
Women who opt to feed their babies formula will need to sterilize bottles frequently throughout the day. So they’ll want to look for a bigger sterilizer that can handle a larger number of bottles. Some can sterilize a day’s worth of bottles at once, so definitely look around for one that will be most convenient for you.
The Cost
If your cash flow is a bit squeezed now that you’re a parent, cost will be an important consideration. Our choices range from about $15 all the way up to $300 so they are available for various budget sizes. Microwave sterilizers are usually cheaper than other types on the market. You can also use sterilizing bags which are the cheapest, but may more expensive in the long run since you need to dispose of them after a certain number of uses.
Does It Dry
Check if the sterilizer can also dry your bottles. Many can, but microwave sterilizers leave bottles are left wet, and they’ll have to be dried after they’re taken out, adding an extra step to your workload.
Kitchen Space
Some moms might like that microwave sterilizers won’t require any space on their kitchen counters. They can be stored in a cabinet until you need them and they don’t need an outlet to work. If you opt for an electric sterilizer, you’ll have to make some room on your counter for it.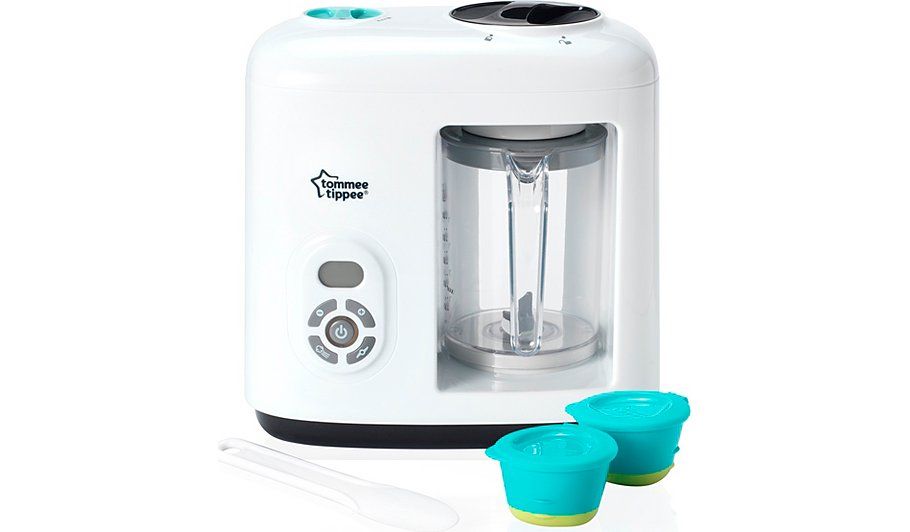
Baby Bottle Sterilizer FAQs
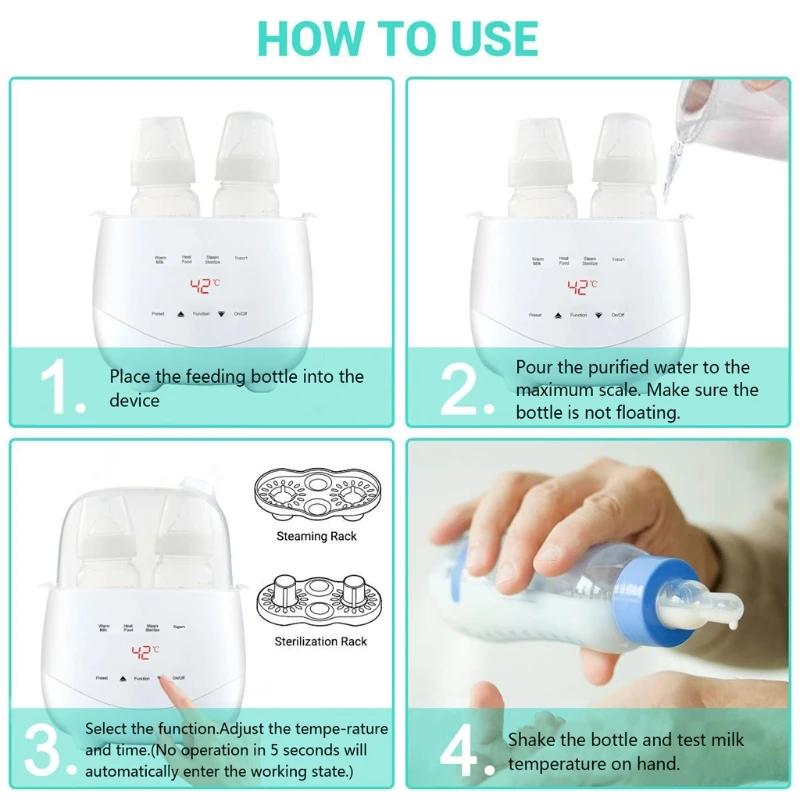
How Do I Use a Bottle Sterilizer?
Depending on your sterilizer model, you’ll follow different methods for getting those perfectly clean, fresh bottles. First, wash everything in warm soapy water or in the dishwasher. Next, load up the sterilizer with clean bottles and add the appropriate amount of water to the unit.
For microwave sterilizers, put it inside the microwave for the recommended time. Remove and allow bottles to cool inside until they’re needed, or use immediately. Dry with a clean, soft cloth. Let the steam dissipate before reaching into the microwave to prevent burns.
For electric sterilizers, turn the unit on and let it get to work. If you’ve got a model that also dries, wait for the drying cycle to complete. Most models will keep your bottles sterile if left inside for 24 hours.
When Can You Stop Sterilizing Bottles?
There’s no point in sterilizing bottles once a baby becomes mobile or begins to grab at every (dirty) thing she sees (1).
Remember
When your child is old enough to make the connection that she can grab things and put them in her mouth, she’s going to be introduced to more germs that will possibly accumulate in her bottles.
After you stop sterilizing, though, you should be certain that you’re doing a top-notch job of cleaning the bottles and nipples. And if your baby has an illness (2), you should sterilize her bottles until she is healthy again. You don’t want to reintroduce any germs to her recovering immune system.
How Can You Clean/Descale a Sterilizer?
Your sterilizer will come with detailed cleaning instructions, but as a rule, most removable parts of any unit can be washed with mild soap and water, while the rest can be wiped down with a damp cloth.
Limescale build-up looks like a yellow or white discoloration on the sterilizer’s heating pad. This can be removed at home with ordinary white vinegar or even lemon juice: simply soak for 30 minutes to overnight and rinse off well, followed by an empty cycle to dislodge any residue.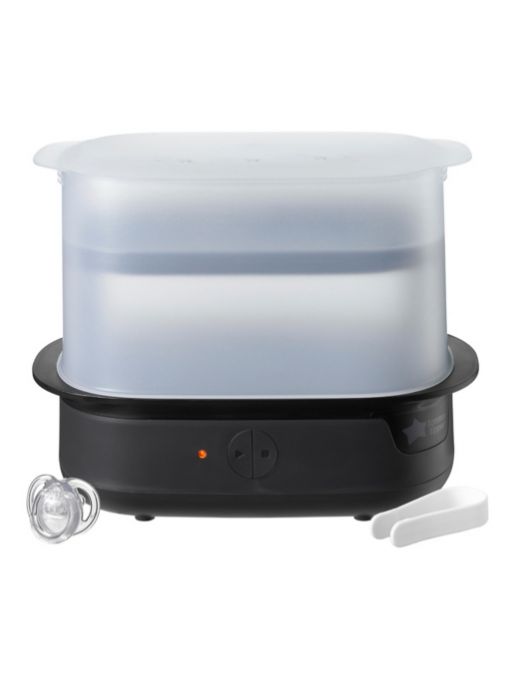
Can I Use a Bottle Sterilizer for My Breast Pump?
Again, your specific breast pump will have come with instructions for cleaning. Check these to see if the breast pump parts can go into the dishwasher.
After you’re done using your pump, use soap and water to wash any part that’s come into contact with breast milk. Allow to air dry (drying cloths can introduce bacteria again) before reassembling everything, and you’re good to go. Thorough home sterilization isn’t really possible, but you can sanitize breast pump parts adequately by simply washing, or using your bottle sterilizer (3).
Before you pop anything into your sterilizer though, check the manual for both the sterilizer and the breast pump to ensure it’s safe. If you’re unsure or want to save yourself the extra work, rest assured that daily sterilization is not necessary and you can clean breast pump accessories with just soap and water.
Feedback: Was This Article Helpful?
Thank You For Your Feedback!
Thank You For Your Feedback!
What Did You Like?
What Went Wrong?
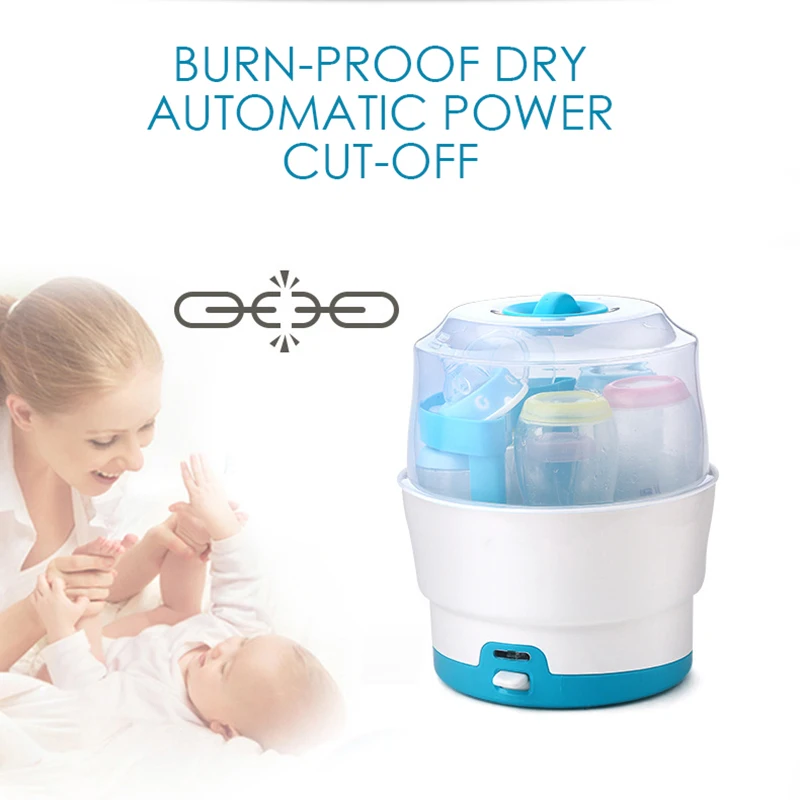
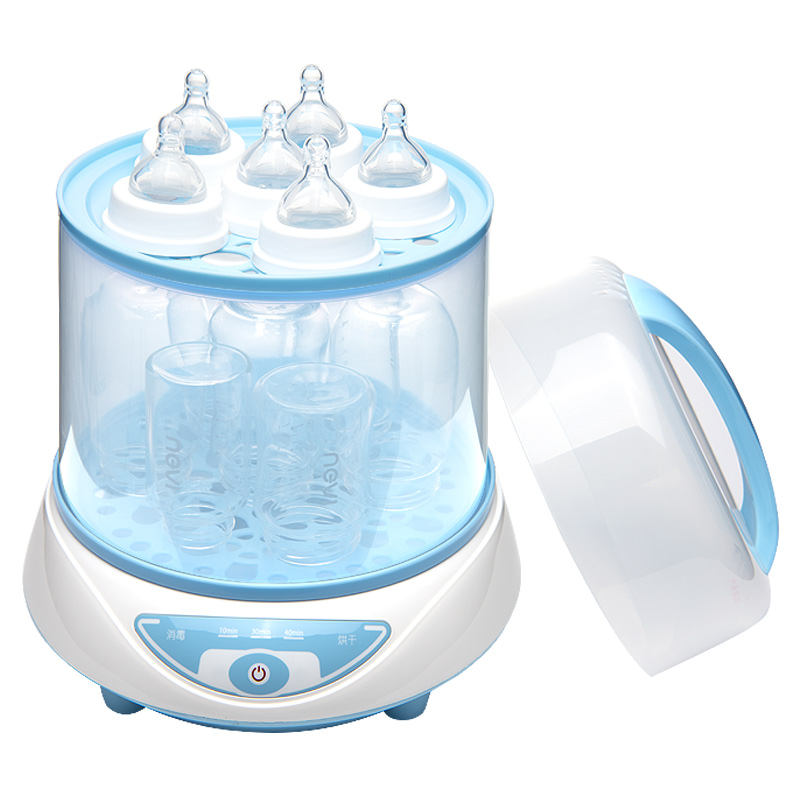
Sterilization of baby bottles in a steamer without a sterilizer
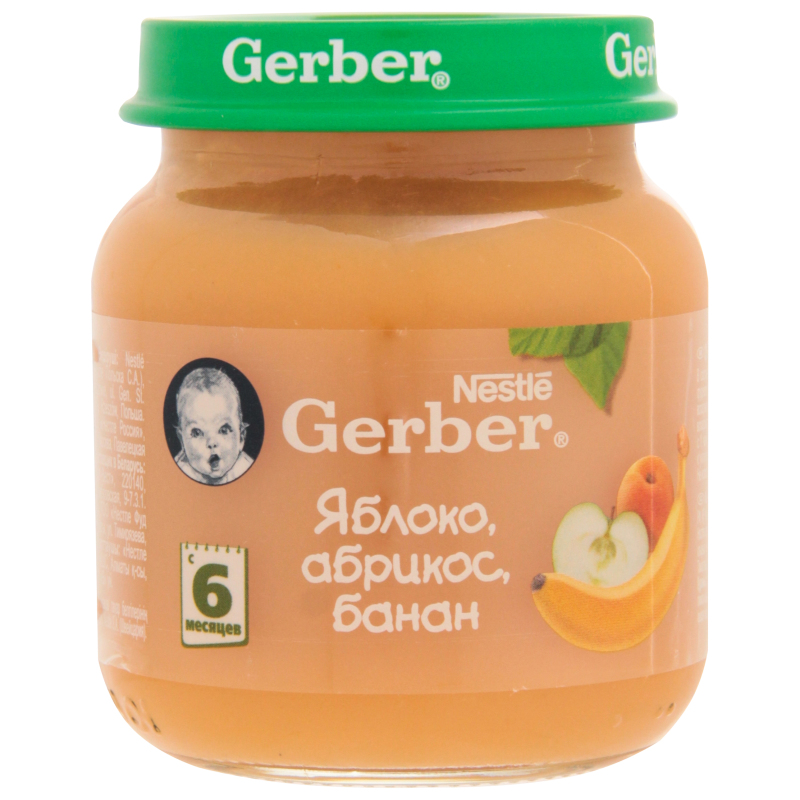
Even if you are breastfeeding, you will still have to switch to formula and baby food over time. This means that you will face the problem of sterilizing dishes. Sterilization of baby bottles can be done in many ways: in a microwave, in a saucepan, in a special sterilizer or in a double boiler. We will look at the last method.
Contents
- 1 Why sterilization is necessary
- 2 Instructions for steam sterilization
- 3 Which dishes to choose
- 4 Benefits of sterilization in a steamer
- 5 Conclusion
Why sterilization is necessary
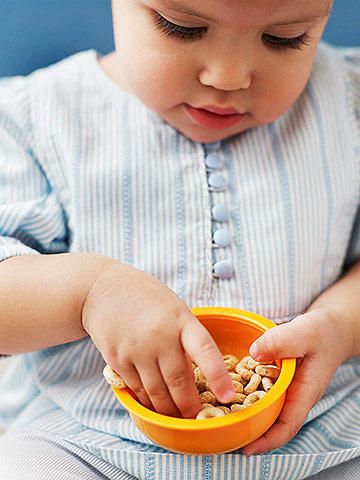
Every mother knows that her baby's immunity is especially weak in the first months of life. In order to prevent the occurrence of various infections and diseases, parents strive to protect everything that their child comes into contact with.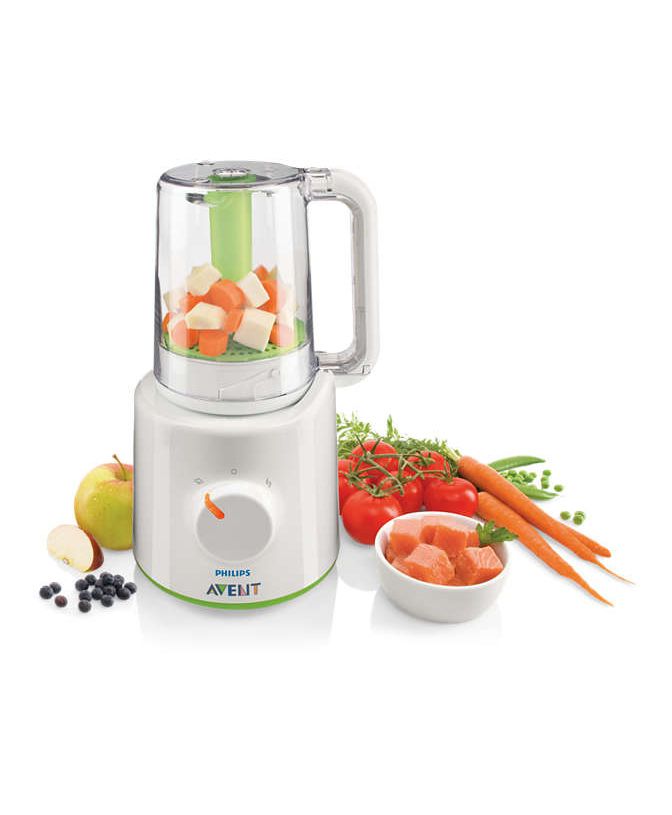 This is especially true for dishes and what a child can take into his mouth. So why is sterilization necessary?
- The child's body simply cannot cope with those infections that can enter his body through a nipple or pacifier.
- Even a slight indigestion at an early age can cause colic, which will cause a lot of trouble for both the baby and his mother.
It is important to understand that the problem of sterilization of dishes is due to the fact that this procedure must be performed before each meal . That is, without process automation, you are doomed to spend more than one hour disinfecting dishes for feeding a baby.
Instructions for sterilization in a steamer
Sometimes, in the desire to take care of their child, mothers can do unimaginable things. What is it worth buying an expensive sterilizer when there is no need for it! Sterilizing bottles in a double boiler is not only economical and practical, but also convenient .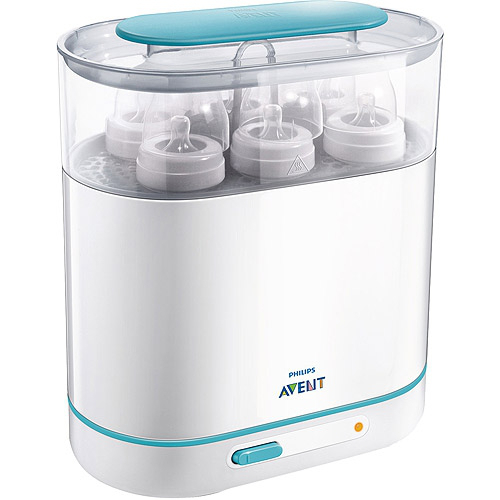 In addition, this technique will bring you much more benefit in the future than a device that you throw away in a year. So, to disinfect dishes with steam, you will need:
- Steamer directly.
- Handy tongs with long handle.
- Clean bottle container.
- Clean towel.
Instructions for sterilizing baby dishes include the following steps:
- The first thing to do is rinse the bottle with water from the mixture.
- Now fill the steamer with water so that it hides the bottom mark, but does not go beyond the top one.
- Place the bottles upside down on the bottom tier. In this case, they should be positioned in such a way that they do not touch each other.
- Set the timer. Sterilization will be enough from 5 to 7 minutes.
- When the steamer is finished, open the lid, carefully remove the bottles with tongs and place them in a clean dish.
- Cover the container with a lid or towel and use the dishes as needed.
Many people leave sterilized dishes in the steamer itself. If you are not using it for anything else, just wipe off the condensation and close the lid tightly.
Which dishes to choose
To understand what problems can arise without a sterilizer, you should understand the features of children's dishes. There are two types of baby bottles: glass and plastic. To determine what to give preference to, you should familiarize yourself with the pros and cons of each material.
Advantages of glass:
- Due to the fact that glass bottles do not emit any substances even during processing, they are completely safe for baby's health.
- Due to their strong structure, they can be processed in any way, they are not deformable.
- A familiar and comfortable shape that is easy to handle and clean.
Advantages of plastic:
- You can choose an interesting model that your baby will like.
- Many bottles have handles that the baby can hold on to.
- Modern plastic bottles are equipped with a special anti-colic system that does not allow air to enter.
- They cannot be broken.
- Light weight, which allows the child to hold them himself.
Glass flaws:
- No handles for the child to eat by himself. Holding on to the glass is uncomfortable for the baby.
- They are easy to shatter, and a fragment can injure a child.
- Such dishes weigh much more than plastic ones, which makes them not very convenient for small children.
Plastic disadvantages:
- If you buy low-quality plastic bottles, they may release harmful substances during heat treatment.
- When subjected to high temperatures, plastic is subject to deformation.
- High-quality bottles equipped with an anti-colic system are not very easy to clean.
If you want to buy a plastic bottle for your baby, it is best to do so at a pharmacy. To date, Avent is considered the most popular company that produces high-quality baby bottles.
Benefits of sterilization in a steamer
Sterilization of baby dishes in a steamer is one of the best solutions to this problem, and here's why:
- The device can be used not only for bottles, but also for sterilizing nipples, pacifiers and even small toys .
- After your child grows up, you can cook healthy meals in it.
- The steamer can sanitize several bottles at the same time, which is very convenient when time is short.
- You don't have to worry about the height of the container, as a bottle of any height will fit into the steamer.
- Even metal objects can be placed in the device, which cannot be done in special sterilizers and microwave ovens.
Conclusion
Only after the practice of sterilizing children's utensils was firmly established in the lives of parents, the proportion of serious diseases in infancy, which in rare cases even ended in death, fell sharply. Of course, the manufacturers of equipment fussed and released a special device - a sterilizer. However, if you have a steamer, you don't need to buy a sterilizer. The first will bring you much more benefit, due to its versatility.
Steam bottle sterilization | WDAY
Magazine Councils to the hostess
Sterilize bottles in a double boiler
- Photo
- Shutterstock
How to sterilize the canvases of the vegetables. Conservative preparations begin to be popular, in the way, there are popularly, in the same way. . Despite the fact that during the canning process, jars can be repeatedly filled with boiling water, they still need to be sterilized beforehand. Steam sterilization is considered the most popular method; for this, the jar was placed on a special stand over a pot of boiling water and kept over steam for 15–20 minutes.
 Banks were sterilized one at a time, the procedure took quite a long time. With the advent of double boilers, the process has been simplified - the canning dishes should be thoroughly washed, placed in a double boiler, turned upside down, and sterilized for 15 minutes.
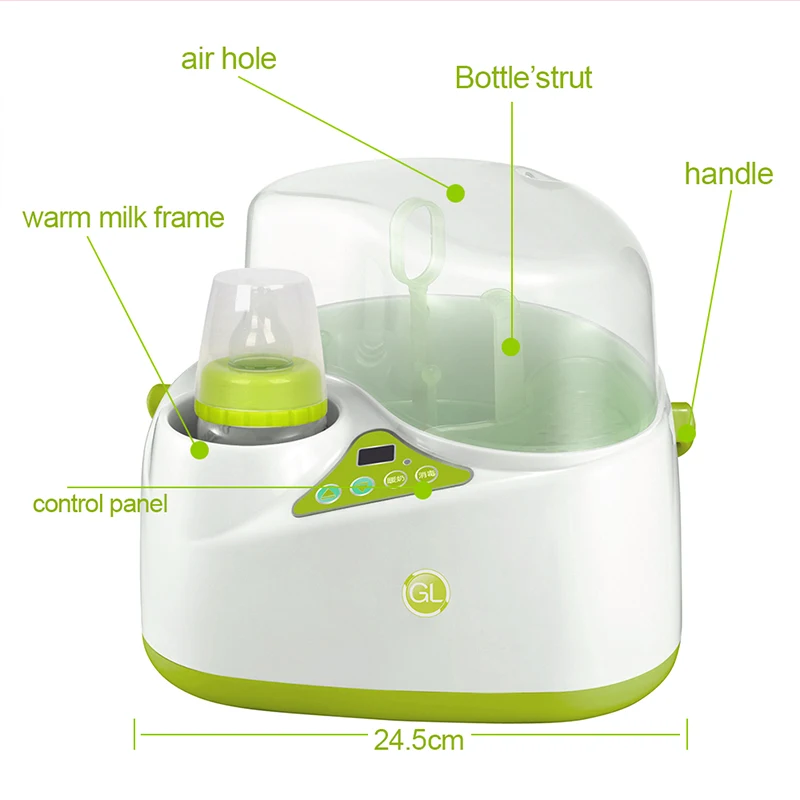
Sterilizing baby utensils in a steamer
Artificial feeding is a hassle and is made more difficult by the fact that baby utensils, bottles and nipples must be sterilized before each use. Especially this requirement must be observed in the first year of life, when the child is most susceptible to various kinds of infections, fraught with the most serious consequences. It was not until the sterilization of baby utensils became a requirement for newborns and infants that the number of cases of gastroenteritis, a deadly disease, dropped sharply.
The industry produces special mini-installations for sterilizing children's dishes. Their disadvantage is the cost and the fact that after a year the need for such a device already disappears.