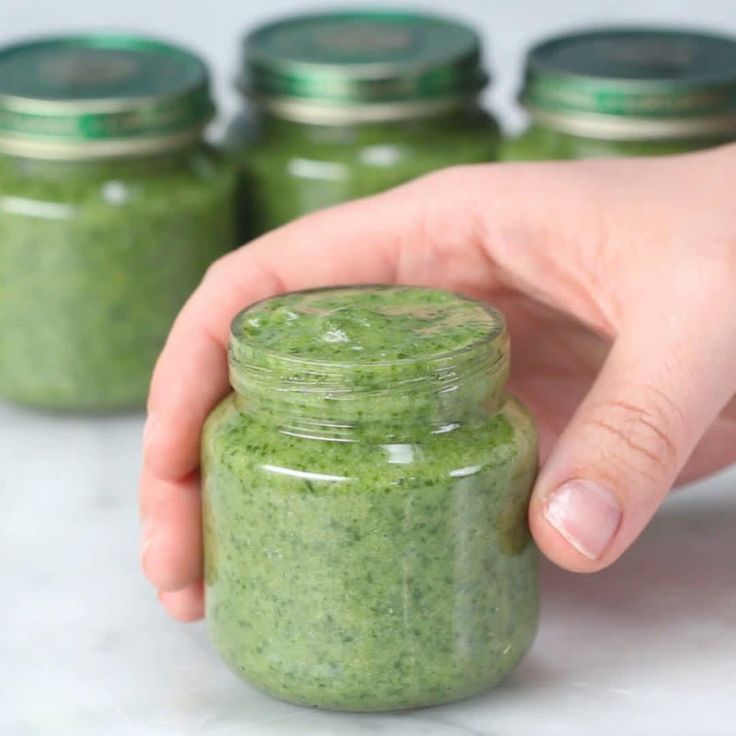
Homemade baby food pouches station
Best Baby Food Pouches (Easy Homemade Ideas)
Learn how to make homemade Baby Food Pouches, no muss, no fuss, with these 15 easy recipe ideas. These are a great way to save money, share lots of flavors with babies and toddlers, and have convenient foods ready to go!
Baby Food Pouches
I always made my own baby food pouches because I like how affordable they are and how once you have a set of reusable pouches, there are so many options! Plus, you can feed many things you’re making for the rest of the family in a pouch, which means you can share flavors with the little ones even if they aren’t quite up to finger foods yet.
I view baby food pouches as one component of feeding a baby and like to mix purees with baby led weaning as a way to expose baby to a wide variety of flavors and textures from an early age.
I also find them very convenient for offering smoothies well into the toddler years!
Ingredients in You Need
What you need for your pouch adventure will depend on what you want to feed your baby! Basically you need something pureed (or a food like yogurt or applesauce that has a very pouch-friendly texture already) and a reusable pouch.
Step-by-Step Instructions
Here’s the general gist of how to make a baby food pouch. Scroll down to the bottom of the post for recipe ideas and best tips!
- Choose your puree and prepare it. Let it cool as needed. (Or pull out the yogurt or applesauce.)
- Fill the pouch, making sure that the cap is on if using the kind with the zipper opening on the bottom. (Otherwise it will all run right out the top!)
- Store in the fridge or serve to baby.
TIP: As a quick an easy snack option, I like to mix half yogurt and half applesauce right in the pouch.
What can I put into a baby food pouch?
You just need the food to be smooth enough that it easily passes through the opening of the pouch, so anything that’s pureed or the consistency of pureed soup or yogurt will work. Generally speaking you can do:
- Applesauce
- Fruit purees
- Vegetable purees
- Baby food combinations
- Pureed meats
- Pureed soups
- Smoothies
- Yogurt
TIP: You can also use any of my go-to Baby Food Combinations too!
Making apple yogurt in a bowlFlavor Ideas for Baby Food Pouches
These are some of my favorite recipe ideas to add to a pouch.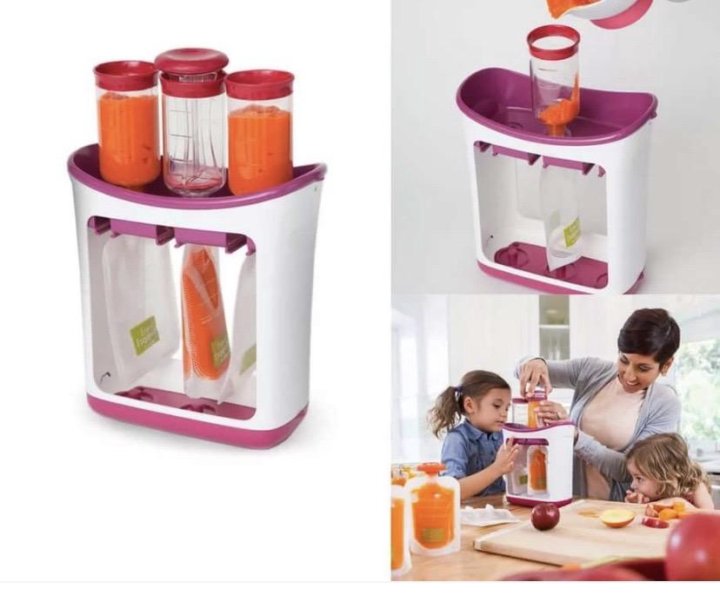
- Applesauce
- Apple Flax Yogurt: Equal parts Apple Puree and plain yogurt, plus a sprinkle of ground flax.
- Baby Oatmeal with Applesauce mixed in for flavor.
- Banana Yogurt
- Pear Coconut Puree: Pear Puree with full-fat coconut milk mixed in.
- Pear Yogurt: Equal parts Pear Puree and plain yogurt.
- Red Lentil Coconut Soup
- Sweet Potato Tomato Soup
- Mango Smoothie
- Mashed Butternut Squash
- Mashed Roasted Sweet Potato
- Spinach-Pea Puree (alone or with Applesauce)
- Simple Green Smoothie
- Strawberry Smoothie
- Veggie Chili, pureed smooth
TIP: For the foods, like soup, that you’d usually serve warm, you can serve them warm in a pouch too. Just be sure they are warm and not hot. Test on your wrist like you would a baby bottle.
How long can I store baby food pouches?
I recommend making them 24 hours ahead or less so they are as fresh as possible. But you can make batches of purees and stash them in the freezer, so the pouch assembly part is quick and easy.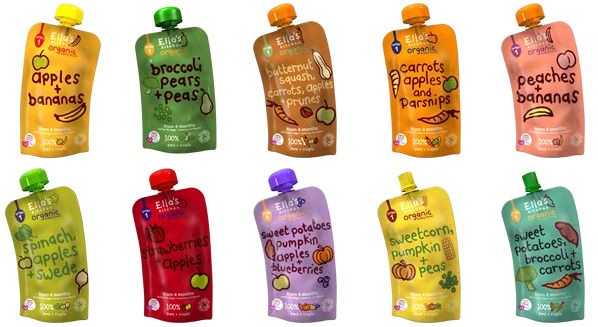
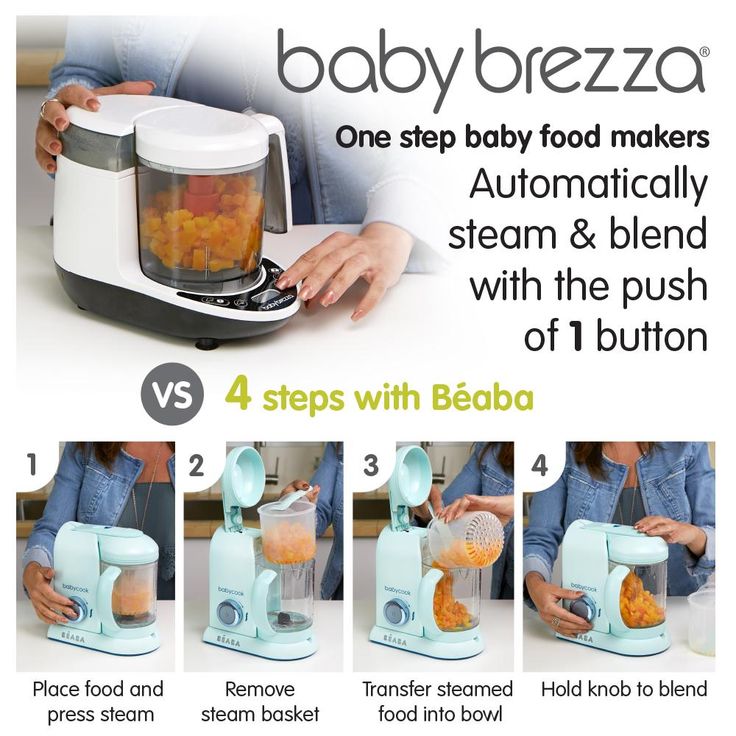
Do I need a baby food pouch maker?
Honestly? No. I tried one and didn’t like it because it took up space in my cabinets and the pouches themselves weren’t reusable, which seemed like a waste and a lot of money. Using reusable pouches is easy and more affordable.
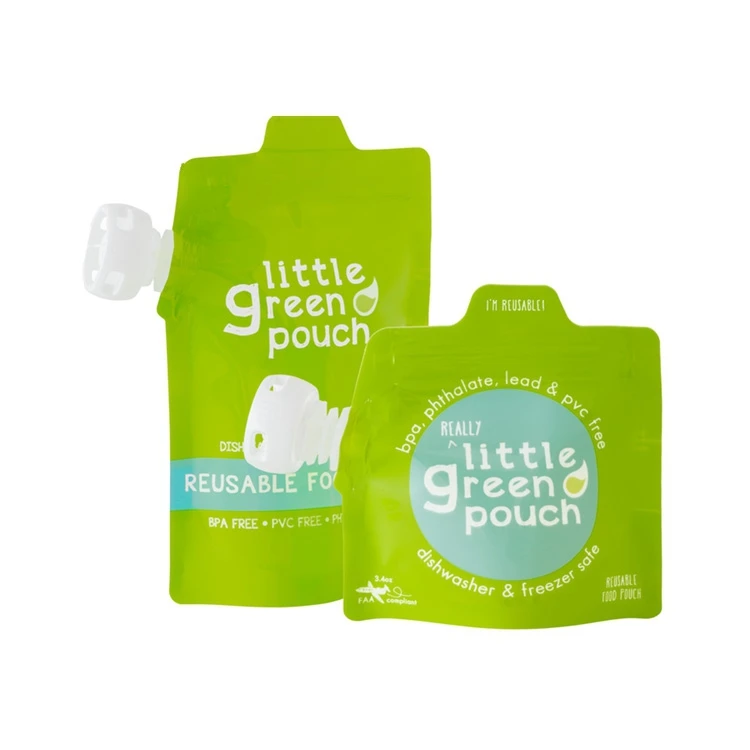
What are the best reusable pouches?
I prefer the silicone Squeasy Gear pouch, which comes in a few sizes (I start with the 3.5 ounce size for babies). It’s easy to learn from as early as 6 or 7 months and the kids can use them for smoothies and applesauce well through toddlerhood as they are very durable. You may want to remove the lid when serving to kids so they don’t play with it.
I also like this set of 3.4 ounce Weesprouts reusable pouches a lot, which are a nice size for babies (there is a larger size too!) and they are easy to clean and use.
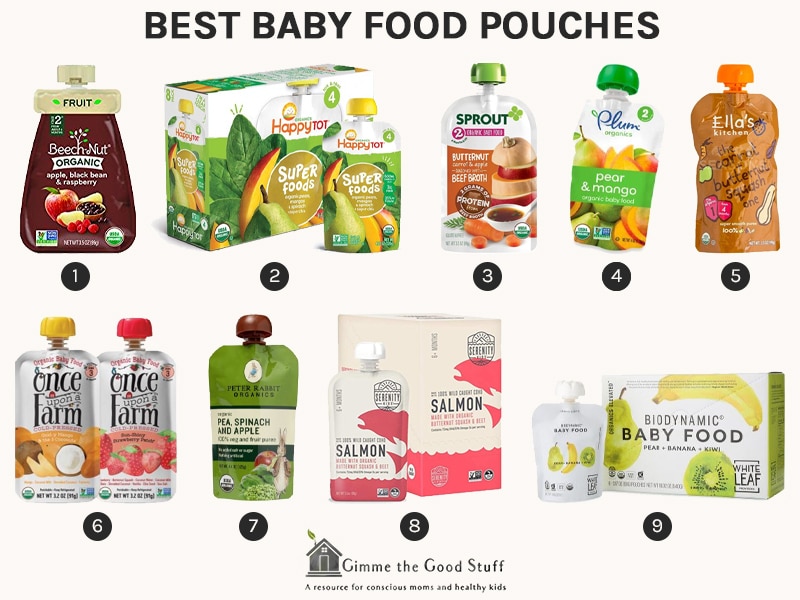
Favorite Store-bought Baby Food
There are so many great store bought options! I like the Amara Organic Baby Food (paid affiliate link), which locks in the nutrients, texture, and taste of fresh foods.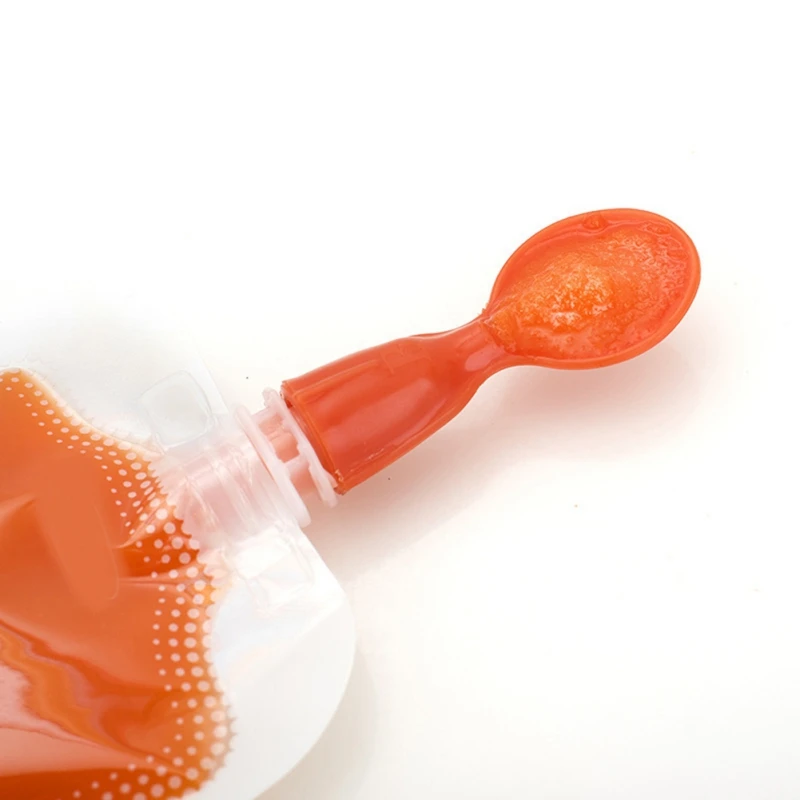 You just add breastmilk, formula, or water— and the flavors are delicious with straight forward ingredients.
I also like Happy Family Organics Clearly Crafted and Plum Organics. Those are just a few options—there is a lot to choose from as you well know from the baby food aisle!
TIP: I recommend serving pouches occasionally along with regular solids from a spoon and baby led weaning style so baby has a chance to learn how to suck, swallow, move all sorts of textures around in their mouths, and gain the skills needed to be ready for finger foods around 9 months.
How to Store
Store pre-made pouches in the fridge for up to 5 days. Store leftover pouches in the fridge for up to 24 hours and serve again. You can also freeze pouches for up to 6 months. Thaw in the fridge overnight or at room temperature.
Best Tips for Success
- If using a pouch with a zipper bottom, like this one from Wee Sprout, avoid overfilling to prevent difficulty sealing the pouch.
- Be sure the mixture is totally smooth to avoid it becoming stuck in the opening of the pouch.
- Add ½ teaspoon hemp seeds to any mixture for extra healthy fats.
- Add 2 tablespoons full fat coconut cream or plain yogurt to the mashed sweet potato or squash for healthy fats.
- Try any other Baby Food Combination or my No-Cook Baby Foods in a pouch.
- Serve foods you’d usually serve warm (like soups) just warm, not hot. Test on your wrist to be sure the temperature is not hot.
- Omit any added salt or sweeteners as needed.
- Combine pouches with baby led weaning foods for a wide range of texture exposure.
Related Recipes
I’d love to hear your feedback if you try these ideas out, so please comment below to share—I love hearing from you guys!
Prep Time 5 minutes
Cook Time 10 minutes
Total Time 15 minutes
Author Amy Palanjian
Cuisine American
Course Baby Food
Calories 46kcal
Servings 1
- ▢ 1½ ounces Apple Puree
- ▢ 1½ ounces plain whole milk yogurt (regular or Greek)
- ▢ ½ ground flaxseeds (or hemp seeds)
Add the ingredients to a small bowl.
 Stir to combine well.
Add to the pouch, avoiding overfilling. If using a zip bottom style of pouch, be sure the cap is on to prevent the puree from coming out.
Serve or store for up to 5 days. (If storing leftovers in a pouch, store in the fridge and serve within 24 hours.)
- If using a pouch with a zipper bottom, like this one from Wee Sprout, avoid overfilling to prevent difficulty sealing the pouch.
- Pouch flavor ideas:
- Be sure the mixture is totally smooth to avoid it becoming stuck in the opening of the pouch.
- Add ½ teaspoon hemp seeds or 2 tablespoons full fat coconut cream or plain yogurt to any mixture for extra healthy fats.
- Try any other Baby Food Combination or my No-Cook Baby Foods in a pouch.
- Serve foods you’d usually serve warm (like soups) just warm, not hot. Test on your wrist to be sure the temperature is not hot.
- Omit any added salt or sweeteners as needed.
- Combine pouches with baby led weaning foods for a wide range of texture exposure.
- Store leftover pouches in the fridge for up to 24 hours and serve again.
Calories: 46kcal, Carbohydrates: 7g, Protein: 2g, Fat: 2g, Saturated Fat: 1g, Polyunsaturated Fat: 0.2g, Monounsaturated Fat: 0.4g, Cholesterol: 6mg, Sodium: 21mg, Potassium: 101mg, Fiber: 1g, Sugar: 6g, Vitamin A: 54IU, Vitamin C: 1mg, Calcium: 54mg, Iron: 0.2mg
Tried this recipe?Rate in the comments and tag @yummytoddlerfood on IG!
Homemade baby food pouches {how-to and 5 recipes}
Jump to RecipePortable, squeezable and with lots of flavor options, homemade baby food pouches are easy to make and a great way to serve healthy fruits, vegetables and whole grains to your little ones!
I made ALL of the baby food for both of my little ones. Which was no small feat because they were very hearty eaters. A good thing, but whew, kept me busy in the kitchen!
I always made big batches of purees, to knock out a bunch at a time, and inevitably, I’d be left with extras when they were moving onto finger foods and self-feeding.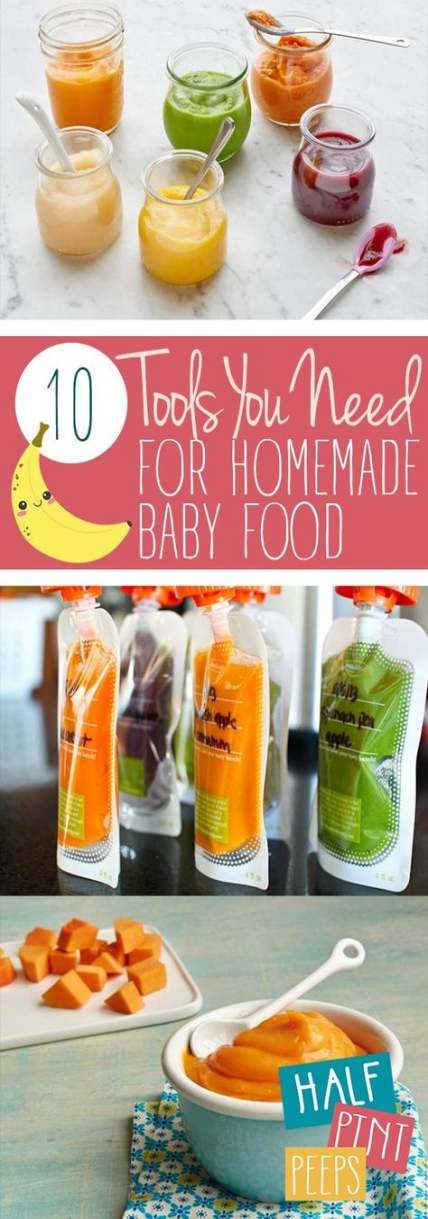
So I started turning those purees into homemade baby food pouches.
(I also have tons of other ideas of ways to use leftover baby food – I didn’t want to waste a bit!)
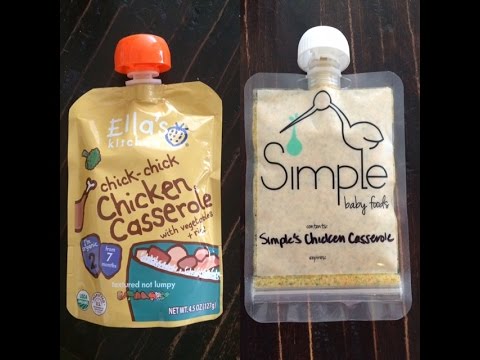
You can of course buy squeeze pouches in the store.
They have lots of different kinds of applesauce mixes, yogurt squeezies, and fruit and veggie combinations.
But you can make your own so quickly, easily and for much less money. Plus, you can customize them to your little one’s liking and feel good that you’re controlling the ingredients.
My kids are older now – M is 5 next week (yikes!) and J is coming up on 3 – but they still love these squeezies. M says she has lots of friends who bring them for lunch, so she’s always asking for me to send them to school.
And I’m happy to.
I love that it’s an easy way to ensure they are eating their veggies. They will take down one of these pouches in a matter of minutes but they don’t always dig into a big bowl of peas or a plate full of broccoli.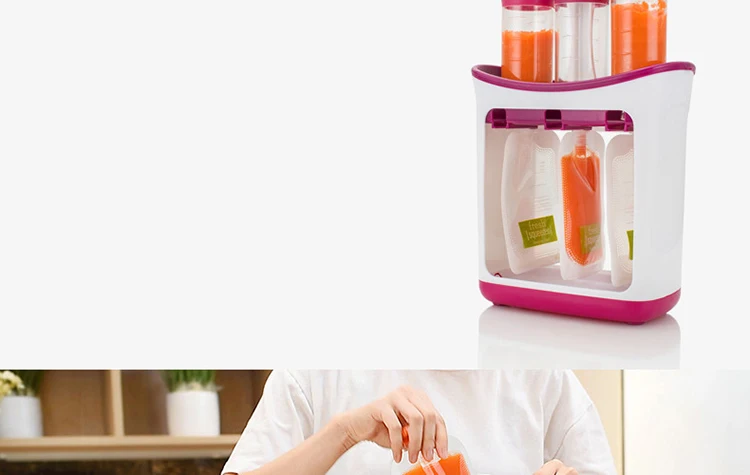 #yet #Iwontgiveup
So today I’m giving you the run-down on what I use, how it works and five easy homemade squeezie combinations to get you started. (Check out these 5 additional homemade baby food pouches for more ideas!)
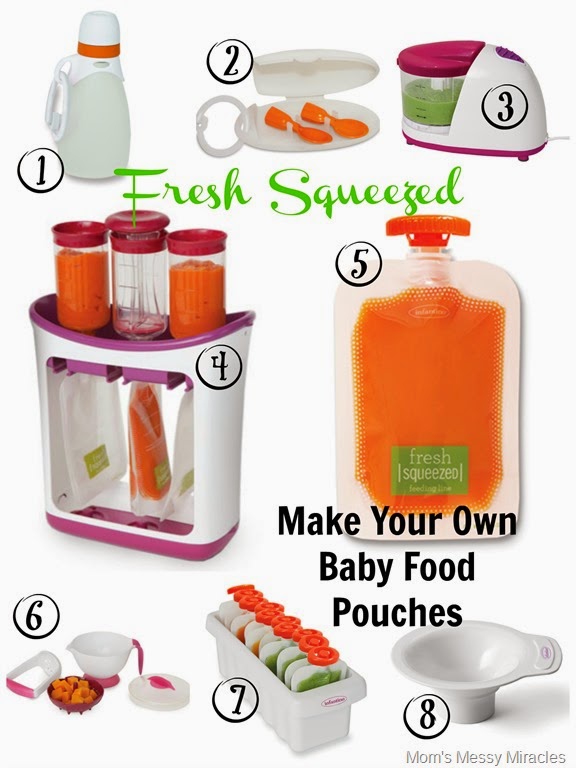
Equipment for baby food pouches
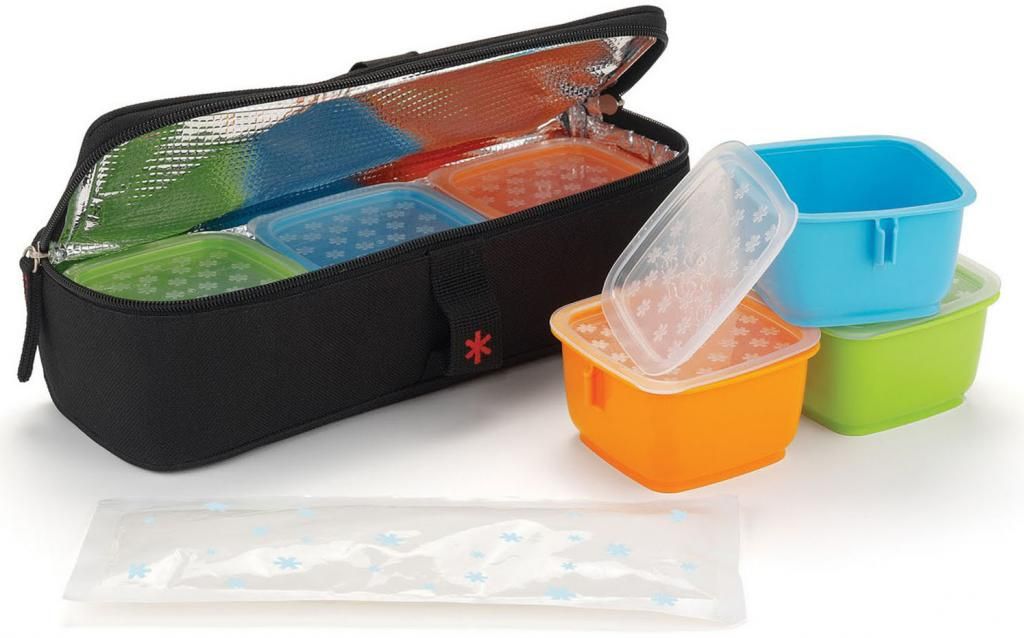
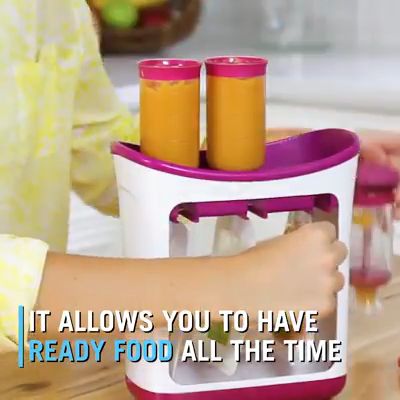
I have the Infantino Squeeze Station and it’s been great. It’s the only specific baby food equipment I’ve bought and was definitely worth it.
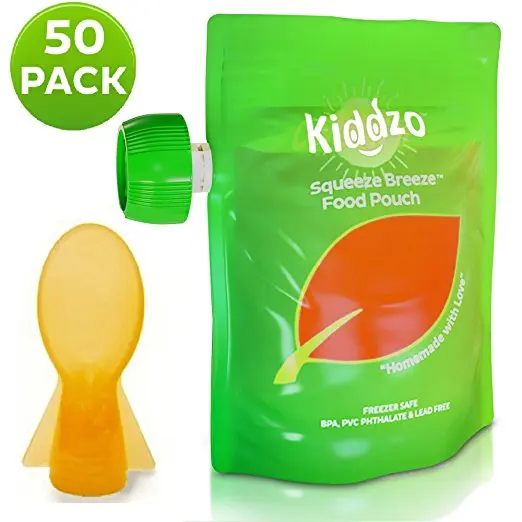
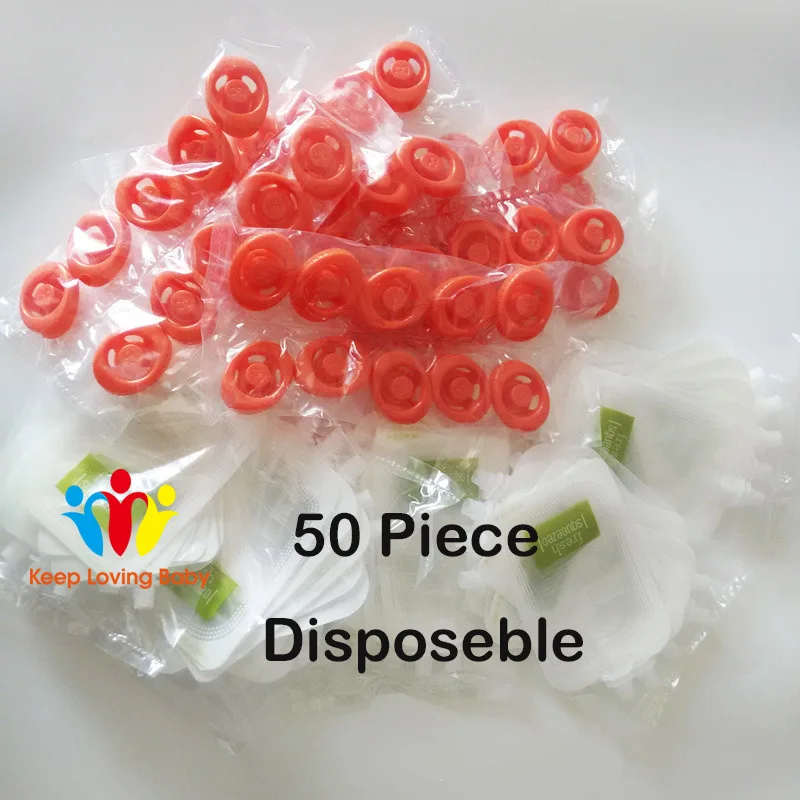
You’ll also need to buy refill pouches (they come in batches of 50 and you will go through them!)
They have other accessories, but I’ve stuck to these basics so far.
You’ll also need an immersion/hand blender or regular blender to make the purees to put into the squeeze pouches.
How to make baby food squeeze pouches
You set up the squeeze station by inserting three pouches into the bottom (they fit through some grooves and sort of snap in.) Then you put the empty containers on top and screw them onto the bags.
Note: Be sure to write the contents and date on your bags before you start to fill them.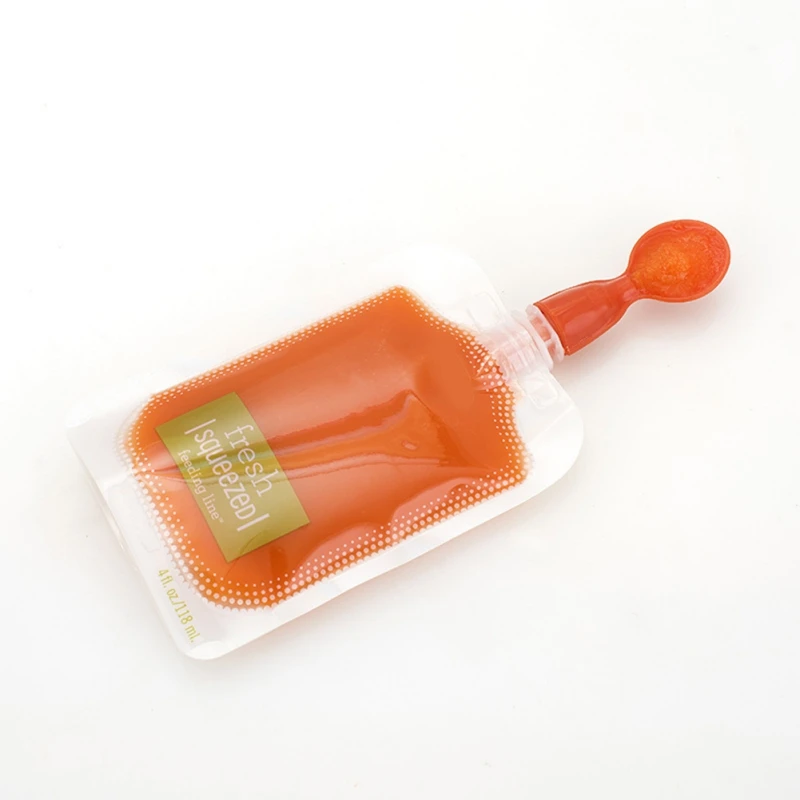 Much easier than after they’re done.
Next, you spoon your puree mix into each container, filling it almost to the top. You use the press tool and push the puree down into the pouch. It’s a weirdly gratifying feeling.
If the mixture gets stuck or won’t push, you probably have a small chunk in your puree that got caught in the hole. Just unscrew your tube, dump the contents back into your blender and reblend (or pick out the offending piece if you see it).
After the bags are filled, unscrew the tubes and carefully pull the bags out. Twist on the orange top and voila!
You can keep them in the fridge for a couple of days or pop them straight into the freezer to have on hand later.
It’s really easy and actually, really fun!
Notes about baby food pouch combinations:
- Add 1 tablespoon lemon juice to all of these to help preserve them. The only exception is the pineapple-broccoli mixture. The citrus from the pineapple is enough on its own.
- You can keep the peels on the pears and apples, just be sure to puree them very well so pieces don’t get stuck and prevent the mixture from going into the squeezie bags.
- The vegetables and grains need to be cooked and soft, so plan ahead. Or use leftovers. These can be a great way to use up scraps and reduce food waste.
- If any of your mixtures seem too thick (because the water content of fruits and veggies can vary), just add a bit of applesauce or a splash of water to the blender until its thin enough.
- Each pouch holds about 4 ounces. Most of these batches for me make about 3 squeezies worth. You can of course always double up if you want to knock out a bunch. They freeze great, so you might as well!
Check out the recipes below and get to making some baby food pouches. I hope your little one enjoys!
(And let me know if you want to see another round-up like this – we have lots of other flavor combinations we’ve made over the years that I can share!)
XO,
Kathryn
Prep Time 15 minutes
Total Time 15 minutes
Ingredients
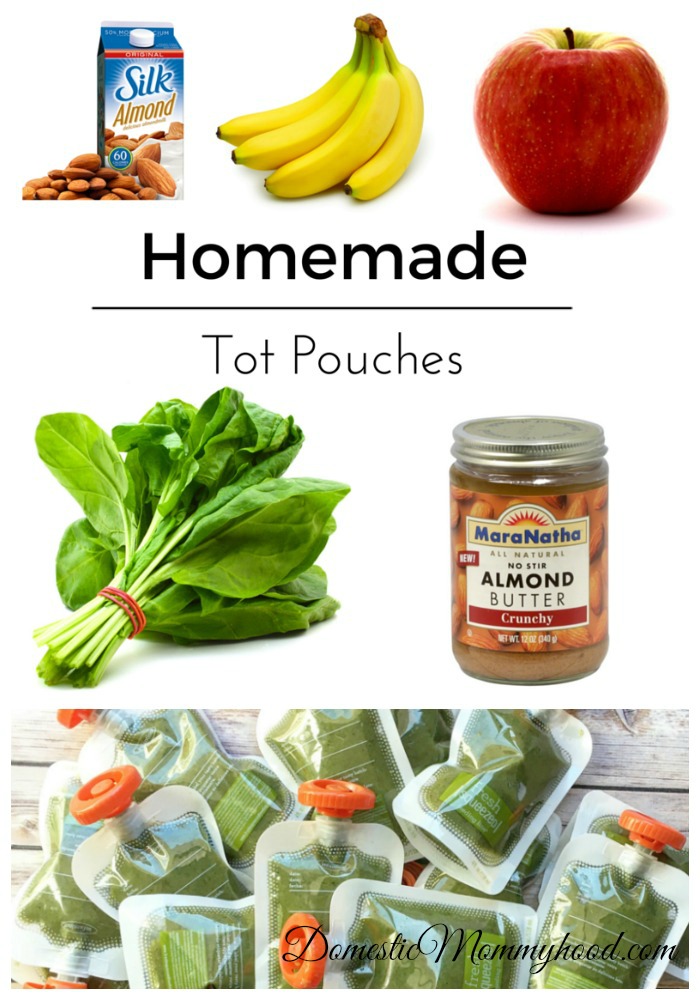
For the apple-brown rice-spinach pouches:
- 1 apple, core removed and roughly chopped
- 1/2 cup cooked brown rice
- 1 cup packed fresh spinach leaves (raw)
- Juice of 1/2 lemon
For the pineapple-broccoli pouches:
- 1 cup cut pineapple (thawed if frozen)
- 2/3 cup cooked broccoli florets
For the mango-sweet potato-quinoa pouches:
- 1 ripe mango, peeled, seed removed and roughly chopped
- 1/2 cup cooked sweet potato
- 1/2 cup cooked quinoa
- Juice of 1/2 lemon
For the banana-barley-zucchini pouches:
- 1 ripe banana
- 1/2 cup cooked barley
- 1/2 cooked chopped zucchini
- Juice of 1/2 lemon
For the pear-peas-spinach pouches:
- 1 ripe pear
- 1/2 cup cooked peas
- 1 cup raw spinach
- Juice of 1/2 lemon
Instructions
- Make sure all of your grains and veggies are cooked, if indicated.

- Combine all ingredients for each pouch combination in a blender or immersion blender and blend until it’s a smooth, pourable consistency. (See notes.)
- Label your bags, set up your station and add the mixture to the squeeze station containers, filled to the indicated line. Push down with the press tool and fill each bag. Remove the bags from the station and twist on the tops.
- Store pouches in the refrigerator for 2-3 days or in the freezer for up to 3 months. To defrost, simply move the pouch to the refrigerator - it thaws in less than a day.
Notes
Add 1 tablespoon lemon juice to all of these to help preserve them. The only exception is the pineapple-broccoli mixture. The citrus from the pineapple is enough on its own.
You can keep the peels on the pears and apples, just be sure to puree them very well so pieces don’t get stuck and prevent the mixture from going into the squeezie bags.
The vegetables and grains need to be cooked and soft, so plan ahead. Or use leftovers. These can be a great way to use up scraps and reduce food waste.
If any of your mixtures seem too thick (because the water content of fruits and veggies can vary), just add a bit of applesauce or a splash of water to the blender until it's thin enough.
Each pouch holds about 4 ounces. Most of these batches for me make about 3 squeezies worth. You can of course always double up if you want to knock out a bunch. They freeze great, so you might as well!
Here are 5 more homemade baby food pouches if you want more flavor/combination ideas!
Nutrition Information:
Yield:
3Serving Size:
1 pouchAmount Per Serving: Calories: 50
The different varieties will yield different nutrition information.
90,000 kindergarten No. 60 Forest fairy tale in Novorossiysk
Group No. 5 Malinka
Deviz:
We are children from the Malinka group
We should be any on the shoulder Tropp In our kindergarten We have a wonderful life… We sculpt and draw, We dance and sing. We love performing very much Education Secondary special pedagogical education in the profile "Preschool education" Higher Pedagogical Education in the specialty of a foreign language teacher - Pedagogical experience in this institution favorable and friendly mood. one of the tasks: Dress up hugs and praises! "Signs of the Week". Helping Birds in Winter We experimented with ice, dissolved an ice floe in warm and cold water! Children drew the result of the experiment and are able to explain themselves, ice dissolves faster in warm temperatures All week reading the encyclopedia "Wonder Everywhere" discussing birds, memorizing their characteristics! The emphasis was made on titmouses, bullfinches, sparrows! They depicted birds according to the schemes, using wax crayons! They made a birdhouse with the whole group, hung it on the territory of the site 5 groups Speech development - performed exercises according to the primer! nine0006 Children's initiative: work with a marker and a board! We were looking for differences in the did. Working with paints, strengthening the skills of working with brushes, watercolor, gouache, theme: winter patterns! Application - snowmen Collective work - birdhouse for bullfinches: technique with glue, paper, can be attributed to experiments, because the end piece of paper was painted with one touch of a brush Topic: "Mushrooms" Tasks about the forms of children; Give knowledge about the diversity of mushrooms; Enrich and develop children's vocabulary; Give knowledge about the rules of behavior in the forest; To cultivate respect for nature; nine0006 Theme: “People of the whole Earth are friends” Purpose: to develop in children interest and respect for other national cultures ; Raising a sense of community, friendship and unity with people different nationalities living in Russia. Expand the horizons of children, develop cognitive interest, ideas about the world. nine0006 Topic: “Me and my friends” Purpose: “Expand the ideas of children, about the value of friendship” Topic of the week according to the plans, I am growing, I am growing what can I do! In a playful way, we measured their height with children! During the week we discussed the benefits of vitamins for growth,0006 made a photo collage of children, they were very interested, themselves threw ideas on how else to measure them. Took part in promotions! We made a garland of friendship, continued the conversation a little on the subject of health. There was a relay race on the street using flags, gave the initiative to the children in the organization, distributed themselves Who commands and who takes part Games with elastic bands also liked children, often ask for and perform exercises in jumping Daily work on the site (leaves still fall) 9000, We made postcards to the soldiers “give a New Year” Took part in the action kind heart, with the participation of parents! Made fakes Choice: autumn-winter clothing! We paid attention to mathematics and the development of speech! We used counting material with did.cards The development of speech in the primer, a reflexive circle with chants! Artistic estlepka “headdress for a doll” We made did. the children said they want to draw scarves! nine0006 Made a dedicated “fabric” studied by touch, attributes on clothing (buttons, beads) How to care for fabrics Discussed clothing on dolls weather station mark This week: 0006 counted lotto pictures, all in a game form; made a postcard gift for mothers with children; made a collective work of the newspaper "mother my sun". This week we paid more attention to physical development and experimental-experimental. made a sports corner with the help of hands and tracks cards, according to the schemes of which the children jump and perform the task Experiments: “Completely water experiments,“ absorbs -not absorbs ”, created homemade scales, looked, studied how much water is needed for balance or overweight Observed weather conditions, had a walk in the rain, discussed the properties of water, circulation in nature. Mathematics- the use of schemes HODED-EST-RIDEDION OF FAVORITY toys. Independent work of children Theme: my toys The final project is a collage with photographs of children, a common work. (art.est) - Molding-autumn mushroom (ecology task) We continue the tradition of the birthday a general portrait of the name-bearer from the group Construction - a town for animals, a farm. Played, told each other which pets we know (speech) Regime moment - made their own group rules. They sketched, spoke labor- for a week 5 group gathered 7 large packages with leaves View cartoon for traffic rules (knowing.) 9000 9000 : my little Motherland! Talks were held about the country, region, city! A large wall newspaper was made - an album with photographs of children both at the sights of the city and on the streets where children live. (hood-est): bus tour around my city! Made a didactic game with a speech cube, with printed pictures answers Russian flag colors, show in the picture the flag of the city, the flag of the region, on which sea our city stands. Applications: task from “childhood” my street in the evening, repeated geometric shapes, filled in with color, cut out, glued, Observation: made a diagram for observing a potted flower, “my indoor flower”; observation of days of the week, weather Great work “Group Tree. We are family ” Application of the palm of educators and children (continuing the topic of unity day) repeated the rules of traffic rules, the rules on the road 9000 9000 Topic“ Safety around “Safety us» Viewing a cartoon on the topic: Fire safety Artistic and aesthetic development: looking at pictures and scene situations on the topic of security Played a theatrical scene: "Cat's House". sensory development: connected to the points of the line, helped to extinguish fire firefighter (line-wound) Speech development: poems “Safety lessons” on T. Kusheleva 9000 9000 9000 9000 000 9000 Subject: "Autumn gifts". studied with children, which is given to us autumn: collected cones, found a mushroom (disposed of immediately after what was seen and studied) С were animated with beneficial labor on the site, cleaned up and cleaned leaves. Studied the days of the week, tear-off calendar, watched weather changes. We keep the tradition of a portrait and a crown. Celebrating the birthday of children A group discussion was held on the topic "Magic, polite words". Fixed with a game. They depicted "polite" daisies, emotional people who respect each other as friends. nine0006 "We live in the Kuban" Summer Krasnoye came It is time to swim, I love It is fun to splash 9000 "Bird Day" Topic: "spring came!" Tasks: To form children's knowledge about the characteristic signs of spring. Bloom soon All the flowers in the meadows! Keep up soon Delicious berries in the forests! Spring is red, come. Melt the cold snow, Dress the trees with greenery, May the day be warmer! Children, line up in order Fun exercises. After all, I woke up from sleep And spring came to visit us! The grass is turning green The sun is shining. Swallow with spring In the canopy flies to us. Lost the sun Golden ray, The sun is sad I recently developed a batch of resistive soil moisture sensors. In this article, I'll show you how to connect these sensors to the MajorDoMo smart scrap system and make houseplant soil moisture information easy to use. Before moving on to setting up MajorDoMo, I will specify my requirements a bit: The server must convert the server readings into a calibrated humidity value […] Read more » Topic: MajorDoMo, Smart home | Tags: Majordomo, Mysensors, NRF24L01 24 Jan 2019 12 comments Last time I designed a soil moisture sensor. But the project went pretty slow. Here is the instability of the readings and the complexity with the software part and the loss of packets during the transmission of 433 MHz. As it turned out, the copper electrode in the soil, and even under current, is wildly oxidized. Read more » Topic: MajorDoMo, Homemade controller, Smart home | Tags: ATMEGA328, Majordomo, Mysensors, NRF24L01 05 Oct 2018 13 comments MajorDoMo is a free smart home platform, powerful and flexible, supporting a wide variety of equipment. The platform is written in PHP, works through a web server and stores data on a MySQL server. All this implies work on a dedicated server. First of all, I raised MajorDoMo on an Orange PI PC single-board computer. To launch gateways with various devices, I ordered the manufacture of shield scarves. AT Read more » Topic: MajorDoMo, Smart home | Tags: Arduino, Majordomo, NRF24L01, Orange PI, Case 28 Jun 2018 6 comments A year of operation of the bathroom fan control controller on the ESP8266 revealed a lot of shortcomings in operation. And although the integration into MajorDoMo of this device was a success, the main ones created problems “Freezing” of the controller in the absence of a server or Wi-Fi, associated with timeouts in the TCP / IP protocol Rebooting the controller during intensive exchange of information with the server Remote button for turning on the fan from the toilet [… ] nine0003 Read more » Topic: MajorDoMo, Smart home | Tags: ATMEGA328, Majordomo, Mysensors, NRF24L01, fan 23 Apr 2018 54 comments The weather station with NRF24L01 has been working for me for several years. Read More » Posted in Arduino, Weather Station, Smart Home | Tags: ATMEGA328, BME280, Majordomo, Mysensors, NRF24L01, Weather Station 06 Jan 2015 8 comments The goal is to create an original interior clock that synchronizes time and shows the weather from the weather station server. Read More » Posted in Arduino, WS2812, Weather Station | Tags: Arduino, NRF24L01, WS2812, Display, Weather Station 28 Sep 2014 11 comments The experience of creating and operating several devices began to take shape the concept of "Smart Home". There was a need for universal and inexpensive controllers. Read more » Heading: Self-made controller, Smart home | Tags: Arduino, ATMEGA328, MAX7219, NRF24L01 10 Jul 2014 43 comments Requirements Outside temperature and humidity measurement Pressure measurement Indication of readings Transmission of readings by radio Read More » Posted in Arduino, Weather Station, Purchase on ALIEXPRESS.COM, Purchase on TAOBAO.COM | Tags: Arduino BMP085 DHT22 MAX7219, NRF24L01, Display, Housing, Weather station 08 Jul 2014 5 comments I have long wanted to organize a large display with the weather and time in the hallway at home. The scoreboard may not be the most important part of the weather station, but definitely the most noticeable.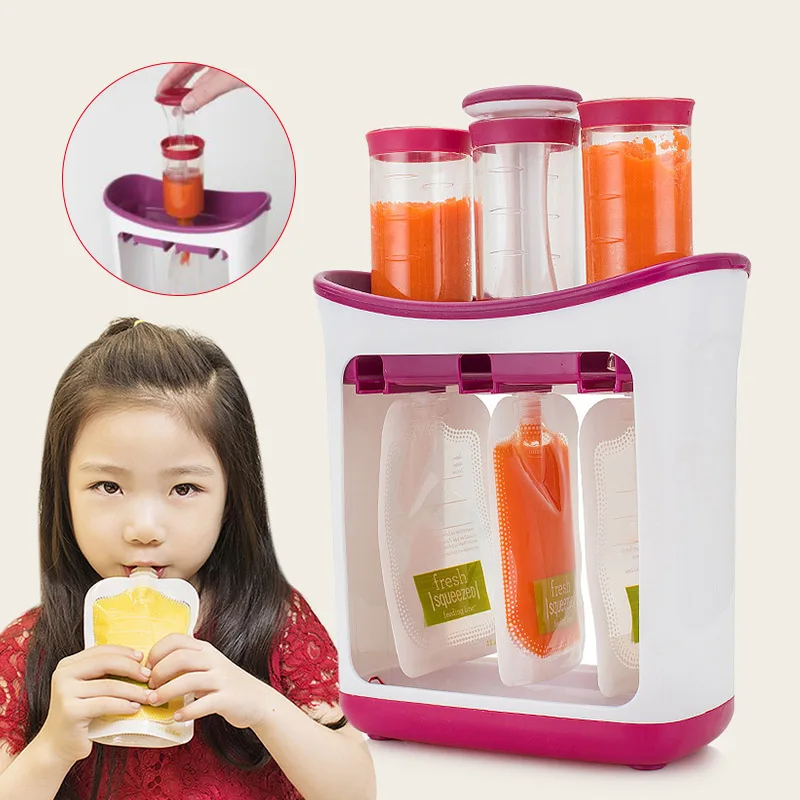
9000 9,0001 /pub/media/catalog/product/0/0/005024_005026_005027_208102_step3_1000x1000_300dpi_hrrgbjpg.jpg) assignments "Winter bird"
assignments "Winter bird" 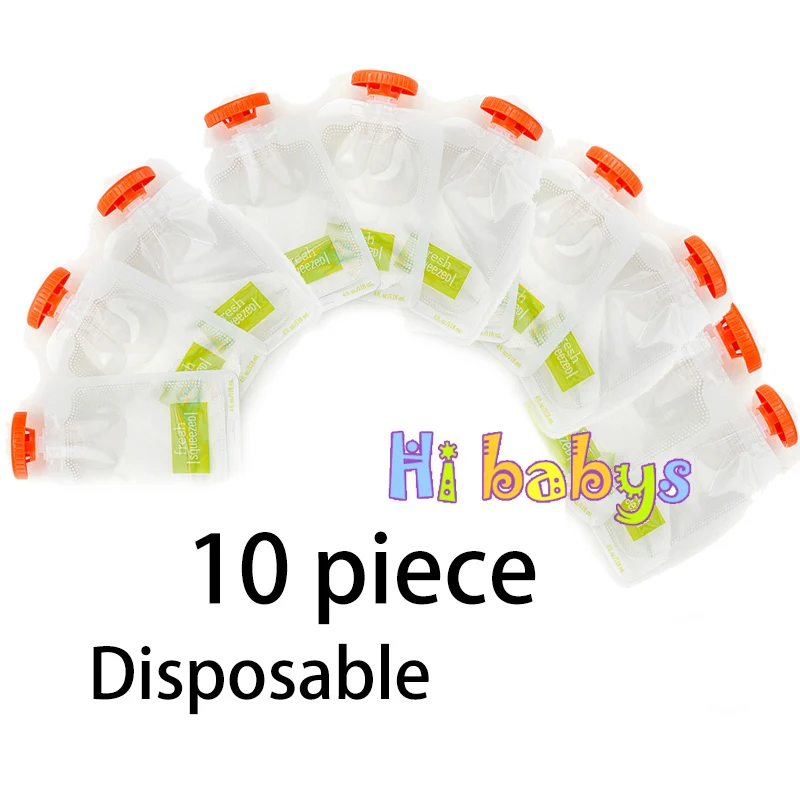
 cards with a preliminary choice of a warm object,
Also on the street they drew with crayons, a flower for mom;
collected 6 bags of leaves;
discussed the professions of parents in the did. game - what professions do I know0002 The world around us 
 Childhood book task done
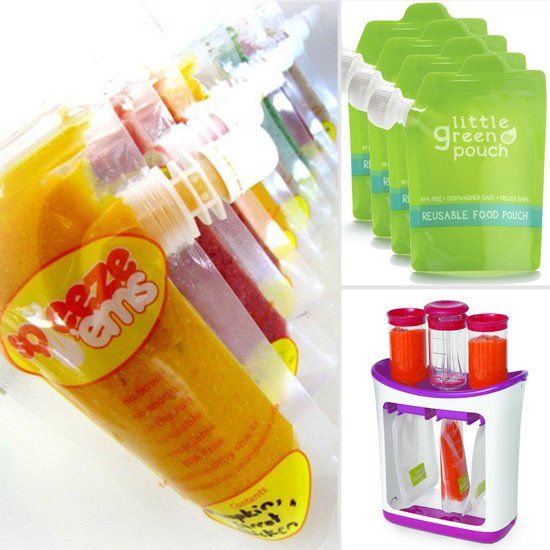

002
 Clarify and expand the vocabulary on the topic "Spring". Form a coherent speech. Develop memory, attention, imagination.
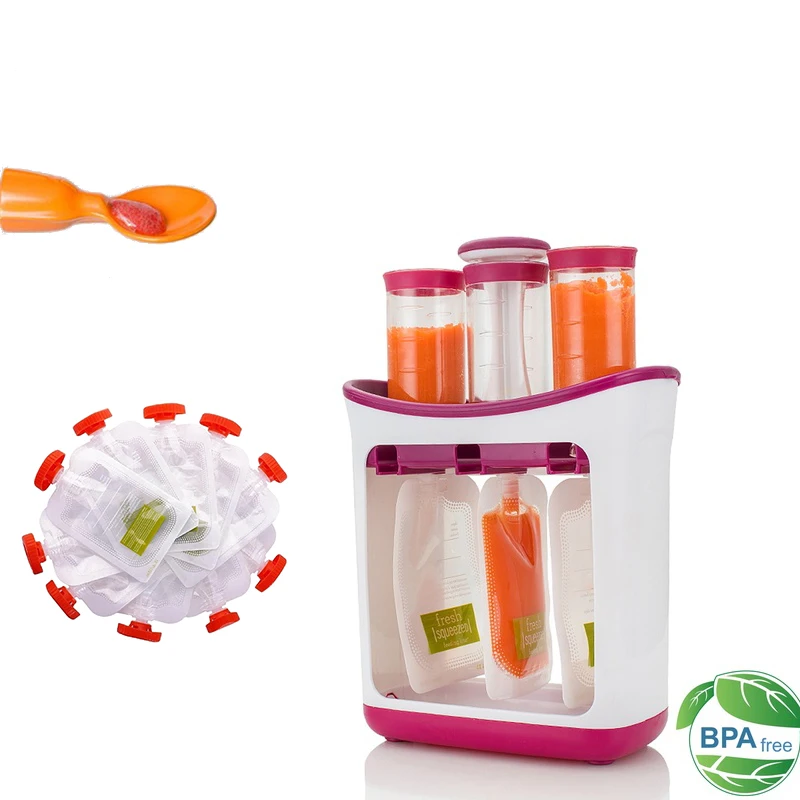
NRF24L01 6 comments
 And here is the new version of the resistive (so far) soil moisture sensor
  There were no problems with the sensor. Several times in heavy rain, the sensor stopped transmitting data, but then everything was restored. Recently, the indicator stopped showing. Most likely the contacts are oxidized. Or a wire fell off somewhere. All the same, hinged mounting is not the most reliable thing in the world. Main […]
 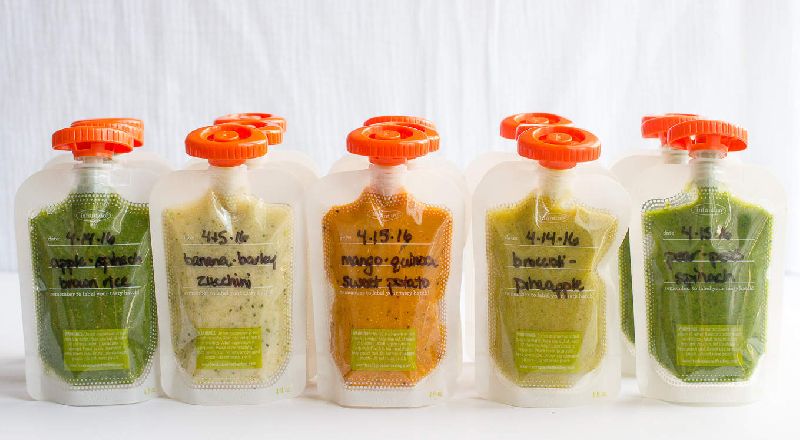 I decided to start with creating a prototype Requirements for the controller Compatibility with Arduino by modules and the Arduino IDE environment Presence of a display Presence of an RF module NRF24L01 Mains power 220V Versatility, reusability Good appearance of end devices Low cost
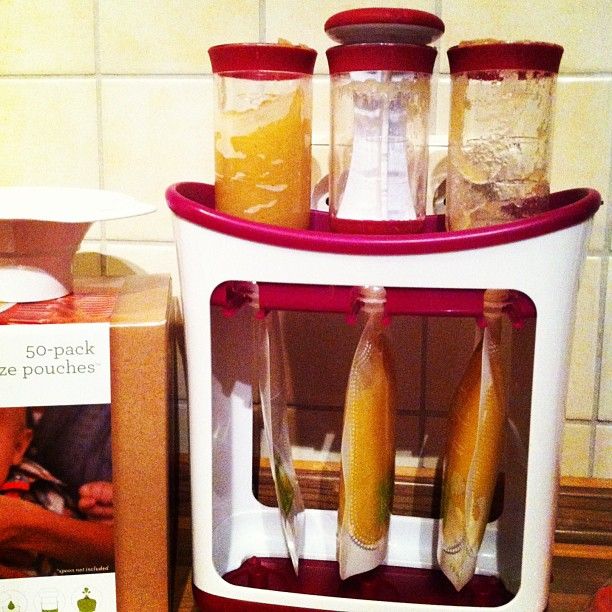
 .
.