How big should i cut baby finger food
How to Cut Food for Babies and Toddlers
It’s possible to make it easier for kids to eat the food we offer them simply by making sure it’s cut into appropriate sizes. This can help reduce frustration, picky eating, and food waste—and the potential for choking risks. This post has all of my best tips for how to cut food for babies and toddlers!
How to Cut Food for Babies and Toddlers
Food can be slippery and hard to pick up. It can be chewy, tough, sticky, or a whole host of other textures. It can help to greatly reduce frustration at mealtimes if you consider a few basic tips when cutting food for kids. The principals of this are really straight forward, but I’m going to share a lot of visuals since I know the real life practice of this can get confusing!
How to Cut Food for Baby Led Weaning
If you’re starting solids with the Baby Led Weaning style, you’ll want to make sure that the food is soft (it should easily squish between your fingers) and be cut at least the size of your finger. This will help ensure that baby can easily pick it up, yet be unable to put the entire piece into her mouth.
TIP: Find my Ultimate Guide to Baby Led Weaning here.
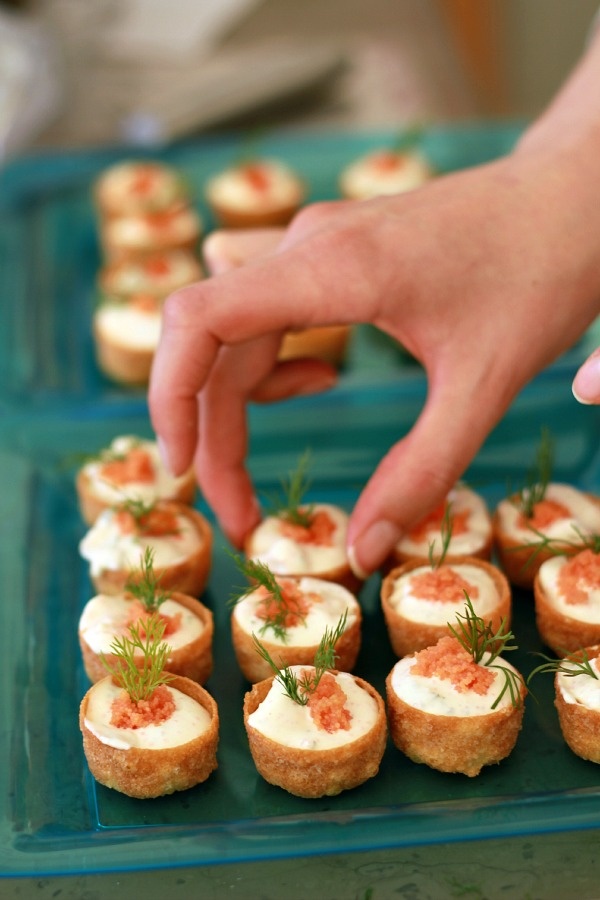
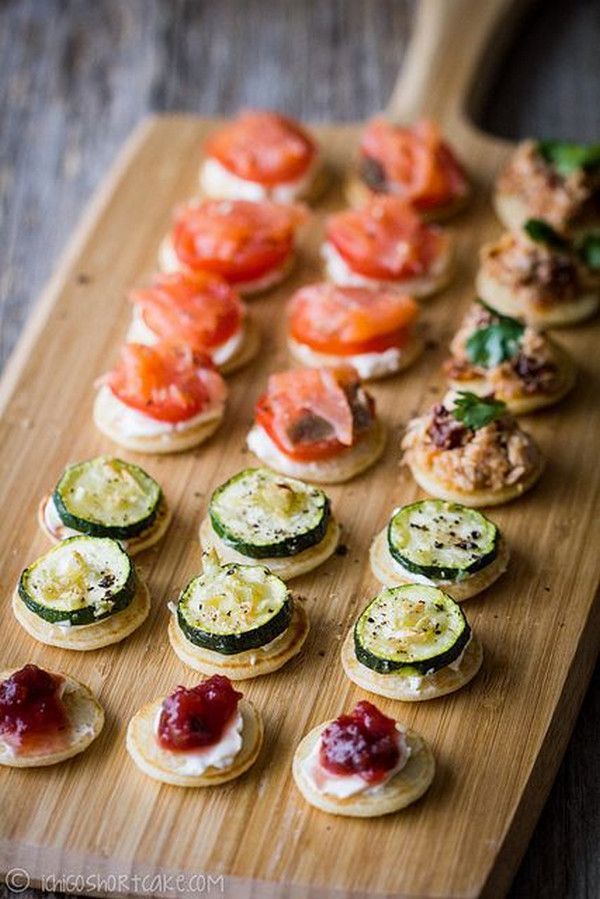
Tips for Cutting Up Finger Foods for Babies
When babies are about 9 months old, they develop the “pincer grasp”, or the ability to pick up smaller pieces between two fingers. At this age, you can start to serve very soft, squishable finger foods that are about the size of a pea or two.
TIP: Find my full list of Early Finger Foods for Babies here.
Progression of how to serve raw veggies for kidsHow to Serve Raw Veggies to Toddlers
Offering raw veggies to kids can be challenging since many are hard and take a lot of work to chew. And big chunks of raw veggies like carrots can be choking hazards. To stay safe and give the kids a chance to practice with the new textures, try:
- 12/14 months: Start with shredded raw veggies like carrots, cucumbers, bell pepper, and lettuce.
 (You can soften the carrots for a few minutes in very hot water if desired.)
 - 16/18 months: Proceed to very, very thin slices (paper thin!).
- 20/24 months: Gradually offer slightly thicker pieces around, but they should still be thin and less than 1/4-inch thick.
- 2 years: Try offering small diced pieces of bell pepper and cucumber, though some kids may still do better with larger, thin pieces.
- 4+ years: Kids may be able to safely chew a big piece of raw carrot or a whole baby carrot. (This is a really tough texture, so try to avoid it for a while.)
How to Cut Sandwiches for Kids
Bread can be a challenging texture for kids, especially when there are other textures in the middle of a sandwich. Progressing through a few phases can make this easier and help avoid frustration.
- 6+ month: Serve lightly toasted finger-size or larger pieces of bread for baby to gnaw on.
- 9+ months: Dice bread into very small pieces. Moisten it with apple butter, baby food puree, or another moist spread as needed to help baby move it around in their mouths.
- 14/16 months: Stick pieces are great for this age to help kids practice taking bites.
- 20/22 months: Sandwich quarters are a great size for one year olds and are a nice size for little hands to hold.
TIP: Find my favorite Kid’s Sandwiches here.
How to Serve Apples to Babies and Toddlers
Start with applesauce and Roasted Apples for babies, then shredded apple to thin matchsticks to very thin slices through the one year old year.
How to Serve Bananas to Babies and Toddlers
Start with a BLW-style banana (leave a little of the skin on to act as a less slippery handle) and Banana Puree, then move to small pieces around 9 months, and larger pieces around 16 months. Kids may also be able to bite whole bananas after 12 months since they are so soft.
How to Serve Broccoli to Babies and Toddlers
Start with Mashed Potatoes with Broccoli or a big BLW-style piece, then move to smaller very tender pieces around 9 months, and gradually increase the size through the one year old year.
With all of these, you want the florets to be very soft so they are easy to chew.
Fork making “bite marks” in pearHow to Help Kids Learn to Take Bites
It’s common for one year olds to stuff a lot of food into their mouths at once, so we sometimes need to be very deliberate about teaching them to take bites. You can use a fork to make a “bite mark” so they can see where to try to put their teeth. You can also give them larger pieces of food that they physically wouldn’t be able to fit into their mouths so they sort of have to take a bite.
Sit with the kids during meals, if you can, and show them how you take bites. This is a normal phase and kids usually get the hang of it if we give them time to learn and practice.
Try cutting foods in new ways to keep thing interesting.
Best Tips for Cutting Food for Kids
- Start with finger-size pieces at 6+ months for baby led weaning.
- Transition to pea (or two peas) size pieces around 9 months when kids can pick up smaller pieces between their fingers.
- Offer larger pieces so they can practice taking bites around 16/18 months.
- For raw veggies and hard fruits (like apples), start with shreds, then matchsticks, and paper thin pieces.
- Save baby carrots and other very hard raw veggies until age 4+.
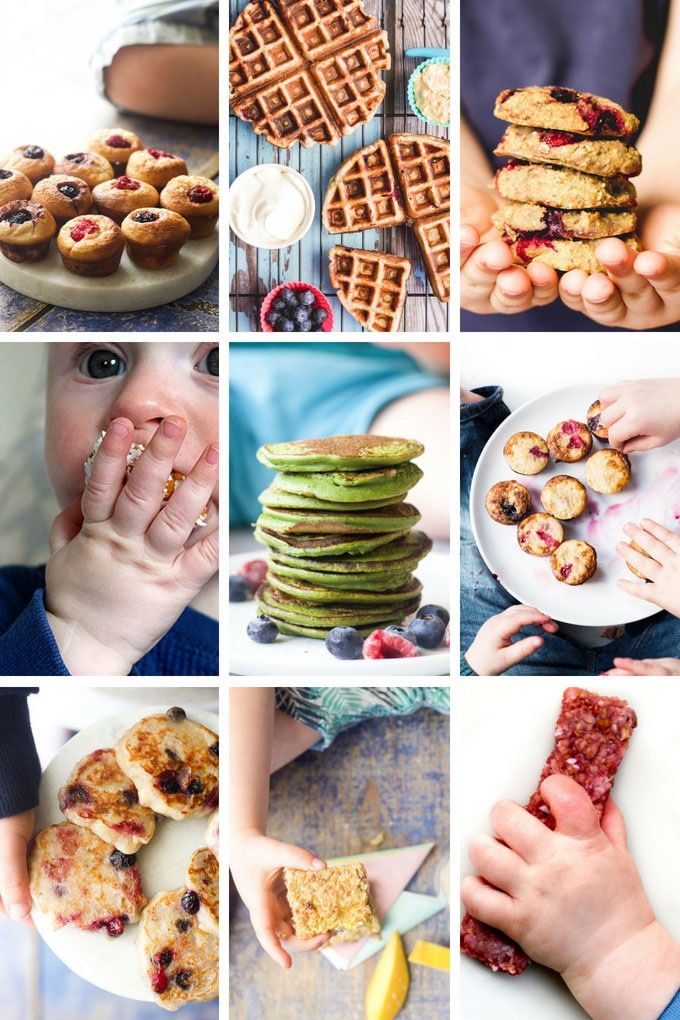
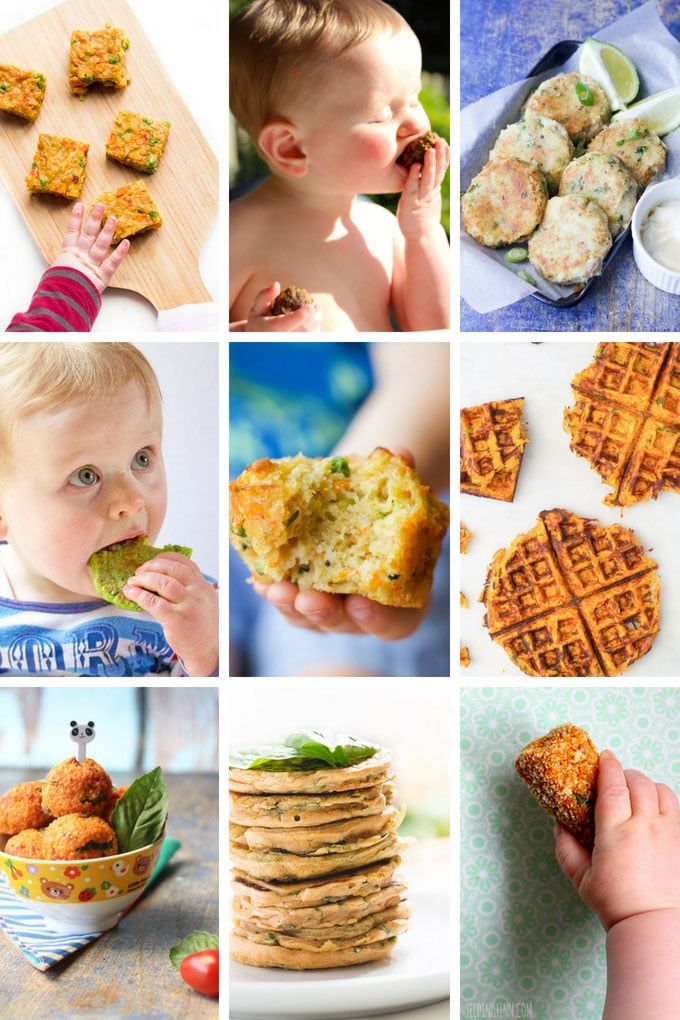
- Find my favorite baby First Finger Foods.
- Find my go-to toddler Finger Foods.
- Learn more about Serving Nuts to Kids.
- Brush up on the common choking hazards and how to reduce the risk.
Related Recipes
I’d love to know if you have any questions on this or feedback, so please comment below!
How to Cut Foods for Baby-Led Weaning
You’ve probably seen photos online of babies practicing baby-led weaning, chomping down on a whole carrot or grasping raw apple slices. But, is this safe?
In the case of the raw carrot and apples, nope. But, baby-led weaning certainly can be safe, if you know how to cut and cook foods properly.
Baby-led weaning, or baby-led feeding as I prefer to call it, means that babies feed themselves finger foods as soon as they start solids. But it isn’t anything goes. Here’s how to make sure that the foods you give your baby are safe and easy-to-eat for your baby’s developmental capabilities. Because if your baby can’t pick up the food, then she can’t actually eat it!
And these guidelines work for any finger foods, even if your baby is still eating some purées (which is just fine, by the way!).
Size and Shape
At around 6 months — Most babies just starting solids haven’t developed their pincer grasp (thumb and forefinger) yet. So to pick up foods they grasp them with their whole palm. Since you want your baby to still access the food while it’s in her palm, it’s best to cut food into long, thin sticks.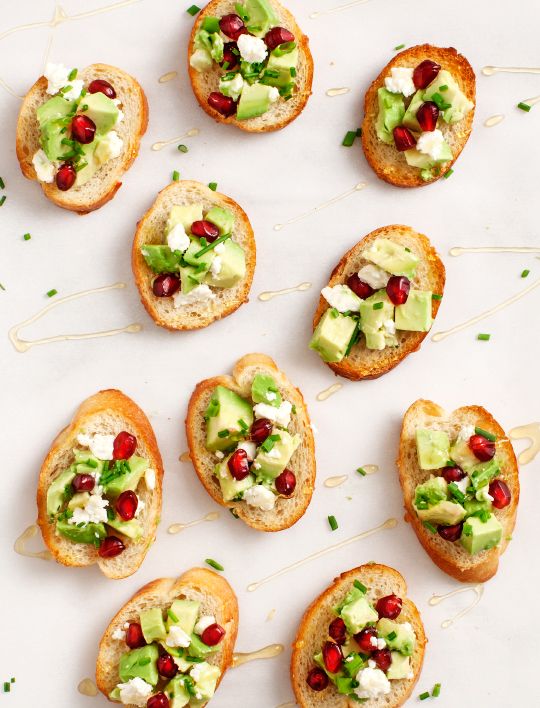 Think about the length and width of your pinky finger, and check out the photo above from Baby-Led Feeding for some ideas.
Other than choking hazards and honey (which you should never give to a baby under age 1), most foods are fair game at this age, including meat, poultry, cheese (shredded), and allergens like eggs, nuts (never whole, but a little smooth nut butter stirred into a purée or spread on toast), and fish.
Toasts are another excellent vehicle for introducing new foods and flavors. Because while we don’t want foods to be too hard (see below), we also don’t want them to be too soft and gummy. Commercial bread can be difficult to pick up and can turn into a ball of mush in a baby’s mouth. But, lightly toasted bread is ideal for self-feeding. Here are 15 of my favorite toast toppings for babies.
And remember that much of eating at this early stage is about your baby exploring–touching, smelling, and yes, tasting. But don’t be alarmed if it seems like little of the food is actually making it into her tummy. Self-feeding takes a lot of eye-hand coordination, and that’s an ability your baby is still developing.
At around 8-10 months — When babies develop their pincer grasp start cutting foods into small pieces, about chickpea-sized. And for small round foods like chickpeas or blueberries, smash them lightly before serving. It’s great for babies at this age to practice their pincer grasp, but it’s also A-OK to continue serving food in sticks like you did when he was younger. The photo above is also from Baby-Led Feeding.
Some of my other favorite single-ingredient foods at this stage include chopped hard-cooked eggs and small pasta shapes.
This is also a good time to begin offering your baby a spoon along with thick soups or mashes. It will take practice for her to get the hang of eating with the spoon, but you can pre-load the utensil to start, and of course, practice makes perfect.
Texture
At all ages, foods should be soft enough that you can smash them with gentle pressure between your thumb and forefinger. This means no raw carrots, apples, nuts, or tough chunks of meat. For vegetables, this usually means steaming them, roasting them, or cooking them in an Instant Pot. Meat should also be very, very tender. Here’s my guide to cooking meat for babies.
Remember, to err on the side of caution with baby-led feeding and always stay with your baby while she’s eating. Then enjoy the show!
Looking for more baby-led weaning ideas and family feeding tips? Sign up for my newsletter! As a thank you, I’ll send you three of my favorite healthy smoothie recipes for the whole family. I look forward to being in touch!
Photos by Lauren Volo.
Jenna Helwig
[email protected]Eating with your hands and not getting fat: a new trend in baby feeding - Parents.ru
About nutrition
- in fact, it is a continuation of pedagogical complementary foods - a trend that appeared in Russia relatively recently, but has already become widespread.
 What it is? Pedagogical complementary foods are not an independent complementary feeding system in its traditional sense (it does not contain specific recommendations regarding the sequence of introducing products and their combinations), but a way to introduce a child to “adult” food and table behavior skills. He implies that if the baby shows interest in food on her mother’s plate, she should offer him this food in the amount of a “microdose” (a droplet on the tip of a teaspoon or a piece the size of a pea) without prior grinding. The main slogan of pedagogical complementary foods is: "Put the child at the common table when the whole family is together, and let him choose what he likes."
 Why
Children eat with their hands more conveniently and “tastier” than cutlery, which is why they do it with pleasure. But finger food is not just entertainment: there are many advantages to eating with your fingers.
-
Improving the ability to chew. It does not happen that up to a year the baby received only breast milk, and then suddenly began to chew the pieces wonderfully.
 The baby learns to chew gradually, so it is very important not to miss the age stages of this skill and offer solid foods in a timely manner.
 -
Grasping exercises. By eating with his hands, the child masters the "tweezer" grip (children grab small pieces of food using the thumb and forefinger), which is necessary for the development of fine motor skills. In the future, this will help them perform many exercises in which they need to be able to capture small objects: lay out a mosaic, sculpt, draw, embroider. In addition, the development of a "tweezer" grip prepares the child's hand for writing.
-
Correction of eating behavior. By the age of two, it has already been formed in some way, and if before the diet was scarce and monotonous, when accustomed to the “adult table”, the baby may reject new foods. "Finger food" - first from mom's plate, and then from your own - will help the child to harmoniously move on to a common meal.

-
Way of knowing the world around. Eating with hands at an early age has a positive effect on child development in general: the baby receives a lot of information - visual, tactile, olfactory, gustatory and even auditory (foods come in different colors, tastes, textures - they can crunch, squish, etc.). This is very useful: in addition to the fact that the child learns to be independent, he also conducts a kind of identification of dishes on the table.
-
- Photo
- Compassionate Eye Foundation/Three Images/Getty Images
- Photo
- Kumacore/Getty Images
-
Do not breastfeed your baby: the risk of choking is much lower if the baby is seated across from you in a high chair.
-
Do not offer food to your baby when he is upset, overexcited, crawling or watching TV: small pieces of food are potentially dangerous - they can easily be put into the nose or ear, and also try to inhale.
 Never leave a child unattended while eating!
 -
For the same reason, do not give him small dense rounded foods: grapes, nuts and raisins, green peas, olives. Cut vegetables and fruits of a dense texture (apples, cucumbers, carrots, celery) into small cubes.
-
Discard fish: small, thin and elastic bones are very difficult to remove from it.
-
Forget sausages and sausages: they are very hard to chew and swallow.
-
If you use a nibbler, make sure the nets are intact and clean. And, of course, be sure to wash your hands before eating - both children's and your own.
- Photo
- Yiu Yu Hoi/Getty Images
-
Vegetables.
 They must be cooked so that they are soft, peeled and de-seeded. Diced boiled potatoes are a great food to eat with your hands. Small soft cubes of boiled carrots, broccoli, pumpkins are also perfect for a child up to a year old. A treat for older kids: slices of cucumber or sweet pepper - these vegetable sticks are conveniently dipped in various sauces.
 -
Fruit. Small cubes of watermelon, melon, ripe banana, pear will do. Cut them into small plates or sticks to make it easier for the baby to bite off.
-
Everything else. Also, soft pasta (tubes, horns, shells, bows), egg yolks from quail eggs and small pieces of soft cheese (tofu, goat or mozzarella), steamed meatballs, pieces of chicken or turkey fillet will be useful and perfect for eating with your hands . Cut pancakes into thin strips - you can dip them directly with your hands in yogurt, sour cream or fruit puree.
- it is best to take fresh products for preparations: fruits from the tree, berries from the bush and vegetables from the garden are much more useful than those that have already been in the refrigerator for a week. If there are no seasonal vegetables at the time of preparation, the use of frozen foods is acceptable, but in this case, try to give preference to whole fruits - they retain the greatest amount of nutrients;
- only filtered water should be used for cooking vegetables;
- Preparing baby food requires, if not separate dishes, then thoroughly washed ones.
 Do not, for example, cut vegetables on a meat board. If there is a dog or cat in the house, then you need to restrict her access to the kitchen when food is being prepared;
 - It is not recommended to use vegetables and fruits in the diet of infants, in which the content of chemical additives is consistently high. These often include watermelons and melons, beets, spinach and lettuce;
- It is better to add water to vegetables purchased on the market before cooking: put carrots, potatoes, zucchini and cauliflower in filtered water for a couple of hours - this will remove nitrates;
- do not leave excess mashed potatoes for the next meal: the child should be given only freshly prepared food, and "yesterday's" mashed potatoes are best eaten by adults or given to pets;
- you can choose cream, boiled egg yolk, grated cheese or finely chopped dill as an additive to puree - this will diversify dishes for children from 8 months;
- try it! Children's food can and should be enjoyed by an adult.
- Rinse pumpkin well under running water, peel, cut in half, remove seeds.
- Then you need to cut the fruit into small cubes, put in a saucepan and pour water. Cooking time after boiling - 20 minutes. You can also steam pumpkin: it will retain more nutrients with the same cooking time.
- The next step is to beat the cooked pumpkin with a blender until the consistency of a gentle puree. If the dish turned out to be thick, add water or milk (milk mixture).
- Vegetable oil and salt are added to pumpkin puree to taste, but these additives should be used with caution: only if they are acceptable for the age of the child.
- Broccoli should be washed, cut into pieces and boiled. Steaming will take 20 minutes, in water - faster: fresh cabbage should be boiled for a little more than 5 minutes, and frozen - at least 10.
 When cooking, do not pour a lot of water, it should only cover the vegetables a little.
 - When the cabbage is cooked, take it out, transfer it to a blender bowl and grind to a puree state, add a little warm boiled water.
- Add salt and butter to taste.
- Fruit must be peeled, core removed with seeds, cut into cubes.
- Transfer the pear to a heavy-bottomed enamel saucepan, add a little water and simmer for 15-20 minutes over low heat.
- Then transfer to a blender bowl and puree until smooth.
 If the puree is too thick, add a little warm boiled water.
 - You can dilute the dish with milk or formula - it depends on the taste preferences of the baby.
- Selected products should be thoroughly washed, peeled, core removed from apples.
- Cut zucchini and apples into cubes, put fruits in a cooking pot first - they should cook for 5 minutes longer, and then vegetables.
 The total cooking time is 20 minutes.
 - When the food becomes soft, it must be ground to a puree with a blender.
- To taste - dilute with water, add salt, oil.
- Wash and peel the vegetables thoroughly and cut into cubes.
- It is better to steam the mashed potatoes and carrots, the vegetables should be boiled separately. Cook until tender, 20 minutes on average.
- Separately puree the vegetables in a blender, diluting with warm water if needed.
- Fruit should be peeled and pitted, cut into cubes.
- Place raw mango in a blender, purée, transfer to a heavy-bottomed pot and simmer for a few minutes.
- Pumpkins and apples must be peeled, peeled and seeds removed, cut into cubes and sent to a double boiler.
- Cook for about 20 minutes until the food is soft. Then place them in a blender bowl, add raisins and chop. If the child chews well, mash everything with a fork, and leave the raisins whole.
- The turkey fillet must be boiled in the "second stock" for about 20 minutes after boiling.
- Wash, peel and cut the celery root into cubes and put into the boiling broth 10 minutes before it is done.
- After cooking, puree the turkey and celery with a blender, adding stock if necessary.
- Salt to taste and add oil. For one children's serving, 3-5 grams of butter is enough.
Eat little, baby!
British scientists have proven that "eating with your hands" reduces the risk of obesity in a child. They conducted an experiment in which more than 150 children aged 6 months to 6 years took part. Half of the parents suggested that their children take pieces of solid food from the plate, the rest - fed from a spoon. The results of the study showed that children who joined the common table through finger food were less likely to suffer from overweight in middle and high school age. Domestic doctors do not quite agree with the conclusion of foreign experts: if the child is not persuaded and not blackmailed (“a spoon for mom, a spoon for dad”, “eat - I’ll give you candy!”), He, eating even with the help of cutlery, he will determine for himself the optimum amount of food to eat. The main thing is that high-quality and healthy products are always present on the children's plate.
When
At what age can you give small pieces of food to a baby? As soon as the baby begins to sit confidently without assistance. It’s good if at 4.5 months, under strict parental guidance, he grinds a dry bagel or a piece of apple in a nibbler with his gums. Do not forget that the consistency of the main complementary foods (porridge, mashed potatoes, etc.) should gradually become thicker so that the child has a need to work with his jaws, lips, tongue. Then you can reduce the degree of grinding: use a meat grinder, grater, fork. All this will gradually teach the baby to fully chew food. Usually, from 7 to 12 months, this skill is successfully formed, and at the age of one, if the child received pediatric complementary foods according to age, he may well be fed with food with his hands on his own.
“Food with hands” is suitable for children from 7–8 months to 1.5 years. Then the child should make friends with cutlery and learn to get pleasant tactile sensations in other ways.
How many
Food with hands is always present in our diet, because bread, pies, chicken wings, khinkali, desserts like “oriental sweets”, and many other things we eat without cutlery . Therefore, there will always be finger food in the child's diet, and it is not necessary to artificially observe its volume. But it is necessary to accustom the baby to cutlery: at eight months he should eat with a spoon with his mother, and at 1.5 years old he should use cutlery on his own. It is both civilized and more hygienic.
How to
Be patient: it is not easy to encourage baby food with your hands, because at first more of it will end up on the floor instead of your mouth. Cover the table with oilcloth and use a plate with a suction cup - it will be more difficult for your baby to knock it over. Also, special containers like lunch boxes with internal dividers are good for finger food: arrange the edible pieces in different sections, and let the baby explore their contents.
Safety Instructions
What
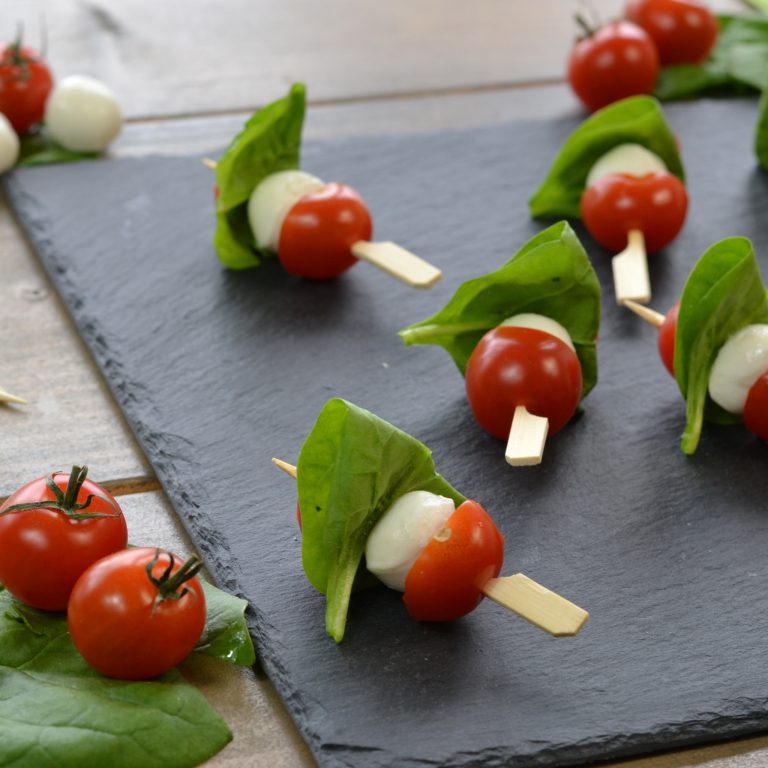
A good food to eat with your hands is one that can be broken into small pieces that are easy to chew or even dissolve in your mouth. The main thing is to make sure that the baby will not only be able to easily hold them in his hands, but also will not choke.
Arrange thick dips of different colors (yellow for cheese, green for spinach or avocado, red for berries) on a plate in circles, imitating a palette. Let the baby mix them with his hands, getting new colors and flavors.
Trying by mouth
Practically all parents know today that it is useful for a baby to touch different objects with his hands from a very early age. The fingertips are equipped with many nerve endings, and stimulating them not only transmits a lot of information to the brain, but also relieves nervous tension. It's safe to say that eating with your hands is soothing. Any tactile sensations have a beneficial effect not only on the nervous system, but, according to some reports, increase immunity. When a baby eats with his hands, he is not so much satiated as he explores unfamiliar objects with his mouth (in tactile terms, the mouth provides him with more effective information than hands). Some children under two years of age retain the need to study objects in this particular form: “Everything is dragged into the mouth,” mothers complain. Nevertheless, at the age of two, a child should be as accustomed to a civilized meal as possible - to be able to use a spoon and a fork. If the baby continues to eat with his hands, this is either from a lack of education, or from a lack of attention and a lack of tactile sensations, which at this age should be replenished in other adequate ways (with the help of mother's hugs, on a carpet with favorite toys).
More useful materials on how to feed your baby - in our channel on Yandex.Zen.
Evgenia Karpovskaya
Baby food at home: recipes, video
Growing up a little person is a delightful process that cannot but please the parents of the crumbs. However, the first feeling that mom and dad face when it comes time to introduce complementary foods into a child's diet is confusion.
Which food is the most healthy, hypoallergenic and delicious? Most often, the first "real" meal of the crumbs after mother's milk and formula is vegetable or fruit puree. The choice of baby food on store shelves is very wide - each manufacturer tries to convince the buyer that jars with beautiful labels contain only natural products, there are no dyes, sweeteners and other harmful additives. A variety of "meals" for babies in factory packaging marked "3+ months." does not guarantee the true usefulness of the product that is inside. Every mother understands that complementary foods prepared on her own, from natural products, are much better for her child.
Another advantage of making your own baby food is that you can choose the best ingredients, wash fruits, berries or vegetables thoroughly, peel them well and remove damaged parts. In addition, the parents of the crumbs themselves can choose the way - how best to cook baby food: food can not only be boiled, but also baked in the oven or cooked in a double boiler.
It is also important that home-made baby puree is much tastier, it will undoubtedly be useful for a growing body and will not cause allergies! Even the simplest children's dish, prepared by mom, keeps the warmth of caring hands and cannot be compared with expensive dishes from the store.
What should be the correct complementary foods for children? Of course, you should start with one ingredient (such purees are called one-component purees), then move on to more complex options. Experts emphasize that the most suitable product for the first "dish" is zucchini. Cauliflower can also be considered neutral. Gradually it will be possible to introduce carrots, pumpkins, potatoes, broccoli and green peas. At the first stage of the introduction of complementary foods, it is better to give preference to vegetable purees and switch to fruit purees when the child already treats “serious” food well.
The basic rules and principles of preparing high-quality baby food yourself:
There is another question that often worries parents: is it permissible to preserve baby puree and how to do it correctly? After all, such complementary foods for the developing body of a small child must be prepared daily for one or even two or three years: until the baby is ready to eat adult food from the common table. Not every mother has the time and opportunity to prepare baby puree daily, but you don’t want to buy food for the baby in the store. In addition, it is obvious that in the winter-spring period it is almost impossible to find fruits and vegetables grown without the addition of chemicals. The answer to the question is quite simple: the requirements for the conditions for preparing baby food are very strict (keeping the temperature, sterilizing jars, etc.), but using an autoclave solves all problems: all that is required is to load jars with blanks into the autoclave for 20 minutes and set temperature 120 degrees. After cooling, it is better to store baby food in a dark, cool place for about 12 months, daily delighting the child with homemade homemade food.
Pumpkin puree: tender and aromatic
Pumpkin is a delicious vegetable that is good for babies. This fruit has a beneficial effect on digestion, is well absorbed by the child's body and is rich in various vitamins: A, C, B, B2, E, PP, T. In addition, the carotene content in pumpkin is 5 times higher than in carrots!
Baby pumpkin puree has a sweet taste, so the kids eat this dish with great pleasure. For preparations, it is better to buy small whole pumpkins, as they usually taste better than large ones and are easier to peel.
For babies older than 8 months, pumpkin puree is supplemented with other fruits and vegetables, and also added to porridge.
Broccoli puree: simplicity and elegance
Broccoli is not just cabbage, but a storehouse of vitamins and microelements! Beautiful on the outside and fantastic on the inside - the high content of protein and vitamin C (there is more in broccoli than in citrus!) deserves special attention. There are many articles on the Internet about the benefits of broccoli, and preparing this product is not at all difficult.
To prepare this type of cabbage for baby food, you need to choose the highest quality product: the inflorescences must be unopened, green, moderately elastic.
Pear puree: a fragrant dessert
It's no secret that babies love fruit puree - almost all children like sweet dishes. The pear is a suitable option for the first one-component fruit food - a sweet fragrant fruit that has a high concentration of vitamins, stimulates digestion and almost never causes allergies.
If you want to cook a safe puree for your child at home, then it is best to choose green pears, these are the fruits that are considered to be the least allergenic.
The same recipe is used for applesauce. In the future, try to combine these two fruits in one dish.
Classic apple-zucchini puree
A good appetite of a baby pleases every mother, but little gourmets are often capricious, and it is not easy to please them. Zucchini and apple puree is a classic combination of products that will diversify the baby's menu already in the fifth or sixth month of life.
This complementary food contains only hypoallergenic products, has a positive effect on the functioning of the heart, and stimulates the strengthening of the immune system.
This puree can be considered an independent dish for the little ones or become a delicious side dish for older kids.
Colorful carrot-potato puree
For many parents, carrots and potatoes are the easiest and most understandable type of complementary food for the baby. However, if you cook and serve standard products a little differently than usual, you can improve the traditional taste of a classic dish.
For baby puree, young potatoes should not be chosen - they contain a lot of starch. Carrots, on the contrary, it is better to buy young ones.
Both types of puree are beautifully placed on a plate without mixing: the child can decide for himself whether to mix food or eat separately.
Exotic variety: mango puree
Tropical fruits should not be offered to a small child before the age of 7-8 months and only if there was no allergy to other foods.
Mango is an aromatic fruit with an original pleasant taste. This fruit helps to overcome colds, reduce inflammation in the body, improve sleep and normalize the functioning of the stomach.
To feed the baby, ripened fruits should be selected - quite soft, yellow-red in color.
Older children may be offered uncooked mango puree. This fruit is completely independent - no need to add sugar or water!
Sweet pumpkin puree with apple
This puree is called sweet because both pumpkin and apples are high in sugar.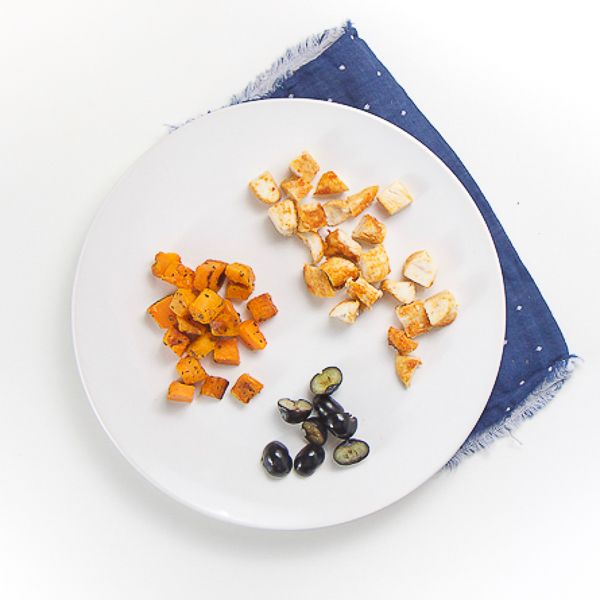 Such a dish is well suited as a dessert for children who already eat “serious” food well - vegetable purees and cereals.
In addition, such complementary foods are a great option for the autumn-winter period: seasonal products contain enough choline, a lot of fiber, natural proteins and vitamins (groups A, B, C, E, etc.), zinc, sodium, calcium and only!
Hearty puree with celery and turkey
For older kids, meat is added to vegetable dishes - turkey fillet is an excellent option for developing a child's taste preferences. Appetizing and fragrant meat puree includes only three ingredients: celery root, turkey fillet, butter.
The proportion of meat and celery should be approximately 10:1, the amount of butter to your taste.
A child from early childhood will begin to get used to full-fledged homemade food without the addition of preservatives and harmful components, and will grow up healthy and strong. In summer and autumn, parents can make preparations: prepare potatoes, carrots, beets, pumpkins and apples for storage (these products are stored for a long time - they do not need to be frozen), freeze berries and seasonal fruits, or roll ready-made mashed potatoes into jars! Homemade baby food without unnecessary flavor enhancers and salt is the best complementary food, warmed by mom's love.