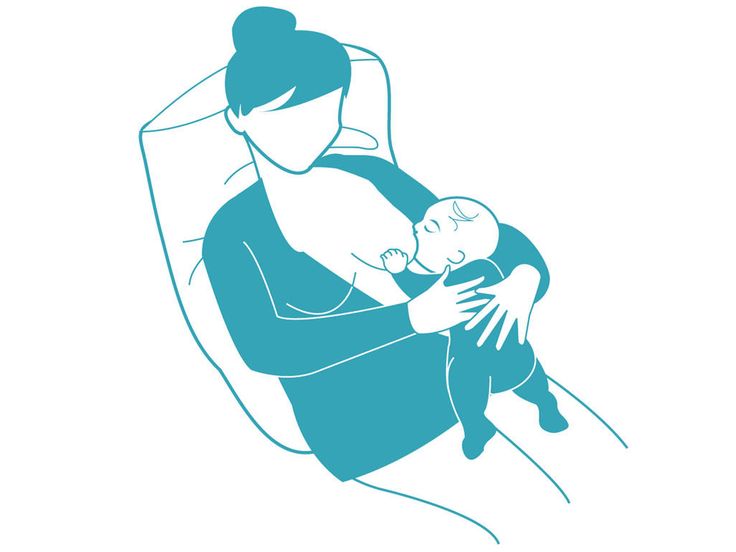
How to hold baby when feeding
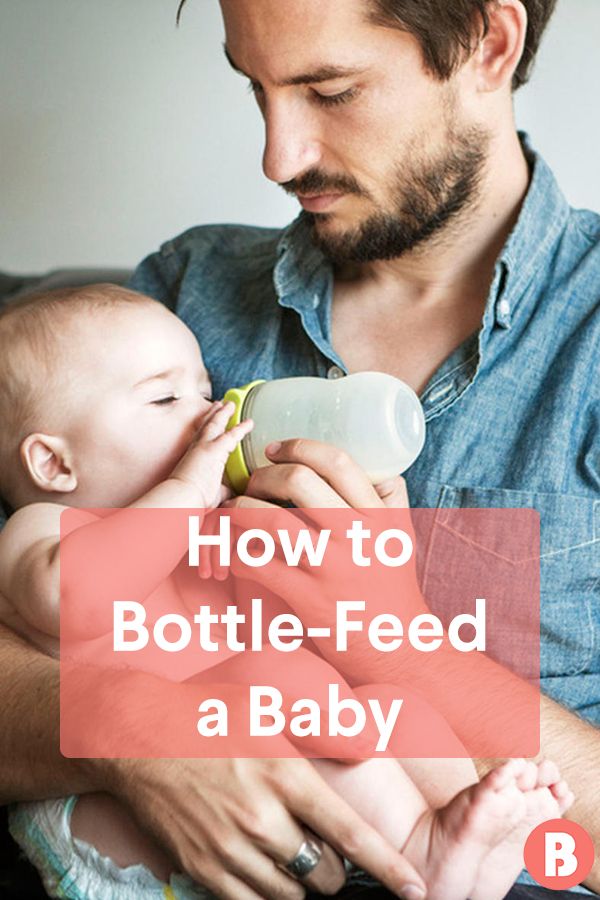
How to Bottle-Feed a Baby
Whether you’re breastfeeding, formula-feeding or doing a combination of both, chances are you’ll eventually use a bottle with your infant. No big deal, right? But while images of a parent blissfully holding a bottle make the process look easy, there’s a learning curve when it comes to proper bottle-feeding. Here, everything you need to know about how to bottle-feed a baby safely and happily.
In this article:
How to choose the right bottle and nipple
How to make a baby bottle
Best bottle-feeding positions
What is pace feeding?
How to get baby to take a bottle
When to wean baby off the bottle
How to Choose the Right Bottle and Nipple
When it comes to figuring out how to bottle-feed a baby, selecting an appropriate bottle and nipple is step one. If people gifted you a bunch of bottles at your baby shower, you may want to hold off before opening and sterilizing them until baby is born, or at least take out just a few to try in the early days of feeding. Why? Because you won’t know what kind of bottle is best until you figure out what baby’s feeding needs are.
“Certain bottles work better for certain babies,” explains Jamie O’Day, BSN, RN, CLC, a registered nurse, certified lactation consultant and cofounder of Boston NAPS, a pre- and postnatal resource center in the Boston area. “For example, some babies who have issues with gas may do better with a bottle that has a filtration system, like a Doctor Brown’s style bottle, while babies who are used to being breastfed may have more success drinking from a bottle that aims to mimic the shape and feel of a mother’s breast, like the Comotomo.”
That said, O’Day has a universal tip for all parents: Look for a bottle that’s easy to take apart and clean. That generally means a nice wide neck and the fewest parts possible. “Proper cleaning is so important, so I always tell parents to choose the simplest bottle, which may just have a nipple, bottle and collar,” she says. If your child seems happy and easily takes the bottle, then there’s no need to switch.
Of course, it’s not just the bottle that you have to consider. It’s also important to pay attention to the flow of the nipple, which varies based on infant age. Generally speaking, young babies need a slower flow, while older babies who’ve mastered the art of bottle-feeding can handle a faster flow. The nipple may be called “slow flow,” “medium flow” or “fast flow” or may be numbered from one to three, with one being the slowest flow. There is no standard of flow between different brands, but most newborns should begin on level one or slow flow.
So how can you tell when it’s time to change the nipple size? That depends. Some infants happily use the same flow nipple throughout their infancy, while others may need a faster flow nipple. “If you notice your child taking a long time to finish a bottle, or losing interest midway through feedings, a faster flow nipple may be needed,” O’Day says, adding that this might happen at around 3 or 4 months of age, with another potential upgrade around 6 or 7 months.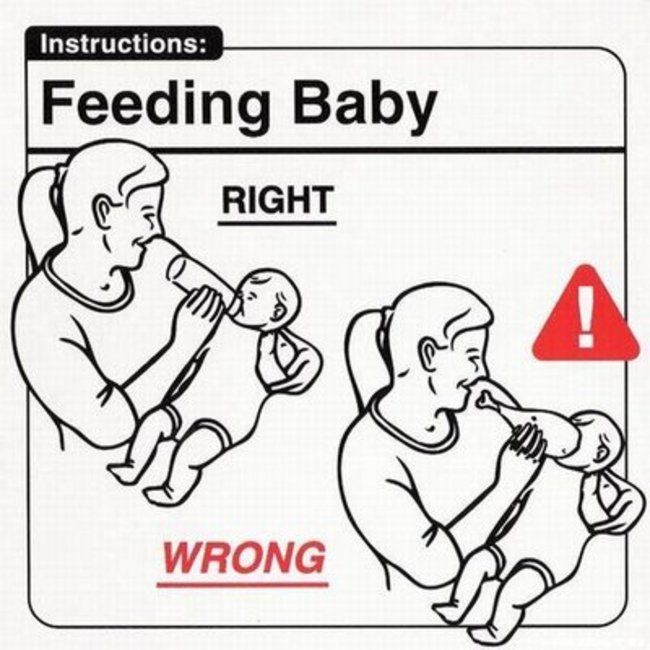
If your infant finishes a bottle quickly (say, under five minutes), seems gassy or cranky, or spits up a lot of milk right after feedings, it may be time to go back to a slower-flow nipple. Your pediatrician can also help determine if it may be time to switch the flow of the nipple.
How to Make a Baby Bottle
If you’re wondering how to bottle-feed a baby, you’re probably new to prepping baby bottles. Take a new skill, add in sleep deprivation and sprinkle in some very real safety concerns and you’ve got the somewhat daunting process of making a baby bottle (at least at first). Don’t despair. By reading directions, following the advice of a pediatrician and making sure to err on the side of caution, you’ll get the hang of it in no time.
How to make a baby bottle with formula
Baby formula comes in three different forms: ready-to-feed, concentrate and powder. The Centers for Disease Control and Prevention (CDC) recommends that babies under 3 months start off with ready-to-feed formula because of the small but real risk of cronobacter, a bacteria that can live in powdered infant formula.
• Preparing ready-to-feed formula: These require very little prep, since they come ready to be poured into a bottle and fed to an infant. Some ready-to-feed formulas come in bottles that can accomodate disposable nipples—all you need to do is screw a nipple on, feed and discard.
• Preparing concentrate formula: To prepare a baby body with this liquid formula, you’ll need to add water. It’s important to read the directions to learn the right ratio of water to concentrate. As for what type of water should you use, that depends on where you live, your pediatrician’s recommendation and your own wishes. If your tap water is safe, feel free to use it—just run it for several minutes before you fill the bottle to remove any trace contaminants in the water. You can also use filtered water, bottled water or boiled (and cooled) tap water.
• Preparing powdered formula: Just like concentrate, it’s important to follow directions on the right ratio of scoops of powder to ounces of water, says Carmen Baker-Clark, an International Board Certified Lactation Consultant (IBCLC) in Hoboken, New Jersey. When using powdered formula, make sure to shake well so the liquid isn’t clumpy. “Some parents notice powdered formulas may make their infant more gassy, more prone to spit-up or more constipated. A lot of this is due to the bottle preparation. For example, not shaking enough can create uneven consistency that may be harder for baby to digest,” Baker-Clark explains.
Regardless of what kind of formula you choose, Baker-Clark recommends sticking with the same brand or being deliberate as you try new ones, instead of just using whatever formula is on sale. While all infant formulas are regulated by the FDA and must pass the same nutrient tests, babies may react differently to various brands of formula. If an infant has frequent reflux, crying episodes or seems uncomfortable after a feeding, speak with your pediatrician. Your child may have an allergy or intolerance and may need a special formula.
Whether you warm the bottle up is up to you. “Many infants have no problem taking a cold bottle and the advantage is that you then don’t need to warm a bottle when you’re on the go,” Baker-Clark says.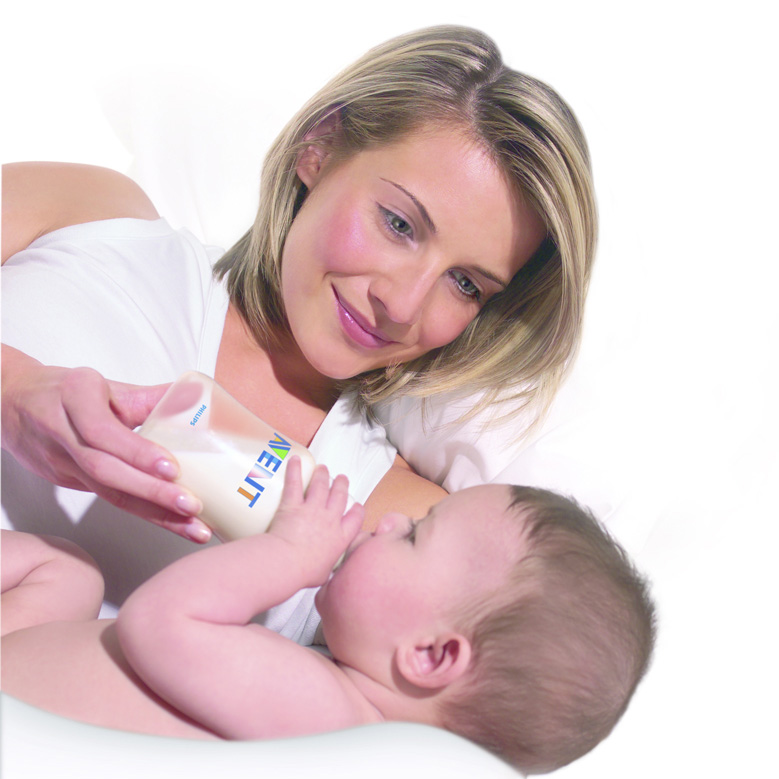 Once a formula bottle has been made and the nipple has touched baby’s lips, the bottle is good for an hour. But if the bottle isn’t used, a bottle may be refrigerated for a day, O’Day says. Some parents like to prepare and refrigerate a bottle in advance to make middle-of-the-night feedings easier, while others may prepare a pitcher to use during the day.
How to make a baby bottle with breast milk
Preparing a bottle of breast milk is of course much more straightforward, since the milk itself is ready to go. But when grabbing a bag of breast milk to use, it’s important to keep an eye on when it was pumped and how it’s been stored since. According to breast milk storage guidelines, it’s safe to use freshly pumped milk that’s been stored at room temperature for up to four hours, in the fridge for up to four days or in the freezer for up to 12 months. Always use the oldest milk first. If baby doesn’t finish a bottle, you can offer it again within two hours of the last feeding.
Before giving baby the bottle, you can warm the milk up by placing the bottle (or milk storage bag) in a cup of warm water for a few minutes, or pop the bottle into a bottle warmer. Whatever you do, steer clear of the microwave, which can cause dangerous hot spots.
Best Bottle-Feeding Positions
How you hold your little one during a feeding is a crucial part of knowing how to bottle-feed a baby properly. Chances are, you’ve come across loads of images of parents bottle-feeding babies—but the positions you sometimes see in photos or on TV may not actually be the best for baby. For one, forget about laying baby across your lap. “Have you ever easily drank something while you lay on your back?” O’Day asks. (Answer: no.) “It’s the same for baby.” Not only can a back position lead to reflux, but it may also cause ear infections. Try these bottle-feeding positions instead:
• Cradle baby in your arms. This is the classic position you probably think of when you imagine giving baby a bottle. In this bottle-feeding position, baby’s head rests in the crook of your arm as you hold her head and chest at a slight incline—close to your chest is great.
• Hold baby upright. Instead of lying down, baby should be almost in a seated position, with his head on your chest or in the crook of your arm. “This position can work especially well for infants who have reflux,” Baker-Clark says. Tilt the bottle so the milk completely fills the nipple, since a nipple filled only halfway with milk may lead to baby gulping some air, which can lead to gassiness or reflux.
• Use a pillow. A nursing pillow can be helpful in keeping baby’s chest and head propped up at an angle. Bonus: It can give your arms a break too as you cradle baby in your lap.
• Switch sides. Regardless of whether you’re breastfeeding or bottle-feeding exclusively, switching baby from one side to another can help prevent your little one from developing a side preference and can give your arms a break. Switching sides can also naturally pace a feeding session and can give baby a chance to decide whether or not he’s full before the bottle is finished.
As baby gets older, she may toy with holding the bottle. That’s fine, if she wants to, but it’s not a developmental milestone. “She may want to hold the bottle at 6 months, so you can let her, but you should still be close by, holding her and supervising her,” O’Day says. And if baby doesn’t show any interest in holding her bottle? As long as she’s reached other developmental milestones, like reaching or grasping for toys, it’s totally normal if your older infant wants his bottle served to him.
What is Pace Feeding?
You may have heard of “pace feeding” and wondered how to bottle-feed a baby using this method. “Paced bottle-feeding is where you follow baby’s cues and allow for breaks,” Baker-Clark says. “Taking the bottle away and re-offering it benefits both breastfed and exclusively bottle-fed babies.”
Pace feeding helps babies learn to regulate their hunger and allows ample time for digestion. It can also cue you into baby’s biorhythm, O’Day says. You may find baby doesn’t uniformly eat the same size bottle at each time of day. For example, maybe he’s extra hungry in the morning and drinks 8 ounces, but prefers 4-ounce bottles post-nap. Paying attention to baby’s cues can help you clue into her unique needs and natural schedule.
Plus, paced bottle-feeding makes a feeding session—which can last about 15 to 20 minutes—a great time for baby and his caregiver to bond. Here, some tips for how to pace feed:
• Hold the bottle at a horizontal angle. When the bottle is held horizontally, baby has to work to pull milk from the bottle, instead of the milk dripping into her mouth.
• Give baby some breaks. Instead of pulling the bottle away from baby’s mouth, lean the bottle back so the milk leaves the nipple. That way, baby has a chance to catch his breath. If he seems like he’s still rooting for milk, offer him more.
• Burp mid-feed. “If baby is pulling away, seems fussy or seems to be playing with the nipple with her mouth, give her a burp,” O’Day says. Then offer the bottle again.
How to Get Baby to Take a Bottle
Even if you’re planning to exclusively breastfeed, at some point you’ll likely need some pointers on how to get baby to take a bottle. “I tell my clients to introduce baby to a bottle once breastfeeding has been established, which depends on each mother-baby dyad, but on average, it’s around one month,” O’Day says. “Even if they’re not planning to regularly bottle-feed, doing so can give peace of mind if an emergency comes up, and can also be a way for mom to get a break.”
Some babies take a bottle no problem—after all, sucking is an instinctive reflex, which is why bottle-fed babies tend to get the hang of it in the first few days of life. But other breastfed babies may initially be reluctant to take a bottle. And sometimes breastfed babies have no issue taking a bottle when they’re one month old, but if a bottle hasn’t been regularly offered, by 3 or 4 months of age, they’re less happy to accept a bottle. Bottle resistance is pretty common, but luckily there are some tried-and-true tips for what to do when baby is refusing a bottle.
• Offer often. Even if you’re breastfeeding, O’Day recommends giving baby at least one bottle a week, once breastfeeding has been established. “That way it’s part of their routine, so they’re less likely to resist it,” she says.
• Don’t offer it when baby is starving. If you’re regularly nursing your infant, O’Day suggests offering a bottle in between nursing sessions. “If they’re too hungry, they may be too worked up to take a bottle. If they’re calm and not super hungry, they may take it,” she explains.
• Let others try bottle-feeding. Some moms have success leaving the house and allowing their partner to try feeding baby a bottle. Again, try it at a time that’s not baby’s “must-feed” time.
• Don’t get frustrated. If baby isn’t taking the bottle, O’Day suggests putting it down and trying again later rather than forcing it, which can make both you and baby upset.
• Ask for help. A lactation consultant can suggest some techniques to help get even the most resistant bottle-feeders to accept a bottle. They may check your infant’s mouth and tongue for any latch problems that could contribute to the difficulty, suggest the best bottle for your infant, troubleshoot any behavioral issues or offer alternate nutritive methods, such as cup- or syringe-feeding.
When to Wean Baby Off the Bottle
The American Academy of Pediatrics recommends parents stop offering bottles by 18 months due to tooth decay concern, but it’s smart to talk with your pediatrician about exactly when baby should wean from the bottle around the 9-month mark, O’Day says. “How and when to wean depends on how much table food baby is eating, any developmental concerns and your pediatrician’s assessment,” she says. Note, though, that cow’s milk shouldn’t be introduced until baby is 12 months old.
When baby is around 6 months old, offer a sippy cup or straw cup for water, O’Day says, since learning to drink from cups can help make the transition from bottles seamless. Some babies have no problem giving up the bottle, while others may require more time to make the transition, but looping in your pediatrician or lactation consultant can help make sure you’re all on the right track.
Whether you’re breastfeeding and offering the occasional bottle, combo-feeding or exclusively bottle-feeding, you might hit some bumps along your bottle-feeding journey. But there are ways to navigate through any problems that arise. If you’re struggling to find the best baby bottle for your child, need some pointers on how to bottle-feed a baby in an optimal position or encounter a full-on bottle strike, reach out to your pediatrician or lactation consultants for guidance.
Published August 2018
Please note: The Bump and the materials and information it contains are not intended to, and do not constitute, medical or other health advice or diagnosis and should not be used as such. You should always consult with a qualified physician or health professional about your specific circumstances.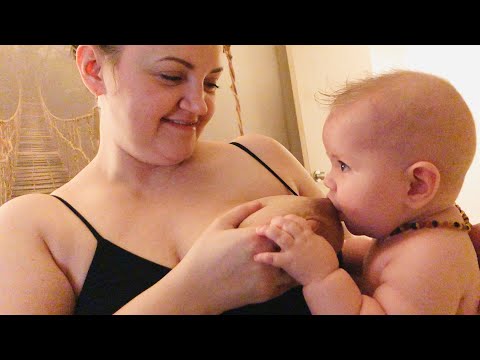
Plus, more from The Bump:
14 Best Bottles for Every Feeding Need
Pumping 101: How to Pump Breast Milk
The Best Baby Formulas for Your Child’s Needs
How to Bottle-Feed a Baby
Whether you’re breastfeeding, formula-feeding or doing a combination of both, chances are you’ll eventually use a bottle with your infant. No big deal, right? But while images of a parent blissfully holding a bottle make the process look easy, there’s a learning curve when it comes to proper bottle-feeding. Here, everything you need to know about how to bottle-feed a baby safely and happily.
In this article:
How to choose the right bottle and nipple
How to make a baby bottle
Best bottle-feeding positions
What is pace feeding?
How to get baby to take a bottle
When to wean baby off the bottle
How to Choose the Right Bottle and Nipple
When it comes to figuring out how to bottle-feed a baby, selecting an appropriate bottle and nipple is step one. If people gifted you a bunch of bottles at your baby shower, you may want to hold off before opening and sterilizing them until baby is born, or at least take out just a few to try in the early days of feeding. Why? Because you won’t know what kind of bottle is best until you figure out what baby’s feeding needs are.
“Certain bottles work better for certain babies,” explains Jamie O’Day, BSN, RN, CLC, a registered nurse, certified lactation consultant and cofounder of Boston NAPS, a pre- and postnatal resource center in the Boston area. “For example, some babies who have issues with gas may do better with a bottle that has a filtration system, like a Doctor Brown’s style bottle, while babies who are used to being breastfed may have more success drinking from a bottle that aims to mimic the shape and feel of a mother’s breast, like the Comotomo.”
That said, O’Day has a universal tip for all parents: Look for a bottle that’s easy to take apart and clean. That generally means a nice wide neck and the fewest parts possible. “Proper cleaning is so important, so I always tell parents to choose the simplest bottle, which may just have a nipple, bottle and collar,” she says. If your child seems happy and easily takes the bottle, then there’s no need to switch.
Of course, it’s not just the bottle that you have to consider. It’s also important to pay attention to the flow of the nipple, which varies based on infant age. Generally speaking, young babies need a slower flow, while older babies who’ve mastered the art of bottle-feeding can handle a faster flow. The nipple may be called “slow flow,” “medium flow” or “fast flow” or may be numbered from one to three, with one being the slowest flow. There is no standard of flow between different brands, but most newborns should begin on level one or slow flow.
So how can you tell when it’s time to change the nipple size? That depends. Some infants happily use the same flow nipple throughout their infancy, while others may need a faster flow nipple. “If you notice your child taking a long time to finish a bottle, or losing interest midway through feedings, a faster flow nipple may be needed,” O’Day says, adding that this might happen at around 3 or 4 months of age, with another potential upgrade around 6 or 7 months.
If your infant finishes a bottle quickly (say, under five minutes), seems gassy or cranky, or spits up a lot of milk right after feedings, it may be time to go back to a slower-flow nipple. Your pediatrician can also help determine if it may be time to switch the flow of the nipple.
How to Make a Baby Bottle
If you’re wondering how to bottle-feed a baby, you’re probably new to prepping baby bottles. Take a new skill, add in sleep deprivation and sprinkle in some very real safety concerns and you’ve got the somewhat daunting process of making a baby bottle (at least at first). Don’t despair. By reading directions, following the advice of a pediatrician and making sure to err on the side of caution, you’ll get the hang of it in no time.
How to make a baby bottle with formula
Baby formula comes in three different forms: ready-to-feed, concentrate and powder. The Centers for Disease Control and Prevention (CDC) recommends that babies under 3 months start off with ready-to-feed formula because of the small but real risk of cronobacter, a bacteria that can live in powdered infant formula.
• Preparing ready-to-feed formula: These require very little prep, since they come ready to be poured into a bottle and fed to an infant. Some ready-to-feed formulas come in bottles that can accomodate disposable nipples—all you need to do is screw a nipple on, feed and discard.
• Preparing concentrate formula: To prepare a baby body with this liquid formula, you’ll need to add water. It’s important to read the directions to learn the right ratio of water to concentrate. As for what type of water should you use, that depends on where you live, your pediatrician’s recommendation and your own wishes. If your tap water is safe, feel free to use it—just run it for several minutes before you fill the bottle to remove any trace contaminants in the water. You can also use filtered water, bottled water or boiled (and cooled) tap water.
• Preparing powdered formula: Just like concentrate, it’s important to follow directions on the right ratio of scoops of powder to ounces of water, says Carmen Baker-Clark, an International Board Certified Lactation Consultant (IBCLC) in Hoboken, New Jersey. When using powdered formula, make sure to shake well so the liquid isn’t clumpy. “Some parents notice powdered formulas may make their infant more gassy, more prone to spit-up or more constipated. A lot of this is due to the bottle preparation. For example, not shaking enough can create uneven consistency that may be harder for baby to digest,” Baker-Clark explains.
Regardless of what kind of formula you choose, Baker-Clark recommends sticking with the same brand or being deliberate as you try new ones, instead of just using whatever formula is on sale. While all infant formulas are regulated by the FDA and must pass the same nutrient tests, babies may react differently to various brands of formula. If an infant has frequent reflux, crying episodes or seems uncomfortable after a feeding, speak with your pediatrician. Your child may have an allergy or intolerance and may need a special formula.
Whether you warm the bottle up is up to you. “Many infants have no problem taking a cold bottle and the advantage is that you then don’t need to warm a bottle when you’re on the go,” Baker-Clark says. Once a formula bottle has been made and the nipple has touched baby’s lips, the bottle is good for an hour. But if the bottle isn’t used, a bottle may be refrigerated for a day, O’Day says. Some parents like to prepare and refrigerate a bottle in advance to make middle-of-the-night feedings easier, while others may prepare a pitcher to use during the day.
How to make a baby bottle with breast milk
Preparing a bottle of breast milk is of course much more straightforward, since the milk itself is ready to go. But when grabbing a bag of breast milk to use, it’s important to keep an eye on when it was pumped and how it’s been stored since. According to breast milk storage guidelines, it’s safe to use freshly pumped milk that’s been stored at room temperature for up to four hours, in the fridge for up to four days or in the freezer for up to 12 months. Always use the oldest milk first. If baby doesn’t finish a bottle, you can offer it again within two hours of the last feeding.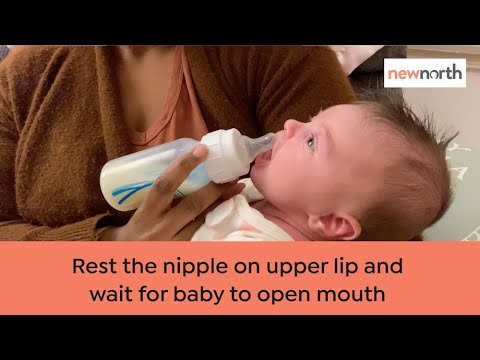
Before giving baby the bottle, you can warm the milk up by placing the bottle (or milk storage bag) in a cup of warm water for a few minutes, or pop the bottle into a bottle warmer. Whatever you do, steer clear of the microwave, which can cause dangerous hot spots.
Best Bottle-Feeding Positions
How you hold your little one during a feeding is a crucial part of knowing how to bottle-feed a baby properly. Chances are, you’ve come across loads of images of parents bottle-feeding babies—but the positions you sometimes see in photos or on TV may not actually be the best for baby. For one, forget about laying baby across your lap. “Have you ever easily drank something while you lay on your back?” O’Day asks. (Answer: no.) “It’s the same for baby.” Not only can a back position lead to reflux, but it may also cause ear infections. Try these bottle-feeding positions instead:
• Cradle baby in your arms. This is the classic position you probably think of when you imagine giving baby a bottle.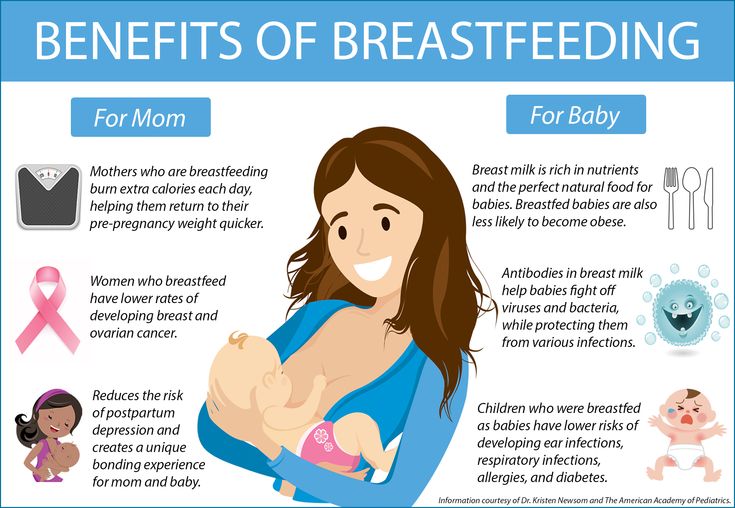 In this bottle-feeding position, baby’s head rests in the crook of your arm as you hold her head and chest at a slight incline—close to your chest is great.
• Hold baby upright. Instead of lying down, baby should be almost in a seated position, with his head on your chest or in the crook of your arm. “This position can work especially well for infants who have reflux,” Baker-Clark says. Tilt the bottle so the milk completely fills the nipple, since a nipple filled only halfway with milk may lead to baby gulping some air, which can lead to gassiness or reflux.
• Use a pillow. A nursing pillow can be helpful in keeping baby’s chest and head propped up at an angle. Bonus: It can give your arms a break too as you cradle baby in your lap.
• Switch sides. Regardless of whether you’re breastfeeding or bottle-feeding exclusively, switching baby from one side to another can help prevent your little one from developing a side preference and can give your arms a break.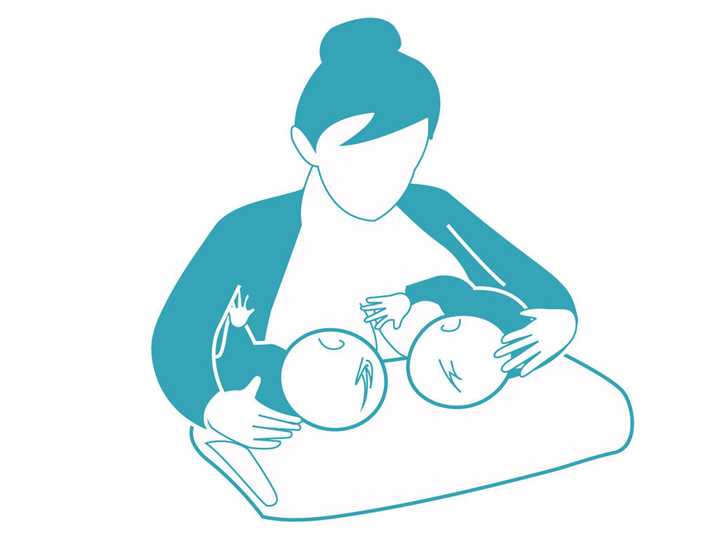 Switching sides can also naturally pace a feeding session and can give baby a chance to decide whether or not he’s full before the bottle is finished.
As baby gets older, she may toy with holding the bottle. That’s fine, if she wants to, but it’s not a developmental milestone. “She may want to hold the bottle at 6 months, so you can let her, but you should still be close by, holding her and supervising her,” O’Day says. And if baby doesn’t show any interest in holding her bottle? As long as she’s reached other developmental milestones, like reaching or grasping for toys, it’s totally normal if your older infant wants his bottle served to him.
What is Pace Feeding?
You may have heard of “pace feeding” and wondered how to bottle-feed a baby using this method. “Paced bottle-feeding is where you follow baby’s cues and allow for breaks,” Baker-Clark says. “Taking the bottle away and re-offering it benefits both breastfed and exclusively bottle-fed babies.”
Pace feeding helps babies learn to regulate their hunger and allows ample time for digestion.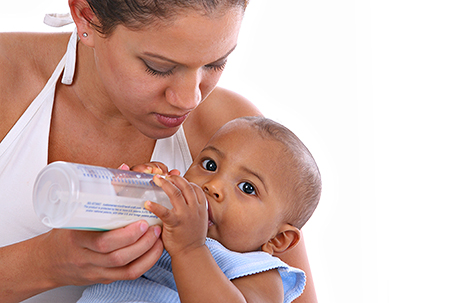 It can also cue you into baby’s biorhythm, O’Day says. You may find baby doesn’t uniformly eat the same size bottle at each time of day. For example, maybe he’s extra hungry in the morning and drinks 8 ounces, but prefers 4-ounce bottles post-nap. Paying attention to baby’s cues can help you clue into her unique needs and natural schedule.
Plus, paced bottle-feeding makes a feeding session—which can last about 15 to 20 minutes—a great time for baby and his caregiver to bond. Here, some tips for how to pace feed:
• Hold the bottle at a horizontal angle. When the bottle is held horizontally, baby has to work to pull milk from the bottle, instead of the milk dripping into her mouth.
• Give baby some breaks. Instead of pulling the bottle away from baby’s mouth, lean the bottle back so the milk leaves the nipple. That way, baby has a chance to catch his breath. If he seems like he’s still rooting for milk, offer him more.
• Burp mid-feed. “If baby is pulling away, seems fussy or seems to be playing with the nipple with her mouth, give her a burp,” O’Day says. Then offer the bottle again.
How to Get Baby to Take a Bottle
Even if you’re planning to exclusively breastfeed, at some point you’ll likely need some pointers on how to get baby to take a bottle. “I tell my clients to introduce baby to a bottle once breastfeeding has been established, which depends on each mother-baby dyad, but on average, it’s around one month,” O’Day says. “Even if they’re not planning to regularly bottle-feed, doing so can give peace of mind if an emergency comes up, and can also be a way for mom to get a break.”
Some babies take a bottle no problem—after all, sucking is an instinctive reflex, which is why bottle-fed babies tend to get the hang of it in the first few days of life. But other breastfed babies may initially be reluctant to take a bottle. And sometimes breastfed babies have no issue taking a bottle when they’re one month old, but if a bottle hasn’t been regularly offered, by 3 or 4 months of age, they’re less happy to accept a bottle.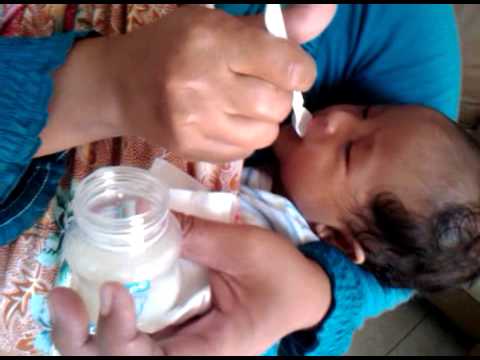 Bottle resistance is pretty common, but luckily there are some tried-and-true tips for what to do when baby is refusing a bottle.
• Offer often. Even if you’re breastfeeding, O’Day recommends giving baby at least one bottle a week, once breastfeeding has been established. “That way it’s part of their routine, so they’re less likely to resist it,” she says.
• Don’t offer it when baby is starving. If you’re regularly nursing your infant, O’Day suggests offering a bottle in between nursing sessions. “If they’re too hungry, they may be too worked up to take a bottle. If they’re calm and not super hungry, they may take it,” she explains.
• Let others try bottle-feeding. Some moms have success leaving the house and allowing their partner to try feeding baby a bottle. Again, try it at a time that’s not baby’s “must-feed” time.
• Don’t get frustrated. If baby isn’t taking the bottle, O’Day suggests putting it down and trying again later rather than forcing it, which can make both you and baby upset.
• Ask for help. A lactation consultant can suggest some techniques to help get even the most resistant bottle-feeders to accept a bottle. They may check your infant’s mouth and tongue for any latch problems that could contribute to the difficulty, suggest the best bottle for your infant, troubleshoot any behavioral issues or offer alternate nutritive methods, such as cup- or syringe-feeding.
When to Wean Baby Off the Bottle
The American Academy of Pediatrics recommends parents stop offering bottles by 18 months due to tooth decay concern, but it’s smart to talk with your pediatrician about exactly when baby should wean from the bottle around the 9-month mark, O’Day says. “How and when to wean depends on how much table food baby is eating, any developmental concerns and your pediatrician’s assessment,” she says. Note, though, that cow’s milk shouldn’t be introduced until baby is 12 months old.
When baby is around 6 months old, offer a sippy cup or straw cup for water, O’Day says, since learning to drink from cups can help make the transition from bottles seamless. Some babies have no problem giving up the bottle, while others may require more time to make the transition, but looping in your pediatrician or lactation consultant can help make sure you’re all on the right track.
Whether you’re breastfeeding and offering the occasional bottle, combo-feeding or exclusively bottle-feeding, you might hit some bumps along your bottle-feeding journey. But there are ways to navigate through any problems that arise. If you’re struggling to find the best baby bottle for your child, need some pointers on how to bottle-feed a baby in an optimal position or encounter a full-on bottle strike, reach out to your pediatrician or lactation consultants for guidance.
Published August 2018
Please note: The Bump and the materials and information it contains are not intended to, and do not constitute, medical or other health advice or diagnosis and should not be used as such. You should always consult with a qualified physician or health professional about your specific circumstances.
Plus, more from The Bump:
14 Best Bottles for Every Feeding Need
Pumping 101: How to Pump Breast Milk
The Best Baby Formulas for Your Child’s Needs
Various breastfeeding positions
Try different breastfeeding positions to find the one that works best for you and your baby. You can see the options in our selection of photos
Share this information
There is no right or wrong way to hold the baby while
feeding, and mom and baby are sure to find their favorite position.
It is important that both you and your child feel comfortable. nine0011 1.2 It's good to learn a few different breastfeeding positions and techniques because life's circumstances often require us to be flexible, especially as your baby gets older and you start to leave the house more often.
Whatever position you choose to breastfeed your baby, remember a few simple rules.
- Prepare everything you need before feeding, including drinks, food, mobile phone, TV remote control, book or magazine. And do not forget to go to the toilet - the feeding process can take a long time! nine0018
- Make sure your baby is comfortable. Whichever position you choose, it's important to keep your baby strong, level, and provide good support for their head, neck, and spine.
- You should also be comfortable. Don't stress. If necessary, use pillows of different sizes or rolls of towels to support your back or arms.
- Make sure your baby is latching on correctly. Proper grip is the key to comfort when breastfeeding. nine0018
- If your baby does not latch on well or you experience pain while feeding, contact a lactation consultant for help. The specialist will also be able to show you how to hold your baby more comfortably.
1. Relaxed feeding or reclining position
The relaxed feeding position, also known as biological feeding, 1 is often the first position for most mothers. If, immediately after birth, the baby is placed on the mother’s chest or stomach, normally, he instinctively reaches for the breast and tries to grab the nipple. This phenomenon is known as the breast seeking reflex. Skin-to-skin contact stimulates the infant's feeding instinct, and gravity helps him to latch onto the breast and maintain balance. nine0003
But it's not just newborns that can be fed in the reclining position - this position is great for babies of all ages. It can be especially helpful if your baby does not latch well in other positions or does not like to be touched during feeding, and also if you have too much milk flow or too large breasts. Isabelle, a mother from the UK, shares her experience: “I had large breasts, and the baby was born small - 2.7 kg, so it was not easy to find a comfortable position at first. After a few weeks, it became clear that there was no “correct” posture for me. As a result, I most often fed lying down, putting the baby on my chest. ” nine0003
It is more convenient to feed not lying flat on your back, but half-sitting, leaning on pillows.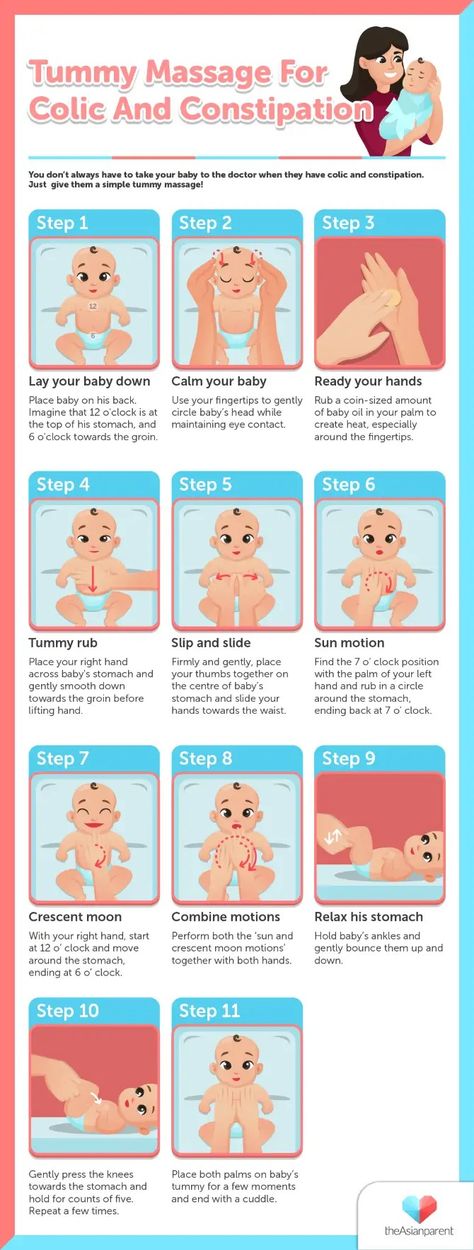 So you will have a back support and you will be able to watch the baby during feeding.
2. Cradle position
This is the classic
first thought of breastfeeding. Mom sits straight
, and the baby lies on her side on her arm, pressing his stomach against her stomach. 3 Although this is a very popular position, it is not always easy to master with newborns because it gives the baby less support. Try putting a pillow under your back, and put a special breastfeeding pillow on your knees and lean on it with your hands. So you can more reliably support the child, without overstraining your back and shoulders. Just make sure that the baby does not lie too high on the pillow for feeding. The breast should remain at a natural level so that the baby can grab it without effort, otherwise sore nipples cannot be avoided. nine0003
“I breastfed in the cradle position because it suited me perfectly! It was comfortable and I loved just sitting and looking at my little one,” recalls Rachel, a mother of two from Italy.
3. Cross Cradle
This breastfeeding position looks almost the same as Cradle, but the baby is on the other arm. 3 This gives your baby support around the neck and shoulders so he can tilt his head to latch on. This position is great for breastfeeding newborns and small babies, as well as for babies who do not latch well. Since the baby lies completely on the other hand, it becomes easier to control his position and you can adjust the chest with your free hand. nine0003
Julie, a UK mother of two, finds this position very practical: “I usually breastfeed my youngest in the cross cradle position. So I have a free second hand, and I can take care of an older baby at the same time. ”
Do not hold the baby's head at first, otherwise you may inadvertently press his chin against his chest. Because of this, the child will not be able to take the breast deeply, because the nipple will rest against the base of the tongue, and not against the palate, which will lead to inflammation of the nipples.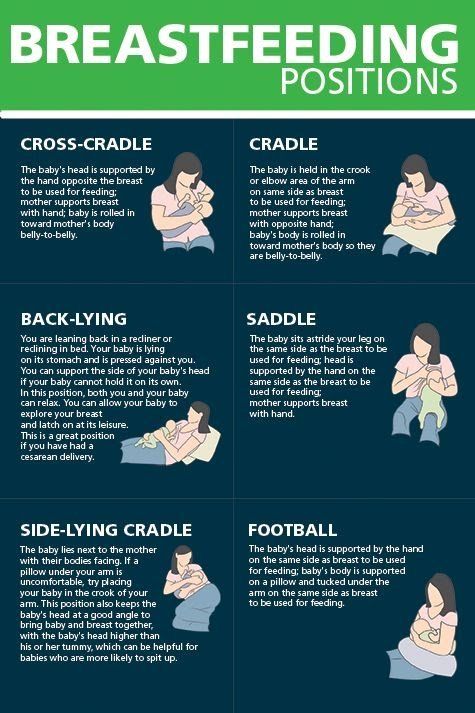 As the child grows, this position becomes more comfortable, and he can rest his head on your palm (as shown in the photo above). nine0003
4. Underarm breastfeeding
In this position, also known as the “ball grip”, the mother sits with the baby lying along her arm at the side, legs towards the back of the chair (or any other seat). 3 Another comfortable position for newborn breastfeeding, you can give your baby good support, full control of his position and a good view of his face. And the baby feels safe in close contact with the mother's body. This position is especially good for those who have had a caesarean section or a premature birth, as well as mothers of twins and women with large breasts. nine0003
“When I breastfed my first daughter, I had very large K-sized breasts—twice the size of her head,” recalls Amy, an Australian mother of two. - I put rolls of towels under each breast, because they were very heavy, and fed my daughter in a pose from under the arm, but only sitting straighter so as not to crush her.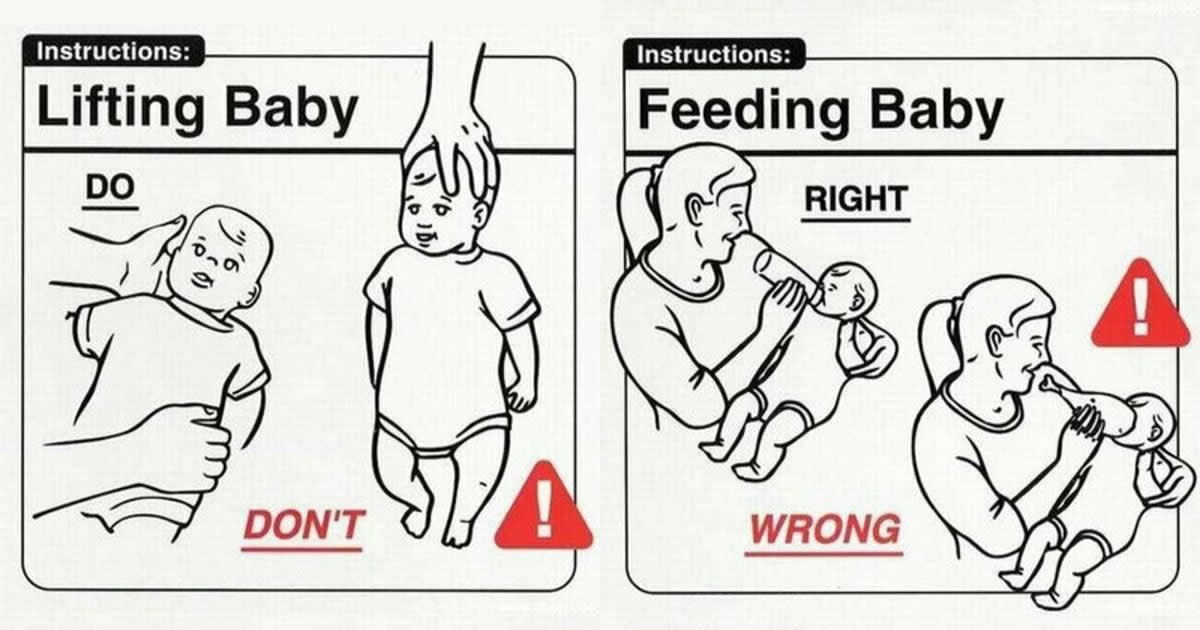 This position was also convenient because I had a caesarean section and could not put the baby on my stomach.”
5. Side-lying position
The side-lying position is ideal for a relaxed
nighttime feeding in bed or on the couch. If you had a
caesarean section or ruptures during childbirth, this position may be more comfortable than sitting down. 3 In this position, mother and baby lie side by side, tummy to tummy.
“It was difficult for me to sit during endless night feedings, firstly because of the caesarean section, and secondly because of lack of sleep,” recalls Francesca, a mother from the UK. “And then I discovered that you can feed your baby lying on your side and rest at the same time.” nine0003
“Because of the short tongue frenulum, Maisie could only properly latch on to her breasts while lying on her side. The lactation consultant showed me how it's done. In this position, the flow of milk was optimal for my daughter, and it was easier for her to keep the nipple in her mouth. As she got older, she became much better at grabbing her breasts in normal positions,” says Sarah, mother of two from Australia.
6. Relaxed breastfeeding after caesarean section
If you can't find a comfortable position for breastfeeding after caesarean section, 3 try holding the baby on your shoulder in a reclining position – this does not stress the postoperative suture and allows you to breastfeed your baby comfortably. You can also try side feeding.
7. Sitting upright breastfeeding or “koala pose”
When breastfeeding in an upright position or “koala pose”, the baby sits with a straight back and a raised head on the mother's hip. 4 This position can be tried even with a newborn if it is well supported, but it is especially convenient for feeding a grown child who can already sit up by himself. The upright sitting position, or “koala pose,” is great for toddlers who suffer from reflux or ear infections and feel better sitting.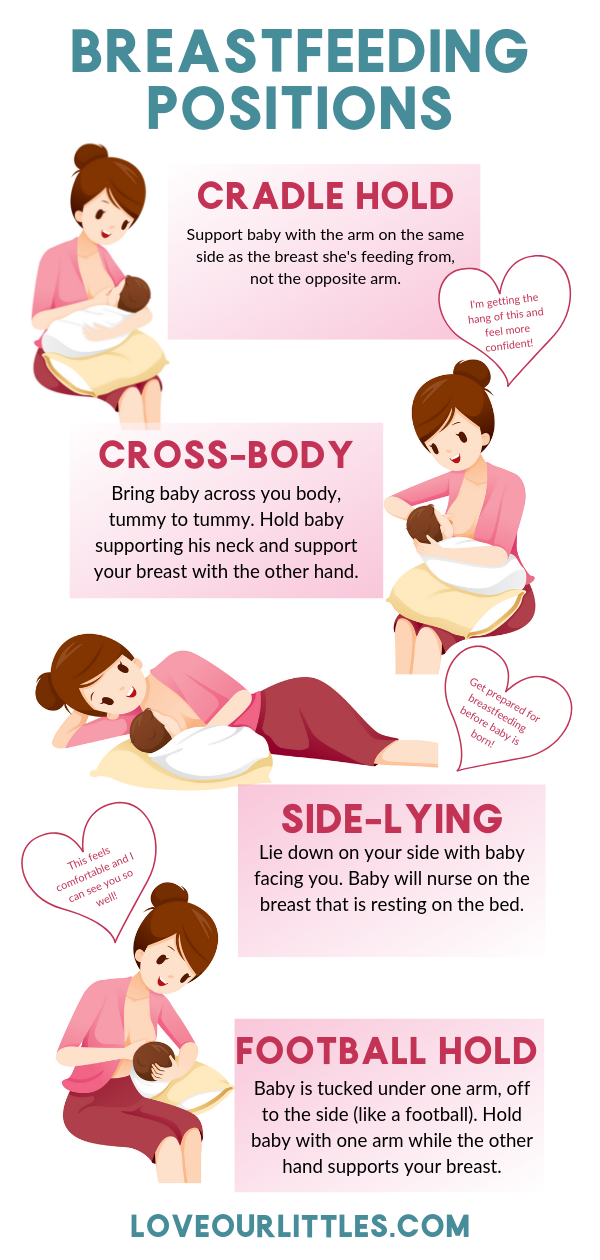 In addition, this pose may be suitable for children with a shortened frenulum of the tongue or reduced muscle tone. nine0003
“When my daughter got a little older, I would often feed her in an upright position, which was more comfortable for both of us, and I could still hold her close,” recalls Peggy, a mother from Switzerland. “Besides, it was possible to discreetly breastfeed her in public places.”
8. Overhanging position
In this position, the baby lies on his back, and the mother bends over him
on all fours so that the nipple falls directly into his mouth. 4 Some moms say this breastfeeding position is good to use occasionally for mastitis, when touching the breasts is especially unpleasant. Some say that this breastfeeding position helps with blockage of the milk ducts, although there is no scientific evidence for this yet. You can also feed in the “overhanging” position while sitting, kneeling over the baby on a bed or sofa, as well as reclining on your stomach with support on your elbows. Pillows of various sizes that you can lean on will help you avoid back and shoulder strain. nine0003
“I have breastfed several times in the 'overhang' position for clogged milk ducts when no other means of dissolving the blockage worked. And this pose seems to have helped. I think it's because of gravity, and also because the breasts were at a completely different angle than with normal feeding, and my daughter sucked her differently, ”says Ellie, a mother of two from the UK.
Feeding in the "overhanging" position is unlikely to be practiced regularly, but in some cases this position may be useful. nine0003
“I used to breastfeed in the overhang position when my baby was having trouble latch-on,” says Lorna, mother of two in the UK. - This, of course, is not the most convenient way, but then I was ready for anything, if only he could capture the chest. We succeeded and have been breastfeeding for eight months now!”
9. Breastfeeding in a sling or in a sling
Breastfeeding in a sling takes some practice, but it can be used to go out, look after older children, or even do a little household chores.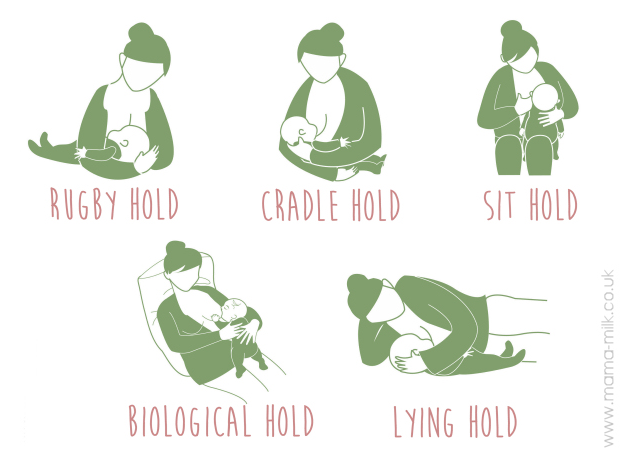 nine0003
The sling is also useful if the baby does not like to lie down or is often attached to the breast. Lindsey, a mother of two in the US, notes: “I used the carrier frequently for both of my children. When we were out, I tied the sarong around my neck and covered the carrier with it. Under such a cape, the baby can eat as much as he wants until he falls asleep.
This breastfeeding position is best when the baby is already good at breastfeeding and can hold his head up by himself. Any slings are suitable for breastfeeding, including elastic and rings, as well as carrying bags. Whatever option you choose, the main thing is that you can always see the face of the child, and his chin does not rest against his chest. nine0003
10. Double hand-held breastfeeding
Double hand-held breastfeeding (or “double-ball grab”) is great for mothers of twins—you can breastfeed both at the same time and keep your arms relatively free. 4 When feeding in this position, it is advisable to use a special pillow for breastfeeding twins, especially at first. It will provide extra support and help keep both babies in the correct position, as well as reduce the burden on the abdomen if you had a caesarean section. In addition, the hands are freer, and if necessary, you can deal with one child without interfering with the second. nine0003
“My twins were born very tiny and had to be fed every two hours at any time of the day or night. Very soon it became clear: if I want to do anything besides feeding, I need to feed them both at the same time, - says Emma, mother of two children from the UK. “I breastfed them two by hand using a breastfeeding pillow.”
Other good positions for breastfeeding twins are two criss-cross cradles, one baby in the cradle and the other close at hand, reclining feeding, or sitting upright (one baby on one side, the other on the other). nine0003
11. Breastfeeding in the "hand-supported" or "dancer's hand" position
muscle tone (which is typical for premature babies, children suffering from various diseases or Down syndrome), try supporting his head and your chest at the same time. 4 Grasp your chest with your palm underneath so that your thumb is on one side and all the others are on the other. Move your hand slightly forward so that your thumb and forefinger form a "U" just in front of your chest. With the other three fingers, continue to support the chest. With your thumb and forefinger, hold the baby's head while feeding so that his chin rests on the part of the palm between them, your thumb gently holds the baby on one cheek, and your index finger on the other. So the baby gets excellent support, and you can control his position and see if he is holding his breast. nine0003
Literature
1 Colson SD et al. Optimal positions for the release of primitive neonatal reflexes stimulating breastfeeding. Early Hum Dev . 2008;84(7):441-449. - Colson S.D. et al., "Optimal Positions for Provoking Primitive Innate Reflexes to Induce Breastfeeding." Early Hume Dev. 2008;84(7):441-449.
2 UNICEF UK BFHI [ Internet ].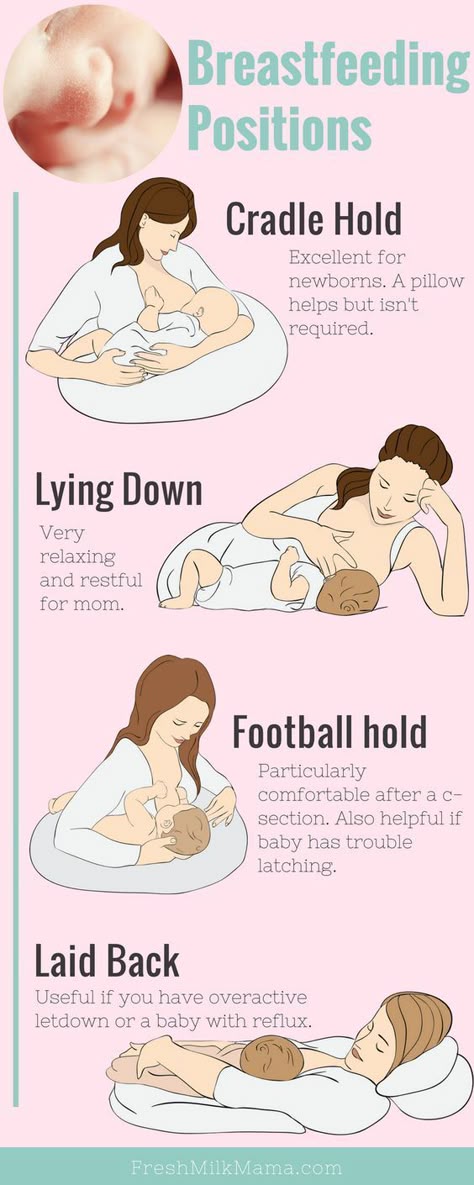 Off to the best start ; 2015 [ cited 2018 Feb ]. - UNICEF UK, Baby-Friendly Hospital Initiative, Start the Best You Can [Internet]. 2015 [cited February 2018].
3 Cadwell K. Latching - On and Suckling of the Healthy Term Neonate: Breastfeeding Assessment. J Midwifery & Women's Health. nine0133 2007;52(6):638-642. — Cadwell, K., "Latching and sucking in healthy newborns: evaluation of breastfeeding." F Midwifery Women Health. 2007;52(6):638-642.
4 Wambach K, Riordan J, editors. Breastfeeding and human lactation. Jones & Bartlett Learning ; 2014. 966 p . - Wambach K., Riordan J., "Breastfeeding and female lactation". Burlington, MA: Publishing House
In this article, we'll talk about the basics of helping a newborn spit up, as well as other questions you may have about spitting up.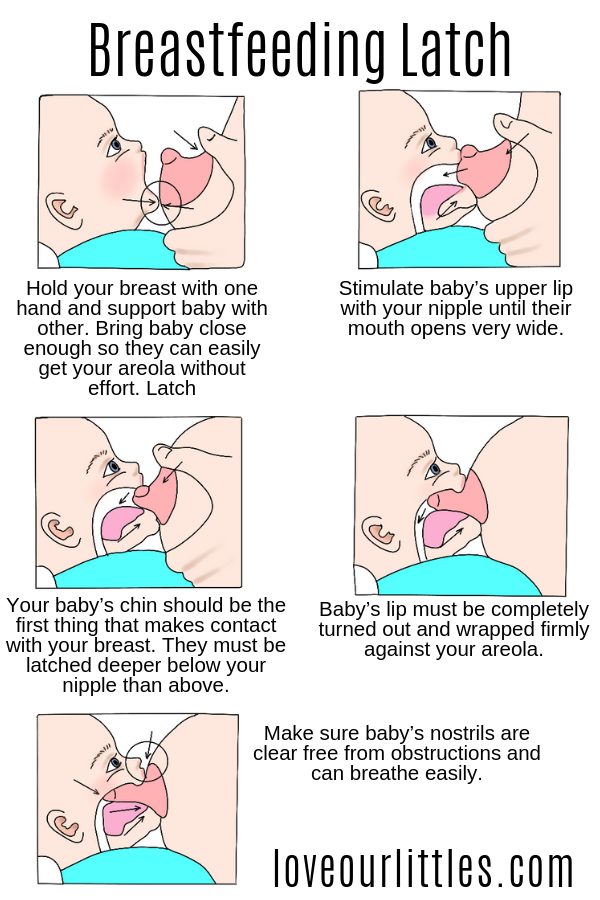
Why do babies spit up?
Let's get this straight: Why do newborns need to burp in the first place? During feeding, children usually swallow extra air - this is called aerophagia. Spitting up helps prevent this air from entering the intestines, as well as vomiting, gas, and crankiness in the baby. To avoid the return of milk after feeding, you should give the baby the opportunity to burp more often. nine0003
How to help a newborn spit up?
During the first six months, the baby should be kept upright in a column for 10-15 minutes after each feed. This will help keep the milk in his stomach, but if the baby occasionally burps anyway, parents need not worry. While carrying your baby in an upright position, you can put a baby diaper or wipes on your shoulder to keep your clothes clean.
We've already seen why spitting up is important, now let's find out how to help your baby spit up. Parents should gently pat the baby on the back with a hand folded in a handful until he burps.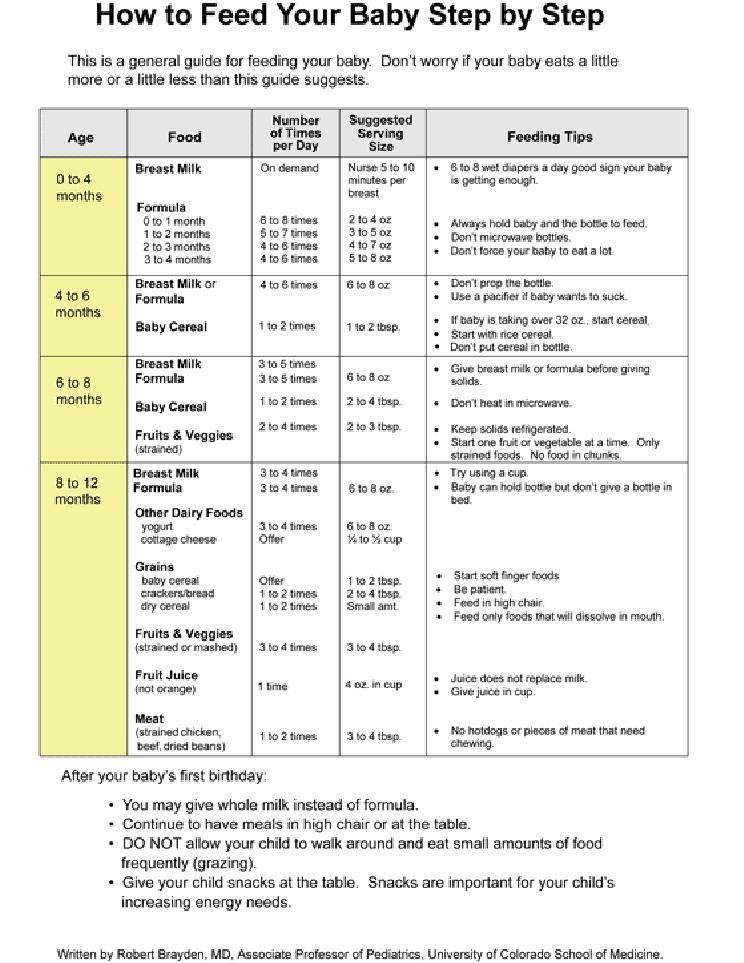 Folding your hand into a handful is important because clapping with a flat palm may be too strong for an infant.
Every baby is different and there is no one right position for spitting up. To get started, you can try the following options:
- Sitting position with the baby on the chest. In this position, the parent puts the baby's head with his chin on his shoulder and with one hand supports the baby under the back. With the other hand, you can gently pat the baby on the back. This method is most effective in a rocking chair or when the baby is gently rocking. nine0018
- Holding a child upright on one's legs. With one hand, parents can hold the baby by the back and head, supporting his chin and placing his palm on the baby’s chest, with the other hand, you can gently pat him on the back. At the same time, it is important to be careful: do not press the child on the throat, but only gently support his chin.
- Holding a baby on your lap while lying on your tummy.
 Make sure his head is above his chest and gently pat your baby on the back until he burps. nine0009
Here are some tips on how best to help your newborn spit up:
- Let your baby spit up while feeding. If the baby is restless or has swallowed air, it is worth giving him the opportunity to burp during feeding, and not just after.
- When bottle feeding, let the newborn burp after every 50-60 ml.
- When breastfeeding, let the baby burp at every breast change. nine0009
It is important to let your baby spit up after eating, even if he spit up during feeding!
If your baby is gassy, spit up more often. Also, if he vomits frequently or suffers from gastroesophageal reflux disease (GERD), have him spit up after every 30 ml bottle-feeding or every five minutes while breastfeeding.
How long should a baby be held for it to burp? It's different for everyone, but generally keeping a newborn upright for 15 to 20 minutes after a feed helps the milk stay in the baby's stomach.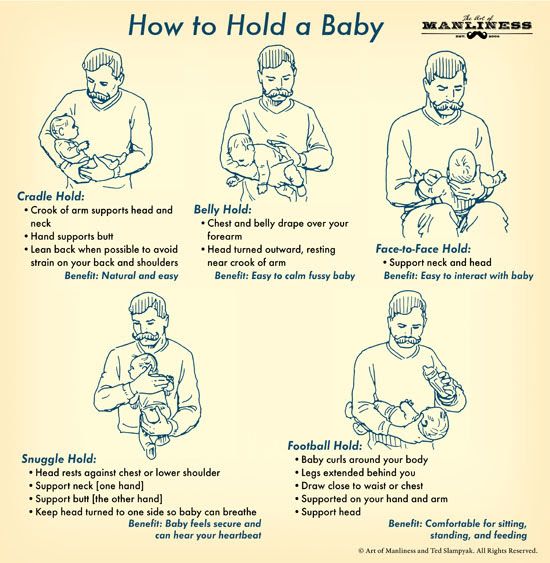 nine0003
Minimize the amount of air you swallow. Gas production and regurgitation result from aerophagia during feeding. The baby will inevitably swallow air, but there are ways to prevent it from swallowing too much. Whether you bottle feed your baby or combine breastfeeding with bottle feeding, the Philips Avent anti-colic bottle with AirFree valve is designed so that the nipple is always filled with milk without excess air, even in a horizontal position, thus preventing the baby from swallowing excess air during feeding. nine0009
Reducing the amount of air your baby swallows can help reduce your baby's risk of colic, gas, and spitting up.
Breastfeeding is a wonderful time to strengthen the bond between parent and baby. Every mom and every baby is different, so learning to help your newborn burp properly can take time and practice.
Articles and tips from Philips Avent
Baby+ app
Download the app and track your child's development and growth with trackers, and keep those special moments forever.