How to steam vegetables for baby food
How to Cook Vegetables for Babies and Toddlers
Here are some easy vegetable recipes for babies and kids (and the rest of the family) - quick and easy, fun and delicious! Let's steam, roast, and steam roast!
We all know veggies are good for us. But getting our babies and toddlers (let's not forget older children as well as adults in the family) to enjoy them can pose quite the challenge. And as a dietitian, I would tell you to keep offering even if they get no love because exposure is everything!
Of course, we sure would like to see them eating their veggies sooner than later. While preparing vegetables that our little human beings will enjoy may seem like a daunting (nearly impossible) task, it doesn't have to be!
Simply switching up the cooking method or flavoring agents can make a world of a difference for picky eaters! Let me show you!
Contents
Baby Led Weaning First Foods
Vegetables make for a wonderful baby led weaning first foods along with iron-rich and high-calorie sources.
First, start with vegetables that are fresh and seasonal. And then comes the fun part - mix it up! Eating the same vegetables prepared the same way day in and out would be boring for anyone.
I put together this post to encourage you to get creative and switch up your cooking methods, experiment with different flavoring agents – oils, herbs, spices, vinegars, butter... Endless possibilities!
Vegetables prepared using any of these methods below will make for the easiest side dish and will make a great accompaniment to just about any meals.
You’ll notice that there are no exact measurements of ingredients here. That’s because how much oil and flavoring agents you use will depend on the amount of vegetables you’re cooking and your taste preferences.
So have fun playing around with it. You just don’t know what deliciousness you’ll stumble upon! And of course, the result might not always be up to your liking, but hey! You never know until you’ve tried.
My biggest advice, don’t be afraid to experiment!
How to steam vegetables for babies
This method is great for getting the vegetables really soft for the baby, which is especially important when first starting solids.
Is your baby 6 months old and up?
Learn all the secrets to starting solids safely while optimizing nutrition!
I NEED IT NOW!
The Basics
- Cut vegetables into uniform pieces. If cooking different types of vegetables together, cut the longer-cooking ones into smaller pieces than the quicker-cooking ones.
- Add water to the pot and insert the steamer basket. The surface of the water should be under the basket. Pour some out if need be.
- Bring the water to a boil.
- Add the vegetables, cover the pot, and reduce the heat to simmer.
- Set the timer. Check periodically so you don’t overcook them.
- Once done cooking, you can then add various flavoring agents to build flavor.
The Benefits
- Doesn’t require oil
- Preserves color, natural flavors, nutrients
- Great for achieving soft texture
Drawback
While you can add oils, herbs, spices, etc. once the vegetables are done, I personally find that the flavors are too overpowering. You might not. Again, experiment!
How to roast vegetables for babies
I personally prefer this method over steaming. It's SO true that magical things happen once the vegetables go inside the oven!
The dry heat of the oven caramelizes the natural sugars in the vegetables, resulting in this incredible depth of flavor! And adding the flavoring agents PRIOR to cooking helps those flavors to get better absorbed into the veggies. YUM!
The Basics
- Set the oven temperature pretty high: 400- 425 degrees Fahrenheit.
- Cut the vegetables into pieces about the same size and place on a baking sheet lined with parchment paper, silicone baking mat, or foil for easy clean up.
- Toss the vegetables with oil and various flavoring agents. Massage the flavors into the veggies using your hands until they’re completely coated.
- Spread the vegetables out evenly onto the baking sheet.
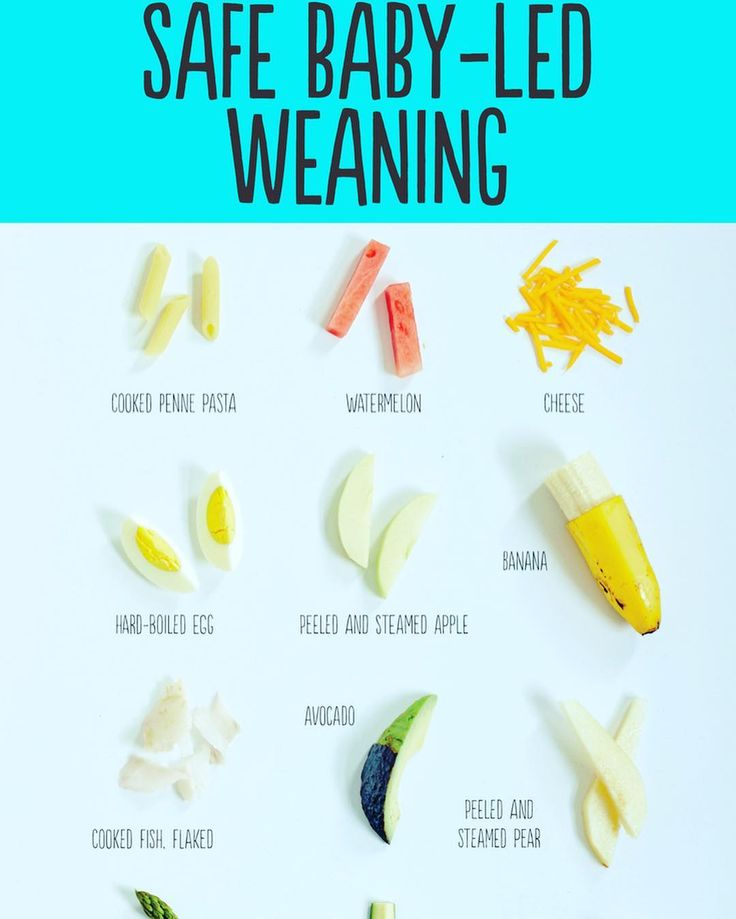
- Cook to desired texture, tossing the vegetables halfway through cooking. Harder vegetables (like winter squash, sweet potatoes, beets) will take longer to cook.
Tips
If roasting multiple vegetables together:
- roast similar ones together – like broccoli and cauliflower; sweet potatoes and parsnips
- roast in stages. Start with veggies that take the longest to cook and then add the other vegetables to the same pan halfway through cooking. As an example, if cooking sweet potatoes and bell peppers, start cooking the potatoes first and then add the bell peppers to the pan. Cook until they both reach the texture you desire.
Don’t skimp on the oil if you want your vegetables to cook evenly and crisp up. Use enough to coat the veggies but not so much that they’re drowning in it. I normally use about a tablespoon or so.
These are the oils I like to use – olive, coconut, avocado, walnut oil. Unlike with steaming, I love that you can add oil with this method as it will be a great source of healthy fats.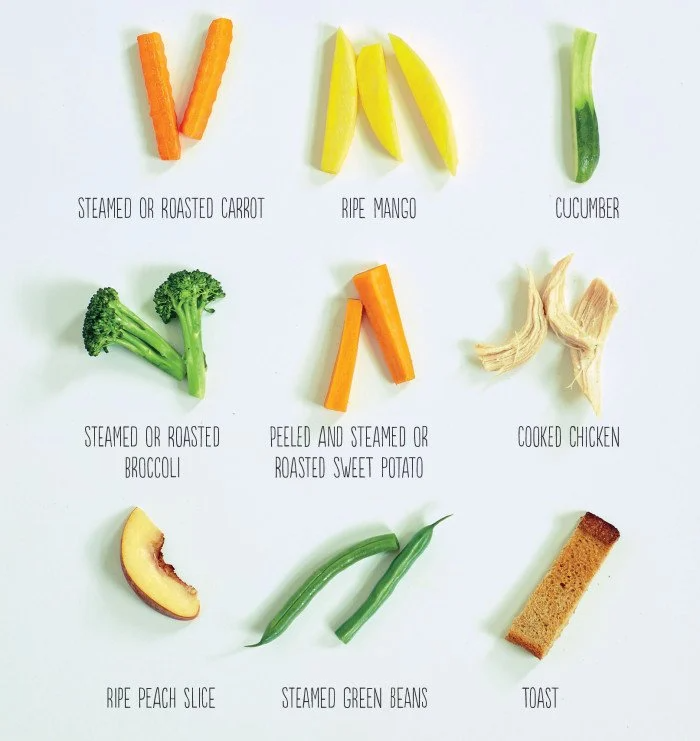 Babies and toddlers NEED them.
Drawback
When not prepared correctly, the exterior of the vegetables can get too crispy or even burnt before they soften. While I personally LOVE the crispy, slightly charred edges that result from roasting, this texture isn’t ideal for babies.
How to Steam Roast(aka best of both worlds)
Just as the name suggests, it combines both methods into one easy step. Because you’re steaming and roasting on the same pan, you’re saving time, effort, and will end up with less dishes! Music to my ears!
The secret is in covering the baking pan tightly. The hot oven plus the moisture from the veggies create steam, allowing for vegetables to soften. But by roasting, the flavors become more concentrated.
To cover, I like to use this when making a large batch or this one for the toaster oven.
The Basics
- Preheat oven to 425F.
- Cut the vegetables into similar sized pieces and place on a baking pan.
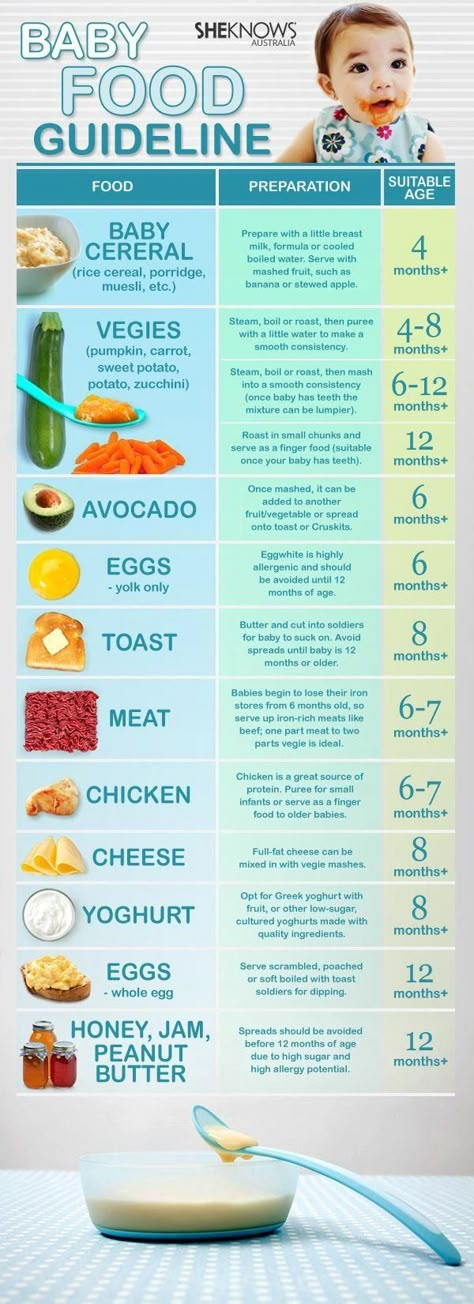
- Toss the vegetables with oil and various flavoring agents. Massage the flavors into the veggies using your hands until they’re completely coated.
- Cover the pan tightly with aluminum foil or silicone baking mat.
- Place in the oven and cook until the vegetables reach your desired texture.
- Once your baby is able to handle more texture, you can go a step further. Remove the foil or baking mat and continue cooking the vegetables in the dry heat until the exteriors caramelize and brown.
Related: Broccoli for babies
Cooking Demo
I know it can be confusing so if you'd like to see a video of how to cook the veggies using all 3 of these methods, head on over to my instagram @kidfriendly.meals (click here) and tap on "Steam Roasting" in the story highlights!
General Cooking Times
As I mentioned, there will most definitely be some learning curve to this as you try to figure out what cooking temperature and time works best for you.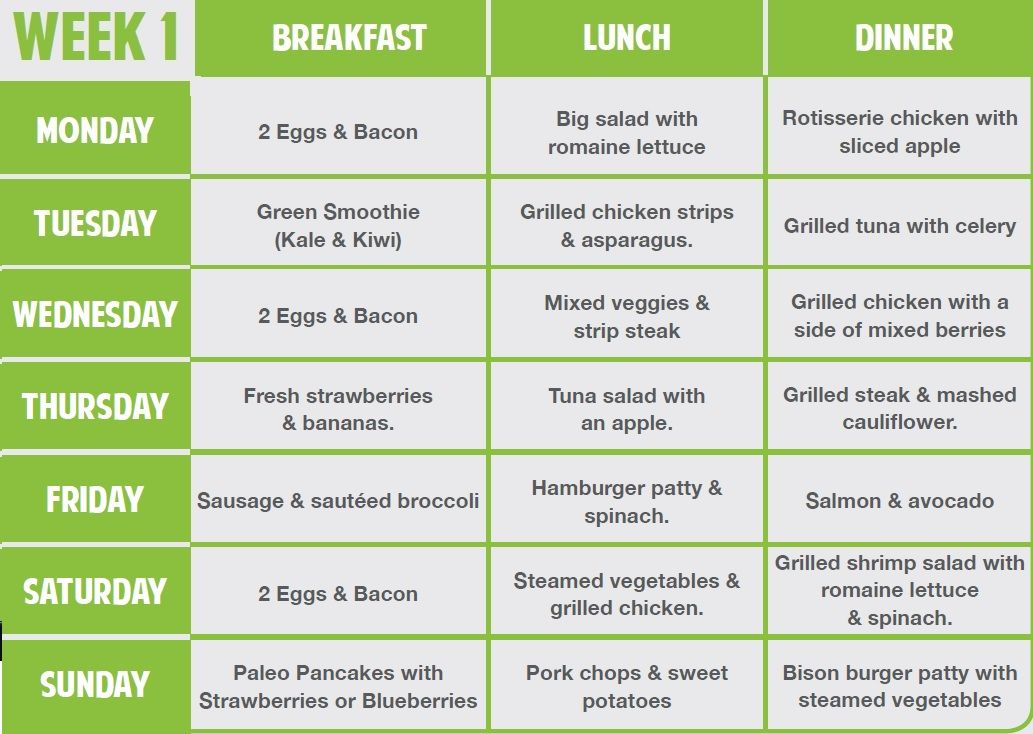 Keep in mind every oven is different. I wanted to share what’s been working well for us in hopes that this will give you a good starting point.
Flavor Combinations
Here are some ideas to get you started! You certainly don't have to get all of these dried herbs and spices. Start with ones that appear in a lot of this list and then build your spice pantry as you wish ;).
- Asparagus: basil, dill, garlic, ginger, curry, nutmeg, oregano, rosemary, citrus (zest and/or juice)
- Beets: basil, cilantro, cinnamon, coriander, cumin, curry powder, dill, garlic, ginger, lemon
- Broccoli: basil, curry, garlic, ginger, oregano, red pepper flakes, rosemary, thyme, vinegar (balsamic, rice)
- Brussels sprouts: butter, coriander, cumin, curry powder, garlic, ginger, lemon, nutmeg, miso, balsamic vinegar
- Cabbage: coriander, curry, dill, garlic, ginger, nutmeg, parsley, thyme, vinegar (apple cider, rice)
- Carrots: cinnamon, coriander, cumin, curry, fennel, garlic, ginger, nutmeg, paprika, parsley, miso
- Cauliflower: basil, coriander, cumin, fennel, garlic, ginger, nutmeg, oregano, paprika, parsley, lemon
- Eggplant: basil, garlic, ginger, oregano, cilantro, curry powder, cumin, lemon, miso, parsley, balsamic vinegar, tahini
- Parsnips: basil, cilantro, cinnamon, coriander, cumin, curry powder, garlic, ginger, lemon, nutmeg, parsley, rosemary, turmeric
- Potatoes: butter, cilantro, cumin, curry powder, dill, garlic, lemon, nutmeg, mustard, parsley, rosemary, thyme
- Winter squash: basil, curry, cumin, coriander, garlic, ginger, nutmeg, cinnamon, paprika, curry
- Sweet potatoes: cinnamon, cilantro, cloves, coriander, cumin, curry powder, garlic, ginger, miso, nutmeg, paprika, parsley, rosemary, balsamic vinegar
- zucchini: basil, cilantro, dill, garlic, ginger, lemon, mint, parsley, oregano, rosemary
Other Helpful Articles
- Starting Solids - Purees or Baby Led Weaning
- Baby Led Weaning - How to serve the right food size and texture
- Repeated Exposure to foods for Babies and Toddlers
- Salt/Sodium for babies and toddlers
- Easy ways to add more fiber to your child's diet
Do you want to minimize picky eating and set a solid foundation for a lifetime of healthy eating habits?
Check out this 3 month mastering self-feeding program! It’s the closest thing to me being in your kitchen
Making Your Own Baby Food
Read time: 7 minutes
What to know about making your own baby food- Advantages to making your own baby food purees
- Supplies you need to get started
- Cooking methods to make homemade baby food
- Baby food puree recipes to get you started
Once your little one is ready to start solids, the next question often asked is: Do I make baby’s food or buy it? The store offers many baby food options, but making at least some of the food at home may allow for even more variety.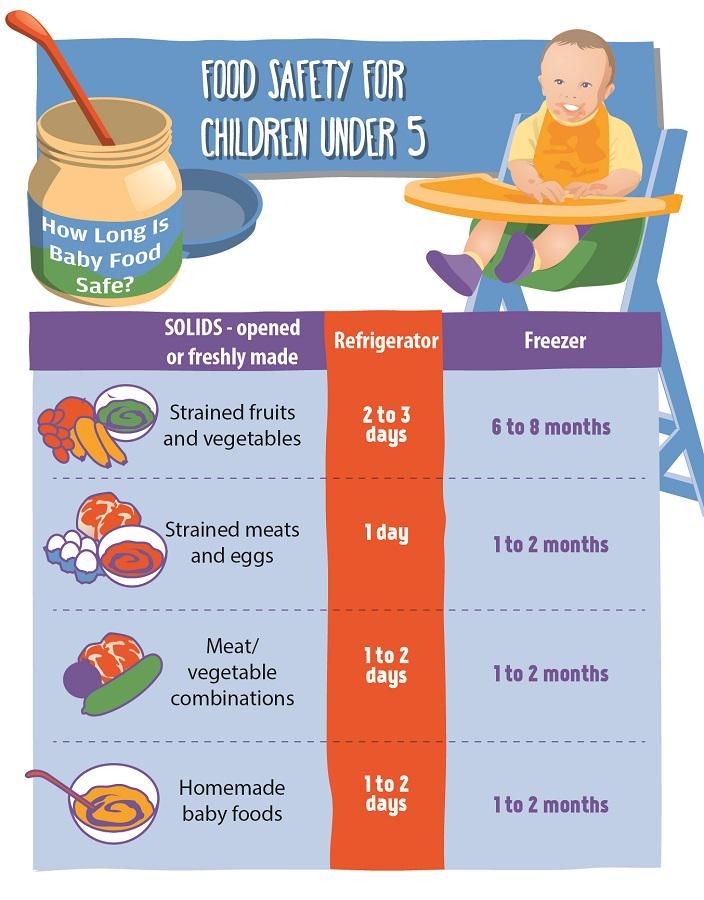
With a little bit of planning and use of some of the utensils you likely already have around the house, making homemade baby food doesn’t have to be as daunting as it sounds.
What are some advantages of making your baby’s pureed food?- Greater control over what you feed your baby: You can use a wider variety of ingredients that are not always available in store-bought baby food.1,10
- Money saver! Did you know the price of 2 to 3 containers of baby food is almost equal to that of 4 to 6 pears, which can create enough pureed food for 10 or more meals for your baby?1
- May help reduce picky eating: Repeatedly offering a greater variety of foods, as well as foods the family eats (with minor changes in textures and ingredients to meet your baby’s needs), may help make your little one a more adventurous eater, even into childhood.2
Read more: Introducing Solids: First Foods & Textures
You might be worried that you need an elaborate kitchen setup and all new kitchen tools to make your baby’s purees, but the good news is that you likely have many of the tools already needed to whip up some homemade baby food!
Here is a list of some of the tools that can be used to make homemade baby food:- Vegetable peeler
- Pot for boiling or steaming
- Sheet pan for baking
- Steamer basket
- Blender or food processor
- Fork and knife
- Food mill
- Potato masher
- Strainer
- Ice cube trays
Following proper food safety is especially important when cooking for children and especially for baby’s first foods. 3 Babies are more prone to foodborne illness than older children or healthy adults, so always wash your hands, rinse the food items, clean your work area, cook foods to their recommended internal temperatures, and avoid cross-contamination.3
For more specifics on proper food safety protocols, see Food Safety for Babies and Toddlers
What cooking methods should I use when making baby food?There are many cooking options available for pureeing food for your baby. Each method has pros and cons in terms of ease and retention of nutritional value:
- Steaming: A very popular (and easy!) method, steaming allows for minimal nutrient loss and the leftover water can be used as stock for pureeing.4
- Boiling or Stewing: While also convenient, this cooking method results in greater nutrient loss into the surrounding water. To recoup these nutrients, you can use the cooking water when you make a puree or broth.
 4
4 - Baking or Roasting: Great for making large quantities in the oven. Baked food items retain a good amount of their nutrients.4,5
- Microwave Cooking: Super easy but mainly best used for only small quantities. Be aware that microwaving may lead to uneven cooking and hot spots in the food or liquids.6
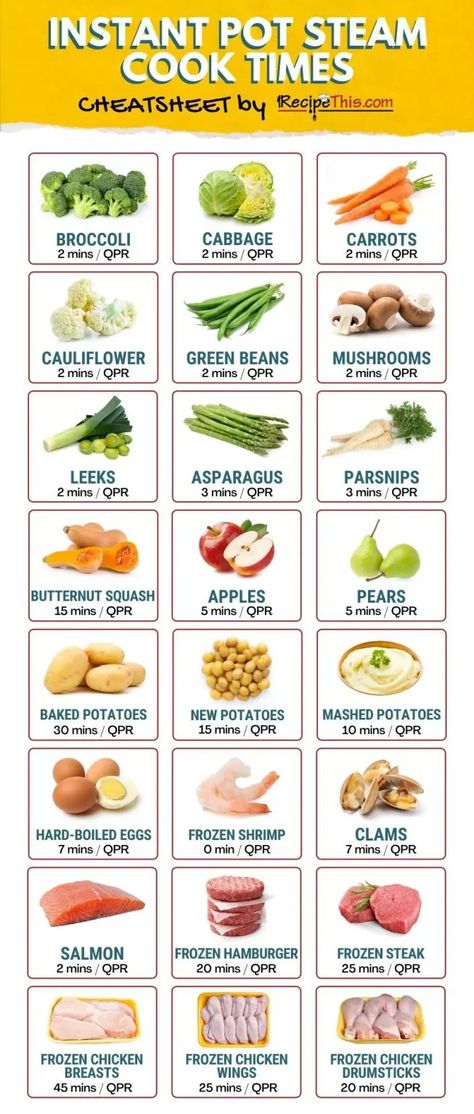
- Pressure Cooking: This technique may require additional kitchen equipment but retains much of the foods’ nutrients because this method uses very little water and is fairly quick.5
- Grilling: Babies and small children can eat grilled foods. When grilling, aim for a low temperature and avoid burning or charring meats.7
- Sautéing and stir-frying: Another fast and flavorful option!
*Note that the longer you cook a food for and the higher the temperature used in cooking, the more nutrients may be lost. 5
5
Fruits, vegetables, grains, and meats can all be cooked and pureed into baby food. In fact, the American Academy of Pediatrics (AAP) states there is no specific order that foods should be introduced.8
Some foods need to be avoided as they are choking hazards. Read more on Preventing Choking
Here’s how to prepare homemade foods for your baby:VegetablesAlways cook vegetables before serving to your baby – steaming, roasting, or baking are the best methods. Once cooked, softer vegetables like sweet potatoes and squash need only be mashed with a fork or potato masher.
If the vegetable has a thick skin, like green beans or peas, push the cooked food through a strainer or sieve to remove the tougher parts. You can also just use a very powerful food processor or blender to puree the entire vegetable once cooked!
Try adding herbs such as oregano, rosemary, or dill; or spices such as cumin, ginger, or curry powder.
Try one of these vegetable puree recipes: Avocado and Pea Puree or Root Vegetable Puree
FruitsCertain fruits, like avocados and bananas; or very ripe pears, mango, and peaches; require no cooking before feeding to your baby. Simply peel then mash them up with a fork or blend quickly.
Other harder fruits, like apples, firmer pears, and underripe nectarines and mangos can be baked or steamed to soften them up for a puree. Simply halve or quarter your fruit of choice, remove the skin, remove the core, pit, or seeds. Place the cut fruit in a shallow baking dish with about 1 inch of water in a 400F degree oven.
Bake for 20-40 minutes, or until fruit is tender, then allow to cool before pureeing in a blender or dicing for finger food.
You can even sprinkle the fruit with ginger, nutmeg, or cinnamon!
Fruit puree recipes to try: Orange Sunny Soup or Beet and Cantaloupe Puree
Grains and CerealsYou can make your own baby cereal at home using whole grains such as oatmeal, brown rice, or barley.
Finely grind the uncooked grain using a coffee grinder, food processor, or blender. Then cook the powder in water for 15 minutes until you get a thin, soupy consistency. You can also cook the raw grain whole, as you normally would for yourself, and then puree or mash. But this method can sometimes create a pasty consistency.
Try one of these homemade cereal recipes: Whole Ancient Grain Baby Cereal or Strawberry Quinoa Cereal
MeatYes, you can even puree meat for your baby using a food mill or blender. Cook the meat to well-done before pureeing (but avoid luncheon, cured, and smoked meats at this stage due to the high salt and additive content).9
Try one of these meat based baby food recipes: Avocado and Chopped Chicken or Ginger Carrot, Sweet Potato Mash and Lean Beef
.
If you have questions on how to make these recipes, or are looking for more ideas, reach out to our team of registered dietitian nutritionists and lactation consultants for free! They’re here to help on our free to live chat from Monday through Friday, from 8am–6pm (ET). Chat now!
Our little one’s food preferences are formed early in life, so avoiding or severely limiting these strong added flavors before the age of one is important. In fact, the 2020-2025 Dietary Guidelines for American recommends no added sugar at all before the age of 2 years.12
Additionally, you want your baby to experience and get used to the true flavors of food so that they are more likely to accept them in the future!11
Read more: Minimizing Added Sugar
Find the right texture for baby’s pureeFind the right consistency for your purees. Most babies start with thinner purees and work their way up to thicker ones as they learn to manage food in their mouth and then swallow.
- If you need to thin your puree for a younger baby, try adding reserved cooking water, no-salt-added veggie stock, prepared formula, or breastmilk.
- If you need to thicken up your puree for an older baby, it can sometimes be as simple as adding less liquid. You can also try adding baby cereal, plain whole milk yogurt, wheat germ, mashed low-sodium cottage cheese, mashed banana, pureed sweet potato, or pureed tofu.
Note that food textures can – and often do – change in the freezer. For example, certain fruits and vegetables like blueberries, pears, and eggplant contain a lot of water and can become quite runny when thawed. You may need to tinker with the consistency either before or after freezing some of these homemade purees.
Advance textures when your baby is readyAdvancing textures steadily as your baby is ready will help develop their oral motor skills as well as prepare them to be more adventurous eaters.11
Start with thinner purees and then move to thicker purees over several weeks as your baby’s chewing and swallowing skills becomes more coordinated.
Once your little one can handle thick purees, it’s time to move onto lumpy purees as they prepare for soft solids.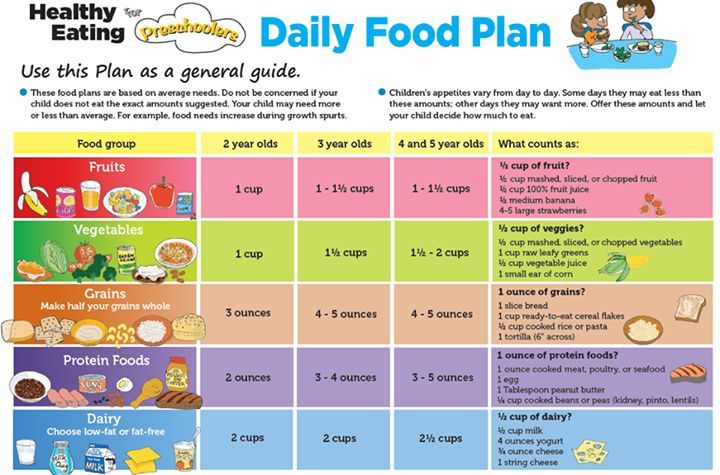
Read more: Introducing Solids: Different Approaches and Strategies
Storing your homemade baby foodAfter making a batch of baby food, either use the food right away or freeze it in small portions in an ice cube tray. Once frozen, pop out and place into a freezer-safe air-tight bag to help save room in your freezer. Be sure to label the bag with type of food and the date it was made.
For more information: How to Store Baby Food
Let’s Chat!We know parenting often means sleepless nights, stressful days, and countless questions and confusion, and we want to support you in your feeding journey and beyond.
Our Happy Baby Experts are a team of lactation consultants and registered dietitian nutritionists certified in infant and maternal nutrition – and they’re all moms, too, which means they’ve been there and seen that. They’re here to help on our free, live chat platform Monday through Friday, from 8am–6pm (ET).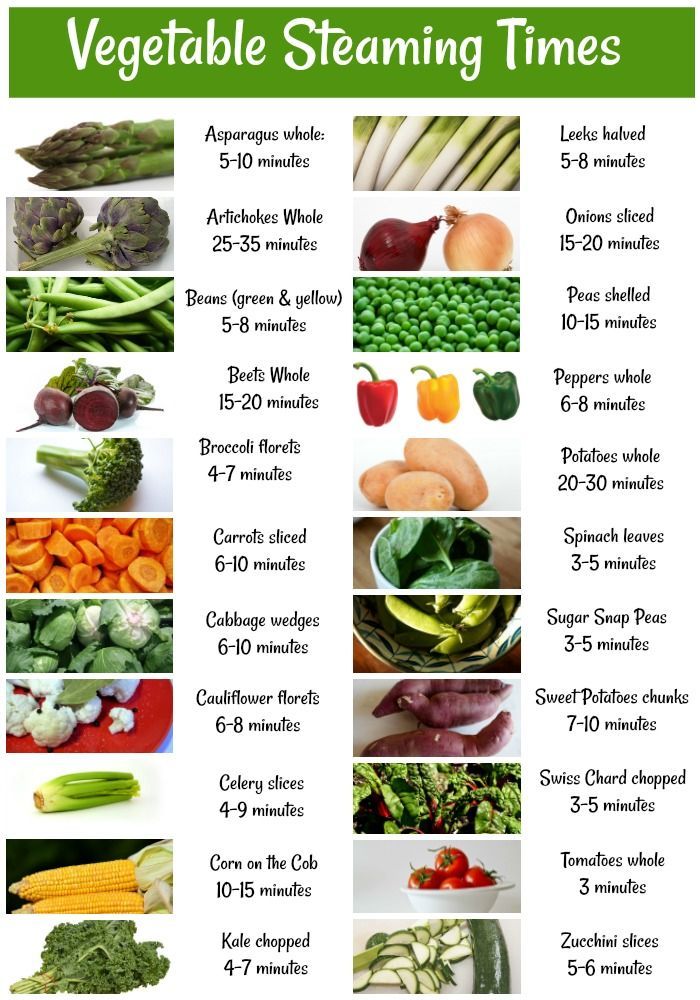 Chat Now!
Read more about the experts that help write our content!
For more on this topic, check out the following articles:
Introducing Solids – Signs of Readiness
Introducing Major Food Allergens to your Infant
Introducing Solids: Baby Led Weaning
Baby puree at home: recipes
Baby puree from vegetables and fruits at home: cooking secrets
Vegetable and fruit puree often becomes the first meal of the baby after breast milk or formula, so many mothers prefer to cook it on their own. Although modern manufacturers convince us that baby food is devoid of preservatives and harmful additives, fresh vegetables and fruits are much healthier, especially when it comes to infant nutrition. Yes, and cooking baby puree at home is not so difficult. nine0005
Vegetables or fruits?
Let's try to make baby puree for our beloved baby. Despite the fact that pediatricians of the last century recommended starting complementary foods with fruits, it is better to first introduce the child to vegetables - modern doctors and nutritionists have come to this conclusion.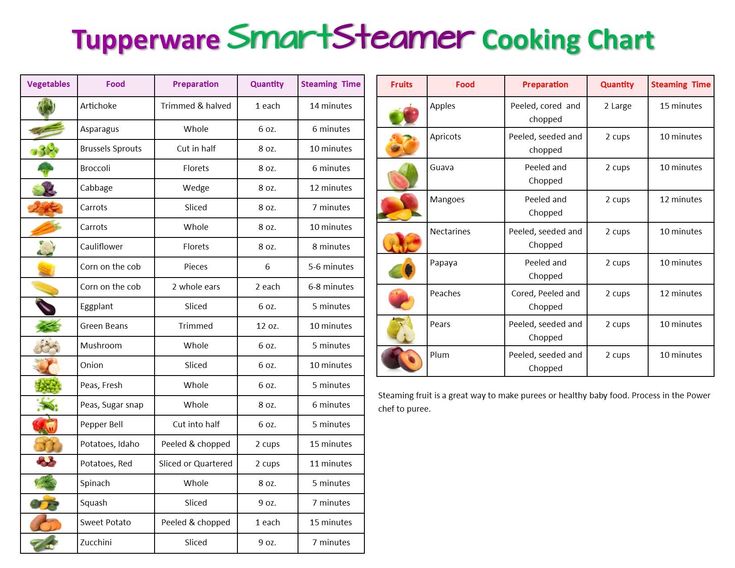 Boiled vegetables do not irritate the gastrointestinal tract, are better absorbed, satisfy hunger, do not cause allergies and increased gas formation. In addition, vegetables do not contain fructose, which irritates the pancreas. And one more weighty argument in favor of the fact that it is better to start with vegetables - fruits are tastier, and if the baby tries them first, he will refuse vegetables, because they will seem to him more insipid. nine0005
How to prepare baby vegetable puree
What can baby puree be made of? The ideal puree for the first feeding is from cauliflower or zucchini. A little later, you can introduce pumpkin, broccoli, carrots, potatoes and green peas. Before cooking, vegetables are washed well, peeled, cut into pieces and cooked - steamed, in the oven or in the usual way, in water. The first two methods are preferable because oven roasting and steaming preserve the vitamins, minerals, nutrients, and natural color in the vegetables. And most importantly - such vegetables are much tastier.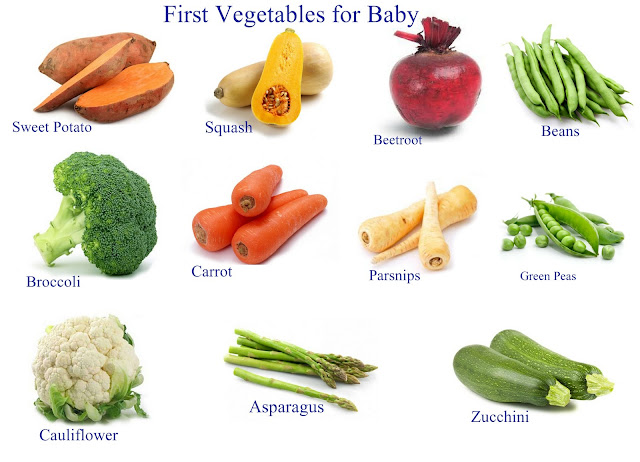 Some nutritionists recommend boiling vegetables with their skins on before peeling them, so choose your own cooking method. nine0005
If you do have to cook vegetables in a saucepan, use an enamel pot, add less water and put the vegetables in boiling water. Boil until soft, but do not overcook vegetables and fruits, otherwise they will become tasteless and lose a lot of vitamins. Ready vegetables are chopped with a blender until smooth and slightly diluted with water, vegetable broth, breast milk or mixture to a gruel state, since the child does not yet know how to digest thick food. Small pieces of vegetables in puree sometimes cause the baby to refuse to eat, so the knives in the blender should be well sharpened, and if there is no technique, you can grind the vegetables through a sieve. Salt and spices are usually not added to baby vegetable puree, and if the baby is more than 6 months old, you can put a little butter in the puree. nine0005
A few rules for making baby puree at home
- Use only fresh vegetables and fruits.
- Water for cooking vegetables must be filtered or bottled.
- If you are using frozen foods, choose only whole fruits and vegetables as they retain the most nutrients.
- All utensils for preparing baby food should be perfectly clean, so if the knife falls on the floor, it should be washed well. Also, the presence of pets in the kitchen during the cooking process is not allowed. nine0026
- Avoid vegetables and fruits high in nitrates, such as spinach, lettuce, beets, melons, and watermelons, in infants' diets.
- Store-bought vegetables are recommended to be soaked in water to remove nitrates: 1-2 hours for this, up to 24 hours for potatoes.
- Mix sour-tasting fruits and berries with sweet fruits - for example, blackcurrant goes well with a banana or pear. Sour puree is unlikely to please the baby. nine0026
- Give your child only fresh food, but yesterday's puree from the refrigerator is better to eat yourself.
DIY fruit puree for children
Children are more likely to eat fruit puree, because fruits are tastier and sweeter.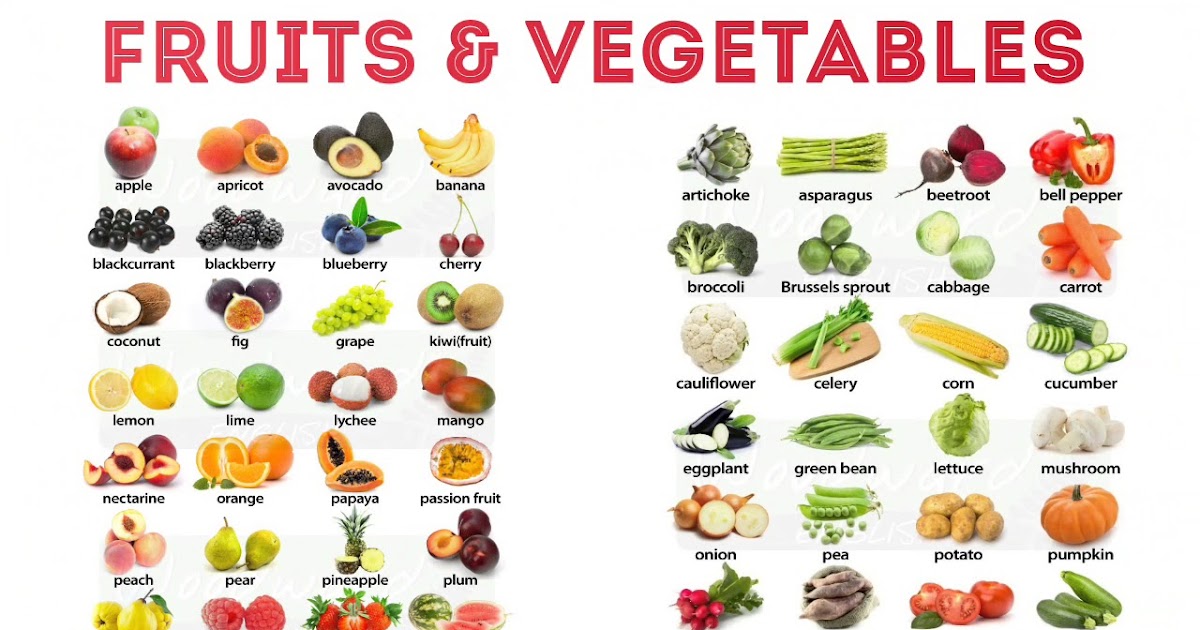 Fruits contain a large amount of vitamins, minerals, trace elements, fiber and antioxidants, so they are very useful for a growing organism. However, fruits are strong allergens, especially berries, bananas, pomegranates and apricots, so they should be given with caution, watching the child's reaction. The most low-allergenic fruits are apples and pears, so it is better to start complementary foods with them, and then introduce all other fruits. First, the baby is fed with a one-component puree made from only one product, and then you can mix different vegetables and fruits, and not only among themselves. Very tasty combinations of fruits and vegetables, such as apples and zucchini, pumpkins and pears. nine0005
Fruits must be of good quality, without damage, ripe and juicy, and the rules for preparing fruits do not differ from the rules for cooking vegetables. Naturally, fruit puree is not sweetened with honey and sugar - the later the child learns the taste of sugar, the stronger his health will be.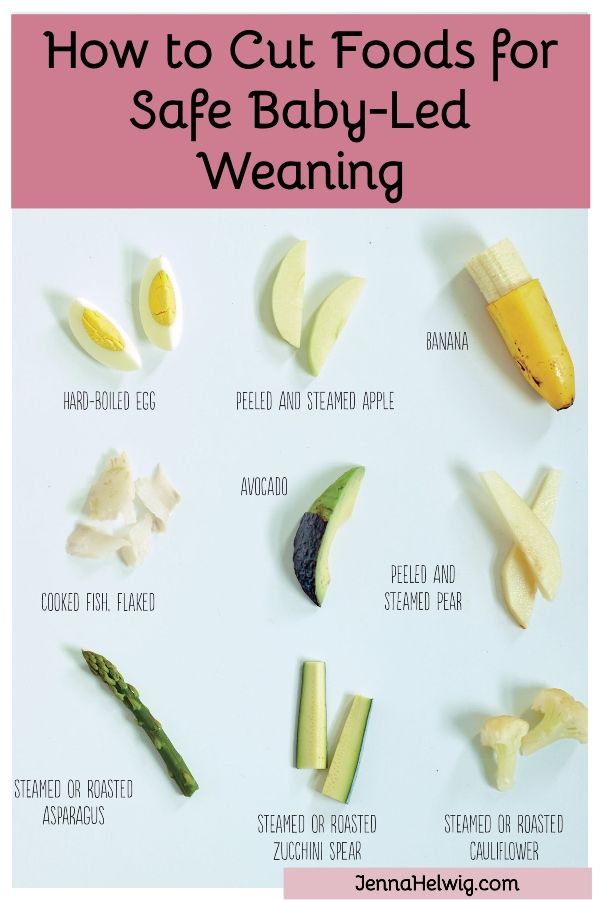
Aromatic pumpkin puree
Babies love to eat pumpkin because of its pleasant sweet taste, besides pumpkin is very healthy. It contains a whole storehouse of various vitamins, including vitamin T, which normalizes the metabolism in the body. For pumpkin puree, small pumpkins are suitable, since large fruits are not as tasty and difficult to peel. nine0005
Cut the pumpkin in half, and then into small slices, one or two of which (depending on the appetite of the crumbs) cut into cubes. Boil the pumpkin in a double boiler or in water for 20 minutes, while warm, beat with a blender to a smooth puree and dilute if necessary with water or a mixture. Add oil and salt depending on the age of the child.
Gentle Broccoli Puree
One of my favorite homemade baby puree recipes is broccoli. This cabbage is extremely useful because it contains potassium, iron, calcium and other valuable substances. It has much more vitamin C than lemon, and the reason for its nutritional value is its high protein content.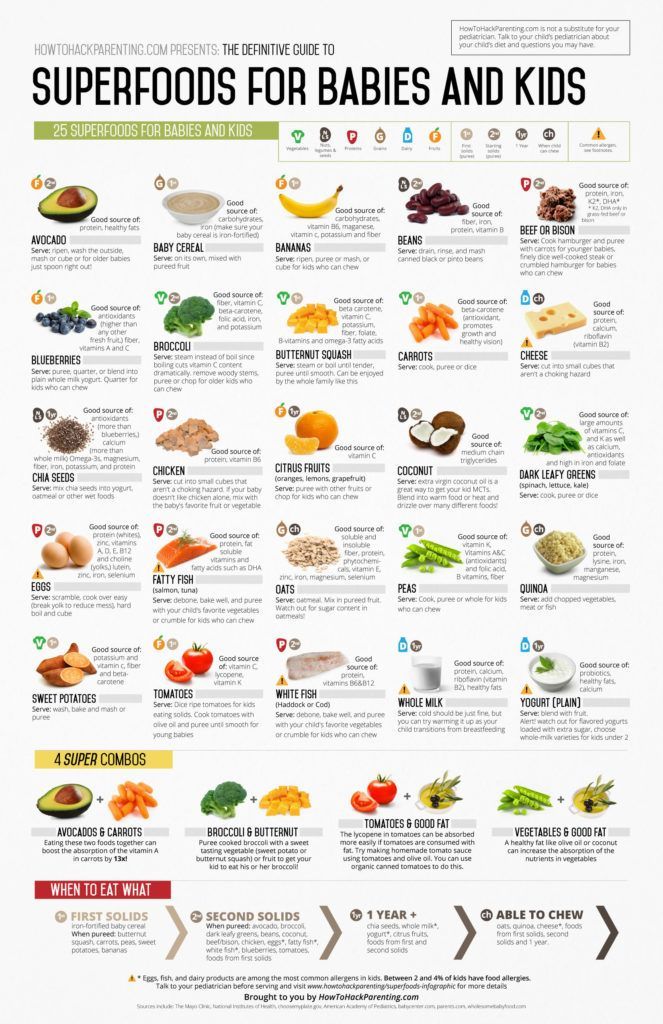 nine0005
Separate the broccoli into florets, wash thoroughly and steam for 20 minutes. Cabbage cooks faster in water - fresh broccoli will take 7 minutes, and frozen - about 15 minutes. Broccoli puree does not need much water, it should lightly coat the vegetables. After the cabbage becomes soft, chop it in a blender or pass through a sieve. If you're mashing for kids older than a year old, be sure to add butter - the little ones will gobble up broccoli on both cheeks! nine0005
How to make baby pear puree at home
Pear is a very delicate, tasty and healthy fruit that rarely causes intolerance. In addition to the high vitamin value, the pear has other beneficial properties - it facilitates digestion and removes toxins from the body.
For baby food, choose green pears to reduce the risk of allergies, which are rare among babies. Peel the fruits from the peel and core with seeds, and then stew the pear in a bowl with a thick bottom in a small amount of water for 15 minutes.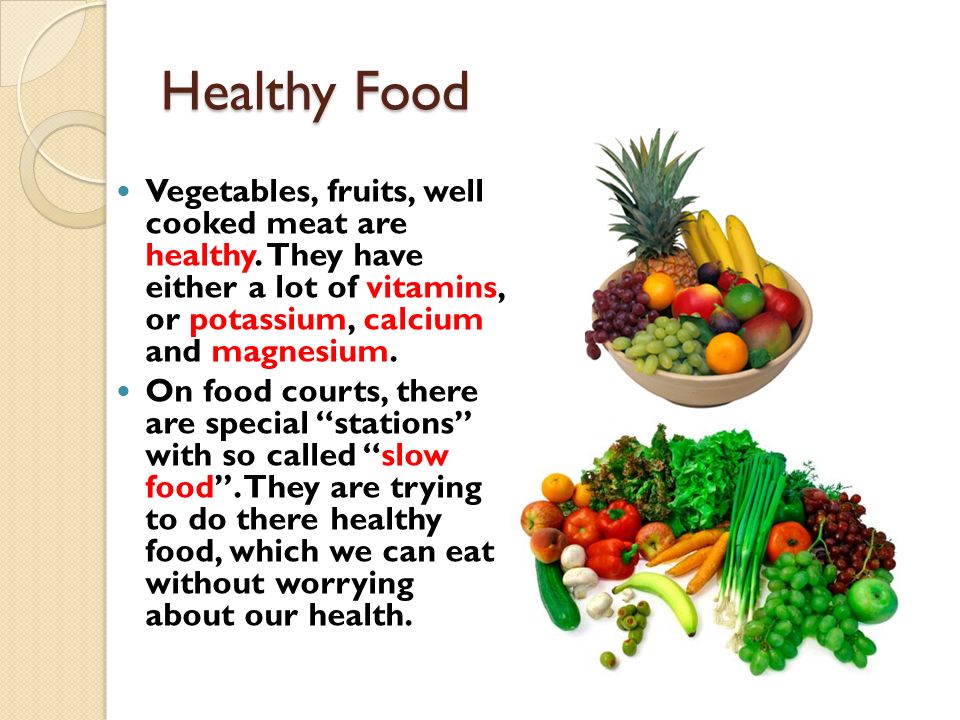 Let the pear cool slightly and puree it in a blender with a little of the remaining pear broth. For large kids, fruits can not be boiled, but add half a teaspoon of natural honey to the puree. nine0005
Zucchini and apple puree
Little gourmets will love this delicious puree, besides, zucchini is considered the most hypoallergenic vegetables, which, due to their high potassium content, have a beneficial effect on the heart. Apples contain iodine, iron and phosphorus, and due to the high concentration of vitamin C, apples help in the prevention of colds and viral infections.
Wash the zucchini and apples well, de-seed them, cut into pieces and cook in a saucepan for about 20 minutes, considering that the zucchini will cook 5 minutes faster. By the way, apples are steamed for 15 minutes, zucchini - 10 minutes. Next, vegetables and fruits are chopped in a blender, mixed and brought to a boil. For allergic children, this is the best side dish! nine0005
Exotic mango
Sometimes you can pamper your baby with exotic fruits - for example, make mango puree.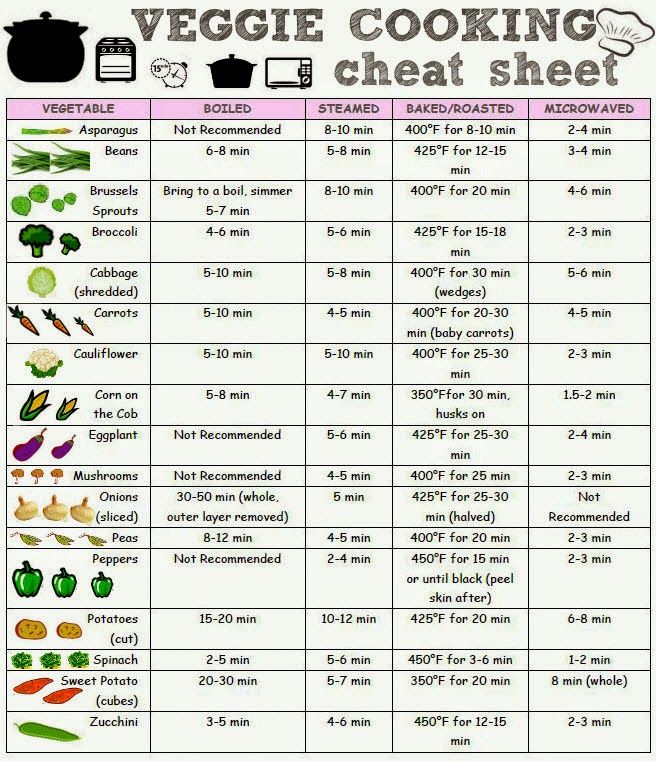 This is a very delicate fruit with an original taste, containing 12 amino acids and improving sleep.
Choose only ripe fruits that are soft and reddish-yellow in color. Peel the mango from a thick skin and a large bone, put the pulp in a blender, add 2 tbsp. l. water and mash it, and then heat it in a saucepan for several minutes. For a baby up to a year old, it is better to give mashed potatoes with heat treatment to facilitate digestion, and older children can be fed raw mangoes. nine0005
Carrot and Potato Puree
Make normal potato puree without oil. Peel the carrots, grate them and stew them with butter and vegetable broth - about 1 tsp is required for 200 g of carrots. butter and 150 g of broth. When the carrot becomes very soft, wipe it through a sieve, and then put it on a plate, put mashed potatoes on the second half. Let the child choose whether to mix two types of puree for him or eat separately!
Pumpkin and apple puree
This sweet, sugar-free pumpkin-apple puree, cooked in a double boiler, is suitable for children who are already accustomed to “adult” food and are able to perceive a new unusual dish. It is better to take a pumpkin with a gray or green skin and with bright pulp - such fruits contain more vitamins and other useful substances. Apples are green because they have fewer allergens.
Cut pumpkin and apple flesh without peel or seeds into pieces, place in a steamer and cook for 20 minutes. Grind pumpkin, apples and raisins in a blender or by hand with a pusher if the child has already learned to chew. They say that this puree is very good for skin and hair, and you can check the truth of this statement yourself if you start feeding this dish to your baby. nine0005
In autumn, you can take care of preparing vegetables for baby purees. Some vegetables, such as pumpkin, carrots and apples, are stored fresh, and zucchini, broccoli, berries are frozen in small portions, because due to frequent freezing and thawing, vegetables lose vitamins and become tasteless. You can roll up fruit and vegetable puree in jars, but this snack should not be given to babies. Remember that the taste of vegetables determines whether the baby will love them in the future, so try to prepare an appetizing and tender puree - for health and good mood! nine0005
Vegetable purees for feeding: how to prepare them for your baby - Parents.
 ru
ru About nutrition Zucchini, cauliflower and broccoli have tender fiber necessary for the first feeding.
Instructions for cooking
To prepare the dish, you will need separate utensils specially allocated for the baby: an enamel pan, a grater, a plastic or metal spoon, a plate, a knife. And besides them, there is also a cutting board, a sieve, a brush for washing vegetables and a blender. nine0005
First, rinse the vegetables thoroughly under warm running water. If they are heavily soiled, use a brush. If necessary, peel the fruit. Then cut into 2-3 cm pieces and boil. You can do this both in a saucepan, and in a double boiler or slow cooker. Pour water so that it only slightly covers what you put there. To reduce the loss of vitamins, cover the container with a lid. The fruits will be ready in 15-20 minutes. Cool them slightly and grind them with a blender or rub through a sieve, achieving a uniform consistency. A 6-8-month-old baby can grate vegetables on a fine one, and 8-9- monthly - on a coarse grater.
- Photo
- AlinaMD/Getty Images/iStockphoto
For taste
You can add a little vegetable broth and 1–3 ml of vegetable oil to the puree. It will provide the baby with essential polyunsaturated fatty acids and vitamin E, which are not synthesized in the body and therefore must be supplied with food. In this case, it is better to do without salt. For the taste of an adult, food for a baby should be unsalted.
Proper storage
It is recommended to prepare the baby puree in small portions. Uneaten food should not be stored until the next feeding. Some mothers freeze homemade puree to save time. But it’s better to send the ingredients themselves to the freezer, and before they are cooked. Cut raw washed and peeled vegetables into slices, put a container or special bags with a lock in a plastic bag and put in the freezer.

