Organic stage 1 baby food recipes
15 Stage One Baby Food Purees (4-6 Months)
Home » Feeding Style » Baby Food Purees » Stage One » 15 Stage One Baby Food Purees
These 15 Stage One Baby Food Recipes will tempt your baby’s taste buds! These simple, homemade baby food recipes are made with nutrient-dense fruits and vegetables with an added pinch of spice that makes these purees out-of-this-world delicious! They’re great for babies 4-6+ months of age!
Medically reviewed and co-written by Jamie Johnson, Registered Dietitian Nutritionist (RDN), and Lauren Braaten, Pediatric Occupational Therapist (OT).
Stage One Baby Food PureesAre you looking to make your baby homemade purees, but don’t know where to start? Does the process intimidate you?
Then you have come to the right place! Here you will find 15 of my all-time favorite starter baby food purees that have been viewed (and made) millions of times by my readers and combined have over 400 5-star reviews!
I would also like to personally welcome you to the wonderful world of baby food, this is a fun (and yummy) club to be in.
Does your baby’s first bite need to be boring?
Of course not!
Baby’s food can (and should be) delicious from the very start!
While it may seem daunting at first, making your own baby food is super easy once you get the hang of it.
And I’m here to walk you through it every step of the way.
First time making homemade baby food? Then I suggest you start this journey by reading my in-depth Guide on How to Make Homemade Baby Food. The detailed guide goes over all the important information such as the best cooking tools to have on hand, safe storage, how to know when baby is ready for solids, how to introduce purees, the best first foods for baby, and so much more! You can also check out my best-selling cookbook for even more information and recipes!
15 Stage One Baby Puree Video
While the recipes themselves are simple, in this video I will show you how to add in a pinch of cinnamon, rosemary, curry, or mint to quickly roasted or steamed fruits and vegetables that enhance their natural flavors. In other words, these are simple purees that I am pretty sure you will want to eat as well!
What is In Each Puree Recipe
After going through this guide, you will want to check out some (or all!) of the homemade baby food recipes below. Each recipe goes into detail about the:
- produce that is in the puree
- benefits of that produce for your baby
- recipe cooking options
- detailed photos and videos with step-by-step instructions
Reminder: The homemade baby food recipes below are made for babies that want to try the most delicious food from the very first bite! 😋
Helpful ToolsLet’s start with a few of my favorite kitchen essentials to make the best homemade baby food purees! These kitchen tools will help make the process of cooking, blending, and freezing baby food hassle-free. You can find a full list of my favorite baby and toddler food making tools in my online Shop.
- Blender or Food Processor
- Freezer Storage Tray
- Fridge Storage Containers
- Stasher Bag
- Baking Sheet
- Steamer Basket
- Medium Saucepan
- Reusable Pouches
- High Chair
- Suction Bowl and Spoon Set
- Bib with Food Catcher
Learning Resources: looking for the best high chair, cups or spoons for your baby? Then we’ve got you covered! Here you will find How to Find the Best High Chair for Baby, an easy guide on Best First Open Cups for Baby (plus 4 tips when introducing a cup) as well as 3 Tips on How To Spoon Feed Baby (plus – our favorite spoons for purees or BLW).
Frequently Asked QuestionsCan babies have spices in their food?
Yes, yes, yes! Babies can absolutely have spices mixed into their purees from the very first bite. Adding a pinch of spice or herbs to a baby’s food makes it taste better and gives the food additional medicinal properties. Read more here. But as I always say — you do you! If you don’t want to add spices to your baby’s food, you can certainly leave them out. Don’t worry, I give instructions on each recipe card for both.
What about allergies? Can spices cause an allergic reaction?
My rule of thumb is that unless there is an immediate family member that has a true allergy to a certain spice or food, then introducing your baby to spices at the same time as new food is completely acceptable. Spice and herb allergies in babies and adults are very rare. But remember, it’s always recommended to keep an eye on your baby when introducing any new food or spices.
At what age should I start my baby on baby food purees?
When a baby can start on solid foods is determined by their own rate of development, which generally comes between 4-6 months of age. Some of the developmental milestones babies need to reach to start solids include: if your baby has solid control of their head and neck, if your baby has doubled in weight, and if your baby is reaching for or opening their mouth when you eat (see my guide here). Before you start your baby on purees, you should consult with your pediatrician to make sure your child is developmentally ready for solids.
All of our baby food recipes are designed to enhance the natural taste of the fruits and veggies while keeping as many nutrients intact as possible. In other words, the goal is to make a puree that’s both healthy and delectable.
There are several ways you can cook baby food purees, but the main techniques I use are:
- Steaming
- Roasting
- Simmering
- Raw
Keep in mind, that as long as the produce is cooked until soft, that there isn’t a right or wrong way to cook it for baby food.
If a recipe for broccoli calls for steaming but you want to roast it because you will already be roasting some broccoli for yourself for dinner, then go ahead and roast the broccoli for your baby’s puree. Play around and have some fun with it!
Adding Spices to Baby PureesIt’s encouraged that you can serve your baby a homemade puree with a pinch of spices or herbs from the very first bite.
Benefits of Spices
- boost and compliment any fruit or vegetable puree
- broaden baby’s emerging palate
- add more flavor and depth into their foods
- decrease picky eating in the years to come
- have medicinal properties in them — they can help with digestive issues, boost brain functions, repair muscle tissues, and so on.
While each puree recipe on this site has a selection of spices or herbs that complement the flavors of the fruit or vegetable in the puree, it’s up to you if you want to add them. You do you! Either way, the puree recipes on this site will be delicious.
Top Spices to Add to Baby’s Puree
- Cinnamon
- Cloves
- Nutmeg
- Basil
- Mint
- Parsley
- Mild Curry Powder
- Fresh Lemon Juice
- Garlic
- Rosemary
Every recipe below has specific instructions on how to store that particular puree, but these are the general guidelines.
How to Freeze Baby FoodYour freezer is about to become your new best friend, allowing you to keep several weeks’ worth of baby purees at the ready. Whenever you make a puree, put several ounces in the fridge for your little one to enjoy that week, then freeze the rest of the batch for your baby to eat at a later date. Please make sure you get it in the puree into the fridge or freezer within 1 hour of cooking to prevent bacteria growth.
- Make a puree.
- Let it cool slightly.

- Transfer the puree to freezer trays or freezer jars.
- Cover the freezer trays with a lid or plastic wrap.
- Label with date and name of puree.
- Place the tray in the freezer.
- Let it freeze for at least 5 hours.
- Take the tray out of the freezer.
- Crack the purees out of the trays.
- Place the frozen purees into zip-lock baggies or stasher bags.
How to Store Baby Food
Purees can be stored for up to four days in an airtight container in the fridge or 4 months in the freezer.
How to Thaw Baby Food
Thawing may seem like a no-brainer, but it never hurts to know your options. There are three different ways to thaw purees.
Microwave- Take the frozen puree cubes that you want to serve out of your freezer.
- Place them in a glass microwave-safe container.
- Microwave in 20-second increments, stirring every time.
- The puree is ready when it is just warm to your touch.
- Grab two clean spoons, one for you and one for your baby, and test your puree before serving.
Heating Tip: To prevent the microwave from unevenly heating the puree, which can leave it with cold and really hot spots and can burn your baby’s mouth, make sure you stir between each interval and taste test it before serving to your baby.
Refrigerator
This one takes the longest time, but it is an excellent alternative to using a microwave.
- Take the frozen puree cubes you want to serve out of your freezer.
- Place the cubes in an air-tight glass container.
- Place the container in the fridge and let the cubes thaw for 8 to 12 hours, usually overnight.
- Do not leave the puree in the container to thaw on the counter or anywhere out of the fridge, as bacteria will start to grow at a rapid rate — which is definitely not recommended.
- Note that the puree will be cold but thawed. So if your baby likes their puree warmed, you’ll have to finish the job using the microwave or stovetop method.

- In a small saucepan, add the frozen puree cubes you want to serve to your baby.
- Over medium-low heat, gently cook the puree until warm, stirring occasionally.
Thawing Tip: Some infants like their puree cold, warm, or really warm, and some will eat it no matter the temperature. You will get to know your baby’s personal preferences as the two of you bond over food.
Feeding Tips
- Make sure baby is showing readiness signs for eating – good control of their head and trunk, sitting with minimal assistance, bringing hands or toys to their mouth, and appearing interested in your food when you’re eating.
- Follow your baby’s lead – when feeding purees from a spoon, sometimes there’s a tendency to keep offering bites past the point of your baby being full. Always follow your baby’s cues for when they are done eating. Turning away from the spoon, closing her mouth, or pushing food away are all signs that your baby is finished with the meal.
- Throwing spoons – is a common phase that all babies go through at one point or another. One of the best ways to handle spoon throwing is to ignore it and keep feeding your baby as usual (with an extra spoon you already have at the table). If your baby ends up also throwing back up spoons #2 AND #3, simply encourage your baby to eat with their hands until they appear to be finished with the meal.
Top Rated Baby Food Purees
Pea Baby Puree (Stage One)
4.91 stars (83 ratings)
A delicious way to introduce peas to baby. Mild peas paired with a fresh hint of mint – a mouth-watering combo!
Get the recipe
Apples Baby Food Puree
4.76 stars (57 ratings)
This Apple Baby Puree recipe is a wonderful first food for baby! A delicious nutrient-dense puree that baby will go gaga over!
Get the recipe
The Best Sweet Potato Baby Food
5 stars (55 ratings)
This Homemade Sweet Potato with Curry Baby Food Puree is a fun and exotic first puree for baby! Great for 4+ months and is completely freezer-friendly!
Get the recipe
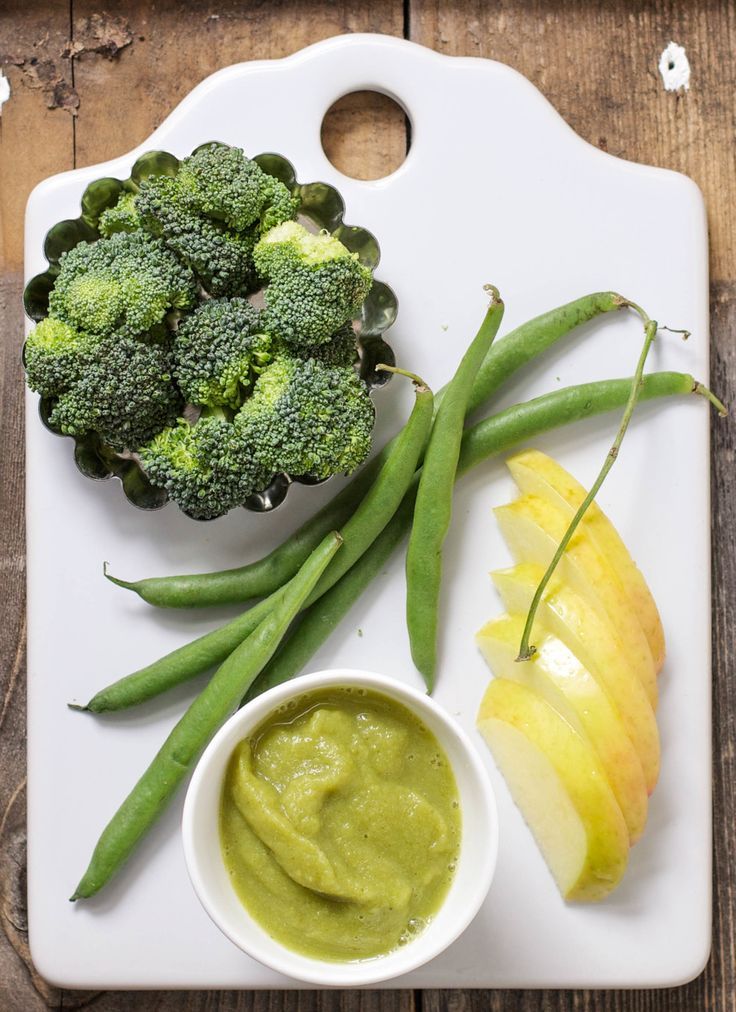
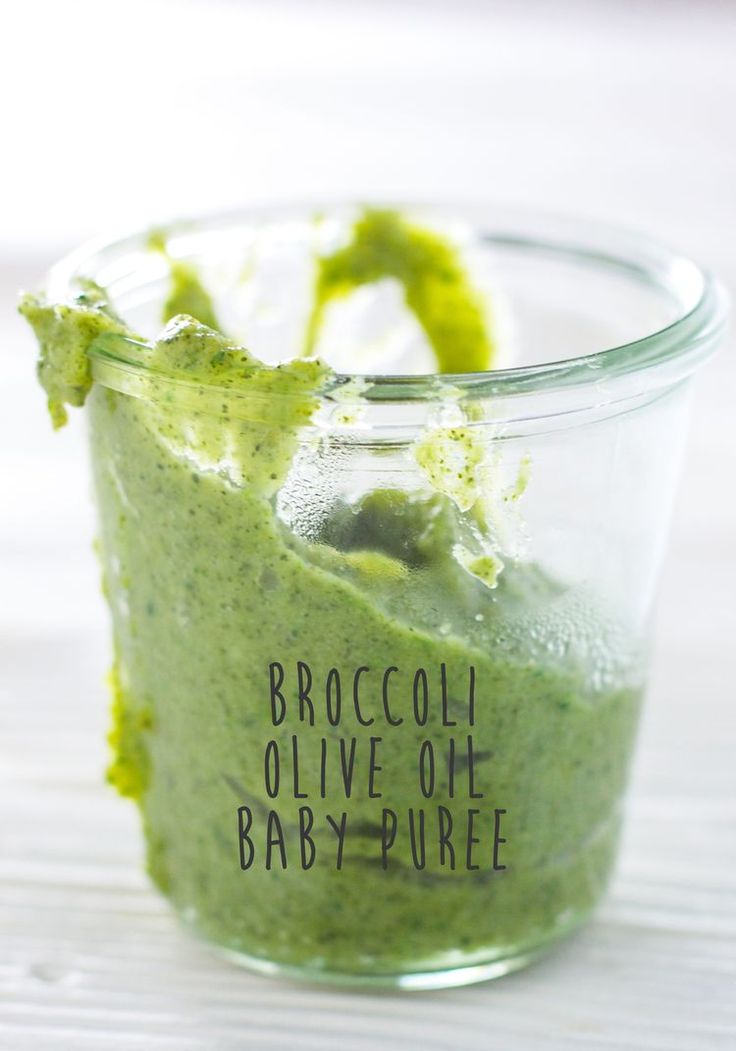
Broccoli Baby Food
4. 80 stars (70 ratings)
This Broccoli Baby Food with olive oil recipe is a great way to introduce healthy green vegetables into your baby's diet. A delicious puree full of essential vitamins and healthy fats for growing baby
Get the recipe
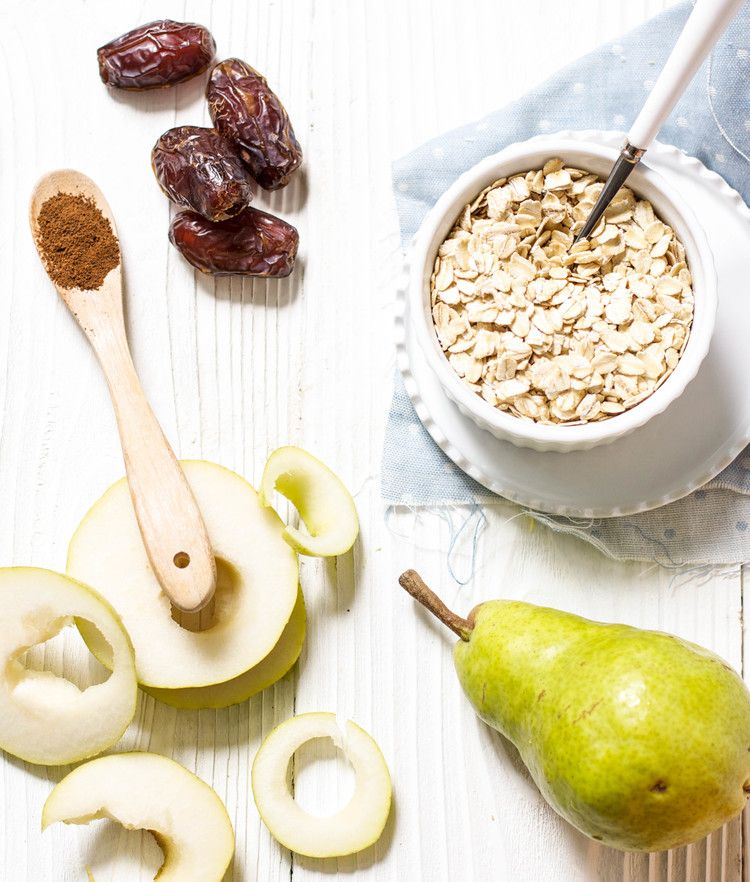
Oatmeal for Babies (Stage One)
5 stars (40 ratings)
This Oatmeal Recipe for Baby is made with simple nutrient-dense ingredients in less than 10 minutes, and it's perfect for baby's first bite or added into their favorite fruit or veggie puree. Great for 4+ months and up.
Get the recipe
Avocado for Baby – Puree & BLW
5 stars (16 ratings)
Avocados are a superfood and great first food for babies 6 months and up. Serve them pureed, smashed, or as a finger food for baby-led weaning.
Get the recipe
WeeSprout Baby Food Freezer Tray
My all-time favorite freezer tray! Individual servings pop out easily. The hard plastic lid snaps on with ease and allows for convenient stacking of freezer trays. Dishwasher safe!
View Product
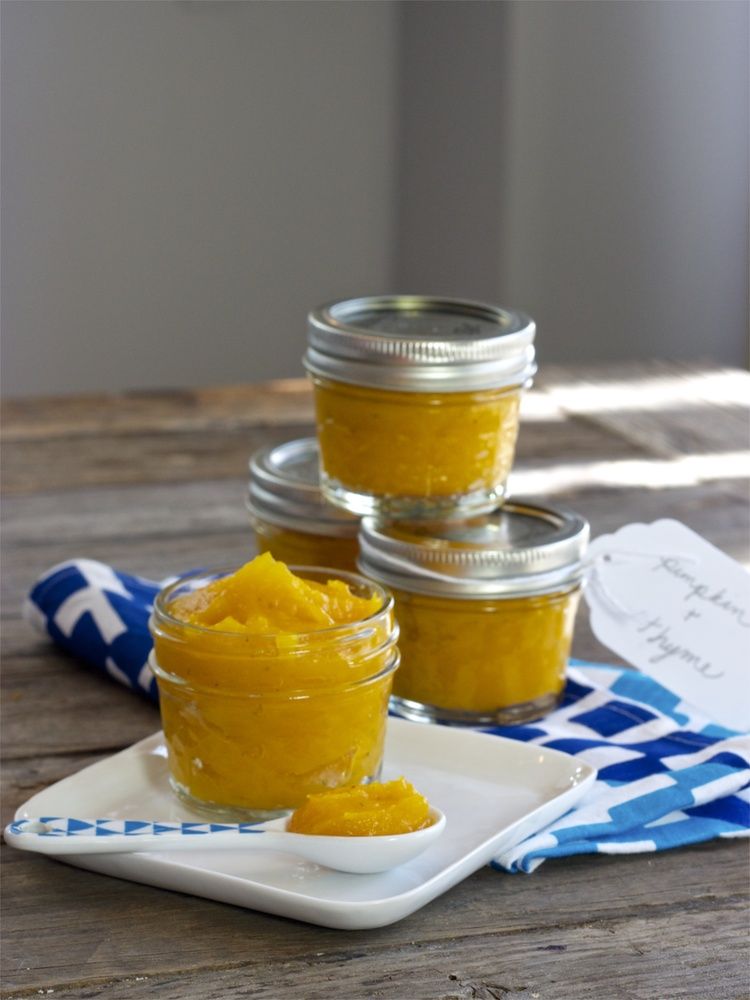
Butternut Squash Baby Food
5 stars (30 ratings)
This homemade Roasted Butternut Squash Baby Food Puree not only contains calcium, folate, vitamins A and C and fiber but it is also a deliciously smooth way to introduce butternut squash to your baby!
Get the recipe
Green Bean Baby Food
5 stars (34 ratings)
Green beans are steamed until just tender, this puree has a mild taste for baby's palette.
Get the recipe
Creamy Mango-licious Baby Food Puree
4.86 stars (27 ratings)
This 5-minute Mango Baby Food Puree is a great way to introduce baby to the magical taste of one of the world's healthiest fruits – MANGOS!
Get the recipe
Pear Baby Puree (Stage One)
5 stars (19 ratings)
This smooth and creamy homemade Pear Baby Puree is a wonderful first puree for baby – easy on the taste buds and great for their growing bodies!
Get the recipe
Peach Baby Puree (Stage One)
5 stars (15 ratings)
Smooth and creamy, this homemade Peach Baby Puree delivers big on taste with naturally sweetened peaches and flecks of vanilla bean.
Get the recipe
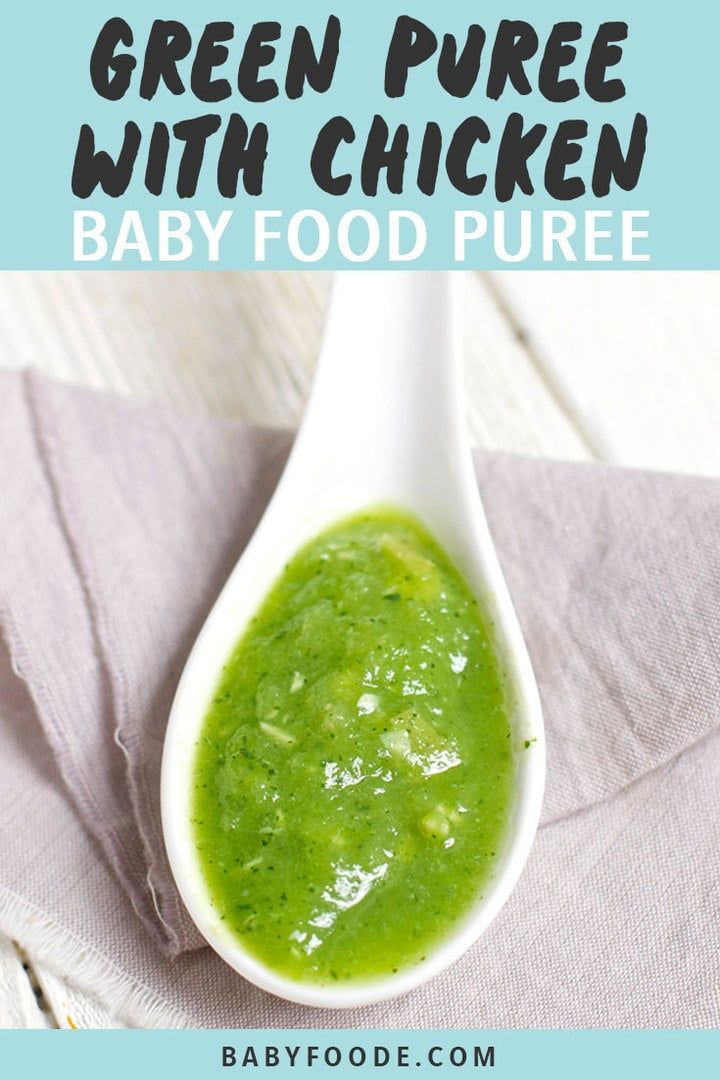
Basic Chicken Baby Food
4.41 stars (196 ratings)
This homemade Basic Chicken Baby Food is a great puree to add to any of your baby’s favorite fruit or veggie purees. Great for extra protein and flavor!
Get the recipe
Homemade Baby Rice Cereal
4.88 stars (48 ratings)
Using only 1-ingredient, this Homemade Baby Rice Cereal is a simple and easy recipe to make baby!
Get the recipe
Red Pepper Baby Puree
4.88 stars (33 ratings)
This Red Pepper Baby Puree recipe is a smooth, creamy and naturally sweet puree that is loaded with vitamin A, B6 and C. Great for 4+ months and older (or stage 1 puree).
Get the recipe
More Baby Fooe Purees
- Strawberry Baby Puree
- Blueberry Baby Puree
- Pumpkin Baby Puree
- Rasberry Baby Food
- Banana Puree
- Homemade Quinoa Baby Cereal
Pea Baby Food Puree
- 2 cups peas, fresh or frozen
- 1 medium zucchini, roughly chopped (optional)
- 4 mint leaves, roughly chopped (optional)
Sweet Potato Baby Food Puree
- 2 large sweet potatoes
- 1/4 tsp mild curry powder (optional)
- 1/4-1 cup liquid, (water, fresh breast milk, formula or sodium-free chicken stock) for pureeing
Roasted Banana Puree
- 4 bananas, cut lengthwise
- 1/8 tsp fresh rosemary, finely chopped (optional)
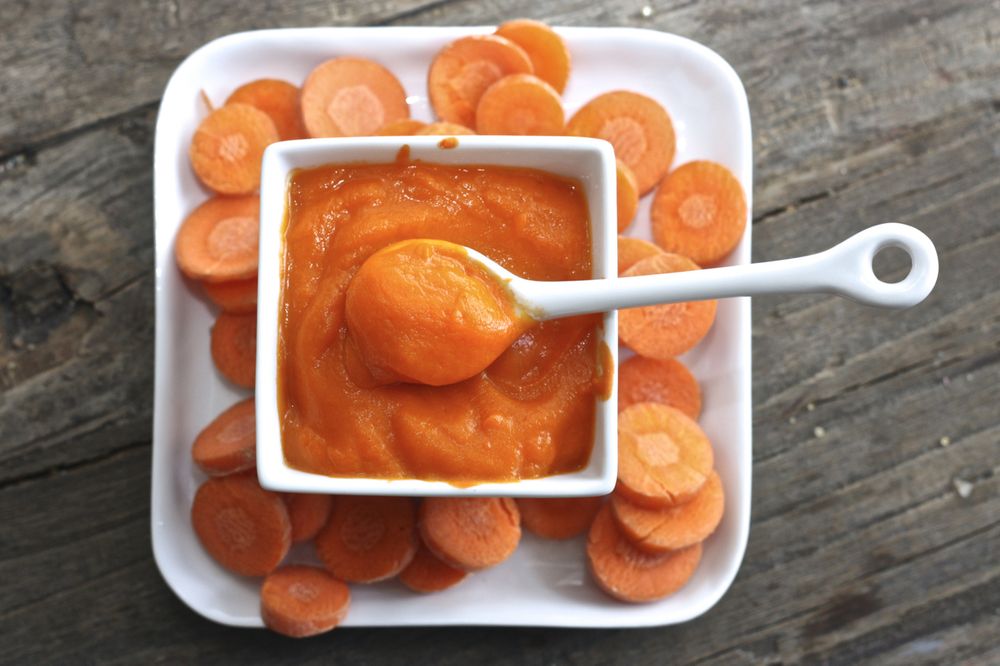
Carrot Baby Food Puree
- 2 pounds carrots, trimmed, peeled and roughly chopped
- 1/4 tsp nutmeg (optional)
- 1/2-1 cup liquid, (water, reserved water, fresh breast milk, formula or low-sodium stock) for pureeing
Apples Baby Food Puree
- 6 apples, peeled, cored and chopped
- 1/2 cup water
- 1/4 tsp cinnamon (optional)
Broccoli Baby Food Puree
- 2 cups broccoli, chopped into small florets
- 1 small white potato, apple or pear, peeled and roughly chopped, roughly 1/2 cup (optional)
- 1 tbsp good quality olive oil (optional)
Butternut Squash Baby Puree
- 1 butternut squash
- 1 tsp fresh thyme, roughly chopped (optional)
- 1-2 tsp olive oil (optional)
- 1/2-1 cup liquid (water, fresh breast milk, formula, low or no-sodium stock or bone broth), for pureeing
Green Bean Baby Food Puree
- 1 pound green beans, fresh or frozen, trimmed
- 1 big pinch fresh basil, cilantro or parsley, finely chopped (optional)
Creamy Mango-licious Baby Food Puree
- 2 cups fresh or frozen mango, deseed, peeled and roughly chopped.
 If using frozen mangos, thaw first
 - 1 medium banana (optional)
- 1 pinch nutmeg (optional)
Pear Baby Food Puree
- 6 pears, peeled and roughly chopped
- 1/8 tsp cardamom or cinnamon (optional)
- 1/4 cup water
Peach Baby Puree
- 3 fresh peaches or 12oz frozen peaches, do not thaw frozen peaches – use frozen
- 1/4 cup water
- 1/2 tsp vanilla bean pod (optional)
- 1 pinch pinch nutmeg (optional)
Basic Chicken Baby Puree
- 1 8-ounce boneless skinless chicken breast or thighs, cubed
- 1 cups chicken or veggie stock, low-sodium or sodium-free
- 1 tsp dried parsley (optional)
Homemade Baby Rice Cereal
- 1 cup brown rice, I prefer organic short grain
- 2 cups water for cooking
- 1-2 cups of liquid for blending, (water, fresh breastmilk or formula)
Red Pepper Baby Puree
- 2 red bell peppers, deseeded and roughly chopped
- 1/2 cup white potato, apple or pear, peeled and roughly chopped
Oatmeal for Babies
- 2 cup water
- 1 cup old fashioned oats
- 1/2 tsp chia seeds (optional)
- 1/2 tsp hemp seeds (optional)
Avocado for Baby
- 1/4 avocado
- 1 tsp breast milk, formula or water
Pea Baby Food Puree
In a medium saucepan, bring 2″ of water to a boil over medium heat.
 Place the zucchini in a steamer basket, and place over boiling water. Cover and steam for 5 minutes.
Add in the peas, and steam for an additional 3-5 minutes. Reserve steamer water. Let cool slightly.
Add the zucchini, peas and mint leaves to a blender or food processor and puree for 1 minute or until you have achieved the desired texture. If the puree is too thick, add in 1/4 cup of the reserved steamer water until you have the right consistency.
Note on Zucchini: while this is a 2 vegetable starter puree, zucchini allergies are very low, so I added it to this recipe to give the peas a mild taste and smoother texture. You can completely leave them out if you prefer. Just steam the peas as directed.
Sweet Potato Baby Food Puree
Heat oven to 400°. Line baking sheet with tin foil, parchment paper or a silicone mat.
Wash and dry the sweet potatoes.
 Prick with a fork in several places and then place the sweet potatoes on the baking sheet. Bake for 45 minutes – 1 hour or until a fork can easily prick the sweet potato. Let sit until cool to touch.
Make a cut into the skin of the potato lengthwise and peel away the skin of the potato. Scoop out the sweet potato meat and place into a blender or food processor, adding in the mild curry powder and water.
Puree on high for 1-2 minutes or until smooth, adding in additional liquid in 1/4 cup increments if needed. I had to add in 1 cup of water to the puree pictured. Serve or freeze for a later meal.
Additional Spices: Feel free to use the following spices instead of the curry – 1/2 tsp of cumin, 1/4 tsp of nutmeg, 1/2 tsp of cloves, 1 fresh garlic clove, 1/2 tsp of chopped fresh thyme, 3-4 basil leaves, 1/2 tsp chopped rosemary or even a big pinch of fresh ginger or 1/2 tsp ginger powder.
 Or you can leave out the spices altogether.
Roasted Banana Baby Puree
Heat oven to 325 degrees F. Line baking sheet with parchment paper.
Place bananas on a baking sheet and roast for 10-12 minutes or until golden brown. Let cool slightly.
Place bananas and rosemary into a blender or food processor and puree for 1-2 minutes or until completely smooth. You may need to add additional water, so start by adding in 1/4 cup increments until you get the desired consistency.
Additional Spices: This recipe is also great with 1 tsp cinnamon, 1/2 tsp cloves, 1/2 tsp nutmeg, or for a fun twist, 1/2 tsp mild curry.
Note on Bananas: while any ripeness of bananas will work, I have found that the bananas that are ripe to very ripe tend to work best in this recipe.
Carrot Baby Food Puree
In a medium saucepan, bring 2″ of water to a boil over medium heat.

Place the carrots into a steamer basket, cover and cook for 9-11 minutes or until tender. Reserve steamer water. Let cool slightly.
Place the carrots, nutmeg and 1/2 cup of liquid into a blender or food processor and puree for 1-2 minutes on high, adding 1/4 cup liquid at a time until you achieve the desired consistency. Serve and enjoy, or freeze for later.
Notes on Nutmeg: adding in spices to babies first purees are completely optional, but totally safe. Nutmeg rounds out the acidic taste carrots sometimes have and make this puree taste grounded and full-bodied.
Additional Spices: Feel free to substitute 1/2 tsp ginger powder or 1/4 fresh ginger, 1/2 tsp mild curry powder, 1/4 tsp cloves, 1/2 tsp finely minced fresh chives or 1/2 garlic clove instead of the nutmeg.
Apples Baby Food Puree
In a medium saucepan, place the apples, water and cinnamon.
 Cover and heat on medium-low for 15-20 minutes or until apples are tender. Let cool slightly.
Transfer all of the ingredients into a blender or food processor and blend for 1-2 minutes or until completely smooth. For a chunky puree, quickly pulse the ingredients 10-15 times or until you receive your desired consistency. Serve or freeze for later.
Additional Spices: Feel free to sub in these spices instead of the cinnamon for this recipe – 1/8 tsp of cloves, 1/8 tsp of nutmeg, 1-2 leaves of fresh mint, 1-2 leaves of fresh basil, a pinch of fresh or 1/4 tsp of ginger powder or even 1/4 of coriander for a fun twist.
Apples: you can use any sweet apple in this recipe – Gala, Honeycrisp, Fuji, McIntosh, etc.
Broccoli Baby Food Puree
In a medium saucepan, bring 2 inches of water to a boil over medium heat. Place the broccoli and potato (or apple/pear) into a steamer basket and place over boiling water, cover and steam for 10-12 minutes or until the broccoli and potato are tender.
 Reserve water from the steamer. Let cool slightly.
Add the broccoli, potato and olive oil into a blender or food processor and puree until smooth, adding the reserved water from the steamer basket in 1/4 cup increments if needed.
Adding In Spices: Feel free to add in 1 tsp of chopped chives, 2-3 mint leaves, 1 tsp of chopped cilantro, 1/2 tsp cumin or a squeeze of fresh lemon juice.
Butternut Squash Baby Puree
Heat oven to 450 degrees F. Line baking sheet with a silicone mat, tin foil or parchment paper.
Cut butternut squash in half, deseed and place flesh side up, skin side down. Optional – Feel free to drizzle the squash with 1-2 teaspoons of olive oil for some added healthy fat.
Bake for 45 minutes or until you can easily prick the squash with a fork. Let cool until you can handle the squash with your hands.
Scrape off the skin and discard. Place the butternut squash into a blender or food processor. Add thyme and puree for 1-2 minutes, adding water in 1/4 cup increments until you have your desired consistency. I had to add 3/4 cup of water to my puree shown below.
Additional Spices: Feel free to sub the thyme for 4 basil leaves, 1 tsp chopped rosemary, 1 tsp ginger powder, or 1 big pinch of fresh ginger, 1/2 teaspoon nutmeg, or even 1/2 tsp of coriander.
Green Bean Baby Food Puree
Fill a medium saucepan with 2” of water and bring to boil over medium heat. Place the green beans (fresh or frozen) into a steamer basket over the boiling water, cover, and cook for 10 minutes or until tender. Let cool slightly. Reserve steamer water.
Transfer the green beans and herb to a blender or food processor and puree for 1-2 minutes or until smooth, adding reserved steamer water in 1/4 cup increments if needed until you reach your desired consistency.

Adding Spices: you can add a big pinch of roughly chopped basil, cilantro, mint, parsley, or chives to this puree before blending.
Creamy Mango-licious Baby Food Puree
Place the mango, banana and nutmeg (if using) into a blender or food processor. Puree for 1 minute or until completely smooth. If your mango is not ripe enough, you might need to add in up to 1/4 cup of water while blending to get the right consistency. Serve or freeze for later.
Mango Tip: I usually find that organic frozen mangos are easier and cheaper to find than fresh organic mangos, but if mangos are in season when you are making this recipe, by all means, you can use fresh over frozen. For fresh mangos, simply peel and chop.
Pear Baby Food Puree
In a medium saucepan, place the pears, cardamon and water, cover and heat on medium-low heat for 10-15 minutes, or until tender.
 Let cool slightly.
Using a slotted spoon, scoop the pears out of the saucepan, leaving water behind, and into a blender or food processor. Blend for 1-2 minutes until you have your desired consistency. If your pear puree is too thick, add the leftover cooking water in 1/4 cup increments.
Peach Baby Puree
If using fresh peaches, peel, pit and slice the peaches. If using the fresh vanilla bean pod, cut in half and then slice open lengthwise. Take the back of your knife or spoon and scrape out all of the vanilla bean, reserve.
In a medium saucepan, add the peaches and water, cook over medium-low heat for 5 minutes (fresh peaches) – 10 minutes (frozen peaches). Right before the peaches are done cooking, add in the vanilla and nutmeg (or any other spices you prefer) and stir until incorporated—Cook for 1 more minute.
Using a slotted spoon, transfer the peaches to a blender or food processor, leaving all excess water in the saucepan.
 You do not want to add any additional liquids, or the puree might be too thin. Starting on low and increasing to high speed, puree the peaches until smooth and creamy. Serve to baby or freeze for later.
Basic Chicken Baby Puree
In a medium saucepan, bring the cubed chicken, broth, and parsley to a boil over medium heat. Turn the heat down to low and simmer, covered, for 15 minutes or until chicken is just cooked through. Let cool slightly.
Using a slotted spoon, transfer the chicken to a blender or food processor, leaving the broth in the saucepan. Reserve the broth.
Starting on low and working your way up to high-speed, puree the chicken until you reach your desired consistency, adding in broth in 1/4 cup increments if needed. I had to add in just 1/4 cup of broth to get the consistency seen in this photo.
Extra Healthy Fat: For some extra healthy fat, this puree is also wonderful, with a teaspoon of grass-fed butter (salt-free) added to the blender right before pureeing.
Homemade Baby Rice Cereal
IMPORTANT STEP: Place the rice in a fine-mesh colander and rinse with water until the water runs clear.
Transfer the rice to a medium saucepan and add 2 cups of water. Bring to a boil over high heat, then reduce heat to low, cover with a lid and simmer for 35-45 minutes or until the rice is tender and the water is evaporated. Each batch of rice cooks a little differently, so taste at 35 minutes to see if the rice is tender. Remove the saucepan from the heat and let rest for 10 minutes, covered. If using fresh breast milk or formula for blending, I would remove the lid and let the rice cool for 15 minutes.
Place the rice into a blender or food processor and add 1/2 cup of liquid of choice. Blend for 1-2 minutes on medium-high speed until completely smooth and creamy, adding in the additional liquid in 1/4 cup increments, if needed, until you have your desired consistency.
Red Pepper Baby Puree
In a medium saucepan, bring 2″ of water to a boil.
If using a potato: place it in a steamer basket and steam for 10 minutes before adding peppers, and cooking for another 5-7 minutes.
If using pear or apple: add in the red peppers and apple or pear and steam for 5-7 minutes or until tender. Reserve steamer water. Let cool slightly.
Add in all of the ingredients into a blender or food processor and puree for 1 minute or until completely smooth, adding in a tablespoon of water at a time if needed.
Oatmeal for Babies
In a medium saucepan, bring 2 cups of water to a boil. Add in 1 cup of old-fashioned oats along with the chia seeds, hemp seeds and any spices you are using. Turn down the heat to medium-low and cook the oats for 5 minutes, stirring occasionally, or until all of the water is gone and the oats are soft. Let cool slightly.
Transfer the oats to a blender or food processor and puree for 1-2 minutes, adding water in 1/4 cup increments if needed, until completely smooth.
 I had to add 1/2 cup of water to my oatmeal. You will want the oat cereal to be on the thinner side, so it doesn't become sticky. The oats will continue to absorb liquid as they cool, so you can add more water, fresh breast milk, or formula as needed. Serve to baby or freeze for later.
 Type of Oats: This recipe is for old-fashioned oats: for steel-cut or instant oats, read the full post.
Adding Spices: you can add a big pinch of cinnamon or pumpkin pie spice mix or a smaller pinch of nutmeg or cloves to these oats before blending.
Chia and Hemp Seeds: are added for a nutritional boost, but you can add or omit them if you prefer. You can get both of these at any health food store or online here (chia/hemp).
Avocado for Baby
Age: 4-6 months and up
Yield: roughly 15-25 ounces, depending on the recipe
Freezer Tray
Bumkins Baby Bowl
Blender
Saucepan
Did you make this recipe?
Tag @babyfoode on Instagram and hashtag it #babyfoode!
Pin Recipe Email a Friend
Pea Baby Puree (4-6+ Months/Stage 1)
This Pea Baby Puree with mint is a smooth and mild baby food puree that is perfect for your baby’s first bite! Your baby will love this green puree thanks to its fresh and earthy flavor. It’s a great stage 1 baby food for 4-6 months and up.
Medically reviewed and co-written by Jamie Johnson, Registered Dietitian Nutritionist (RDN), and Lauren Braaten, Pediatric Occupational Therapist (OT).
Homemade Pea Baby Food
Don’t get caught up on what you think pea baby food is going to taste like.
Store-bought brands can be thick and lumpy with a strong acidic taste of overly cooked peas. Don’t even get me started on the smell! 🤢
But this homemade pea puree is exactly the opposite! And trust me; it tastes nothing like you expect.
I’m telling you… this pea baby food is beyond delicious. It’s heavenly!
Smooth and creamy with a mild taste and a hint of minty freshness, it’s also bright and appetizing to look at.
It will actually put a smile on your and your baby’s faces! 😁
Is it your first time making homemade baby food? Then I suggest you start this journey by reading my in-depth Guide on How to Make Homemade Baby Food. The detailed guide goes over all the important information such as the best cooking tools to have on hand, safe storage, how to know when baby is ready for solids, how to introduce purees, the best first foods for baby, and more! You can also check out my best-selling cookbook for even more information and recipes!
Pea Baby Puree Video
Watch this video to see just how easy this Pea Baby Puree is to make!
Reasons to Love this Pea Baby Puree- great baby food for 4-6+ months
- starter puree
- 3 simple ingredients
- super smooth and creamy
- delicious green puree
- easy to make — requires less than 10 minutes
- freezer-friendly
- budget-friendly
- homemade
- healthy
- organic – can easily (and cheaply) use organic peas and zucchini
- can use fresh or frozen peas
Make sure to read the recipe card below for the full ingredient list and instructions!
- Peas: They are high in fiber, folate, vitamins A, C, and K, and are a good source of protein.
 They also help promote healthy digestion and may protect against cancer.
 - Zucchini: While this is a 2-vegetable starter puree, zucchini allergies are very low, so I added it to this recipe to give the peas a mild taste and a smoother, creamier texture. You can completely leave it out if you prefer. Just steam the peas as directed below.
- Mint: This is an ideal herb to add to baby food because it helps soothe an upset stomach, improves digestion, can help improve mental awareness and focus, and is rich in nutrients. However, adding mint to this puree is entirely optional.
- A good source of protein
- Contains a high amount of fiber, which helps with digestion
- Contains an array of micronutrients, such as thiamine, folate, manganese, vitamins K and C
- A good source of antioxidants
Frequently Asked Questions
When can babies eat peas?
development, which generally comes between 4-6 months of age. Some of the developmental milestones babies need to reach in order to start solids include: if your baby has solid control of their head and neck, if your baby has doubled in weight, and if your baby is reaching for or opening their mouth when you eat (see my guide here). Before you start your baby on purees, you should consult with your pediatrician to make sure your child is developmentally ready.
Can peas be baby’s first food?
Peas can 100% be baby’s first food if you want it to be. It is recommended to wait to introduce the top eight allergen foods to your baby once a few other well-tolerated foods have been introduced, but otherwise, foods can be introduced in any order so choose whatever you are most excited for your baby to have.
Are peas a common allergen for baby?
No, peas are not a common allergen, however, as with any food, start with a small portion and be aware of any signs that might be an allergic reaction after introducing it.
Do peas cause constipation for babies?
No, peas are not known to cause constipation in babies, and they may actually help relieve constipation in babies due to the high fiber content that makes it easier for your baby to pass stools.
Can you use frozen peas for baby food?
Yes, you can definitely use frozen peas in baby food! For this recipe, I added the frozen peas straight into the steamer basket to cook along with the zucchini. You can also freeze the peas once they are cooked and pureed.
How to Make Pea Baby Puree- Bring Water To Boil: Bring a saucepan with a little water to a boil.
- Steam Zucchini: Add chopped zucchini (optional) to a steamer basket, cover, and steam for 5 minutes.
- Steam Peas: Add the peas (fresh or frozen) and steam for another 3-5 minutes.
- Let Cool: Let it cool slightly and reserve the steamer water.
- Transfer to Blender: Transfer the cooked peas and zucchini to the blender or food processor.
- Add Mint: Add in the chopped mint or another spice.
- Puree: Puree until smooth or creamy, adding reserved water if needed to thin out the puree.
- Serve or Freeze.
- Medium Saucepan
- Steamer Basket
- Blender or Food Processor
- Freezer Tray
- Storage Containers for Fridge
- highchair
- suction bowl or baby bowl
- baby spoon
- open lid cup
- bib with catch pocket
While I love the fresh flavor of steamed peas with mint, there are several ways you can cook peas for baby food.
BEABA BabycookDoes anything sound better than a homemade baby food puree with a 15-second hands-on prep and cook time? I didn’t think so. Let me introduce you to the magic of the BEABA Babycook! With the touch of a button, the Babycook will cook and blend the peas into a smooth and creamy baby food puree! It’s like magic. To make, place 2 cups of peas into the stainless steel steamer basket, and place the basket into the glass container, closing the lid. Fill the reservoir tank to a level 3, close and lock the lid. Hit the steam button and let the machine do its magic. Once steamed, transfer the peas into the glass container, leaving the water. Add in a pinch of fresh mint, if using. Close the lid, and hit the blend button for 1 minute or until the puree is smooth.
Full Review: read my full, in-depth and honest review of the BEABA Babycook Neo here! Make sure to grab 15% off your Babycook with code (BabyFoode15)!
SkilletIn a medium skillet, add 2 cups of frozen peas. Cook over medium heat for 5-7 minutes, stirring often. Puree in a blender as directed below.
Place 2 cups of peas into a medium saucepan, add enough water to cover the peas, and bring to a boil. Reduce to simmer and cook for 8-10 minutes or until tender. Puree in a blender as directed below. Note that boiling will rid the peas of some nutrients as they are leached into the boiling water, so steaming or using a skillet is preferred. If you need liquid to thin out the puree, use some of the leftover water.
Great Pea Combination PureesWhile this pea puree is delicious and satisfying by itself, it’s also easy to mix and match with other nutrient-dense baby food purees. So give these fun flavor combos a try!
- Apples
- Broccoli
- Bananas
- Pears
- Quinoa Baby Cereal
- Fennel and Peaches
- Green Beans
- Chicken
- Spinach
- Soft Tofu
- Mango
- Yogurt
WeeSprout Silicone Baby Food Freezer Tray
Our favorite freezer storage container for baby food! Made of 100% food-grade silicone and comes with a hard clip-on lid. Large 3oz sections with 2oz markings to make sure you have the right amount for your baby.
View Product
Adding SpicesWhile the most popular option is adding mint to baby food, you can also add a splash of lemon or lime juice, 1/2 tsp coconut oil, 1 tsp chopped basil, 1 tsp chopped parsley, or 1/4 tsp fresh ginger.
Tip on Spices: I always add spices or herbs to my baby food purees, but you can choose to leave them out in all of your baby food. You do you! Either way, this puree will surely taste amazing.
How to Store Pea Baby FoodRefridgeratorYou can store this puree in an airtight container in the fridge for 3-4 days.
FreezerThis puree can be frozen for up to 4 months.
- Spoon puree into a freezer storage container. Do not overfill.
- Place the lid on the storage container or cover with a piece of saran wrap, and label with the date and recipe name.
- Place the tray into the freezer and let it freeze completely — preferably overnight.
- Pop-out the baby food cubes and place them in a ziplock baggie or stasher bag. Don’t forget to relabel the baggie or stasher bag for future reference.
Need more information on how to store your baby foods? Head over to my Best Baby Food Storage Containers – Plus 6 Tips on Freezing and Thawing post!
Related
15 Stage One Baby Food Purees
Feeding Tips
- Follow your baby’s lead – when feeding purees from a spoon, sometimes there’s a tendency to keep offering bites past the point of your baby being full. Always follow baby’s cues for when they are done eating. Turning away from the spoon, closing her mouth, or pushing food away are all signs that baby is finished with the meal.
- Try adding a little seasoning or spice to purees – babies like flavor! Or consider changing the temperature of purees from time to time, to slightly warmed or slightly chilled.
 Varying these aspects adds to the sensory experience!
 - Place a small amount of puree on the tray during spoon feeding, so that your baby can dip their fingers or hands in the puree. Allowing baby to explore foods in this way helps them learn to self-feed and can help them be more willing to try new textures and foods in the future.
Or watch a shortened version of this video here.
- 2 cups peas, fresh or frozen
- 1/2 cup zucchini, roughly chopped (optional)
- 4 mint leaves, roughly chopped (optional)
Steam: In a medium saucepan, bring 2″ of water to a boil over medium heat. Place the zucchini in a steamer basket, and place over boiling water.
 Cover and steam for 5 minutes.
Add Peas: Add in the peas, and steam for an additional 3-5 minutes. Reserve steamer water. Let cool slightly.
Blend: Add the zucchini, peas and mint leaves to a blender or food processor and puree for 1 minute or until you have achieved the desired texture. If the puree is too thick, add in 1/4 cup of the reserved steamer water until you have the right consistency.
Serve: let cool and serve to your baby or freeze for a later meal.
Age: 4-6 months and up
Yield: 15 ounces
Note on Zucchini: while this is a 2 vegetable starter puree, zucchini allergies are very low, so I added it to this recipe to give the peas a mild taste and smoother texture. You can completely leave them out if you prefer. Just steam the peas as directed.
Additional Spices: instead of the mint, feel free to use a splash of lemon or lime juice, 1/2 tsp coconut oil, 1 tsp chopped basil, 1 tsp chopped parsley or 1/4 tsp fresh ginger.
Storage: Fridge – store in an airtight container in the fridge for up to 4 days. Freezer – can be frozen for up to 4 months.
Blender
Freezer Tray
Saucepan
Tripp Trapp High Chair
Bumkins Baby Bowl
Serving: 1ounce, Calories: 15kcal, Carbohydrates: 2.9g, Protein: 1.1g, Fat: 0.1g, Sodium: 1mg, Potassium: 57mg, Fiber: 1g, Sugar: 1.2g, Calcium: 5mg
Did you make this recipe?
Tag @babyfoode on Instagram and hashtag it #babyfoode!
Pin Recipe Email a Friend
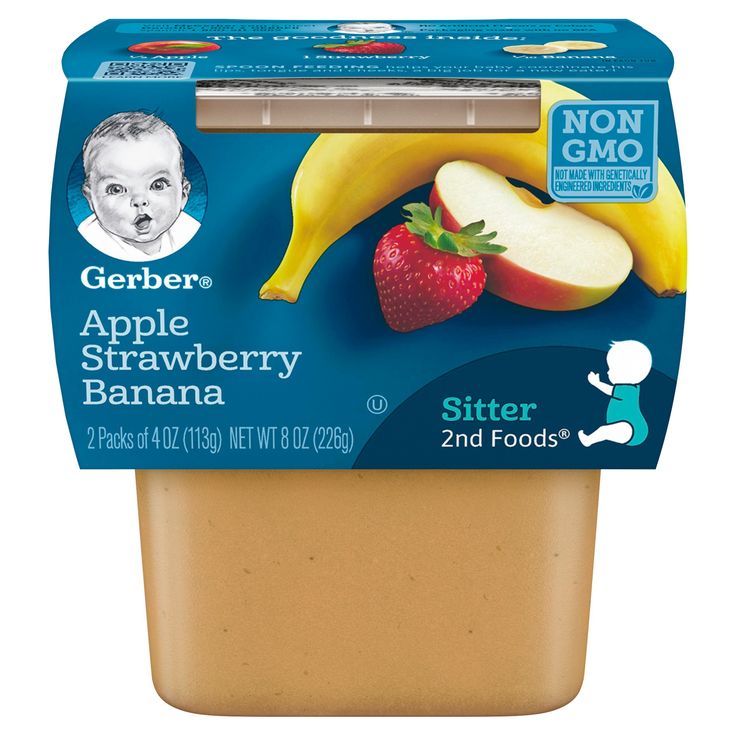
90,000 organic baby foods. Organic Fruits Organic Meats, Baby Food Raw Materials If you have a small child who you occasionally feed with canned baby food, HiPP food is familiar to you. Looking at the jar, most likely you did not pay attention to the round HiPP BIO sign placed on the label. What is this sign and why does it deserve special attention?
Organic farming - a source of organic raw materials
You have probably already come across the term "organic farming" - a way of farming without the use of synthetic fertilizers, pesticides, plant growth regulators, which uses only organic fertilizers and competent crop rotation, as well as biological pest control methods. For example, with a five-year crop rotation cycle, clover, wheat, oats, buckwheat, vegetables are alternately grown on the field - and then clover again. This reduces the clogging of the soil with weeds, provides it with various nutrients and reduces the degree of natural soil depletion. Manure is used as a fertilizer in the fields to enrich the soil and increase productivity.
Growing grains and vegetables organically is more labor intensive. Of course, modern mechanical methods of weed control are actively used, but at some stages manual labor is also required.
Since the use of insecticides in organic farming is prohibited, insect pests are controlled by natural methods - creating favorable conditions for beneficial insects and birds. For example, grain harvesting is not carried out in the middle of the day, when bees are most active, because. mechanical harvesting can kill a large number of beneficial insects. And Colorado beetles are fought with the help of neem tree oil.
In organic agriculture, cattle graze most of the year on natural pastures in the open. This allows the animals to be strong and healthy, as well as to consume a more varied diet. Poultry is also raised in free-range conditions. In the cold season, animals receive biofeed grown in organic fields - the same clover used in the crop rotation system, as well as various grains and straw.
Why is it important to use organic products in baby food?
In addition to the fact that organic farming does not degrade the quality of the soil, groundwater is not polluted - i.e. the ecological state of the environment does not suffer, organically grown products have a natural taste and are more beneficial to human health.
Infants and young children are especially vulnerable - even pesticide residues from food can adversely affect the health of the baby. Therefore The use of organic products in baby food is the key to future health .
Raw material sources for HiPP baby food production
HiPP has a long and close relationship with organic farmers, whose methods of management allow growing the best raw materials, intelligently adapting to the natural cycle of nature. For the production of baby food, HiPP uses only raw materials grown in accordance with the European legislation on organic production, which contains clear requirements regarding the cultivation and production of organic products . The quality of HiPP BIO goes beyond the general legal requirements for bio products - for this, additional checks of raw materials and products are carried out at different stages of production.
More than 8,000 organic farmers around the world produce organic fruit, organic vegetables and organic meat for HiPP. When purchasing raw materials that do not grow in local latitudes, such as bananas, high organic quality is also emphasized.
To secure its own natural bananas, HiPP has established its direct import system, which includes farms located in the pristine high jungles of Costa Rica. Plants in such farms do not grow crowded, but at a distance from each other - in a completely different way than on ordinary plantations. No pesticides or plant protection products are used in the cultivation of these bananas. If a plant is affected by a fungal or other disease, it is enough to remove the diseased branch to avoid the spread of the disease.
Quality control of raw materials and finished products - a guarantee of safety
Immediately after the delivery of raw materials intended for the production of HiPP baby food, the first checks for the presence of harmful substances are carried out, and if there are complaints, the goods are not accepted.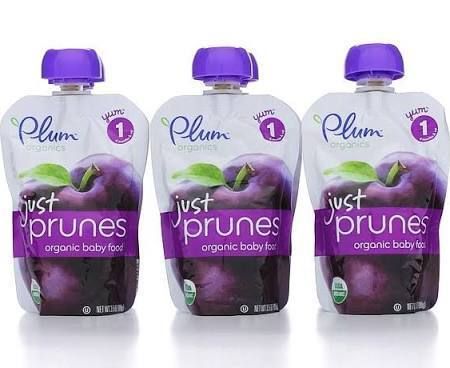 Only raw materials that have been tested for the absence of about 1,200 prohibited residues enter the production. Only ingredients that have passed through a multi-level quality control system enter the jars. And only after that the jar receives the HiPP BIO organic quality mark.
HiPP baby food is produced in several factories throughout Europe. In 2009, the HiPP plant also appeared in Russia - in the Kaliningrad region. Currently, this is the only organic baby food production in the Russian Federation with its own vegetable store, microbiological laboratories and autonomous water supply.
All HiPP products that left the assembly line of the Russian factory, are manufactured according to the same company standards , complying with the requirements of European legislation for organic products. A significant part of the raw materials for the production of baby food at the Kaliningrad plant is produced outside of Russia. Only a small part of it is supplied by Russian farmers - these are potatoes, carrots, parsnips. In the near future, domestic organic beef will begin to be used - bulls have already been grown, production is currently being certified.
Raw materials and finished products in the Russian Federation go through the same quality control stages as at each HiPP plant. The contents of each jar are controlled more than 260 times - up to checking the finished product before shipment to the client.
But why HiPP?
The Hipp company dates back to the end of the 19th century, when the hereditary German confectioner Josef Hipp created children's porridge for his own children - from ground crackers and milk. Kasha gained fame among the neighbors and laid the foundation for a family business. In 1956, one of the sons of Josef Hipp began the industrial production of baby food in jars - first in cans, and then in glass ones. At the same time, the family farm gradually began to switch to organic farming.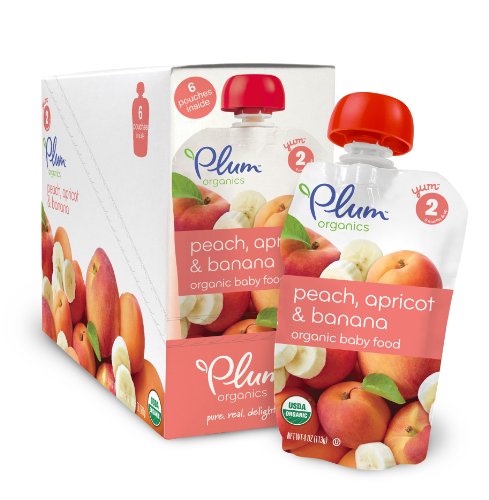
Commitment to produce the highest quality products and constant concern for the environment are the main principles of HiPP's success today. “The highest quality and responsibility for the natural and healthy development of children are at the forefront for us,” comments Klaus Hipp, who heads the company with his brother and sons. He personally vouches for the products produced by the company.
The material was prepared based on the results of a press tour to the HiPP organic farm located in Poland and a plant in the Kaliningrad region of the Russian Federation
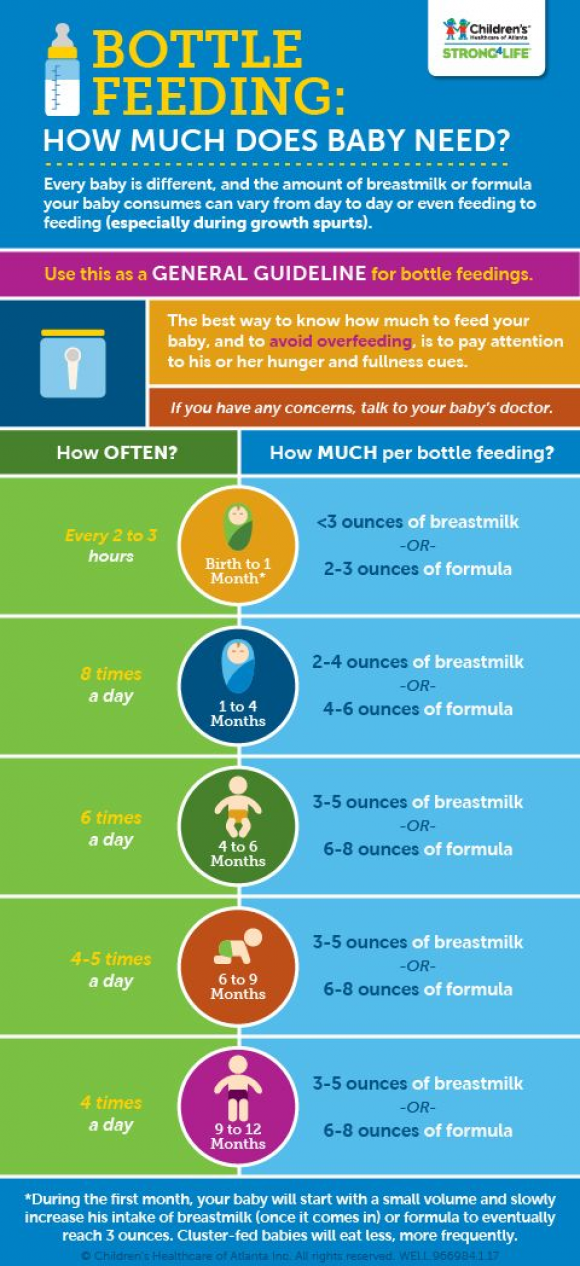
Complementary food menu. Complementary feeding by months
There is a need to introduce new products and dishes into his diet, different in their nutritional and biological value, composition, texture and taste. The introduction of complementary foods is an important and crucial moment in organizing the proper feeding of a child in the first year of life, so the approach to it must be responsible and reasonable. The expansion of the child's nutrition is caused by the need to additionally introduce a number of nutrients into his body, the intake of which only with human milk or an adapted mixture becomes insufficient at a certain stage in the development of the child's body. In particular, the child's body needs proteins, fats, carbohydrates, dietary fiber, a wide range of minerals and trace elements necessary for its further growth and development. Many children, especially in winter and spring, begin to experience a deficiency of certain vitamins.
Introduce complementary foods earlier than 3-4 months. inappropriate, since the child's body is not yet ready for this. In addition, early complementary feeding may reduce the frequency and activity of suckling and thus crowd out breastfeeding. At the same time, introducing complementary foods after 6-7 months is also not advisable, because this may cause problems with the perception of denser food, various negative reactions, up to reflex vomiting on solid food particles and the development of deficient conditions.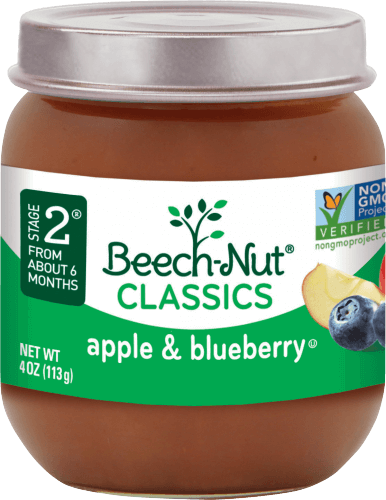
Rules for the introduction of complementary foods
In order for the introduction of complementary foods to go smoothly, the following rules must be followed.
1. You can start the introduction of any new product only when the child is healthy.
2. Complementary foods should not be introduced during the hot season, as well as during preventive vaccinations.
3. During the period of introducing complementary foods, breast milk (adapted milk formula) remains the main type of nutrition for the child.
4. A new product or a new dish should be given in the morning in order to be able to note a possible reaction to it.
5. Complementary foods are given before breastfeeding (adapted formula).
6. Complementary foods must be given from a spoon, and not through a nipple.
7. Complementary foods begin to be given in a semi-liquid (homogenized) consistency, then the food becomes more dense.
8. The introduction of a new product (dish) begins with small quantities with a gradual increase in volume.
9. Complementary foods must begin with one type of product of this group with the gradual inclusion of new ones.
10. As complementary foods, it is better to use industrial products that have a stable composition and are made from environmentally friendly raw materials.
For each baby, the timing of the introduction of complementary foods is individual. As a rule, the first complementary foods coincide with the age of 5.5-6 months and do not prevent further breastfeeding or artificial feeding.
juices are the first to be introduced into the child's diet. Juices are a source of sugars, potassium, iron, β-carotene. They can be monocomponent (from one type of fruit) and polycomponent, consisting of 2 or more fruits, berries or vegetables. They may be clarified or contain pulp. The nutritional value of juices with pulp is higher. First, monocomponent clarified juices (preferably apple, pear), without sugar are introduced. The sweetness in these juices is achieved by selecting sweet fruits containing natural sugars. They begin to introduce juices from 4–4.5 months with ½ tsp. and gradually, in the absence of a reaction, increase the amount; from 5.5 months you can enter polycomponent juices. For children suffering from unstable stools, it is best to give juices from blueberries, blackcurrants, cherries, pomegranates, which contain tannins and act as a fixative. Cabbage and beetroot juices, prunes nectar, which act as a laxative, are very useful for children with constipation.
2 weeks after the administration of juices, fruit purees are prescribed. They can be monocomponent or multicomponent, as well as combined, when dairy additives (cottage cheese, yogurt, cream) or grain additives (specially processed rice, corn, oatmeal) are added to their composition. Fruit purees are also divided according to the degree of grinding: homogenized for children aged 4–6 months. and puree for children 6-9 months. Fruit purees are a source of natural sugars, vitamin C, β-carotene, potassium, iron, bioflavonoids that increase the activity of the immune system. Fruit purees, as well as juices with pulp, contain dietary fiber that regulates intestinal motility. They participate in the normalization of the intestinal microflora and are able to remove toxic substances from the body. With an unstable stool, it is better to use puree from apples, pears, bananas, rich in pectins, which have a beneficial effect on digestion. With a tendency to constipation, apricot, plum, carrot, prunes puree is recommended. The latter is given in addition to other fruit purees from 2 to 4 teaspoons per day.
From 5–6 months, more dense food is introduced into the child's diet - basic complementary foods . The need for the introduction of complementary foods is due to the peculiarities of the development of the child. After four months of life, his neuropsychic development is proceeding at a rapid pace. The kid becomes more active, mobile, keenly interested in the world around him. Therefore, he no longer needs only breast milk or formula, as well as those small amounts of nutritional supplements in the form of fruit juices and purees. Complementary foods are given in fairly large quantities and are actually independent nutrition, almost completely replacing first one and then several breastfeeds or formula. If the baby is breastfed, after each meal, it should be applied to the mother's breast. This creates the prerequisites for a longer preservation of lactation.
There are various special programs that provide for the gradual introduction of various complementary foods into the child's diet. The choice of the first product of the main complementary foods is carried out taking into account the state of the digestive system and the developmental features of the child. For children with low body weight, single regurgitation, episodic colic and flatulence, as well as absolutely healthy babies, cereals (grain complementary foods) can be recommended as the first complementary foods. At present, cereals industrial production, which are prepared from environmentally friendly raw materials, using modern technologies, which improves their absorption. They have a stable composition, good taste and guaranteed microbiological parameters. Porridges are enriched with vitamins and minerals necessary for the growing body of a child and are of great importance for the prevention of a number of alimentary-dependent diseases, such as anemia, rickets, malnutrition, which often occur in children in the second half of life. One of the advantages of instant cereals is the possibility of their quick preparation, without boiling. The range of industrial cereals is quite wide and involves the use of various cereals: buckwheat, oatmeal, rice, barley, corn, etc. Porridges are made from one type of cereal (monocomponent), and using 2 or more cereals (polycomponent).
There are gluten-containing cereals (semolina, oatmeal, barley) and gluten-free (buckwheat, corn, rice). It is not recommended to introduce gluten-containing cereals into the child's diet before 6 months of age. This is a preventive measure for the occurrence of allergic reactions to gluten, as well as early manifestations of celiac disease. Porridges can be dairy or dairy-free. The latter are diluted with breast milk or infant formula received by the child. They are especially necessary for children who are allergic to cow's milk proteins and lactase deficiency. In the future, gluten-containing cereals (oatmeal, barley, wheat, semolina) and cereals from a mixture of cereals can be used.
There are also varieties of cereals. These primarily include soluble biscuits. For its preparation, wheat, oat flour is used, with the addition of various food ingredients (milk, sugar, malt extract, corn starch, egg yolk, etc.). An obligatory component of instant biscuits are vitamins especially necessary for a child (groups B, C, beta-carotene) and minerals (calcium, phosphorus, iron). Instant biscuits can usually be used from 5 months. both in its natural form, which contributes to the formation of the act of chewing, and in the form of cereals, which is especially convenient in road conditions.
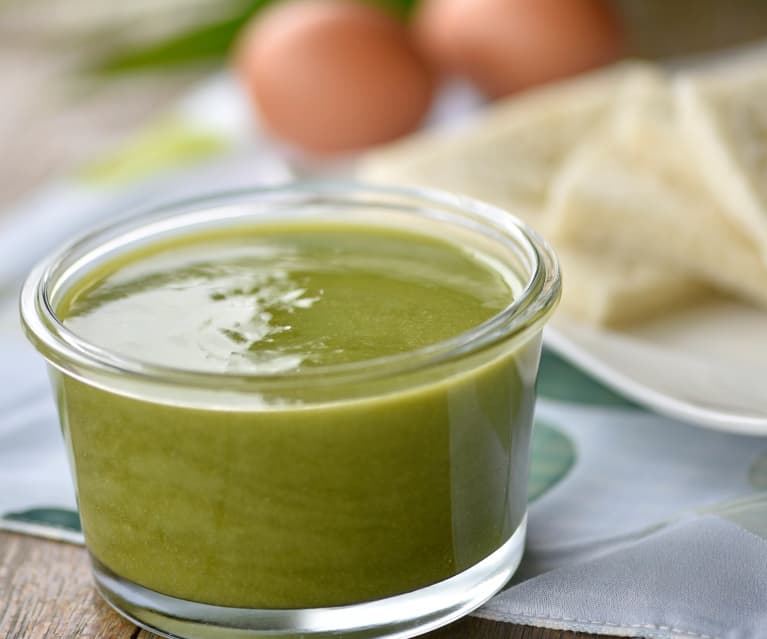
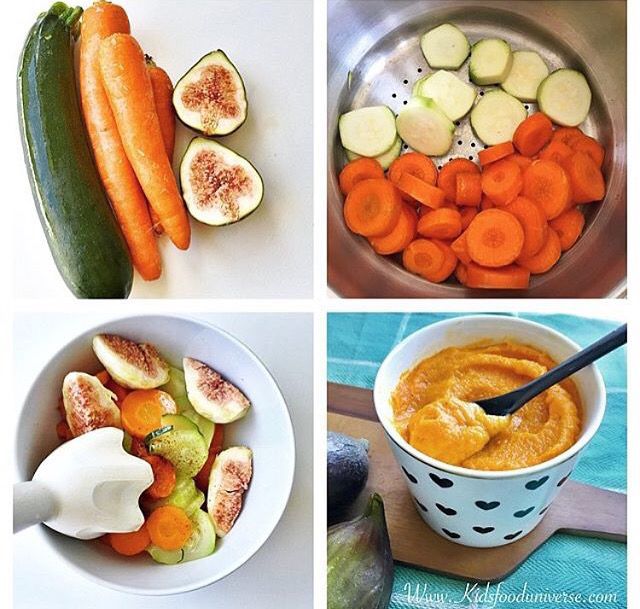
With increased body weight or delayed stools (difficult defecation), vegetable puree can be offered as a starting complementary food from 4–6 months of age. Vegetable puree is a source of organic acids, potassium, iron and dietary fiber, including pectins. Certain types of vegetables (carrots, pumpkin, spinach, etc.) are rich in beta-carotene, a precursor of vitamin A. At the beginning, vegetable puree should consist of one type of vegetable with delicate fiber, such as zucchini. Further, it is advisable to use a combination of 3-4 vegetables. Vegetable purees can be monocomponent (cauliflower, zucchini, carrots, etc.) and polycomponent (cauliflower and pumpkin, or zucchini, carrots and potatoes). Multicomponent purees can contain not only various vegetables, but also a combination with fruits (apple-carrot, pumpkin-apple, etc. ). Multicomponent vegetable purees are richer in the spectrum of nutrients and therefore more useful, but it is recommended to introduce them after no negative reactions to individual vegetables have been noted (monocomponent vegetable purees). There are also combined vegetable purees, when meat (vegetable-meat) or fish (vegetable-fish) is added to vegetables. Vegetable purees, depending on the age of the child, come in 3 degrees of grinding: homogenized, puree and coarsely ground.
From 5–6 months, cottage cheese is introduced into the child's diet, which is a source of complete protein and calcium. Cottage cheese is introduced into the child's diet from small amounts. Gradually increase the dose and after 3-4 days bring it up to 20 g per day in one or two doses, then up to 40 g and by the year - up to 50 g per day. They give cottage cheese specially prepared for baby food in dairy kitchens or in baby food shops of dairy factories.
From 6 months, you can enter egg yolk . From 6 months - ¼, from 8 months. - ½ hard-boiled egg yolk. It must be carefully separated from protein, which is not given to children under 1 year old, as it is difficult to digest. The yolk can be given simultaneously with milk porridge or vegetable puree. However, children with food allergies should not be given yolk, as ovalbumin is a strong allergen. Meat is recommended to be introduced into the child's diet from 7 months with natural feeding and from 6 months with artificial feeding. In some cases, if the child lags behind in development, there are manifestations of rickets, anemia, meat can be given earlier (at 5.5 and even 5 months at the same time as vegetable puree).
Canned meat is a valuable source of: animal protein, iron, magnesium, B vitamins, including B12. Canned meats come in three degrees of grinding: homogenized (with a particle size of 0.4 mm), puree (with a particle size of 1.5 mm) and coarsely ground (with a particle size of 3 mm). Some manufacturers produce canned food in the form of meatballs, with vegetables, i.e. there is a formed dish. Canned meat can be monocomponent, multicomponent and combined, with vegetable raw materials (cereals or vegetables).
From 8–9 months vegetable soups may be introduced into the child's diet. Meat broths are currently not used in the nutrition of children under 1 year of age, as they mainly contain substances that cause irritation of the gastric mucosa. Soups are used as the first course when the child is already preparing lunch. They are given in a small amount of 30-50 ml to stimulate the function of the digestive glands and increase appetite. The small volume of the 1st dish is due to the importance of providing the child with the 20th dish in the required volume, as it is more complete in terms of nutrient content.
Expert advice:
- Take your time with complementary foods. The baby's body is designed so that up to 4-6 months he can only digest mother's milk or adapted mixtures, and other products are unacceptable for him.
 That is why it is necessary to introduce new food very carefully, giving the child's body the opportunity to get used to it.
 - With mixed and artificial feeding, it is recommended to introduce complementary foods two weeks earlier than with exclusive breastfeeding.
- Up to a year and a half, it is better to introduce each new juice with caution and in no case give the baby multicomponent juices until the child's reaction to each juice of the components of such a drink has been studied.
- Alternate complementary foods according to the nature of the products - if the first complementary foods were vegetables, then it is better to choose cereals as the second.
- If you prepare complementary foods yourself, do not do it for the future - all food for the baby should be fresh.
- Up to 1.5 years, it is categorically not recommended to add salt and sweeten the child's food. Sodium salt is poorly excreted and accumulates in the body, besides, the child's kidneys are not yet sufficiently developed.
 Sugar, on the other hand, contributes to the development of caries in milk teeth, loads the pancreas and forms the habit of sweets in the baby.
Sample daily diet for a 6 month old baby
| Feeding hour | Menu composition | Approximate amount g/ml |
| 06:00 | Breast milk or formula | 180–200 |
| 10:00 | Breast milk or formula fruit puree | 180 fifty |
| 14:00 | vegetable puree Fruit juice | 100 fifty |
| 18:00 | Breast milk or formula Cottage cheese Fruit juice | 180 twenty twenty |
| 22:00 | Breast milk or formula | 180–200 |
Example of a daily diet for an 8-9 month old baby
| Feeding hour | Menu composition | Approximate amount g/ml |
| 06:00 | Breast milk or formula | 200 |
| 10:00 | Porridge Fruit juice | 170 fifty |
| 14:00 | vegetable puree Yolk Or meat puree Fruit juice | 170 ¼ pcs. fifty 400 |
| 18:00 | Kefir or baby milk Cottage cheese fruit puree | 180 40 60 |
| 22:00 | Breast milk or formula | 200 |
Sample daily diet for a 1 year old child
| Feeding hour | Menu composition | Approximate amount g/ml |
| 08:00 | Milk porridge fruit puree Fruit juice | 200 thirty fifty |
| 12:00 | Vegetable broth with croutons vegetable puree steam cutlet Fruit or vegetable juice | 30/10 150 60 thirty |
| 16:00 | Kefir Cottage cheese fruit puree | 100 100 fifty |
| 20:00 | Vegetable puree or porridge Baby milk fruit puree | 100 100 fifty |
| 24:00 | Kefir or baby milk | 200 |
If the child continues to receive breast milk, then each feeding should end with the attachment of the baby to the mother's breast.