Spray painting baby food jar lids
Re-Purposing Baby Food Jars | Chickens in the Road Classic
I’ve been working hard to live my belief that if something doesn’t have a function–be it sentiment, beauty, or purpose–it needs to go because it only clutters my focus and stands in the way of doing things I really want to do.
It stands in the way of living my life the way I truly want to live it.
It’s a process, though, and perhaps an eternal one. I’m getting closer with the clear out and renovation downstairs. I’ve done away with a lot of things upstairs, too, over the past year. And I still have a long way to go.
Wait, was this supposed to be about baby food jars?
Just some of my vast baby food jar stockpile. I had them on the floor of the living room while I was sorting and counting what I had in the different sizes.
Baby food jars are fantastic for all sorts of small storage–craft and office doo-dads–as well as many uses in the kitchen (herbs and spices, small batches of things like horseradish, etc), homemade beauty products, candles, storing seeds, gifting various things, and on and ON. Baby food jars are next to canning jars for their versatility and re-usability. You can often find baby food jars at garage sales or in the penny papers, but if you make a habit of letting people know you want jars, you might happen on a stash for free. My friend Faye is helping to raise her granddaughter these days and has masses of baby food jars. She offered them to me, knowing I was a likely suspect for taking them off her hands. I jumped at them, but then had nowhere to put them. They were in plastic grocery store bags (numerous bags) and some ended up on a table on the back porch (where the cats got into them) and others on the bottom landing of the back porch steps (where the dogs and chickens got into them).
My baby food jar mess is a perfect example of why you need to get rid of stuff you don’t need so you can take care of what you do need.
Amazingly, only a few of the jars were broken, and now I have dedicated jar storage space downstairs. (Yay!) Currently, I have somewhere in the neighborhood of 200 jars, in 2-ounce, 4-ounce, and 6-ounce sizes.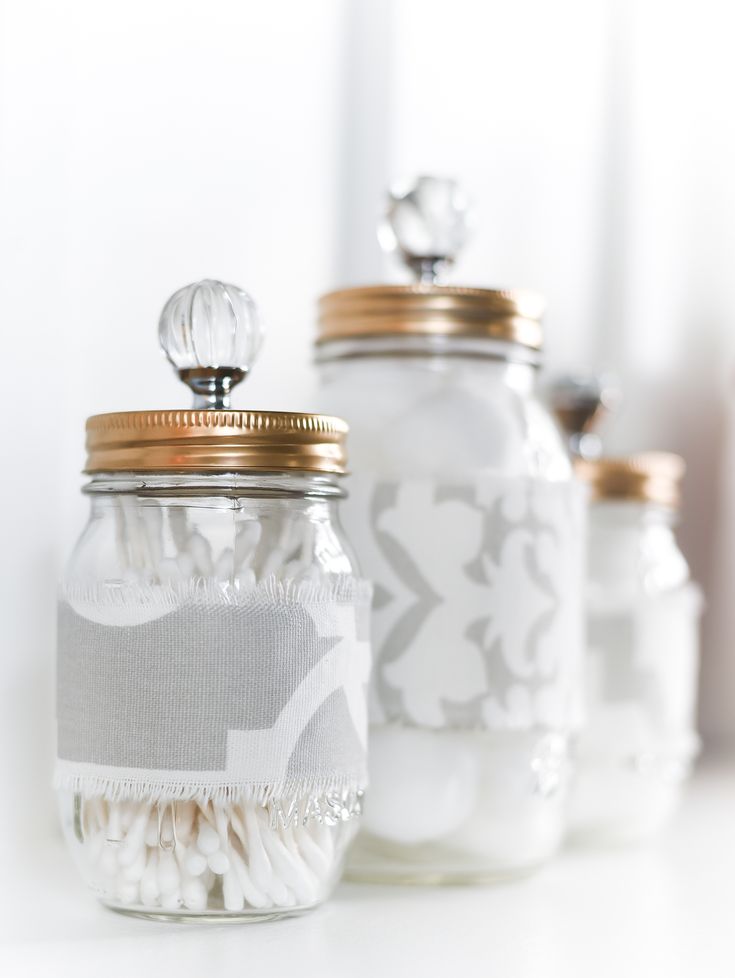 Believe it or not, most of these jars are going to be used in the next six weeks. That’s because we’ll be using them at the CITR Retreat in homemade beauty product classes and candlemaking classes. It’ll take me the next week or so, off and on, to get all these jars ready for students at the retreat.
It won’t be long before I’ll be shoring up my soon-to-be depleted baby food jar collection as Faye has been gathering more bagfuls for me. She told me the other day, “Every time I wash a baby food jar, I think of you.” Now there’s a friend who knows what you like!
Anyway–if you neglect something for awhile, you get to do about 20 times more work cleaning it up. These jars had been outside and gotten dirty, so they needed washing, but not only that, there was still label goo to remove. I’ve tried every “homemade” way to get that sticky label stuff off jars, and sometimes you just gotta turn to a product, especially if you’re dealing with a large number of jars.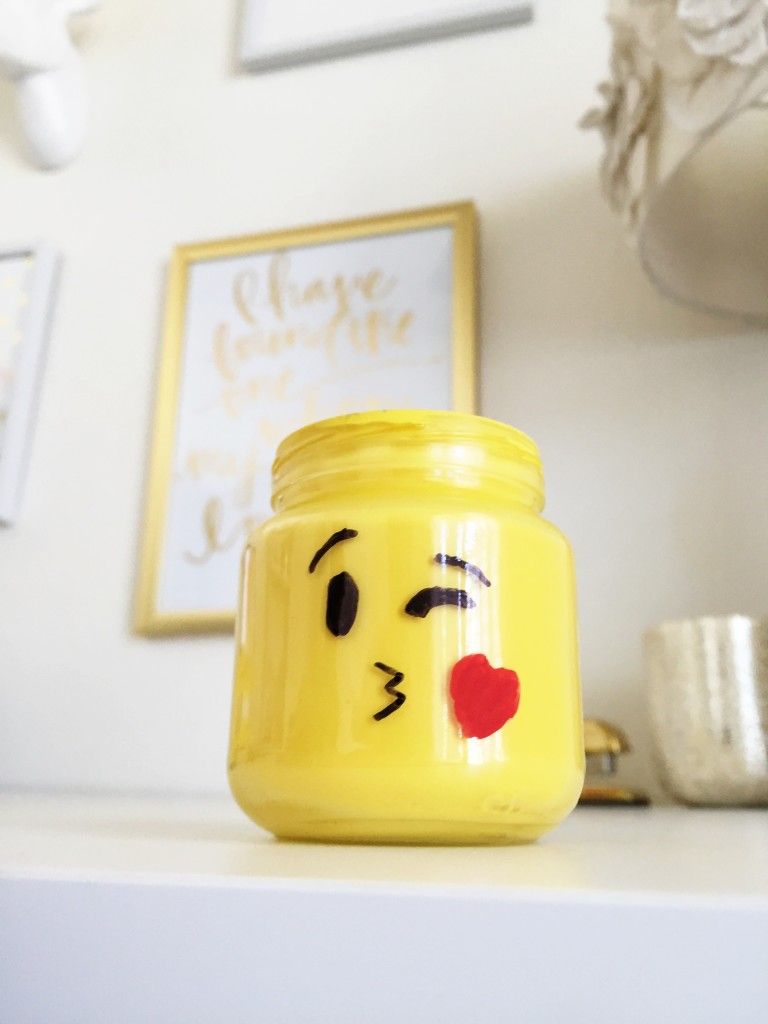 Baby food jar label goo seems especially resistant to removal. I used Goo Gone.
It dissolves the goo and makes it easier to scrub away. It doesn’t completely take away the need to scrub and even scrape a bit, but it makes the job a lot faster and the longer you let it soak on the jar (you spray it on there), the better it works. It’s the best thing I’ve found so far for easing the goo removal.
Free of sticky goo, the jars just take a trip through the dishwasher and they’re sanitized. They stack nicely for storage in paper boxes (the kind that reams of paper come in), sorted by size.
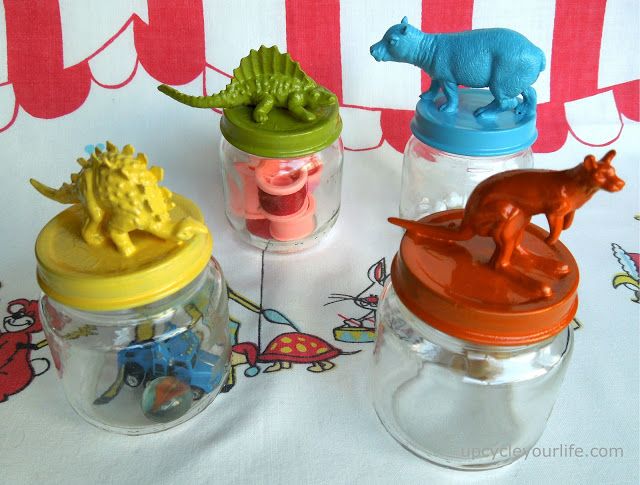
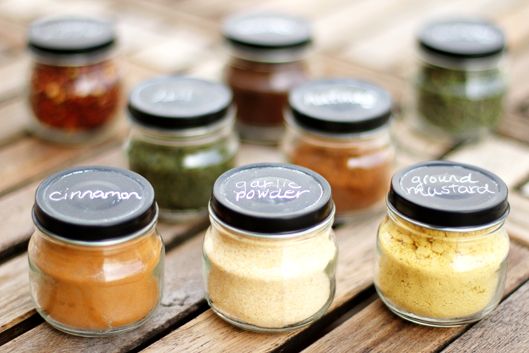
But what about those lids?
Not horrible, but. Who needs Gerber on there? I took the lids outside and sprayed them with a fast-dry chrome paint (labeled for metal).
Now this isn’t a baby jar…..
It’s a jar with style, baby!
DIY Baby Food Jars Turned Valentine Storage Decor
On a recent trip to JoAnns, I was browsing the Valentine section and saw these cute little Valentine jars.
They were adorable and knew I could make something similar myself. Why pay $12.99 each, when I could make 4 for LESS than the price of one?
They were adorable and knew I could make something similar…
I found a sales person and asked, “Where are your chalkboard labels?” and found some really cute heart ones! They TOTALLY matched the look I was going for! I was super excited to get home (and put the kids down for a nap) and get started on one of my new valentine crafts!! YAY!
Getting Started
The chalkboard heart labels were around $5.00, BUT of course, I used my “Handy Dandy” 40% off coupon! I already had spray paints left over from other craft projects.
Since I’m REALLY into turquoise right now, I wanted to make a couple jars using it. I decided to use baby food jars I had left over from my son, but you can use a LARGER jar if you’d like.
Check out the next image to see my inspiration picture.
These are the jars I saw at JoAnns. I had to take a quick pic with my phone.
Step 1 – Spray Paint Your Jars and Lids
I took my jars outside, and spray painted 3 coats on the jars (letting them dry a half hour each time). I did the SAME process with the lids.
My poor grass looks like a CRIME SCENE from the red spray paint, but totally worth it, LOL!
Painting the jars was easy. They turned out really great!
Love the turquoise with the white lids. Really glad I chose this color too!
Quick Tip: To remove the glue from a baby food jar’s label, I recommend Goo Gone. Use nail polish remover to “erase” any expiration dates from the glass.
Step 2 – Add Your Chalkboard Hearts
Once my jars were completely dry, I pulled out my chalkboard heart stickers and gently added them to the jars. Voila, so easy!!
The ORIGINAL inspiration jars did not have chalk heart labels (the hearts were painted on). I thought the chalkboard heart labels gave them a little something EXTRA!
Step 3 – Finishing Touches
To put a finish on this craft, I pulled out some chalk and wrote my little sayings on them. Super cute, I can’t wait to start using them!
I {heart} my new Valentine storage jars!!
Quick Tip: Whenever I write with chalk, I sharpen my chalk FIRST. It’s much easier to write with. Works great every time!
There are so many things you can do with these jars. I think they would make a REALLY CUTE gift with candies inside to give someone or even use them for display or storage.
There are so many things you can do with these jars.
I plan on using these cute little jars for storage (maybe to store beads and buttons in my craft area)!! Since I used chalkboard labels, I can WRITE what’s inside the jars.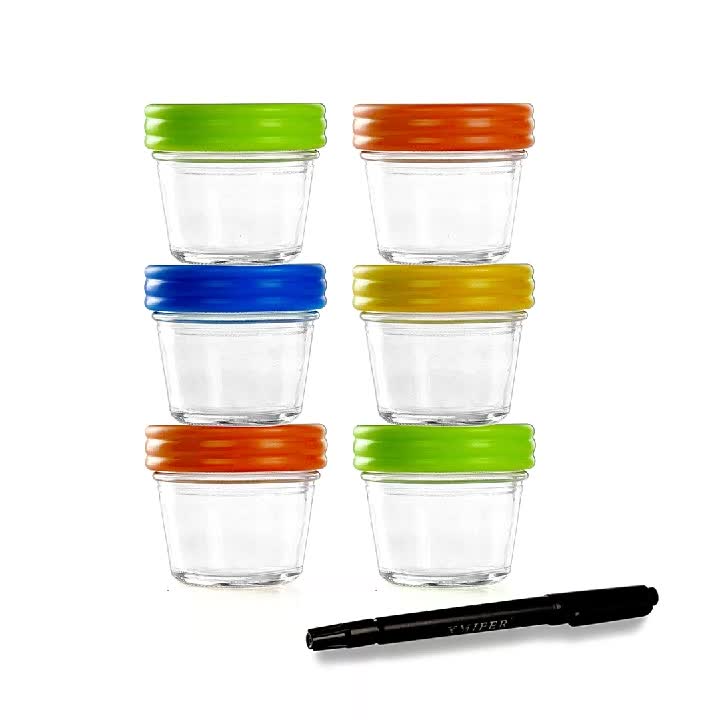
One of my FAVORITE things about this craft, is you don’t have to spend a lot to make. I’m sure we all have cans of spray paint and a couple glass jars saved. All you need to do is grab some chalk labels and you’re set!
Love, Courtney
DIY crafts from jars :: Infoniak
15 Oct, 2015 02:40 59676 Crafts
18+
Useful Tips
If you still have small jars of jam, baby food or something else, you should not put them in the pantry and even more so throw them away.
Of course, you can store something in such jars - spices, tea, coffee - and you can make interesting crafts out of them, and involve children in creative work.
Here are some interesting crafts you can make from regular jars:
DIY flower pots and vases
Small jars can be used to make beautiful flower pots .
You can also make a flower vase. These buttercups were almost in bloom, so they decided to cut them off and put in the decorated water jar .
If wrap them with pretty paper , tie a string and add wish tag , then you can create a beautiful gift or bonus to the main gift .
See also: 20 easiest crafts for everyone
Vases from glass jars for the holiday
You will need:
- acrylic paint
- water
- flowers.
1. Pour some paint into the can.
2. Start turning the can a little so that the paint "draws" waves inside the can.
3. Lay the jars on their side and leave to dry overnight. Then turn the jars upside down and leave for a couple more hours for the jar to dry at the bottom.
* Different inks or inks of similar shades can be used.
* If you use a brush, you can draw patterns.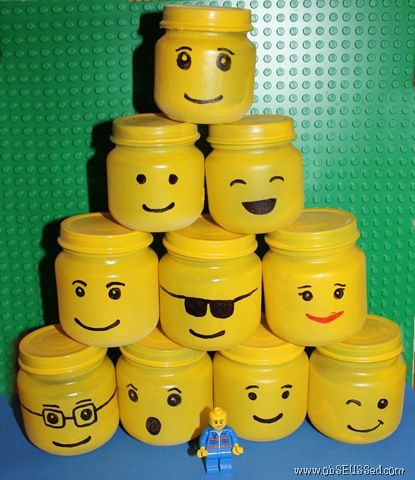
See also: DIY crafts for the home
Glass jar crafts: handy nail polish remover
You will need:
sponge
nail polish remover.
How to make a snow globe out of a glass jar
You will need:
- small jars with screw caps
- small artificial trees (maybe toys)
- degreaser (if necessary)
- spray paint or acrylic paint (optional)
- glycerin superglue
-05
- glitter
1. Remove the label and wipe the jar with a degreaser. If there is no label on the jar, then just skip this step.
2. If desired, you can paint the lid of the jar in any color.
3. Apply a little superglue to the inside of the jar lid and to the bottom of the faux wood.
4. Leave to dry for 24 hours, then pour 1 teaspoon of glitter into a jar and fill with water, adding 5 drops of glycerin.
5. Close the lid tightly and turn the jar over (so that the tree is in the correct position).
Done!
See also: How to make a vase with your own hands
Beautiful pumpkin jars
You will need:
- acrylic paint
- glitter paint
- brushes.
1. Start painting the jars. It will take 2-3 coats of paint. If the theme is "Autumn" or "Halloween", then you can use orange paint (under the pumpkin).
2. When the paint is dry, apply a coat of glitter paint on top.
3. You can draw eyes and mouth on the jar with a brush and black paint.
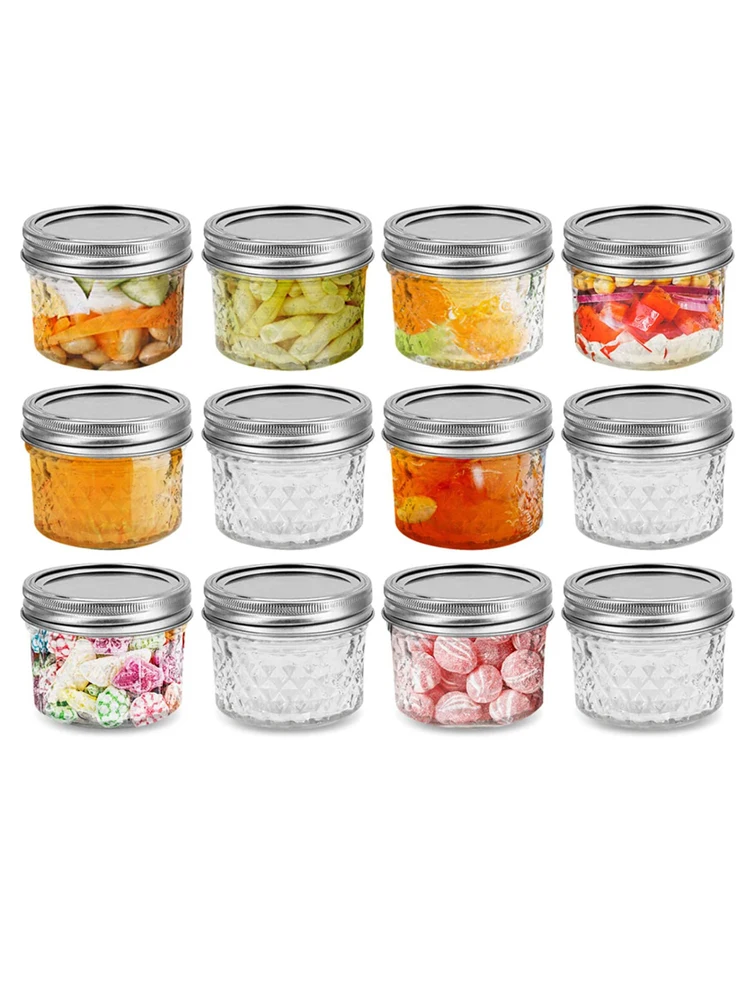
* Fill the jar with sweets and you're done!
Jar craft: wax crayon organizer
You will need:
- round tray
- small jars
- spray paint (optional)
- glue (for glass or superglue)
- masking tape
- acrylic paint in different colors.
1. Put all the jars on the tray to see how much you can fit on it. Mark where each jar will be with a piece of masking tape.
2. If desired, you can paint the tray (directly with pieces of masking tape). To better paint it with spray paint, place the tray in a box (it will protect from the wind). It's best to paint outside.
3. Choose an acrylic paint for each jar. You only need to paint the inside of each jar.
To make it easier to paint the inside of the jar, you need to pour some paint inside, add a little water, close the lid and start turning the jar over so that all the paint spreads along the inner walls.
4. Turn the colored jars upside down (remove the lids) and place on a newspaper or paper towel to dry for about 1 hour.
5. Then turn each can on its side and begin to twist it so that the paint is evenly distributed along the sides of the can. The paint will need at least a day or even two days to dry.
6. Remove the masking tape from the tray, apply glue in its place and place a jar on each mark with glue.
The crayons, pencils and/or markers can now be sorted by color.
Chocolate snowmen in glass jars with screw cap
For one snowman you will need:
- 3 small clean jars (without labels) with screw caps
- hot chocolate
- small marshmallows optional)
- small twigs
- felt or a small piece of fabric (for a snowman scarf)
- embroidery thread
- decorations (in this example, star-shaped stickers)
- polymer clay (for nose) or plasticine
- small lollipops (for buttons and hats)
- little Santa Claus hat
- glass marker
- superglue or glue gun with hot glue
- secateurs orscissors (to cut off small branches).
1. Fill one jar with marshmallows, another with chocolate or cocoa powder, and a third with small candies. Close covers.
2. Glue to the jar, which will act as the snowman's head, eyes and nose. You can use chocolate chips with icing, felt (brown and white for pupils) and superglue, polymer clay, plasticine, marker or acrylic paint - there are many options.
3. Use glue to attach small branches to the jar in the middle, which will act as the snowman's arms.
4. Glue one jar to another.
5. Cut out a scarf and gloves for the snowman from the felt.
5.1. Wrap the scarf around the snowman and secure with glue.
5.2. Take a small piece of embroidery thread and glue one mitten to each end. Hang the mittens on the snowman and secure them with glue.
6. You can add various decorations to the snowman: stars, stickers, glue pieces of felt, small hats, etc.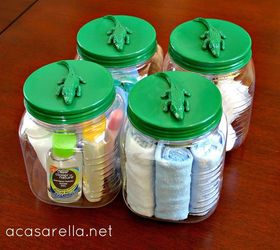
Crafts from cans: minions
You will need:
- small jars
- yellow paint
- toy eyes (they can also be made from plasticine or super marker or paints)
- draw on 9005 hot glue and cardboard 9006 glue.
1. Paint the jars yellow. You will need to apply 2-3 coats of paint.
2. After the paint has dried, cut a thin strip of black cardboard and glue it just above the middle of the jar, where the minion's eyes will be.
3. Glue the toy eyes onto the black stripe, or you can use plasticine instead of plastic eyes.
4. Draw a smile with a marker or acrylics and you're done!
Other bottles can be decorated in a similar way, but colored paper can be used instead of paint:
Decoration of glass jars for a house or cottage: candles on a branch
You will need:
- a large branch and a pot or tree in the garden
- decorative stones (you can try ordinary small stones)
- wire
- wire cutters
- small jars
- small candles (church) or artificial (battery operated).
1. Wrap one piece of wire around the neck of each jar. Leave more wire on the sides so that you can twist it and make loops for the future handle (see image).
2. Take another piece of wire and attach it to the loops of the first wire. This will make a handle so you can hang your lamp. Cut off the excess parts with pliers.
3. Pour some decorative stones into the jar.
4. Place your candles on the pebbles in the jar.
Now you can hang up your crafts and light the candles.
Author: Filipenko D.S.
We are in social networks
How else can you use baby food jars?
Tags
Decor Crafts Jewelry Where to put baby food jars? Kind of a shame in the trash. They are so pretty and good quality. Probably, many young mothers asked this question when the issue of taking out the garbage arose. You can understand. Since it is obvious that such strong packaging can be used for other purposes.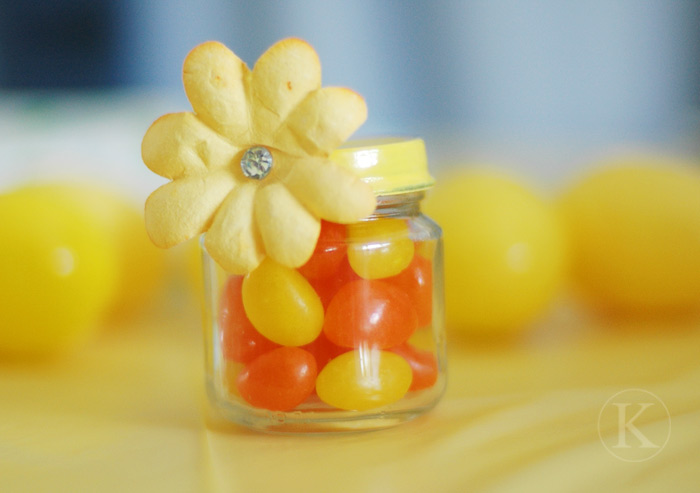 And for which, now we will tell!
© Pexels
Extra storage space
© Pexels
Of course, something big will not fit in such small jars. Therefore, it is better to focus on something small. Many craftswomen and just those who like to collect something can find great potential in these containers. Beads, elastic bands, hairpins, threads, buttons, decorative elements - all this is great for storing in such jars. In addition, thanks to the transparency of the glass, you can quickly find the right jar. And you don't need to sign anything.
Pencil and marker holder
© Pexels
Jars are also suitable as holders for pencils, crayons or markers. Due to their small size, they are perfect for both children and adults. And although in this case transparency does not really play into the hands of the style, this can be corrected with the help of painting.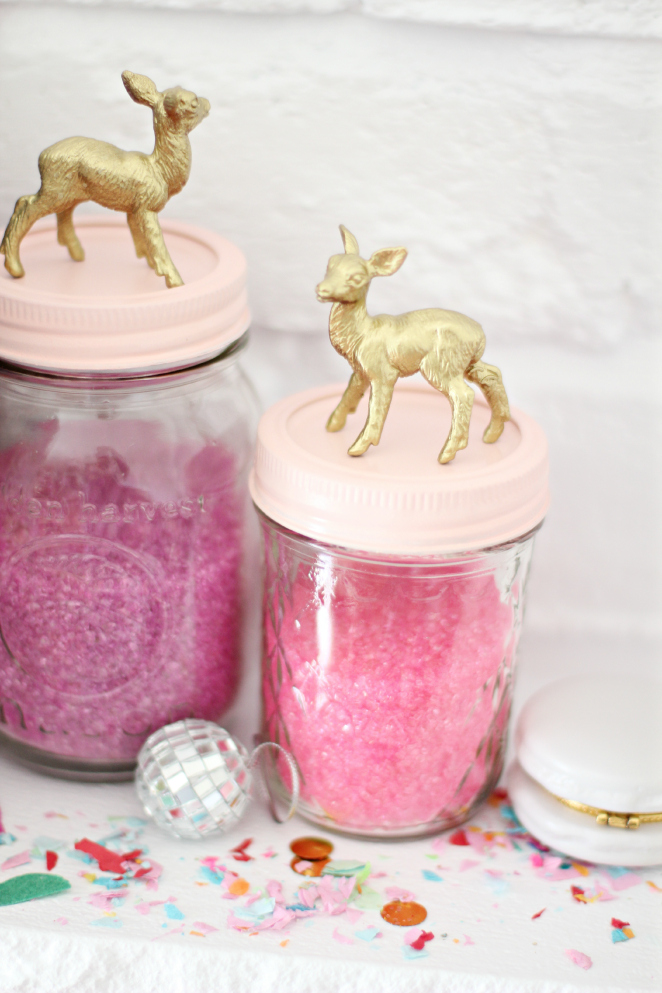
For example, you can take several cans and use acrylic paints to give them a more cheerful look. The jar should be painted from the inside. This can be done with a brush, sponge or colored water. The latter can be done as follows: a little paint is poured into a jar, and then a little water. After the jar, you need to close and shake thoroughly for a while until the paint evenly covers the walls of the jar. At the end, open the jar and leave to dry, but do not forget to change its position from time to time - for even color.
Space for parts
As with crafters, crafters can also use jars. After all, you need to store small parts somewhere for repairs. Nuts, bolts, nails and screws can be excellent filling for extra jars. Thanks to good lids, nothing can crumble, and the transparency of the glass will reduce the time it takes to find the next desired part.
Vases for flowers and seedlings
© Pexels
What if there is a small bouquet of daisies or lilies of the valley in the house, but there is no small vase? Of course, take a jar of baby food.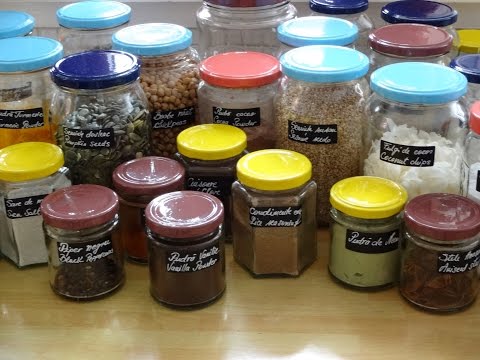 It's perfect for a small vase. And if you decorate it with paints or other decorative elements, you get just a wonderful picture.
In addition to serving as a vase for flowers, it is also used as a container for seedlings. Or for growing herbs for cooking in the kitchen.
Decor element
© Pexels
Of course, if the jar can be painted, then something else can be done with it. Lots of decor options. From decorating and gluing to re-decorating into polymer clay houses and turning into a New Year's toy.
In the latter case, you will need glitter, a decorative element (a small Christmas tree, a house, etc.), distilled water and glycerin. A decorative element is attached to the wrong side of the jar lid with glue. At the same time, distilled water is poured into the jar itself (a little more than half of the jar), and then glycerin is added. Since we need it for viscosity. You can buy it at any pharmacy. Then add sparkles or artificial snow.