Stage 3 homemade baby food
18 Stage 3 Baby Food Recipes (Easy + Delicious)
Home » Feeding Style » Baby Food Purees » Stage Three » 18 Stage 3 Baby Food Recipes (Easy, Delicious + Homemade)
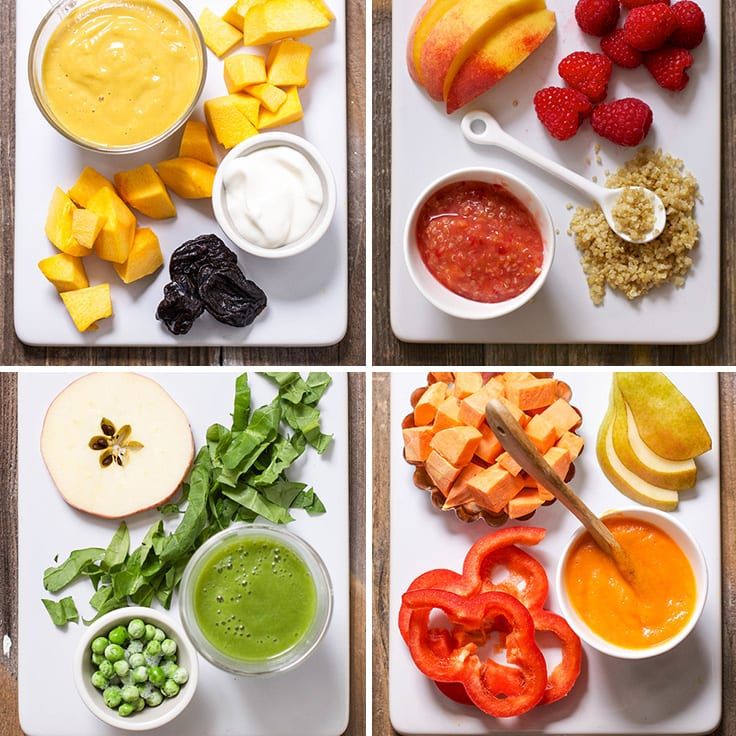
These 18 Stage 3 Baby Food Recipes are easy to make, delicious for baby to eat and completely homemade! They are combination purees with soft chunks that will get baby ready for the next stage – finger foods. Great for babies 9-12 months.
Medically reviewed and co-written by Jamie Johnson, Registered Dietitian Nutritionist (RDN), and Lauren Braaten, Pediatric Occupational Therapist (OT).
Stage 3 Baby Food RecipesNow that your baby has mastered Stage 1 as well as Stage 2 baby food purees, it’s time to move on to the last phase of their puree journey – Stage 3!
Stage 3, or Chunky Purees, is the last stop of the puree culinary adventure for baby – the next phase is finger foods.
What exactly are Stage 3 Baby Purees? Well, put simply, Stage 3 baby foods are a puree with small chewable chunks inside. Having small manageable chunks in a puree gets your baby ready for finger foods by having them explore similar tastes that they are used to but with completely different texture profiles.
Baby has to learn how to move the chunks around their little mouths, how to chew on those chunks and finally they have to learn to swallow them without gagging or choking. It’s a sensory and exploratory practice that takes some time, but trust me, baby will learn how to do all of these things in no time at all.
Looking for even more baby food ideas? You can also check out my best-selling cookbook for even more information and recipes.
Reasons to Love these Homemade Stage 3 Purees- wholesome
- delicious
- freezer-friendly
- nutrient-dense
- full of whole grains – millet, whole wheat pasta, quinoa, etc
- great ideas for breakfast, lunch and dinners
- can be made slightly chunky or really chunky depending on where baby is at with this stage of purees
- baby doesn’t have to have teeth for these chunky purees – they will be able to gnaw at any of these chunks with their gums
Frequently Asked Questions
When can you introduce baby to stage 3 purees?
You can introduce Stage 3 purees to your baby around 9 months of age.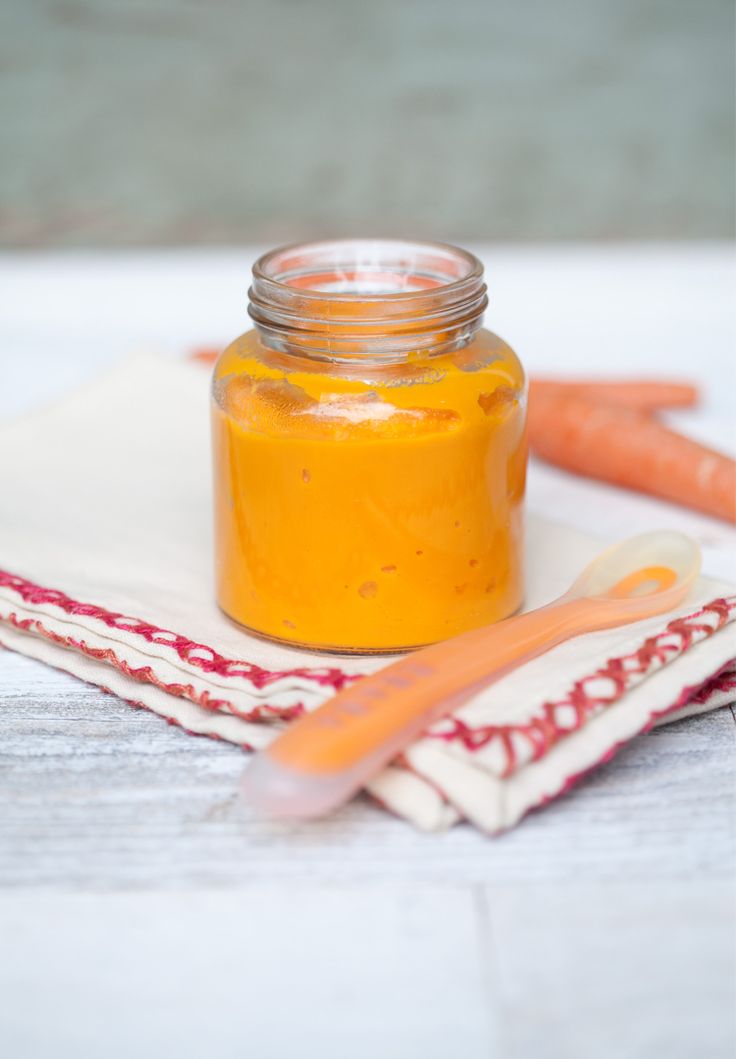 You will want your baby to have had a great deal of practice eating smooth combination purees before you serve them chunky purees.
What are Stage 3 Baby Foods?
Stage 3 baby foods are a thick puree with soft chewable pieces of food inside.
What is the difference between Stage 2 and Stage 3 baby foods?
The only difference between Stage 2 and Stage 3 baby food is that Stage 3 baby foods are slightly chunkier than Stage 2 purees. Traditionally, Stage 3 baby foods are meant to be the last step in the puree process before you start your baby on finger foods. You are giving your baby some time to practice mouthing and chewing on small pieces of cooked foods before handing them solid foods. Of course, you can always introduce finger foods at the same time as Stage 3 purees.
Why are Stage 3 Baby Foods Important?
Stage 3 baby foods are important because they will help teach baby what to do with small chunks of food in their mouths, how to move the chunks around their mouth, how to “chew” these chunks as well as how to swallow them. This stage is important because you are exposing them to a ton of different textures and taste sensations.
How to Make Stage 3 Baby Purees
You can make any homemade Stage 2 baby food puree into a Stage 3 baby food simply by not blending the produce into a smooth puree.
- Cook the fruits, veggies, grains and meat according to the recipe.
- Place in a food processor or blender.
- Pulse the puree in 5-10 second intervals until you have small ‘pea’ size pieces and everything is incorporated.
- Serve to your baby.
Yes, you can start finger foods at any age! This stage is all about texture and taste exploration, so the more you introduce to your baby now, the easier it will be for them when they start eating table foods. You can read my Ultimate Guide to Finger Foods for more information.
HELPFUL TOOLSThese tools will make it a lot easier to make homemade baby food purees. For more of my favorite kitchen tools make sure to check out my shop.
- blender or food processor
- baking sheet
- saucepans
- knives
- veggie peeler
- spatula
- freezer tray
- storage containers for fridge
- stasher bag
- reusable pouches
- baby food maker
Every recipe below has specific instructions on how to store that particular puree, but these are the general guidelines.
REFRIGERATORYou can store the puree in an airtight container in the fridge for up to 4 days.
FREEZERMost homemade puree can be frozen for up to 4 months.
- Spoon puree into a freezer storage container. Do not overfill.
- Place the lid on the storage container or cover with a piece of saran wrap, and label with the date and recipe name.
- Place the tray into the freezer and let it freeze completely — preferably overnight.

- Pop-out the baby food cubes and place them in a ziplock baggie or stasher bag. Don’t forget to relabel the baggie or stasher bag for future reference.
Need more information on how to store your baby foods? Head over to my Best Baby Food Storage Containers – Plus 6 Tips on Freezing and Thawing post!
FEEDING TIPS
- Have a spare spoon (or three!) – even very young babies often want to be involved in feeding themselves as much as possible. Giving your baby an extra spoon to hold can be helpful in giving her a sense of control and also promotes hand-eye coordination. Allow your baby to use spoons as a teether during the meal. There are many great options out there but a few we particularly love include the Olababy 3 Piece Set, the NumNum Pre-Spoon GOOtensils, and the ChooMee FlexiDip Baby Starter Spoons.
- Purees are great to keep in your baby’s regular rotation of foods – but if you start feeding with traditional weaning using purees, make sure to progress beyond eating ONLY purees.
 Once your baby can safely and comfortably swallow purees (usually by 7 or 8 months) it’s time to introduce other textures, such as teething biscuits and soft-cooked finger foods. Moving onto additional textures in a timely manner may help prevent feeding difficulties at a later age.
 - Throwing spoons is a common phase that all babies go through at one point or another. One of the best ways to handle spoon throwing is to ignore it and keep feeding your baby as usual (with an extra spoon you already have at the table). If your baby ends up also throwing back up spoons #2 AND #3, simply encourage your baby to eat with their hands until they appear to be finished with the meal. ***Give baby plenty of opportunities to practice putting items in and taking items out of containers outside of mealtimes.
Chunky Summer Veggie Pasta
5 stars (5 ratings)
This Chunky Summer Veggie Pasta for Baby and Toddler combines all the flavorful tastes of summer into one bite-size dish!
Get the recipe
Oatmeal with Beets + Carrots
5 stars (8 ratings)
Yummy healthy oatmeal gets mixed with beets and carrots, spices, and raisins for a veggie packed breakfast your toddler won’t be able to resist.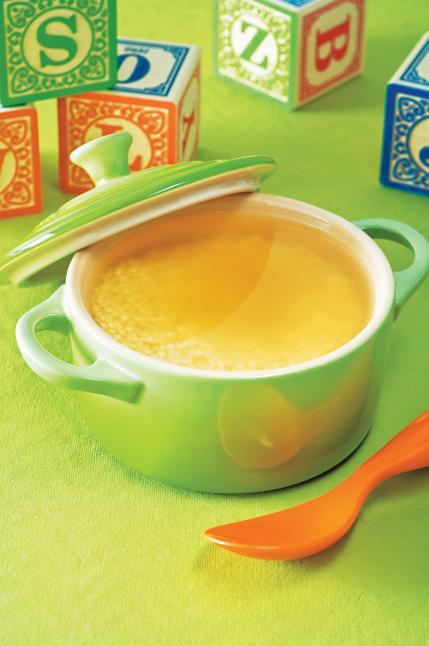
Get the recipe
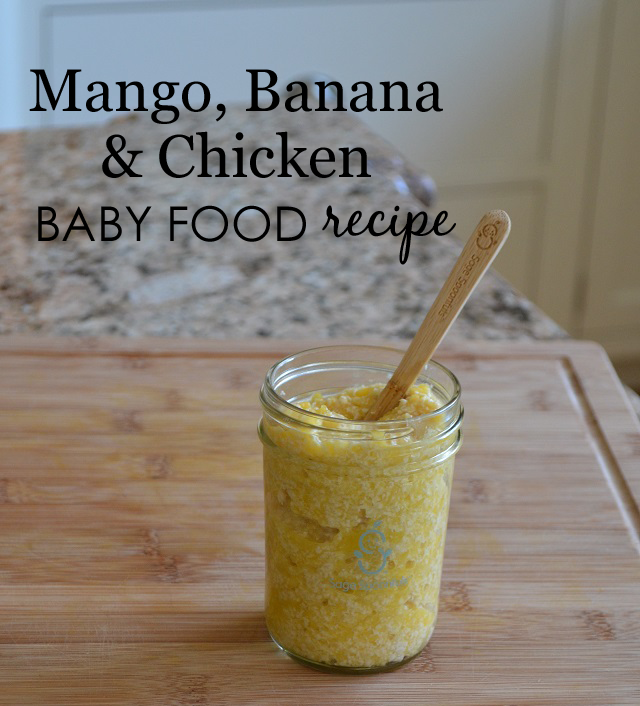
Green Baby Puree with Chicken
5 stars (7 ratings)
Green Baby Puree with Chicken is a delicious chunky puree that can be made in under 30 minutes! It is loaded with healthy green vegetables, lean protein and topped off with some apple sweetness.
Get the recipe
Blueberry Chickpea with Rosemary Baby Food Puree
5 stars (40 ratings)
This puree is packed with antioxidants, fiber, Vitamin A and C from the blueberries and protein, zinc, manganese, folate and iron from the chickpeas. All of that goodness packed into a super simple and delicious puree!
Get the recipe
Avocado for Baby – Puree & BLW
5 stars (16 ratings)
Avocados are a superfood and great first food for babies 6 months and up. Serve them pureed, smashed, or as a finger food for baby-led weaning.
Get the recipe
More Recipes Baby will Love- 8 Baby-Led Weaning Meal Ideas for Baby + Toddler
- 4 Baby-Led Weaning Snack Food Ideas
- 6 Baby-Led Weaning Breakfasts
- The Ultimate Guide of Fingers Foods for Baby
- 15 Healthy Finger Foods for Toddlers (that they will love!)
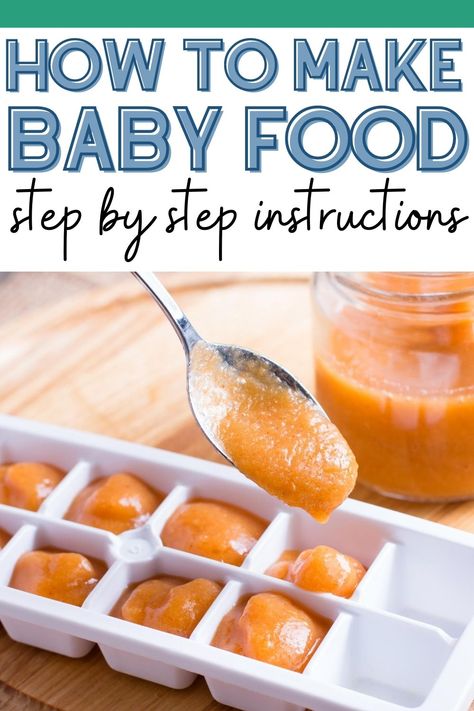
- 2 cups sweet potato, peeled and chopped (roughly 2 small sweet potatoes)
- 2 cups strawberries, trimmed and chopped
- 1/2 tsp cinnamon
- 1 cup cooked farro
Steam: In a medium saucepan, bring 2 inches of water to a boil.
 In a steamer basket add the sweet potatoes, cover and steam for 15 minutes. Add the strawberries and sprinkle with cinnamon and steam for 3 more minutes. Let cool slightly. Reserve steamer water.
Blend: Transfer the cooked sweet potatoes and strawberries as well as the cooked farro into a blender or food processor. Pulse in 5-10 second increments until all of the ingredients are combined and you have small pieces of food.
Eat: Serve to baby and enjoy.
Age: 8+ months
Yield: 20 ounces
Storage: Fridge – store in an airtight container in the fridge for up to 4 days. Freezer – can be frozen for up to 4 months.
Notes on Strawberries: in the spring time when strawberries are not at their juiciest, I find that giving them a quick steam helps make their flavor more impactful.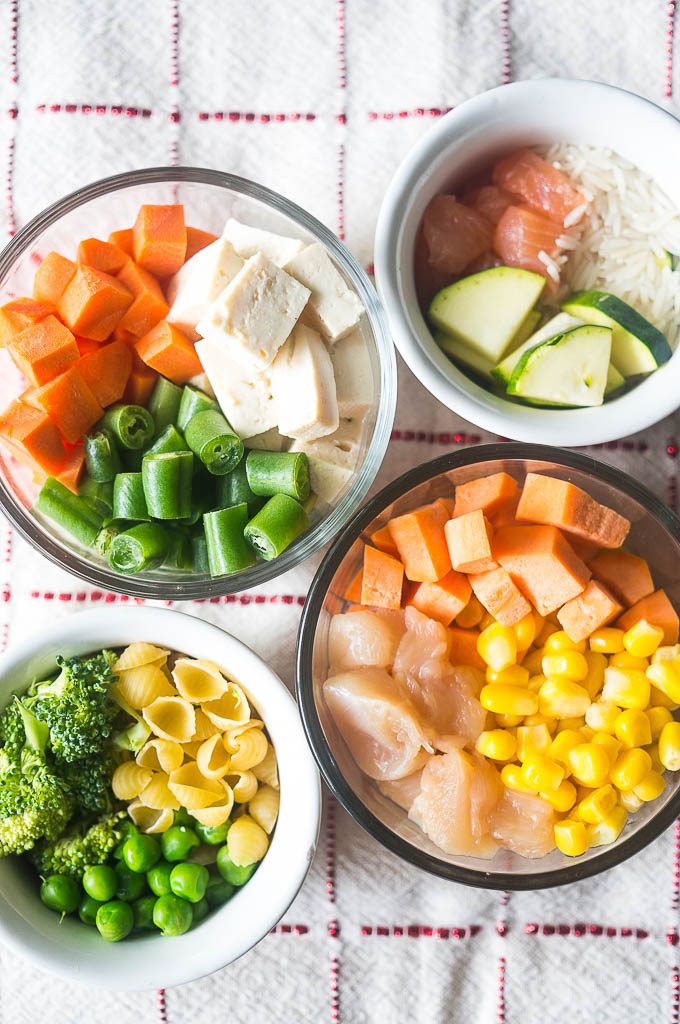 If you are making this at the height of strawberry season and your strawberries are bursting with flavor, feel free to skip the steaming step and you can add them straight to the blender before pulsing.
Blender
Reusable Pouches
Bumkins Baby Bowl
NumNum Pre-Spoon GOOtensils
Did you make this recipe?
Tag @babyfoode on Instagram and hashtag it #babyfoode!
Pin Recipe Email a Friend
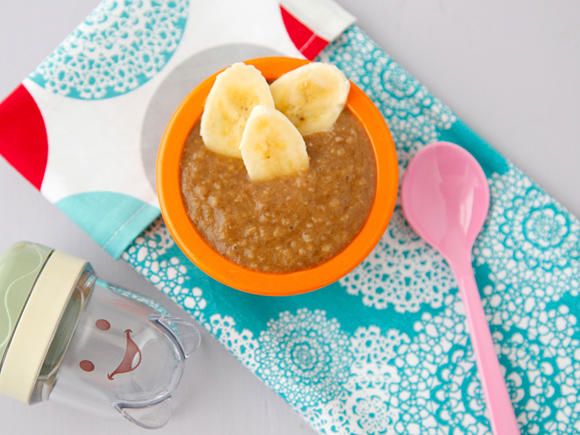
Strawberry, Sweet Potato + Farro Baby Food (stage 2 or 3)
Home » Feeding Style » Baby Food Purees » Stage Two » Strawberry, Sweet Potato + Farro Baby Food
by Michele Olivier on May 3, 2016 (updated Feb 26, 2021)
Jump to Recipe
5 stars (7 ratings)
This chunky Strawberry, Sweet Potato + Farro Baby Food is a delicious meal for baby! You can either leave chunky or puree and serve as a puree. Great for stage 2 or 3 baby food.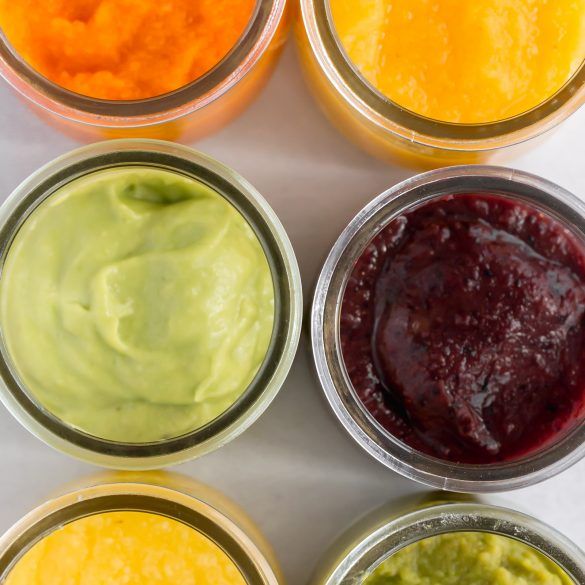
This post is sponsored by Babymoov but my love for this product is all my own! Thank you for supporting the brands that support Baby FoodE!
Strawberry, Sweet Potato + Farro Baby FoodOh man! Sweet potatoes, strawberries and cinnamon <——- this is a match made in baby puree heaven!
This puree is a little sweet and a little savory – a deep rich taste from the sweet potatoes, a little summer fun kick from the strawberries and a little spicy wholesome cinnamon for a complimentary flavor kick, are all blended together before being swirled in with nutty and chewy farro.
You can serve this as a chunky puree with a little cooked farro, or you can puree the farro along with the sweet potato mixture for a smooth puree for baby. Either way, this puree has it going on!
I spooned this puree into reusable pouches for the girls and they couldn’t get enough! They went through 6 pouches in 2 days!! I probably should monitor their pouch intake but when they are eating pouches full of beta carotene, vitamin C, antioxidants, fiber and protein for a snack, I always cave.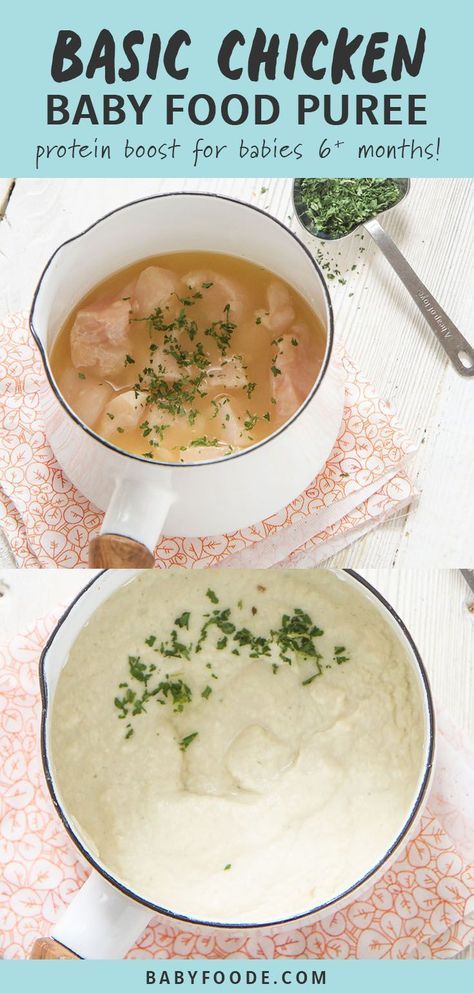
- 2 cups sweet potato, peeled and chopped (roughly 2 small sweet potatoes)
- 2 cups strawberries, trimmed and chopped
- 1/2 tsp cinnamon
- 1 cup cooked farro
Instructions for Nutribaby
In the large basket, place the sweet potatoes and start a 15 minute steam cycle.
In the small basket, place the strawberries and sprinkle with cinnamon. When the first 15 minutes for the sweet potatoes are done, add the small basket of strawberries ontop of the sweet potato basket and start a 3 minute steam cycle. Let both cool slightly.
Transfer both the sweet potatoes and strawberries to a blender and puree until smooth, using the juices from the cooking process if needed.
Mix the puree with the cooked farro. For a chunky puree, mix the puree and whole farro and serve. For a smooth puree, add the farro to the blender after pureeing the sweet potatoes and puree or pulse until you reach your desired consistency.
Instructions for Regular Cooking Method
In a medium saucepan, bring 2 inches of water to a boil. In a steamer basket add the sweet potatoes, cover and steam for 15 minutes. Add the strawberries and sprinkle with cinnamon and steam for 3 more minutes. Let cool slightly. Reserve steamer water.
Transfer all ingredients to a blender or food processor and puree for 1-2 minutes or until smooth, adding cooking water in if needed in 1/4 cup increments.
For a chunky puree, add in the farro and mix until incorporated. For a smooth puree, add the cooked farro to the blender and puree unitl smooth.
Age: 6+ months
Yield: 20 ounces
Storage: Fridge – store in an airtight container in the fridge for 3-4 days. Freezer – can be frozen for up to 4 months (this and this are my favorite freezer storage containers).
Favorite Kitchen Tools: Get a list of my favorite kitchen tools to make the best baby food here!
Notes on Strawberries: in the spring time when strawberries are not at their juiciest, I find that giving them a quick steam helps make their flavor more impactful. If you are making this at the height of strawberry season and your strawberries are bursting with flavor, feel free to skip the steaming step.
Did you make this recipe?
Tag @babyfoode on Instagram and hashtag it #babyfoode!
Pin Recipe Email a Friend
free guide when you subscribe! How to Feed Your Baby« Previous PostYellow Squash + Thyme Baby Food Puree
Next Post » Beet Chocolate Muffins for Toddler + Kids
Homemade baby food recipes for 1-3 years old
person Posted By: Alexander Puzankevich On: comment Comment: 0 favorite hit: 320
Homemade baby food tastes better and gives you the confidence to know exactly what your baby is eating. It also gives you the freedom and flexibility to change the combinations and textures of your child's food to suit their needs. nine0013
Homemade baby food may seem like an impossible task, especially for a new mom, but it's not as hard as you think and definitely worth the effort.
Homemade baby food tastes better and gives you the confidence to know exactly what your baby is eating. It also gives you the freedom and flexibility to change the combinations and textures of your child's food to suit their needs.
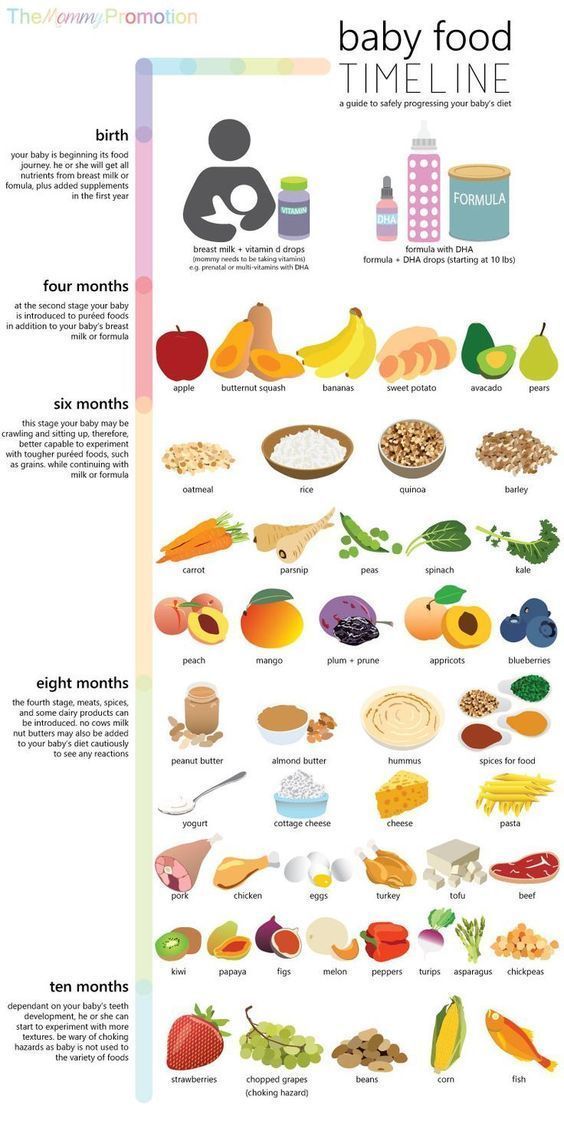
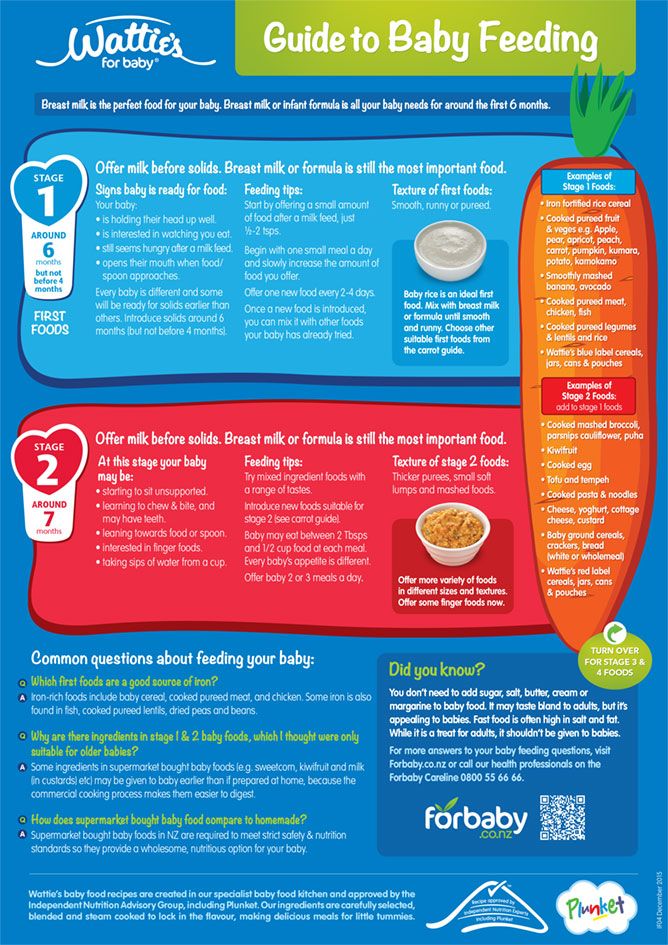
First stage baby food: what is it and when should I start? nine0013
The first stage is the first food your baby will be introduced to from about 6 months of age. In the past, some doctors have recommended starting your baby on solid foods as early as 4 months of age, but the American Academy of Pediatrics recommends waiting until at least 6 months of age before introducing anything other than formula or breast milk to your baby. .
Baby food should have a thin, smooth texture in the first stage because your baby may still have a strong tongue thrust reflex. The food at this stage should not have much texture because otherwise your child may experience suppression or vomiting. nine0013
At this point you also want to use mostly single ingredient meals and you will need to introduce one food at a time and wait a few days before introducing a new food to make sure your child does not react to that particular food.
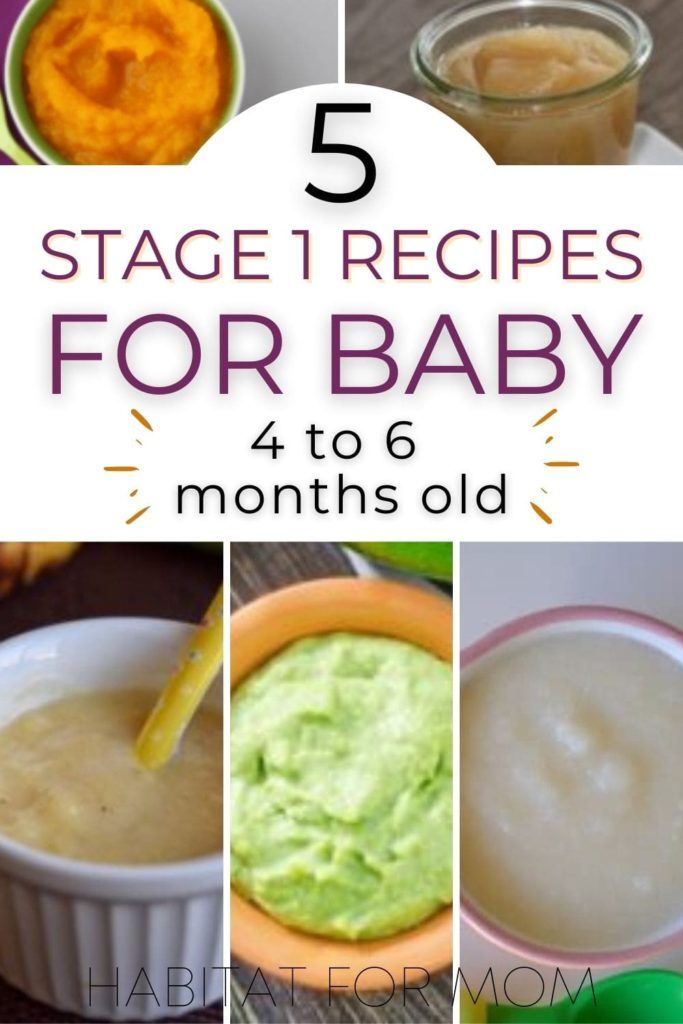
Step 1 Baby Food Recipes
For this step you will need a blender, food processor, Baby Bullet or hand blender.
Also, everything except bananas and avocados you will need to cook before blending, but make sure you don't use oil or butter in the cooking process because fat and dairy are hard for kids to digest at this young age. To cook vegetables and fruits, they can be steamed, boiled or baked in the oven. nine0013
To steam fruits and vegetables, you can use a skillet with a steam insert or pour a small amount of water into the bottom of the pot, cover, bring to a boil and cook until the vegetables are very soft (Note: make sure make sure you use enough water so that it doesn't boil away before the vegetables are cooked - about half an inch to an inch of water in the bottom of the pan).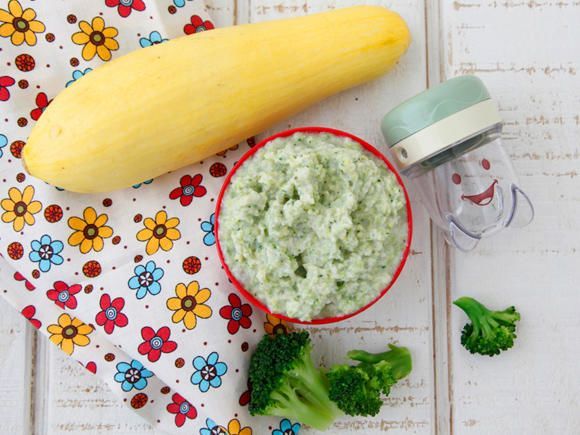
To roast fruits and vegetables, set the oven to 400 degrees, arrange the fruits or vegetables in a single layer on a baking sheet and roast until tender - the roasting time will depend on what you are cooking. nine0013
When fruits and vegetables are ready, add them to a blender, food processor or baby bullet, add a little water and mix.
After mixing until smooth, check the consistency. If the food is still too thick, add more water until the fruit or vegetable is a smooth, runny consistency.
Second stage Baby food: what to introduce now and when to introduce?
The second stage of baby food is when you start adding more texture and combinations to your baby's diet. This stage usually begins between 7 and 8 months of age. nine0013
Instead of mixing your child's food until it's thin and smooth, you can leave a little more texture in his or her food in the second step. You can also start creating delicious combinations with the products already featured.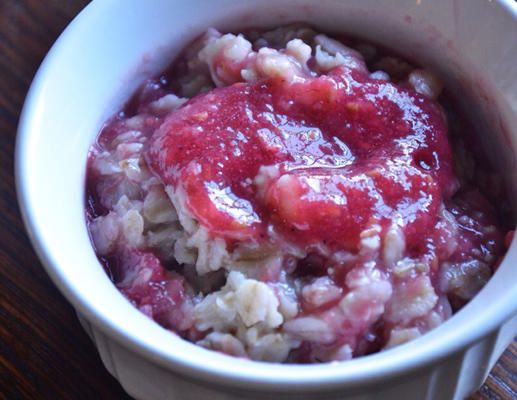 However, with new foods, you need to keep introducing them every few days to keep looking for a reaction.
At this point, you can also start introducing allergy risk foods such as eggs, nut butter (yes, nut butter, including peanut butter - I explain why here) and fish. This is also a great time to add yogurt and some cheeses (like cheddar or parmesan) to your child's diet. nine0013
Homemade Baby Food Recipes Step Two
Oatmeal and Peanut Butter
Ingredients
1/2 c. Old fashioned oats
1 c. water
1-2 T. Peanut butter
1/4 T. Cinnamon (optional)
How to cook?
Bring water to a boil, add oats and reduce heat to medium. Cook until the water is absorbed and the oats are soft. Add peanut butter and cinnamon. Let cool and serve. nine0013
Yogurt and apples with cinnamon
Ingredients
1/2 p. Yoghurt
1 apple
1T. Butter
1/4 ton Cinnamon (optional)
How to cook?
Peel the apple and cut it into small pieces. Add the apple and oil to the pan and sauté until the apple is very soft. Add cinnamon and stir until smooth.
Let the apple cool and then cut it into small pieces with a fork or potato masher. Mix apple with plain yogurt and serve. nine0013
Third stage Baby food: what to feed a child who is becoming more independent?
The third step in baby food is teaching your child independence in eating (and snacking). At this stage, you will be feeding your child food that he can feed himself. This includes thicker food that he or she can eat with utensils and food that he or she can eat with his or her hands.
Some great and nutritious snacks are soft vegetables, soft fruits, pasta, scrambled eggs and cheese. When choosing snacks, avoid choking foods such as hot dogs, hard raw vegetables such as carrots and celery, whole grapes, whole nuts and seeds, and hard candies. nine0013
Homemade baby food recipe for step 3
Parmesan pasta with peas
Ingredients
1/4 p. Dry pasta - shells, elbows, or ditalini are best.
1 t. Unsalted butter
2 t. Parmesan cheese
2 t. Frozen peas
How to cook?
Cook pasta until soft - not al dente. Add the butter until it melts and then add the parmesan cheese and peas. Stir and cook the mixture until it is smooth and the peas are steamed. nine0013
Storing mixed baby food
As I explained in my article on baby food in step one, the easiest way to always have homemade baby food on hand is to make a large batch and freeze it. This allows you to simply defrost what you need every day.
The best way to freeze baby food is to freeze it in ice trays. Each cube is approximately one ounce, so you can measure your child's nutrition in cubes. nine0013
The above recipes are just some of the many easy and healthy homemade baby food options. It may seem daunting at first to start making your own baby food, but hopefully you'll soon find it's easier than you thought and well worth the effort.
Baby food at home: recipes, video
Growing up a little person is a delightful process that cannot but please the parents of the crumbs. However, the first feeling that mom and dad face when it comes time to introduce complementary foods into a child's diet is confusion. nine0013
Which food is the most healthy, hypoallergenic and delicious? Most often, the first "real" meal of the crumbs after mother's milk and formula is vegetable or fruit puree. The choice of baby food on store shelves is very wide - each manufacturer tries to convince the buyer that jars with beautiful labels contain only natural products, there are no dyes, sweeteners and other harmful additives. A variety of "meals" for babies in factory packaging marked "3+ months." does not guarantee the true usefulness of the product that is inside. Every mother understands that complementary foods prepared on her own, from natural products, are much better for her child. nine0013
Another advantage of making your own baby food is that you can choose the best ingredients, wash fruits, berries or vegetables thoroughly, peel them well and remove damaged parts. In addition, the parents of the crumbs themselves can choose the way - how best to cook baby food: food can not only be boiled, but also baked in the oven or cooked in a double boiler.
It is also important that home-made baby puree is much tastier, it will undoubtedly be useful for a growing body and will not cause allergies! Even the simplest children's dish, prepared by mom, keeps the warmth of caring hands and cannot be compared with expensive dishes from the store. nine0013
What should be the correct complementary foods for children? Of course, you should start with one ingredient (such purees are called one-component purees), then move on to more complex options. Experts emphasize that the most suitable product for the first "dish" is zucchini. Cauliflower can also be considered neutral. Gradually it will be possible to introduce carrots, pumpkins, potatoes, broccoli and green peas. At the first stage of the introduction of complementary foods, it is better to give preference to vegetable purees and switch to fruit purees when the child already treats “serious” food well.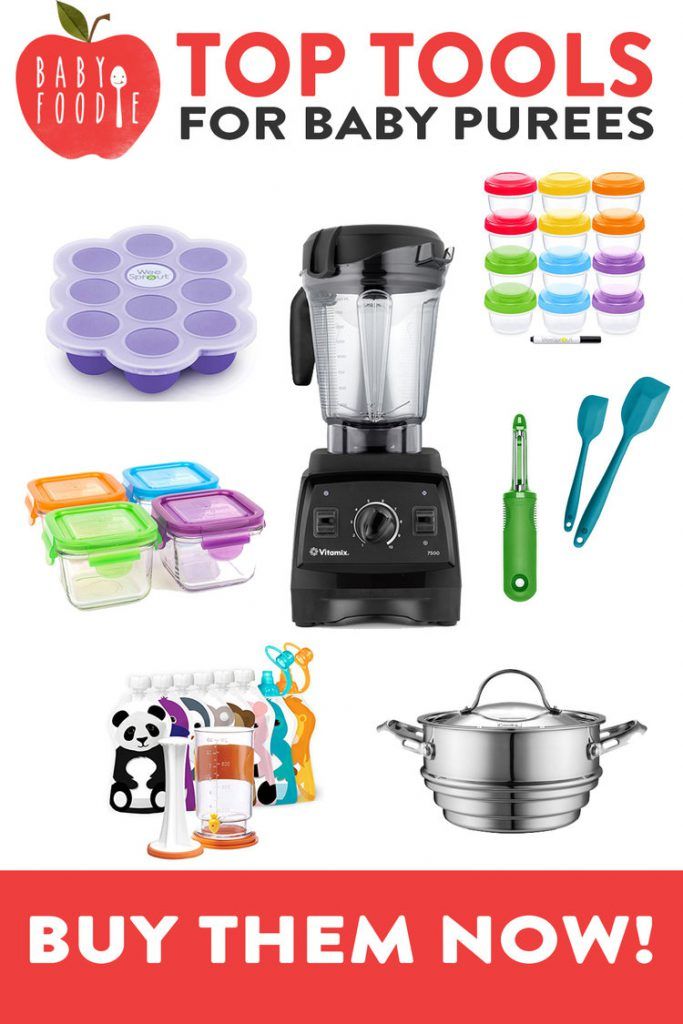 nine0013
The basic rules and principles of preparing high-quality baby food yourself:
- it is best to take fresh products for preparations: fruits from the tree, berries from the bush and vegetables from the garden are much healthier than those that have already been in the refrigerator for a week. If there are no seasonal vegetables at the time of preparation, the use of frozen foods is acceptable, but in this case, try to give preference to whole fruits - they retain the greatest amount of nutrients; nine0146
- only filtered water should be used for cooking vegetables;
- the preparation of baby food requires, if not separate dishes, then thoroughly washed. Do not, for example, cut vegetables on a meat board. If there is a dog or cat in the house, then you need to restrict her access to the kitchen when food is being prepared;
- It is not recommended to use vegetables and fruits in the diet of infants, in which the content of chemical additives is consistently high.
 These often include watermelons and melons, beets, spinach and lettuce; nine0146
 - It is better to soak vegetables purchased on the market with water before cooking: put carrots, potatoes, zucchini and cauliflower in filtered water for a couple of hours - this will remove nitrates;
- do not leave excess mashed potatoes for the next meal: the child should be given only freshly prepared food, and "yesterday's" mashed potatoes are best eaten by adults or given to pets;
- you can choose cream, boiled egg yolk, grated cheese or finely chopped dill as an additive to puree - this will diversify dishes for children from 8 months; nine0146
- try it! Children's food can and should be enjoyed by an adult.
There is another question that often worries parents: is it permissible to preserve baby puree and how to do it correctly? After all, such complementary foods for the developing body of a small child must be prepared daily for one or even two or three years: until the baby is ready to eat adult food from the common table. Not every mother has the time and opportunity to prepare baby puree daily, but you don’t want to buy food for the baby in the store. In addition, it is obvious that in the winter-spring period it is almost impossible to find fruits and vegetables grown without the addition of chemicals. The answer to the question is quite simple: the requirements for the conditions for preparing baby food are very strict (keeping the temperature, sterilizing jars, etc.), but using an autoclave solves all problems: all that is required is to load jars with blanks into the autoclave for 20 minutes and set temperature 120 degrees. After cooling, it is better to store baby food in a dark, cool place for about 12 months, daily delighting the child with homemade homemade food. nine0013
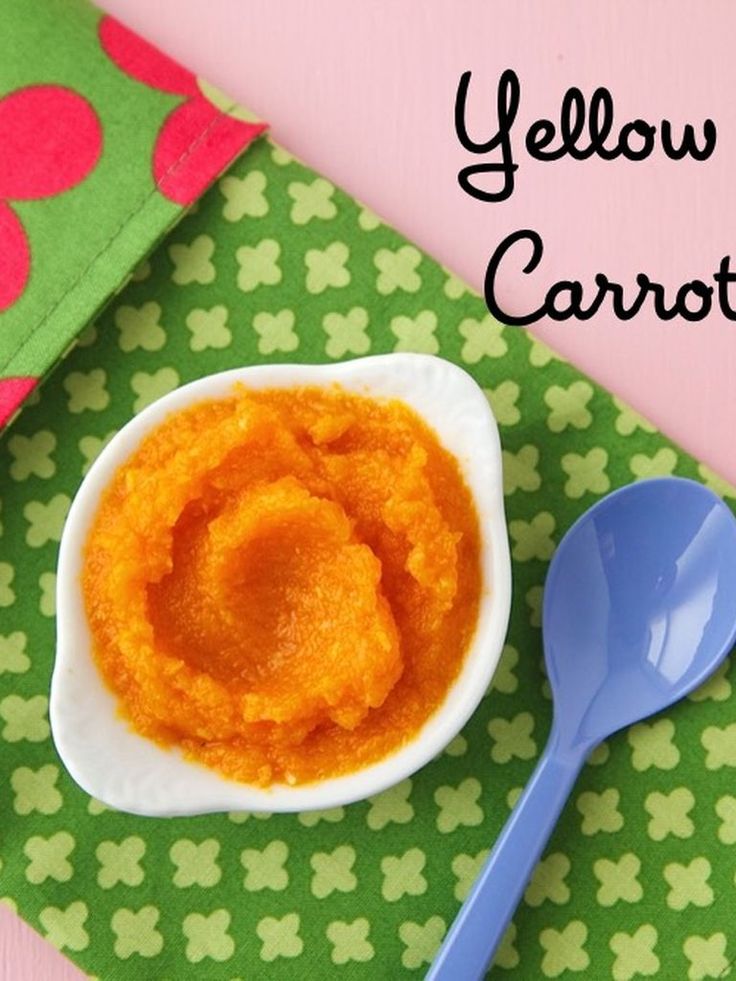
Pumpkin puree: tender and fragrant
Pumpkin is a tasty vegetable that is good for babies. This fruit has a beneficial effect on digestion, is well absorbed by the child's body and is rich in various vitamins: A, C, B, B2, E, PP, T. In addition, the carotene content in pumpkin is 5 times higher than in carrots!
Baby pumpkin puree has a sweet taste, so the kids eat this dish with great pleasure. For preparations, it is better to buy small whole pumpkins, as they usually taste better than large ones and are easier to peel. nine0013
- Rinse pumpkin well under running water, peel, cut in half, remove seeds.
- Then you need to cut the fruit into small cubes, put in a saucepan and cover with water. Cooking time after boiling - 20 minutes. You can also steam pumpkin: it will retain more nutrients with the same cooking time.
- The next step is to beat the cooked pumpkin with a blender until the consistency of a gentle puree. If the dish turned out to be thick, add water or milk (milk mixture). nine0146
- Vegetable oil and salt are added to pumpkin puree to taste, but these additives should be used with caution: only if they are acceptable for the age of the child.
For babies older than 8 months, pumpkin puree is supplemented with other fruits and vegetables, and also added to porridge.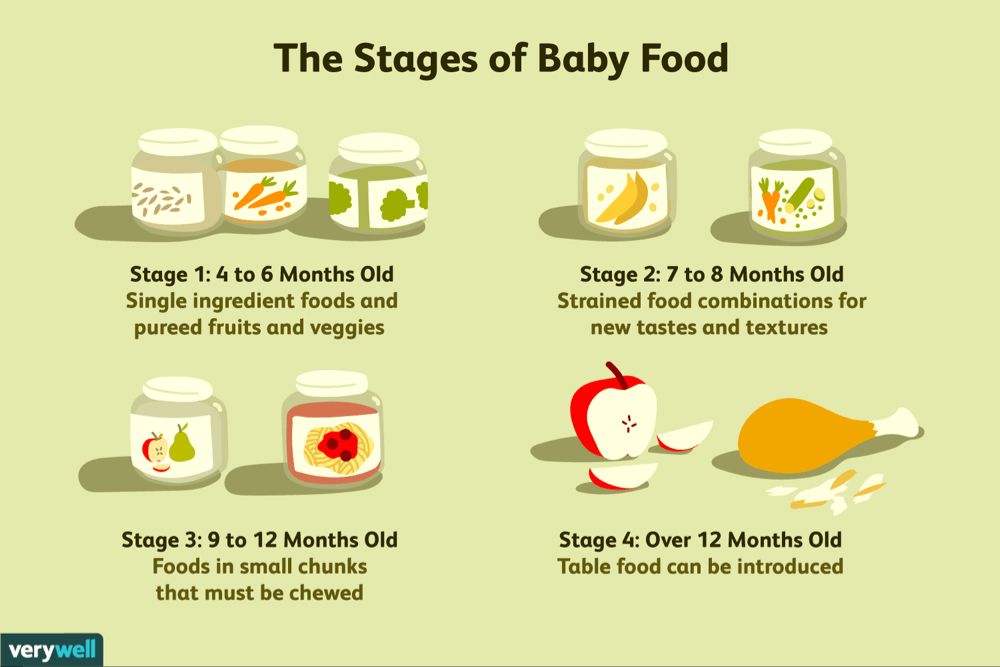
Broccoli puree: simplicity and elegance
Broccoli is not just cabbage, but a storehouse of vitamins and microelements! Beautiful on the outside and fantastic on the inside - the high content of protein and vitamin C (there is more in broccoli than in citrus!) deserves special attention. There are many articles on the Internet about the benefits of broccoli, and preparing this product is not at all difficult. nine0013
To prepare this type of cabbage for baby food, you need to choose the highest quality product: the inflorescences must be unopened, green, moderately elastic.
- Broccoli should be washed, cut into pieces and boiled. Steaming will take 20 minutes, in water - faster: fresh cabbage should be boiled for a little more than 5 minutes, and frozen - at least 10. When cooking, do not pour a lot of water, it should only cover the vegetables a little.
- When the cabbage is cooked, take it out, transfer it to a blender bowl and grind to a puree state, add a little warm boiled water.
 nine0146
 - Add salt and butter to taste.
Pear puree: a fragrant dessert
It's no secret that babies love fruit puree - almost all children like sweet dishes. The pear is a suitable option for the first one-component fruit food - a sweet fragrant fruit that has a high concentration of vitamins, stimulates digestion and almost never causes allergies.
If you want to cook a safe puree for your child at home, then it is best to choose green pears, these are the fruits that are considered to be the least allergenic. nine0013
- Fruit must be peeled, core removed with seeds, cut into cubes.
- Transfer the pear to a heavy-bottomed enamel saucepan, cover with a little water and simmer over low heat for 15-20 minutes.
- Then transfer to a blender bowl and puree until smooth. If the puree is too thick, add a little warm boiled water.
- You can dilute the dish with milk or formula - it depends on the taste preferences of the baby.
 nine0146
The same recipe is used for applesauce. In the future, try to combine these two fruits in one dish.
Classic apple-zucchini puree
A good appetite of a baby pleases every mother, but little gourmets are often capricious, and it is not easy to please them. Zucchini and apple puree is a classic combination of products that will diversify the baby's menu already in the fifth or sixth month of life.
This complementary food contains only hypoallergenic products, has a positive effect on the functioning of the heart, and stimulates the strengthening of the immune system. nine0013
- Selected products should be thoroughly washed, peeled, core removed from apples.
- Cut zucchini and apples into cubes, put fruits in a cooking pot first - they should cook for 5 minutes longer, and then vegetables. The total cooking time is 20 minutes.
- When the food is soft, puree it with a blender.
- To taste - dilute with water, add salt, oil.
This puree can be considered a separate dish for the little ones or become a delicious side dish for older kids. nine0013
Colorful carrot-potato puree
For many parents, carrots and potatoes are the easiest and most understandable type of complementary food for the baby. However, if you cook and serve standard products a little differently than usual, you can improve the traditional taste of a classic dish.
For baby puree, young potatoes should not be chosen - they contain a lot of starch. Carrots, on the contrary, it is better to buy young ones.
- Wash and peel the vegetables thoroughly and cut into cubes. nine0146
- It is better to steam the mashed potatoes and carrots, the vegetables should be boiled separately. Cook until tender, 20 minutes on average.
- Separately puree the vegetables in a blender, thinning with warm water if necessary.
Both types of puree are beautifully placed on a plate without mixing: the child can decide for himself whether to mix food or eat separately.
Exotic variety: mango puree
Tropical fruits should not be offered to a small child before the age of 7-8 months and only if there was no allergy to other foods.
Mango is an aromatic fruit with an original pleasant taste. This fruit helps to overcome colds, reduce inflammation in the body, improve sleep and normalize the functioning of the stomach.
To feed the baby, ripened fruits should be selected - quite soft, yellow-red in color.
- Fruit should be peeled and pitted, cut into cubes. nine0146
- Put the raw mango into a blender, purée, transfer to a heavy-bottomed pot and simmer for a few minutes.
Older children may be offered uncooked mango puree. This fruit is completely independent - no need to add sugar or water!
Sweet pumpkin puree with apple
This puree is called sweet because both pumpkin and apples are high in sugar. Such a dish is well suited as a dessert for children who already eat “serious” food well - vegetable purees and cereals.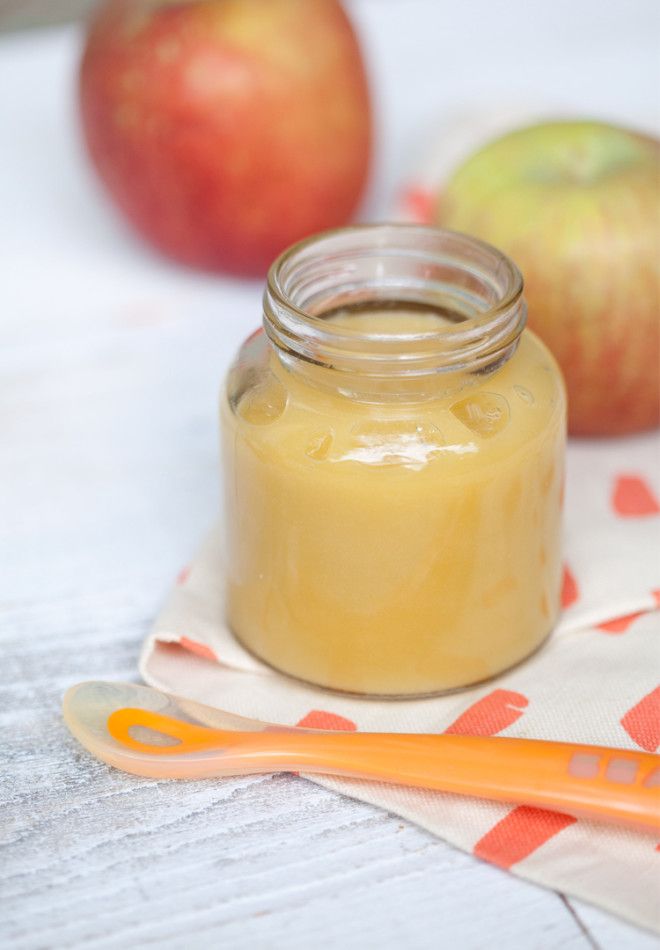 nine0013
In addition, such complementary foods are a great option for the autumn-winter period: seasonal products contain enough choline, a lot of fiber, natural proteins and vitamins (groups A, B, C, E, etc.), zinc, sodium, calcium and only!
- Pumpkins and apples must be peeled, peeled and seeds removed, cut into cubes and sent to a double boiler.
- Cook for about 20 minutes until the food is soft. Then place them in a blender bowl, add raisins and chop. If the child chews well, mash everything with a fork, and leave the raisins whole. nine0146
Hearty puree with celery and turkey
For older kids, meat is added to vegetable dishes - turkey fillet is an excellent option for developing a child's taste preferences. Appetizing and fragrant meat puree includes only three ingredients: celery root, turkey fillet, butter.
The proportion of meat and celery should be approximately 10:1, the amount of butter to your taste.
- The turkey fillet must be boiled in the "second stock" for about 20 minutes after boiling.