Baby feeder washer
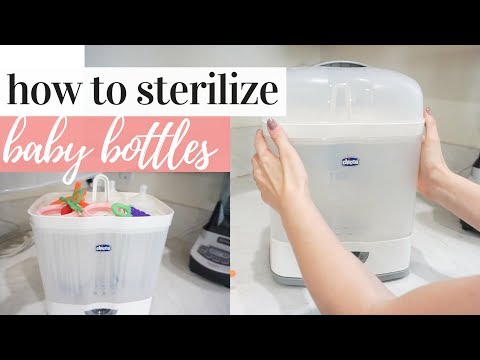
11 Best Baby Bottle Sterilizers (2022 Reviews)
You won’t be able to protect your baby from everything out there, but you can absolutely take steps to make sure they aren’t drinking germs along with their milk.
The best baby bottle sterilizers can kill 99.9% of bacteria in minutes.
To help give you some peace of mind, we’ve rounded up our favorite sterilizers to ensure your baby’s bottles are as germ-free as possible.
Our Top Picks
We love honesty! Mom Loves Best earns a commission through the following hand-picked links at no extra cost to you.
Image
Model
Product Comparison Table
Features
Best All-In-One Sterlizer
Papablic Baby
- Can handle very large loads
- Dries bottles thoroughly
- Quicker sterilization cycle
Check Price
Best Easy to Operate Sterilizer
Dr. Brown's
- Includes several accessories
- Cycle indicator
- Comes with an accessory tray
Check Price
Best Value for Money
Philips Avent Microwave
- Cheaper than other options
- Sterilize four bottles at a time
- Sterilizes in under 2 minutes
Check Price
Best Electric Sterilizer
Tommee Tippee
- Easy to clean and store
- Cools down rapidly
- Has HEPA filter
Check Price
Best for Small Spaces
Philips Avent 3-in-1
- Takes up less kitchen space
- Kills 99.
9% of germs and bacteria
- Automatic shut off feature
Check Price
Best UV Sterilizer
Wabi Baby Touch
- Uses UV rays to dry and sterilize
- Multiple setting options
- Eliminates 99.9% germs and bacteria
Check Price
Best for Breastfeeding
Baby Brezza Dryer Machine
- Fits every size and shape
- Multifunctional
- Sterilizes various breastfeeding utensils
Check Price
Best Steam Sterilizer
Bololo Steam Sterilizer and Dryer
- Accommodates variety of bottle brands
- Fits up to 12 bottles
- Safe filtration system
Check Price
Best Microwave Sterilizer
Nanobébé Microwave
- Most affordable microwave sterilizers
- Multi-purpose steamer
- Heat-resistant rubber handles
Check Price
Best Steam Bags
Medela Micro Bags
- Very affordable
- Convenient, compact, easy to use
- Portable design for trips away
Check Price
Table of Contents
- Our Top Picks
- The Best Baby Bottle Sterilizers of 2022
- Do I Need to Sterilize My Bottles?
- Different Ways to Sterilize a Bottle
- How to Choose a Baby Bottle Sterilizer
- Baby Bottle Sterilizer FAQs
The Best Baby Bottle Sterilizers of 2022
Here are 11 excellent baby bottle sterilizers to consider.
1. Papablic Steam Sterilizer and Dryer
Best All-In-One Baby Bottle Sterilizer
Check Price
If you’re serious about sterilization and your little one is a bottle feeding champ who goes through tons of bottles, you might like the unit from Papablic. It’s a bit like a tiny dishwasher for all your bottles and accessories.
This sterilizer is large and fits up to 11 bottles inside, and the internal trays can be reorganized depending on what you want to clean. Add water, turn the dial, and after 45 minutes you’ll have perfectly clean and dry bottles you can use immediately. There are different settings, however, so you could also opt for a quicker sterilization cycle.
Pros
- The sterilizer can handle very large loads.
- Dries bottles thoroughly so they’re ready to use.
- Just turn on and go with minimal fuss.
Cons
- This is an extra-large, tall unit and may just be too clunky for many moms.
- Some feel the quality is lacking for a substantial price.

2. Dr. Brown's Deluxe Bottle Sterilizer
Best Easy to Operate Baby Bottle Sterilizer
Check Price
Dr. Brown’s sterilizer takes just around 7 to 9 minutes to sterilize its content.
It’s easy to operate – all you do is add the water and a measuring cup is included in the package too. Put the bottles in and press a button. Moms who go through a lot of bottles may appreciate that it can accommodate six standard-sized bottles at a time. It has a cycle indicator and an auto-shut off feature for safe hassle-free sterilizing.
Pros
- Includes several accessories.
- Has cycle indicator.
- Comes with an accessory tray for easy organization.
Cons
- Can only sterilize six bottles at max.
3. Philips Avent Microwave Steam Sterilizer
Best Budget Baby Bottle Sterilizer
View on Amazon
View on Target
This plastic product is BPA-free, inexpensive and effective. In under two minutes, it kills 99.9 percent of the bacteria that could harm your baby. It can hold bottles, breast pump parts, and feeding accessories. It fits into most microwaves, and if you keep the lid closed until right before you need the items inside, everything will stay sterilized for 24 hours.
Moms will appreciate that this unit is easy to pack for weekend getaways, and it won’t take up much storage space at your house. It doesn’t involve any complicated instructions – anyone can figure out how to use it.
Pros
- Cheaper than other options on the market.
- Can sterilize up to four bottles at a time.
- Sterilizes in under 2 minutes so your bottles are ready to use in no time.
Cons
- The size of this sterilizer may be too large for many microwaves, at around 11 inches in height.
- Some moms have reported that the lid melts in the microwave.
4. Tommee Tippee Electric Steam Sterilizer
Best Electric Baby Bottle Sterilizer
Check Price
This unit may be the perfect choice for someone who wants to sterilize a lot of bottles at once. It can hold an entire day’s worth of bottles at one time. In just ten minutes, all the sterilizing you’ll need for any given day will be done.
This sterilizer will kill 99.9 percent of the germs that can harm your baby. Because it has a space-saving design, moms with limited counter space may like that it doesn’t seem too big given how many bottles it holds. Plus, the lid can be flipped over to serve as a germ-free place to prepare bottles.
Pros
- Easy to clean and store.
- Cools down rapidly so you can get the bottles right away if you need them.
- It can clean six bottles at once.
- BPA-free plastic for the health of your family.
Cons
- It can get a strong plastic smell when heating up.
- Needs to be frequently descaled, especially if you’re in a hard water area.
5. Philips Avent 3-in-1 Electric Steam Sterilizer
Best for Small Spaces Baby Bottle Sterilizer
Check Price
This 3-in-1 sterilizer kills 99. 9 percent of harmful germs and bacteria on bottles without using any chemicals that could harm your little one.
It has an adjustable modular design so you can fit a variety of bottles or nursing accessories inside. At most, it fits up to six 11-ounce bottles. We love the design because it takes up less kitchen space.
This machine uses electric steam for sterilization, which only takes six minutes. It also features an automatic shut-off for speed and to prevent overheating. You can even keep the objects sterile for up to 24 hours if you don’t remove the lid after you’ve run it.
To use, just add water to the base, fill the compartment up, shut the lid, and press the button. If you’re limited on space and need a sterilizer that works quickly, this is a great choice.
Pros
- Takes up less kitchen space and fits various bottle shapes with an adjustable size rack.
- Uses electric steam to kill 99.9 percent of germs and bacteria.
- Has an automatic shut-off feature.
Cons
- Condensation forms during use, so it makes a watery mess when you take the lid off.
6. Wabi Baby Touch Sterilizer & Dryer
Best UV Baby Bottle Sterilizer
Check Price
Did you know you can harness to power of UV rays to sterilize almost anything? Well, you can and this special touch panel, dual function sterilizer, and dryer harnesses that power to make your life easier.
Place your bottles inside and with the single touch of a button start the drying and sterilizing process, which takes approximately 30 minutes. After removing the bottles, wipe them down with a clean cloth. The dual UV bulbs eliminate 99.9 percent of E. coli, Salmonella, Staph, and other harmful bacteria safely and efficiently.
One reason we love the idea of UV rays is the versatility. Not only can you sterilize your baby bottles, but you can safely dry and sterilize practically anything, including jewelry, sunglasses, breast pump parts, and even electronic devices.
Choose from a dry setting, a UV sterilizing setting, or both. This is a great investment for moms with a lot they want to sterilize and dry.
Pros
- Uses UV rays to dry and sterilize, so you can put almost anything in it.
- Has multiple setting options.
- Effectively eliminates 99.9 percent of germs and bacteria.
Cons
- Takes at least 30 minutes to sterilize, so it’s not great if you’re short on time.
7. Baby Brezza Baby Bottle Sterilizer
Best Baby Bottle Sterilizer for Breastfeeding
View on Amazon
View on BuyBuyBaby
View on BedBath&Beyond
View on Walmart
When you breastfeed, a lot of things change. Suddenly, your schedule revolves around your little one. Many moms who breastfeed also use bottles to store excess milk to ensure their production and flow is maintained while preventing infections and swelling.
This baby bottle sterilizer system is perfect for breastfeeding moms because it allows you to dry and sterilize everything.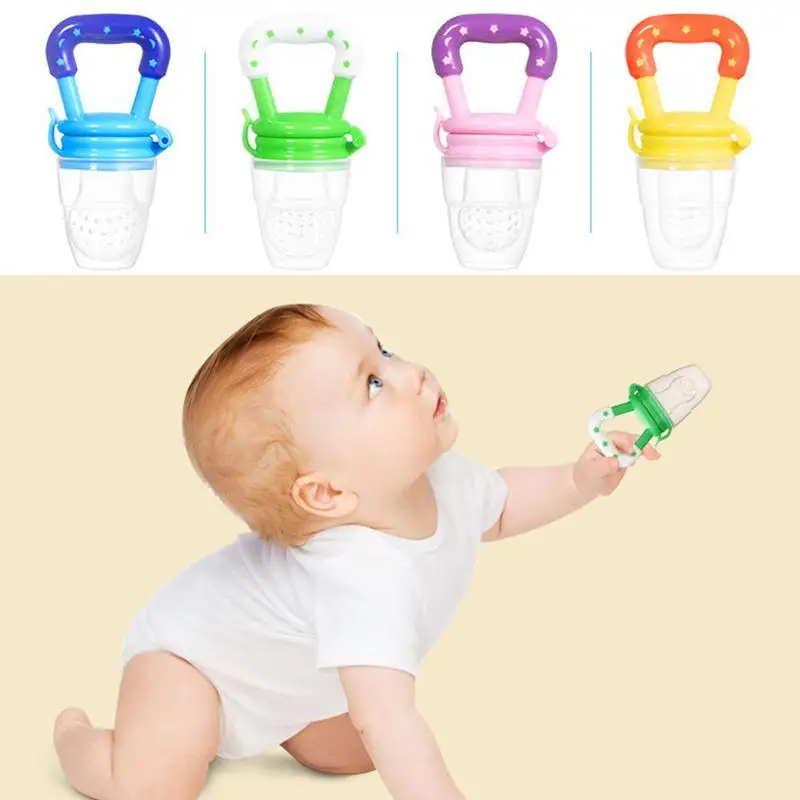 It fits up to six bottles of any size or shape and can also be used on breast pump parts. Sterilization takes only a few minutes and if you can leave it for longer all of the excess condensation will be dried up with one of the multiple drying settings.
All of the parts are 100 percent BPA-free and can keep items sterilized for up to 24 hours if the machine is not opened. It has an automatic drying mode you can set up, as well as an auto shut-off function.
Pros
- Great for sterilizing everything you use to breastfeed, not just bottles.
- Fits every size and shape of the bottle.
- Multifunctional.
Cons
- While you can put different breast pump parts inside, it can be hard to make things fit properly.
8. Bololo Electric Steam Sterilizer and Dryer
Best Baby Bottle Steam Sterilizer
Check Price
This steam sterilizer offers versatility – it can be used for bottles, pacifiers, and small toys. It was designed to allow steam to reach deep into the bottle, which creates more thorough sterilization.
Moms might like that this unit has a built-in drying rack. The trays can be taken out of the sterilizer and placed on the counter to allow the bottles to air dry. This sterilizer has a unique HEPA filtration system, which may be reassuring to parents who are worried about exposing their baby to harmful chemicals and pathogens.
Pros
- It can accommodate a wide variety of bottle brands.
- Fits up to 12 bottles.
- The built-in drying rack can hold a variety of items.
Cons
- Some parents have doubts about the product durability.
9. Nanobébé Microwave Sterilizer
Best Microwave Baby Bottle Sterilizer
Check Price
This is one of the most affordable microwave sterilizers available so it’s perfect if you’re on a budget.
Moms who have heard horror stories about their friends being burned by microwave sterilizers may appreciate that this unit has heat-resistant handles that may make moms feel safer taking this sterilizer out of the microwave.
Parents who want a multi-purpose steamer should like that this unit can also be used on pacifiers, teething rings and small toys. It fits all standard-sized microwaves and comes with tongs to help ensure the safe removal of the hot bottles.
Pros
- Adjustable pegs to faciliate various items for sterilization.
- Works for both wide-mouth and standard size bottles.
- It works in as little as four minutes, so it’s great if you need a bottle in a hurry.
Cons
- The pegs do not fit too snugly at the base.
10. Medela Micro Steam Bags
Best Steam Bags
View on Amazon
View on Walmart
Medela steam bags are a godsend, and sanitize bottles quickly, easily and thoroughly. All you need is a microwave (even a small one) and a little water. The box contains 12 bags that can each be reused 20 times before the seal starts to lose its integrity.
Like other sterilizers, they kill 99.9 percent of germs and best of all: you can keep them sealed until the bottles are needed. You can toss in breast pump shields, nipples, dummies, feeding accessories and more and they’ll get a burst of cleaning steam as well. These take up barely any room – they’re great for use at home but work just as well on trips, as long as you have access to a small microwave.
Pros
- Very affordable, even more budget-friendly than microwave steamers.
- Convenient, compact and super easy to use.
- Portable design which makes them great for trips.
Cons
- Some moms dislike that there’s no handle to grab the hot bag from the microwave.
- Despite claims, these bags might melt breast pump tubing.
11. Papablic 5-in-1 Ultra-Fast Baby Bottle Warmer
Best Portable Baby Bottle Sterilizer
Check Price
While the product is a baby bottle warmer, we double-checked that it too can sterilize baby bottles. Actually, it has five functions. It can be used for steady warming, sterilizing, fast warming, food heating, and defrosting.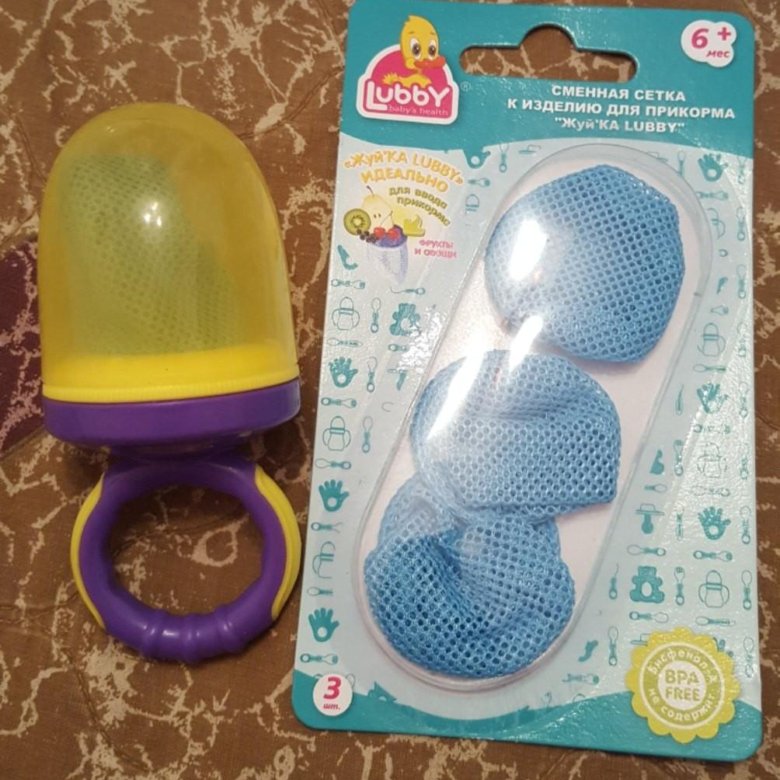 The Papablic sterilizer removes 99.99 percent of germs and bacteria so your baby’s bottles are as clean as they can be.
With this sterilizer, you can clean bottles, and because it only weighs 1.96 pounds it would be easier for you to bring this while traveling.
It can clean bottles, pacifiers, toys, and nipples. So, once you’ve done the bottles, use it for other items around the house.
It takes a minimum of three minutes for the sterilization process.
Pros
- Auto-shutoff feature.
- Multifunctional.
- Can accommodate almost any baby bottle brands and materials.
- Sterilizes bottles, pacifiers and nipples.
Cons
- Can sterilize one item at a time.
Do I Need to Sterilize My Bottles?
Sterilizing bottles isn’t a necessity, but it’s a step many mothers still choose to take.
A baby’s immune system is fragile for the first year. When you’re a new parent, it feels like germs are everywhere and there’s nothing you can do to avoid exposure — people love to touch and hold your baby. But since nobody likes being labeled a paranoid mommy who won’t let people around her baby, you’re often left ignoring that inner voice telling you to watch out for germs.
While you can’t stop all the germs caused by the doting friends and family members who want to hold your baby, at least you can make sure her bottles aren’t making her sick.
Sterilizing bottles is easy, and it cuts back on the mountain of germs your baby is introduced to daily — and that’s always a good thing in my book. I know I can’t wrap my children in bubble wrap and keep them safe from everything, but if sterilizing bottles prevents even one illness, I think it’s worth it.
Different Ways to Sterilize a Bottle
There are several ways to sterilize bottles and nipples, some easier than others.
1. Boiling
The way our moms sterilized bottles was to boil them in water on the stove in a pan. The method is simple: immerse each item thoroughly in boiling water for at least 10 minutes. This is cheap and relatively easy to do, although it can wear down bottle nipples with time, so be sure to check them for cracks once in a while.
While boiling is a perfectly good way to sterilize, I’ve always avoided it. I use plastic bottles, and I didn’t like the idea of boiling them because I wasn’t confident that harmful chemicals wouldn’t leach out when heated.
2. UV Light
UV bottle sterilizers are one of the newest methods for sterilization and use ultraviolet light to kill germs. If you go this route, be prepared to pay dearly – these units cost several times what you’d pay for an electric or microwave sterilizer. Though they work well, the cost puts them out of reach for those of us who aren’t prepared to skip a car payment to afford one.
Pros
- Effectively kills 99.9% of germs, viruses and bacteria.
Cons
- Relatively expensive.
3. Cold Water Sterilizing Solution
This method requires you to immerse your bottles and accessories in cold water in which you’ve dissolved a substance that will kill bacteria. The sterilizer usually comes in a dissolveable tablet form that can be used to sanitize just about anything, not just bottles.
Pros
- This method is affordable
Cons
- A little environmentally unfriendly.
- Perhaps not as thorough as other methods.
4. Steaming
Times have changed since we were babies, and there is a simpler way to do things today. You can now use steam to sterilize bottles, either with an electric steam sterilizer or a microwaveable one as shown below.
Microwave steamers
These steamers are simple in design. To use, simply fill with water and place in the microwave for a few minutes to generate sterilizing steam.
Pros
- They’re typically cheap and easy to use.
- They can be taken on trips and used anywhere there’s a microwave.
Cons
- They may scald you when you remove them from the microwave.
- Some models may end up melting more delicate items.
- Microwaveable steamer bags are cheaper still but may require a little more practice to use. They are, however, the best choice for travel.
Electric steamers
Plugin and sterilize your bottles with the press of a button.
Pros
- They’re pricier than microwave sterilizers.
- Some parents find them more thorough.
- A few models come with a handy drying function.
Cons
- These kinds of sterilizers offer more variability in size, price, and design, as you get a whole appliance dedicated just to bottle sterilization.
- Bigger units can hog the kitchen counter space.
- If you live in a hard water area, these will need to be descaled regularly.
How to Choose a Baby Bottle Sterilizer
Here’s what to look for when buying a good electric steamer/sterilizer to keep everything sterile for your little one.
Ease of Use
Some sterilizers are easier to use than others. We recommend electric baby bottle sterilizers if you’re looking for something simple to operate. If you find yourself scratching your head over the instructions or the number of buttons, move on in your search to find something more straightforward.
The Size
You want the unit to be large enough to fit all your bottles. Mothers who are breastfeeding and only use bottles occasionally can get by with a small unit that holds just a few bottles.
You’ll find lots of different sizes available. Some hold a couple, while others can hold up to a dozen!
How Many Bottles It Sterilizes at Once
Women who opt to feed their babies formula will need to sterilize bottles frequently throughout the day. So they’ll want to look for a bigger sterilizer that can handle a larger number of bottles. Some can sterilize a day’s worth of bottles at once, so definitely look around for one that will be most convenient for you.
The Cost
If your cash flow is a bit squeezed now that you’re a parent, cost will be an important consideration. Our choices range from about $15 all the way up to $300 so they are available for various budget sizes. Microwave sterilizers are usually cheaper than other types on the market. You can also use sterilizing bags which are the cheapest, but may more expensive in the long run since you need to dispose of them after a certain number of uses.
Does It Dry
Check if the sterilizer can also dry your bottles. Many can, but microwave sterilizers leave bottles are left wet, and they’ll have to be dried after they’re taken out, adding an extra step to your workload.
Kitchen Space
Some moms might like that microwave sterilizers won’t require any space on their kitchen counters. They can be stored in a cabinet until you need them and they don’t need an outlet to work. If you opt for an electric sterilizer, you’ll have to make some room on your counter for it.
Baby Bottle Sterilizer FAQs
How Do I Use a Bottle Sterilizer?
Depending on your sterilizer model, you’ll follow different methods for getting those perfectly clean, fresh bottles. First, wash everything in warm soapy water or in the dishwasher. Next, load up the sterilizer with clean bottles and add the appropriate amount of water to the unit.
For microwave sterilizers, put it inside the microwave for the recommended time. Remove and allow bottles to cool inside until they’re needed, or use immediately. Dry with a clean, soft cloth. Let the steam dissipate before reaching into the microwave to prevent burns.
For electric sterilizers, turn the unit on and let it get to work. If you’ve got a model that also dries, wait for the drying cycle to complete. Most models will keep your bottles sterile if left inside for 24 hours.
When Can You Stop Sterilizing Bottles?
There’s no point in sterilizing bottles once a baby becomes mobile or begins to grab at every (dirty) thing she sees (1).
Remember
When your child is old enough to make the connection that she can grab things and put them in her mouth, she’s going to be introduced to more germs that will possibly accumulate in her bottles.
After you stop sterilizing, though, you should be certain that you’re doing a top-notch job of cleaning the bottles and nipples. And if your baby has an illness (2), you should sterilize her bottles until she is healthy again. You don’t want to reintroduce any germs to her recovering immune system.
How Can You Clean/Descale a Sterilizer?
Your sterilizer will come with detailed cleaning instructions, but as a rule, most removable parts of any unit can be washed with mild soap and water, while the rest can be wiped down with a damp cloth.
Limescale build-up looks like a yellow or white discoloration on the sterilizer’s heating pad. This can be removed at home with ordinary white vinegar or even lemon juice: simply soak for 30 minutes to overnight and rinse off well, followed by an empty cycle to dislodge any residue.
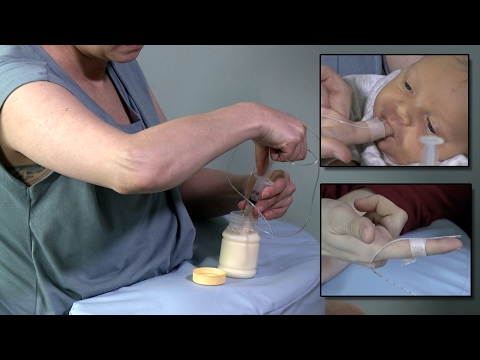
Can I Use a Bottle Sterilizer for My Breast Pump?
Again, your specific breast pump will have come with instructions for cleaning. Check these to see if the breast pump parts can go into the dishwasher.
After you’re done using your pump, use soap and water to wash any part that’s come into contact with breast milk. Allow to air dry (drying cloths can introduce bacteria again) before reassembling everything, and you’re good to go. Thorough home sterilization isn’t really possible, but you can sanitize breast pump parts adequately by simply washing, or using your bottle sterilizer (3).
Before you pop anything into your sterilizer though, check the manual for both the sterilizer and the breast pump to ensure it’s safe. If you’re unsure or want to save yourself the extra work, rest assured that daily sterilization is not necessary and you can clean breast pump accessories with just soap and water.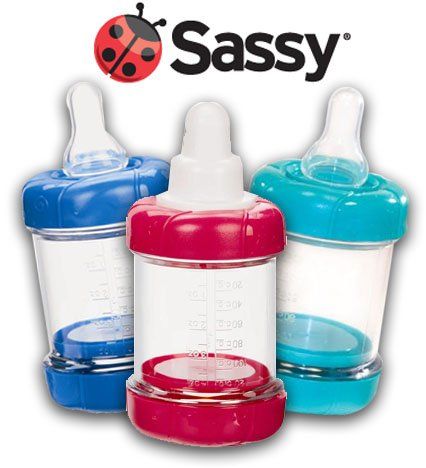
Feedback: Was This Article Helpful?
Thank You For Your Feedback!
Thank You For Your Feedback!
What Did You Like?
What Went Wrong?
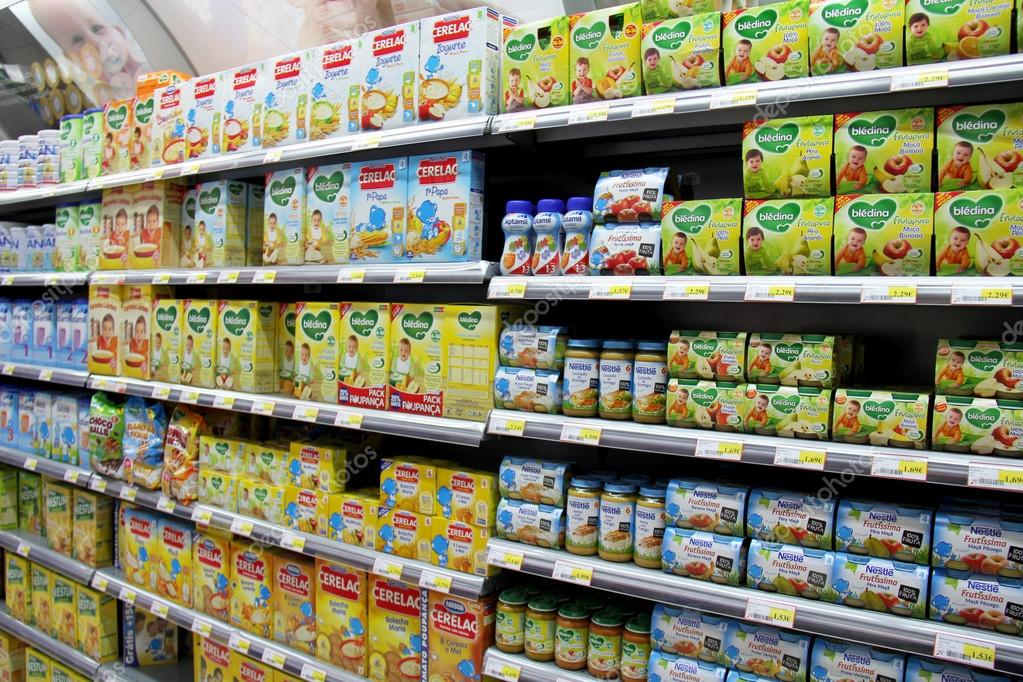
Bottle Cleaning & Sterilization Products Online Pakistan: Buy imported Bottle Cleaning & Sterilization Products: Zubaidas Baby Shop
View as:
24 Item(s)
Show 24 36 48 96
Sort By Position Sort By Name Sort By Price Sort By Date
Shop By
-
10%off
-
10%off
-
10%off
-
10%off
-
10%off
-
10%off
-
10%off
-
10%off
-
50%off
-
10%off
-
10%off
-
10%off
-
10%off
-
10%off
-
10%off
-
10%off
-
10%off
-
10%off
-
10%off
-
10%off
-
10%off
A baby’s immune system is not yet fully developed, and babies are more susceptible to infection and illness than an older child or adult. Cleanliness is therefore very important when preparing your baby’s bottles.
Bottles, lids, teats and other equipment you use to prepare a feed should always be thoroughly cleaned after each use:
1) As soon as possible after your baby finishes a feed, wash the bottle, teat and lid in hot soapy water.
2) Use a bottle brush, and make sure to wipe out any dried drain stuck inside the bottle and nipple.
3) Once it is clean, rinse the equipment with some fresh water and allow it to air dry.
4) This sort of cleaning is important for getting rid of all traces of milk or formula left inside the bottles, but gets ensure that all the particles have been removed.
Baby Bottle Sterilizers, Warmers & Cleaning Brushes:Baby bottle sterilizers, Warmers and Cleaning brushes are mandatory to get cleaned or sterilized, cleaning and sterilizing is the process of killing harmful germs so it’s important to sterilize or clean it on daily basis before using it.
Sterilize your baby’s feeding bottles in electric steam sterilizer as its way easier than boiling your babies bottles in cauldron. Everything has become easier now for parents.
Make sure your babies’ feeding bottles, warmers and cleaning brushes are thoroughly clean before you begin feeding. Follow the instructions for adding water to the unit and turning it on. And keep on looking that how much time it takes, leave bottles in the sterilizer until they needed.
You can definitely boil your baby feeding bottles but it’s better to sterilize it in baby bottle sterilizers, it is going to be less messy.
Feed your baby with neat utensils, if you want to keep your baby fit and healthy then make sure you are done with cleaning of their feeding bottles, bowls etc. As a mother you always wanted to feed your baby healthy meal. For that you also need to keep everything clean not only bottles but also use neat brushes from which you wash your babies feeding bottles, nipples, caps etc.
Moreover, keep in mind one more thing that before feeding and holding those sterilized utensils your hands should also be neat and washed, as it matters a lot.
Buy Baby Bottle Sterilizers & Cleaning Brushes:Are you planning or thinking about buying baby bottle sterilizer to keep your entire baby feeding equipment’s away from bacteria? Then it’s perfectly amazing.
Buy baby bottle sterilizers and cleaning brushes, even some curved style brushes are especially intended to wash your babies’ bottle, nipple and other equipment’s and make it effectively clean. Mama’s can order it online, there are several different types of sterilizers and cleaning brushes are available in different design and colors. Baby bottles are of lightweight, strong and unbreakable. If you have sterilizers then you can wash or boil it in deep clean.
Having a baby bottle sterilizer means making your life comfortable as it takes less time for cleaning.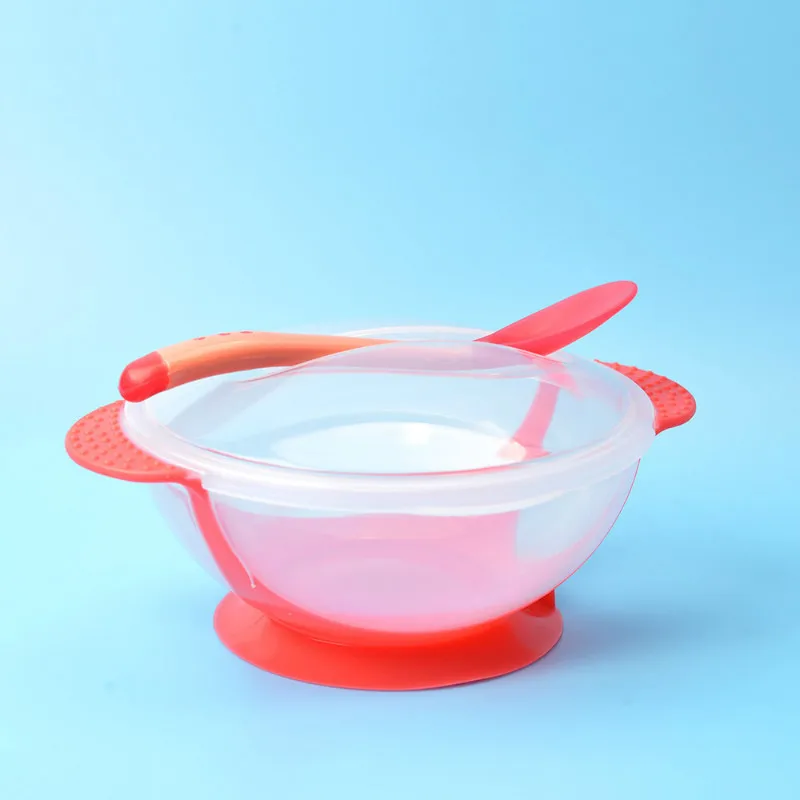 No water mess, Kills 99% germs with natural steam. Even some sterilizers have dryer in them, which makes cleaning process easier.
Cleaning brushes are very helpful that can get rid of bacteria at once. Combination of nylon bristles, and sponge makes cleaning super easy.
Being a mother is no easy task and cleaning the bottles could seem like a mundane job. So if would buy baby bottle sterilizer or cleaning brushes then everything is going to be normal and easy for you.
You may be interested in:
Bath & Skin Care Products Baby Diapers
Baby Safety Baby Wipes
How to reset the program in the LG washing machine - magazine LG MAGAZINE Russia
LG washing machines are popular all over the world due to their high build quality, durability and a wide range of options and programs. In the range of washing machines presented on the official LG website and in partner stores, even the most demanding user can choose a washing machine that suits his needs.
The service life of LG washing machines is also largely determined by how well the equipment is used. In some cases, in case of emergency situations, it may be necessary to reset the washing machine program during washing. In these cases, it is very important to follow the instructions in order to prevent your washing machine from breaking down.
Washing programs in LG washing machines
LG washing machines allow you to efficiently cope with various types of dirt and wash things from different fabrics, including baby clothes that require special care, as well as things made of delicate fabrics such as silk, chiffon or lace. Of course, the functions differ depending on the model, but the basic washing programs are the same. Owners of LG washing machines use some programs more often, others are too specific and are used less frequently.
In order for the unit to work without failures and errors, it is important to understand everything and correctly set up the washing programs.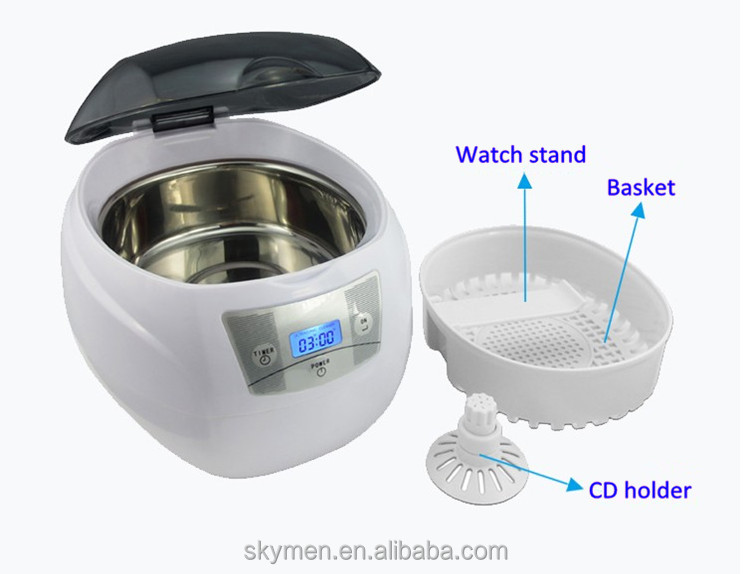 Some of them will allow you to adjust the process, depending on the type of things in the load, others (economical) will significantly reduce the washing time (which means water and electricity), and still others will take care of your health (for allergy sufferers, disinfection, etc.).
- Cotton. The standard mode is switched on when working with heavily soiled items made of cotton, linen, bed linen. There are different temperature settings - 30 degrees (quick wash), 40 (for colored items), 60 and 90-95 (for white items). Washes 105-120 minutes. It is rinsed in cold water, and wrung out at high speeds. Program “Cotton. Fast” washes less dirty clothes from the same fabrics faster at 60 degrees, spending even less energy.
- Synthetic . Long (110 min.) mode, when at a temperature of 60 degrees you can wash synthetic and mixed items. Spinning is also carried out at high speeds.
- Delicate. Gently washes delicate fabrics, lace, tulle, etc.
 Temperature - 30 degrees. 60 minutes. The grip is weak.
 - Wool (handmade). In this mode, the drum easily rotates at 30-40 degrees. Knitwear, cashmere marked "Hand wash". Cycle - 56 min. There is no pressing.
- Economy mode . Low temperatures. Saving electricity (up to 40%). Short duration of the process (20-30 min.). New or not very dirty things are refreshed.
- Other modes : Fast, Duvet, Babywear, Biocare, Sportswear and many more. (Different models may have different names.)
Important! When loading the machine, it is important to load a certain amount of things according to the instructions.
In what cases it may be necessary to reset the program in the LG washing machine
An emergency shutdown of the washing machine is performed in order to reset the settings on the LG washing machine. This manipulation will be needed if:
- the wrong mode is set;
- there are other items in the drum;
- children's things mixed with adults;
- colored linen with white;
- indicators flashed on the electronic panel;
- the system "hangs" and the buttons do not respond for various reasons, etc.

Resetting the program in the LG washing machine: step-by-step instructions
Radical measures (for example, unplug the cable from the socket or even turn off the power button) when canceling programs are unacceptable. The wash cycle of the LG washing machine can be easily resumed by following a few simple, but important and consistent steps.
Three scenarios are proposed.
1) To restart the cycle, press the Start/Stop button once, which in many models also performs the Pause function. If the washer stops, do not pull the door. The door lock should click. Only after it is unlocked, you can remove something superfluous or report the forgotten. Having done these steps, you need to close the hatch and start the device again.
Important! When opening the door, water may spill onto the floor if it reaches a significant level. The situation will be corrected by draining the water through the drain filter.
2) To carry out a complete reset of the error, you should also use the "Start" or "Pause" key, holding it for about five seconds. After resetting, the lock will unlock, but the water will remain in the drum. If it has not merged, the lock will still be unlocked (the excess must be drained through the drain filter). Then the desired program is set: turn the toggle switch, press the "Start" key and at the same time return the toggle switch to the zero position.
3) (If the LG washing machine does not respond). You should disconnect the device from the network for 15 minutes. Then restart it. If it does not help, there is a breakdown! In this case, you should contact the LG Authorized Service Center and in no case try to fix the problem yourself.
Read also “Questions and answers”
Washing machine - What to do if the washing machine stops without draining the water
stains from food, juices, baby nutrition. Your main task is to get rid of them as soon as possible. However, there are cases when yellowish stains are found, for example, on seasonal outerwear, which you pulled out of the closet.
 Get rid of such contaminants with a normal wash. impossible. That is why it is very important to know how and how to remove old stains from the nursery. clothes.
 But be aware that some items require delicate handling. Therefore, the chosen remedy should be as gentle as possible.
We also recommend that you follow these simple rules:
-
Do not be lazy to sort clothes before washing: whites in one pile, colored ones in another. Items with old stains should be sorted separately as they are not suitable for washing. more effort will be required.
-
Try to determine what caused stains on this or that T-shirt. Fat traces are distinguished by blurred contours, and there is no color as such. Spilled juice or contamination from fruit is characterized by dark contours. If clearly the yellowish or brownish color of the stain is different, then it has already managed to be strongly absorbed into the cloth.
-
Look at labels on items.
 With the help of the signs indicated on them, manufacturers clothes tell us how to properly care for products (optimal washing, the possibility of ironing, spinning, bleaching, etc.).
Fighting old stains
A popular folk recipe is suitable for this purpose. As the main components, thanks to which it will be possible to remove the old stain, peroxide acts hydrogen, dishwashing detergent and soda. Take them in approximately the same proportions, stir until a homogeneous slurry is obtained. Then, using a sponge, apply the mass to problem areas, soak for at least 20 minutes, and then rinse thoroughly with lukewarm water. If the impurities are not gone, then repeat the procedure. Often in large families, well-preserved sweaters, pants and T-shirts pass from older children to younger ones. In this case, it will be even more difficult to remove the stubborn dirt. How to wash children's things from old stains? One of the most effective home methods is to use vegetable oil. Dissolve in 5 liters of warm water 150 grams of washing powder and pour a couple of tablespoons of vegetable oil. Soak things overnight. Finally, wash the item in a convenient way.
Mini-survey
Have there been any new types of dirt/stains on your clothes during the lockdown?
Yes, I had to deal with new types of spots
0%
There were few new types of spots
0%
No, there were no new types of spots
0%
0 Spots from 9002 herbs, although they are not old, but getting rid of them can be very difficult. Try rubbing the mark with a cotton pad soaked in alcohol. You can leave cotton for a quarter of an hour. For greater effectiveness, prepare vinegar and soda paste by mixing components 1:1. Put a couple of drops of dishwashing detergent into the paste, apply it to problem areas, soak for 15 minutes.
Removing fruit stains
The tactics of struggle will depend on how much dirt found on clothes "fresh". Dried fruit marks require pre-soaking. For this you you will need hot water in which you need to pour citric acid (1 tablespoon citric acid per liter of liquid). Immerse the item in the prepared solution and leave for half an hour or an hour. Then carefully rub the stains with a stain remover for baby clothes and wait another 20 minutes. After the specified time, wash the product. Fresh contamination from fruits and berries does not require soaking. Enough to decompose T-shirts in the bathtub or sink and slowly pour the above solution over them.
Please note that the water must be very hot, almost boiling. Then the traces will go away easily. But remember that only cotton can be processed with boiling water. fabrics. Synthetic, silk or wool garments deform when exposed to high temperature.
When fruit stains have had time to slightly absorb into the fabric fibers, treat them a bar of laundry soap or prepare a soap paste. Grate a small a bar of soap, add a couple of drops of water until you get a soap slurry, and then apply obtained agent for pollution.
Yellow stains: top ways to remove them
Such stains are characterized by strong absorption into the fibers of the fabric. Remains sweat, urine, dairy products on colored clothes are not very noticeable. But white t-shirts Socks or tights can be permanently damaged if they are not washed in time. We suggest you try some of the most effective folk methods:
-
Alcohol solution with citric acid. Mix the components in equal proportions, wait for the citric acid to dissolve, then apply the product on yellow streaks for a few minutes.
-
Mixture of vegetable oil, powder and stain remover (1:1:1). received rub the problem areas with gruel, and pour the rest of the mixture into a basin with warm water and soak things for 1-2 hours.
-
Boric acid solution, weak concentration. To 5 liters of warm water, pour 2 tablespoons spoons of acid, soak dirty T-shirts and socks for several hours.
-
Hydrogen peroxide.
 Saturate the dirt with it, iron it.
We remove stains from baby clothes
If you are parents or grandparents, then with stains on baby clothes you have to deal with every day. Milk, milk formula, puree for the first feeding, traces of feces or urine. In addition, babies in the first months of life quite often regurgitate, which also entails the appearance of ugly pollution. For example, laundry soap does a good job of removing urine and stool marks. First you need to immerse the panties and sliders in hot water, leaving them to liquid cooling. Then rub them with a bar of laundry soap, wash by hand, rinse.
How to remove baby food and cereal stains from clothes
How to remove baby food stains from clothes? Let's look at a few best practices:
-
Aspirin paste. Crush 2-3 aspirin tablets and put a couple of drops on them water until a paste is obtained. This method will help get rid of milk stains, milk mixture and porridge.
 Pre-soak things in cold water for 1-2 hours.
 -
Whitening toothpaste/washing gel. Take note that they solve the problem of dairy product residues on bodysuits and slips.
How to remove baby puree stains? Best for dealing with pollution resulting from the introduction of the first complementary foods, stain remover.
Mandatory condition - washing clothes after the manipulations with using washing powder marked 0+. Stain remover is also needed exclusively for baby clothes.
Getting rid of stains on delicate fabrics
Delicate fabrics require more gentle handling. With dirt on silk, For satin or chiffon fabrics, a mixture of glycerin and ammonia will do just fine. For her cooking, take a tablespoon of glycerin, drop a couple of drops of ammonia to it alcohol, treat dirty residues. It is best to leave the mixture for 15 minutes and then rinse.
Removing dirt from wool
Wool is also a delicate fabric. It is necessary to choose not only sparing means, but also take into account that the temperature of the water during washing should not exceed + 40 ° C. Otherwise, the fabric is deformed: it will sit or stretch.
As active ingredients you will need:
Mix the components, apply to problem areas, rub gently with your hands, rinse. In conclusion, we erase in the usual way.
Powerful stain remover
Unfortunately, not all traditional methods are 100% effective. While the recipes require some effort to prepare, as well as time to soak. How to wash children's things from stains of fat, tomato juice, porridge, mashed potatoes and grass for a matter of minutes? We recommend using Cif Universal Ultra Fast Spray. It must be sprayed on dirt, clean the surface with a sponge or cloth, and then rinse under running water.
Whitening clothes
Underwear and T-shirts/bodysuits are the most soiled. Often they require bleaching. As a safe bleaching solution, you can use ammonia-soda solution (in 1 liter of water, dissolve 1 teaspoon ammonia and soda).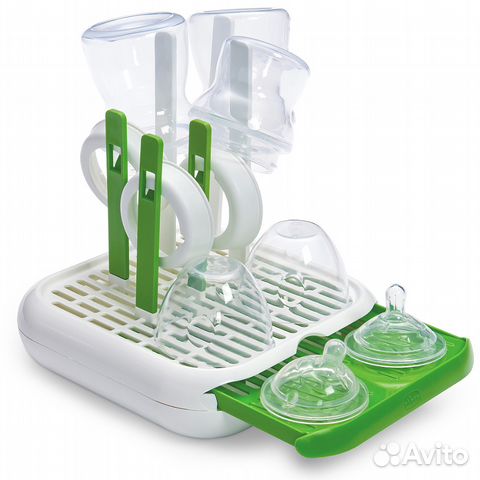 Soak the bodysuit for 2-3 hours and wash.
Which detergents should not be used?
Carefully study the composition of the detergent before buying. It shouldn't contain phosphates, surfactants, and various fragrances. They can be toxic, cause skin irritation, allergic reactions.
Choose only tested and proven powders. Even the child is no longer a baby, it is still better to buy funds marked 0+.
What is the best temperature for washing
The labels on the clothes will help you figure it out. They usually contain comprehensive information on how to wash a particular thing. If the tag is already cut, then refer to the composition of the fabric:
-
Cotton things perfectly tolerate water temperatures up to +95°C;
-
Synthetic fabrics - up to +60°C;
-
Linen - up to +90°C;
-
Delicate silk, wool, satin is best washed at a water temperature not exceeding +40 ° C.