Baby food jar lanterns
Baby Food Jar Jack-O-Lanterns - SuperMom Shuffle
Jump to How-ToI love a good craft project! Especially a seasonal one. It’s just that I don’t always have the time to complete one. I also don’t have the space available to lay out a huge project and leave it laying out as I work on the project at a leisurely pace. However, these baby food jar Jack-O-Lanterns are the perfect craft for me! They are quick to make, require very few supplies and don’t take up a lot of space.
Baby Food Jars
I just love baby food jars. They are so tiny and cute! I kept more than my fair share of them when my kids were eating baby food a few years back. I knew they were just asking to be made into a craft. Maybe I didn’t know what kind or when, but I knew there was a project in there! I had seen this idea on Pinterest done in a several different ways, so I decided to give it a try and make my own version of baby food jar jack-o-lanterns!
This post contains affiliate links. If you purchase something from those links, I may make a small commission. See our full Disclosure and Disclaimer Policy here.
Let’s Get To It!
Supplies Needed
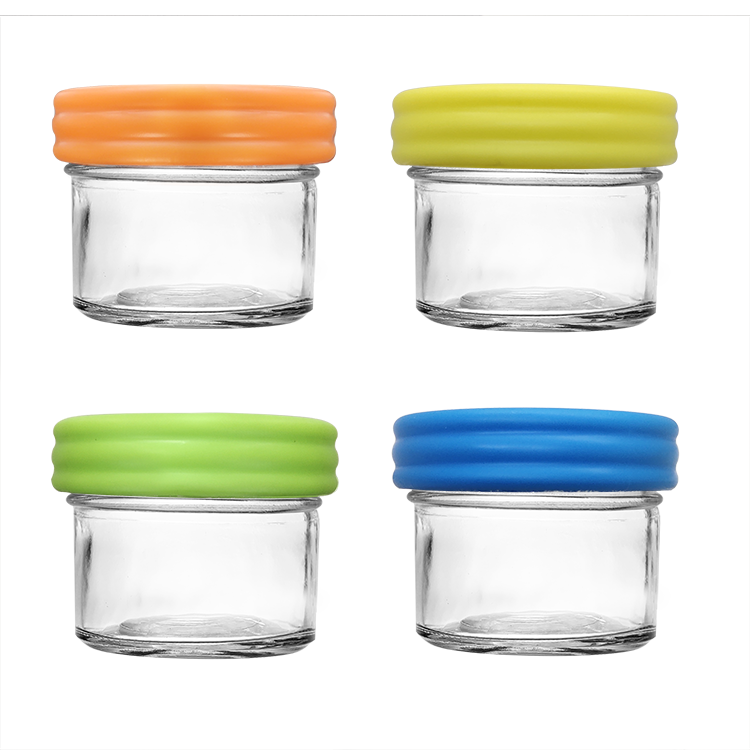
- Babyfood Jars – (or crafty jars) Washed, dried and labels removed
- Orange craft paint
- Clear Printable Labels – The download to print is below!
Additional Supplies
- Printer – To Print the labels for the jars
- Goo Gone – to remove the original baby food brand labeling on the jar
How to Make Baby Food Jar Jack-O-Lanterns
We’ve got all our supplies assembled! Now we are ready!
Step 1: Clean Jars
First, you need to make sure your jars are clean and dry. Remove the labels and the sticky residue from the labels. I used Goo Gone for the label removal part and then washed the jars in warm soapy dishwater. I let them dry while I got everything else ready.
If you don’t have a baby around that’s eating baby food, there are any kind of jars you could ever want at most craft stores or online here.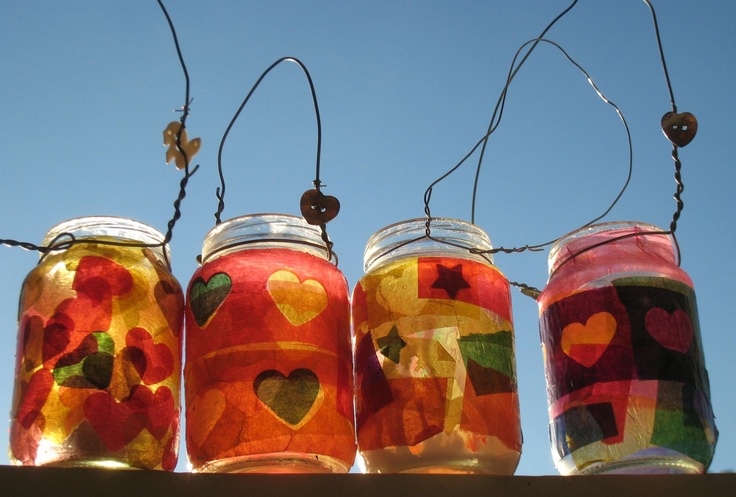
Step 2: Paint the Jars
This is crazy easy and not at all messy. My kind of painting! All you do is squeeze or pour a few tablespoons worth of paint into the baby food jar.
Step 3: Roll the Paint Around Inside The Jar
Gently lean the jar towards it sides and gently roll the jar around in your hands until the inside of the jar is totally covered with orange paint, all the way to the top of the jar, including the rim.
Step 4: Drain Extra Paint
If you have extra paint in your jar, simply let that paint drip into your next jar you are going to paint. If you are done painting jars, you could just let it drip back into the bottle of paint or into a scrap jar.
Step 5: Print Your Labels
While your jars are drying, go ahead and print out the labels for your jars. I’ve used Avery Labels Size 22825 and the template I created can be downloaded for printing here:
Side Note:
If you prefer, there are a lot of other ways to get the faces on the jars.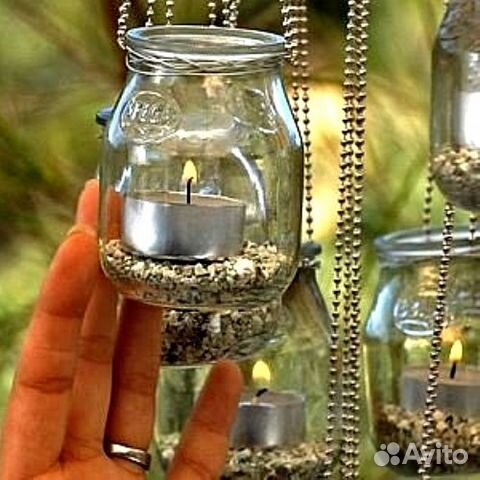 I don’t have a steady enough hand, but if you do, you could easily paint them on the jar or even use a Sharpie marker to draw them on the jar. Some people enjoy cutting out vinyl with a Cricut cutting machine, and that would totally work too. I just found printing labels to be the easiest and certainly the quickest solution for me!
Step 6: Stick Labels on Jars
Once you have the labels printed, all that’s left to do is stick the labels on the jars! A word of warning for you though! I had a lot of trouble with these large round labels lying flat and smooth on the jar. Partly because the labels were big compared to the jar, and partly because the particular jars I was using (BeechNut Brand) are more pear shaped with a smaller top of the jar and bigger bottom of the jar.
The solution to this problem is actually a crazy easy fix. Just cut out the amount of label you need right around the face of the jack-o-lantern. Don’t try to stick the entire round label onto the jar.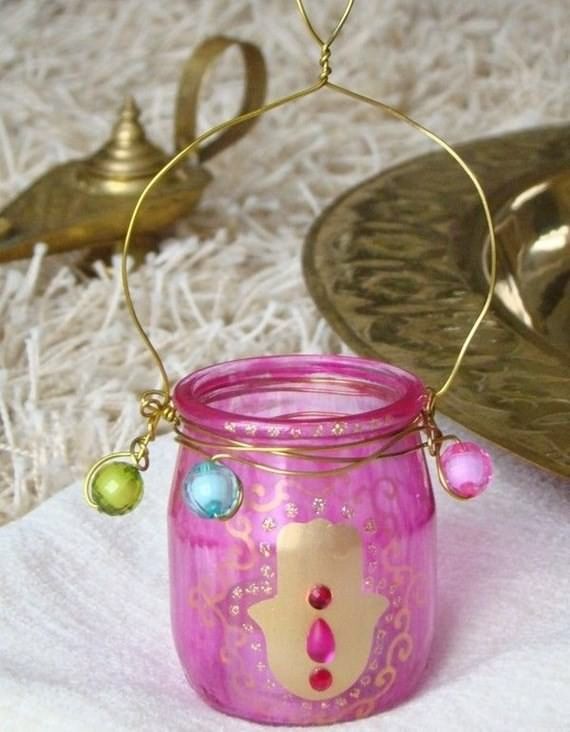 Trust me, it was an exercise in frustration!
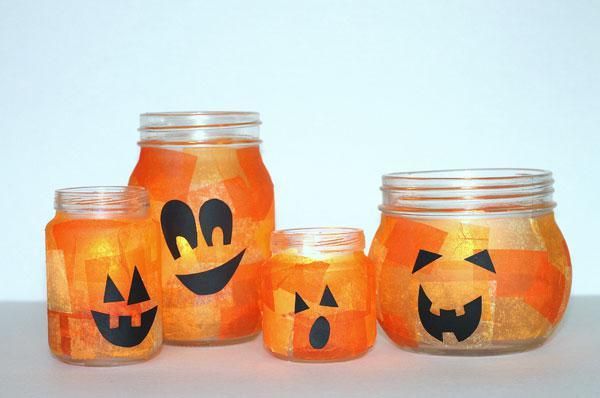
Step 7: Admire Your Work
These jars turned out even cuter than I had hoped they would. I just love them. Look how cute!
I put a label with a different face on each side of the jar so I can change it up and decide that day which kind of face I want to see. The kids loved changing them around as well!
What Do You Do With Them?
So, now you have them, what do you do with them?
I like to put a flameless candle inside and let them sit out and light them up when it gets dark. I will put mine on the mantel with the other Halloween decorations and light them in the evenings. But you could put them anywhere you want a little Halloween cheer! You could also put some candy in a baggy inside and deliver it to others as a gift and a decoration for the fall season!
Baby Food Jar Jack-O-Lanterns Wrap Up
These jars turned out to be such a fun and EASY craft. I am not known for my abilities to begin and FINISH a craft project sometimes.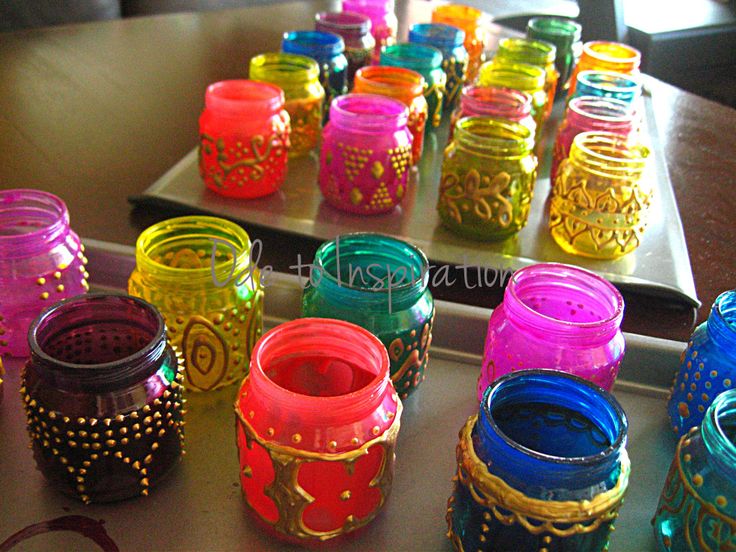 But this little project is so quick and easy, it can be completed in an hour, minus the drying time for the paint. And even that doesn’t slow you down progressing with the project! These baby food jar Jack-O-Lanterns were right up my alley. And the turned out to be so cute! I’m going to use them for decorations and also for gift giving for some loved ones and teachers. I hope you give this project a try! If you do, send me pictures of your jack-o-lanterns! I’d love to see how yours turn out!
Until then, just keep shuffling!
Supplies for Baby Food Jar Jack-O-Lanterns:
- Clear Jars (leftover baby food jars or others!)
- Orange Paint
- Clear Printable Labels
- Inkjet Printer
- Goo Gone (for removing jar labels)
- Sharpie Markers (alternate jack-o-lantern face)
- Black Vinyl (alternate jack-o-lantern face)
- Cricut Cutting Machine
- Flameless Tea Light Candles
Prep Time 5 minutes
Active Time 10 minutes
Additional Time 2 hours
Total Time 2 hours 15 minutes
Difficulty Easy
Materials
- Baby food jars (used) - cleaned and labels removed
- Orange craft paint
- Clear adhesive labels
Tools
- Printer - to print the faces on labels
- Goo Gone - to remove baby food labels
Instructions
- Start with clean, dry jars with labels removed.
- Paint the Jars - For this step, simply squeeze around 2-3 tablespoons of the orange paint into the car.
- Angle the jar towards it sides and gently roll the jar around in your hands until the inside of the jar is totally covered with orange paint, all the way to the top of the jar, including the rim.
- If you have extra paint in your jar, simply let that paint drip into your next jar you are going to paint. If you are done painting jars, you could just let it drip back into the bottle of paint.
- While your jars are drying, go ahead and print out the labels for your jars. The file can be found here.
- Once you have your labels printed, all that's left is to stick them on the outside of the jar. ***NOTE: My baby food jars are bigger on the bottom and smaller on the top. (I.e. - BeechNut brand is more of a "pear" shaped jar) so I found that my label crinkled up and would not lay flat on the jar without creating creases or bubbles. So, I simply cut it to be a smaller label and just cut it into a square shape around the actual face on the label, and it stuck on smoothly and perfectly!
Notes
***NOTE: My baby food jars are bigger on the bottom and smaller on the top.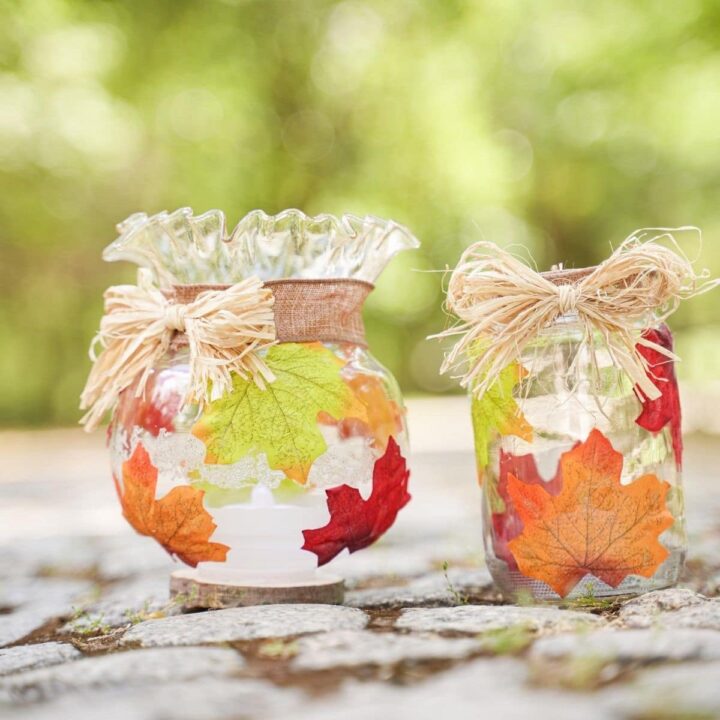 (I.e. - BeechNut brand is more of a "pear" shaped jar) so I found that my label would crinkle up and would not lay flat on the jar without creating creases and bubbles. So, I simply cut it to be a smaller label and just cut it into a square shape around the actual face on the label, and it stuck on smoothly and perfectly!
Recommended Products
As an Amazon Associate and member of other affiliate programs, I earn from qualifying purchases.
-
Goo Gone Original - 2 Ounce - Surface Safe Adhesive Remover Safely Removes Stickers Labels Decals Residue Tape Chewing Gum Grease Tar
-
Apple Barrel Gloss Acrylic Paint in Assorted Colors (8 oz), 20748 Gloss Pumpkin Orange
-
Avery 2" Round Labels for Laser & Inkjet Printers, 120 Glossy Crystal Clear Labels (22825)
Related Posts:
- Fall Day Date Ideas
- Spring Monogram Wreath
- 6 Things To Do Immediately When You Are Having The Worst Week Ever
Want to remember this? Save this article about “Baby Food Jar Jack-O-Lanterns” to your favorite Pinterest board!
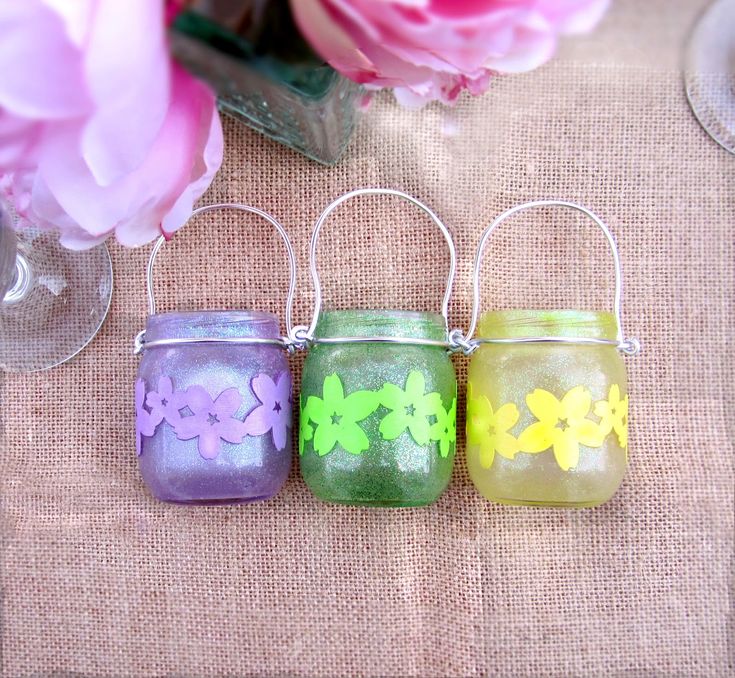
Dyed Glass Luminaries from Baby Jars
I was sitting at a little artsy café with my hubby enjoying some decadent chocolate fondue for our 9th anniversary and suddenly I had this great idea: dyed glass luminaries from baby jars.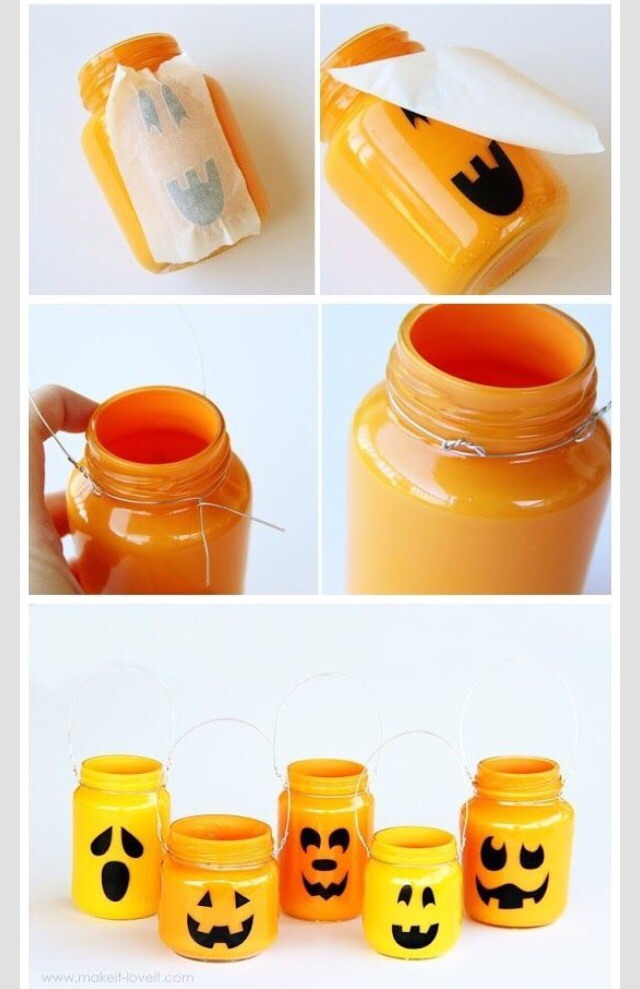 This was featured in the Simple Summer Magazine Issue here.
As I sat there reminiscing and taking in the past 9 years, thinking through the great moments, the not so great moments, the waitresses interesting accent, the cafés decor, our wedding day, how cute my husband looks……
So back to the cute little café decor.
I noticed that hanging over each table were beautiful brightly colored vases with candles. I loved it! Sitting there thoroughly engaged in our romantic evening and enjoying our deep and silly conversation, I was also coming up with a list in my head on how I can make a version of these glass vase luminaries myself. Yes, women can be in the midst of a romantic moment and still think about mundane tasks like the grocery list.
In my mind, I toyed around with learning how to blow glass and opening up a cute little shop with beautiful one of a kind glass decor pieces but that idea was quickly replaced with a much more practical one. Why don’t I just learn how to dye glass?
I have a habit of including my husband in my crafting thought process which I am sure he loves (insert smirk). I interrupted our conversation about our future goals and desires and I asked him “How do you think they dyed those vases?”
His reply was to the point–“I don’t know.”
We carried on with our fabulous anniversary (NO KIDS) evening. Later when I got home looked it up and pretty much everyone’s process was the similar: glue, food coloring and water.
I was already planning an Alfresco Dinner Party so this project Dyed Glass Luminaries from baby food jars was added to the list. To my surprise no one had tried it yet with baby food jars at least that was the results from my online search. So here’s my unique take on it, enjoy!
For more simple summer projects stop by and check out our recipes, crafts and home decor here or join the fun via Facebook or Feedburner.
Supplies:
- food coloring (colors of your choice)
- washed baby food jars w/ lids
- glue (basic white paper glue)
- water
Process:
- In each jar place 1tsp of glue, 2 tsp of water and 3 drop of food coloring and mix.
- Place lid on jar and shake around making sure that it’s completely covered.
- With lid still on turn over and let it drip down.
- Then once the excess has completely dripped down, remove the cap and turn over to let it air dry (completely dry inside).
- Wrap wire around the rim and then over for the handle.
It took about 20min and it cost me nothing (since I had all of these items on hand at home).
NOTE: If you notice that the jars are not completely covered then shake it up again and start over with step #2. Also, if you want your colors to be darker add more food coloring. Play around with the ratios but this is what worked for me. Also, if you are too lazy to take them down after your party and it happens to rain the colors will strip off. Not that I did that, ahem.
They looked absolutely beautiful when they were lit up in the dark! So beautiful, that I used it for the cover of our Simple Summer Issue.
I entered this project in the CSI Project and it won! I don’t think I have ever participated in one of these. Fun times!
Crafts from baby food jars
Skip to content
Search for:
The kid ate the puree with pleasure, smearing its contents on all surfaces. And the jar was carefully washed out and sent to the shelf to its fellows. What to do with her?
There are a lot of ideas for using glass baby food jars. Website "Mom can do anything!" collected the most interesting of them.
- Needle cases. From glass jars it is easy to make such cute pincushions that can fit buttons and other small handicraft things.
- Houses for fairies. If you are fond of modeling, then you should try to make such a delightful house for fairies.
- Aquarium. A jar is a small aquarium for a toy fish. Pour soil inside, install algae - the craft is ready. You can also mold plasticine fish together with your child and place them in a jar.
- Terrarium. Plant moss and other small, low-maintenance plants inside.
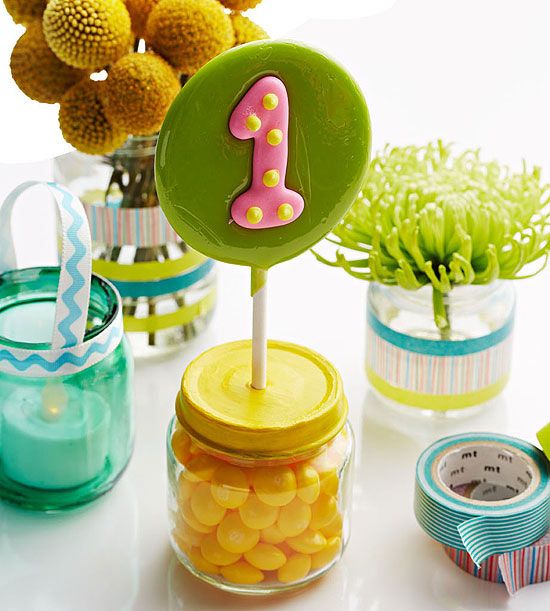
- Decorations for the holiday.
 Decorate the jars with glitter, make holes in the lids and install decorative elements, letters and numbers. A very original decoration is ready.
 - Bird feeder. Few people realize that such delicious drinkers and bird feeders are obtained from an ordinary baby food can. In the sun, they will shimmer with all the colors of the rainbow and delight the eye.
- Storage for small items. From cans, not only beautiful things are obtained, but also very practical. Screw the lids to a wooden surface and you will get very convenient containers for storing small things.
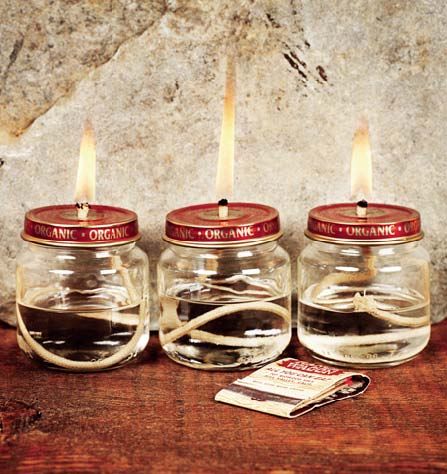
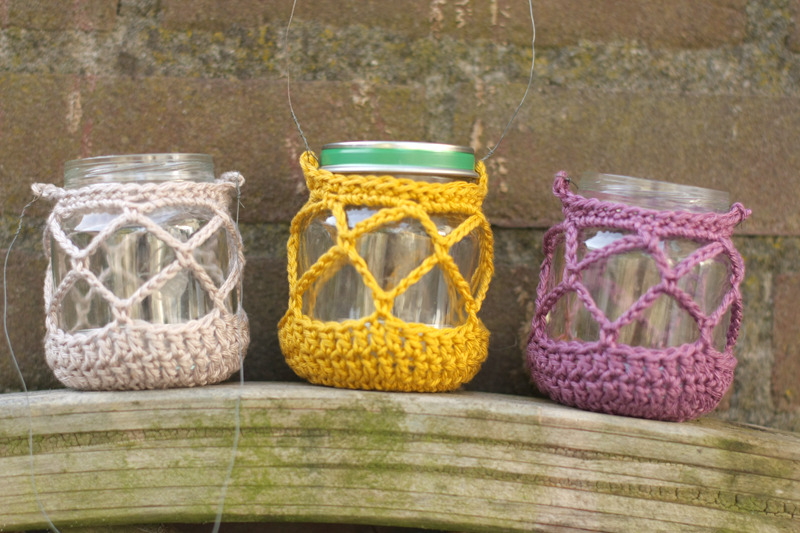
- Candlesticks for the garden. Buy a lot of small candles, put each one in its own jar and hang them by ropes on tree branches. A beautiful setting for a romantic evening is ready.
- Container for growing onions. Green onions are a storehouse of nutrients that are so lacking in the cold season. Growing such an onion is not difficult. Pour water into the jar, put the bulb on top, in a few days we will get the first shoots.
- Pots for seedlings. It is convenient to plant parsley, dill and other herbs in small jars.
- Crafts from baby food jars. Such beautiful flowers in pots are easy to make yourself with your children. We circle the palm on a green sheet of cardboard, cut it out, gluing a flower on each finger. We put it in a pot-jar - a beautiful craft is ready. Such flowers will be a great gift for mom or grandmother by March 8th.
- Storage containers. In puree jars it is very convenient to store buttons, beads, beads.
- Pencil holders.
- Night lamps.
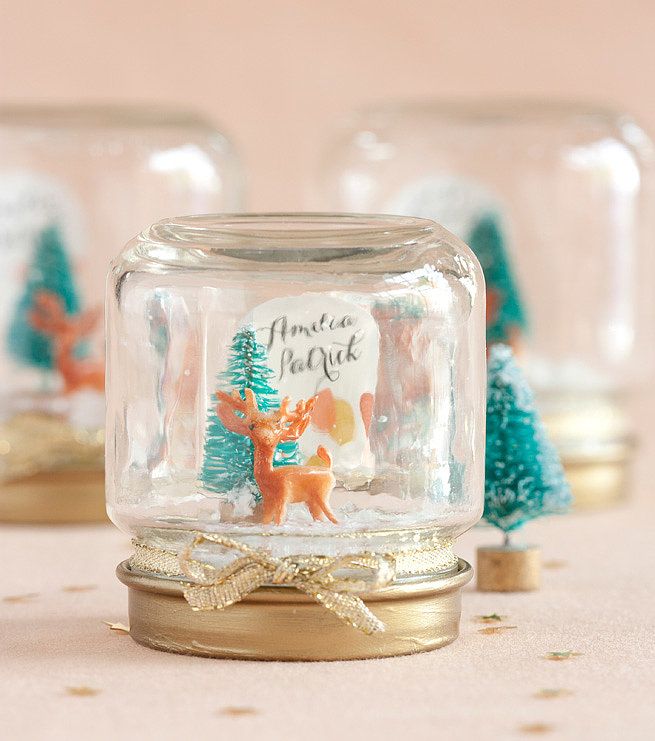
- Snow globe. A can of baby food makes a delicious snow globe. Just stick the figurine on the lid. Pour the baby oil and glitter into the jar, close the lid tightly and shake.
- Gift-treat for guests or children.
- Original frames. Just place photos inside the jar.
- Spice storage. Glass jars with screw-on lids keep spices fresh for a long time.
- Vases for flowers. Just dip the jar in the paint and get unusual vases for small flowers.
- Jelly mold. Small jars are great for making jelly. It looks beautiful and appetizing in them, one jar holds one serving, and the screw cap will help keep it in the refrigerator for a long time.
- Portion desserts. In small jars it is convenient to make portioned desserts.
- Refreshing cocktail in a jar.
- Candles. You can read how to make these candles here.
- Crafts. Small glass jars are a great base for crafts.
- Rubber storage. The advantages of transparent jars are obvious - it's easy to find the right one.
How do you use jars?
Share with friends
26 ideas on how to use baby food jars
The child has grown up, eats with everyone at the same table, and there is no longer a need to buy baby food in jars for him. During the time while you accustomed him to various tastes, a huge amount of containers for juices and purees accumulated. Where to put jars of baby food? InterestsPortal invites you to take advantage of our ideas.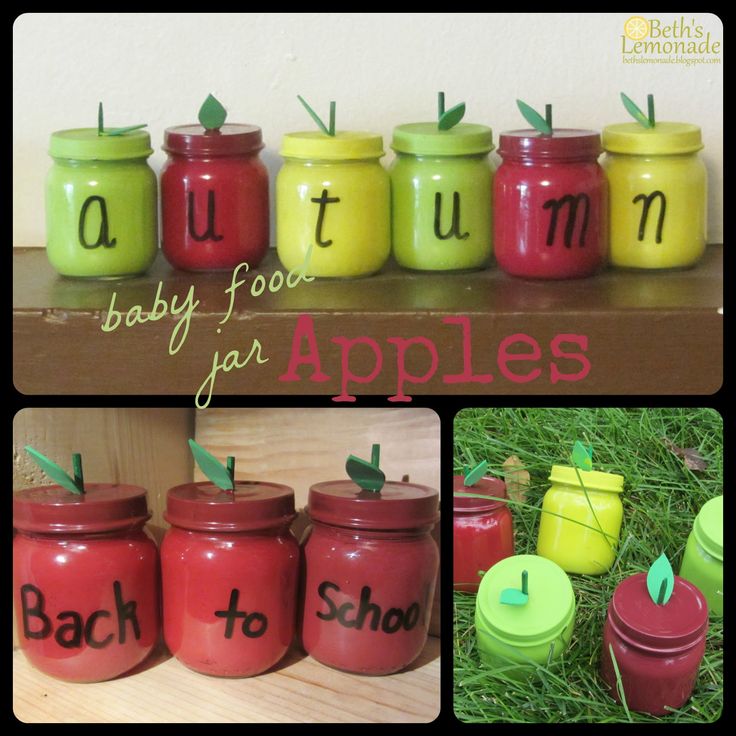
Candle holders from jars
The simplest idea that most often comes to mind is to make candle holders. Place colored sand, beautiful pebbles, decorative glass pebbles on the bottom and light tea candles.
DIY candle holders
Baby food jars can be decorated to fit any theme. In this photo, the candlestick is made in a marine style. Paint the jar with paint. Apply colorless varnish around the bottom and, while the varnish is still wet, sprinkle sand on it. Tie the neck of the baby food jar with pretty ribbon or twine. Glue decorative glass pebbles, shells, starfish.
Vase for your interior
It is always nice to have fresh flowers in different parts of the house. You can decorate small vases with your own hands to match the style of your interior.
A group of vases for an original interior
We are used to having a bouquet of 5-7 flowers in vases. Try using several juice bottles. Put one flower in each jar, and you will get a bouquet of vases. Is it really original?
For table setting
Use the idea of table setting. Place cutlery and napkins in each bottle. If you also write the names of the guests on the jar with a permanent marker, then you will also get cards for seating guests at the table.
For bathroom accessories
Put ear buds, cotton pads and other little things that are needed for daily hygiene into glass jars and you will see the contents. By screwing beautiful handles to the lids, you will no longer need to unscrew the lid of the jar every day - just cover it. Brilliant idea for organizing space in the bathroom.
DIY napkin holder
Paint your favorite baby bottle color. Make a slit on the lid of the jar, twist the napkins and place inside. Pull the center napkin through the slot. Such a napkin holder can be used both for table setting and placed on an office desktop.
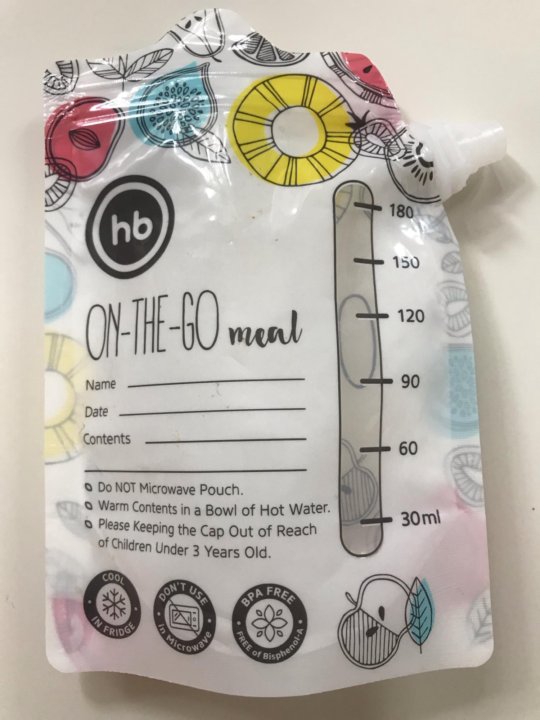
Lunch to go
Use the food jar as a food container.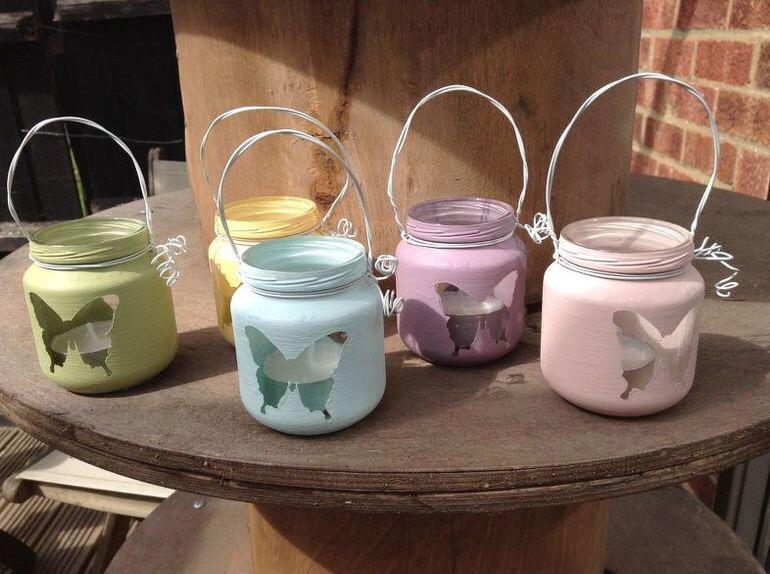 Our idea is to prepare a healthy cheesecake and put it to the children at school. Place crumbled shortbread cookies on the bottom, then curd cheese, decorate with berries from cherry jam on top. We think your kids will definitely like this dessert to take away.
Healthy food to go
It's always nice to start every morning with a healthy breakfast, like this smoothie. Can't have breakfast? Close the lid and take it with you.
Here are some more healthy smoothie recipes.
Baby food jars as glasses
Why buy wine glasses or drink glasses when you have a huge number of bottles? Pour cold lemonade into them, insert a straw and treat your friends.
Spice jars
Another idea for using baby food jars is to use them as spice containers.
Storage container for buttons, needles and threads
Organizer for all sewing accessories in one jar. Use this idea to lose nothing and find quickly.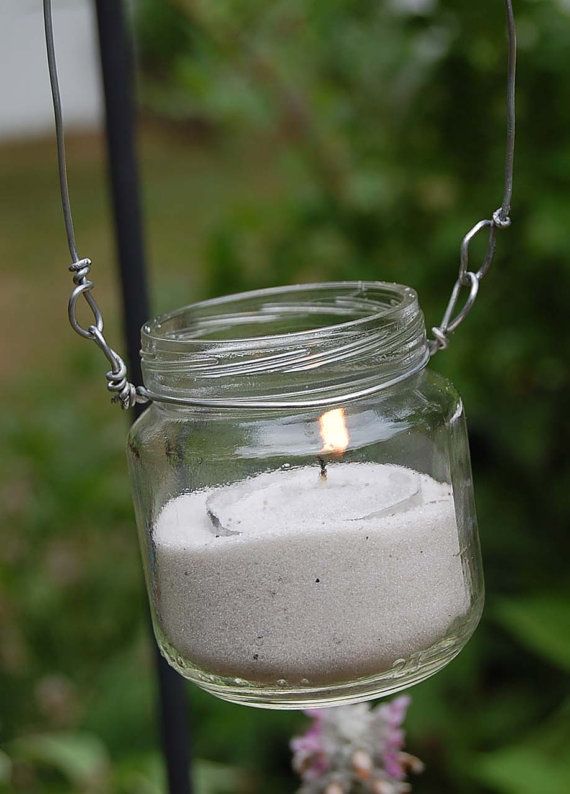
Nails, screws, bolts container
Screw the jar lid to the bottom of the shelf in your shed. Now you don't have to look for anything, all content will be immediately visible. Why not a paradise for a perfectionist?
Garden lanterns
Twist the handles for the candlestick out of the wire. Place a tea candle in a jar - the lantern for your garden is ready.
Romantic garden
Do you want to create a romantic atmosphere in your garden? Hang these lanterns over your resting place.
Here are some more ideas for creating garden seating areas.
Garden Party
Combining the two previous ideas, create a blooming fragrant garden. Use bottles as vases.
Pencil holder
Colored jars are the perfect solution for storing stationery. These glasses can hold pens, pencils, crayons, scissors and more.
Small terrarium with your own hands
Together with your children on vacation you can make such a terrarium.
More ideas on what to do with your child during the holidays read here.
New Year's decor
Preparations for the celebration of the New Year always begin with decorating your home with themed decor. Glass jars provide an incredible amount of ideas.
DIY gift for the New Year
Every year we spend a lot of money buying souvenirs for loved ones. Make a New Year's gift with your own hands from a baby bottle. Place artificial snow, a spruce twig, a snowman toy, glass beads inside - an original gift is ready!
Girl's birthday
Rinse bottles that used to contain juice. Fill them with a milkshake or other drinks for a girl's birthday party. Insert tubes. Your princess's guests will be delighted.
Boy's birthday party
Have you already decided that the boy's party will be pirate-style? Then this idea is for you. You can place these candy bottles in a candy bar, or distribute them to little guests as birthday gifts.