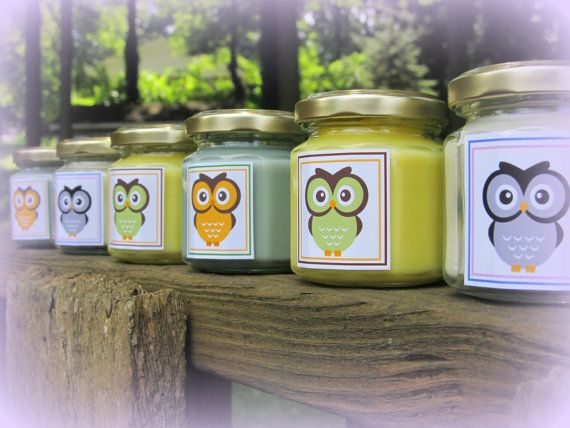
Baby food jars candles
Baby Food Jar Candles - Etsy.de
Etsy is no longer supporting older versions of your web browser in order to ensure that user data remains secure. Please update to the latest version.
Take full advantage of our site features by enabling JavaScript.
Find something memorable, join a community doing good.
(46 relevant results)
DIY Baby Food Jar Candles
Disclaimer: This post contains Amazon affiliate links!
Looking for a way to upcycle those baby food jars? I had over 200 sitting in my garage, and had saved them thinking “maybe I can reuse them someday with the kids”. So two years ago I made these adorbs DIY Baby Food Jar Candles and gave them to everyone I know for Christmas. I mean, who wouldn’t want a homemade gift right? And hot wax and kids are a perfect combination…right? (yeah I’m crazy) But I did find productive tasks they loved…I promise!
So first I hit the web trying to figure out what to buy. After doing some research, I chose soy wax. You can order it online at several candle places, but my virtual shopping cart was bulging. So I did what every crazy mom did, I went to Michael’s the day after Thanksgiving and capitalized on big sales. However I just scoped out Amazon and the prices are really great!
what you need
All you really need are the the wicks (super cheap compared to Michael’s), the wax, and a silver pitcher to melt the wax. Everything else the websites tell you to buy is unnecessary in my opinion. You probably don’t even need the special pitcher, but I didn’t want to worry about ruining one of my pots.
Here’s a step-by-step idiot proof guide on how to make inexpensive DIY baby food jar candles.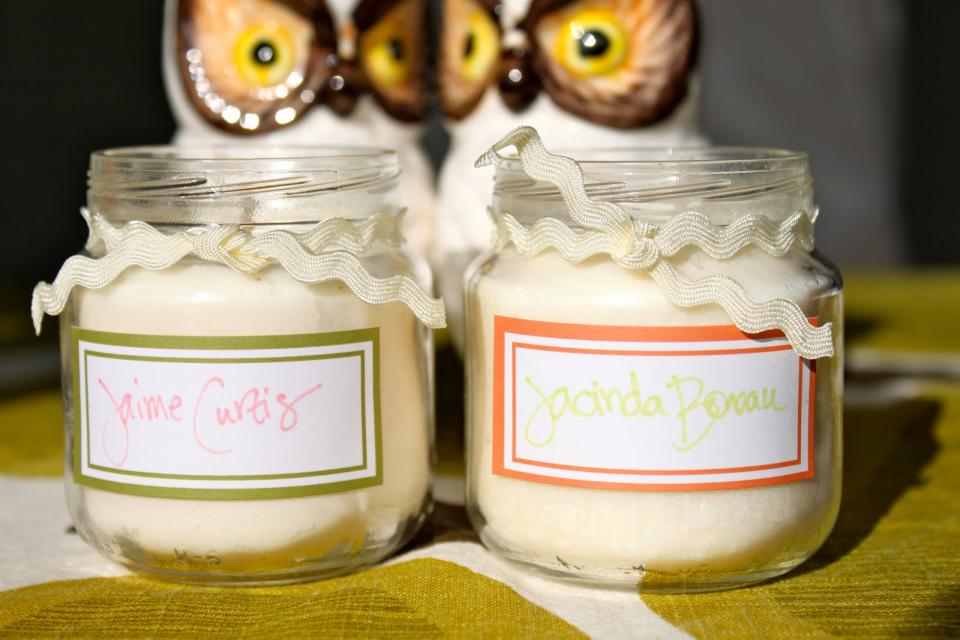 Let me preface this by saying I am very impatient, and even for me, this was a breeze.
diy baby food jar candles
Step 1. Clean baby food jars and get sticky stuff off. Goof Off to the rescue, don’t even bother with anything else.
Step 2. Hot glue the wicks in. Don’t buy the fancy stickers they sell, hot glue is cheaper and everyone needs a hot glue gun…especially if you have little girls with tiaras!
Step 3. Heat up wax. There’s all these directions online about heating the soy wax up to 175 degrees, and letting it cool to 150 degrees before you pour. But I didn’t buy a fancy thermometer, I just used a meat thermometer. But, you do need to keep the wick still after you pour the wax in. You can buy wick clips, but again too much dough for me. So be inventive! I used my daughters hair clips and they worked fine. Oh and you can add scent if you want! I had lavender and rosemary on hand, (what I use sometimes when I clean) so I put a few drops of lavender in a few batches.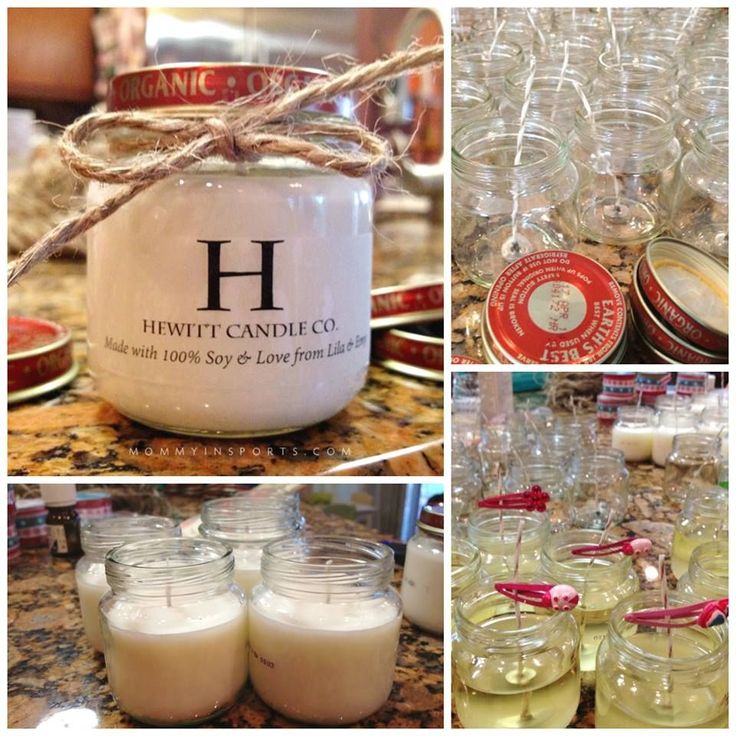
Step 4. Let them cool.
Step 5. Decorate! I used clear mailing labels from an office store, I think this was the most expensive part of the project. I also bought different ribbons, but settled on good old-fashioned twine from Home Depot I had in the garage. I thought it looked rustic and cool…kind of what a homemade gift should look like…right?
Super cute DIY baby food jar candles huh? But I bet you’re wondering…”how did the kiddos help?”. Well, that was tricky because I forgot about the hot wax part when I started. But Lila was able to use her scissors and cut all the twine for me. She loved measuring each piece with her Hello Kitty ruler! She also added the lavender and counted the drops. She was pretty good with putting on the stickers too, and she and the little one helped me put on the lids.
These were great gifts for family, teachers, friends, neighbors, and co-workers. Plus they were made with love…which is why we celebrate in the first place! Good luck and happy candle making! (Pin this for later!)
Did you like this post? Follow along on Facebook for more cute DIY Projects like these! (Links below the projects!)
DIY No Sew Tutu
DIY Crayon Party Favors
DIY Sharpie Mugs
How to Make a Planet Using an Old CD
DIY Christmas Ornaments
DIY Homemade Holiday Gifts
We also have loads more ideas on Pinterest! See you over there!
Do-it-yourself candlestick from a jar from baby food
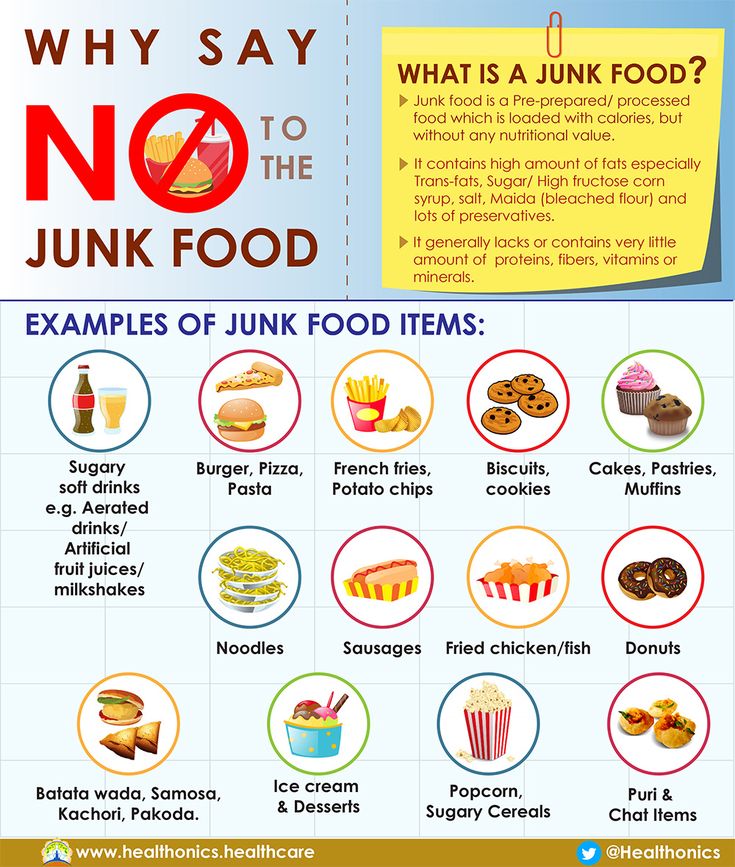
Today, there is electricity in every home and there is no need to constantly use candles. But they remain popular in various countries and the manufacturing industry is constantly evolving. Today, candles symbolize the holiday, help create a romantic atmosphere, aroma candles soothe, are used as decorative elements, and most importantly, they bring coziness and comfort to the house. Candlesticks can now be seen in a wide variety of materials, sizes and colors. Sometimes such creations cost a lot of money, and if you want to make something fabulous and unusual on your own, then today we will tell you how to make a candlestick from a jar with your own hands. nine0003
Consider several options
If you have several glass jars in stock, then you will definitely choose several options for yourself. Jars of baby food or spices look very good, you can make a whole series of candlesticks of the same size. You can use a candle holder or pour wax inside and add various ingredients for fragrance and decoration.
Here, for example, is a chandelier made from such small jars. For manufacturing, the most common materials are required, you can see an example of manufacturing in the photo. nine0003
Or these lanterns, they will be a good decoration for the restaurant.
For the stability of the candle inside the candlestick, you need to add sand, grains to the bottom, with the addition of small gravel and salt it will also look good.
These lamps will fit well into the interior of the gazebo.
Winter version of the candlestick. Salt was poured tightly at the bottom, the top was decorated with twine, and you're done.
Just color illustrations can be added.
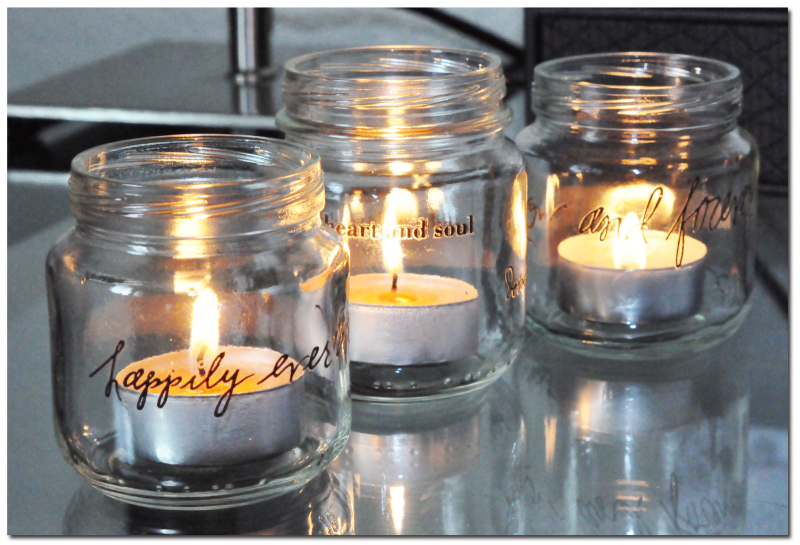
Small glass cups instead of jars are also a good option.
And to make such a magic candle with your own hands, you will need:
- wax;
- wax heating container;
- wooden stick;
- aroma oils;
- dye;
- wick;
- jar.
Cut the wax into small pieces and set to warm up in a water bath.
Stir the wax well until all the pieces are completely dissolved and add various aroma oils and dyes. You can add spices, such as cinnamon or star anise.
Various decorative elements can be added to the sides of the jar.
The wax hardens very quickly, so pour it into the mold immediately.
We fix the wick with a stick and hold it carefully. All details can also be fixed with wax. When the wax has completely cooled, you can remove the top mount and cut off the excess thread. nine0003
To make multi-colored layers, you need to wait until each filled layer hardens, only then pour the next one.
Small jars do not need much decoration, their shape gives an unusual look anyway.
It all depends on your mood, you can come up with different decorations on different topics.
Here, for example, the beauty of the sea with the help of an ordinary semolina.
Jars decorated with glitter. nine0003
If the jar is wrapped with rope or threads, and then covered with paint of one tone or several, then such a structural candlestick will turn out.
Fantasy will always tell you the best. The main thing is to have the desire and mood, then you get such wonderful works.
Decorative pebbles are sold in every craft store. They can also be used to create mesmerizing beauty.
You can't take your eyes off this beauty.
Cans can also be used, they can also be beautifully decorated. Video on the topic of the article
Festive Candlestick, or The second life of a baby food jar
After my youngest son was 5 months old and we started introducing complementary foods, I had a lot of empty baby food jars. I distributed them, and when I supplied everyone I could, these jars began to force me out of my own kitchen. And so I got hold of them. So, we make a festive candlestick!
For this we need:
* Baby food jars,
* Paints and contours for glass and not only (acrylic, melallic, glitter, universal ... in general, everything that is available for any surfaces)
* Thinner for non-water based stained glass paints (if they require it) I do not dilute the paint with it but my brushes.
* Varnish glossy universal or for decoupage.
* Brushes.
* Wide brush or blush brush - to shake off glitter.
* Loose sequins - different colors and sizes.
* Alcohol or nail polish remover.
* Cotton pads.
* Absolutely any ribbons: satin, nylon, thin, wide, with or without a pattern, braid and plaits, etc. ... nine0003
* Beads, glass beads, beads, sequins, etc.
* Glue gun.
* Scissors.
* Tea candle.
* Well, what is there and how you really want to decorate the candlestick.
So let's get started.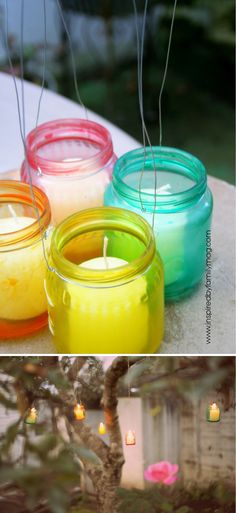
I propose to make several variants of candlesticks:
Making a candlestick Pink glamour.
Degrease the jar by wiping it with alcohol or nail polish remover.
Next, with stained glass paint and the selected color, I have it orange, holding the jar upside down, apply paint around the circumference of the jar and rotate it, forming smudges. nine0003
Pour orange sequins on the still wet paint.
After the paint with the glitter sprinkled on it has dried, shake off the glitter that has not stuck to the paint and got on the clean glass. Next, with white paint, we do the same thing only from the side of the neck. Controlling and forming smudges. Then we pour pink sequins of a larger size than red ones onto the dry paint.
After everything has dried up and we have removed the non-stick sequins from the jar, we proceed to decorate the neck. We will decorate it with a pink-lilac ribbon and threads of different colors. nine0003
Having wrapped the neck with tape, we fixed it with a glue gun (do not overdo it with glue, it can leak when heated from a candle!) fix it pointwise and wrap it tightly. We glue the threads on top of the tape, after tying the knots at the same distance.
Next, we make a bow from the same ribbon and the same threads and glue it. The hanging ends of the threads seemed long to me, but I didn’t cut them off, but wrapped them in a jar and fixed them with a small ribbon bow. Then we insert a tea candle into the resulting candlestick, and voila !!! Enjoy! Glamor - mur - mur - mur - it turned out purr! nine0003
********************************************** **
Making a Beaded Fairy Candlestick:
Degrease the jar by wiping it with alcohol or nail polish remover.
Then draw a contour on the glass, I have it golden, a vertical line from the bottom to the neck. We draw a fatter line, we will glue multi-colored beads on it.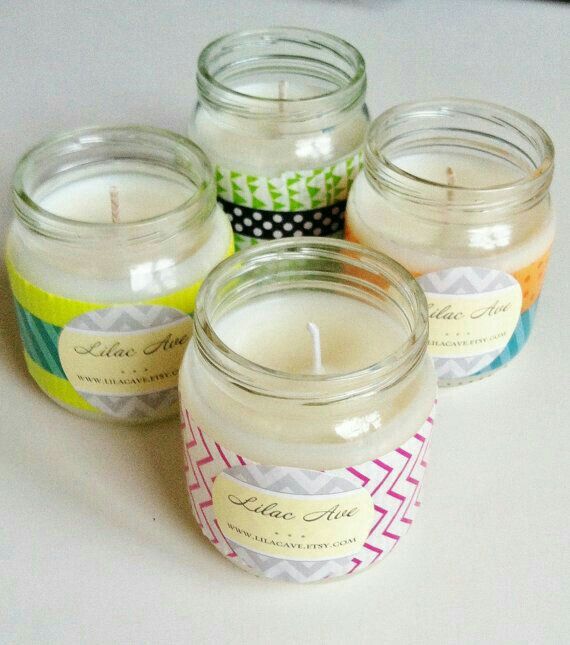
Draw the next line...
Draw lines at equal distance dividing the jar into segments. We cover all lines with beads. From the bottom around the circumference of the jar, too. Further, after our contour with beads, yellow and green paints on glass has dried up, we paint over the resulting windows one by one. Sprinkle the top with pale green glitter. nine0003
After complete drying, we begin to decorate our candlestick with ribbons and threads.
As in the first version of the candlestick, we fix the ribbons and threads around the circumference very carefully without excess glue. We decorate with large and smaller bows so that our candlestick is beautiful from all sides.
We insert a candle into the candlestick, light it and admire! This is what we ended up with:
************************************** *** nine0003
Making a candlestick Mosaic lantern:
Degrease the jar by wiping it with alcohol or nail polish remover.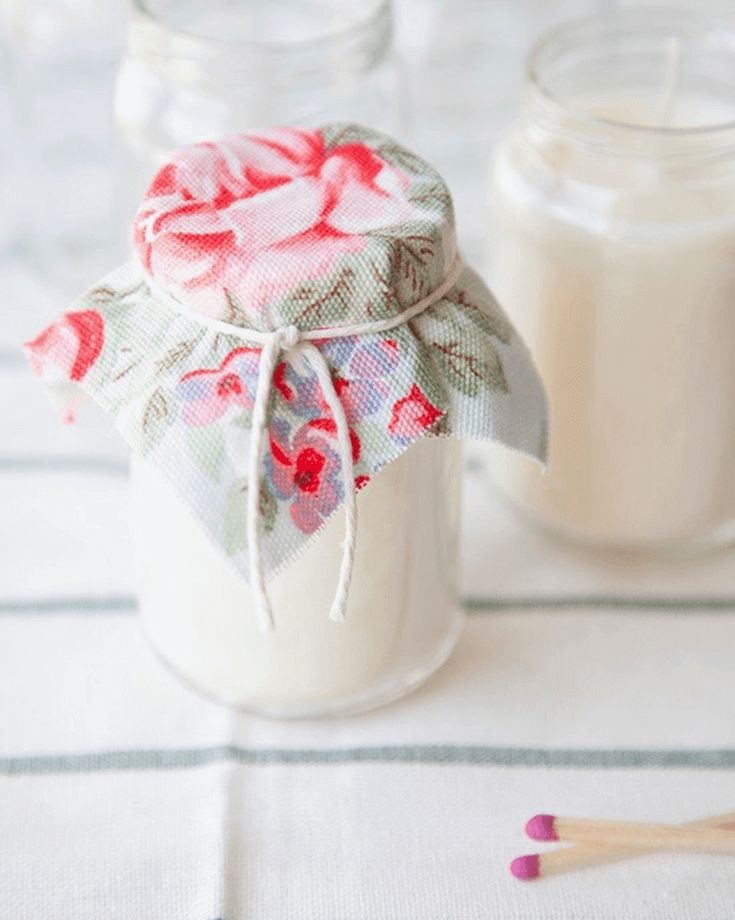
Draw chaotic straight lines on the glass with a bronze contour. As a result, we get a mosaic pattern. Don't grind! After the contour has dried with white, yellow and orange paints on the glass, we paint the resulting cells, leaving some of them unpainted. On the dry paint, pour red sequins, not very thick. nine0003
After the paint has dried, shake off the excess glitter and start decorating the neck.
We wrap the neck with a wide pale yellow ribbon, hiding the thread. With a thinner white ribbon, we wrap it in spiral steps. We finish the decor with an orange thread and a ribbon bow.
Insert a candle, light it and admire the play of light in the mosaic picture!
************************************
Making paired candlesticks M F:
Degrease the jars by wiping them with alcohol or nail polish remover.
With universal contours with sparkles (red and blue), draw a triangle and a circle on the other jar with a red contour - the sign Zh on the other, with a blue contour a triangle, but already inverted and a circle - the sign M.