Diy baby chick feeder
How to make a DIY chicken and quail feeder for 0 dollars – Road Less Unraveled
We may earn money or products from the companies mentioned in this post.
DIY feeders for your brooder that cost nothing
If you’ve already read my previous posts on chicken rearing, you can probably guess that I’m a fan of diy’ing over buying when possible.
This applies to chicken feeders too. I hate most feeder designs because they’re yet more scraps of plastic polluting the planet. They also suck at what they’re supposed to do!
No matter what, your chickens will find a way to spill their food all over the floor. Your chickens will also inevitably find a way to drop a deuce or two in their food. These things will happen no matter what.
So if these things will happen no matter what, why are you wasting money on buying useless feeders?
Sometimes the best solutions are the ones we create ourselves using free stuff we have around the house.
Best baby chick feeder (0-1 weeks old)
My new favorite feeder for new baby chicks consists of a row of paper egg cartons. Elevate the feeder up to the height of your chicks’ heads so they can’t poop in their food or kick the food all over the place. I secure the egg cartons to the sides of my brooder walls with twist ties.
As the babies get older, they’ll start getting naughty. They’ll climb into the cups of the feeder. Very cute!
They’ll also be just tall enough to poop inside the feeders. Not so cute!
This is when you rip out the egg cartons and throw them in your compost pile.
Zero waste homestead!
The paper egg cartons are big enough to hold food for chicks up to one week old. At this stage you should only have to refill the feeder about 2-3 times a day.
Once they get bigger, you’ll want to upgrade to diy hanging feeders…
Keep reading!
Paper egg carton feeders for new chicks. Compost the cardboard when the chicks outgrow them.
Best diy hanging chicken feeder (1 week+ to adulthood)
For bigger chicks and even adult chickens, hanging feeders are the best way to keep their food clean of poop and to keep them from flicking their food all over the place.
I use regular 1L pop bottles for my older chicks. If you have more chicks, or full grown chickens, you’ll want to use larger soda bottles to store more feed.
Simply cut 3 openings about 2″-3″ up from the bottom of the bottle. The openings should be wide and tall enough for your chickens to stick their heads in without scratching their combs or wattles. You don’t want the openings any bigger because multiple chickens will try to stick their heads in the same hole and end up pecking each other.
Some people elevate their feeders by stacking bricks underneath, but this just gives naughty chickens a step up when they want to topple their feeder.
I like to hang my feeders. Again, you’ll want to hang the bottles so the opening is just at their head height when they’re standing upright (maybe 1″ higher, depending on the age of your chickens).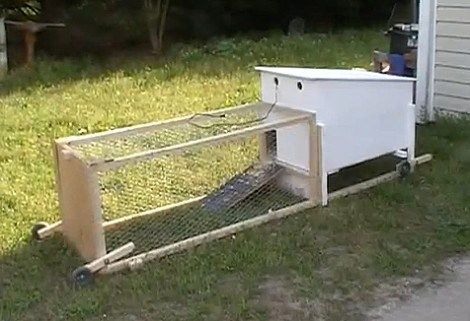 This keeps them from gripping the opening with their legs. It’s also just high enough that they can’t stick their butt holes in the openings…
Try it out and watch them eat. If it’s too high for them to reach the last bits of food in the bottom of the bottle, you’ll want to lower the feeder a bit.
As your chickens grow, you can adjust the height of the bottles along with their growth.
Hanging 1L bottle feeders. No mess. No wasted food. No poop. These babies are not happy that I’m sneaking a photo during their lunchtime. Look at those angry faces!Sometimes the best and most frugal solutions to common problems are found in items we all have lying around the house. Let me know if you have any other nifty ways to reuse household items for your chooks!
Robin
On the path to figuring out how to survive in a system that wants to chew me up and spit me out. From autism, to finding ways to make a living without a job, to frugality, to retiring early, to homesteading.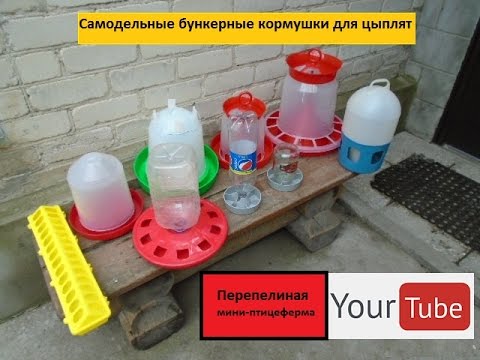 Finding a road that’s less unraveled. That’s pretty much what this site is all about.
Homemade Chick Waterer • The Prairie Homestead
When I was meandering through the aisle of the feed store the other day, I almost grabbed one of those plastic chick waterers. I knew we were going to be needing one soon, since the coop is clean and shiny and the chicks are set to arrive in a couple weeks.
But of course, my craziness innovative, frugal mentality won out, and I decided I would challenge myself to create my own chick waterer from materials I had at home.
After several conversations with my scientifically-minded husband regarding the laws of physics, I scrounged up various plastic containers and began to conduct experiments.
Let’s just say I should have payed more attention to our conversations, as I ended some with some flooded counters and sopping wet dish towels.
Anyway. I do believe I have mastered the elusive chick waterer.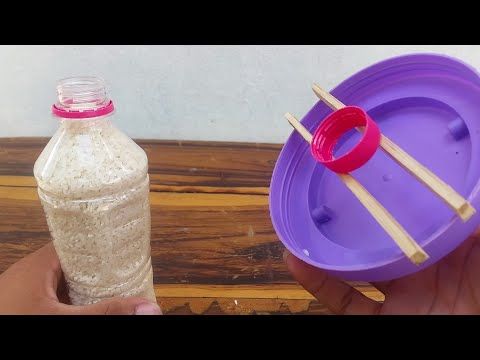 I am excited to share my findings with you, in hopes of saving you several physics lessons and wet kitchen floors.
First off, here is what I came up with after treasure hunting around my home:
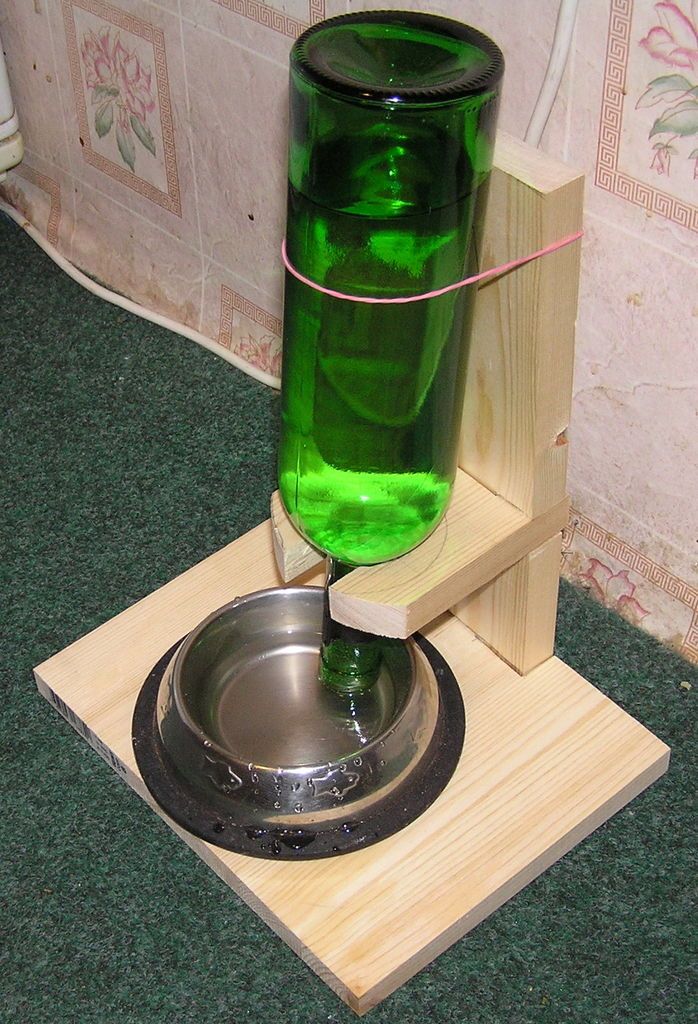
My intial idea was to repurpose this old parmesan cheese container for the top portion. I then cut the bottom off of a plastic gallon jug to make a “dish” that is around 3 inches tall.
However, after some trial runs, I found that the parmesan container didn’t work because the lid did not seal securely enough.
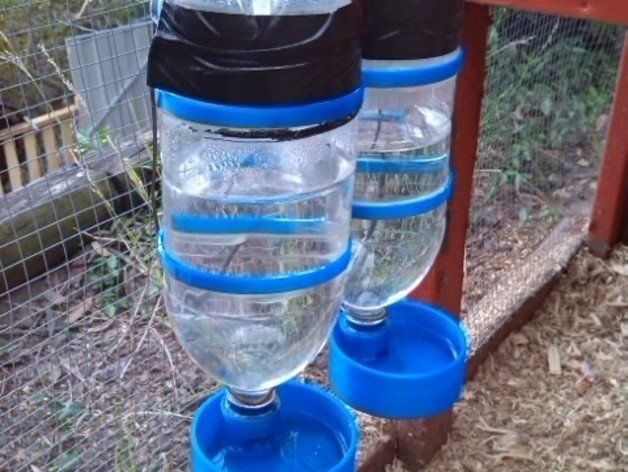
So I found a 48 oz lemon juice bottle instead. I highly recommend using a bottle that has a small cap, since it’s important that the container holding the water be airtight.
I then poked a small hole, about the diameter of a pencil, near the bottom of the jug.
I used a hot glue gun to attach the bottle to the tray. I didn’t want to use any sort of glue that might leach into the water and harm the chicks.
And now you are ready to fill ‘er up. The tray should fill until the hole is covered, and then stop. When the chicks drink, the bottle should slowly release water to provide fresh water at all times. A self-refreshing waterer is more ideal than an open pan, since it prevents the chicks from taking a bath or drowning. And we don’t want that.
Ready to make your own?
Homemade Chick Waterer Notes
- There are numerous options when it comes to raw materials. Dig through your recycling box, garbage can, or pantry to see what will work. The bottom tray needs to be several inches larger in diameter than your water container. Some ideas could include: milk jugs, yogurt tubs, gallon jugs, large plastic water bottles, etc.
- Make sure to thoroughly wash everything before assembly and don’t use any container that might have had substances that would be toxic to the chicks.
- The container that you choose to hold the water must have a lid and be air tight.

- Be mindful of where you place the hole. If it is too high, the tray will overflow. If it is too low, the water level might be unreachable for the chicks.
- If the water does not want to flow, try increasing the size of your hole.
Of course, these same principles could be applied to a larger scale to make a full-sized chicken waterer. If Prairie Baby was older, this would have made a great science experiment. But as of right now, she is more interested in trying to chew on the containers. Oh well, maybe eventually. 😉
Have you ever made a homemade chicken waterer? What materials did you use?
Do-it-yourself feeder for chickens from improvised materials: photo and video
01/28/2022 18 788 2 0 Chicken coops, cages and feeders
so that it is comfortable for the birds.
There are ready-made products that can be purchased in stores, but it is much more pleasant to make a feeder yourself. How to do it? What materials will be needed? All this and much more in our article. nine0006
Content:
- 1
Medical from improvised materials
- 2
Plastic bottle
- 2.1
Tools and materials
- 2.2
9000
- 2.1
- 9000
- 3.1
Tools and materials
- 3.2
Step-by-step instructions
- 3.1
- 4
Photo gallery
- 5
Video “Chicken feeders”
Feeder made from local materials
Feeders for chickens have different modifications. They depend on the types of feed supply, and the position of the structure itself in the cage. For example, they are divided by size, how they are attached, or how you will serve food.
Here is their classification:
- floor;
- wall-mounted;
- suspended;
- tray.
Making a product with your own hands is very simple.
General rules for creation:
- Little chickens must not be able to climb into the food bowl, otherwise they will leave their droppings there and will not eat food.
- The design itself should be comfortable in everyday use.
- The volume of the structure should be enough for all the chickens and preferably for the whole day, and most importantly, the size should be such that there is enough space for everyone to eat.
There are many types of homemade feeders from scrap materials, here are a few:
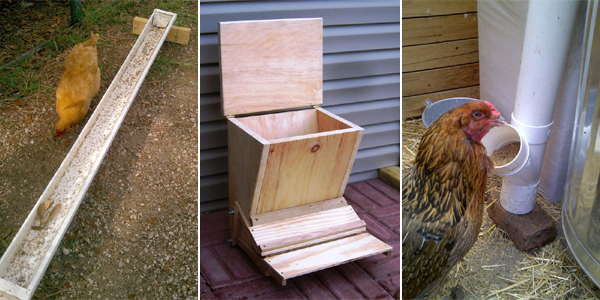
- Feeder based on a plastic sewer pipe. It can be left lying around for example after repair, or you can buy it at any store. And the assembly process is very simple and within the power of any craftsman. To do this, you will need a pipe with a sufficient diameter, a plastic pipe tee, a cap to fit the pipe and a file to cut it all.
- You can also make a feeder using a small bucket left over from ice cream, for example.
- They are also of the bunker type, to create them you need a bucket of construction mixtures, not metal, for example, a sectional dog bowl, and most importantly, a very sharp knife.
- Ordinary canteen, made very simply, a hole is cut in a simple, for example, 5 liter plastic canister.
- For the more experienced, there is a plywood fixture, its production will take you more time and effort, but the reliability of this design will serve you for more than one year.
- With plastic, we can make many different feeders.
Next, we will tell you how to make a feeder from a plastic bottle.
Plastic bottle feeder
DIY bottle feeder for chicks is an easy solution for beginner poultry farmers. This method is the most popular and easily accessible, you can do it too, and now we will tell you how easy it is.
Tools and materials
To get started on creating a design based on a plastic bottle, we need things that are at hand in every home:
- An eggplant with a capacity of 2 to 10 liters, at your discretion.
- Metal bowl, preferably a large basin.
- We also need a plastic funnel.
- And the most important thing is a hammer and up to 20 nails.
- We will also need a very sharp knife, which we mentioned earlier. nine0017
Step-by-step instructions
- On the bottom of your chosen bottle, cut a few holes. It is with the help of them that the food will get enough sleep for our chicks.
- Next, take the nails and heat them up, then insert them on the bottom of the bottle at the same level with the basin in order to delimit the approach of the chickens to the dish. The main thing is that the gap between the nails should be exactly for one bird.
- We attach a funnel-shaped dish to the neck, with the help of which the food will evenly fill the bottle.
 All this is shown in the photo below. nine0017
That's it, this feeder should be enough for 20-25 chickens, it remains only to place it in a cage with livestock.
Loading ...
Automatic chicken feeder
It is very important to provide chickens with good nutrition from the very beginning and the main thing is that it be on a constant basis, that is, at any time of the day, an automatic feeder will help us with this.
Tools and materials
We need:
- sharp knife;
- 1.5 or 2 liter bottle;
- food bowl, one and a half times the width of the selected bottle;
- screw.
Step by step instructions
- Cut off the bottom of the bottle.
- Cut off the neck about 7 cm from the edge.
- Cut out holes so that the feed can flow evenly.
- Punch the cap with a screw.
- We connect them as shown in the photo.
Everything can be filled with food and put on your chicks.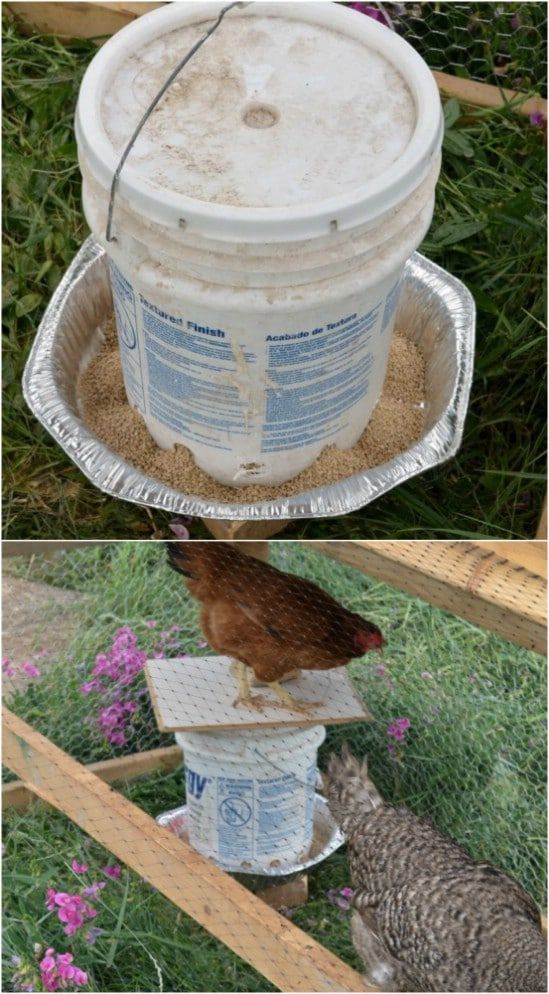 Feed should be enough for the day and you do not need to check every five minutes for its availability. nine0006
Here we have told you one of the intricacies of poultry farming. In the video below, we have selected several more types of feeders to create at home, which will certainly interest you.
Photo gallery
- photo 1. Chickens eat food
- photo 2. Feeding for feeding chickens
- photo 3. Chicken and plastic feeder
- photo 4 nine0185
- Photo 5. Chickens in a cage eating food
- Photo 6. Dimensions of a homemade structure for chickens
Video "Chicken feeders"
This video describes the creation of several types of feeders from plastic containers.
from a plastic bottle and other materials with photos, drawings and videos
Home > Poultry farming > Chickens > Keeping chickens > Homemade chicken feeder: types, criteria,…
Keeping poultry at home can be a good source of family food and budget.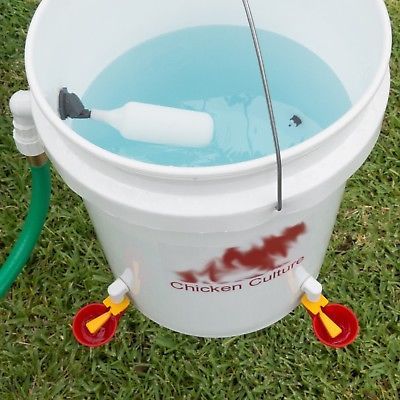 Regardless of the goals pursued, one of the main keys to the success of raising chickens is the competent construction of the feeding process. Since this aspect is considered to be one of the most costly, choosing the right feeder will help to reduce costs and achieve the desired results in a short time.
Article contents
- 1 Types of chicken feeders
- 1.1 Production material
- 1.2 Type of feed feed
- 1.3 Regulation in the chicken coop
- 2 Main requirements
- 3 DIY feeders
- 4 Plastic bottles
- 5 Automatic cake 677
- 7 Plywood feeder
- 8 Bucket feeder
- 9 Hopper feeder
- 9.1 Similar articles
Types of chicken feeders
The main advantage of the feeder is cleanliness and economical consumption of feed. All feeders are divided according to three main parameters: material of manufacture, type of feed supply and position in the chicken coop.
Material
- Wooden. Suitable for feeding grain, mixed feed, chalk, shells and small stones to poultry.
- Metal or plastic . Designed for wet mash, because it is easy to clean.
- Container covered with mesh or thin metal rods. It is rational to use for feeding green grass. nine0017
Feed type
Making a feeder requires tools and skill.- Tray. This is the name of flat rectangular containers with low sides on the sides, which prevent the feed from spilling. Most often used for feeding chickens with compound feed.
- Grooved. Represents a container with a removable grid or turntable. Inside, such a feeder is divided into several compartments, in which different types of food are placed. As a rule, they are used outside the chicken coop. nine0017
- Bunker. Designed for dry food. In the container, you can pour such a volume of compound feed and grain, which is enough for 24-30 hours.
 In these feeders, bird food fills the trays gradually, and the closed design keeps it clean and dry.
[adsp-pro-4]
Coop position
- Floor standing. Suitable for placement anywhere in the house.
- Mounted . They can only stand inside the chicken coop: in the center or around the perimeter. Mounted on special devices or brackets. nine0017
General requirements
The basic principle of the bird feeder is to avoid contamination and spillage of feed.Chicken feeders must have the following characteristics:
- Ensure correct feed intake. The container should be made so that the chickens do not have the slightest opportunity to climb into the middle, scatter food and defecate on it. Borders, turntables or a net should protect the feed.
- Be user-friendly. Since the feeder must be replenished daily with food, periodically washed and cleaned of food residues, it must be made of lightweight material and simple in design.
 nine0017
 - Correct size. The feeder should contain food for the entire bird for every 3-4 hours.
Important! In a rectangular feeder, one chicken should fall 10-15 centimeters in length, for chickens - 5-8 centimeters. In the case of a circular tray, 3 cm should fall on each individual.
DIY feeders
Making a feeder is possible even from an ordinary bucket.There is a wide range of bird feeders available in agricultural stores today, but you don't have to buy them. In order to save the family budget, you can make a feeder yourself. This will not take much time, but A plastic bottle, a bucket, plywood and even a sewer pipe are suitable as a material.
Plastic bottle feeder
One of the easiest feeders to make. It is a container with holes at the bottom, from which the birds receive food. Suitable for feeding the smallest chickens.
Important! The main advantage of a plastic bottle feeder is a stable round base.
Chicks are evenly spaced, do not choke. nine0006
Materials required:
- Clean plastic bottle 1.5 l.
- Scissors or knife.
- Shallow plastic bowl.
Step-by-step instructions:
The advantage of a bottle feeder is ease of manufacture.- Wash and dry the bottle thoroughly.
- Cut off the neck with scissors, cut 5 holes at the bottom with a diameter of 1.5-2 centimeters.
- Secure the bottle to the container with liquid nails. nine0014 Pour compound feed inside the feeder until the container is full.
The chicks will be uninterruptedly fed throughout the day, not pushing and giving weaker individuals.
[adsp-pro-5]
Pipe feeder
This container is suitable for feeding a large number of older chicks.
Materials required:
- Sewer or drainpipe.
- Sharp knife.
Step by step:
Any pipe can be used to make a feeder.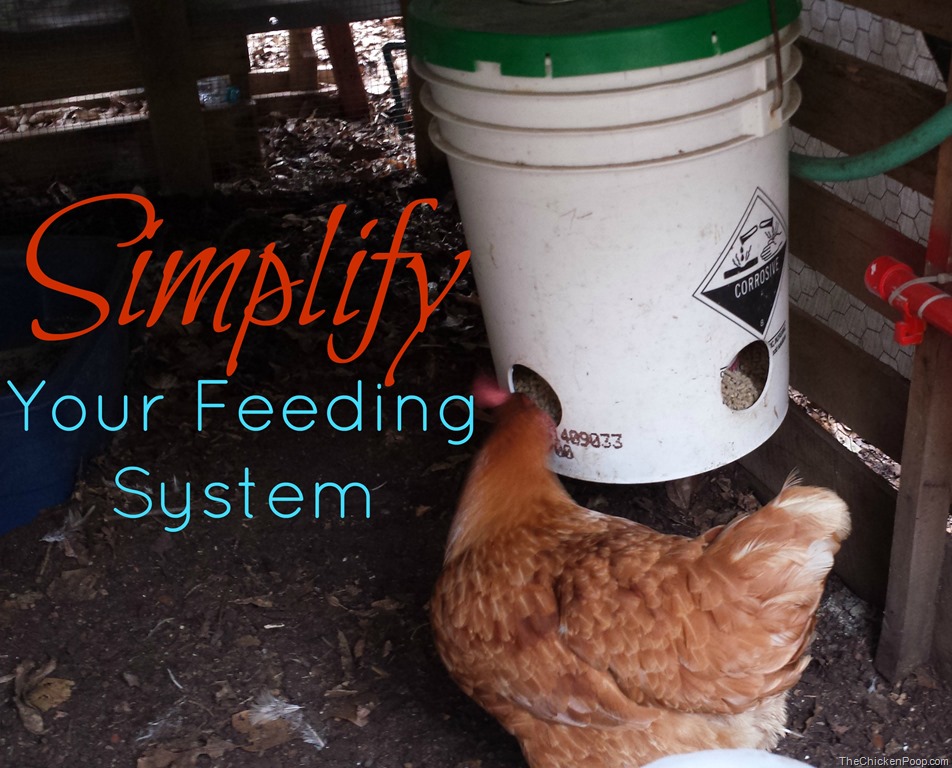
- Clean the pipe of debris and dust, treat with a disinfectant.
- Cut out rectangular holes 12-15 cm long, 5-6 cm wide.
- Place on the floor near the wall, cover with compound feed.
A handmade pipe feeder will provide chickens with food for 7-8 hours.
Automatic feeder
Is the most original model. It has a large reserve capacity for food storage. When the main zone runs out of food, a new portion automatically arrives. This system is very convenient because you do not need to regularly check if the bird has feed. nine0006
Attention! Depending on the size of the reserve cavity, an auto feeder can provide food for one and a half to two days.
Materials required:
- Plastic pipe.
- Suitable low knee. It is rational to use double.
- Sharp knife and scissors.
- Nails.
- Hammer.
Step-by-step instructions:
An automatic feeder provides birds with food for several days.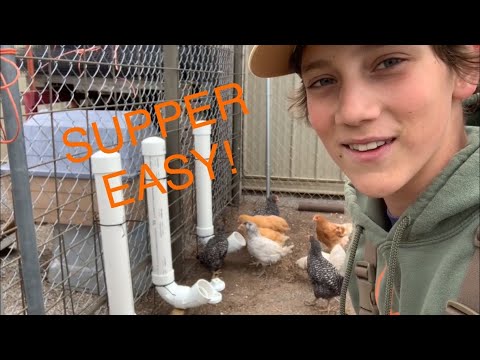
- Fold pipe and elbow. nine0017
- Attach the structure evenly to the wall with nails and wire.
- Fill the pipe completely with feed. It will systematically enter the main tank under its own pressure.
The automatic feeder is the ideal way to feed your chickens. They will have free access to the feed for broilers, and the limited size of the main container will not allow the young to rake and soil the food.
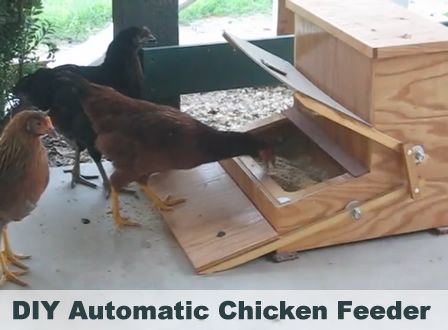
Plywood feeder
The main advantages of a wooden feeder are lightness and mobility. It can be used not only in a chicken coop, but also in an open pen for birds. nine0006
Materials required:
- 2 pieces of plywood for side pieces 12 cm wide x 18 cm high.
- 2 pieces of plywood for walls in the following dimensions: length - 80 centimeters, height - 15 centimeters.
- Base plywood 80 cm long x 12 cm wide.
- Narrow wooden board and stick, 80 cm long.
- Hammer and nails.
Step-by-step instructions:
Instead of plywood, you can take the usual cutting boards. nine0077Bucket feeder
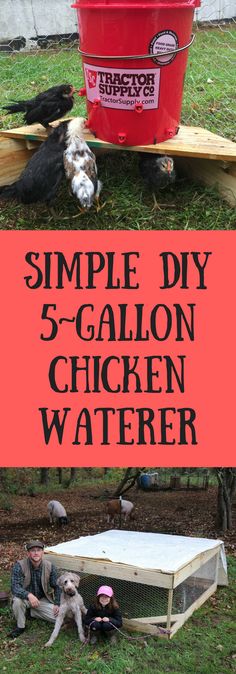
The main advantage of the device is the limited access of birds to feed , which allows keeping it clean for as long as possible. It can be used for a large number of chickens and adults. nine0006
[adsp-pro-6]
Required material:
- Large shallow dish.
- Plastic bucket. It is recommended to take a container with a volume of at least 5 liters.
- Sharp knife.
Step-by-step instructions:
For the feeder, it is better to use large buckets from under building materials.
- Use a knife to cut 5-6 holes in the bottom of the bucket, 2-3 cm in diameter.
- Place a container in the middle of the plate and fill it completely with food. It will evenly fall to the bottom under the weight of its own weight. nine0017
Hopper feeder
This type of feeder eliminates the need to feed the chicks every 2 hours.
Materials required:
- Large plastic bucket.
- Empty container from cooler.
- A small piece of pipe in any profile material.
Step-by-step instructions:
Feed losses in the hopper feeder are minimal.- Cut small oval holes in the bucket. Their size should be such that the chickens can get food and not completely climb into it. nine0017
- Make three small holes on the pipe. Cut out three segments from them, so that in the end it has three teeth.
- Attach the tube to the neck of the pre-filled container.
- Cover everything with a bucket and turn over.