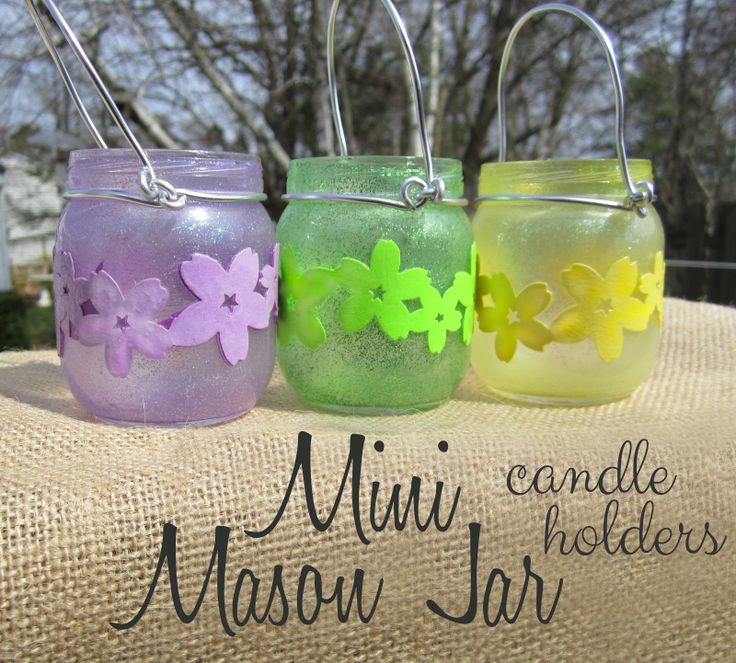
Hanging baby food jar candles
Baby Food Jar Candles - Etsy.de
Etsy is no longer supporting older versions of your web browser in order to ensure that user data remains secure. Please update to the latest version.
Take full advantage of our site features by enabling JavaScript.
Find something memorable, join a community doing good.
(53 relevant results)
Baby Food Candle Jars - TinkerLab
- Rachelle
- Art Activities, Collage, Craft, Elementary, Everyday Materials, Pre-School, Recycled
Despite putting my best foot forward toward making my own baby food, I’ve still succumbed to buying jars of smashed peas and pureed peaches for handy food on-the-go. While all of our jars get recycled, it’s hard to ignore the quantity of glass or the art-making potential in these adorable little vessels. I allowed about ten of them to pile up before this project hit me. Not only do I like how they turned out, but it’s also one of those crafts that’s child-driven. And if you know me, you know that I like my art projects to be open-ended. If you also have a stack of these cuties in your dish rack begging to be repurposed, you might also want to scroll through the links at the end of this post for more ideas.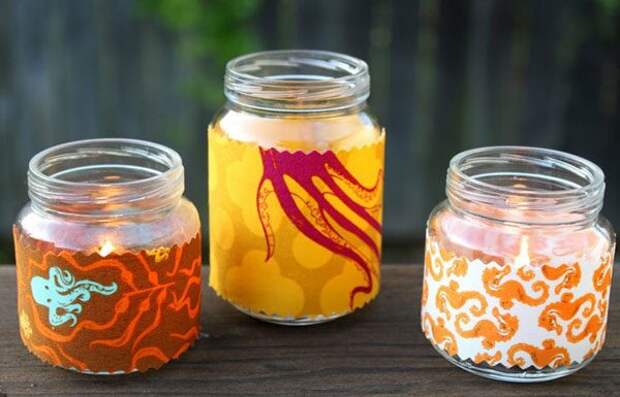
Materials
- Baby Food Jars with the labels removed
- Tissue Paper
- Mod Podge
- Paint Brush
- Scissors
- Glitter (optional)
Cut the tissue paper up into pieces. I cut a bunch of these ahead of time since I wasn’t sure how invested N would be in this step. But of course, she loves cutting, and we had a bounty of tissue paper pieces in no time at all!
I limited the palette to pink, light blue, and white with a red pattern (saved from an Anthropologie gift…lucky me!), and recommend this as a unifying strategy if you’re going for something seasonal or to match your couch.
I poured some Mod Podge into one of the jars and N mixed in some glitter for an extra-sparkly effect. If you’ve never used Mod Podge, it’s similar to white glue and does an amazing job at both gluing and sealing. Mod Podge Rocks is a fabulous blog that’s brimming with Mod Podge ideas.
We placed the tissue papers into clear containers for easy spotting. With a brush, my daughter painted glue on the outside of the jars and covered them with tissue paper of her choice. I didn’t want to miss out on the fun and made a few, too!
I was impressed when she came up with the stumpy-hand technique for covering the jars mess-free!
To seal them well, I gave each jar a goodly overall layer of Mod Podge before turning them upside down for drying.
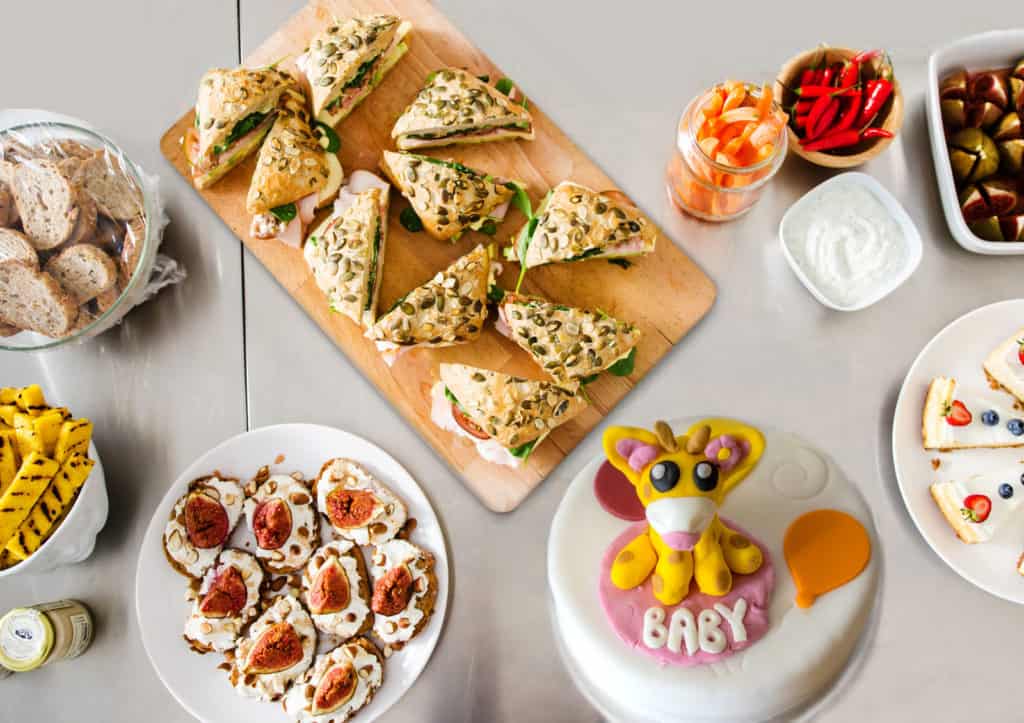
We’ve been decorating our summer table with them, but given the palette, wouldn’t these be sweet decorations for a baby shower? Looking for Mod Podge? You can buy it here!
So, I know I’m not the only one trying to come up with baby food jar ideas. Tell me, please, what you’ve done with baby food jars!!
More Baby Food Jar Crafts from around the web
Fabric Tea Light Baby Food Jars from Prudent Baby
Tons of Ideas for re-purposing baby food jars from Making Friends
Gluing knick-knacks to baby food jars from The Mother Huddle
12 Ways to Re-Use Baby Food Jars from Chasing Green
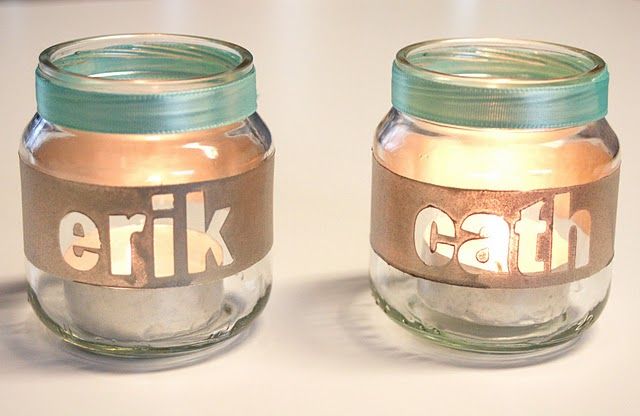
Personalized Tea Light Holders from Radical Crafts
TinkerLab Schoolhouse Online Art Club for Kids
Engaging kids art classes - from the comfort of home!
You set up the supplies & we'll offer the instruction.
Do-it-yourself candlestick from a jar from baby food
Today, there is electricity in every home and there is no need to constantly use candles. But they remain popular in various countries and the manufacturing industry is constantly evolving. Today, candles symbolize the holiday, help create a romantic atmosphere, aroma candles soothe, are used as decorative elements, and most importantly, they bring coziness and comfort to the house. Candlesticks can now be seen in a wide variety of materials, sizes and colors. Sometimes such creations cost a lot of money, and if you want to make something fabulous and unusual on your own, then today we will tell you how to make a candlestick from a jar with your own hands.
Consider several options
If you have several glass jars in stock, then you will definitely choose several options for yourself. Jars of baby food or spices look very good, you can make a whole series of candlesticks of the same size.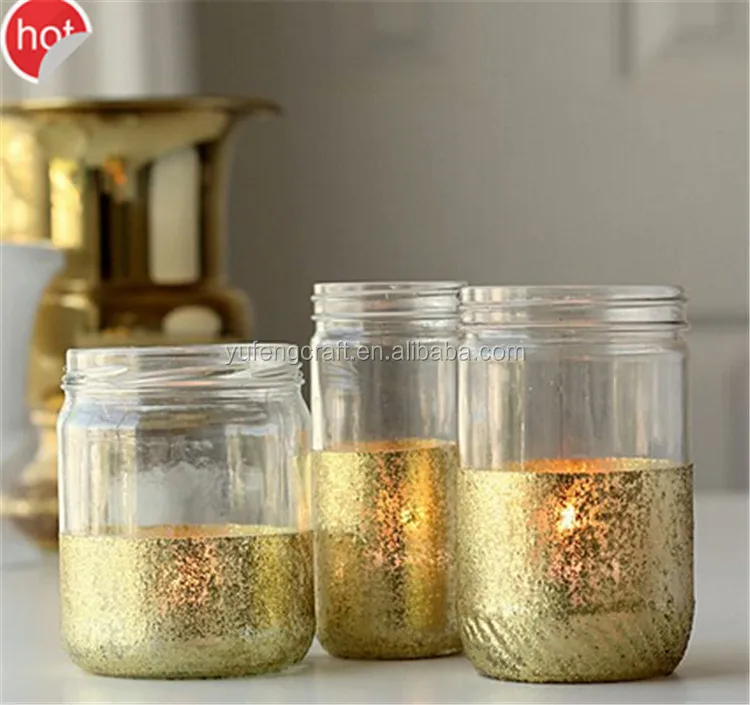 You can use a candle holder or pour wax inside and add various ingredients for fragrance and decoration.
Here, for example, is a chandelier made from such small jars. For manufacturing, the most common materials are required, you can see an example of manufacturing in the photo.
Or these lanterns, they will be a good decoration for the restaurant.
For the stability of the candle inside the candlestick, you need to add sand, grains to the bottom, with the addition of small gravel and salt it will also look good.
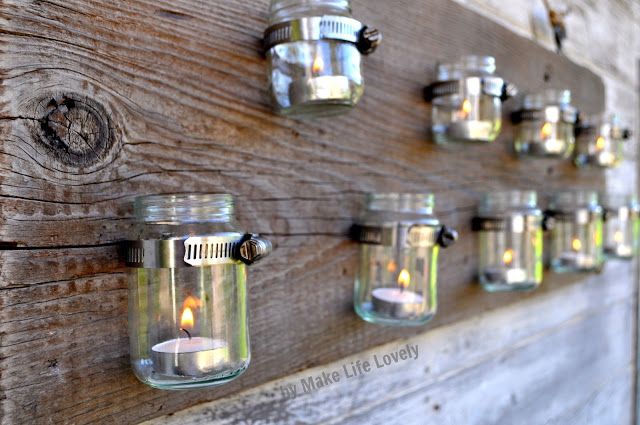
These lamps will fit well into the interior of the gazebo.
Winter version of the candlestick. Salt was poured tightly at the bottom, the top was decorated with twine, and you're done.
Just color illustrations can be added.
Small glass cups instead of jars are also a good option.
And to make such a magic candle with your own hands, you will need:
- wax;
- wax heating container;
- wooden stick;
- aroma oils;
- dye;
- wick;
- jar.
Cut the wax into small pieces and set to warm up in a water bath.
Stir the wax well until all the pieces are completely dissolved and add various aroma oils and dyes. You can add spices, such as cinnamon or star anise.
Various decorative elements can be added to the sides of the jar.
The wax hardens very quickly, so pour it into the mold immediately.
We fix the wick with a stick and hold it carefully. All details can also be fixed with wax. When the wax has completely cooled, you can remove the top mount and cut off the excess thread.
To make multi-colored layers, you need to wait until each filled layer hardens, only then pour the next one.
Small jars do not need much decoration, their shape gives an unusual look anyway.
It all depends on your mood, you can come up with different decorations on different topics.
Here, for example, the beauty of the sea with the help of an ordinary semolina.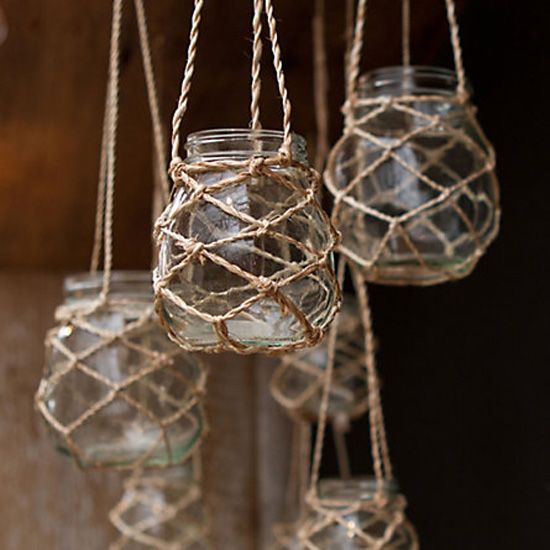
Jars decorated with glitter.
If the jar is wrapped with rope or threads, and then covered with paint of one tone or several, then such a structural candlestick will turn out.
Fantasy will always tell you the best. The main thing is to have the desire and mood, then you get such wonderful works.
Decorative pebbles are sold in every craft store. They can also be used to create mesmerizing beauty.
You can't take your eyes off this beauty.
Cans can also be used, they can also be beautifully decorated. Video on the topic of the article
The second life of glass jars - 33 Crafts
Do you also not raise your hand to throw away glass jars from pickles or jams? And all these miniature containers from baby food and creams - what a pity to get rid of them! Admit it, even empty bottles of chocolate paste or coffee do you reluctantly send to the trash can? Then you will definitely like this collection of ideas.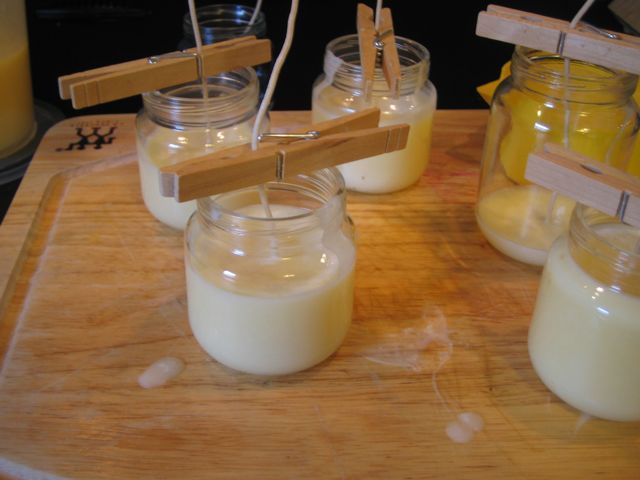 We have collected the 10 best workshops with photos and videos, from which you will learn what you can do with glass jars with your own hands.
Browse the entire article to find what's right for you. You can repeat almost every idea with a jar of any size. When a coffee jar is used in the master class, feel free to change it to a three-liter one if you need to decorate it.
Helpful Hint: Dip jars with labels in a strong soapy solution. It should be warm, but not hot. Hold them for about half an hour - the labels will be easier to remove.
Bathroom organizer
You don't even have to do anything here. The main thing is to decorate glass jars and figure out how to fill them. For this master class, coffee jars or other not too large containers are best suited.
We need:
- decorative paper;
- patch;
- marker.
In this case, it is better to decorate about a third of the height of the jar. So that you can see exactly what is inside. It is best to choose self-adhesive or patterned tape. Due to this, the surface will be water-repellent.
Customize your jar decoration with plaster. The simplest - the one in the coils. Stick it to the surface, paint it with a marker, make a funny or useful inscription.
All that's left to do is fill the jars with useful little things - here's your bathroom organizer! And to fix the brush or comb, you can fill glass containers with pebbles or decorative beads.
See also: handy bathroom organizer
Pendant lights
Beautiful glass cream jars can be decorated and turned into hanging candle holders. It's simple enough.
We need:
- stained glass paints;
- wire;
- candles.
We have already told you about how to work with stained glass paints. Come up with a beautiful pattern or make the simplest geometric pattern on your glass jar.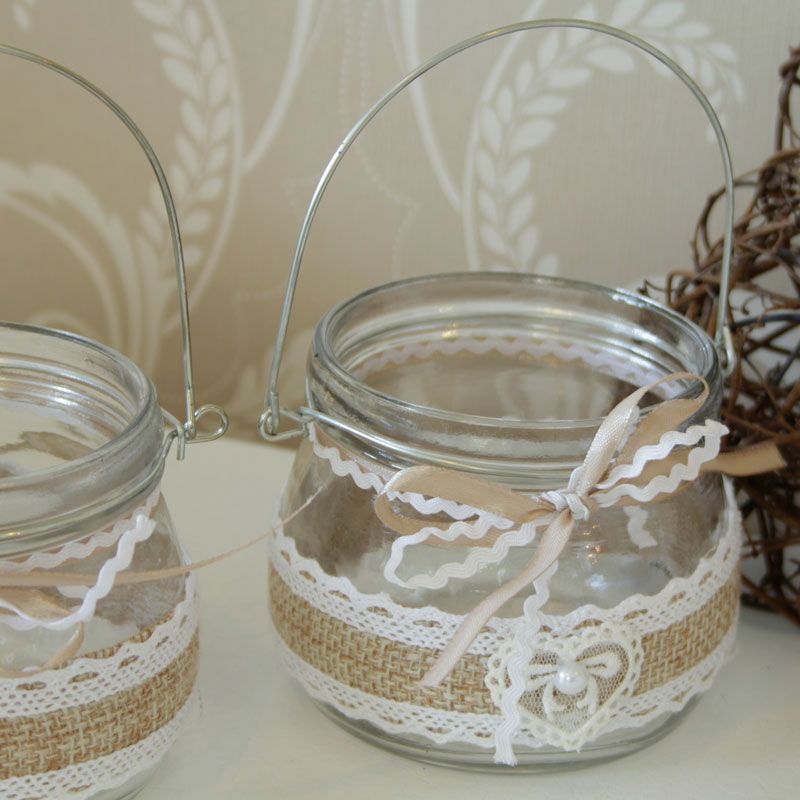 The space can be filled with acrylic paints. But don't apply too much of them - otherwise the glass will not be transparent, and the light from the candle will not be very noticeable.
Place the candle in a jar and wind the neck with wire. Go around it twice to fix the structure more securely. Cream jars can be replaced with small baby food containers - they are also easy to decorate and turn into candlesticks.
Flower pots
Why not save on flower pots? Wide-mouthed glass jars can be a great alternative—sometimes even prettier. This is especially true for those who grow many flowers of the same type.
We will need:
- acrylic paints;
- land.
Be sure to use non-toxic paints so that no chemicals are released when in contact with water and soil. Banks need to be painted from the inside. To do this, it will be convenient to use a thin brush with a long handle. We recommend that you do this in batches. First, decorate the third of the jar - paint the glass from the bottom, moving up.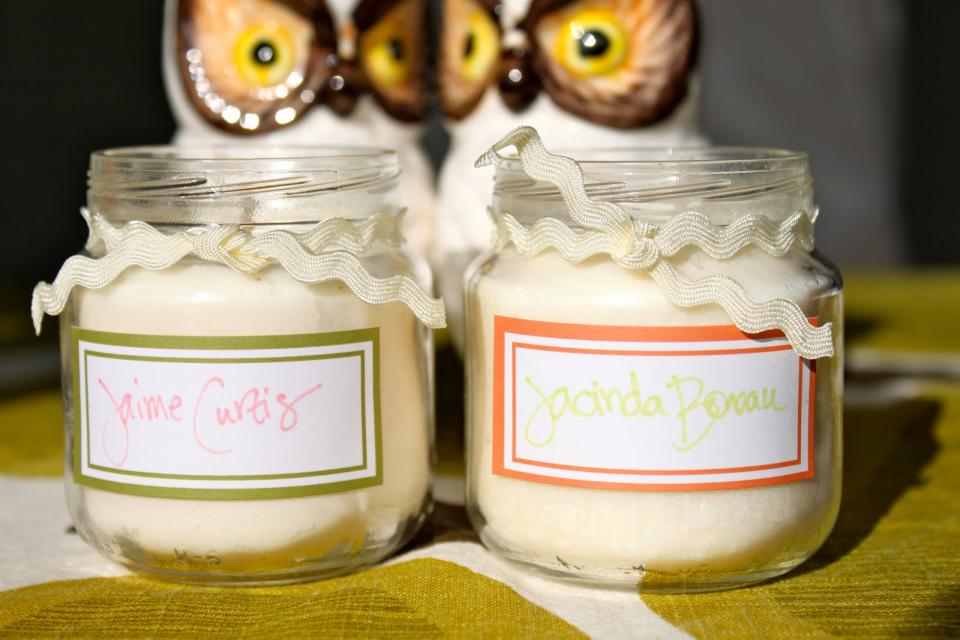 Dry the structure completely, and then paint the rest. That way you won't get your hands dirty.
When your future glass jar pot is completely dry, fill it with earth and plant a flower inside. Put several bright jars on the windowsill one after another - it will turn out very beautiful.
See also: other ideas for decorating flower pots
Hanging organizer
This idea is very simple, but for some reason not everyone comes up with the idea of using empty jars in such an original way. But it is not only convenient, but also beautiful.
We will need:
- wooden board;
- headbands;
- screws.
Fasten the board to the wall with screws. If your jars are initially beautiful or neutral, use them without additional decoration. If you want to make an organizer out of coffee cans, it would be better to decorate them in advance (acrylic, decoupage, self-adhesive, etc.).
Grab the neck of the jar with a zip tie, attach the structure to the board with a screw.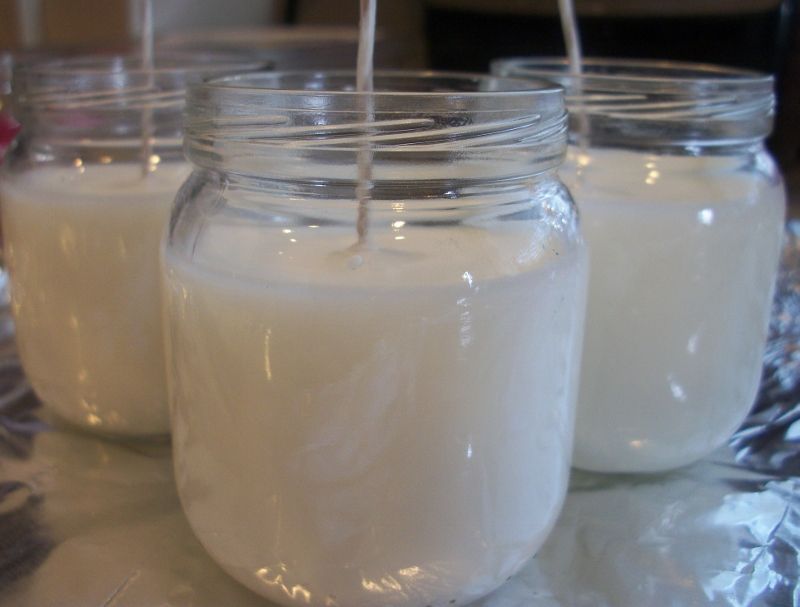 You just have to fill the containers with little things to your taste. Add liveliness designs and use one of the jars as a flower vase.
Men can also benefit from this idea. These cans are easy to use as an organizer for tools, nails, screws in the garage.
Gift wrapping
Leave a jar of coffee or baby food - with a simple decor you can turn it into a great gift yourself. This will appeal to both children and adults. Look at an interesting idea on the example of crafts from a glass jar for the new year. What an adorable deer!
We need:
- jar with lid;
- acrylic paints;
- paper, cardboard;
- fluffy wire;
- plastic eyes;
- any decor;
- candy.
Make a line of paint in the center of the can. Or stick the cardboard on the transparent glue from the inside. Glue wire to the lid - an imitation of deer horns. To do this, it is better to use superglue or glue "liquid nails".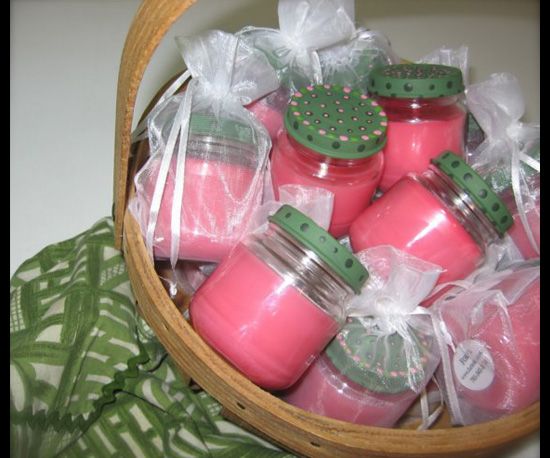
Make a face out of buttons or plastic blanks. Add a small cardboard postcard tag. Hang this decorative message directly on the jar. Fill the container with candies to match. Make such a sweet surprise for all your friends.
This is just an example of a jar decor - you can choose any animal or just paint the jar with colors and fill it with something delicious. A little imagination - and the gift will turn out really great. No one will consider that once this craft was an ordinary jar for coffee or baby food.
Romantic lamp
Glass jar lamp can be used as a gift for Valentine's Day or an anniversary. Please your loved one for any reason or without it. Or you can even make such a decor for the room - just for yourself, so that the apartment becomes more comfortable.
We need:
- LED;
- acrylic paints;
- heart stencil;
- braid.
Attach the stencil of the heart to a glass jar: it can be from coffee, even from cream, even three liters - to your taste.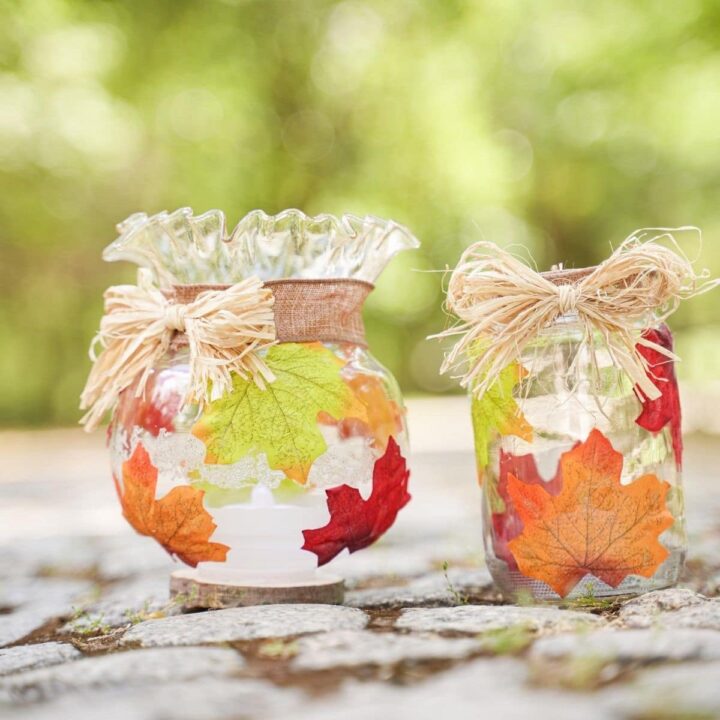 It is very convenient to cut the workpiece from masking tape - then you just remove it. Paint the jar on all sides with acrylic paint. Choose a thick solid color coating or sparkles - to your taste. Paint along with the lid. When the paint is dry, remove the tape.
The LED can be quite small. If this is a garland, make a hole in the lid so that you can pull the cord through it and plug the lamp from the jar into an outlet.
To make the seam with the lid less visible, tie a pretty ribbon, ribbon or twine. This decorative lamp made from a simple glass jar looks amazing in real life. Be sure to try this idea! You can easily choose any other stencil instead of a heart. Even a hero from fairy tales, if you are making a lamp for a child.
Jar of memories
What do you think about using a coffee container as a jar of travel memories? Here, decor is almost not needed: the main thing is filling.
We need:
- photograph;
- cardboard;
- twine;
- any decor.

You can stick a photo of the place where you have been on cardboard. Or cut out a silhouette from a photo card and make it a little voluminous with cardboard. Add some glitter or paint to spice up the picture.
In a glass jar you can place small figurines that gather dust on the shelf. Complete this composition with magazine clippings and other stylish little things. For sea travel, you can add sand, shells, miniature stars or pebbles to the craft.
Create a series of tangible memories with glass jars. This is much more interesting than magnets, key chains and lonely figurines on a shelf.
Cocktail glasses
Why not? Today it is fashionable to drink from jars. If they are served in a cafe, then why don't you make cocktails in such containers? They are suitable for both children's and adults' holidays.
We need:
- cocktail straws;
- cardboard.
Jars must be completely de-labeled. Otherwise, you get something indistinct, but certainly not a fashionable serving of a cocktail. Be sure to make sure that there is no mica left on the neck (the one that usually closes coffee jars). If it was not possible to clean the containers to the end, decorate them with paints or glass contours.
It is desirable that all cans be the same. Attach interesting cardboard labels to the tubes. Cocktails should be as bright as possible. Additionally, the walls of the containers can be decorated with bright syrup or chocolate from the inside. And hide the top with a hat of cream or sprinkle the neck with sugar.
This serving of drinks is just as good as glasses or standard glasses!
Storage jars
Use glass jars for their intended purpose - to store food. Just give them a second life with original decor.
We will need:
- acrylic paints;
- beads, rhinestones;
- braid;
- decoupage napkins;
- PVA glue.
We have already told you what decoupage is and how to do it correctly.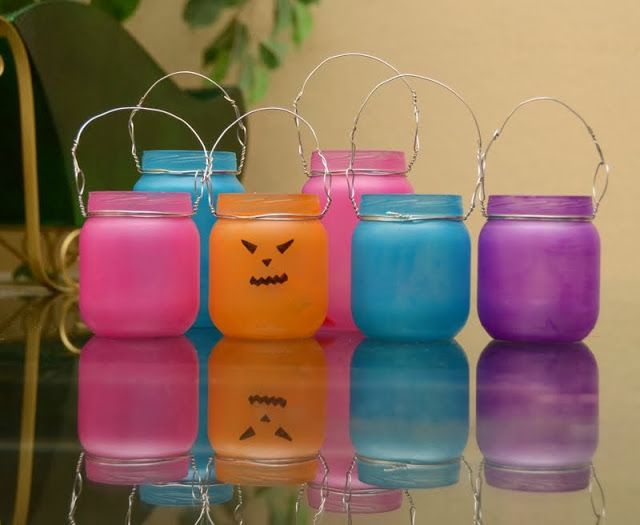 We advise you to study this material. Decoupage technique is very good for decorating glass jars. She transforms them beyond recognition. Even the most ugly, already opaque and worn out jars will sparkle with new colors with the right decor.
Acrylic paints can also be used. Pre-glue half beads, buttons, hearts and any other decor on the jar. It needs to be placed on superglue. Then top coat the glass with paint using a brush or spray can. Small scuffs, gaps in the paint, a protruding inscription - all this will only add zest to your craft.
The lids can also be painted and decorated with braid. With the help of contours for glass, if desired, it is easy to add any inscriptions to jars.
Painted Jar
Watch this short video tutorial to see how you can paint a glass jar in an original way at home. Just a few minutes - and your interior will have a great brand new accessory. Drawing, colors, application technique, jar size - all this is easily variable.