Homemade baby food pouches recipes
Best Baby Food Pouches (Easy Homemade Ideas)
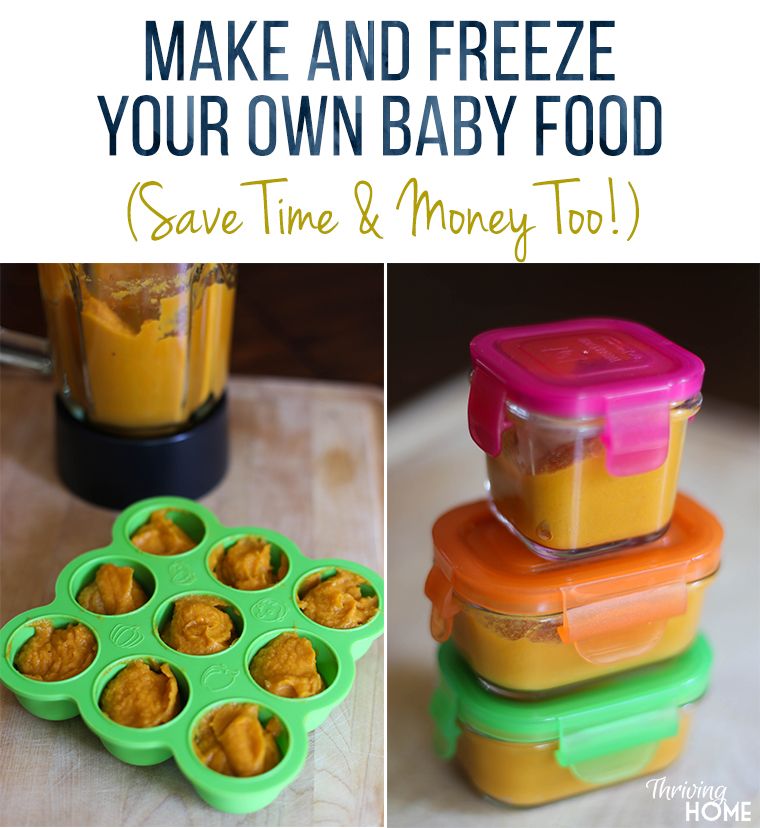
Learn how to make homemade Baby Food Pouches, no muss, no fuss, with these 15 easy recipe ideas. These are a great way to save money, share lots of flavors with babies and toddlers, and have convenient foods ready to go!
Baby Food Pouches
I always made my own baby food pouches because I like how affordable they are and how once you have a set of reusable pouches, there are so many options! Plus, you can feed many things you’re making for the rest of the family in a pouch, which means you can share flavors with the little ones even if they aren’t quite up to finger foods yet.
I view baby food pouches as one component of feeding a baby and like to mix purees with baby led weaning as a way to expose baby to a wide variety of flavors and textures from an early age.
I also find them very convenient for offering smoothies well into the toddler years!
Ingredients in You Need
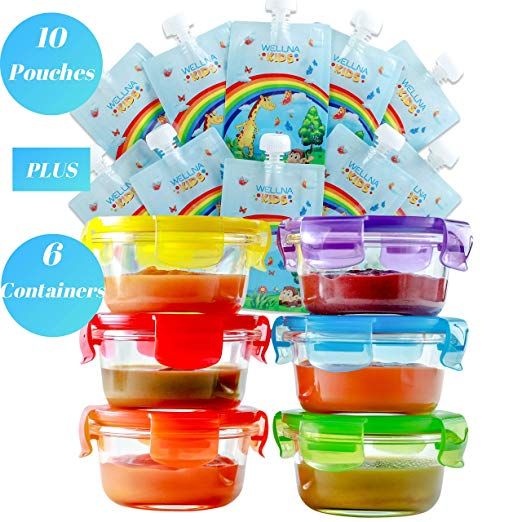
What you need for your pouch adventure will depend on what you want to feed your baby! Basically you need something pureed (or a food like yogurt or applesauce that has a very pouch-friendly texture already) and a reusable pouch.
Step-by-Step Instructions
Here’s the general gist of how to make a baby food pouch. Scroll down to the bottom of the post for recipe ideas and best tips!
- Choose your puree and prepare it. Let it cool as needed. (Or pull out the yogurt or applesauce.)
- Fill the pouch, making sure that the cap is on if using the kind with the zipper opening on the bottom. (Otherwise it will all run right out the top!)
- Store in the fridge or serve to baby.
TIP: As a quick an easy snack option, I like to mix half yogurt and half applesauce right in the pouch.
What can I put into a baby food pouch?
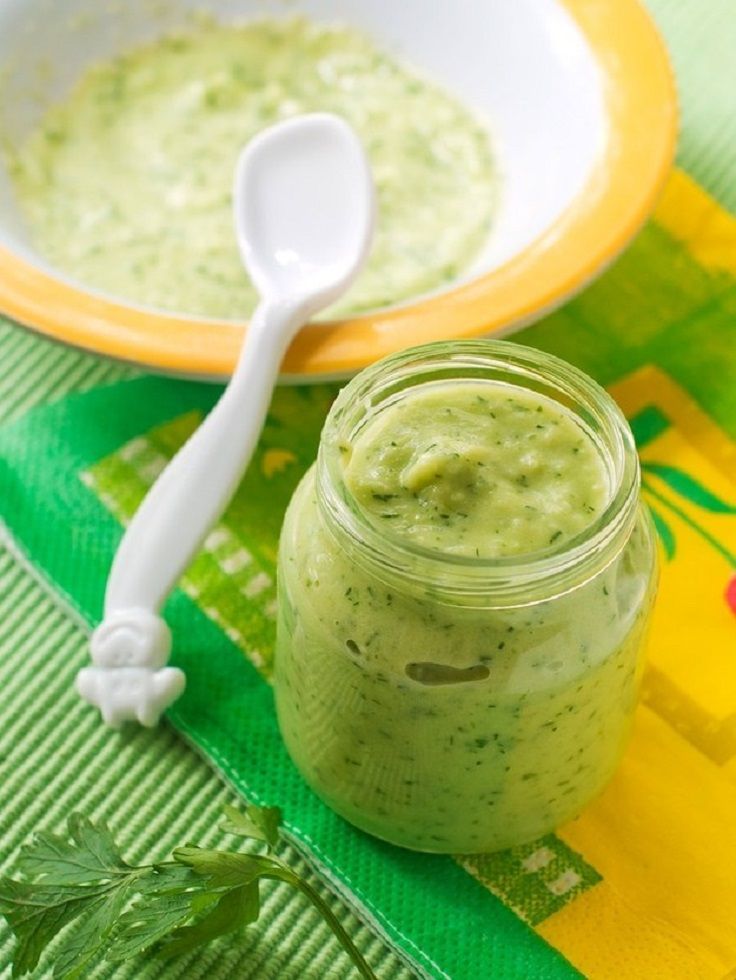
You just need the food to be smooth enough that it easily passes through the opening of the pouch, so anything that’s pureed or the consistency of pureed soup or yogurt will work. Generally speaking you can do:
- Applesauce
- Fruit purees
- Vegetable purees
- Baby food combinations
- Pureed meats
- Pureed soups
- Smoothies
- Yogurt
TIP: You can also use any of my go-to Baby Food Combinations too!
Making apple yogurt in a bowlFlavor Ideas for Baby Food Pouches
These are some of my favorite recipe ideas to add to a pouch.
- Applesauce
- Apple Flax Yogurt: Equal parts Apple Puree and plain yogurt, plus a sprinkle of ground flax.
- Baby Oatmeal with Applesauce mixed in for flavor.
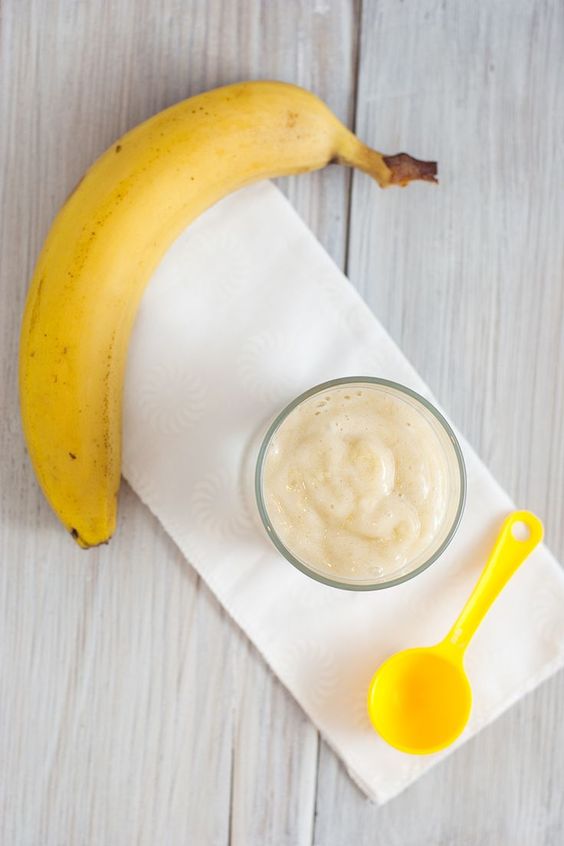
- Banana Yogurt
- Pear Coconut Puree: Pear Puree with full-fat coconut milk mixed in.
- Pear Yogurt: Equal parts Pear Puree and plain yogurt.
- Red Lentil Coconut Soup
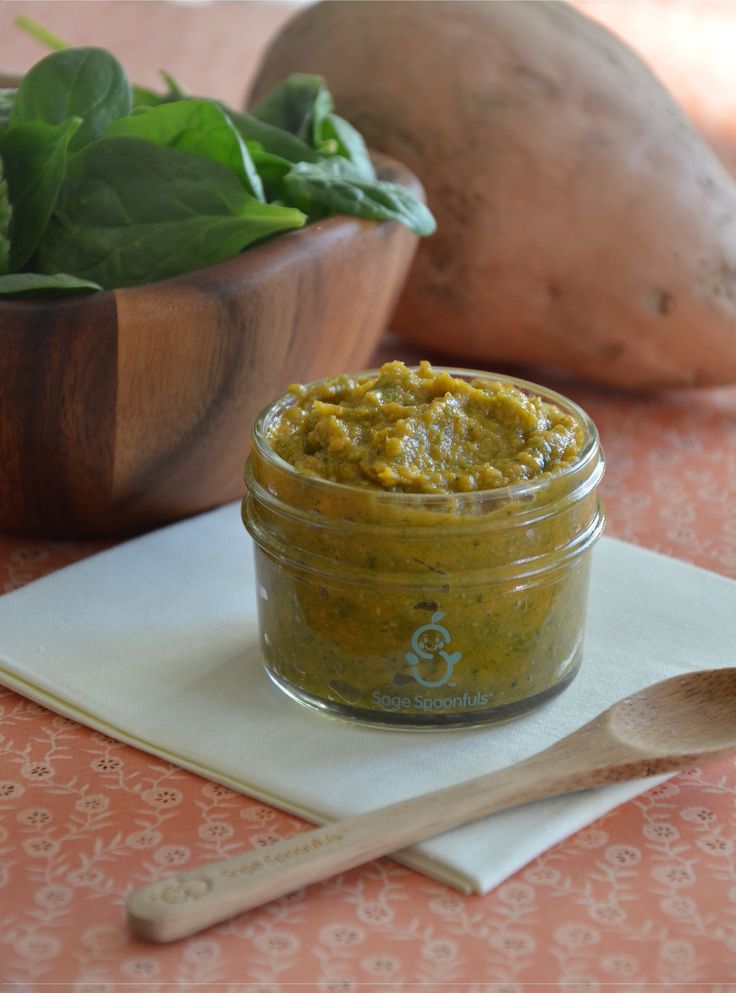
- Sweet Potato Tomato Soup
- Mango Smoothie
- Mashed Butternut Squash
- Mashed Roasted Sweet Potato
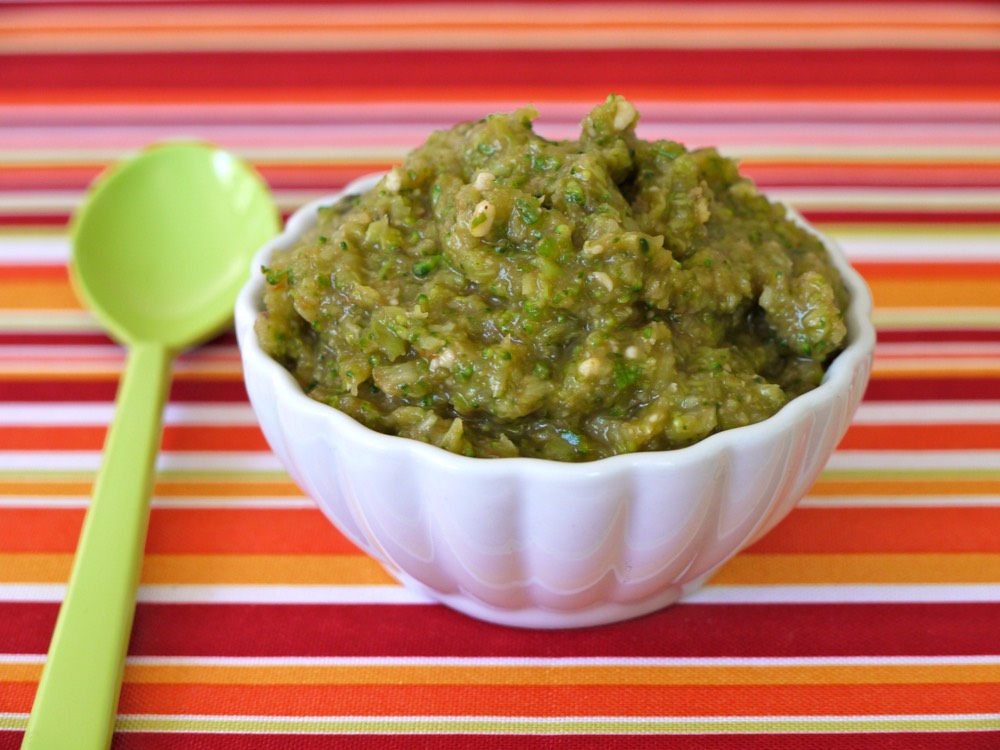
- Spinach-Pea Puree (alone or with Applesauce)
- Simple Green Smoothie
- Strawberry Smoothie
- Veggie Chili, pureed smooth
TIP: For the foods, like soup, that you’d usually serve warm, you can serve them warm in a pouch too. Just be sure they are warm and not hot. Test on your wrist like you would a baby bottle.
How long can I store baby food pouches?
I recommend making them 24 hours ahead or less so they are as fresh as possible. But you can make batches of purees and stash them in the freezer, so the pouch assembly part is quick and easy.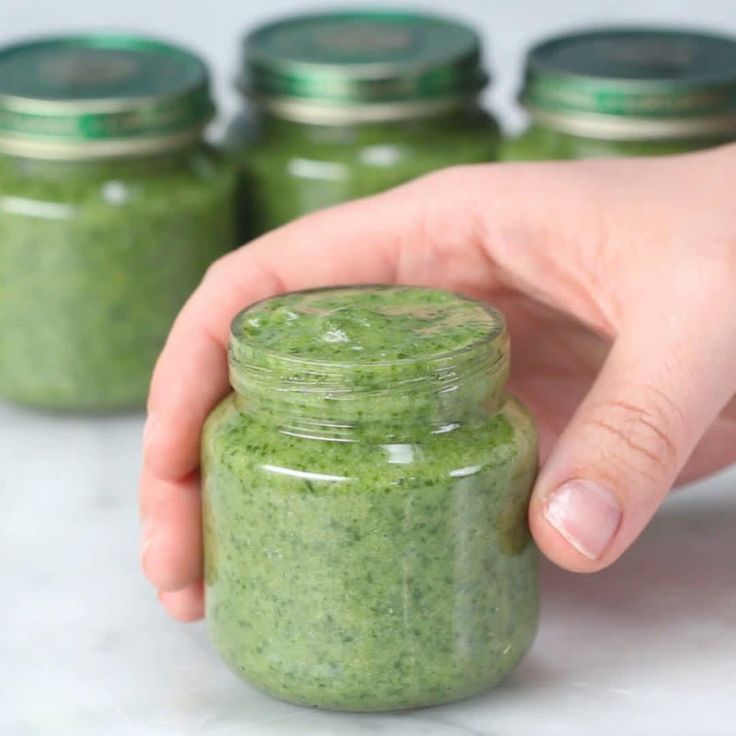
Do I need a baby food pouch maker?
Honestly? No. I tried one and didn’t like it because it took up space in my cabinets and the pouches themselves weren’t reusable, which seemed like a waste and a lot of money. Using reusable pouches is easy and more affordable.
What are the best reusable pouches?
I prefer the silicone Squeasy Gear pouch, which comes in a few sizes (I start with the 3.5 ounce size for babies). It’s easy to learn from as early as 6 or 7 months and the kids can use them for smoothies and applesauce well through toddlerhood as they are very durable. You may want to remove the lid when serving to kids so they don’t play with it.
I also like this set of 3.4 ounce Weesprouts reusable pouches a lot, which are a nice size for babies (there is a larger size too!) and they are easy to clean and use.
Favorite Store-bought Baby Food
There are so many great store bought options! I like the Amara Organic Baby Food (paid affiliate link), which locks in the nutrients, texture, and taste of fresh foods.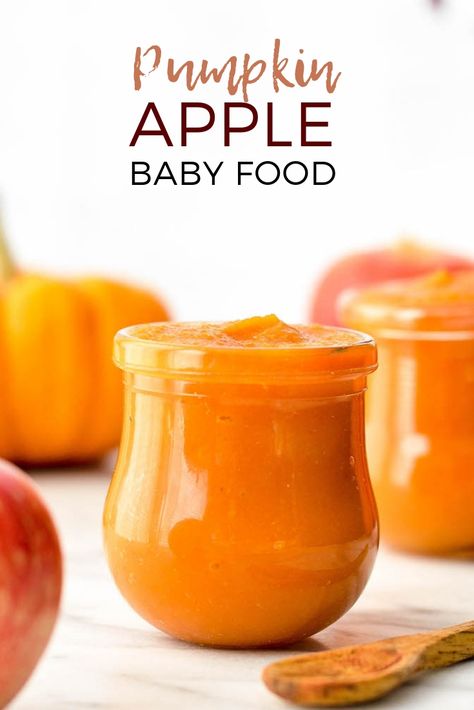 You just add breastmilk, formula, or water— and the flavors are delicious with straight forward ingredients.
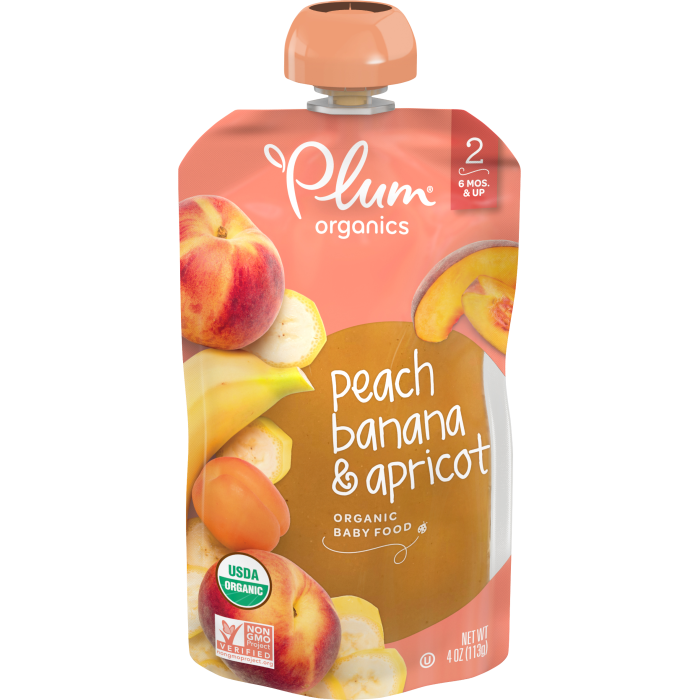
I also like Happy Family Organics Clearly Crafted and Plum Organics. Those are just a few options—there is a lot to choose from as you well know from the baby food aisle!
TIP: I recommend serving pouches occasionally along with regular solids from a spoon and baby led weaning style so baby has a chance to learn how to suck, swallow, move all sorts of textures around in their mouths, and gain the skills needed to be ready for finger foods around 9 months.
How to Store
Store pre-made pouches in the fridge for up to 5 days. Store leftover pouches in the fridge for up to 24 hours and serve again. You can also freeze pouches for up to 6 months. Thaw in the fridge overnight or at room temperature.
Best Tips for Success
- If using a pouch with a zipper bottom, like this one from Wee Sprout, avoid overfilling to prevent difficulty sealing the pouch.
- Be sure the mixture is totally smooth to avoid it becoming stuck in the opening of the pouch.
- Add ½ teaspoon hemp seeds to any mixture for extra healthy fats.
- Add 2 tablespoons full fat coconut cream or plain yogurt to the mashed sweet potato or squash for healthy fats.
- Try any other Baby Food Combination or my No-Cook Baby Foods in a pouch.
- Serve foods you’d usually serve warm (like soups) just warm, not hot. Test on your wrist to be sure the temperature is not hot.
- Omit any added salt or sweeteners as needed.
- Combine pouches with baby led weaning foods for a wide range of texture exposure.
Related Recipes
I’d love to hear your feedback if you try these ideas out, so please comment below to share—I love hearing from you guys!
Prep Time 5 minutes
Cook Time 10 minutes
Total Time 15 minutes
Author Amy Palanjian
Cuisine American
Course Baby Food
Calories 46kcal
Servings 1
- ▢ 1½ ounces Apple Puree
- ▢ 1½ ounces plain whole milk yogurt (regular or Greek)
- ▢ ½ ground flaxseeds (or hemp seeds)
Add the ingredients to a small bowl.
 Stir to combine well.
Add to the pouch, avoiding overfilling. If using a zip bottom style of pouch, be sure the cap is on to prevent the puree from coming out.
Serve or store for up to 5 days. (If storing leftovers in a pouch, store in the fridge and serve within 24 hours.)
- If using a pouch with a zipper bottom, like this one from Wee Sprout, avoid overfilling to prevent difficulty sealing the pouch.
- Pouch flavor ideas:
- Be sure the mixture is totally smooth to avoid it becoming stuck in the opening of the pouch.
- Add ½ teaspoon hemp seeds or 2 tablespoons full fat coconut cream or plain yogurt to any mixture for extra healthy fats.
- Try any other Baby Food Combination or my No-Cook Baby Foods in a pouch.
- Serve foods you’d usually serve warm (like soups) just warm, not hot. Test on your wrist to be sure the temperature is not hot.
- Omit any added salt or sweeteners as needed.
- Combine pouches with baby led weaning foods for a wide range of texture exposure.
- Store leftover pouches in the fridge for up to 24 hours and serve again.
Calories: 46kcal, Carbohydrates: 7g, Protein: 2g, Fat: 2g, Saturated Fat: 1g, Polyunsaturated Fat: 0.2g, Monounsaturated Fat: 0.4g, Cholesterol: 6mg, Sodium: 21mg, Potassium: 101mg, Fiber: 1g, Sugar: 6g, Vitamin A: 54IU, Vitamin C: 1mg, Calcium: 54mg, Iron: 0.2mg
Tried this recipe?Rate in the comments and tag @yummytoddlerfood on IG!
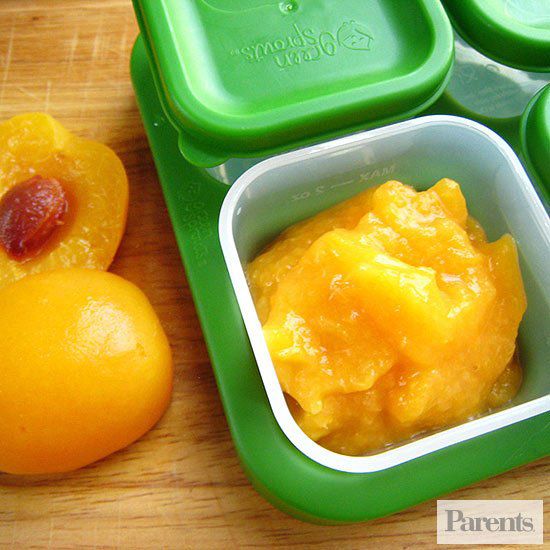
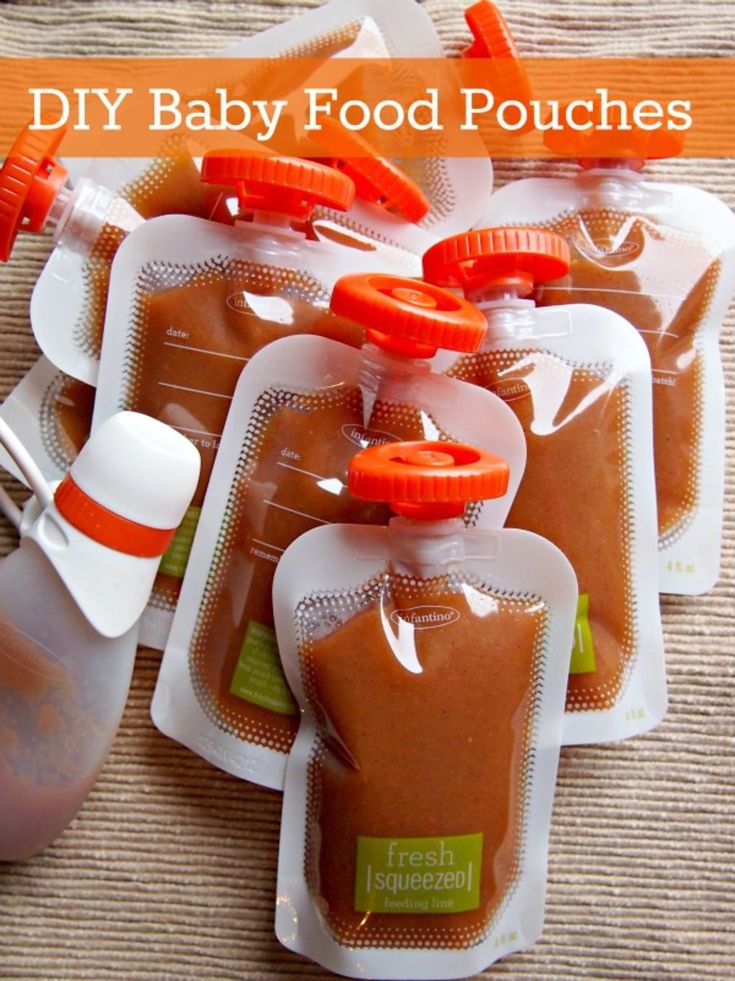
Homemade baby food pouches {how-to and 5 recipes}
Portable, squeezable and with lots of flavor options, homemade baby food pouches are easy to make and a great way to serve healthy fruits, vegetables and whole grains to your little ones!
I made ALL of the baby food for both of my little ones. Which was no small feat because they were very hearty eaters. A good thing, but whew, kept me busy in the kitchen!
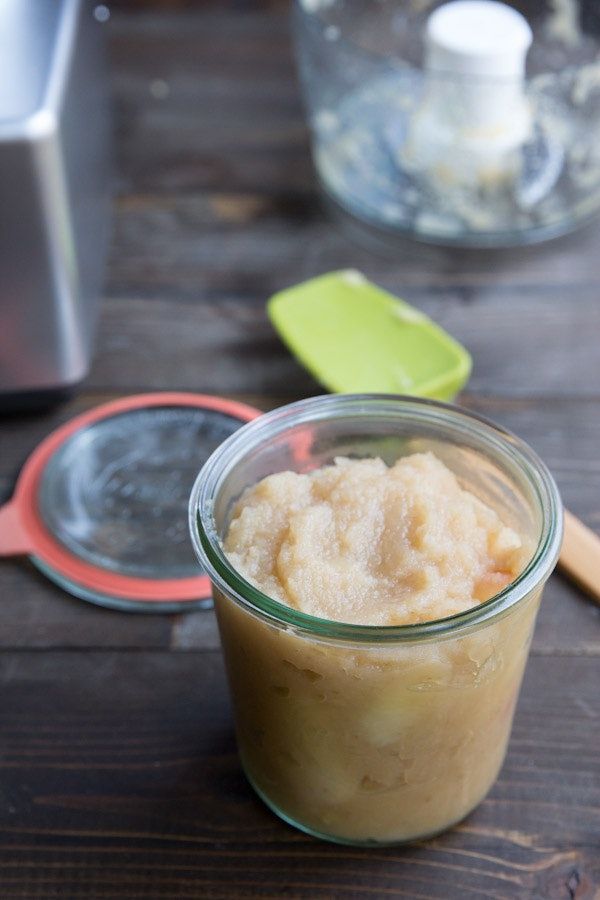
I always made big batches of purees, to knock out a bunch at a time, and inevitably, I’d be left with extras when they were moving onto finger foods and self-feeding.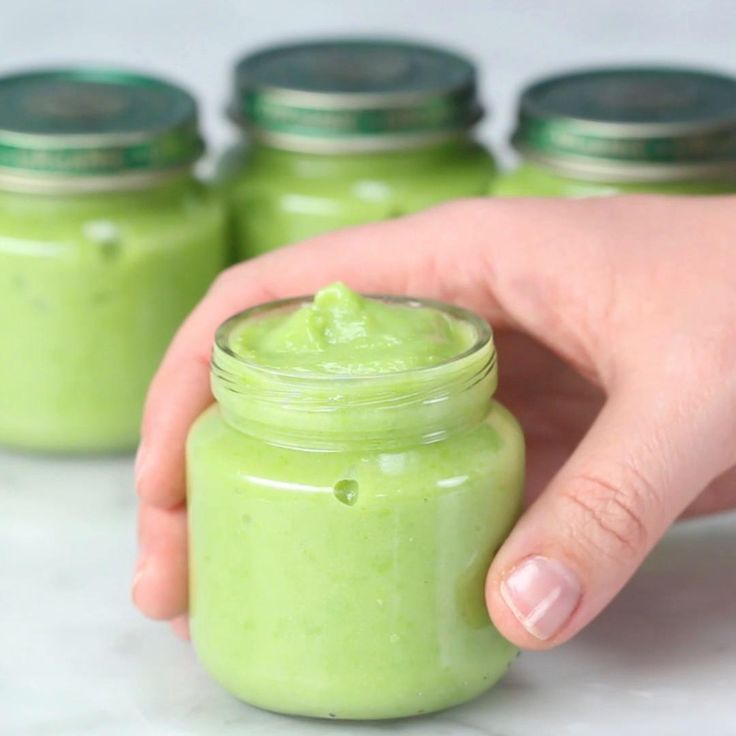
So I started turning those purees into homemade baby food pouches.
(I also have tons of other ideas of ways to use leftover baby food – I didn’t want to waste a bit!)
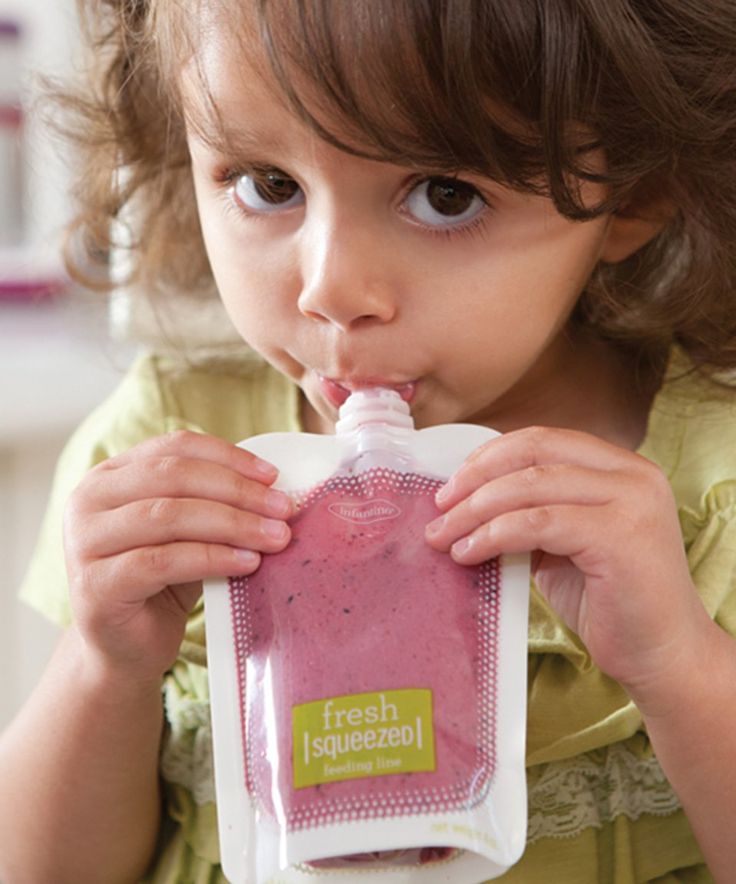
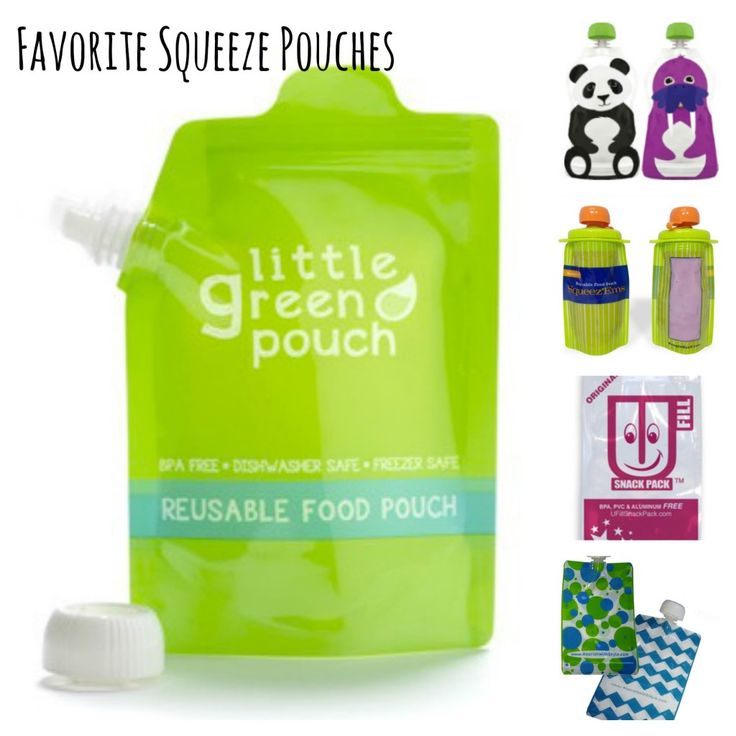
You can of course buy squeeze pouches in the store.
They have lots of different kinds of applesauce mixes, yogurt squeezies, and fruit and veggie combinations.
But you can make your own so quickly, easily and for much less money. Plus, you can customize them to your little one’s liking and feel good that you’re controlling the ingredients.
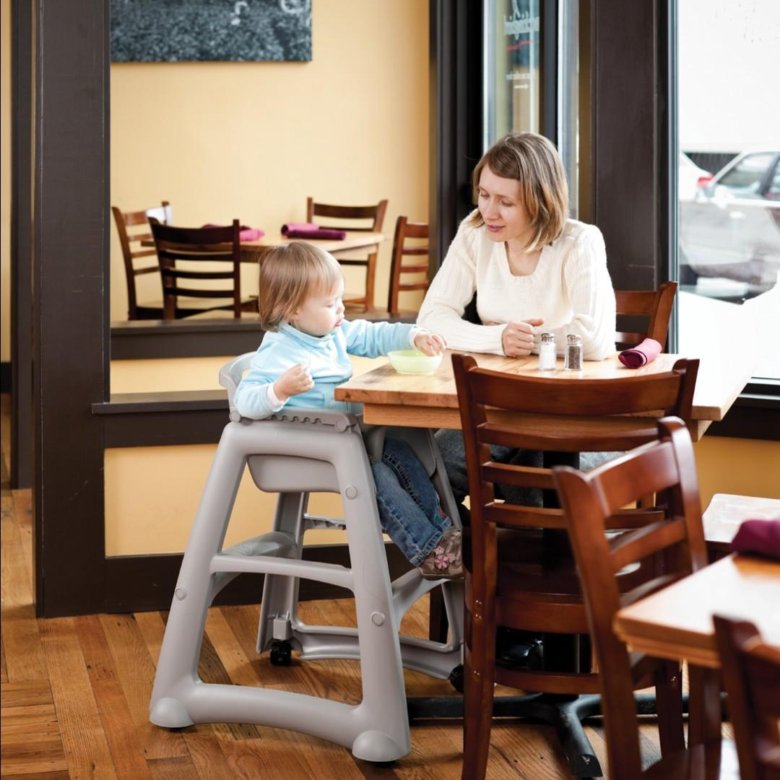
My kids are older now – M is 5 next week (yikes!) and J is coming up on 3 – but they still love these squeezies. M says she has lots of friends who bring them for lunch, so she’s always asking for me to send them to school.
And I’m happy to.
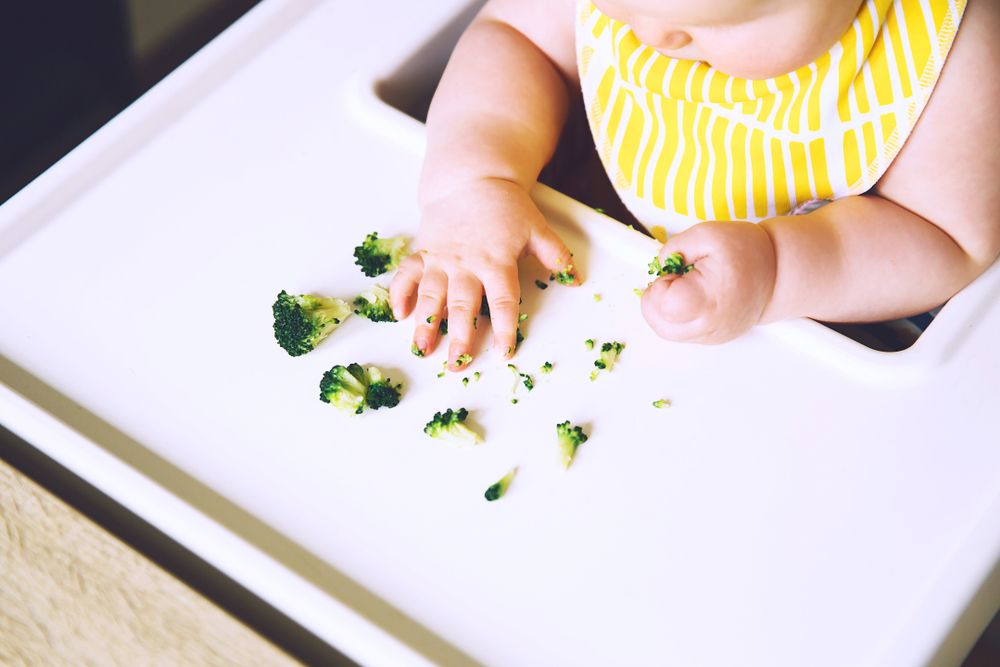
I love that it’s an easy way to ensure they are eating their veggies. They will take down one of these pouches in a matter of minutes but they don’t always dig into a big bowl of peas or a plate full of broccoli.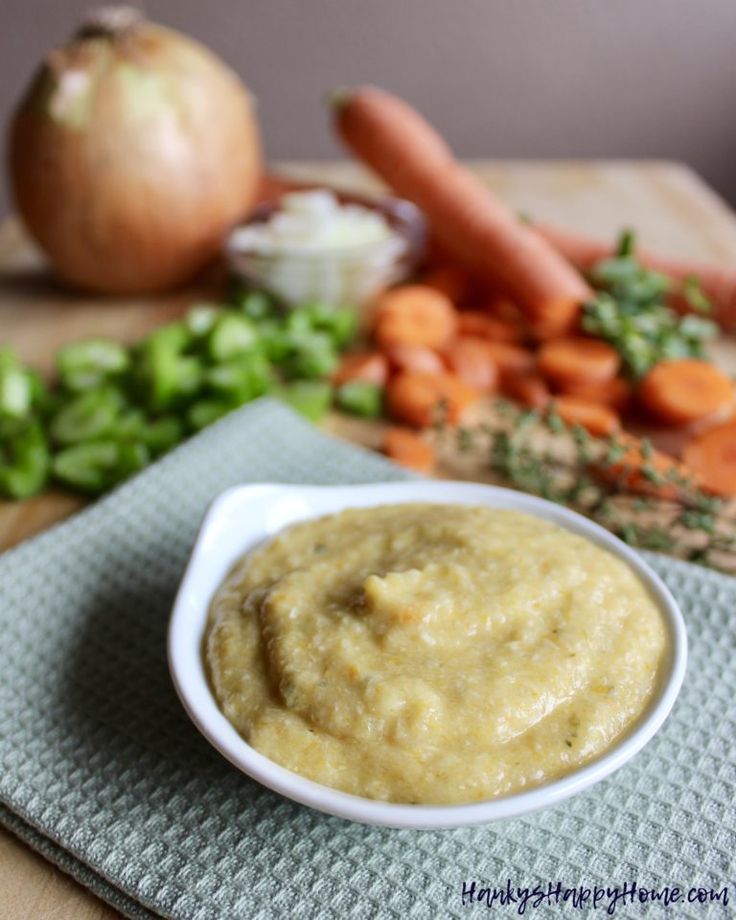 #yet #Iwontgiveup
So today I’m giving you the run-down on what I use, how it works and five easy homemade squeezie combinations to get you started. (Check out these 5 additional homemade baby food pouches for more ideas!)
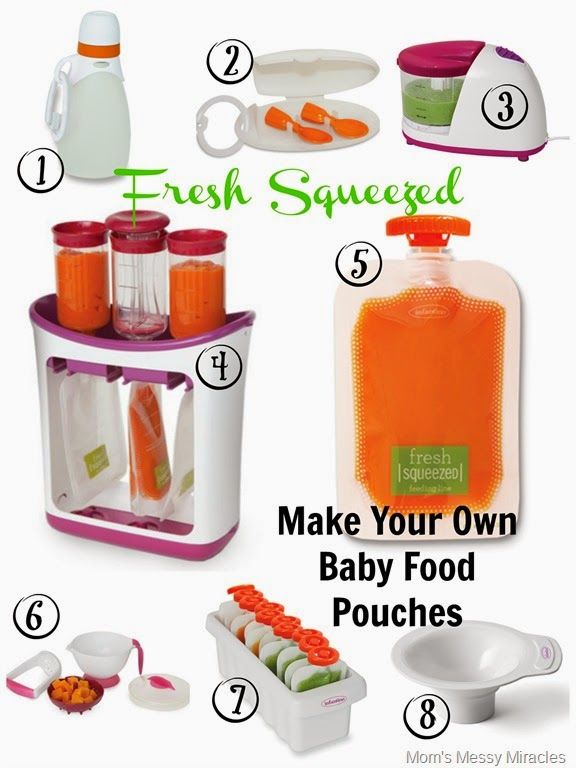
Equipment for baby food pouches
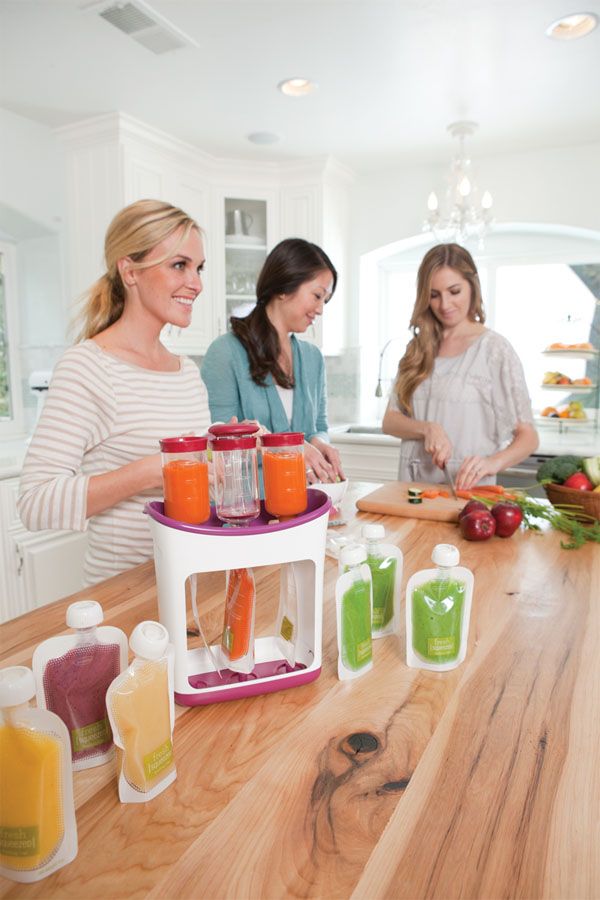
I have the Infantino Squeeze Station and it’s been great. It’s the only specific baby food equipment I’ve bought and was definitely worth it.
You’ll also need to buy refill pouches (they come in batches of 50 and you will go through them!)
They have other accessories, but I’ve stuck to these basics so far.
You’ll also need an immersion/hand blender or regular blender to make the purees to put into the squeeze pouches.
How to make baby food squeeze pouches
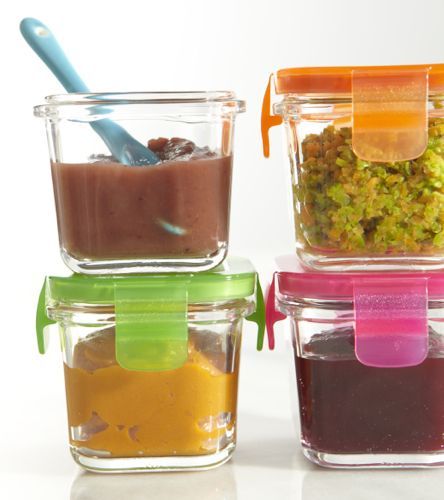
You set up the squeeze station by inserting three pouches into the bottom (they fit through some grooves and sort of snap in.) Then you put the empty containers on top and screw them onto the bags.
Note: Be sure to write the contents and date on your bags before you start to fill them.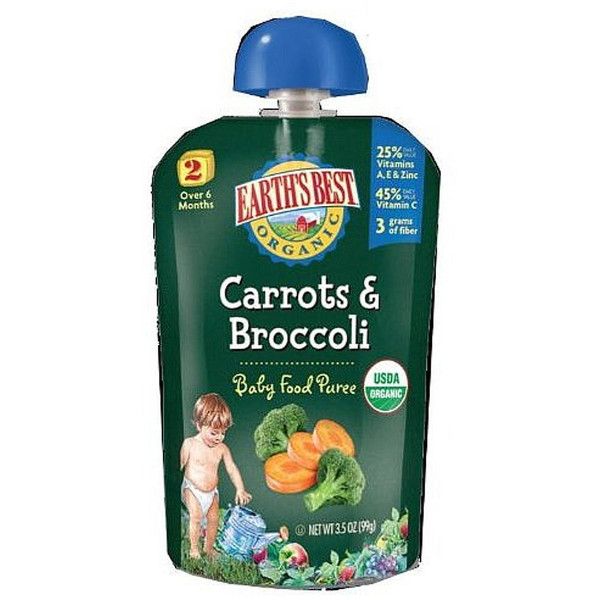 Much easier than after they’re done.
Next, you spoon your puree mix into each container, filling it almost to the top. You use the press tool and push the puree down into the pouch. It’s a weirdly gratifying feeling.
If the mixture gets stuck or won’t push, you probably have a small chunk in your puree that got caught in the hole. Just unscrew your tube, dump the contents back into your blender and reblend (or pick out the offending piece if you see it).
After the bags are filled, unscrew the tubes and carefully pull the bags out. Twist on the orange top and voila!
You can keep them in the fridge for a couple of days or pop them straight into the freezer to have on hand later.
It’s really easy and actually, really fun!
Notes about baby food pouch combinations:
- Add 1 tablespoon lemon juice to all of these to help preserve them. The only exception is the pineapple-broccoli mixture. The citrus from the pineapple is enough on its own.
- You can keep the peels on the pears and apples, just be sure to puree them very well so pieces don’t get stuck and prevent the mixture from going into the squeezie bags.
- The vegetables and grains need to be cooked and soft, so plan ahead. Or use leftovers. These can be a great way to use up scraps and reduce food waste.
- If any of your mixtures seem too thick (because the water content of fruits and veggies can vary), just add a bit of applesauce or a splash of water to the blender until its thin enough.
- Each pouch holds about 4 ounces. Most of these batches for me make about 3 squeezies worth. You can of course always double up if you want to knock out a bunch. They freeze great, so you might as well!
Check out the recipes below and get to making some baby food pouches. I hope your little one enjoys!
(And let me know if you want to see another round-up like this – we have lots of other flavor combinations we’ve made over the years that I can share!)
XO,
Kathryn
Prep Time 15 minutes
Total Time 15 minutes
Ingredients
For the apple-brown rice-spinach pouches:
- 1 apple, core removed and roughly chopped
- 1/2 cup cooked brown rice
- 1 cup packed fresh spinach leaves (raw)
- Juice of 1/2 lemon
For the pineapple-broccoli pouches:
- 1 cup cut pineapple (thawed if frozen)
- 2/3 cup cooked broccoli florets
For the mango-sweet potato-quinoa pouches:
- 1 ripe mango, peeled, seed removed and roughly chopped
- 1/2 cup cooked sweet potato
- 1/2 cup cooked quinoa
- Juice of 1/2 lemon
For the banana-barley-zucchini pouches:
- 1 ripe banana
- 1/2 cup cooked barley
- 1/2 cooked chopped zucchini
- Juice of 1/2 lemon
For the pear-peas-spinach pouches:
- 1 ripe pear
- 1/2 cup cooked peas
- 1 cup raw spinach
- Juice of 1/2 lemon
Instructions
- Make sure all of your grains and veggies are cooked, if indicated.
- Combine all ingredients for each pouch combination in a blender or immersion blender and blend until it’s a smooth, pourable consistency. (See notes.)
- Label your bags, set up your station and add the mixture to the squeeze station containers, filled to the indicated line. Push down with the press tool and fill each bag. Remove the bags from the station and twist on the tops.
- Store pouches in the refrigerator for 2-3 days or in the freezer for up to 3 months. To defrost, simply move the pouch to the refrigerator - it thaws in less than a day.
Notes
Add 1 tablespoon lemon juice to all of these to help preserve them. The only exception is the pineapple-broccoli mixture. The citrus from the pineapple is enough on its own.
You can keep the peels on the pears and apples, just be sure to puree them very well so pieces don’t get stuck and prevent the mixture from going into the squeezie bags.
The vegetables and grains need to be cooked and soft, so plan ahead.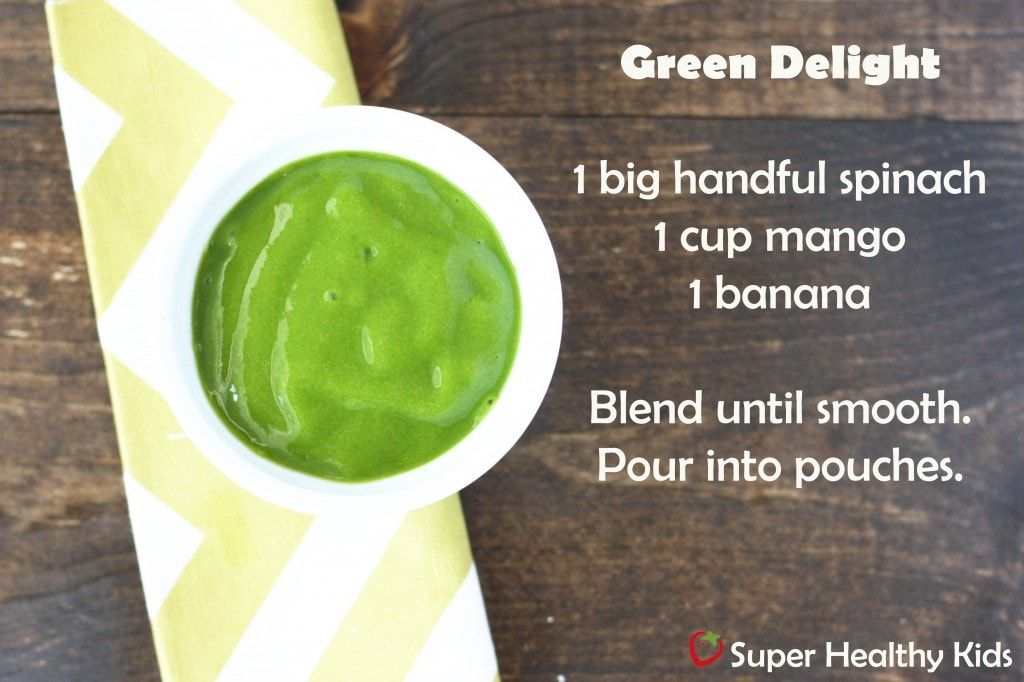 Or use leftovers. These can be a great way to use up scraps and reduce food waste.
If any of your mixtures seem too thick (because the water content of fruits and veggies can vary), just add a bit of applesauce or a splash of water to the blender until it's thin enough.
Each pouch holds about 4 ounces. Most of these batches for me make about 3 squeezies worth. You can of course always double up if you want to knock out a bunch. They freeze great, so you might as well!
Here are 5 more homemade baby food pouches if you want more flavor/combination ideas!
Nutrition Information:
Yield:
3Serving Size:
1 pouchAmount Per Serving: Calories: 50
The different varieties will yield different nutrition information.
6 Easy Recipes with Leftover Baby Formula
This dish is hugely popular with large families. After all, it is much more pleasant to eat sweets that were prepared by your beloved mother or grandmother.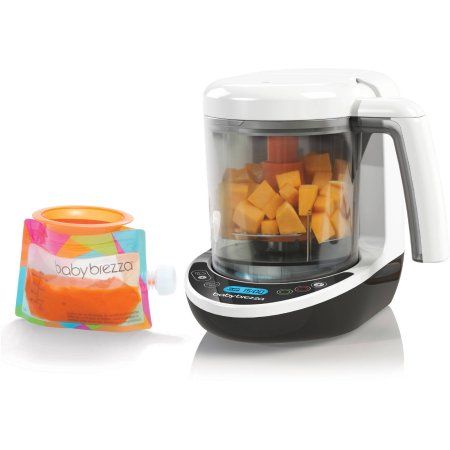 So, the ingredients are:
- 500 g of dry infant formula (full pack)
- 3 tablespoons of butter
- Half a glass of shelled walnuts
- 0.5 l of fresh milk optional)
So, the recipe. Pour milk into a small saucepan, add cocoa powder and butter to it. Put everything together on a high heat and, stirring occasionally, bring to a boil. Add the baby formula, boil for almost a minute, after which we turn off the fire and let the mass cool. After half an hour, pour the chopped walnuts into the pan. As a result, we get a mixture that resembles plasticine in consistency. From it we sculpt round or cone-shaped sweets. Put them on a tray or plate. Grind the waffles, sprinkle them on the dish. Dessert is ready!
Truffles
You will need:
- 4 cups “Malyutka” (and 0.5 cups of a collapse mixture)
- 2.5 glasses of sugar
- ¾ cup of milk
- 4 tablespoons of cocoa 9000 9000 50 grams oils, coconut.
Sugar, milk, cocoa, butter are mixed and put on a slow fire until the sugar dissolves.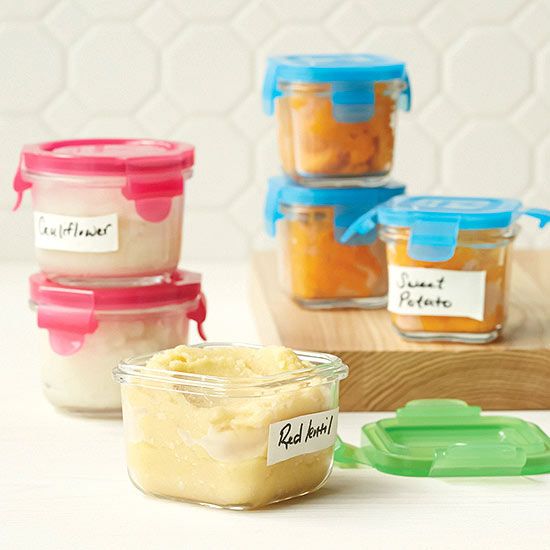 Let it cool down and gradually stir in the milk mixture until the consistency of a very thick dough. From the resulting mass, hands dipped in water form balls, which are then rolled in infant formula and sprinkled with coconut flakes.
Preparation:
Baking with infant formula is very easy. In this recipe, it is a tender cake, which is prepared on the basis of infant formula, sour cream, eggs and sugar. The pie is prepared with or without cream (to your taste). I've tried both ways, and in all cases, it turns out very tasty. It's nice to decorate the cake with berries, nuts or pour it with condensed milk. Please note that sugar is included in infant formula, so be careful when adding it to dough or cream. Purpose: For an afternoon snack Main ingredient: Dough Dish: Pastries / Pies
Cake “Malyutka”
We need the following products:
for test:
- 200 grams of sugar
- 1 cup “Baby”
- 2 eggs
- 1 cup flour,
- Squirrel bag.
For cream:
- 100 grams of sugar
Beat eggs and sugar, add flour and baking powder, then baby formula, knead the dough (thick). Place in a deep baking dish, bake in the oven until golden brown (medium temperature). To prepare the cream, beat "Baby" with sugar and sour cream. The finished cake is poured over with a thick cream and put in the refrigerator.
Recipe 4. Baby cake
The dessert got its name from the famous infant formula. Of course, you can use not only the "baby", but any other powder. The result is a tender and very tasty cake that will delight every member of the family. To prepare you will need:
- A glass of sugar (200 g)
- A glass of infant formula
- 2 chicken eggs
- A glass of flour (wheat)
- A packet (serving) of baking powder
Separately, to prepare the cream, you need:
- 100 g of granulated sugar
- Half a glass of baby formula
- Half a glass of sour cream
First of all, as always, eggs and granulated sugar are beaten. Gradually add flour and a portion of baking powder to this, mix. After that, add the baby powder mixture to the dough. The result is a thick homogeneous consistency. It must be laid out in a special baking dish, greased with oil. The cake is baked for 15-20 minutes at medium temperature, until golden brown. While the cake is baking, make the cream. To do this, mix the baby formula and sour cream with sugar until a homogeneous consistency. Fill the finished cake with cream, cut and serve.
Biscuits
The following ingredients are needed to make cookies:
- 300 grams of infant formula
- 250 grams of sugar
- 200 grams of butter
- 50 grams of cocoa 100005
Water with sugar is brought to a boil, oil is added. Boil over low heat. As soon as the syrup begins to thicken, remove from heat. Cocoa and baby formula are mixed and added to the syrup in small portions until thickened. Cookies of any shape are molded from warm dough, rolled in cocoa, powdered sugar or poured with hot chocolate.
Step by step preparation
- We need simple ingredients to make this cake. It often happens (mothers know) that infant formula remains (crumples or costs more than the due date). It is a pity to throw it away, but it would seem that there is nowhere to attach it. From the mixture you can cook not only sweets, but also excellent pastries.
- Whisk eggs, baby food, flour and sugar. You can do this with a whisk or a mixer (at your request and as you prefer).
- Knead the dough thoroughly, there should be no lumps. The consistency of the dough should be not too thick and not too liquid (like thick sour cream).
- Pour the dough into a pre-greased form, send it to the oven preheated to 200 degrees for 25-30 minutes (the temperature during baking should not exceed 180 degrees).
- After baking, let the dough stand for a while, then take it out of the mold, cut it and serve it to the table. If desired, the cake can be sprinkled with powdered sugar or decorated with fruit.
 The cream for this cake is made on the basis of sour cream and infant formula. I decided to make a cake without cream, it turned out just as delicious. If you want to make it even tastier, then beat a glass of sour cream with baby formula, you get an airy cream.
Pancakes
You can bake pancakes from infant formula. The ingredients for them are:
- 500 grams of water
- 18 scoops of dry mix
- 2 eggs
- 1.5 tablespoons of vegetable oil,
- salt,
- at least 6 flour,
- as needed.
Mix water and mixture with a whisk in a bowl. Add eggs, sugar and salt, mix again. Flour is added spoon by spoon, stirring with a whisk, until the consistency of liquid sour cream. The dough should be infused for 30 minutes, after which vegetable oil is added to it, the pancakes are mixed and baked in a well-heated frying pan (the frying pan is greased with vegetable oil for the first time). Each pancake is smeared with butter.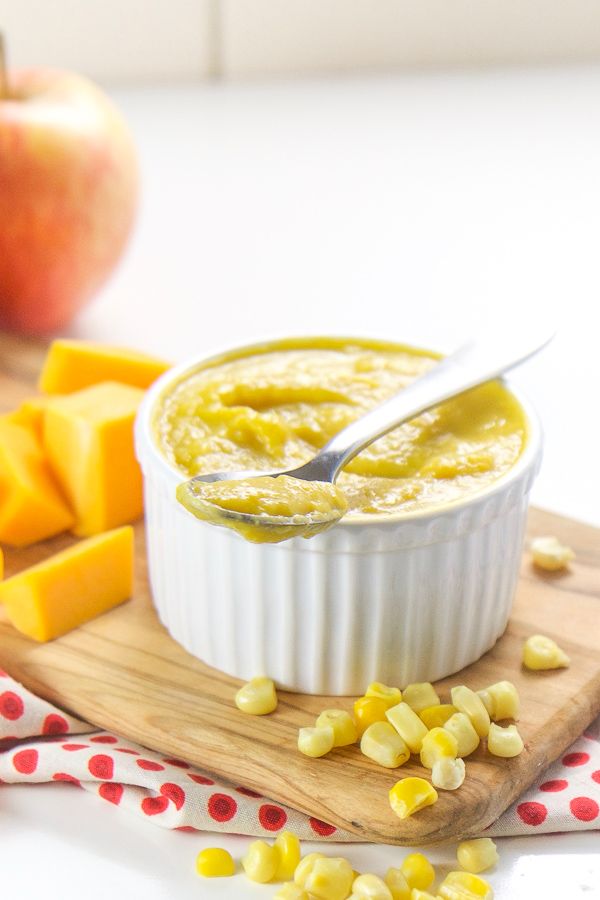 Enjoy your meal!
Recipe 5: Baby Formula Roll
This is another dessert recipe that uses baby formula as an ingredient. As a result, we get a soft, juicy roll, which is suitable for both an ordinary tea party and a festive table. We will need:
- A glass of infant formula (approximately 6-7 tablespoons)
- A glass of wheat flour
- 2-3 chicken eggs (depending on their size)
- A glass of sugar (+- to taste)
- Soda (baking powder can be used instead)
- Jam or marmalade or any other filling
Infant formula mixed with flour and sugar. Eggs and soda are added to them. All ingredients are thoroughly beaten until a liquid, sour cream-like dough is formed. In the meantime, prepare tracing paper or special paper for baking. You can also use a regular baking sheet, but this is not so convenient. Pour the dough in a thin layer onto a prepared, oiled surface, after which we hide it in the oven for about 15 - 30 minutes, depending on the temperature.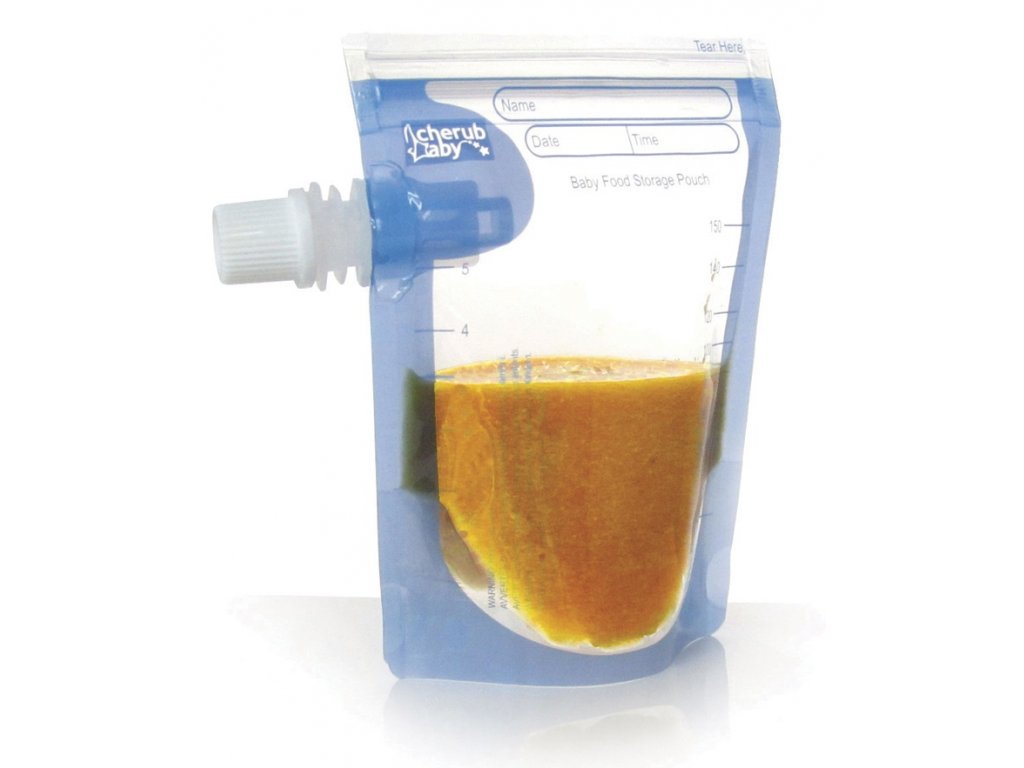 When the dough has turned into a soft, but ready-made cake, we take it out of the oven, grease it with the filling and wrap it in the form of a roll. From above, you can decorate the dessert with chocolate chips, cinnamon, powdered sugar and any other spices.
All these recipes are irrefutable proof that there are no extra products in the kitchen. Even infant formula, which many people think is not suitable for anything other than feeding children, turns out to be a very useful addition to many dishes. Of course, this is not a complete list of what can be prepared with the addition of this miracle powder. Well, the most important thing is the absence of complex actions and expensive ingredients. Almost all products are in every housewife's kitchen. Cook easily and enjoy. Enjoy your meal!
Recipe for dessert with apple marmalade
For baking you will need:
- Three eggs.
- Sugar (1 tablespoon).
- 7 grams baking powder.
- Apple jam - 1 cup.
- Three tablespoons of milk formula.
- Wheat flour (the same).
- Wafers, nut kernels.
To make a dessert, you need to grind eggs with granulated sugar. The components are whipped with a mixer until foam is formed. Add sifted flour, milk mixture and baking powder. The ingredients are rubbed with a spatula or spoon.
The resulting mass is placed in a bowl lined with baking paper and greased with butter. Cook in the oven for seven minutes.
Remove the cake from the mold and let it cool. Cut lengthwise into several pieces of the same size. Cover with a layer of jam. Place the dessert tiers on top of each other.
Walnut kernels and waffles should be ground with a blender. A cake from a baby formula according to a recipe with the addition of jam is sprinkled with the resulting crumbs.
Infant Formula Recipes
Leftover infant formula can be used to make delicious treats for your family and guests. The variety of recipes from baby formulas is amazing and makes it possible for a good housewife to surprise and delight her loved ones.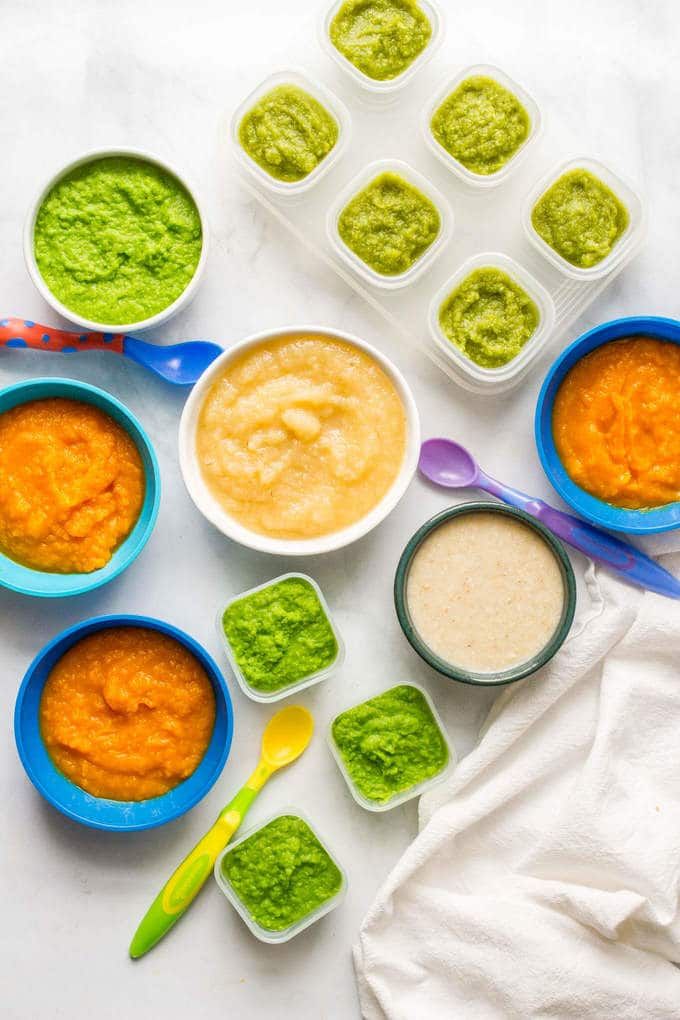 Let's consider some of them.
Recipe #1. Truffles. You will need:
- 4 cups Baby (plus 0.5 cups of dip mix)
- 2.5 cups sugar
- ¾ cup milk
- 4 tablespoons of cocoa
- 50 grams of butter, coconut flakes.
Sugar, milk, cocoa, butter are mixed and put on a slow fire until the sugar dissolves. Let it cool down and gradually stir in the milk mixture until the consistency of a very thick dough. From the resulting mass, hands dipped in water form balls, which are then rolled in infant formula and sprinkled with coconut flakes.
Recipe #2. Roll. To do this, take:
- 6 tablespoons of the mixture
- 6 tablespoons flour
- 3 eggs
- 5 tablespoons sugar,
- soda or baking powder.
Stir the ingredients to a batter consistency. Paper or tracing paper for baking is smeared with margarine or fat, the resulting mass is poured onto it in a thin layer and baked for 5 minutes.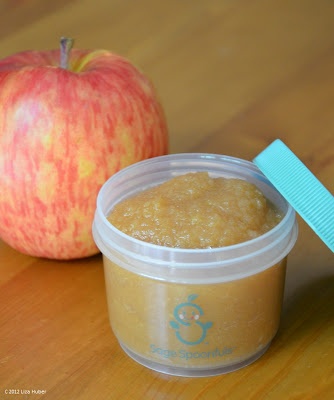 Having removed from the baking sheet, grease the roll (with jam, cream) and wrap it, sprinkle with powdered sugar on top.
Recipe #3. Cake "Baby". The following products are needed:
For the dough:
- 200 grams of sugar
- 1 glass of "Baby"
- 2 eggs
- 1 glass of flour,
- a bag of baking powder.
For cream:
- 100 grams of sugar
Beat eggs and sugar, add flour and baking powder, then baby formula, knead the dough (thick). Place in a deep baking dish, bake in the oven until golden brown (medium temperature). To prepare the cream, beat "Baby" with sugar and sour cream. The finished cake is poured over with a thick cream and put in the refrigerator.
Recipe #4. Candies. To make sweets, you will need:
- 1 pack of "Baby"
- 150 grams of butter
- 150 grams of walnuts
- 0.5 cup of milk
- 2 tablespoons of cocoa
Cocoa, butter and milk are mixed and boiled for a minute, cooled.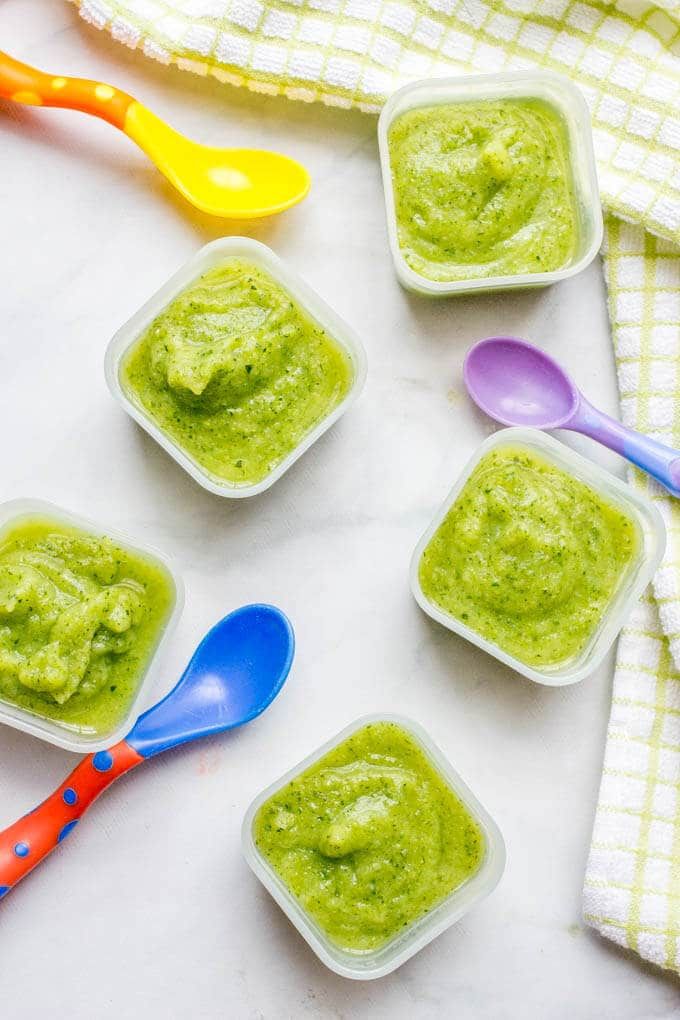 Add baby formula and chopped nuts. Stir, mold sweets-cones. Waffles are rubbed on a grater and sprinkled with sweets.
Recipe #5. Cookie. To prepare cookies, the following ingredients are needed:
- 300 grams of infant formula
- 250 grams of sugar
- 200 grams of butter
- 50 grams of cocoa
- 100 grams of water.
Water with sugar is brought to a boil, oil is added. Boil over low heat. As soon as the syrup begins to thicken, remove from heat. Cocoa and baby formula are mixed and added to the syrup in small portions until thickened. Cookies of any shape are molded from warm dough, rolled in cocoa, powdered sugar or poured with hot chocolate.
Recipe #6. Blitny. You can bake pancakes from baby formula. The ingredients for them are:
- 500 grams of water
- 18 scoops of dry mix
- 2 eggs
- 1.5 tablespoons of vegetable oil,
- salt,
- at least 6 flour,
- as needed.
Mix water and mixture with a whisk in a bowl. Add eggs, sugar and salt, mix again. Flour is added spoon by spoon, stirring with a whisk, until the consistency of liquid sour cream. The dough should be infused for 30 minutes, after which vegetable oil is added to it, the pancakes are mixed and baked in a well-heated frying pan (the frying pan is greased with vegetable oil for the first time). Each pancake is smeared with butter. Enjoy your meal!
Previous article Next article
The information on our site is educational and educational. However, this information is by no means a self-medication guide. Be sure to consult your doctor.
www.ja-zdorov.ru
Simple dessert with buttercream
You will need:
- Three eggs.
- 200 g of granulated sugar.
- Flour (one glass).
- Soda (half a teaspoon).
- Milk formula "Baby" in the amount of 400 g.
- Butter - about 200 g.
- Six large spoons of water.
Baby formula cake is prepared like this.
Eggs are combined with granulated sugar. They rub well. Add a mixture of 200 g, soda, flour, pour in water - three tablespoons. The resulting dough is divided into three fragments, each of which must be cooked in the oven at a temperature of about 200 degrees for 15 minutes. Then the layers of dessert should be cooled.
For the cream, beat the butter with a mixer. Add three large spoons of water and the remaining mixture. Whisk the ingredients thoroughly. The layers of dessert are smeared with the resulting mass, connected to each other.
Preparation
The mixture is combined with cocoa powder and butter. Rub until a lump appears. Water and granulated sugar are heated on the stove. Cool the syrup and combine with the chocolate mixture. Cream for dessert should be soft, without lumps.
Baking utensils covered with foil. Cookies are placed on its surface, covered with cream. Repeat these steps until the products run out.
The infant formula cake is then placed in a cold place.
Preparation
The ingredients needed for the biscuit are combined in a deep dish. Grind until a homogeneous mass is formed. The mixture should be placed in a baking dish. Sprinkle with a layer of chopped walnut kernels. The biscuit is cooked in the oven at 160 degrees for 30 minutes.
To prepare the cream, sour cream is combined with a portion of the mixture. You can put sugar in the mass (about 1 tablespoon). Then the products are rubbed well.
The biscuit is cooled and cut lengthwise into three identical pieces. Cakes are covered with sour cream, put in a cold place. When the cream becomes thick, layers of dessert are stacked on top of each other. The baby formula cake is sprinkled with chopped walnut kernels.
Sour cream pastry
Treat base contains:
- Half a glass of baby formula.
- The same amount of flour.
- 100 g sugar.
- Sour cream (the same).
- Two eggs.
- Baking powder - half a teaspoon.
For cream you will need:
- Sour cream (half a glass).
- Milk mixture (3 tablespoons).
- Granulated sugar - to taste.
Four walnut kernels are used to decorate the dessert. How to make a baby formula cake with sour cream?
The recipe is described in the next chapter.
Powdered milk cake
Do you remember here in urgent questions I asked about the recipe for Malyutka's baby formula cake on behalf of Ulyana? Ulyana wrote to me asking if I knew such a cake recipe from the times of the USSR, because she has a lot of good childhood memories associated with this cake, my mother baked such a cake for every new year, but unfortunately the recipe was lost, but I would like to repeat it now for your child.
I did not know such a cake, so I decided to ask you, dear visitors of my culinary blog, and now, thanks to Margarita, the recipe has been found! It is very valuable that it really is not on the Internet, we searched with Ulyana and did not find it, everything is not right.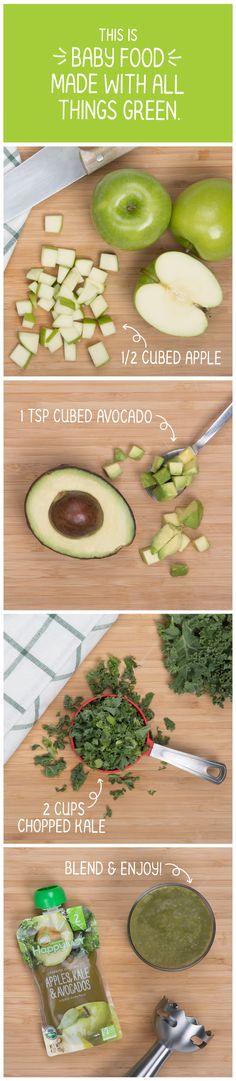 And Margarita helped us a lot, thank you!
I looked at the recipe and since now I also have a small baby doll at home who eats infant formula, I also really wanted to make such a cake. So I share not only the recipe, but also step-by-step photos of making a cake from infant formula and sour cream.
Very tasty cake turned out! Only I replaced sour cream with homemade, thick, unsweetened yogurt, everything turned out great! And also keep in mind that the cake turns out to be sweet, after all, the baby formula is already sweet in itself, so I would take less sugar next time. In the cake itself 2/3 cup, in the cream 1/4 cup.
This cake can be baked for children's birthdays, thanks to the presence of baby formula, the cake is also healthy.
| In order to prepare such a baby cake from powdered milk formula, I needed: 2 eggs 1 glass of sugar 1 glass of sour cream 1 tsp. soda 1 cup Malyutka (can be replaced with any dry milk mixture) 1 cup flour Cream: 1/2 cup sugar 1 cup sour cream 1 cup Malyutka |
I broke the eggs, poured sugar into them.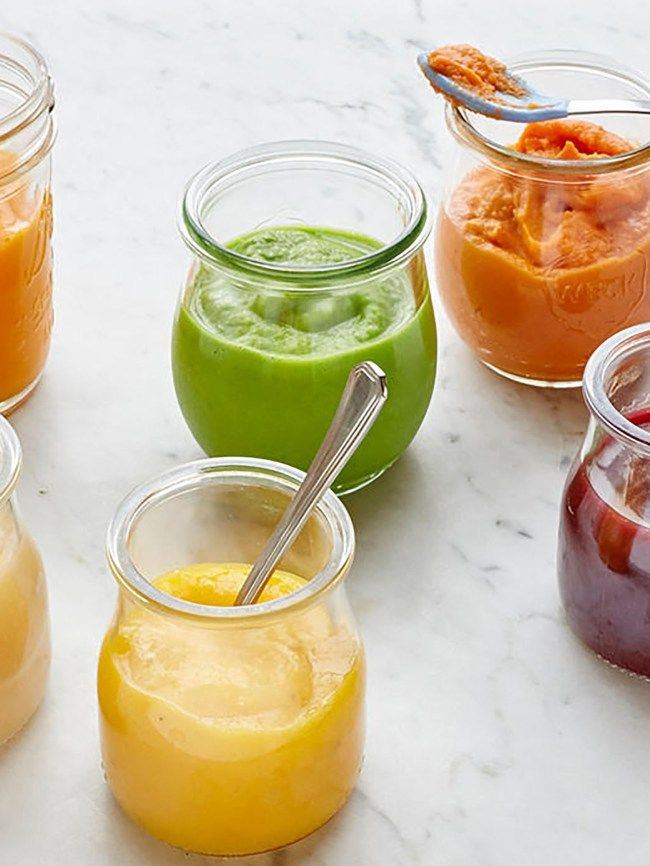 |
| Whipped for 5 minutes. It turned out such a thick, white, fluffy cake, like a cream. Further, the mixer is no longer required, the dough is kneaded with a spoon, like a biscuit. |
| I poured the soda into yogurt (according to the recipe into sour cream), mixed it so that it was extinguished. |
| Poured yogurt (sour cream) into beaten eggs. |
| I poured out the dry infant formula, gently mixed the dough with a spoon from the bottom up so that all the lumps dispersed. |
| I sifted the flour and mixed everything in the same way. |
| The result is such an airy dough, not very liquid and not very thick. |
| Then you can bake cakes in the oven, you can in a slow cooker. There was a lot of dough, so Margarita advised him to divide it into two parts and bake two cakes. I decided to bake in a slow cooker and immediately the entire volume. To do this, greased the bowl with butter, sprinkled with semolina. If you are going to bake in the oven, then place the mold with the dough in a preheated oven and bake at 180 degrees for about 40-50 minutes. Check readiness with a wooden skewer. |
| Here is a biscuit cake I have turned around, very fluffy, soft, airy. Cool it down and cut it in two. |
| For the cream I mixed baby formula, sugar and yogurt (sour cream). Whipped with a mixer. |
| Covered the cake with cream. And the truth is, as Ulyana wrote, the cream is amazingly delicious! |
| Topped the cake with chocolate chips and garnished with whipped cream. I put it in the refrigerator overnight. |
| Then you can cut into pieces and drink tea. |
 She poured out the dough and baked in the Baking mode for 65 minutes, then turned it on again for 20 minutes. There is a lot of dough, the cake turned out to be high, so I slightly increased the baking time.
 This recipe belongs to the group: children's recipes
See more recipes from this section:
www.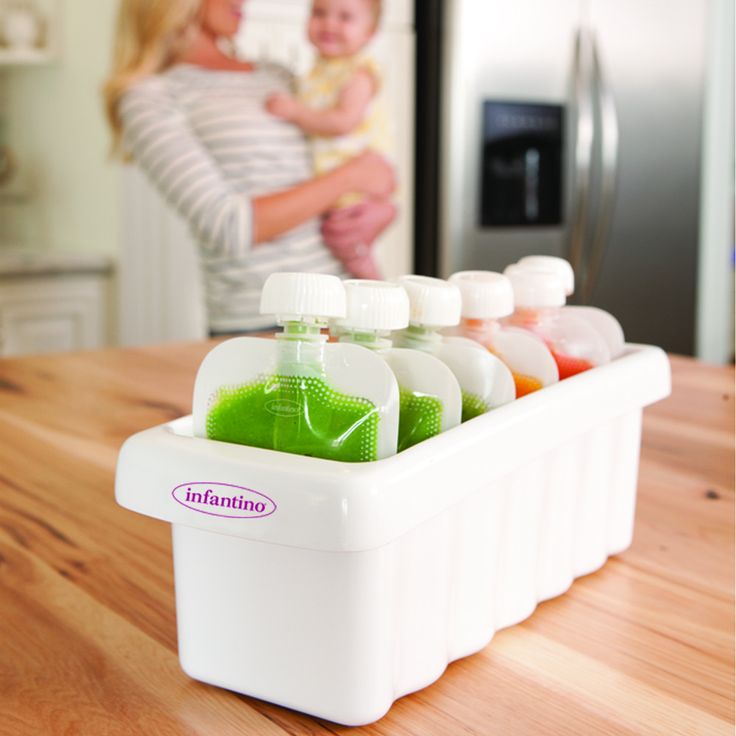 vseblyuda.ru mixtures.
Crack the eggs into a deep bowl, add sugar, water and beat well.
Add the sifted flour, baby formula, baking powder and mix gently. The dough will look fluffy, but somewhat runny.
Pour the batter into a baking dish and bake in a preheated oven at 180 degrees for 15-20 minutes.
To make the cream, soften the butter at room temperature and beat it.
Add infant formula and water.
Stir the cream and beat until smooth. Taste the cream if you don't find it sweet, but add the condensed milk and mix well.
Grind cookies in a blender until crumbs form.
Cut the finished infant formula cake into 2 or 3 pieces.
Assemble the cake, soaking and spreading the cream on each layer and sprinkle with cookie crumbs on top.
The infant formula cake is ready. Enjoy your meal!
Dishes from baby milk formula: cooking methods and recipes
Many young mothers who were forced to feed their babies with milk formula for one reason or another often face a situation where a certain amount of these baby products accumulate in the house and there is nowhere to put them.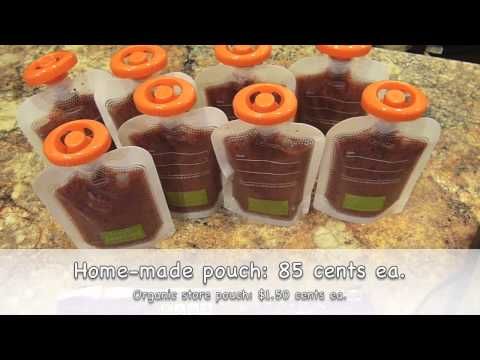 . Most often this happens when parents have to choose the most suitable porridge option for a baby for a long time due to the appearance of allergic rashes or negative intestinal reactions to the use of one or another baby food.
Sometimes a child simply refuses to eat a certain type of food, for reasons known to him alone. How can you use infant formula wisely, because they are not so cheap? It turns out that this product can be used to prepare a lot of delicious dishes for adults!
Contents:
Weighing the pros and cons of breastfeeding and artificial feeding can take a long time, and every mother has her own reasons for that.
But be that as it may, dishes prepared from baby milk formulas are extremely tasty and healthy, and all thanks to their composition, which every year baby food manufacturers make as close as possible to breast milk.
So, children's milk porridges owe their taste qualities and benefits to the body to such components as:
- casein - together with whey protein, it is the main building material for the body and a catalyst for many biochemical processes;
- taurine is an amino acid necessary for the full functioning of the central nervous system and organs of vision;
- milk sugar (lactose) - provides the body with energy, promotes better absorption of calcium and iron, improves digestion, and also creates favorable conditions for the formation of healthy microflora;
- linoleic acid is a special fatty acid required by the body for the normal functioning of the brain;
- probiotics are strains of microorganisms designed to stimulate the reproduction of beneficial microflora in the intestines.

In addition, infant formula contains manganese, zinc, copper, selenium and iodine. Depending on which age the food is intended for, it can also be enriched with other vitamins and microelements.
The easiest way to use dry food for children is to prepare ordinary porridge from any cereal based on it. The most commonly used round rice.
To prepare it you will need:
- a glass of rice;
- a glass of dry milk porridge;
- 3 cups of water.
Rice must be pre-soaked for 20 minutes, then rinsed thoroughly until the water is clear. Milk porridge must be diluted in 3 glasses of warm water, stir and warm over a fire without boiling.
Put the washed rice into the liquid and cook until tender without stirring. You can add sugar or salt to the finished porridge according to your taste, although sugar is in the optimal amount in most types of baby food.
For all lovers of homemade pancakes, the recipe for making them based on baby food will be a real find.
To make delicious pancakes based on infant formula, you will need the following ingredients:
- 500 ml of formula diluted according to the instructions on the package;
- teaspoon of salt;
- a glass of wheat flour;
- 2-3 eggs;
- 100 g sugar;
- tablespoon butter (melted).
Egg whites must be separated from the yolks and beaten into a thick elastic foam. Grind the yolks with sugar, add dry food and butter to them. Mix all the ingredients well and add the flour, stir until the lumps disappear. You can additionally strain the pancake mass through a large sieve to be sure that not a single lump will slip into the pan. Lastly, add egg whites and mix.
Pancakes should be baked in a well-heated frying pan greased with oil. Pancakes are best served warm with sour cream or jam.
It turns out that preparing delicious truffles and making your family happy with a sweet treat is not so difficult, especially if you have some dry baby food lying around the house.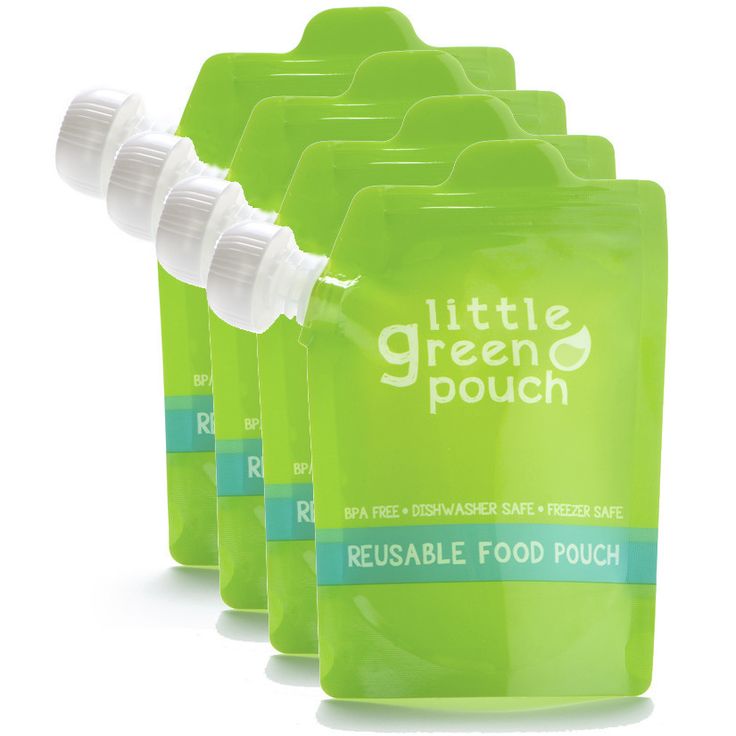
For this you will need:
- 500 g of dry "porridge";
- 2 cups sugar;
- 350 ml boiled water;
- pack of butter;
- 5 tablespoons cocoa.
You will also need shredded coconut or finely crumbled waffles for decoration.
Place water, sugar and butter in a saucepan, melt and stir well until a smooth syrup is obtained. In a separate bowl, mix still dry milk porridge and cocoa, then combine with syrup and mix thoroughly. Cool the resulting mass to room temperature and place in the refrigerator for 2 hours.
Then form balls from the hardened mass, roll them in shavings and place on a dish. Truffles should be stored in the refrigerator.
Preparing pastries from baby formula will not take you much time, and its taste will exceed all expectations.
So, to prepare the dough for cake layers you will need:
- 250 g of the mixture;
- 200 g sugar;
- glass of flour;
- 2 eggs;
- sachet of baking powder.
To prepare the cream, you will need such products as:
- 200 g of the mixture;
- 100 g sour cream;
- 100 g sugar.
First prepare the dough. Eggs are beaten with sugar. Flour, baking powder and milk porridge are thoroughly mixed and combined with eggs and sugar. The dough should be quite thick. The entire resulting volume of dough must be divided into 2 parts and bake 2 cakes.
All cream ingredients are thoroughly mixed and infused in the refrigerator for 30 minutes.
After the cakes have cooled down, you can start greasing them with cream. On top of the cake is also covered with a layer of cream, if desired, it can be decorated with nuts and raisins.
However, dry baby food is not just about cakes. In addition, you can make very tasty cookies from the leftover infant formula.
For this you will need:
- 300 g milk formula;
- 50 g cocoa powder;
- pack of butter;
- 100 ml water;
- 250 g sugar.

Prepare syrup from water and sugar - place in a saucepan and bring to a boil, then immediately add oil to it. Boil the resulting mass over low heat until thickened.
Combine cocoa with baby food, slowly add to the thickened syrup with constant stirring. Knead the dough thoroughly, and while it has not cooled down, proceed to the formation of cookies.
Cooked cookies must be rolled in cocoa and placed on a baking sheet. Warm up in the oven for 20-25 minutes.
As you can see, you can make delicious meals from leftover baby milk formulas. Therefore, do not rush to throw away or give away an extra package of baby food to someone, it is better to please your family with amazing desserts.
mjusli.ru
How to make a homemade dry mix cake
Today we offer you a simple solution to this problem and tell you how to make a homemade dry mix cake. Believe me, complex baking has never been so simple. The recipe is based on the ready-made flour mixture “Home Cake”, which has a balanced, carefully adjusted composition.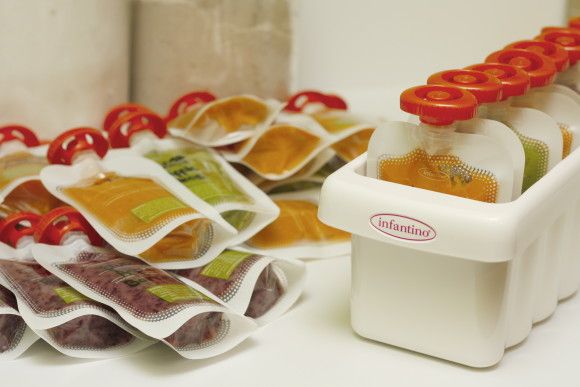 Thanks to this, the cakes always turn out lush, fragrant and tasty. In addition, the proposed mixture for cakes does not contain preservatives, but only natural ingredients: wheat flour, milk powder, sugar, vanillin and baking powder. This is the main secret of healthy and tasty homemade baking. And, of course, do not forget about the cream. You can cook any, but we suggest trying our recipe based on curd cheese and whipped cream. Light, delicate, almost weightless, such a cream will surely become a worthy decoration for your cake. The final chord of the recipe is slices of fresh strawberries. Sweet and juicy, this berry is very healthy. And strawberries have their own little secret, which few people know about. It lowers blood sugar levels. So, the eaten piece of strawberry cake will be almost invisible to your body. But you can use any other berry you like. Now is the time to tell in detail how to make a homemade cake from the finished dry mix. Ingredients: premium wheat flour, granulated sugar, whole milk powder, edible table sea salt.
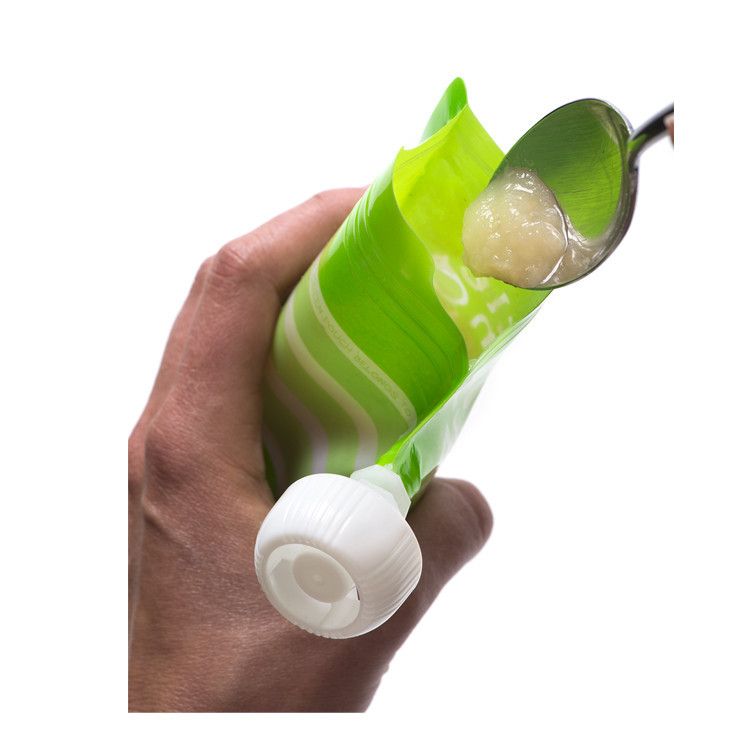 Food additives: natural vanillin flavor, baking powder (baking soda, citric acid)
Add 2 eggs, 100 g of softened butter (or margarine), 100 ml of water at room temperature to the finished flour mixture. Knead the dough. Let it stand for 5 minutes.
Put the dough into a greased 22-23 cm tin.
Bake in a preheated oven at 170-180 C for 35-40 minutes until done. Remove the cooked cake from the mold, cool on a wire rack or wooden board. While the cake is cooling, you can prepare the cream. Whip the chilled cream, gradually add the powdered sugar. As soon as the cream is whipped, add curd cheese, flavoring and beat again until a homogeneous mass is obtained. Cut the cooled cake into 2 parts.
Lubricate the surface of one cake with cream.
Cover with the second cake and connect. We also apply cream on the top and sides of the cake.
Put fresh berries and chocolate pieces on the surface of the cake.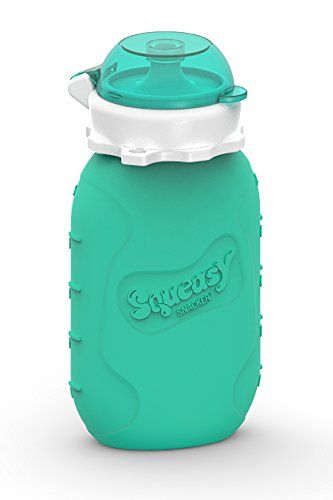 Instead of this cream, you can use any other cream, jam or marmalade.
How to make Baby Formula Cake
1. We need simple ingredients to make this cake. It often happens (mothers know) that infant formula remains (crumples or costs more than the due date). It is a pity to throw it away, but it would seem that there is nowhere to attach it. From the mixture you can cook not only sweets, but also excellent pastries.
2. Whisk eggs, baby food, flour and sugar. You can do this with a whisk or a mixer (at your request and as you prefer).
3. Knead the dough thoroughly, there should be no lumps. The consistency of the dough should be not too thick and not too liquid (like thick sour cream).
4. Pour the dough into a pre-oiled form, send it to the oven preheated to 200 degrees for 25-30 minutes (the temperature during baking should not exceed 180 degrees).
5. After baking, let the dough stand for a while, then take it out of the mold, cut it and serve it to the table. If desired, the cake can be sprinkled with powdered sugar or decorated with fruit. The cream for this cake is made on the basis of sour cream and infant formula. I decided to make a cake without cream, it turned out just as delicious. If you want to make it even tastier, then beat a glass of sour cream with baby formula, you get an airy cream.
Condensed milk treat
To prepare the dough you need:
- Flour (about 200 grams).
- A glass of infant formula.
- The same amount of granulated sugar.
- Three eggs.
- Three tablespoons of water.
- Seven grams of baking powder.
The cream contains:
- Butter in the amount of 200 grams.
- A glass of infant formula.
- Three tablespoons of water.
- Condensed milk (to taste)
0003
- 75 g of granulated sugar.
- 150 ml water.
Nut kernels, biscuit crumbs, waffles are used to decorate the dish.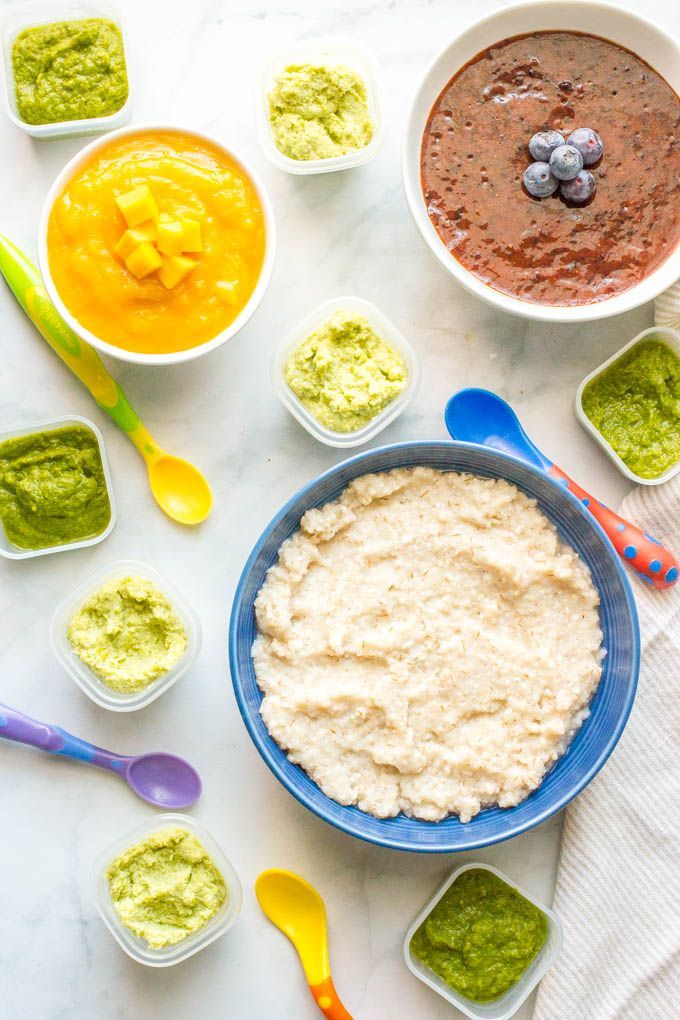
How to make a baby formula cake? The recipe with a photo is discussed in this chapter. To prepare a biscuit, you need to grind the eggs with sugar. Add water, baking powder and flour. Whisk the ingredients well. Pour into the milk mixture. Thoroughly mix the products with a mixer.
Place the dough in a bowl lined with parchment paper. Cook in the oven for about a quarter of an hour. Then the biscuit should be cooled. Divide into two or three fragments of the same size.
To make cream, you need to beat warm butter with a mixer. Combine it with milk mixture and water. Add condensed milk and mix well.
Syrup is made from granulated sugar and water, which is used to cover the surface of the cakes. Layers of dessert are stacked on top of each other. Each tier of the baby formula cake is smeared with cream. The surface of the treat is covered with wafers, nuts, and cookie crumbs crushed in a blender.
How to make baby food - Encyclopedia Baby Food
Victoria Levchuk© Victoria Levchuk © Broccoli, Zucchini and Cauliflower Puree Taking care of your child's health in today's world means starting complementary foods right with whole, healthy foods prepared with love.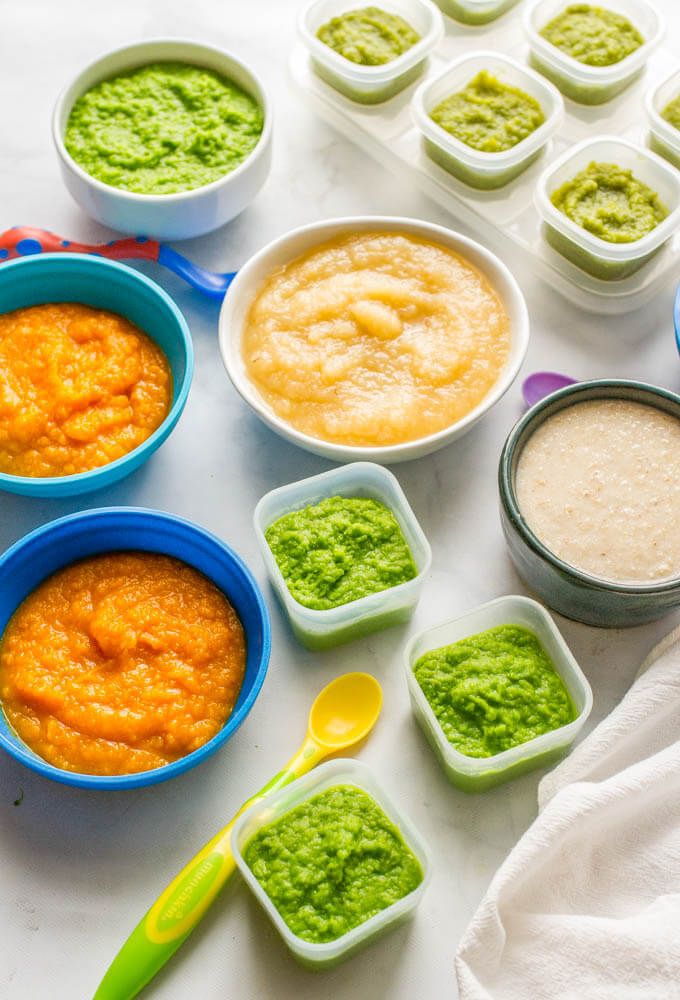 Most mothers will immediately ask how to prepare baby food that is of high quality, easily digestible and tasty.
Canned food can sometimes seem easy to feed a baby, but when you start reading the ingredients of each tiny can (not to mention the cost of each can), it makes more sense to try your hand at making homemade baby food yourself.
When you think about how to prepare baby food, it seems so difficult. However, everything is much easier. In fact, baby food is the easiest recipe to prepare. Many mothers who hate to cook learn how to cook with healthy complementary foods for their beloved child.
Let's start with a few practical tips on what you'll need, what products to choose and what else to keep in mind to make the process as easy as possible.
Contents:
So, how to prepare baby food? Simple - choose a fruit or vegetable that needs to be introduced into complementary foods, cook until tender, make a smooth puree and voila ... a batch of baby food is ready. And now to the details, the following tips will teach you how to cook baby food in no time.
1. Buy the right tools
-
Blender
This “devil machine” is the best assistant in the kitchen. Only a blender can bring fruits, vegetables, grains, meat and other products to the ideal consistency. During the first few months, solid foods are made smooth and tender without lumps so that the baby's digestion slowly gets used to the complex textures.
-
Stainless saucepan
Good, regular dishes will always be washed. The first experiments burn, stick and are almost not washed off. Buy one good quality baby food pot. I have never regretted in 6 years. She washes with a brush, dishwasher, iron brush and she is still like new. We choose high-quality, stainless dishes, small up to 1 liter, with a good handle and lid. I have a lid with heat protection, I can take it with my bare hands, it is not hot, and neither is the pen.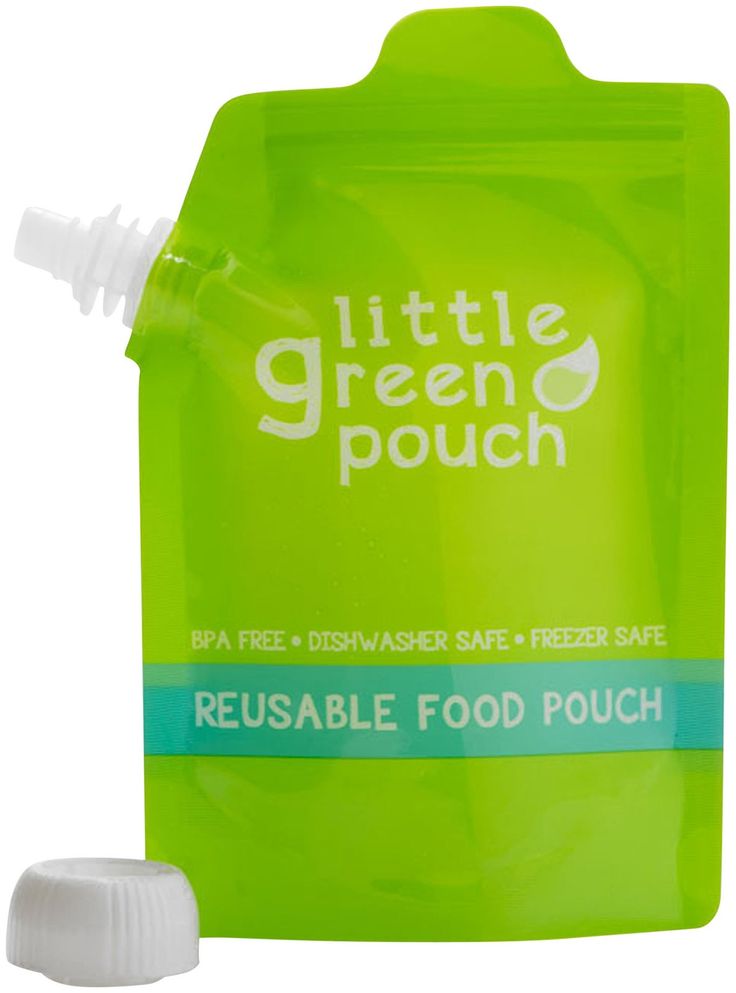
-
Baby food freezer tray with lid
One good plastic or flexible silicone tray will last a long time. Moreover, it is needed for the first 4-6 months; you will not need to freeze baby purees anymore. You can buy without a lid, but then you have to suffer from bags, as baby purees love to absorb odors from the freezer. During meals, portions can be diced and heated in the microwave before serving.
freezer mold-
Food thermometer
Many new mothers are advised to buy a food thermometer. I didn't buy. My wrist was an indicator, always, if I'm hot, then the child will be very hot. But for speed and convenience, a food thermometer comes in handy to make sure the food is at the right temperature for small mouths.
-
Steamer or multicooker
A modern kitchen cannot do without these devices, because it is easier and more useful for us.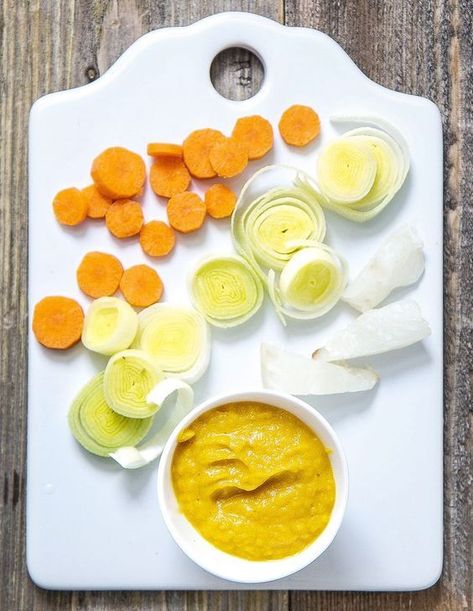 In principle, a slow cooker will always help out when you need to cook porridge, and a double boiler - a lot of vegetables and fruits. These tools always help out, save the time of an eternally busy mother. I advise!!!
2. Choosing Your First Foods Carefully
Choose fruits and vegetables for your first weaning foods that are rich in nutrients. Brightly colored vegetables are fresh vegetables. For the first feeding, foods such as broccoli, zucchini, zucchini, pumpkin are suitable, they are rich in vitamins, and at the same time look attractive. Fruits such as apple and pear can be introduced from about six months of age and are also very rich in vitamins, such as blueberries and peaches.
It's a good idea to talk to your doctor about which foods to introduce first and what is the best age to start complementary foods (this could be four to six months) and remember to start with one.
We offer the child the same food for four days - if any signs of allergy appear, the mother will immediately notice it.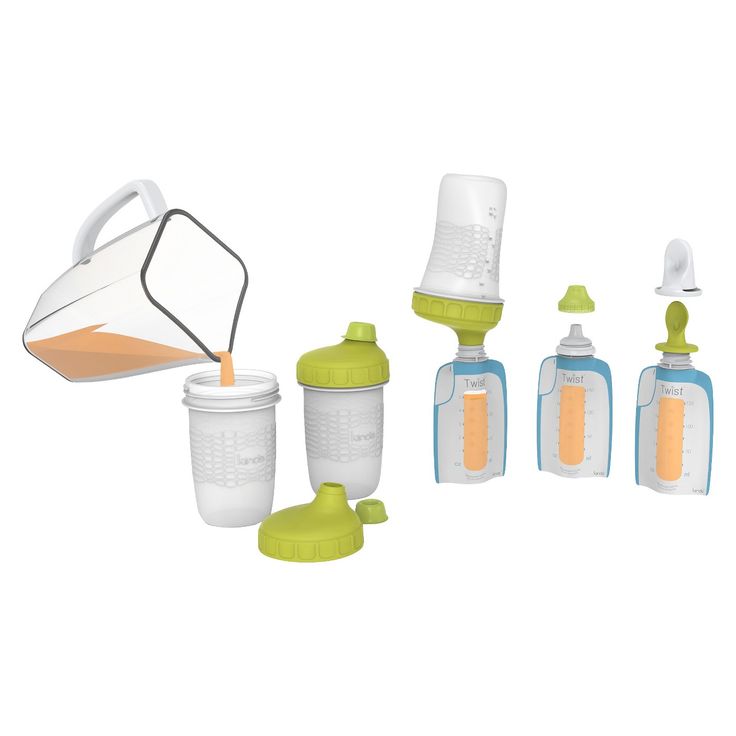
3. Safety first
Making homemade baby food is a convenient way to provide your baby with a healthy diet free of additives and preservatives.
Preparing and freezing small batches of food in advance makes the task much easier. However, do not forget to throw away any food that has been touched with a used feeding spoon, food that has already been reheated, and food that has been in the freezer for too long. At first, it is recommended to keep frozen baby puree for no more than 1 month in the freezer.
Children's dishes can be washed in the dishwasher, the only thing you have to do is choose a cleaning agent for children. If there is no dishwasher, then wash the dishes under hot water, at first you can pour boiling water over before use.
Food should always be warm, but never hot. If there is no thermometer, we measure the temperature of the food with the back of the wrist before serving.
Avoid food or utensils that contain harsh chemicals that can react in microwaves or ovens and always keep your hands clean before handling any food.
I remind you that your child should wash their hands before preparing food. They should be washed frequently, as well as products that are cleaned and then cut.
What happens when products are rejected?
It is important to understand that a child likes and dislikes certain foods, but it is important to consider that as the baby develops, his tiny taste buds also grow and new taste preferences appear. Parents need to be patient, the first feeding is a messy experience, so you need to have enough rags and bibs on hand to enjoy the baby's first taste sensations.
We are not afraid and add me to VK and Odnoklassniki, Instagram!
Like this article? Subscribe to site updates
"Encyclopedia Baby Food"!
Don't forget to bookmark us! (CTRL+SHIFT+D) Subscribe to the site, comment, share in social networks.
On our site Encyclopedia Baby Food there is useful information on the nutrition of your children, which is useful for everyone, and we update the site "Encyclopedia Baby Food" constantly and try to search and write only excellent, verified and necessary information for you and your children.
Disclaimer No. 1: It must be understood that the author of the articles on the Baby Food Encyclopedia website is not a medical staff, “I am not a doctor.” The information I share is based on my own experience. My goal is not to teach you how to eat or feed your child, but to talk about how we did it, what new things I learned or read. This expands the picture of Baby Food knowledge, gives you a glimpse of the whole process so you can decide if you like it or not.
Disclaimer No. 2 : However, the above does not cancel a visit to the pediatrician. Before you start complementary foods, you need to get his professional opinion on the best way to introduce new foods for your baby. I also draw your attention to the fact that you need to look at the original date of the published articles, because some of the "best practices" may have changed. Always check with your child's pediatrician about complementary foods and their health.
Disclaimer #3: Keep in mind that every family is unique, every situation is also completely unique. There are no universal solutions. Only you can find what works best for you. Certain goals require certain sacrifices and priorities - not everyone wants to make those choices, and that's GREAT! Just know what you want to achieve, and be ready to get to work, putting the best of your strength!
Disclaimer No. 4: The Encyclopedia Baby Food website uses photos from books on baby food with attribution, for a better understanding of the information (Article 1274, paragraph 1, part four of the Civil Code of the Russian Federation). Literature on baby food is found in the public domain on the Internet.
Apricot puree with chicken
Banan-global puree
Banana puree
borsch
Bousse broth with peas and rice
Boturbrod with kohlrabi
Quick dessert from Kabachki with strawberry
General cigarette Buckwheat porridge with apricots
Buckwheat porridge with banana
Buckwheat pilaf
Children's sausage
Children's milk porridge with banana
Children's vinaigrette
Children's ketchup
Children's cucumber salad
Children's Olivier salad
Children's porridge biscuits
Children's puree of strawberries, bananas, yellow cherries, yoghurt and cookies with cereals
Children's puree with cottage cheese and fruits
Homemade yeast bread with flax flour
Homemade cheese
Homemade pizza
Breakfast outside
Kohlrabi appetizer
Roasted cauliflower
Roasted carrots
Roasted carrots and cherries with millet
Winter salad with Jerusalem artichoke
Cabbage with white beans
Canteen-style coleslaw
Mashed potatoes
Quinoa and pumpkin porridge
Quinoa porridge
breakfast cereals
Quinoa and apple
Strawberry puree
Strawberry puree with banana
Strawberry compote
Dried apple, raspberry compote
in a thermos" for a child older than 8 months
Corn porridge
Corn porridge with pear
Corn porridge with pumpkin
Corn porridge with pumpkin and carrots
Corn porridge with apple and carrots
Chicken liver in the oven
Chicken cutlets with carrots
Chicken with carrots, sweet peppers and potatoes
Navy pasta
Pasta with orange sauce
Gremolata pasta
Muffins with vegetables and egg
Young potatoes in their skins 949 Vermicelli milk soup6 Carrot-potato puree
Carrot-rice casserole
Carrot with chicken
Amanita from eggs and tomatoes
Meat envelopes
Homemade Tarragon drink for children
Vegetable puree from cauliflower and carrots
Vegetable soup with corn semolina
Vegetable soup with cheese and corn semolina
Vegetable soup with spinach
Vegetable puree soup with bell pepper
Oatmeal
Pollock fritters
Hot kefir fritters
Omelet in a bag
Spinach and Cheese Omelet
Omelette Pancake
Peach Puree
Baked Apples 7 months +
Zucchini and Carrot Pie
Zucchini Pie
Rice and Zucchini Pie
Fish Pie
Fish and potato pie
White cabbage pizza
Lavash pizza
Zucchini, tomato and sausage pizza
Tomato and olive pizza
Spinach pizza
Rabbit pilaf
Chicken pilaf with green peas and corn Puree 9049 and cherries
Banana, cottage cheese and porridge puree 4 cereals
Broccoli (cauliflower) puree
Broccoli, courgette and cauliflower puree
Blueberry puree
Pear puree
Pear and banana puree
Baked pear and banana puree
Pear and pumpkin puree 7 months +
Pear, pumpkin and peach puree
Pear, apple, plum and prunes puree
Blackberry puree
Turkey puree
Zucchini puree 90 zucchini and broccoli
Zucchini, carrot and potato puree
Quinoa and banana puree
Quinoa and carrot puree
Quinoa, banana and carrot puree
Quinoa, squash and carrot puree
Quinoa, peach and raspberry puree
quinoa, cauliflower, apple, peas and mint
Quinoa, apple, pear and raisin puree
Quinoa, apple, carrot puree
Rabbit, broccoli and cauliflower puree
Chicken, carrot, potato, apple and pea puree
Raspberry, cherry and banana puree
carrots
Carrot and apple puree
Carrot, potato, broccoli puree with cheese
Carrot, potato, apple and quinoa puree
Carrot, pumpkin, apple and prunes puree
Carrot, apple and potato puree
Turnip and carrots
Plum puree
Cottage cheese, strawberry and banana puree
Pumpkin puree
Pumpkin and banana puree
Pumpkin and squash puree
Pumpkin and apple puree
Pumpkin, apple and banana puree
Cauliflower and broccoli puree
Cauliflower and Potato Puree
Cauliflower and Rice Puree
Cauliflower and Apple Puree
Cauliflower, Green Pea and Squash Puree
Cauliflower, Turkey and Potato Puree
Cauliflower, Potato and Squash Puree
Cauliflower, carrot and broccoli puree
Cauliflower, carrot, cheese and rice puree
Cauliflower, apple and courgette puree
Zucchini puree
Zucchini and potato puree
Zucchini, carrot and apple puree 90 cherries
Blueberry puree
Prune puree
Apple, pumpkin, carrot and some curry puree
Apple and pear puree
Apple and strawberry puree
Apple, strawberry and cherry puree
Apple, peach and banana puree
Carrot and pumpkin puree
Cottage cheese and banana puree
Turkey, potato and carrot stew
Zucchini, carrot and broccoli stew
Fish, potato, carrot and broccoli stew
Rice porridge
Whole grain rice porridge
carrot
Rice porridge with pumpkin
Rice porridge with apples
Rice porridge with apple and pear
Rice porridge with apple and pumpkin
Fish cakes with vegetables
Semi-cooked fish
Fish meatballs with ketchup
Baby Fish Soup
Salmon and Celery Fish Soup
Carrot and Kohlrabi Salad
Chickpea Salad
Chickpea and Cabbage Salad
Laziest Soup
Creamy Kohlrabi Soup
Oatmeal Smoothie6 Sauce
Cheesy Pizza
Pea and Bacon Soup
Baked Vegetable Soup
Kohlrabi Soup
Salmon Soup
Cauliflower Soup
Turnip Potato Soup
Meatball Soup for the Picky Eater
Green apple kohlrabi soup
Rabbit, pumpkin, potato, broccoli and cauliflower soup
Beetroot soup
Pumpkin mushroom soup
Broccoli and celery soup
Soup/stew pork with potatoes and carrots
Cheese chebureks
Pumpkin cheese sauce (Annabelle Carmel recipe)
Buzz Lightyear Sandwich
Pumpkin-apple puree
Pumpkin-apple juice
Pumpkin cake
Pumpkin soup9-puree
Fruit salad
Cauliflower with cheese
Linden and thyme tea
Experimental noodle soup with lentils
Apple puree
Apple juice
Like this article? Subscribe to site updates
"Encyclopedia Baby Food"!
Don't forget to bookmark us! (CTRL+SHIFT+D) Subscribe to the site, comment, share in social networks.
On our site Encyclopedia Baby Food there is useful information on the nutrition of your children, which is useful for everyone, and we update the site "Encyclopedia Baby Food" constantly and try to search and write only excellent, verified and necessary information for you and your children.
Disclaimer No. 1: It must be understood that the author of the articles on the Baby Food Encyclopedia website is not a medical staff, “I am not a doctor.” The information I share is based on my own experience. My goal is not to teach you how to eat or feed your child, but to talk about how we did it, what new things I learned or read. This expands the picture of Baby Food knowledge, gives you a glimpse of the whole process so you can decide if you like it or not.
Disclaimer No. 2 : However, the above does not cancel a visit to the pediatrician. Before you start complementary foods, you need to get his professional opinion on the best way to introduce new foods for your baby.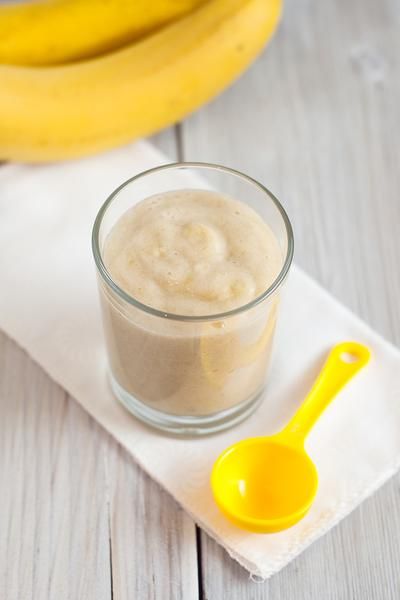 I also draw your attention to the fact that you need to look at the original date of the published articles, because some of the "best practices" may have changed. Always check with your child's pediatrician about complementary foods and their health.
Disclaimer #3: Keep in mind that every family is unique, every situation is also completely unique. There are no universal solutions. Only you can find what works best for you. Certain goals require certain sacrifices and priorities - not everyone wants to make that choice, and that's GREAT! Just know what you want to achieve, and be ready to get to work, putting the best of your strength!
Disclaimer No. 4: The Encyclopedia Baby Food website uses photos from books on baby food with attribution, for a better understanding of the information (Article 1274, paragraph 1, part four of the Civil Code of the Russian Federation). Literature on baby food is found in the public domain on the Internet.