How to make a water feeder for baby chicks
Homemade Chick Waterer • The Prairie Homestead
When I was meandering through the aisle of the feed store the other day, I almost grabbed one of those plastic chick waterers. I knew we were going to be needing one soon, since the coop is clean and shiny and the chicks are set to arrive in a couple weeks.
But of course, my craziness innovative, frugal mentality won out, and I decided I would challenge myself to create my own chick waterer from materials I had at home.
After several conversations with my scientifically-minded husband regarding the laws of physics, I scrounged up various plastic containers and began to conduct experiments.
Let’s just say I should have payed more attention to our conversations, as I ended some with some flooded counters and sopping wet dish towels.
Anyway. I do believe I have mastered the elusive chick waterer. I am excited to share my findings with you, in hopes of saving you several physics lessons and wet kitchen floors.
First off, here is what I came up with after treasure hunting around my home:
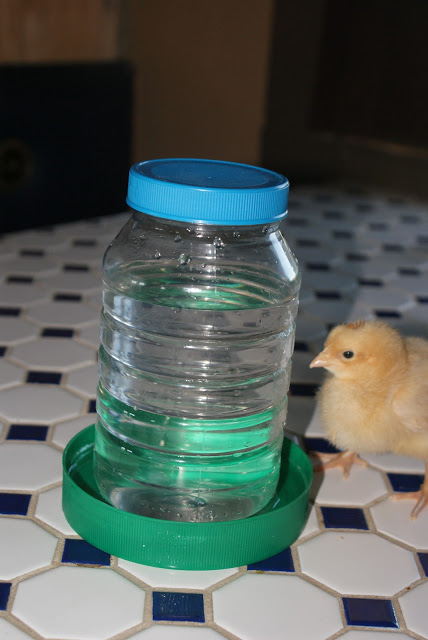
My intial idea was to repurpose this old parmesan cheese container for the top portion. I then cut the bottom off of a plastic gallon jug to make a “dish” that is around 3 inches tall.
However, after some trial runs, I found that the parmesan container didn’t work because the lid did not seal securely enough.
So I found a 48 oz lemon juice bottle instead. I highly recommend using a bottle that has a small cap, since it’s important that the container holding the water be airtight.
I then poked a small hole, about the diameter of a pencil, near the bottom of the jug.
I used a hot glue gun to attach the bottle to the tray. I didn’t want to use any sort of glue that might leach into the water and harm the chicks.
And now you are ready to fill ‘er up. The tray should fill until the hole is covered, and then stop. When the chicks drink, the bottle should slowly release water to provide fresh water at all times. A self-refreshing waterer is more ideal than an open pan, since it prevents the chicks from taking a bath or drowning. And we don’t want that.
Ready to make your own?
Homemade Chick Waterer Notes
- There are numerous options when it comes to raw materials. Dig through your recycling box, garbage can, or pantry to see what will work. The bottom tray needs to be several inches larger in diameter than your water container. Some ideas could include: milk jugs, yogurt tubs, gallon jugs, large plastic water bottles, etc.
- Make sure to thoroughly wash everything before assembly and don’t use any container that might have had substances that would be toxic to the chicks.
- The container that you choose to hold the water must have a lid and be air tight.
- Be mindful of where you place the hole.
 If it is too high, the tray will overflow. If it is too low, the water level might be unreachable for the chicks.
- If the water does not want to flow, try increasing the size of your hole.
Of course, these same principles could be applied to a larger scale to make a full-sized chicken waterer. If Prairie Baby was older, this would have made a great science experiment. But as of right now, she is more interested in trying to chew on the containers. Oh well, maybe eventually. 😉
Have you ever made a homemade chicken waterer? What materials did you use?
DIY Chicken Waterer and Feeder From 5-Gallon Buckets
Published: · Modified: by Melissa · 110 Comments
Spring is in the air and that means that it’s time to start thinking and getting prepped for backyard chickens! I’m going to tell you everything you have ever wanted to know and more about Chicken Waterers and how to DIY your very own from a 5 gallon bucket.
Providing animals with water to drink seems like a no brainer, but there are a lot of factors that go into watering chickens. For instance: how much water do chickens need, what type/material of waterer is best, how to keep the water clean and how to DIY a chicken waterer that is simple and cost efficient. Let’s dive in.
DIY chicken waterer and feeder from 5-gallon buckets
Water is essential for humans to survive and it is no different for chickens. Appropriate access to clean water drastically influences how healthy a chicken is and how well they produce. If a chicken does not have an ample supply of water they will actually stop laying eggs! Did you know that? Water also aids in the digestive process and helps a chicken eliminate waste.
When a chicken is sufficiently hydrated they are able to regulate their body temperature more effectively. A chicken that drinks clean, cool water also has a healthy brain. This will keep the animal in tip top shape and their mind sharper to be able to watch for predators. In short-chickens will not survive without water.
It doesn’t seem like chickens drink very much water because they just take small sips throughout the day. However, on average chickens drink about 1 pint of water per day. They will drink more if the temperature is hot. They also like cool, fresh water. If the water has been sitting out in the sun too long, hasn’t been refreshed regularly, or starts to get dirty from the chicken’s own doing- they may stop drinking. You don’t want a chicken that isn’t drinking so remedy the issue quickly.
The process of chickens drinking water is actually really fun to watch. Chickens use their tongue to push food to the back of their mouth to be swallowed but that method doesn’t work for drinking. If a chicken wants to drink water you will see them dip their beak into the water and rapidly tilt their head back to let the water drip down their throat. So you can imagine they can’t drink a whole bunch of water at once.
Keeping the water you feed your chickens clean is essential. Ideally, you should refresh their water every single day to prevent bacteria build up and algae forming. Along with changing their water every single day, I suggest sanitizing the waterer at least weekly. You can use dish soap and a brush to clean the waterer or a diluted bleach solution.
Chicken waterers can come in various shapes, sizes, dollar amounts and can be constructed from a myriad of materials. In my experience, you don’t need to break the bank providing water for chickens. As long as they have clean, fresh water and lots of it your chickens will thrive. We have used this DIY version for chicken waterers for years and have found great success with them.
Frequently Asked Questions:
Do chickens need water in their coop at night?
Chickens typically do not need water during the night. At night, they usually sleep on their roost until morning.
Where should I place my waterers?
You want to place your waterers in a place without direct sunlight in order to keep the water as cool as possible.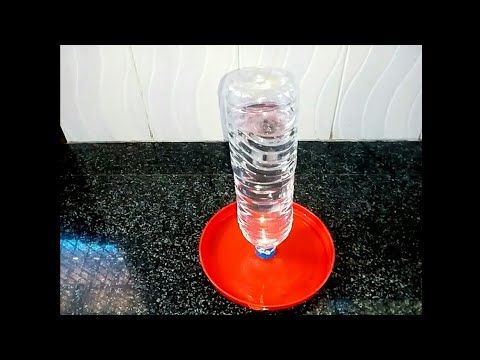
How many waterers do I need for my chickens?
I plan for 1 large waterer per 6-8 chickens. Remember that they drink about 1 pint a day so plan accordingly.
Can chickens drink tap water?
The general rule is if it is safe enough for you to drink then your chickens can drink it too.
What happens if chickens run out of water?
If a chicken is dehydrated you will want to remedy the situation quickly. When a chicken isn’t getting enough water their egg laying will slow down or could stop completely, they will become lethargic, you many notice them panting or a pale comb as well.
DIY CHICKEN WATERER AND FEEDER FROM 5-GALLON BUCKETS
WHAT YOU'LL NEED:
- Two 5-gallon buckets with lids (free - they are everywhere! Really! Just ask your local sandwich shop to save you a few that the pickles come in).
- Drill
- 1-inch standard drill bit or paddle drill bit
- Two large foil roasting pans ($2 - pick them up at the Dollar Store) OR these large feed pans
HOW TO:
FOR THE DIY CHICKEN FEEDER:Clean and empty your 5-gallon bucket. Along the bottom edge of the bucket drill 1-inch holes all the way around the bottom, spacing the holes about 2 inches apart. Place the bucket inside the foil roasting pan, right-side-up (holes in the pan), and then fill it with chicken feed. The feed will pour through the holes into the pan and as they eat, more will come out. Replace the lid to the bucket so that the chickens can't get to the food from the top (and poo in it). Easy!
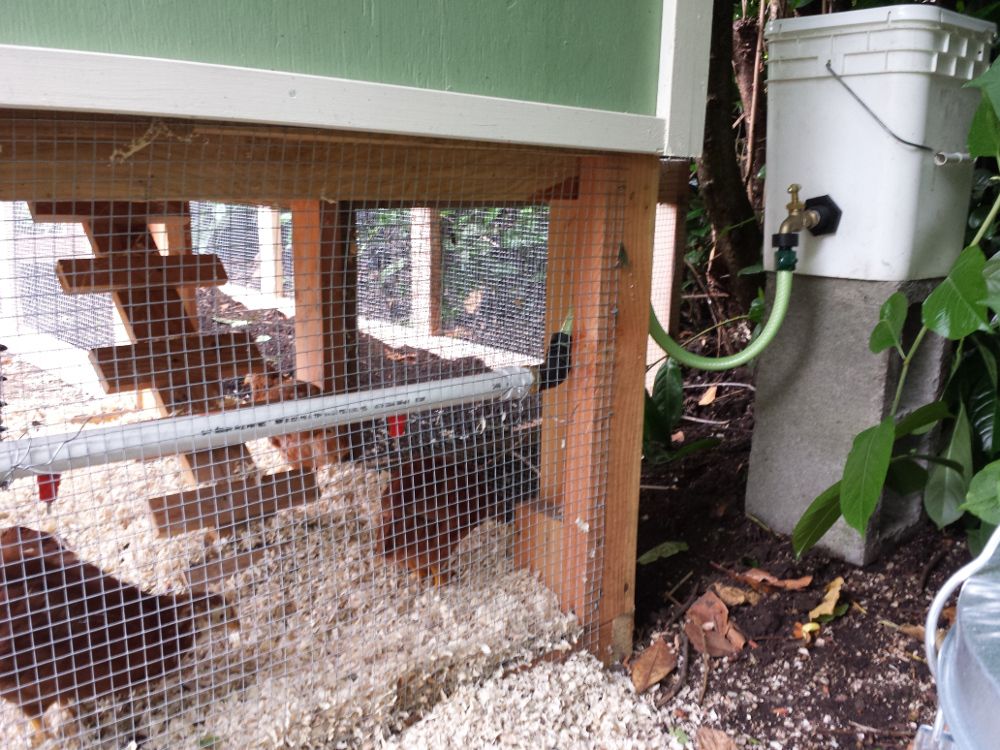
FOR THE DIY CHICKEN WATERER:
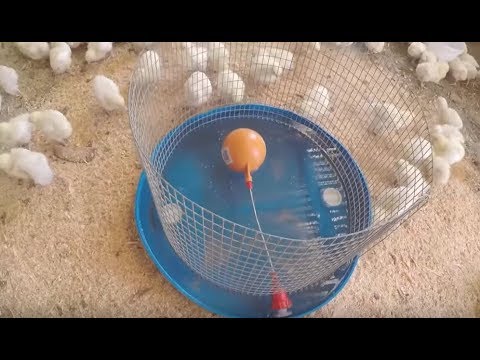
Clean and empty your 5-gallon bucket. Along the bottom edge of the bucket, drill two 1-inch holes, holes opposite of each other. Place the bucket inside the foil roasting pan, right-side-up (holes in the pan), and then fill it with chicken water.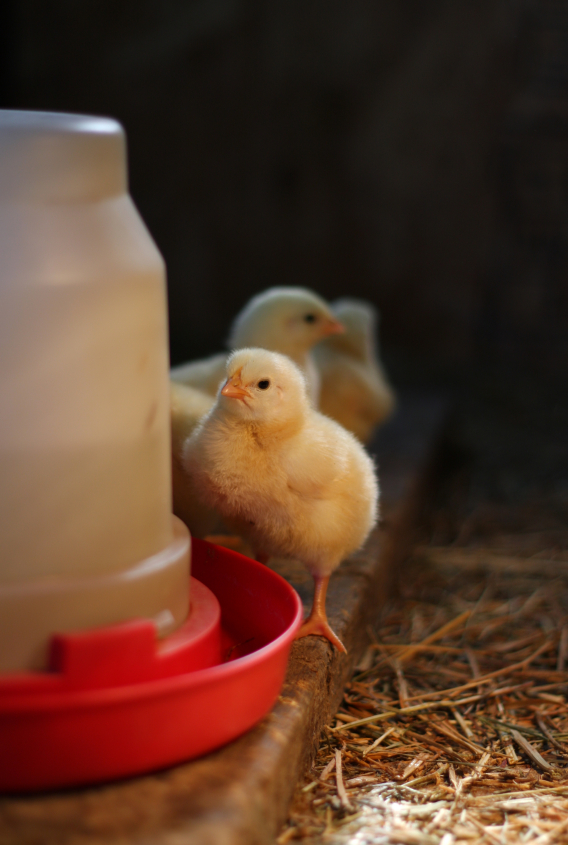 Quickly replace the lid and make sure that it has an airtight seal. This seal is key!! The water will stop coming out of the holes once the water covers the holes completely if the lid is airtight. The water will keep running out of the bucket and over flow the roasting pan if there isn't a good seal. It's a hydrodynamics thing....just ask my water engineer husband; he'd gladly explain it to you.
Here's how all that looks in pictures:
What you need:
Drill some holes:
Completed DIY chicken feeder:
Completed DIY chicken water with lid (see, it's not leaking!)
UPDATE OCTOBER 2017: I've now been using these same buckets as a DIY chicken waterer and feeder for over 4 years. I have upgraded from the tin foil turkey roaster pans though. Those pans lasted about 6 weeks but I was in it for the long haul. I picked up some large (about 16 inches wide and 4 inches deep) round metal pans from our hardware store to replace the pans in these pictures.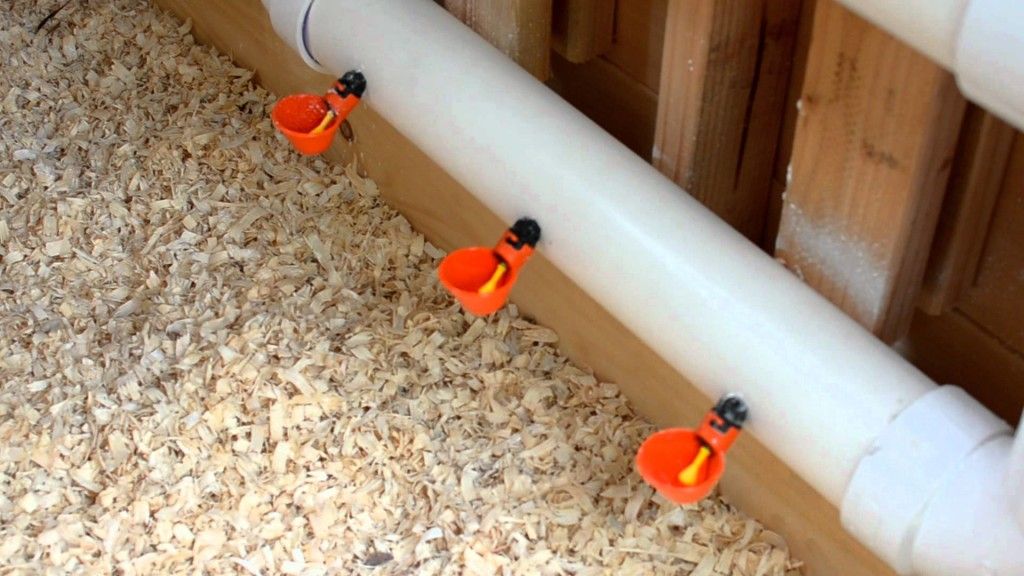 Here are similar pans on Amazon. They cost me less than $10 each and have lasted 4 years. So for $20 total, instead of $2, I have a large feeder and waterer that I've been using for years. They work great and I still highly recommend making these.
Not everyone needs a post on a DIY chicken waterer and feeder from 5-gallon buckets, but someone out there does need it! Even if you don't have your own hens yet, this might be something to store away in your "someday" file because you just never know when you might need some great info that will save you a dollar or two!
Craving More
Take the hassle out of meal planning with: Dinner Made Easy, a FREE 1 week meal plan with full shopping list, easy dinners, nutrition information, serving suggestions for each meal, and more!
Subscribe Now
About Melissa
Melissa is dedicated to helping parents figure out the nightly questions, "What's for Dinner?!" with her no-fuss approach to cooking. Read more...
Reader Interactions
Drinks for chickens from plastic bottles
Content
- Why should a drinker be closed
- How to make a chipper for chickens from plastic bottles
- Priestly chipper from a bottle
- Vacuum water drinker 9000
- Nipple drin chicks
- Conclusions
Those who breed poultry know that they need not only feed, but also sufficient water. Small chickens are especially acutely in need of constant access to fresh water, which today are fed with special compound feeds and mixtures for accelerated growth - such feed must be washed down with plenty of liquid.
A wide variety of designs are available for adult and young hens. But, despite the whole range, most poultry houses continue to use simple bowls or other open containers for water.
About the dangers of open tanks, about the varieties of closed-type drinkers, as well as how you can make them yourself from ordinary plastic bottles, this article will be.
Why the drinker must be closed
Disadvantages of open drinking bowls for poultry are obvious:
Even the simplest closed chick drinker, made from a plastic bottle, has many advantages over open designs. Among others, these are:
- protection of water from foreign objects and substances;
- precise dosing of water, the amount of which can be easily calculated taking into account the number of chickens;
- a small chicken will not be able to get wet in such a drinker, drown or get cold;
- the ability to independently regulate the amount of incoming water;
- the cost of a homemade drinking cup from a plastic bottle will be zero;
- plastic is durable, which means that you can use the drinker for a long time;
- Even if a plastic bottle cup fails or becomes clogged, it can be easily replaced with a new one using a different bottle.
Important! The amount of water a chick needs per day depends on several factors, among others, the type of feed, the age of the chick, and the room temperature. On average, it is generally accepted that a chicken needs about 0.5 liters of clean water per day.
How to make your own chicken drinker from plastic bottles
There are many ways to make poultry troughs using plastic containers. This can be done from ordinary one and a half liter bottles, and from bottles of five or ten liters, many use plastic buckets from building mixtures or food products for this purpose. The choice of container and its size depends, first of all, on the number of chickens and their age.
There are also many designs of drinkers for chickens, they are difficult to manufacture: these can be simply fixed horizontally and cut along open drinkers, or there can be closed-type drinkers that supply water gradually.
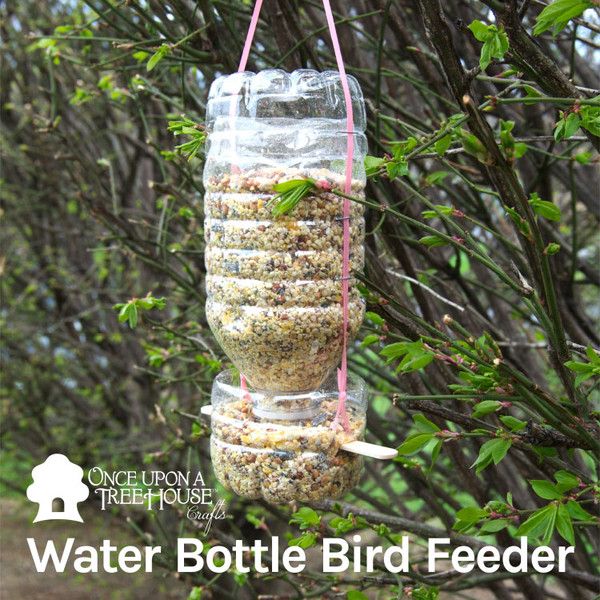
The simplest bottled chick drinker
The simplest and safest chick drinker is made in one minute. To make it, you will need a bottle with a capacity of 1.5 or 2 liters, a sharp knife and wire.
First, close the bottle with a lid - so the container will not be deformed during cutting. Now the bottle must be placed horizontally and several round or oval parts should be marked with a marker or pen - these will be holes for the bird's heads.
Holes are cut out according to the outlined contours, the resulting drinker is fixed on the wall of the shed or cage with a wire.
Attention! In this embodiment, it is very important to maintain the correct size of the holes: if they are small, the chickens will not be able to get drunk from the drinker, through holes that are too large, the bird will be able to crawl inside the bottle, cripple or choke.
Given these factors, it can be concluded that these drinkers are more suitable for adult birds than for constantly growing chicks.
Vacuum drinker from plastic bottles
The principle of operation of purchased vacuum drinkers is that water gradually fills the container or tank - adding liquid occurs when its level becomes critically low.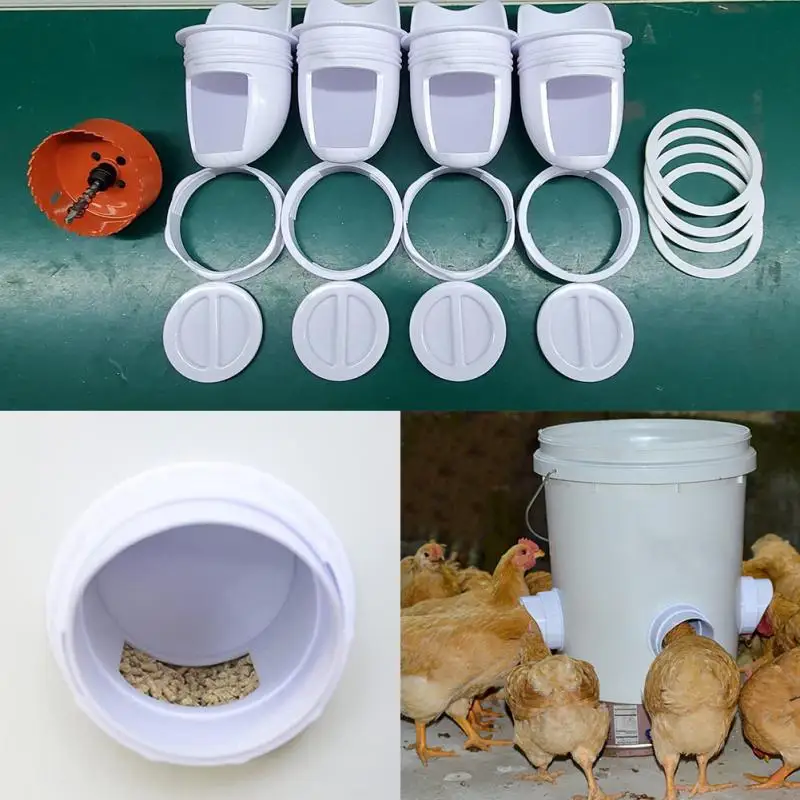
It is quite easy to make a vacuum drinking bowl with your own hands, for this you need:
- a large five-liter bottle;
- 1.5 or 2 liter plastic bottle;
- lids from both containers;
- knife or scissors;
- self-tapping screws;
- wire.
The whole process of making a vacuum chick drinker is easy to describe in a few paragraphs:
- From a five-liter bottle, you need to cut off the neck - about a fifth of the container.
- The cap of a small bottle is inserted inside the large cap and fastened together with a self-tapping screw with a nut.
- A one and a half or two liter bottle is screwed into a previously fixed cap.
- In a small bottle, make a hole with a diameter of about 5-8 mm, it should be in the upper part of the bottle so that the cut edge of the large container passes above the hole.
- Fill the whole bottle with water, screw on the cap.
- The drinker is turned over and fixed to the previously prepared fixtures on the wall of the cage.
The principle of operation is based on the difference in pressure - water will flow into the cut bottle when the hole in the small bottle is above the liquid level.
Important! The advantage of a vacuum drinker is that several chickens can drink from it at the same time, which is the best suited for large poultry houses.
Nipple drinker for chicks
The main advantage of the nipple drinker is that the chick will not be able to get wet or choke - the water will flow out in tiny doses and only when the bird needs it.
You can also make a nipple drinker from a plastic bottle. In addition to the tank itself, you only need a drill, a nipple (sold in markets and stores) and a sealant (water tape, sealant or other tool).
The whole procedure for making a cup is very simple:
- The bottle is screwed on with a cap.
- A hole is made in the cap with a drill, the diameter of which corresponds to the size of the nipple.
- The nipple is inserted into the hole and sealed in any way.
- The bottle is filled with water and turned over.
Just fix the drinker to the wall and the chicks can drink fresh water.
The main disadvantage of nipple drinkers is that only one chick can drink from them. This can cause a crush near the water source, so the number of such drinkers should correspond to the number of chickens.
Conclusions
Breeding poultry is a profitable business, but modern prices for feed, electricity, veterinary drugs can nullify all efforts of the poultry house. This is what makes us look for ways to reduce the cost of the process, one of these methods is the independent production of drinkers and feeders.
Drinking bowls from plastic bottles cost nothing, because every owner has the material for their manufacture.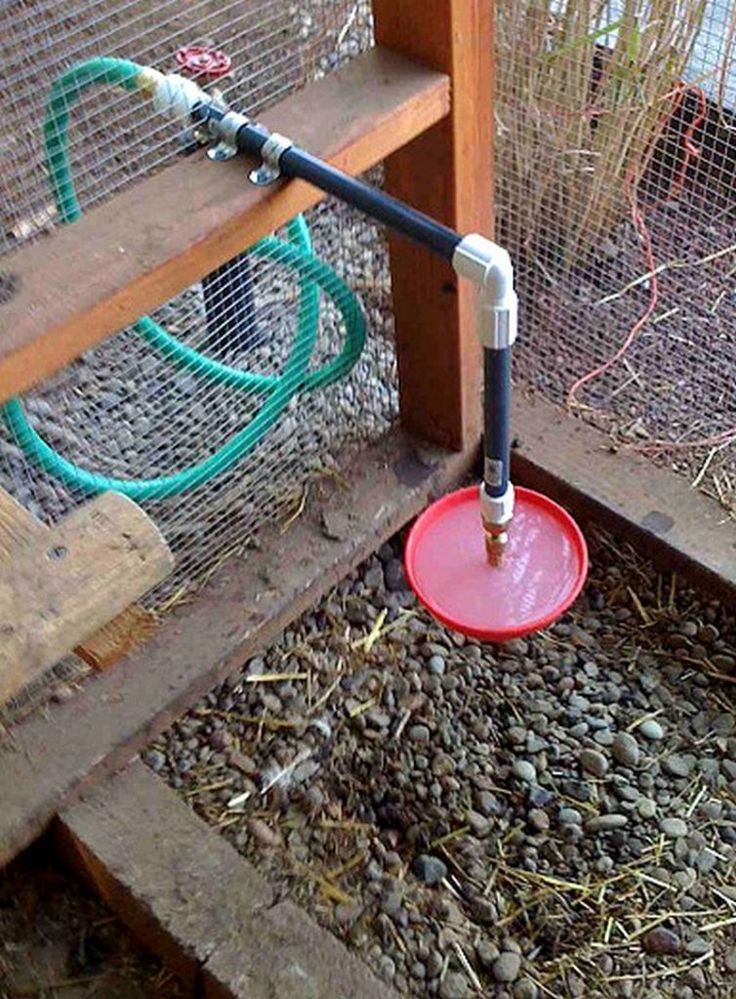 In addition, such drinkers are safe for chickens and are in no way inferior to ready-made designs.
- Do-it-yourself greenhouse from old window frames
- We make a garden bench with our own hands
- Dimensions of the booth for a shepherd dog, alabai and other dogs
- How to make a homemade smokehouse with your own hands
model overview and step-by-step instructions And one of them is the availability of water in sufficient quantities. Birds should be watered so that they do not get wet. For such purposes, special devices were invented. You can buy them, or you can make your own.
Content:
- 1
What should be taken into account
- 2
Homemade manufacture
- 2.1
Using plastic
- 2.2
Nipple structure
- 2.3
Creating an automatic device
9000 9000 9000 9000
- 2.1
- 4
Video "Creating a device"
Things to consider
It should be borne in mind that the younger generation consumes water almost twice as much as feed per day.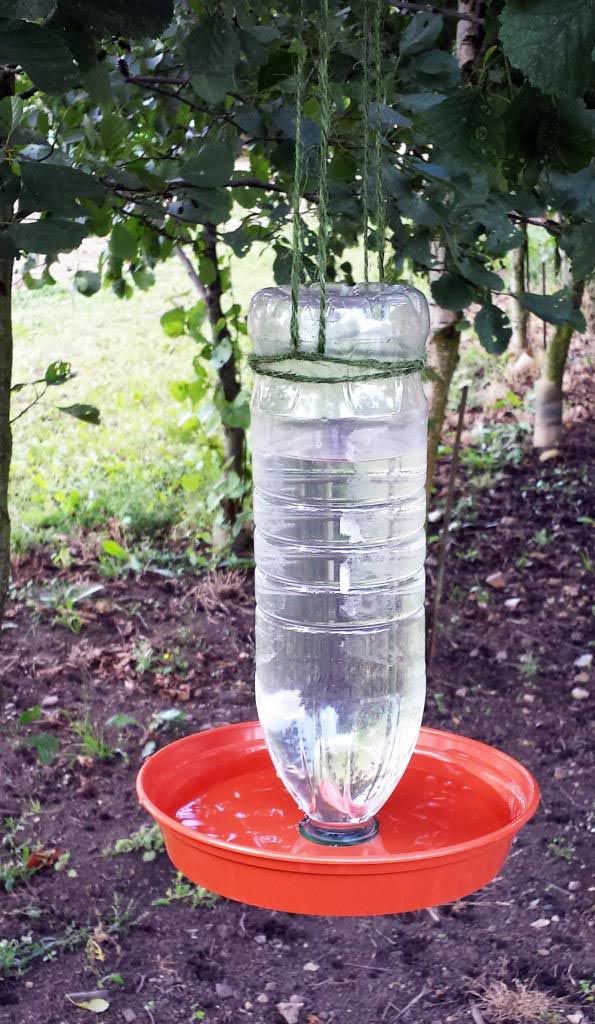 Therefore, home-made devices should differ in capacity. This will help maintain the water balance at a certain level, contributing to the normalization of development.
The feeling of thirst can lead to irreversible consequences and even death of the younger generation. In addition, the chicks constantly feel the desire to swim, wander through the water. For this reason, it is recommended to make safe devices with your own hands at home so that they cannot climb into them.
Homemade
At the present stage, a wide variety of drinkers for chickens are being produced. Numerous photos serve as proof of this. However, not all devices are suitable for a large number of chicks. For this reason, it is better to make them at home with your own hands from improvised materials.
Using plastic
A plastic bottle makes a good device for chicks. And numerous photos and videos serve as excellent proof of this. Creating such a drinker is not difficult. Of the tools with materials, you will need to use plastic containers, a screwdriver, screws, cutting tools.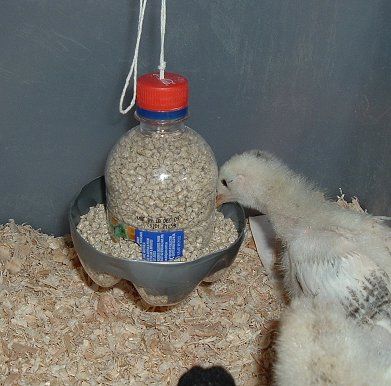 You also need to take two bottles.
To build your own DIY chick water fixture, you will need to follow these steps:
- The top of the bottle should be cut off, stepping back from the neck by 5 cm. You should get a kind of cup.
- The plastic container must be attached with screws to the received container from the inside, creating a kind of lid in the lid.
- 5 cm away from the neck of the smaller bottle, it is recommended to make small holes. Their height should not exceed the depth of the large bowl.
- The structure must be inserted into a pre-made frame or screwed to the wall with screws. Can be filled with water.
Nipple design
Even if the household is small, automation may be required. It will help you simplify the care process. If you plan to breed broilers, you will need to feed them with high quality. And in such a situation, nipple drinkers will be the best option. For broilers, it will not be difficult to make such a device from improvised materials.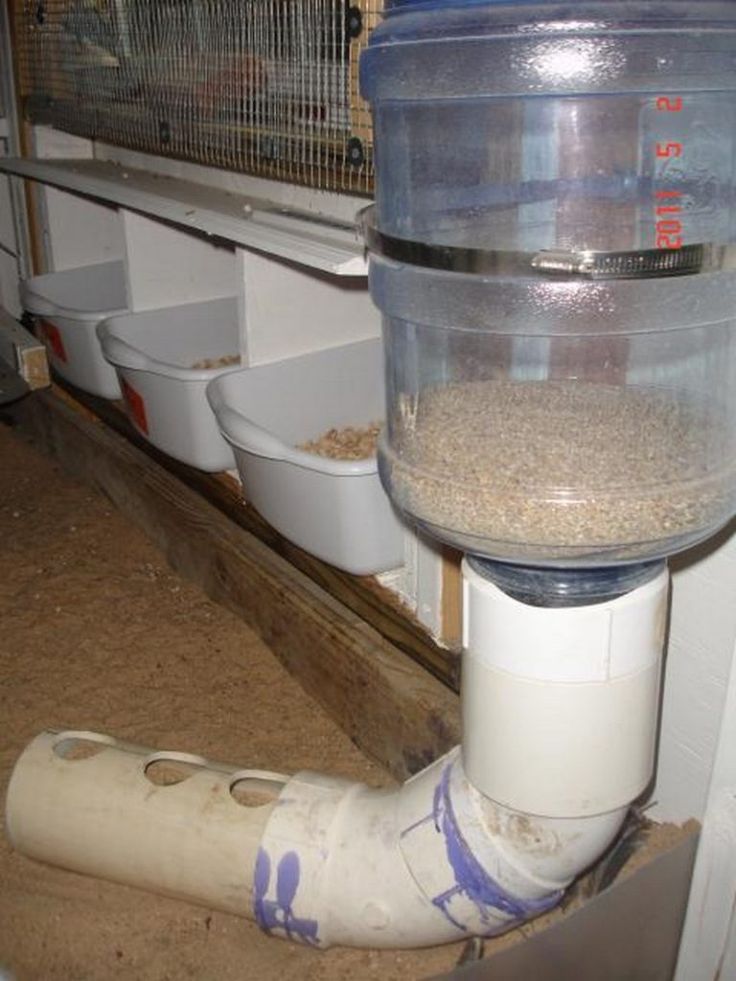
You can build a drinker with your own hands using a pipe, outlet, plug, drip catcher or nipple, water tank and liquid level regulator.
To get a homemade drinker, you need to follow a few fairly simple steps:
- Mark on the pipe the places where you need to drill holes for the drip catcher. There must be at least 20 cm between them. The diameter of the holes is 9 mm.
- We recommend screwing nipples into the holes.
- Install a plug on one side of the pipe.
- At the bottom, he recommends cutting a hole for the hose, inserting a thread into it and screwing the hose itself directly.
Homemade drinker is ready to use. What are nipple devices, you can find out by watching the video.
Making an automatic device
Broilers and other chicken breeds may require an automatic makeshift drinker.