How to start baby on finger foods
Best Early Finger Foods for Baby (With Tips, Visuals, and Recipes)
Use this list of safe, nutritious, and easy to eat finger foods for baby to help you know exactly what (and how) to offer at meals and snacks. Plus, find the best first finger foods, troubleshooting tips, and visuals of foods broken down by food group to keep things easy!
Finger Foods for Baby
After baby starts solids and is ready to move onto finger foods, you may feel a little confused by exactly what to serve and how to serve it. Which is totally normal because it can be scary to let baby feed themselves this way and we may not have any experience doing this—or we may have totally forgotten from our last kiddo!
This list of finger foods for baby will cover some great first finger foods to start with, then set you up with plenty of healthy options from each food group.
TIP: Find more info on starting solids here and the best foods to start with if doing baby led weaning or purees with baby.
Healthy Baby Food
I love sharing these ideas for baby food since they are easy to prepare and serve and because I know how hard it can be to continue to come up with flavorful and healthy meals and snacks for our little ones. Let me tell you, I’m on my third kiddo and it can be such a challenge to feed him during the chaos of parenting the rest of my crew! These foods are wholesome and nutritious—perfect for your baby.
TIP: I’m a big fan of SpoonfulONE, a company that offers the most complete way to introduce food allergens to our kids. They make mix-ins, puffs, and crackers that are yummy and easy for babies and toddlers to eat. Learn more about their pediatrician-approved baby foods here. (sponsored link)
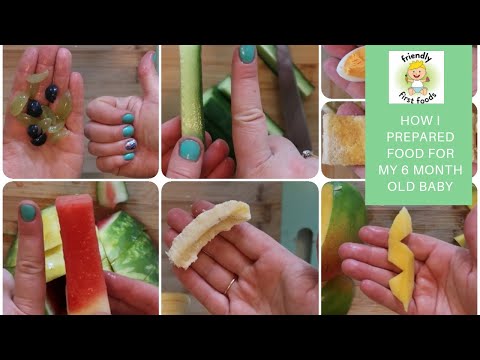
Best First Finger Foods
When baby is around 9 months, you’ll notice that they’re able to pick up smaller pieces of food with two fingers. This is known as the “pincer grasp” and is a sign that they’re ready to start finger foods. To be clear, when I say “finger foods” I mean small pieces of food that a baby (or toddler) can feed themselves.
Here are some of my favorite ones to start with that are all super soft, safe to eat, and easy to pick up.
- Scrambled egg, broken up into small pieces
- Roasted sweet potato mashed and broken up into small pieces
- Fresh raspberries, broken up into smaller pieces
- Oatmeal, cooked according to package directions and allowed to cool
- Tofu, diced and sauteed lightly or steamed
- Ground beef, chicken, or turkey, broken up into small pieces or lightly mashed meatballs
- Shredded cheese or crumbled goat cheese
- Mashed sweet potato, in little pieces
- Peanut butter puffs
TIP: You can serve the tofu, ground meat, or meatballs in veggie puree from a pouch or a simple marinara sauce for extra moisture and flavor. Learn more about how and why to introduce peanut butter.
Finger Foods for Baby: Fruits and Veggies
Some of my favorite early fruits and veggies to serve babies are:
- Mashed roasted sweet potato, broken up into small pieces
- Warmed frozen peas, slightly mashed if desired
- Roasted Zucchini
- Diced Roasted Sweet Potato or Butternut Squash
- Fresh blueberries, cut in half or quarters
- Fresh raspberries, broken into small pieces
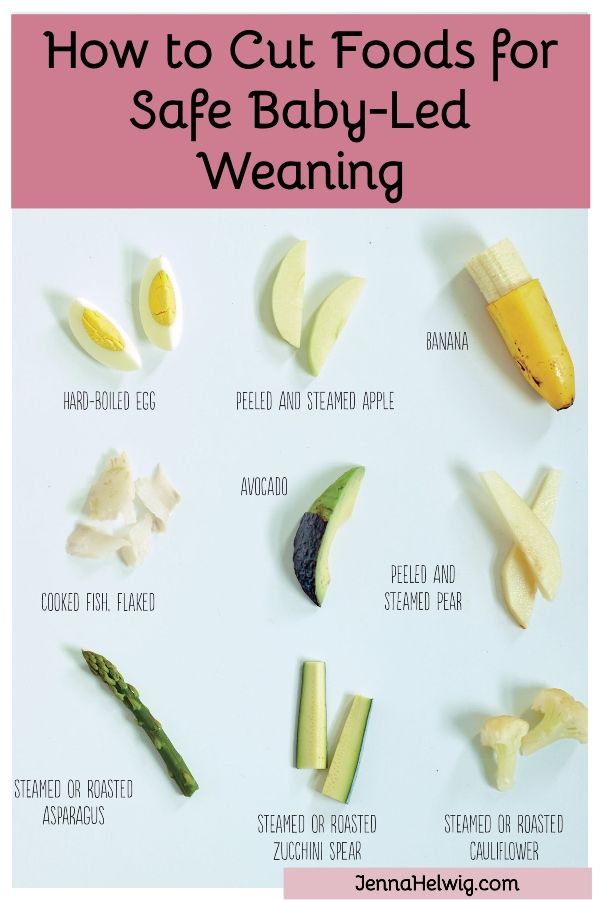
- Banana, broken into small segments (they are less slippery this way versus slicing them)
- Avocado, diced and mashed slightly (be sure it’s ripe and very soft)
TIP: A good rule of thumb is to serve pieces of food that are about the size of a pea to start and soft enough that they are easy to squish between your fingers. This will be easy for baby to pick up and eat and will also reduce chances of choking.
Finger Food Ideas: Carbohydrates
Offering complex carbohydrates can provide fiber, a variety of textures, B vitamins, and more. Try these with your baby.
- Spinach pancakes (moisten with applesauce or plain yogurt if needed; this recipe is particularly moist and great for babies)
- Oatmeal, cooked according to package directions and allowed to cool
- Baby Puffs
- Peanut Butter Puffs
- Rice (it’s easiest if it’s in little clumps so baby can pick it up; this Coconut Rice or this Cheesy Rice are both good options)
- Baby Banana Muffin
- O cereal (soften in nondairy unsweetened milk or yogurt as needed)
- Baked Oatmeal, diced
Finger Food Ideas: Proteins
Offering proteins will continue to expose baby to a range of nutrients. These are my go-tos for babies newer to finger foods—and toddlers too.
- Shredded cheese (thicker cuts are a little easier to pick up)
- Tofu, diced and sauteed lightly or steamed
- Flaked cooked wild salmon
- Lightly mashed meatballs
- Shredded chicken, cut up finely (we love this Butter Chicken to share with baby)
- Ground beef, turkey, or chicken, broken into smaller pieces
- Lightly mashed beans
- Scrambled eggs, broken up into small pieces
- Diced egg muffins
I’d love to hear any questions you may have, or if you have foods that your babies enjoy that I didn’t include here.
 Chime in below in the comments!
Prep Time 5 minutes
Cook Time 5 minutes
Total Time 10 minutes
Author Amy Palanjian
Cuisine American
Course Baby Food
Calories 124kcal
Servings 1
First Finger Foods (choose 1-3 per meal)
- ▢ 1 Scrambled egg (broken up into small pieces)
- ▢ 1/4 cup Roasted sweet potato, mashed and broken up into small pieces
- ▢ 1/4 cup Fresh raspberries (broken up into smaller pieces)
- ▢ 1/4 cup Oatmeal (cooked according to package directions and allowed to cool)
- ▢ 2 tbsp Tofu (diced and sauteed lightly or steamed)
- ▢ 2 tbsp ground beef, chicken, or turkey, broken up into small pieces or lightly mashed meatballs
- ▢ 2 tbsp shredded cheese or crumbled goat cheese
- ▢ 1/4 cup Mashed sweet potato (broken into little pieces)
- ▢ 1/4 cup Peanut butter puffs
Fruits and Veggies
- ▢ 1/4 cup mashed roasted sweet potato (broken up into small pieces)
- ▢ 1/4 cup warmed frozen peas
- ▢ 1/4 cup Roasted Zucchini
- ▢ 1/4 cup diced Roasted Sweet Potato or Butternut Squash
- ▢ 1/4 cup blueberries (cut in half or quarters)
- ▢ 1/4 cup raspberries (broken into small pieces)
- ▢ 1/4 cup banana slices (broken into small segments—they are less slippery this way versus slicing them)
- ▢ 2 tbsp avocado (diced and mashed slightly—be sure it's ripe and very soft)
Whole Grains and Carbohydrates
- ▢ 1 Spinach pancakes (moisten with applesauce or plain yogurt if needed; this recipe is particularly moist and great for babies)
- ▢ 1/4 cup Oatmeal (cooked according to package directions and allowed to cool)
- ▢ 1/4 cup Baby Puffs
- ▢ 1/4 cup Peanut Butter Puffs
- ▢ 1/4 cup fully cooked rice (it's easiest if it's in little clumps so baby can pick it up; this Coconut Rice or this Cheesy Rice are both good options)
- ▢ 1 Baby Banana Muffin
- ▢ 1/4 cup O cereal (soften in nondairy unsweetened milk or yogurt as needed)
- ▢ 1/4 cup Baked Oatmeal (diced or regular oatmeal broken into little pieces)
Dairy
- ▢ 2 tbsp Shredded cheese (such as mozzarella)
- ▢ 2 tbsp Tofu (diced and sauteed lightly or steamed)
- ▢ 2 tbsp flaked cooked wild salmon
- ▢ 1 lightly mashed meatballs
- ▢ 2 tbsp finely shredded chicken (we love this Butter Chicken to share with baby)
- ▢ 2 tbsp ground beef, turkey, or chicken (broken into smaller pieces)
- ▢ 2 tbsp lightly mashed beans
- ▢ 1 Scrambled egg (broken up into small pieces)
- ▢ 1 Diced Egg muffins
For each meal or snack, choose 2-3 foods from a mix of food groups.
 Aim to include some fat in most meals and protein in many too.
Prepare the food, cutting into small pieces and/or mashing as needed to make the food easy to eat.
Start with small portions and allow more as baby indicates according to their hunger.
- Store leftovers in an airtight container for 3-5 days in the fridge.
- Many foods you cook for your family will work as baby finger foods—just be sure they are easy to squish between your fingers and the pieces are small and easy to chew.
- Babies very normally make a lot of faces when they eat, so don't assume they don't like something just because they scrunch their nose!
- Flavors and textures can take time to learn to eat, so continue offering foods in small portions even if baby hasn't liked them in the past—and make sure they taste good to you!
Calories: 124kcal, Carbohydrates: 14g, Protein: 7g, Fat: 4g, Saturated Fat: 1g, Polyunsaturated Fat: 1g, Monounsaturated Fat: 2g, Trans Fat: 1g, Cholesterol: 164mg, Sodium: 81mg, Potassium: 344mg, Fiber: 4g, Sugar: 5g, Vitamin A: 9857IU, Vitamin C: 18mg, Calcium: 51mg, Iron: 1mg
Tried this recipe?Rate in the comments and tag @yummytoddlerfood on IG!
Easy, Healthy, Perfect for Kids and Babies!
These sweet Banana Spinach Pancakes are a favorite when you’re looking to boost nutrition in a favorite breakfast option. Or to have a little fun at the breakfast table by serving up a colorful meal.
Spinach Pancakes
I never thought that my older daughter would be such a fan of green pancakes, but just when you think you know your kiddo, they go and surprise you! It turns out that she’ll eat pretty much anything in pancake form. This (and Spinach Pesto and my Spinach Muffins) are by far her preferred ways to get her greens.
I love how these are both easy to make and they’re so easy for the kids to enjoy.
The beauty of this kids pancake recipe is that it comes together in the blender so you don’t have to dirty a sink full of dishes to make it happen.
And it includes two bananas and small pile of spinach, so everyone will get a nice amount of vitamins and minerals to start the day.
TIP: The flavor is sweet, so despite the color, they taste like healthy banana pancakes.
Ingredients You Need
To make this simple pancake recipe you’ll need:
- Very ripe bananas: Those with brown spots will have the best flavor
- Eggs
- Buckwheat flour or whole wheat flour
- Milk: Dairy or nondairy
- Baby spinach: You can use fresh spinach or spinach that you’ve frozen
- Ground flaxseed
- Baking powder
- Cinnamon
- Vanilla extract,
- Oil or butter for cooking
Ingredient Substitutions
Both whole wheat and buckwheat flour work well in this recipe, though the pancakes cook through more easily with buckwheat. Look for it in the natural flours section of your supermarket. It’s widely available and very nutritious. For tips on using whole wheat flour, see the Notes section at the bottom of the recipe as you’ll want to reduce the milk amount slightly.
Use an egg replacer like the one from Bob’s Red Mill to make these egg-free.
Use buckwheat flour to make these gluten-free.
Use nondairy milk to make these without dairy.
Step-by-Step Instructions
Here’s a look at how to make these healthy pancakes. Scroll down to the bottom of this post for the full information.
- Add all ingredients to a blender except the flour.
- Blend, starting on low and working up to high. You want the spinach to be very well incorporated.
- Stir or pulse in the flour. Avoid over-blending but do make sure to get all of the flour blended in.
- Cook as you would any other pancakes and serve warm.
TIP: I like to cook these in a nonstick skillet or griddle since they are easiest to flip.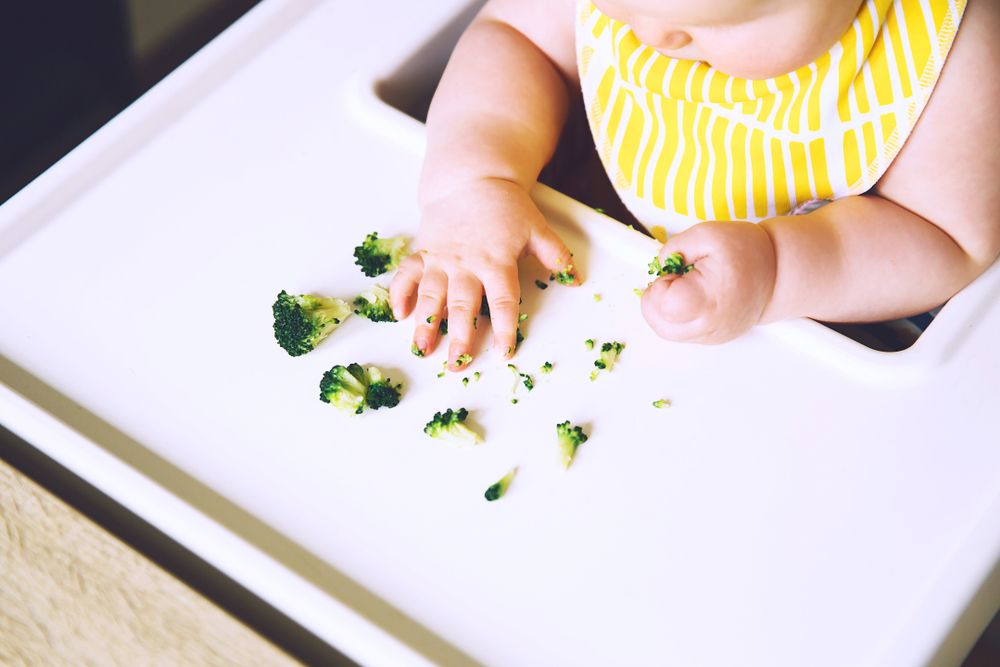 Cast iron also works if well greased.
Gluten-Free Spinach Pancakes
Yes! Buckwheat flour is naturally gluten-free and it works well in this recipe.
Dairy-Free Spinach Pancakes
To make these dairy-free, simply use nondairy plain unsweetened milk instead of dairy milk and cook with neutral oil.
Easy Baby Pancakes
Due to the very soft texture of these pancakes, they tend to be much easier for babies to eat than traditional ones. And since they are packed with nutrients, this is a favorite pancake recipe to make for baby led weaning and once a baby is starting to eat finger foods.
TIP: Find my favorite early finger foods for babies here.
Serving Suggestions
Maple syrup and butter of course, or nut butter, yogurt, applesauce, chopped fruit, or jam are all good options. When my middle kiddo was a baby, she ate them plain!
TIP: We like to have ours with a fruit salad rainbow (without the pot of gold at the end, unfortunately!) for St.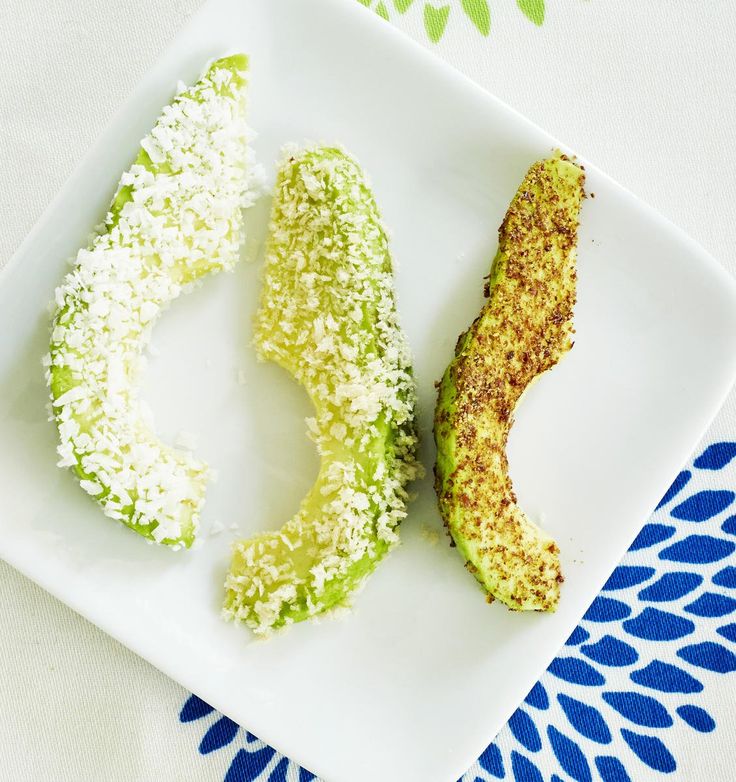 Patrick’s Day, but that part is of course optional.
How to Store
These store really well if you let any leftovers cool and store in an airtight container or zip top freezer bags. You can store leftovers in an airtight container in the fridge for 3-5 days or in a freezer safe container or bag for up to 3 months. Warm in 15 second increments in the microwave to serve.
Tips for Making the Best Spinach Pancakes
- You can store a bag of baby spinach in the freezer to use in smoothies and pancakes. Freezing it maintains the nutrients but it knocks out any “green” flavor which is handy! It’s also nice that you don’t have to worry about it going bad before you can use it up.
- Be sure to blend the batter very smooth to get the greens very well processed.
- You can sub in whole wheat flour for the buckwheat, but you’ll want to reduce the milk by ¼ cup.
- If the bottoms start to brown too much before they are set, lower the heat to medium-low.
- Look for buckwheat in the natural flours section of your supermarket.
 It’s widely available and very nutritious.
 - If making for a baby who’s not yet consuming cow’s milk, you can use unsweetened nondairy milk.
- I prefer to use a nonstick skillet or griddle for this recipe, though cast iron works too.
- You may also like Spinach Banana Muffins, 2-Ingredient Pancakes, Banana Oatmeal Pancakes, and Yogurt Pancakes.
I’d love to hear what you think of this recipe so please comment below with feedback!
This post was first published March 2018.
Prep Time 5 minutes
Cook Time 15 minutes
Total Time 20 minutes
Author Amy Palanjian
Cuisine American
Course Breakfast
Calories 237kcal
Servings 4
- ▢ 2 small very ripe bananas (about 1 cup tightly packed sliced banans)
- ▢ 2 large eggs
- ▢ 1 cup buckwheat flour or whole wheat (See Notes at the bottom if using whole wheat)
- ▢ 1 cup milk
- ▢ 2 cups lightly packed baby spinach
- ▢ 1 tablespoon ground flaxseed
- ▢ 1 1/2 teaspoons baking powder
- ▢ 1 teaspoon cinnamon
- ▢ 1 teaspoon vanilla extract
- ▢ Coconut oil for cooking (or canola oil or butter)
Add all ingredients to a blender except the flour.
Blend on high until very well combined, about 20-30 seconds, or until you no longer see any noticeable flecks of spinach.
Stir or pulse in the flour and thoroughly combine without over-mixing.
Warm a nonstick or cast iron skillet or griddle over medium heat and coat with oil or butter. Pour small rounds of batter onto the hot surface—the batter should spread fairly thinly on its own—and let cook until bubbles form on the surface and the surface is mostly set, about 3-4 minutes.
Flip and cook for an additional 3 minutes, or until fully cooked.
Continue to prepare the rest of the batter, keeping the finished pancakes warm in a 275 degree oven if desired.
Serve warm with fruit, maple syrup, or another favorite dip.
Green Pan Non-Stick Pan
Vitamix Blender
Spatula
- To store, let cool fully and keep in an airtight container in the fridge for up to 3 days.
 Warm slightly before serving. Or, store in a zip top freezer bag for up to 3 months and warm through to serve.
 - Whole-wheat flour: You can sub in whole wheat flour for the buckwheat. Just reduce the milk to ¾ cup.
- You can use baby kale in this recipe if you prefer.
- You can store a bag of baby spinach in the freezer to use in smoothies and pancakes. Freezing it maintains the nutrients but it knocks out any “green” flavor which is handy! It’s also nice that you don’t have to worry about it going bad before you can use it up.
- Be sure to blend the batter very smooth to get the greens very well processed.
- If the bottoms start to brown too much before they are set, lower the heat to medium-low.
- Look for buckwheat in the natural flours section of your supermarket. It’s widely available and very nutritious.
- If making for a baby who’s not yet consuming cow’s milk, you can use unsweetened nondairy milk.
- I prefer to use a nonstick skillet or griddle for this recipe, though cast iron works too.
Calories: 237kcal, Carbohydrates: 40g, Protein: 9g, Fat: 6g, Saturated Fat: 2g, Polyunsaturated Fat: 1g, Monounsaturated Fat: 2g, Cholesterol: 104mg, Sodium: 206mg, Potassium: 577mg, Fiber: 6g, Sugar: 11g, Vitamin A: 1674IU, Vitamin C: 9mg, Calcium: 208mg, Iron: 2mg
Tried this recipe?Rate in the comments and tag @yummytoddlerfood on IG!
How to teach a child to eat independently
A spoon for mom, a spoon for dad - this is what any loving parent probably says while feeding their baby. However, the introduction of complementary foods and similar feeding is only an intermediate step in the development of a child: from breastfeeding to full self-feeding. How to make the process of learning food “on your own” as simple and easy as possible?
Everyone will learn this
The most important and basic rule when a small child learns to use a spoon, plate, cup, bottle, fork and knife correctly is to have maximum patience. Understand: shouting, rushing or irritating you will not help the baby in any way. On the contrary, the process will slow down for him, and with constant abuse from his parents, almost a reflex may even develop - nutrition for him will automatically mean a scandal, which, of course, does not contribute to the development of a healthy appetite and, accordingly, the whole body. Agree, in the end, at some point, absolutely all people master the wisdom of self-catering - such as the ability to use the potty or sleep in a separate bed away from mom and dad. Therefore, just carefully clean the kitchen or dining room after the next "lesson", wash clothes and the child - and continue all over again after a few hours ...
When to start training, at what age? Here everything is strictly individual. Some children are already ready by 7-8 months, others at 1.5-2 years persistently ask to be spoon-fed. But usually, on average, around the year, the development of a little man already allows you to confidently try to hold the same spoon and direct it into your mouth.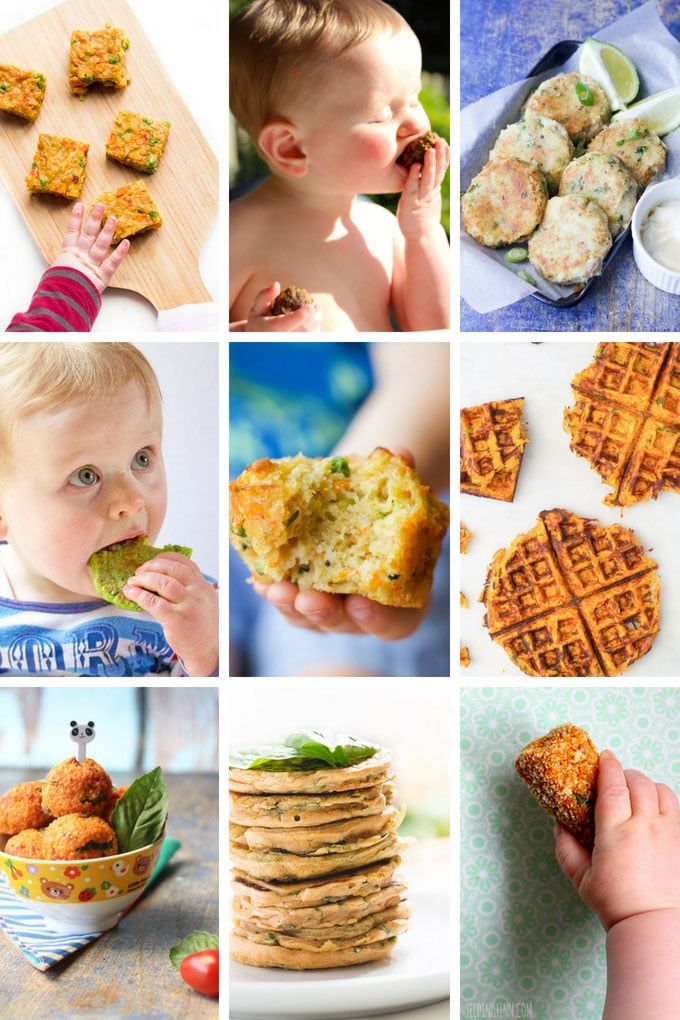 It is hardly worth forcing to do this, but if the baby, on the contrary, takes the initiative, reaches out to grab it himself in order to scoop porridge from the plate, lick it, “feed” the mother, of course, you shouldn’t interfere - such interest is only a plus, it can to a noticeable extent help you. Therefore, watch your child - he himself is the best indicator when it's time to start!
How to organize training directly?
In order for a child to learn to eat on his own faster and with fewer problems, it is worth learning a number of certain rules and techniques, an approximate list of which includes the following points:
Introduce your baby to the spoon as early as possible, even before the introduction of complementary foods. This object should be familiar to him: it is better that he turn it in his hands, like a rattle or a cube, try it by touch and taste, knock on it - in general, he completely mastered and got used to it. Then she will not frighten him and will not cause rejection either at the moment of weaning from her mother's breast, or later, when she will need to wield it on her own.
Buy plastic utensils. You can also use the standard: metal, ceramic or gift silver. But for a very young child, they are not very suitable: such spoons and plates may seem unpleasant to the touch, cold, hard for delicate gums, and heavy. It is important that the plastic is unbreakable, food-grade and free of harmful dyes - the quality certificates from the seller will tell about this.
Choose a children's set. Such dishes are most adapted for a small child: the spoon has a special grip for children's fingers, the plate has high edges (and sometimes even suction cups so that it cannot be knocked over from the table!), The mug has two handles, and the fork and knife are not sharp, so as not get hurt. Well, of course, such dishes are usually made bright, with attractive patterns and designs to interest the child.
Prepare a place. Not a single child manages to bring soup or mashed potatoes from a bowl to their mouths whole, either from the first, or from the second, or even from the tenth time. Therefore, be prepared that at first they will be literally everywhere! And it’s better to immediately prepare the feeding area for subsequent cleaning: cover the table, children’s chair and the floor with oilcloth, remove everything valuable and afraid of moisture, move away from the wallpaper, grab a set of napkins.
Prepare your child. During such “lessons”, of course, the baby himself gets dirty. Therefore, at least a bib or an apron is required - and the larger it is, the better. Sometimes on sale there are special oilcloth jackets for teaching self-catering, but if the room is warm, you can do without clothes, leaving panties or a diaper. It’s easier to wash a child than to wash his clothes every day.
Pick a moment. Although parents should try to accustom their child to a certain daily routine, it is not worth forcing him to eat when he has no desire. This is especially critical for learning to use dishes. If the child is not hungry, he will not take this process seriously: it will either become a game for him, or simply cause a negative reaction.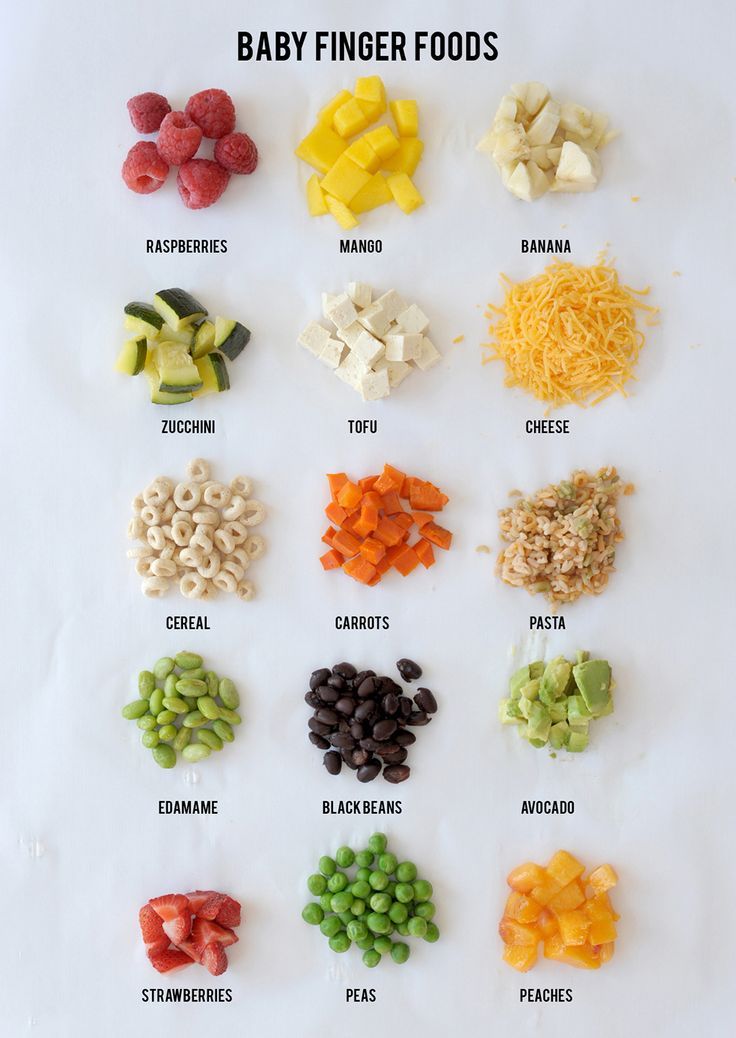 Therefore, teach when he really wants to eat, is not sick and is ready for a new one.
Show an example. Take a spoon, scoop up food with it, bring it to the baby’s mouth or your own, commenting on each of your actions (even if the baby is not talking yet). Then invite the child to try to repeat all this himself. Support is very welcome: help his fingers grab and hold the spoon, point the child's hand to his mouth - and after a dozen or two or three repetitions, he will understand what they want from him.
Pay attention to food. For the first attempts, the baby should like it and be moderately liquid (but not too much, the soup will spill). Also, do not put on a full plate, adding parts of the portion gradually - it is easier for the child to scoop up, and there is less risk of splashing, and the food itself will be warm (the learning process may be delayed). And one more thing: cook with a margin so that the baby, having “lost” part of the food, probably does not remain hungry.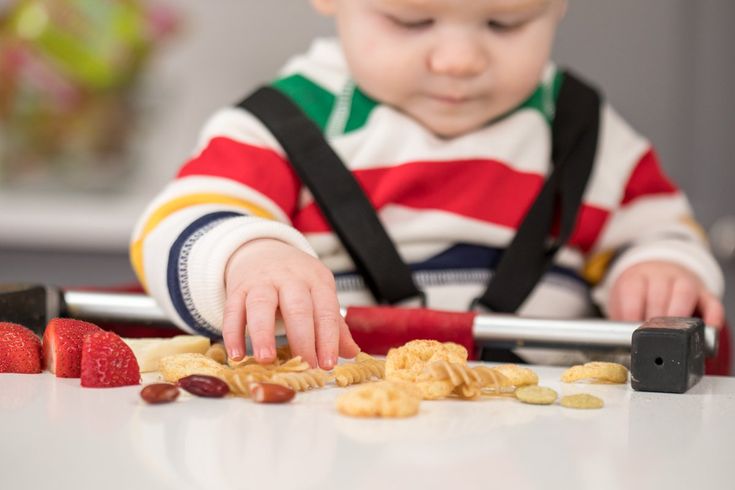
Stop games. It was possible to play with a spoon during the acquaintance, but not now - the child must learn this rule ironically. Therefore, gently, but very persistently, stop when he tries to knock over a spoon, plop it on the soup, spill everything on the floor, or throw it at mom and dad. And also watch when he is full to stop learning - it is at this moment that food for him can turn into a game, and he himself can be capricious.
Supplement. At first, there is nothing wrong with the fact that the child abandoned what he started right in the middle of the process. He could get tired, lose interest if he didn’t succeed, be afraid of spilled food on himself or the fact that he choked or choked on it. Therefore, in reserve, keep "your" spoon nearby so that you can finish your meal the old fashioned way, feeding him yourself.
Create a ritual. In order for the baby to take the rules of nutrition seriously, turn food into a ritual. To do this, you can decorate food (put on a plate of it, for example, funny faces), gather the whole family at the dinner table, set and clean the table together (including spilled ones) - this will increase the child's level of responsibility for their actions.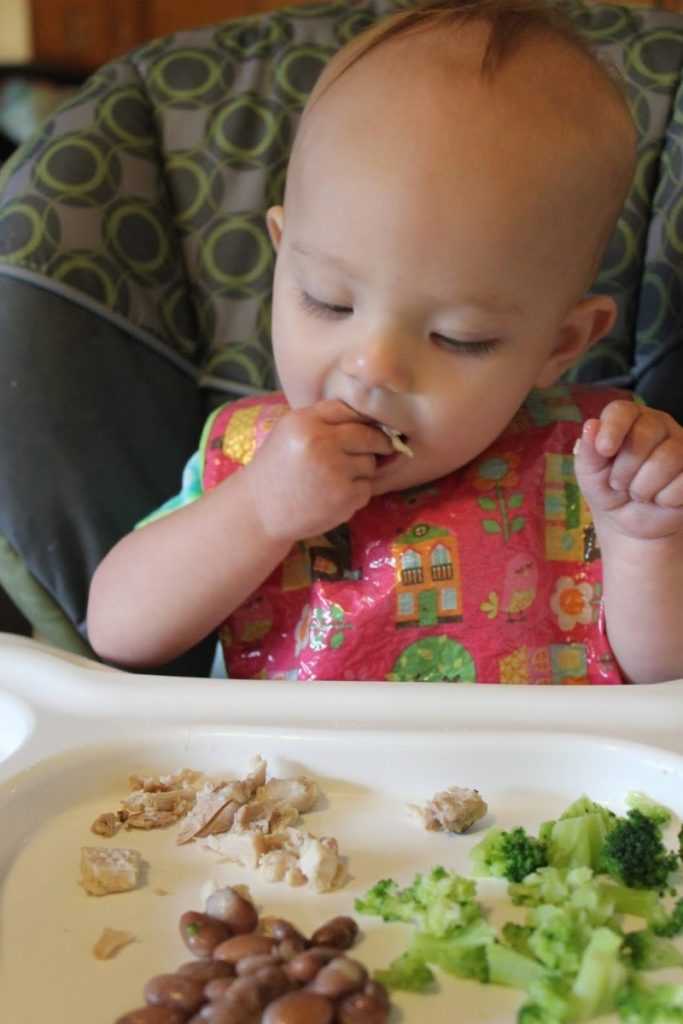 And, of course, learn to wash your hands before eating and wipe your mouth after.
Discuss learning with your family. Everyone who has access to feeding the baby (mother, father, grandparents, older brothers and sisters) must be aware of the ongoing training. Otherwise, at some point, the child will simply begin to be lazy: after all, why learn to eat with your mother yourself, if the same beloved grandmother feeds him from a spoon herself, without requiring him to repeat complex procedures?
Don't rush things. Start with a spoon, but you can wait a little with a cup, fork and knife. So, give out a cup when the baby has mastered the bottle (showing how to lean it against his lips and supporting it at first so that he does not choke), the plug is available by 1.5-2 years (at the same time, you need to pay attention to both ways of its use: picking up a side dish, and piercing pieces of food), and a knife - after 2-3 years.
Don't impose rules. Remember: your ultimate goal is for your child to eat on his own.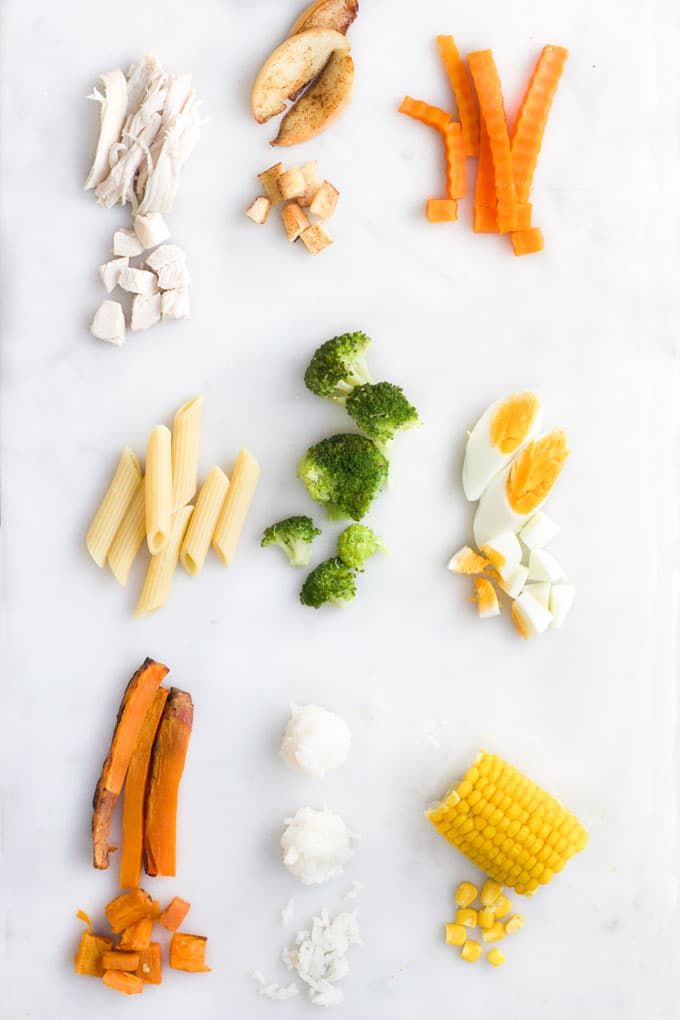 But how he will do it, in principle, does not matter: the main thing is that it is clean and dry around. Therefore, if it is more convenient for him to hold the spoon a little differently than you showed, it does not matter. Moreover, do not force him to eat with his right hand - even if he is right-handed (there is nothing to say about the left-hander), he himself will determine how it is more convenient for him to deal with these devices.
Praise! It is very important for a little man to hear a high assessment of his work. Therefore, any achievement in the matter of teaching independent nutrition should be celebrated and encouraged. Of course, you shouldn’t overpraise, but the joy of mom and dad from the fact that he learned to hold a spoon and didn’t spill anything on the floor will raise his self-esteem and make him even more actively master the wisdom of this business.
Step aside. As the learning process progresses, it is important to start gradually giving the child more and more independence.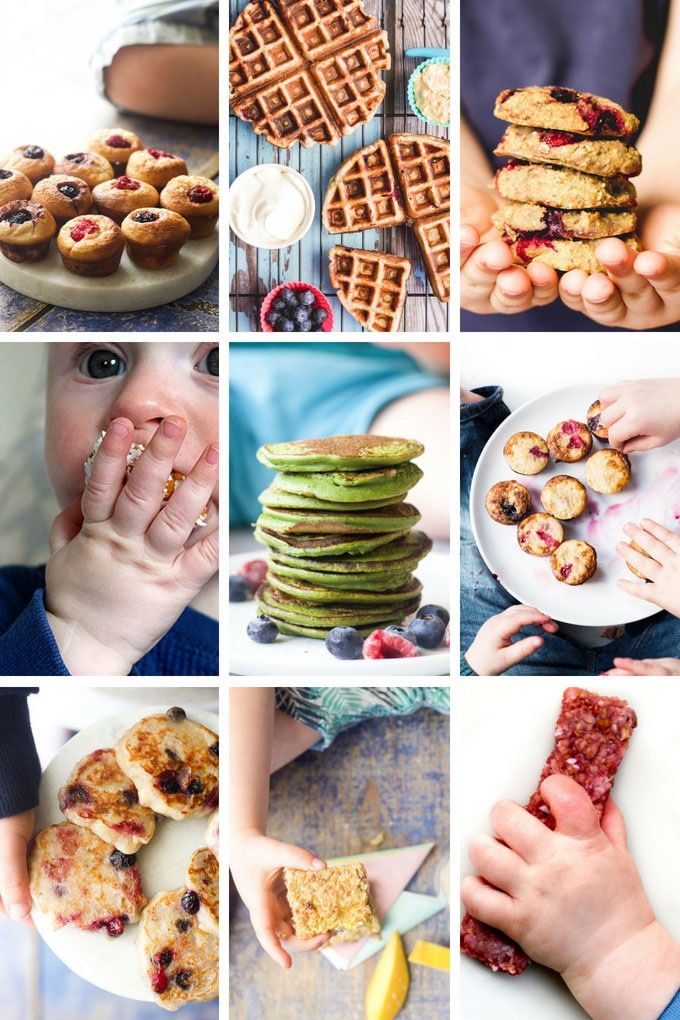 And this must be done gradually. At first you hold his pen with a spoon, then you help only in difficult or critical situations, then you just sit next to him while eating, and by the age of 3-4 you generally follow the whole process with one eye, doing your own business in the kitchen. After all, he already eats himself!
And finally, etiquette. Agree, it’s useless to explain to a very young child how to behave at the table in a decent society, why you can’t eat with your hands, pick your food, spit out chewed and burp, why you need to wish others a good appetite, etc. All this will become more or less relevant by the age of 2-3, when the baby already adequately perceives what the parents said. But this in no way means that attention should not be paid to this at an earlier age! Speak these rules, gently rebuke when he did something wrong, and, of course, set your own example. Looking at you, the child will quickly master the necessary norms of behavior!
How to teach a child to eat any food with pleasure - Moscow 24, 01/18/2021
January 18, 2021, 10:07
Society
A common table, a turned off TV and a personal example.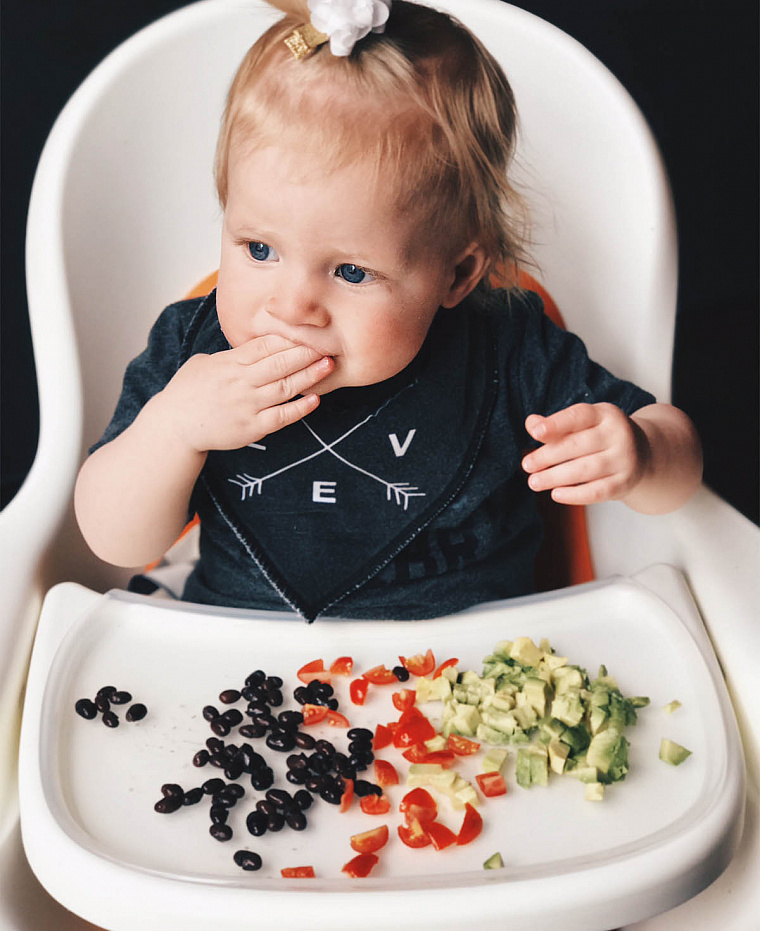 Journalist and mother Evgenia Artamonova shares life hacks on building a healthy relationship with food in a child.
Photo: depositphotos/oksun70
Before the birth of the child and all the 2.5 years that we were together, I thought a lot about food. I listened to authoritative speakers, talked with other mothers and read modern literature.
It was important to me that my son liked to eat. He felt the taste of food, ate intuitively: when he wants and what he wants. So that he would not remember with horror how he was not allowed to leave the table, "until the soup is finished." So that in adulthood he does not suffer from eating disorders and does not eat sweets.
The second, no less important task that I set for myself (and, to be honest, I have not yet fully solved it) is to reduce the level of parental anxiety and make life easier for myself. Do not calculate the grams eaten by the child, do not worry that he did not want something. Do not "fly" like a seagull around the table, constantly instructing "how it should be. "
"
We are still half way there. But I'm happy with the results. Most often the child eats. And eat with pleasure. And if I suddenly decide not to eat, I try not to worry, because this is normal. As soon as I catch myself wanting to help my son finish eating, I seem to be transported back to my childhood and automatically turn on some settings that have been recorded in my subcortex. I almost want to distract and spoon-feed, but most often I stop myself in time. I strive for 100% Zen.
Answers to many pressing questions were found in the book "My child does not want to eat!", written by a pediatrician, author of several works on nutrition and children's health, Carlos Gonzalez. His modern approach is very close to me: to give the child freedom of choice, to believe in him and not interfere.
Below is a list of tips on how to instill a love of food in your child based on the insights of Gonzalez and other evidence-based professionals that work.
- Don't force me.
As Gonzalez writes, "The truth is that children do not grow because they eat. They eat because they grow. Those who become tall, with broad bones, always eat more than those who are short and thin." That is, we cannot know for sure how much a child really needs at a particular moment. - Don't worry if your child doesn't eat.
Doesn't want to eat now - will come back later. And if not, then he doesn't need it. Therefore, the best solution is to shift your attention to other more important tasks. - Involve your baby in the kitchen, do it together.
When preparing food, invite your child to take part in the process. Trust some simple assignments. From my own experience I will say: what the son had a hand in is eaten with special pleasure. - Make eating a family ritual.
Give your baby a separate seat at the table and eat together at the same time. We have a special children's growing chair. From a month we move to a common large table and simply adjust the seat for height. It is interesting and important for the son to be with us.
 - Less salt and pepper.
Try to limit the use of spices and sweeteners so that the child (and adults will also benefit) learns to recognize the original taste and enjoy, for example, even cauliflower eaten without any additives. - Green light for food games.
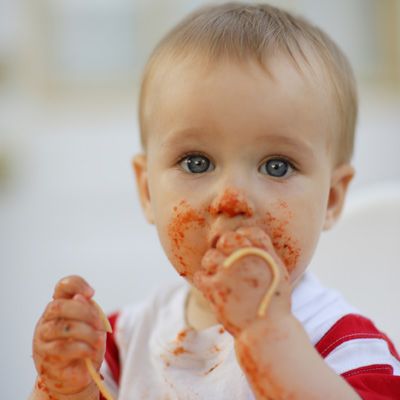
Playing with food within reasonable limits is also an experience! After all, a child learns the world through play. I allow (do not interfere) to scatter the ingredients of the dish around, eat with my hands / spoon / fork, sit on the table, eat from my plate, leave the table in the midst of the meal and return.And if we talk about restlessness, then up to three years (and sometimes later) this is normal. That's how little kids are. During periods of wandering back and forth, I catch zen.
- Don't get distracted.
During each reception, try to keep the process at the forefront.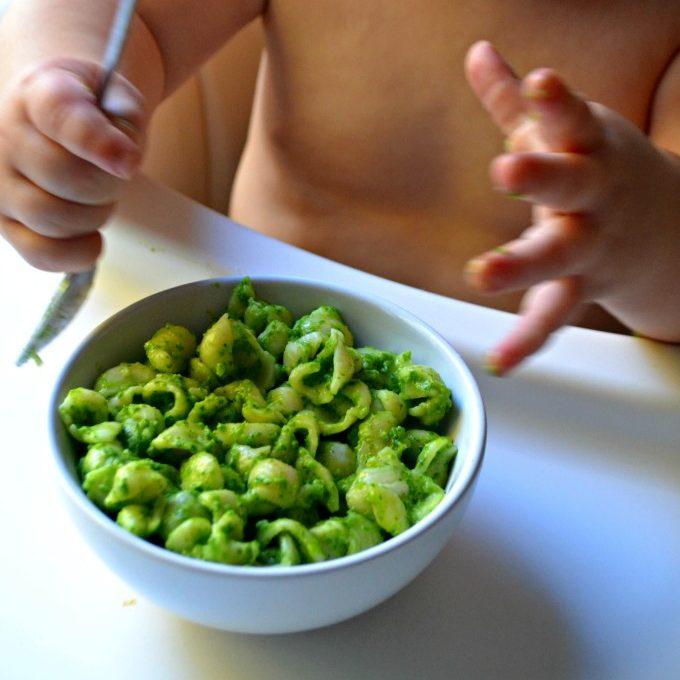 You can chat, joke, listen to music, but if something interferes, you need to remove it. It's better to turn off the TV. Because if adults can still somehow separate watching TV and eating food, then children become little zombies: they automatically put spoons in their mouths or completely forget. And then, already at a more meaningful age, they stop noticing gastronomic desires and needs.
 - Set an example.
And, probably, the main secret is that significant adults in the family eat the way they would like the child to eat. Children repeat everything after their parents. If you do not eat barley, soups and broccoli, then why should a child love them? He understands: yeah, mom and dad don’t eat it, I don’t want it either!
Photo: depositphotos/demiurg_100
Therefore, start with yourself. Do you want your child to have a healthy and balanced diet? Study the question. Introduce more vegetables, different cereals, legumes into the diet. Experiment, explore new flavors and combinations.