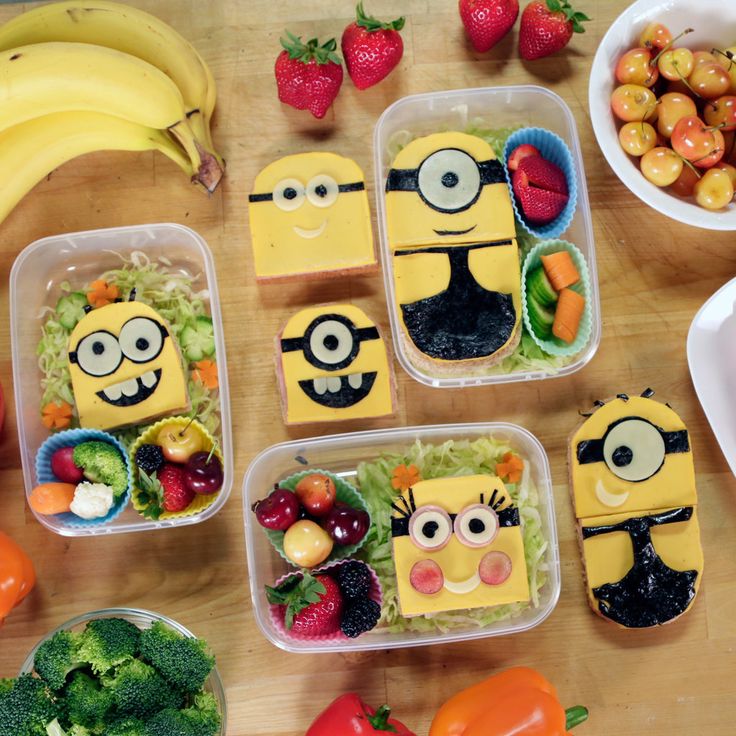
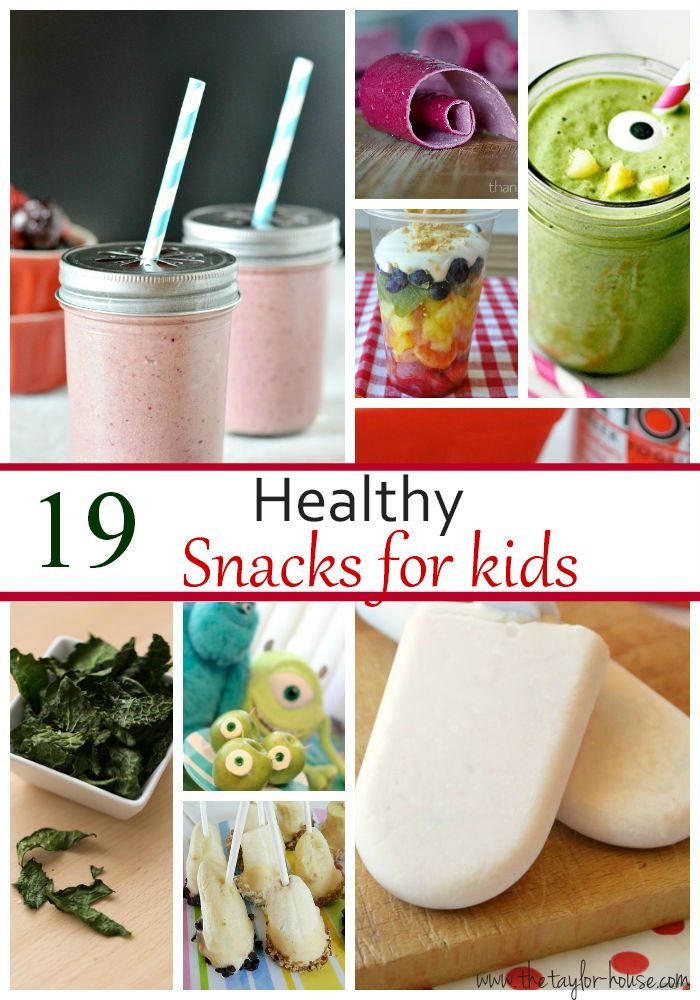
Ideas for making baby food
10 Easy Homemade Baby Food Ideas (No-Cook, Super Fast, Stage 1)
Learn how to make the EASIEST homemade baby food recipes (stage 1) for your little one with these super simple no-cook ideas. Plus: I have the best tips for making them ahead and freezing them so you can batch cook and simplify your days!
Homemade Baby Food
As a mom to three kids, I know firsthand how the urge to make homemade baby food can be both exciting and a little daunting. And if you have a busy schedule or other kids in the house, finding the time to actually do it can seem impossible. But, there are so many healthy foods that you can transform into stage 1 baby food purees with hardly any work or special equipment at all!
TIP: I use a regular blender for all of these recipes, so you don’t need to buy a special baby food maker unless you want to.
Baby Food Recipes for 6, 7, and 8 Month Old Babies
These homemade baby food ideas are designed for younger babies who are still eating thinner purees, but you can of course use them for older babies and toddlers too. Each can be served as is, or you can combine more than one together to create new flavors if you’re feeling creative!
TIP: If you want to add fat or protein to any of these fruit or veggie purees, simply stir in a little whole milk yogurt, coconut cream, or Avocado Puree.
Best Way to Make Baby Food
I’ve found that the easiest and most approachable way to make baby food is to simply use a blender. With fresh ingredients and a little water, breastmilk, or formula to thin it as needed, you can easily make your baby meals without investing in equipment you may not use very long.
TIP: You’ll want to start with at least 1 cup of any base ingredient to ensure that there’s enough in the blender to fully blend up.
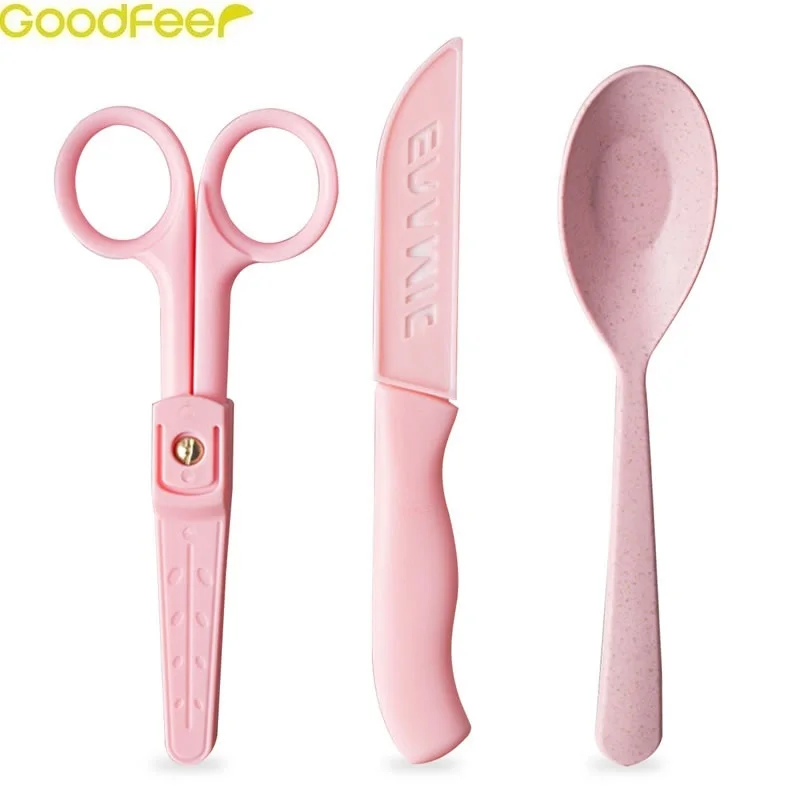
Tools You Need to Make Homemade Baby Food
To make these baby food recipes you’ll need:
- Blender (you could also use an immersion blender if yours is very strong)
- Water, formula, or breastmilk to thin as needed
- Knife for chopping produce
- Spoon
- Bowls
- Ice cube tray
- Freezer bags for storage
- Baby food storage containers
Stage 1 Baby Food
These baby foods are meant for early eaters as they are typically very thin and easy for a baby to move around in their mouths. I follow the recommendations to wait until 6 months to start solids, so I personally don’t worry excessively about this distinction as I like babies to experience some texture in their purees. (The ones you find at the store are low allergenic foods and are meant for 4+ months.)
Stage 2 Baby Food
These baby foods are typically a little bit thicker, sometimes include more than one ingredient, and offer a wider variety of ingredients. Most babies are ready for these sorts of purees around 7-8 months, or once they’ve mastered thinner purees. (Again, since I like to do a combined baby feeding approach with both baby led weaning and purees, I don’t worry too much about following the calendar to decide when to introduce these.)
TIP: As a backup to my homemade baby foods, I love the options from Amara Organic Baby Food (paid affiliate link) since you simply need to stir it together with breast milk, formula, or water and it’s ready to serve.
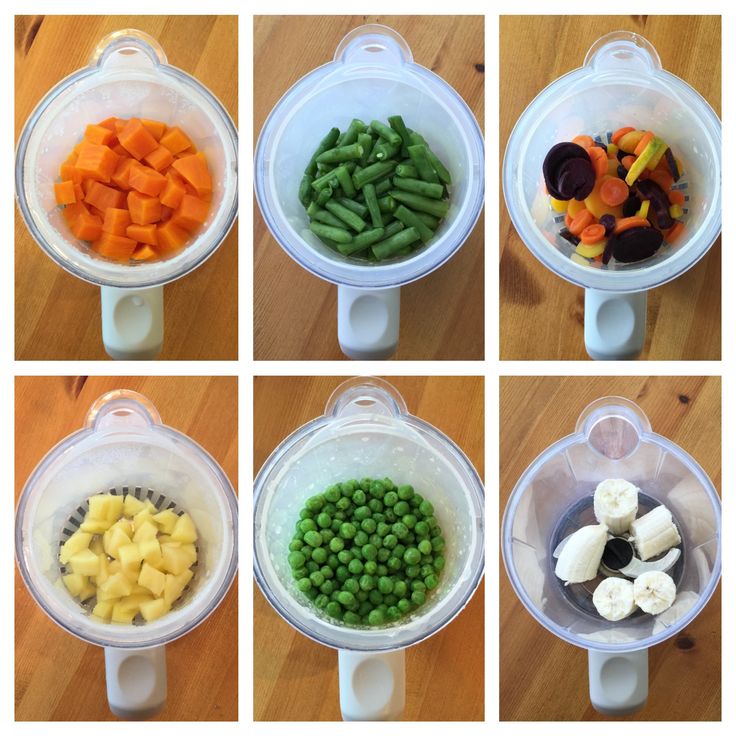
And now, for my ten go-to homemade baby food purees that you don’t even need to cook!
1.
 Avocado Puree
To make avocado puree for a baby, you just need a fresh avocado, a blender, and some lemon juice if you plan to store it for later. I sometimes even do this with just a fork if the avocado is super soft! It’s a perfect way to introduce a low allergenic food that’s rich in healthy fats.
TIP: Get the full recipe for Avocado Puree here.
2. Bean Puree
Baby’s early foods don’t have to be all one food group and beans are a great food to have in the mix. You can do this easy bean puree with chickpeas, pinto beans, black beans, or even white beans, thinning it as needed with water, formula, or breastmilk. This is a great puree to mix with a little sweet potato or butternut squash.
TIP: Get the full recipe for Bean Puree here.
3. Blueberry Puree
Using fresh or frozen blueberries, this easy berry puree is loaded with fresh flavor and antioxidants. It’s delicious on its own or stirred into plain whole milk yogurt or baby oatmeal.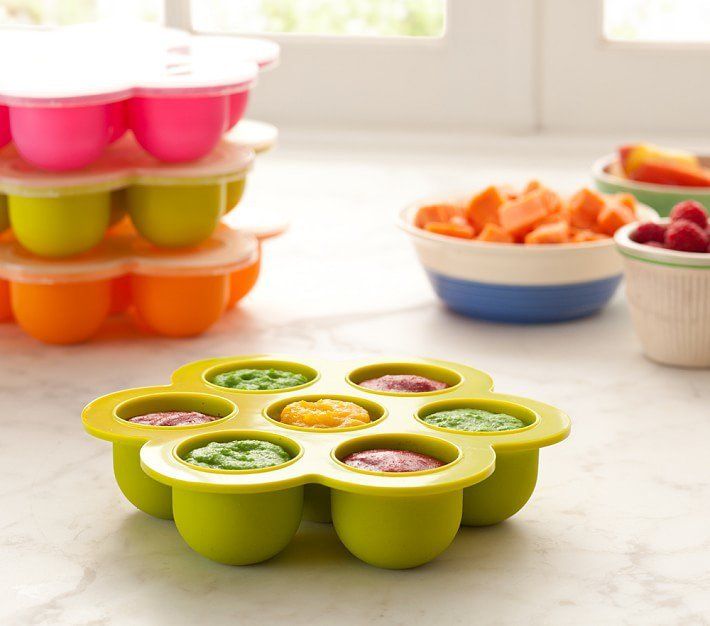 (Note that it thickens up as it sits in the fridge, so you’ll need to stir it well to serve.)
TIP: Get the full recipe for Blueberry Puree here.
4. Kiwi Puree
With a bright flavor, this puree is great for babies who seem to love flavor—and it’s a fun one to make and store for later. You’ll want to make sure that you choose very ripe and sweet kiwi and taste it before you make the puree to ensure that it’s not too tart. (If it seems tart, you can mix with banana or applesauce.)
TIP: Get the full recipe for Kiwi Puree here.
5. Mango Puree
Using fresh or thawed frozen mango, this baby puree blends up in seconds. It’s bright, flavorful, and a great source of immune-boosting vitamins. Taste your mango to be sure that it’s sweet and not too tart. (If it’s tart, you can add Applesauce or ripe Banana Puree.)
TIP: Get the full recipe for Mango Puree here.
6. Peach Puree
Turn fresh or frozen and thawed peach slices into a super smooth Stage 1 baby food with this easy blender method.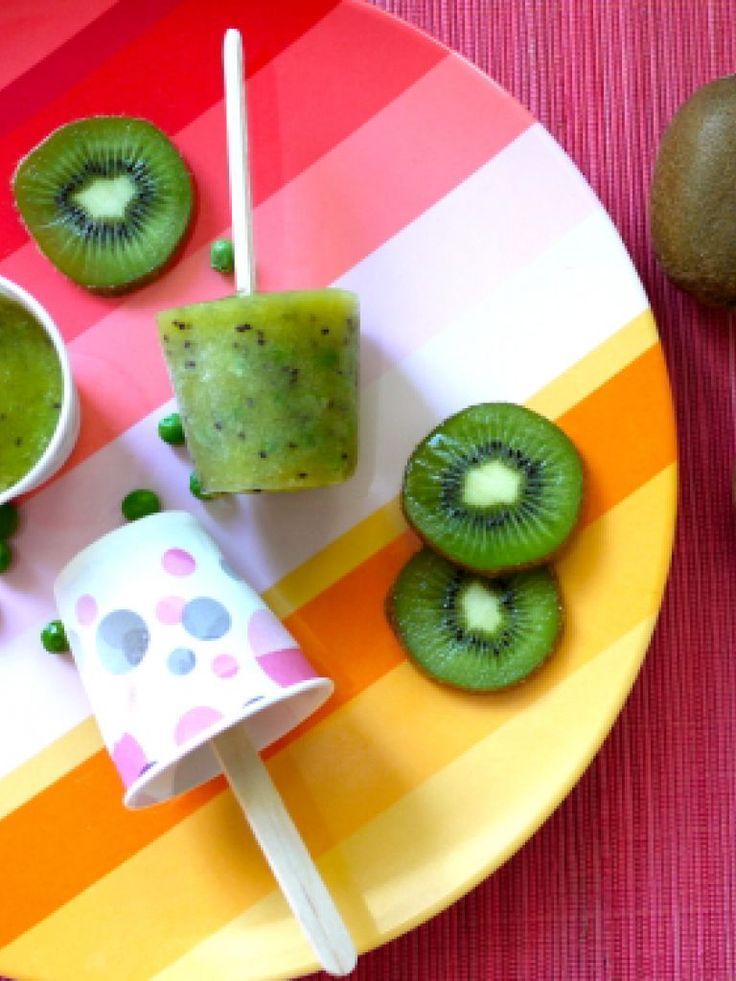 You’ll want to strain out the skin since it’s hard to blend up smooth, even with a high powered blender, but that’s so easy to do! This baby food recipe is a nice alternative to applesauce.
TIP: Get the full recipe for Peach Puree here.
7. Whipped Peanut Butter
This may not have occurred to you, but whipped peanut butter is a great baby food! This is a perfect way to introduce baby to peanut butter and to offer it safely there after. You just need to stir water into unsweetened creamy peanut butter until it forms a whipped consistency like yogurt. It’s smooth, not too sticky, and packed with protein.
TIP: Get the full scoop on introducing peanuts to baby here.
8. Pineapple Puree
Blend up fresh or frozen pineapple chunks into a tropical baby food puree that’s smooth and creamy. This is yummy on its own or paired with whole milk plain yogurt. Taste your pineapple to ensure that it’s not too tart. (If it’s tart, you can add Applesauce or ripe Banana Puree.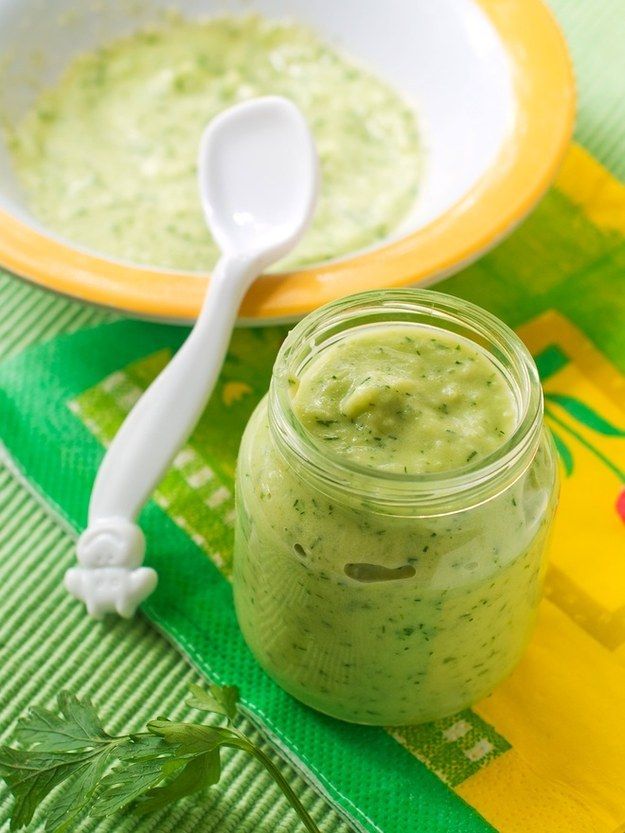 )
)
TIP: Get the full recipe for Pineapple Puree here.
9. Strawberry Puree
Fresh strawberries blend up into a perfectly smooth homemade puree without the need for any additional liquid. You can serve this as is, or mix with applesauce if desired. The flavor of your berries will determine the flavor of your puree, so be sure to taste them for sweetness.
TIP: Get the full recipe for Strawberry Puree here.
10. Banana Puree
Ripe bananas make great homemade baby food with the help of just a blender. This is a super simple baby food to make at home and it’s easy to digest as a Stage 1 baby food. Use ripe bananas with brown spots to ensure that the puree tastes sweet and is easy for baby to digest.
TIP: Get the full recipe for Banana Puree here.
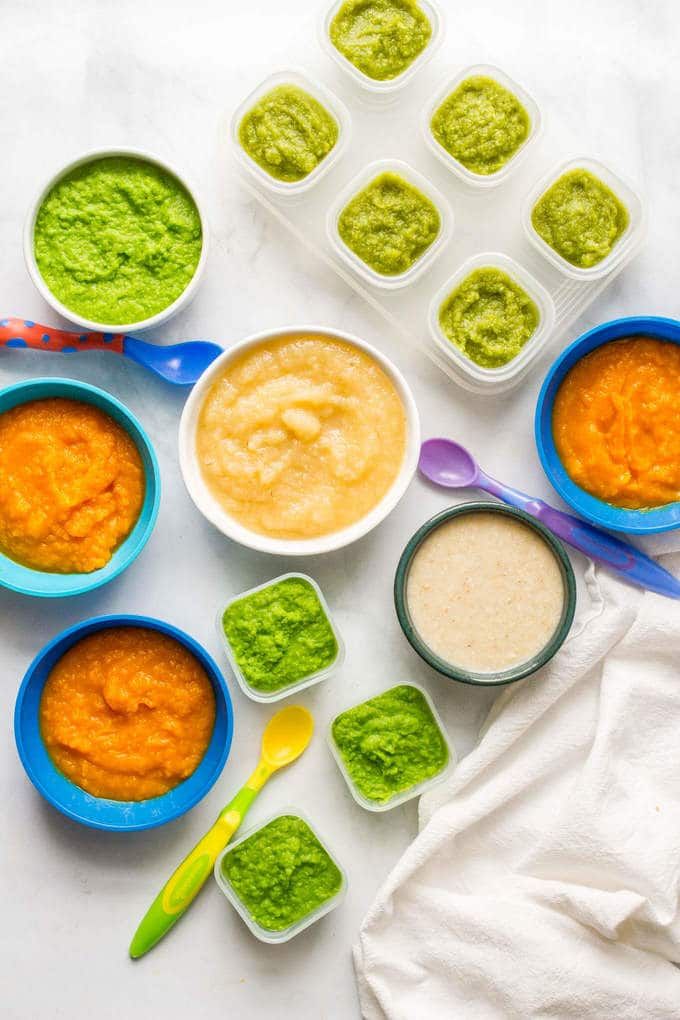
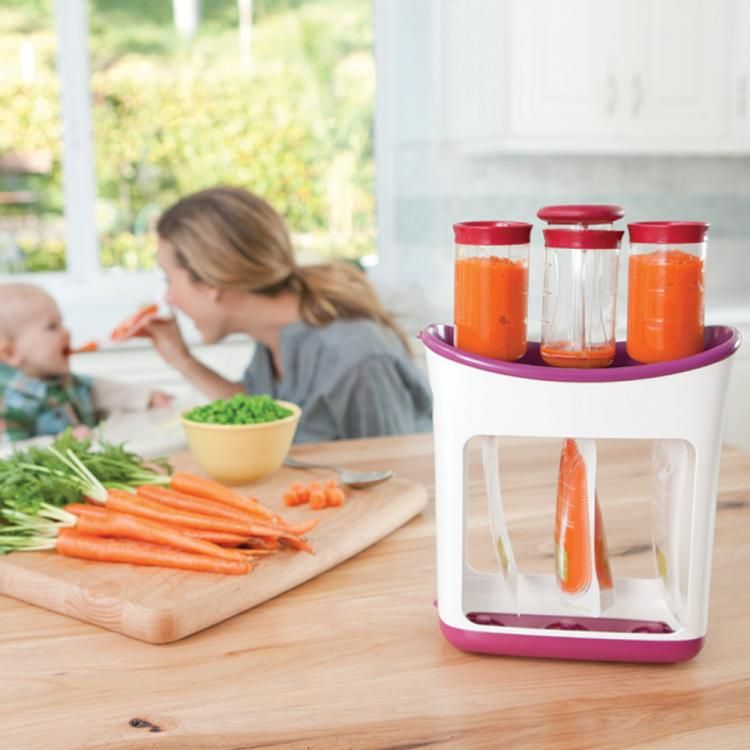
Homemade Baby Food Storage
The easiest way to store homemade baby food is to add fresh purees to an ice cube tray and freeze.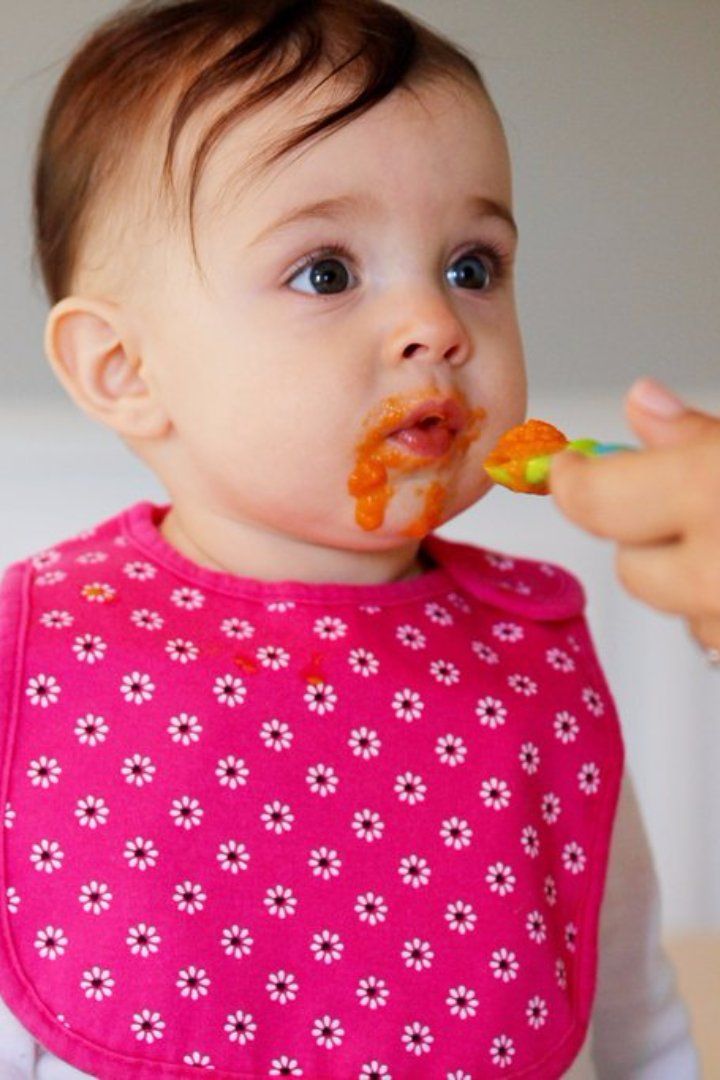 Once frozen, simply pop out the cubes and store in labeled freezer bags for up to 3 months. These are a perfect way to make it easy to send homemade baby food to daycare or to simply get ahead for the coming week.
TIP: Find more information about storing baby food—including the best small food storage containers—here.
]
Tips for Making the Best Homemade Baby Food
- Use at least 1 cup base ingredient to ensure that a blender has enough volume to blend well.
- Thin any homemade puree with water, formula, or breast milk.
- Freeze any baby food you won’t use within 3 days in an ice cube tray. Transfer frozen cubes into freezer storage bags for up to 3 months. Thaw these frozen baby food recipes in an airtight container in the fridge overnight before you plan to serve.
- Taste all fresh foods for sweetness and to ensure that your puree isn’t too tart. To tame tartness, mix any puree with Banana Puree , Avocado Puree, Applesauce, or Mashed Sweet Potato.
- If you want to add fat or protein to any of these fruit or veggie purees, simply stir in a little whole milk yogurt, coconut cream, or Avocado Puree.
- Use breastmilk or formula in place of the water if desired.
- Mix two purees together for more complex flavors.
- Add texture to any puree by stirring in baby oatmeal or hemp seeds.
- For more details on each of these, find them here: Avocado Puree; Banana Puree, Bean Puree; Blueberry Puree, Kiwi Puree, Mango Puree, Pineapple Puree, Peanut Butter Puree, Peach Puree, Strawberry Puree
I’d love to hear your feedback on this way of making simple baby food, so please comment below. I so appreciate hearing your experience with my recipes!
Prep Time 5 minutes
Cook Time 0 minutes
Total Time 5 minutes
Author Amy Palanjian
Cuisine American
Course Baby Food
Calories 42kcal
Servings 4
- ▢ 1 cup blueberries, diced strawberries, diced peaches (peeled), diced kiwi (peeled), diced pineapple (peeled), diced banana (peeled), diced mango (peeled), diced avocado (peeled), OR beans (rinsed and drained)
- ▢ water, formula, or breast milk (as needed)
Choose one fruit, the avocado, or beans and add to a blender.
If making the puree with blueberries, strawberries, peaches, kiwi, pineapple, mango, or beans, add ¼ cup water and blend, adding more water as desired to make a thin, very smooth puree. If making avocado or banana, just blend (without water) until very smooth.
Serve or store in an airtight container for 3-5 days in the fridge, or up to 3 months in the freezer.
Vitamix Blender
Storage Containers
Silicone Ice Cube Tray
- Use at least 1 cup base ingredient to ensure that a blender has enough volume to blend well.
- Thin any homemade puree with water, formula, or breast milk.
- Freeze any baby food you won't use within 3 days in an ice cube tray. Transfer frozen cubes into freezer storage bags for up to 3 months. Thaw these frozen baby food recipes in an airtight container in the fridge overnight before you plan to serve.
- Taste all fresh foods for sweetness and to ensure that your puree isn't too tart.
 To tame tartness, mix any puree with Banana Puree , Avocado Puree, Applesauce, or Mashed Sweet Potato.
 - If you want to add fat or protein to any of these fruit or veggie purees, simply stir in a little whole milk yogurt, coconut cream, or Avocado Puree.
- Use breastmilk or formula in place of the water if desired.
- Mix two purees together for more complex flavors.
- Add texture to any puree by stirring in baby oatmeal or hemp seeds.
- For more details on each of these, find them here: Avocado Puree; Banana Puree, Bean Puree; Blueberry Puree, Kiwi Puree, Mango Puree, Pineapple Puree, Peanut Butter Puree, Peach Puree, Strawberry Puree
Serving: 0.25cup, Calories: 42kcal, Carbohydrates: 11g, Protein: 1g, Fat: 1g, Saturated Fat: 1g, Polyunsaturated Fat: 1g, Monounsaturated Fat: 1g, Sodium: 1mg, Potassium: 57mg, Fiber: 2g, Sugar: 7g, Vitamin A: 40IU, Vitamin C: 7mg, Calcium: 4mg, Iron: 1mg
Tried this recipe?Rate in the comments and tag @yummytoddlerfood on IG!
Tips on Freezing and Best Containers
Learn the secrets to storing and freezing homemade baby food for ultimate freshness—AND the best baby food storage containers to use to ensure that you never waste what you make!
Baby Food Storage
Going through the effort to make homemade baby food really only works if you have a good plan for how to store the food to ensure that it stays fresh and that baby has plenty of opportunities to enjoy it. After making a LOT of baby food for my third kiddo to send with him to daycare, I got into a good routine of making and storing baby food—both in the fridge and freezer. Here’s how you can do it too.
TIP: You can find my favorite baby food recipes here.
Homemade Baby Food Storage: In the Fridge
You can store baby food in the fridge in airtight containers for up to 3 days. You can use masking tape and a Sharpie to label the containers with the contents and the date if you have a hard time keeping track of when you made something. (It’s definitely helpful to do that!)
Best Baby Food Storage Containers
I have a four favorite baby food storage containers that I use regularly.
1. Wean Green Baby Food Cubes
These are small, incredibly durable, and made from glass. They’re easy to clean and last forever. (Seriously, I’ve been using the same set for 7 years and they’re still as good as new!) $19.99 for a set of 4
2.
 Easy Lunchboxes Mini Dippers
These small containers are a perfect size for 1-2 frozen baby food cubes and they’re my go to for packing food for a baby to take to daycare. They also nest nicely when stored in the cabinet. $7.95 for a set of 8
3. Beaba Food Storage Containers
I have two sets of these and I use them regularly for larger amounts of baby food (you could probably fit 4 cubes of frozen food) and for toddler snacks. When assembled, they snap together, so they’re an easy way to stay organized. $14.95 for a set of 6
4. Oxo Tot Baby Food Blocks
This neat system is easy to keep contained in the fridge and is also made from a polypropylene body that is PVC, BPA, and phthalate free. They are dishwasher and microwave safe. $9.99 for a set of 6
Homemade Baby Food Storage: For Freezing
Storing homemade baby food in the freezer allows you to make a bigger batch at once, and then serve it to baby over the course of a few weeks or months. The easiest way is to use an ice cube tray, which has the added benefit of portioning out the baby food nicely.
TIP: Any ice cube tray will do. You can use silicone ice cube trays if you prefer a non-plastic option.
Baby Food Storage Without An Ice Cube Tray
If you don’t have an ice cube tray or you’d just rather not use one, you can place a predetermined amount of baby food into a pint-size freezer bag. Remove as much air as possible, press flat, and seal. Place flat in the freezer to freeze. Then you can thaw the entire bag in the fridge overnight, or break off a portion of it to thaw.
How to Store Baby Food in the Freezer Step by Step
- Place baby food into each compartment of the ice cube tray, or fill as many as you need to with the amount of baby food you have.
- Cover (if your ice cube tray has a cover) and freezer for 4-6 hours or overnight.
- Pop out frozen cubes and transfer to freezer storage bags. Label as desired with the type of baby food and the date.
- Store in the freezer for up to 3 months.
TIP: I like to have a bag of sweet fruit purees and more savory vegetable purees to avoid having too many separate bags in the freezer at any given time. Then you can combine them into baby food combinations easily!
How to Thaw Baby Food
To thaw baby food, simply remove a cube (or as many as you need) and place into airtight containers. Thaw overnight in the fridge and serve. 1 cube may be plenty for a baby aged 6-7 months and older babies may enjoy two cubes.
Tips for the Best Baby Food Storage
- Keep fresh baby food in an airtight container for up to 3 days in the fridge.
- Use a regular ice cube tray to freeze, a silicone ice cube tray with a lid, or a small freezer bag with the contents pressed flat.
- Store frozen baby food in a freezer storage bag in the freezer for up to 3 months.
- To avoid freezer burn, try to remove as much air as possible from the storage bags.
- Label your bags with the contents and the date.
- To thaw baby food, simply remove a cube (or as many as you need) and place into airtight containers. Thaw overnight in the fridge.
- Use leftover baby food to flavor yogurt, baby oatmeal, baby rice cereal, smoothies, or cottage cheese.
- See some of my favorite Baby Food Pouch recipes here for more ideas on how to serve your baby food!
I’d love to hear your feedback if you have another storage technique or container that you love, so please comment below!
ideas of baby food: what to cook for the future: tanyaluneva - Livejournal
- CANCEL
When it's time for the first feeding, even rows of canned children appear in the home cupboard: jars with vegetable, fruit, and then meat puree. Among the ruddy peanuts there are big lovers to taste something new. At first, the child's appetite is small, a modest portion of 50-100 g, which the manufacturer has prepared for him, is enough for 2-3 meals. Then the range expands, and the needs grow. Not every mother can cook a separate menu for a baby. There is simply not enough time for this, especially if you have to take care of several children. Feeding a child only canned food is also not an option. I offer a very simple alternative: to prepare food for the smallest member of the family for the future.
How to prepare baby food for future use
To do this, you will have to prepare some food for the baby every 3-4 days. And then lay out single servings in separate containers with a lid (now they are sold in a variety of sizes). You can organize the layout and make it easier for yourself and family members to find the right container. For example, put vegetable purees in containers with a green lid, meat purees with a red lid, and fruit purees with an orange or purple lid.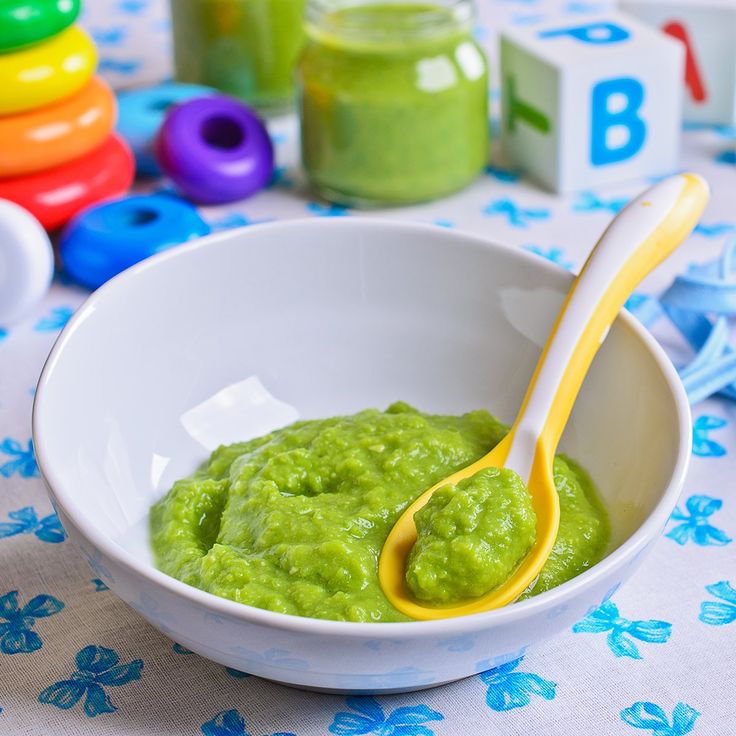 It remains only to get 3-4 small containers in the morning - for lunch and dinner - and rearrange them in the upper compartment. As the meal time approaches, the contents of the two containers are warmed up and served to the little gourmet. It can be quite a variety of dishes.
Children's menu options
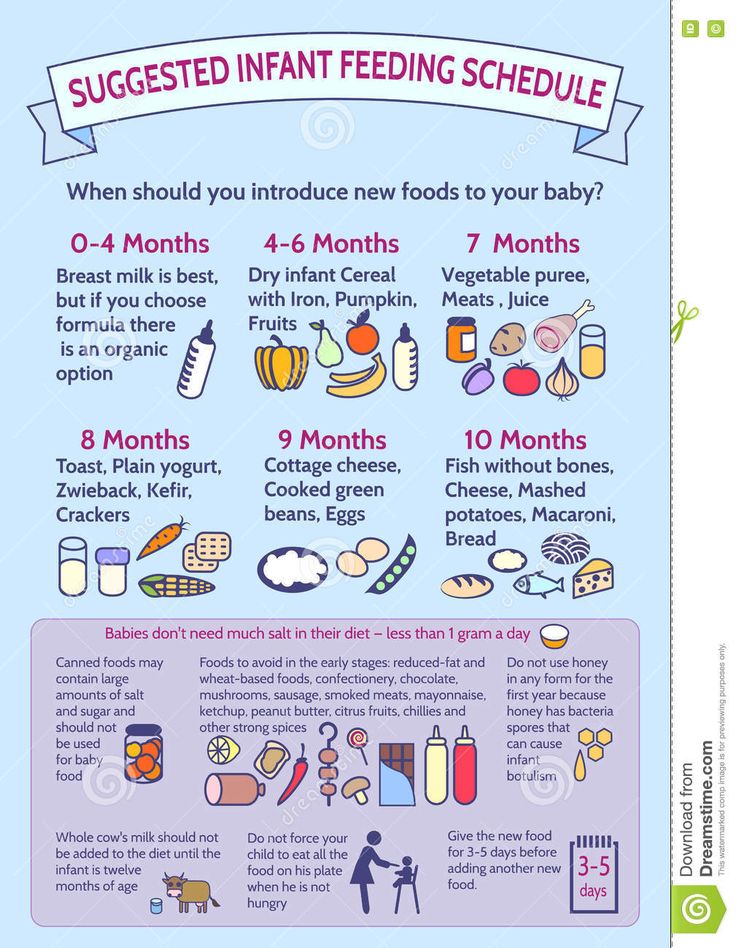
Vegetables are allowed to be given to babies from six months of age. Add meat ingredient - from 6-8 months. Focus on the table:
From 5-6 months - zucchini and cauliflower;
From 6 months - broccoli, potatoes, pumpkin, carrots;
From 7-8 months - green peas;
C 9 - beets;
· From the year - tomatoes, cucumbers.
From the age of 4 months you can give a spoonful of fruit puree from apples, pears, from 5-6 months - from apricots, pumpkins, prunes, bananas.
Children choose lean meat. Preference is given to chicken, rabbit, beef.
For cooking, choose the method of boiling or stewing in a conventional saucepan. Or more modern and less labor-intensive - in a slow cooker. Vegetables are boiled in a small amount of water until soft, then the liquid is evaporated, and the contents are crushed with a blender with a few grains of salt and a spoonful of vegetable oil (at first it is possible without it). The cooled puree should be decomposed into containers and frozen.
Cut the meat into small pieces, stew until soft, grind with a blender with a small amount of broth. Put in a container exactly a portion for 1 time, close the lid and put in the freeze.
Combination options:
Zucchini vegetable puree with chicken cutlet;
Carrot puree with beef;
Potato-pumpkin mix;
Cauliflower with rabbit;
Zucchini with mashed potatoes.
If you mix 2 types of vegetable puree and 1 type of meat, dilute everything with a little boiled milk (or ready-made vegetable broth), you get a variant of a thick soup for lunch.
To prepare the popular applesauce, you need to select a sweet variety of apples, simmer the peeled apples in a small amount of water until soft.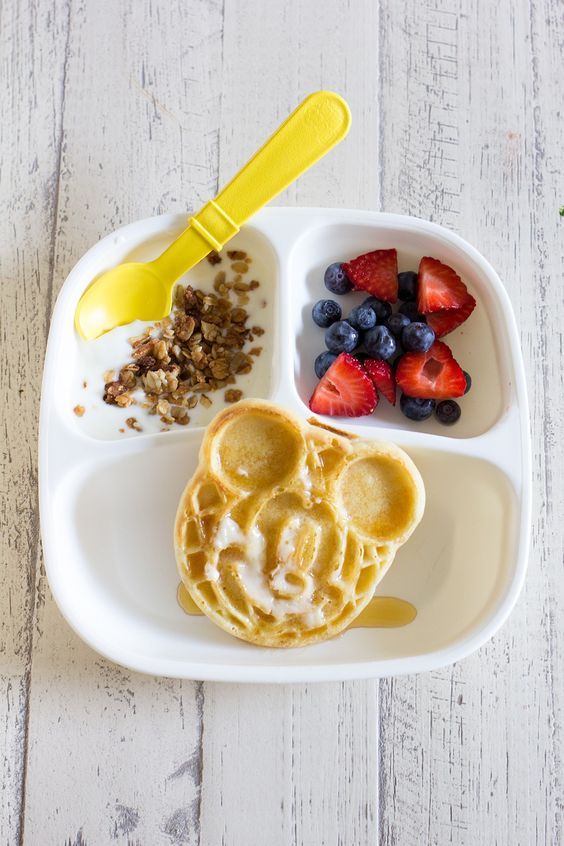 Beat with a blender until a smooth homogeneous consistency. And you can feed. At the age of 7-8 months, you can dilute the thick puree with a small amount of boiled cream. Sugar - to a minimum, but you can completely do without it.
Children take apple-apricot puree well. In winter, high quality dried apricots are used instead of fresh apricots. It is first kept in boiling water, and then boiled and rubbed with apples. Fruit puree, just like vegetable puree, can be frozen for future use.
I am not advocating to feed a baby with one “freeze”. But as an auxiliary method, this option is very good.
#I'm testing a new children's menu idea editor
Baby puree at home: recipes
Baby puree from vegetables and fruits at home: cooking secrets
Vegetable and fruit puree often becomes the first meal of the baby after breast milk or formula, so many mothers prefer to cook it on their own. Although modern manufacturers convince us that baby food is devoid of preservatives and harmful additives, fresh vegetables and fruits are much healthier, especially when it comes to infant nutrition. Yes, and cooking baby puree at home is not so difficult.
Vegetables or fruits?
Let's try to make baby puree for our beloved baby. Despite the fact that pediatricians of the last century recommended starting complementary foods with fruits, it is better to first introduce the child to vegetables - modern doctors and nutritionists have come to this conclusion. Boiled vegetables do not irritate the gastrointestinal tract, are better absorbed, satisfy hunger, do not cause allergies and increased gas formation. In addition, vegetables do not contain fructose, which irritates the pancreas. And one more weighty argument in favor of the fact that it is better to start with vegetables - fruits are tastier, and if the baby tries them first, he will refuse vegetables, because they will seem to him more insipid.
How to prepare baby vegetable puree
What can baby puree be made from? The ideal puree for the first feeding is from cauliflower or zucchini.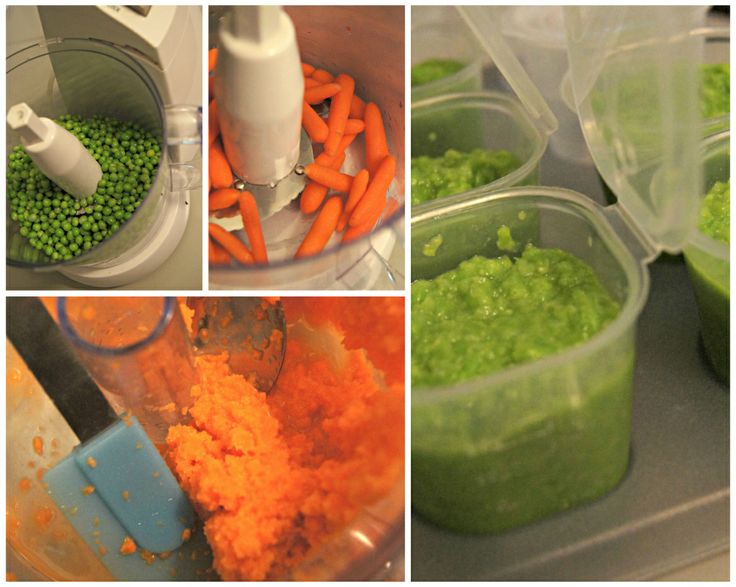 A little later, you can introduce pumpkin, broccoli, carrots, potatoes and green peas. Before cooking, vegetables are washed well, peeled, cut into pieces and cooked - steamed, in the oven or in the usual way, in water. The first two methods are preferable because oven roasting and steaming preserve the vitamins, minerals, nutrients, and natural color in the vegetables. And most importantly - such vegetables are much tastier. Some nutritionists recommend boiling vegetables with their skins on before peeling them, so choose your own cooking method.
If you do have to cook vegetables in a saucepan, use an enamel pot, add less water and dip the vegetables into boiling water. Boil until soft, but do not overcook vegetables and fruits, otherwise they will become tasteless and lose a lot of vitamins. Ready vegetables are chopped with a blender until smooth and slightly diluted with water, vegetable broth, breast milk or mixture to a gruel state, since the child does not yet know how to digest thick food. Small pieces of vegetables in puree sometimes cause the baby to refuse to eat, so the knives in the blender should be well sharpened, and if there is no technique, you can grind the vegetables through a sieve. Salt and spices are usually not added to baby vegetable puree, and if the baby is more than 6 months old, you can put a little butter in the puree.
A few rules for making baby puree at home
- Use only fresh vegetables and fruits.
- Water for cooking vegetables must be filtered or bottled.
- If you are using frozen foods, choose only whole fruits and vegetables as they retain the most nutrients.
- All utensils for preparing baby food must be perfectly clean, so if the knife falls on the floor, it should be washed well. Also, the presence of pets in the kitchen during the cooking process is not allowed.
- Avoid vegetables and fruits high in nitrates, such as spinach, lettuce, beets, melons, and watermelons, in infants' diets.
- Store-bought vegetables are recommended to be soaked in water to remove nitrates: 1-2 hours for this, up to 24 hours for potatoes.
- Mix sour-tasting fruits and berries with sweet fruits - for example, blackcurrant goes well with a banana or pear. Sour puree is unlikely to please the baby.
- Give your child only fresh food, but yesterday's puree from the refrigerator is better to eat yourself.
DIY fruit puree for children
Children are more likely to eat fruit puree, as fruits are tastier and sweeter. Fruits contain a large amount of vitamins, minerals, trace elements, fiber and antioxidants, so they are very useful for a growing body. However, fruits are strong allergens, especially berries, bananas, pomegranates and apricots, so they should be given with caution, watching the child's reaction. The most low-allergenic fruits are apples and pears, so it is better to start complementary foods with them, and then introduce all other fruits. First, the baby is fed with a one-component puree made from only one product, and then you can mix different vegetables and fruits, and not only among themselves. Very tasty combinations of fruits and vegetables, such as apples and zucchini, pumpkins and pears.
Fruit must be of good quality, undamaged, ripe and juicy, and the rules for preparing fruit should not differ from those for cooking vegetables. Naturally, fruit puree is not sweetened with honey and sugar - the later the child learns the taste of sugar, the stronger his health will be.
Aromatic pumpkin puree
Babies love to eat pumpkin because of its pleasant sweetish taste, besides pumpkin is very healthy. It contains a whole storehouse of various vitamins, including vitamin T, which normalizes the metabolism in the body. For pumpkin puree, small pumpkins are suitable, since large fruits are not as tasty and difficult to peel.
Cut the pumpkin in half, and then into small pieces, one or two of which (depending on the appetite of the crumbs) cut into cubes. Boil the pumpkin in a double boiler or in water for 20 minutes, while warm, beat with a blender to a smooth puree and dilute if necessary with water or a mixture. Add oil and salt depending on the age of the child.
Gentle Broccoli Puree
One of my favorite homemade baby puree recipes is broccoli. This cabbage is extremely useful because it contains potassium, iron, calcium and other valuable substances. It has much more vitamin C than lemon, and the reason for its nutritional value is its high protein content.
Separate the broccoli into florets, wash thoroughly and steam for 20 minutes. Cabbage cooks faster in water - fresh broccoli will take 7 minutes, and frozen - about 15 minutes. Broccoli puree does not need much water, it should lightly coat the vegetables. After the cabbage becomes soft, chop it in a blender or pass through a sieve. If you're mashing for kids older than a year old, be sure to add butter - the little ones will gobble up broccoli on both cheeks!
How to make baby pear puree at home
Pear is a very delicate, tasty and healthy fruit that rarely causes intolerance. In addition to the high vitamin value, the pear has other beneficial properties - it facilitates digestion and removes toxins from the body.
For baby food, choose green pears to reduce the risk of allergies, which are rare among babies. Peel the fruits from the peel and core with seeds, and then stew the pear in a bowl with a thick bottom in a small amount of water for 15 minutes. Let the pear cool slightly and puree it in a blender with a little of the remaining pear broth. For large kids, fruits can not be boiled, but add half a teaspoon of natural honey to the puree.
Zucchini and apple puree
Little gourmets will love this delicious puree, besides, zucchini is considered the most hypoallergenic vegetables, which, due to their high potassium content, have a beneficial effect on the heart. Apples contain iodine, iron and phosphorus, and due to the high concentration of vitamin C, apples help in the prevention of colds and viral infections.
Wash the zucchini and apples well, de-seed them, cut into pieces and cook in a saucepan for about 20 minutes, considering that the zucchini will cook 5 minutes faster. By the way, apples are steamed for 15 minutes, zucchini - 10 minutes. Next, vegetables and fruits are chopped in a blender, mixed and brought to a boil. For allergic children, this is the best side dish!
Exotic mango
Sometimes you can pamper your baby with exotic fruits - for example, make mango puree. This is a very delicate fruit with an original taste, containing 12 amino acids and improving sleep.
Choose only ripe fruits that are soft and reddish-yellow in color. Peel the mango from a thick skin and a large bone, put the pulp in a blender, add 2 tbsp. l. water and mash it, and then heat it in a saucepan for several minutes. For a baby up to a year old, it is better to give mashed potatoes with heat treatment to facilitate digestion, and older children can be fed raw mangoes.
Carrot and Potato Puree
Make normal potato puree without oil. Peel the carrots, grate them and stew them with butter and vegetable broth - about 1 tsp is required for 200 g of carrots.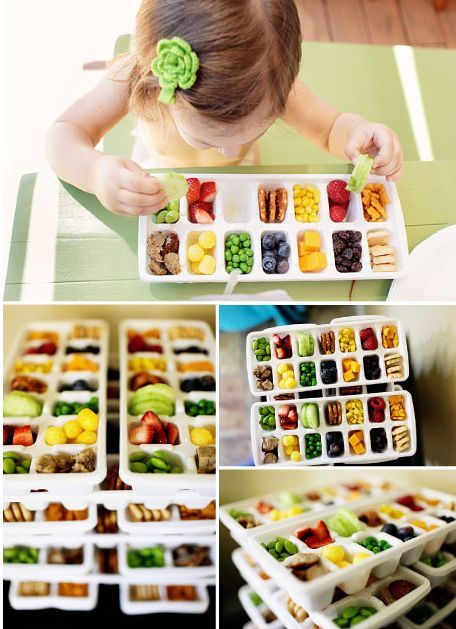 butter and 150 g of broth. When the carrot becomes very soft, wipe it through a sieve, and then put it on a plate, put mashed potatoes on the second half. Let the child choose whether to mix two types of puree for him or eat separately!
Pumpkin and apple puree
This sugar-free sweet pumpkin-apple puree made in a double boiler is suitable for children who are already accustomed to “adult” food and are able to perceive a new unusual dish. It is better to take a pumpkin with a gray or green skin and with bright pulp - such fruits contain more vitamins and other useful substances. Apples are green because they have fewer allergens.
Cut pumpkin and apple flesh without peel or seeds into pieces, place in a double boiler and cook for 20 minutes. Grind pumpkin, apples and raisins in a blender or by hand with a pusher if the child has already learned to chew. They say that this puree is very good for skin and hair, and you can check the truth of this statement yourself if you start feeding this dish to your baby.