Instant baby food india
Baby food recipes - 6 to 18 months
By Swasthi on August 26, 2022, Comments, Jump to Recipe
Baby food recipes – A collection of homemade Indian baby food recipes for 6 10 18 months babies. If you are a new mum, you can check this Baby food chart for 6 months baby. If you have a baby older than 7 months then you can check this Indian baby food chart for 8 months & above. You can also take a look at the best foods to gain weight in babies & toddlers. This post contains a list of all Indian baby food recipes available on this blog.
I have also included a few sample baby food recipes in the recipe card. All the recipes are tried and tested and have been served for both my babies.
If your pediatrician has suggested you to start, then You can start with a single fruit, single veggie and then single grain. For more details please check this post on How to introduce solids to baby.
I highly recommend reading every line of the baby food posts on this blog as they can guide you extensively.
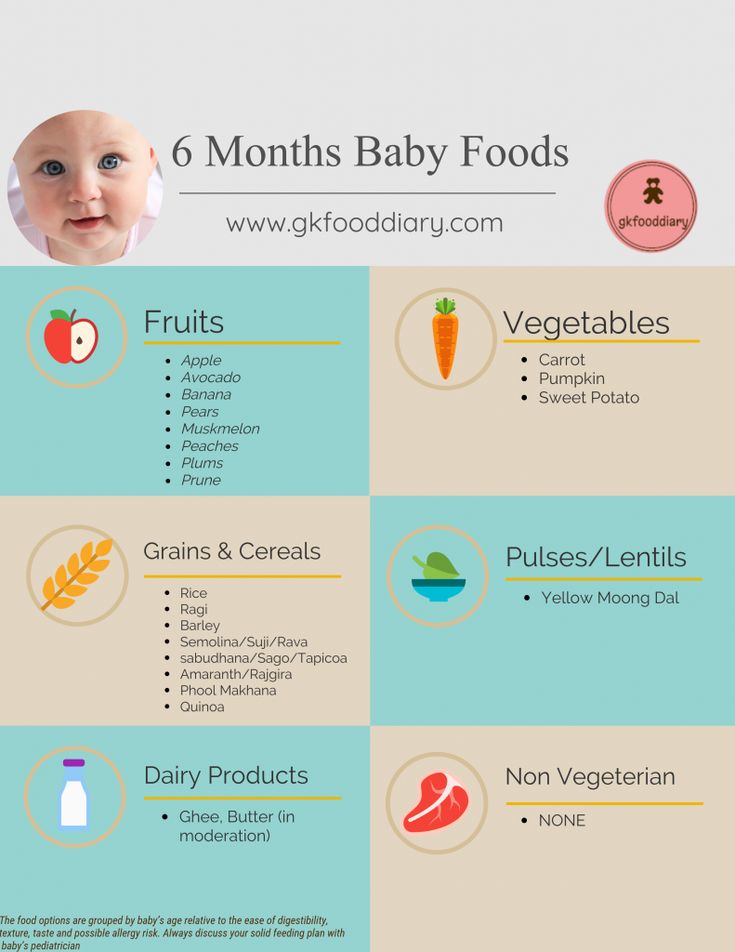
Baby food recipes – babies above 6 months
How to make baby rice cereal
Apple rice
Ragi porridge for babies
Apple Wheat porridge
Apple ragi (try ragi and apple separately first, then try together)
Khichdi for babies
Methi khichdi
Moong dal soup
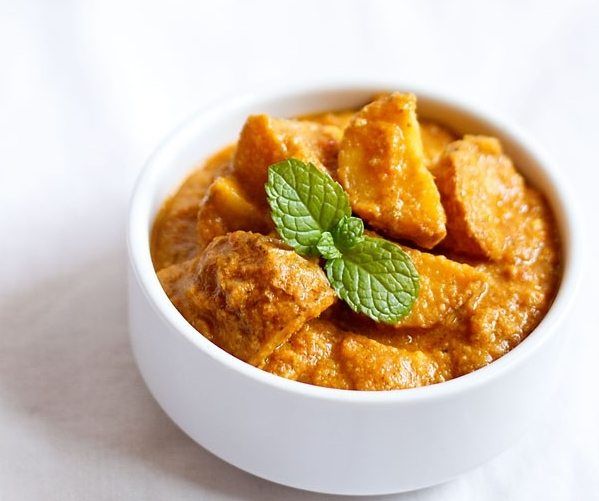
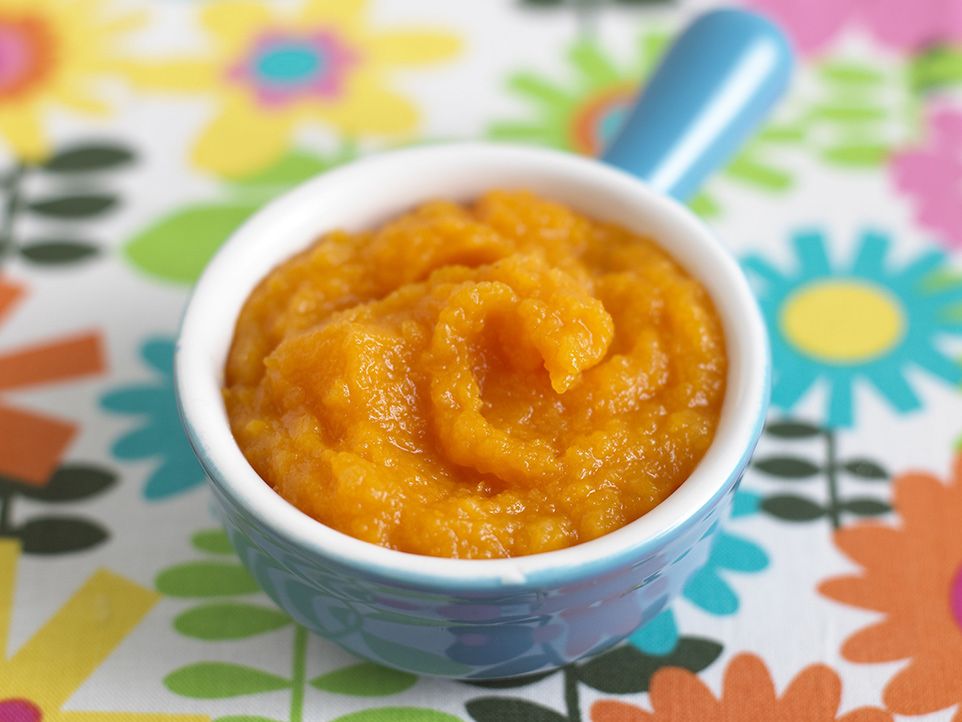
Carrot almond baby food
Potato rice
Barley baby cereal
Sago carrot kheer for babies
Sabudana kheer for babies
Wheat cereal for babies
Soft idli recipe
Milk oats porridge
How to make ragi flour for babies
Oats porridge with vegetables (blend till smooth)
Sweet potato rice
Apple oats
Babies above 8 months
Sprouts soup
Urad dal khichdi
Raw banana rice
Ven pongal. please mash the rice well and remove the pepper corns. You can also puree it.
Curd rice. Puree if desired, skip tempering.
Curd oats
Moong dal halwa
Ragi idli
Baby food recipes for babies above 11 months
These need to be pureed before serving
Dalia khichdi
Oats vegetable khichdi
Sweet corn soup
Barley soup with vegetables
Chickpeas toddler food
Chickpeas soup (for babies above 15 months)
Badam milk. pls consult your doctor and use buffalo or goat milk, avoid cow’s milk.
Set dosa
Banana milkshake
Lassi (avoid salt and sugar)
Neer dosa
Kambu dosa
Sample Indian baby food recipes
Prep Time10 minutes
Cook Time20 minutes
Total Time30 minutes
Servings2
AuthorSwasthi
Ingredients for 6 months baby food recipes 1 – Any one of the following (refer notes)
- ▢ ½ banana
- ▢ 1 sapota
- ▢ ½ papaya
- ▢ 2 tbsp cooked rice
Ingredients for 7 to 8 months baby food recipes 2 (refer notes)
- ▢ 2 tbsp rice or 2 tbsps ragi or wheat flour
- ▢ 200 ml water
- ▢ 1 small apple or banana
- ▢ 1/8 tsp ghee homemade (refer notes)
Ingredients for 8 months baby food recipes 3
- ▢ 1½ tbsp rice aged rice
- ▢ 1½ tbsp dal (toor or moong dal)
- ▢ 1½ tbsp carrots chopped
- ▢ 200 ml water
- ▢ 1/8 tsp ghee homemade
Ingredients for 8 months baby food recipes 4
- ▢ 2 tbsp rice
- ▢ 1 baby potato or 2 tbsp chopped
- ▢ 1 pinch carom seeds powder (ajwain powder)
- ▢ ¼ tsp ghee homemade
Making 6 months baby food recipes
- ▢
Make sure you follow the 3 day test rule for every food you introduce.
 Wait for the results until 4th day.
 - ▢
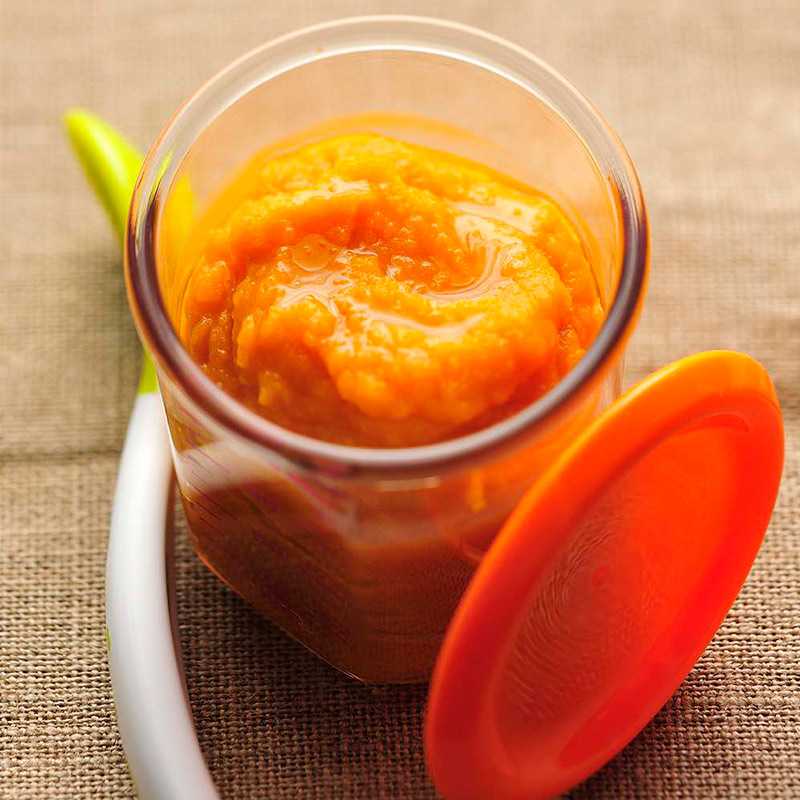
To make the baby food, Mash any one of the fruits – banana, papaya, sapota very well until smooth.
- ▢
If desired add it to a blender and puree until smooth. To thin down add a few spoons of boiled and cooled water. Fruit puree is ready.
- ▢
If using cooked rice, then puree together rice and any of the fruit – (banana, papaya, sapota or steamed apple) along with some boiled and cooled water. Fruit flavored rice is ready.
- ▢
You can also feed only steamed apple. Peel and chop the apples. Bring half cup water to a boil and add the apples to it.
- ▢
Cook until the apples are slightly tender just for a minute or 2. Cool and puree with rice or just the steamed apple. Apple puree is ready.
Making 7 months baby food recipes
- ▢
Wash rice and soak in water for at least 30 mins.
- ▢
Pressure cook on a medium flame for 2 to 3 whistles.
 You can also cook in a pot until soft.
 - ▢
Apple flavored rice cereal : When the pressure goes down, open the lid and add grated apple. Cover and cook for 2 to 3 mins. Cool and make a smooth puree. If needed add some boiled and cooled water. Add few drops of hot ghee. Apple flavored rice is ready.
- ▢
Banana rice cereal : Cool the rice completely. Add banana and rice to a blender and make a fine puree. Pour few tbsps boiled and cooled water if desired.
Making 8 months baby food recipes
- ▢
Wash rice and dal in a cooker or pot a few times until the water runs clear. Add grated carrots and pour water.
- ▢
Pressure cook for 2 to 3 whistles on a medium heat. If cooking in a pot add more water as needed.
- ▢
When the pressure goes down, using a masher mash the food to smooth. This is the stage you must be teaching you baby to eat mashed foods. Reduce feeding pureed foods. Add ghee to hot food and serve warm.
 Rice dal baby food is ready.
Making 8 months baby food recipes
- ▢
Soak rice until water runs clear. Soak for 30 mins and cook along with potato until soft for 3 whistles. Mash the rice well and add ghee. Feed warm. To prevent colic you can add a pinch of ajwain powder. Potato rice is ready.
The nutrition values are only for the banana flavored rice. These are approximations only.
Please follow 3 day wait rule for every food you introduce.
Alternative quantities provided in the recipe card are for 1x only, original recipe.
For best results follow my detailed step-by-step photo instructions and tips above the recipe card.
Nutrition Facts
Baby food recipes
Amount Per Serving
Calories 45
% Daily Value*
Potassium 105mg3%
Carbohydrates 10g3%
Sugar 3g3%
Vitamin C 2.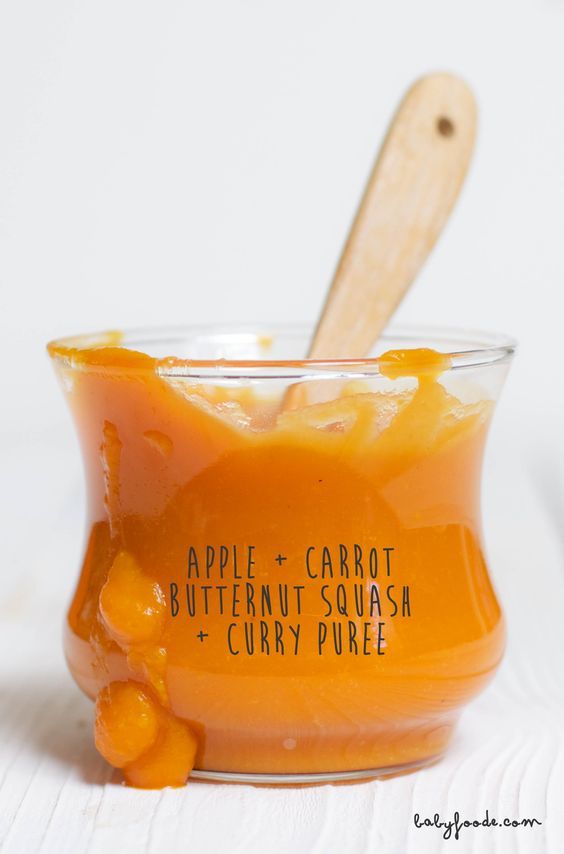 6mg3%
6mg3%
* Percent Daily Values are based on a 2000 calorie diet.
Tried this recipe?Mention @SwasthisRecipes or tag #swasthisrecipes!
© Swasthi’s Recipes
step by step
About Swasthi
I’m Swasthi Shreekanth, the recipe developer, food photographer & food writer behind Swasthi’s Recipes. My aim is to help you cook great Indian food with my time-tested recipes. After 2 decades of experience in practical Indian cooking I started this blog to help people cook better & more often at home. Whether you are a novice or an experienced cook I am sure Swasthi’s Recipes will assist you to enhance your cooking skills.
Follow Swasthi’s Recipes
Sign up to receive awesome Swasthi’s Recipes in your inbox *
Popular Recipes
Featured Recipes
Easy Homemade Baby Food in your Instant Pot
Jump to RecipeDid you know that you can make healthy, nutritious baby food right in your Instant Pot? Instant Pot Baby Food is a cost-effective and low-effort method for cooking nutritious meals for your baby at home.
My little munchkin is now almost eight months old. I started her off with pureed baby food that I made in the instant pot at about 6 months, and now slowly transitioned her to enjoy more textured food.
With my older one 6 years back, there was no instant pot, and I can say for sure that making baby food in the instant pot has saved me so much time.
Instant Pot Baby Food is a fantastic way to offer your baby a variety of nutritious foods while saving both time and money. In this post, I'll share how to make an array of stage 1 baby foods as well as a few ways to combine purees to please your little one's palate. If you're looking for more baby-friendly pressure cooker recipes, check out my post on how to make simple homemade yogurt in your Instant Pot.
Jump to:- Why make Homemade Baby Food?
- When to Give Baby Food?
- How to Offer Homemade Baby Food?
- What kind of veggies and fruits can you include for Stage 1 Baby Food?
- How to Use the Instant Pot to Make Baby Food
- What bowls can I use in the Instant Pot?
- Tips for Pureeing Baby Food
- Storing Baby Food
- Homemade Instant Pot Baby Food Blends
- Other Homemade Instant Pot Baby Food Recipes to Try
- What to Avoid When Making Baby Food in Instant Pot
- How to thaw and reheat frozen baby food?
- Instant Pot Baby Food
Why make Homemade Baby Food?
There are so many reasons to make your baby's food at home in your Instant Pot.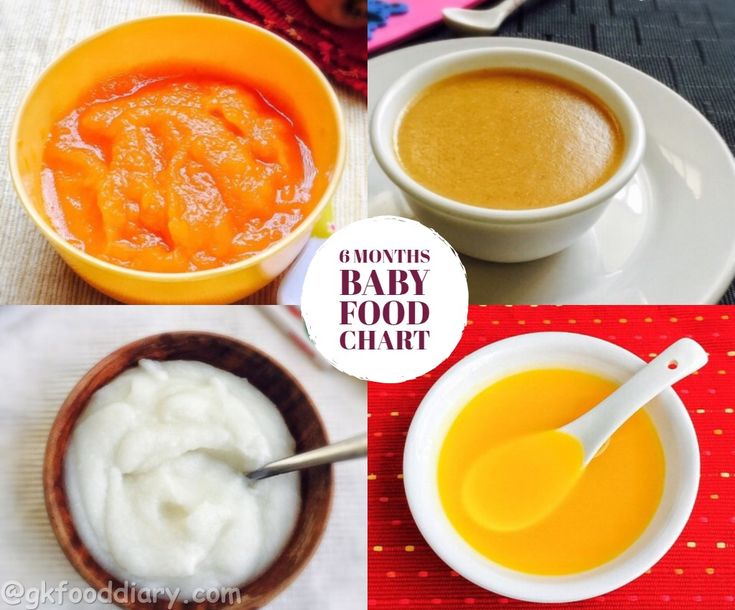 Not only will you save money (the price of those jars and pouches can really add up), but you'll be able to control the ingredients that go into your baby's food.
Plus, you'll be surprised at how many servings you can get from just one vegetable or piece of fruit, and if you plan well, you can make a big batch of baby food at a time, which will save you time in the long run.
When to Give Baby Food?
When your baby's pediatrician has given you the green light to begin letting your baby try solid purees it can be both an exciting and overwhelming time.
There's a lot of conflicting information on the web these days about when it's appropriate to begin feeding your baby solid foods and whether you should try baby-led weaning or purees. The most important thing to remember is that your baby is unique. It's best to make a decision that is right for your baby and your family.
If you do decide to follow the traditional route of feeding your baby purees, it's best to begin with thinly pureed vegetables and fruits. These are called stage 1 foods, and they're a great way to offer your baby new tastes and nutrients while teaching them the very early fundamentals of self-feeding.
As I mentioned earlier, I started off my daughter with purees (I did look at baby led weaning, but preferred to start with purees), then quickly transitioned to more textured foods.
How to Offer Homemade Baby Food?
My baby is now 8 months and I have been using the Instant Pot to make baby food. We started by introducing one new food at a time, making sure there are no allergies, then zing a new food every 2 days.
The biggest thing to remember when starting your baby on new foods is that you'll need to start slowly. Not only does this give your baby a chance to learn without overwhelming, but it also helps to identify potential allergens so that you can avoid those foods in the future and come up with an appropriate action plan in case your child would come into contact with those foods in the future.
To start offering your baby new homemade baby foods stage 1, start with one single puree at a time, waiting a minimum of 24-48 hours before trying a new puree. Keep an eye on your baby's skin to identify potential rashes, hives, or other changes that could indicate an allergy. Additionally, it's helpful to notice any changes in your baby's breathing or swelling inside his or her mouth.
When in doubt, contact your pediatrician if you are unsure of whether you're seeing something that could indicate a food allergy.
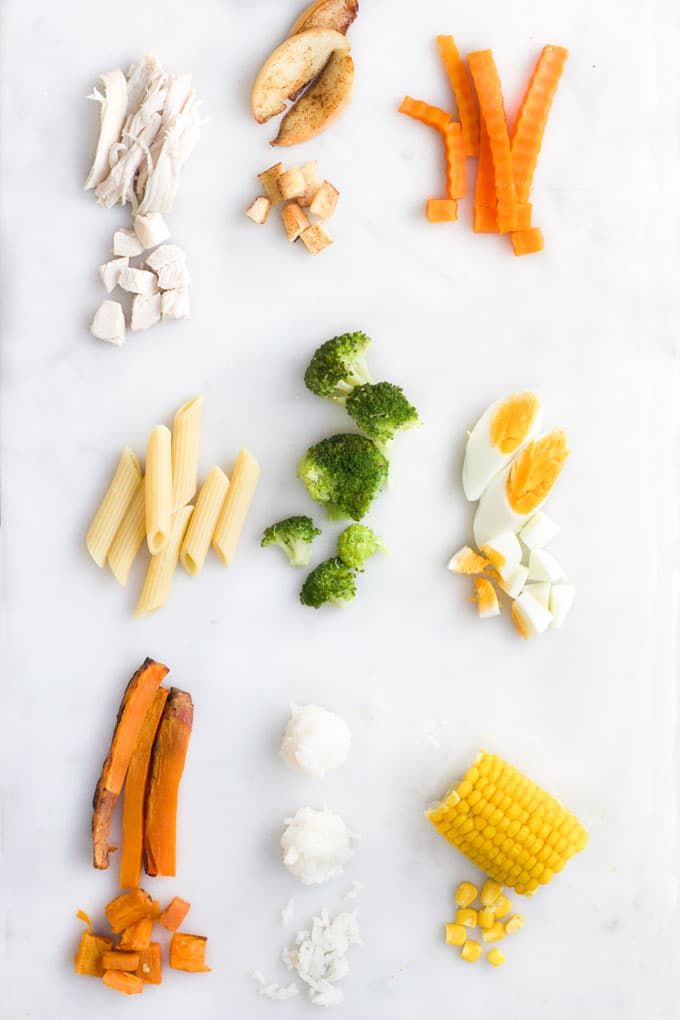
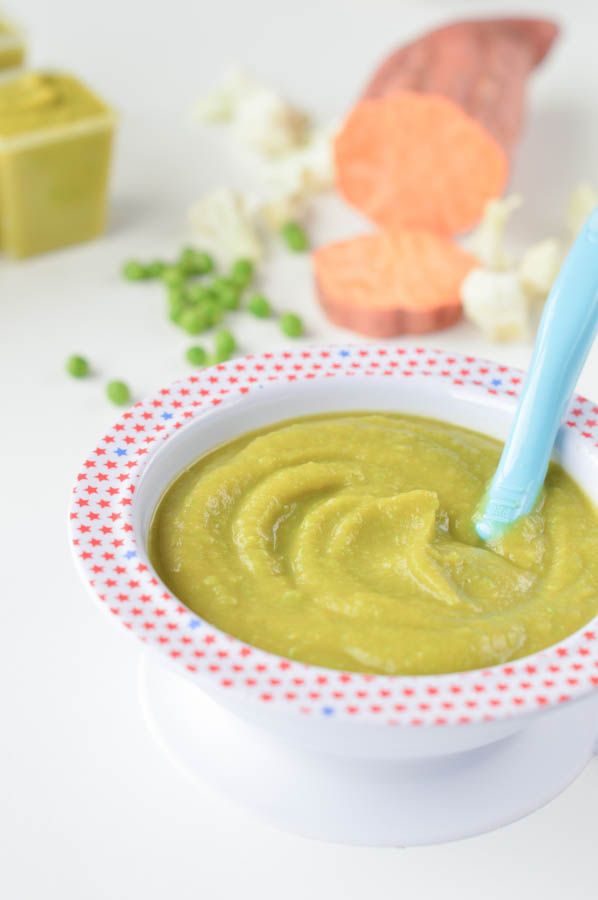
What kind of veggies and fruits can you include for Stage 1 Baby Food?
There are lots of options to start with when making stage 1 baby food recipes in the Instant Pot. Here are some ideas:
- carrot
- squash
- peas
- sweet potato
- apple
- pear
- green beans
- broccoli
- zucchini
- beets
- peaches
How to Use the Instant Pot to Make Baby Food
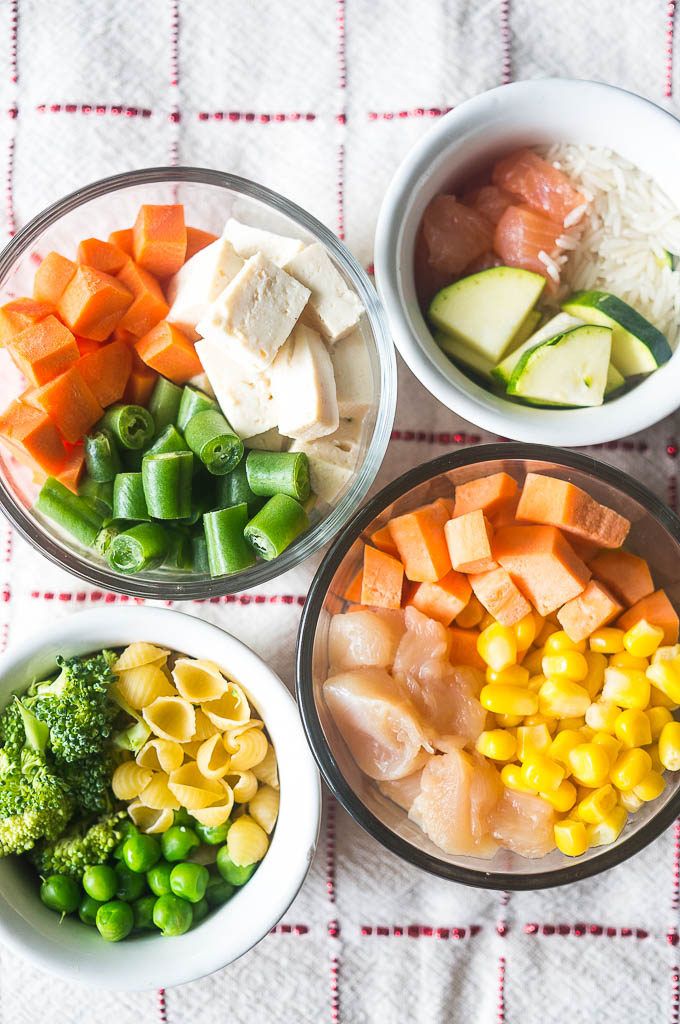
- Dice your choice of fruits and veggies into small, uniform pieces.
- Pour 1 cup water into your Instant Pot's steel insert, then place a low trivet in the bottom. Place 4 ramekins (or other oven safe bowls) filled with the diced fruits & veggies on the trivet.
- If there is space, repeat with a second layer of ramekins. You can also add a separating steamer basket between the 2 layers. Close the lid and set the vent to the sealing position. Cook on high pressure for 5 minutes. When the instant pot beeps, let the pressure release naturally.
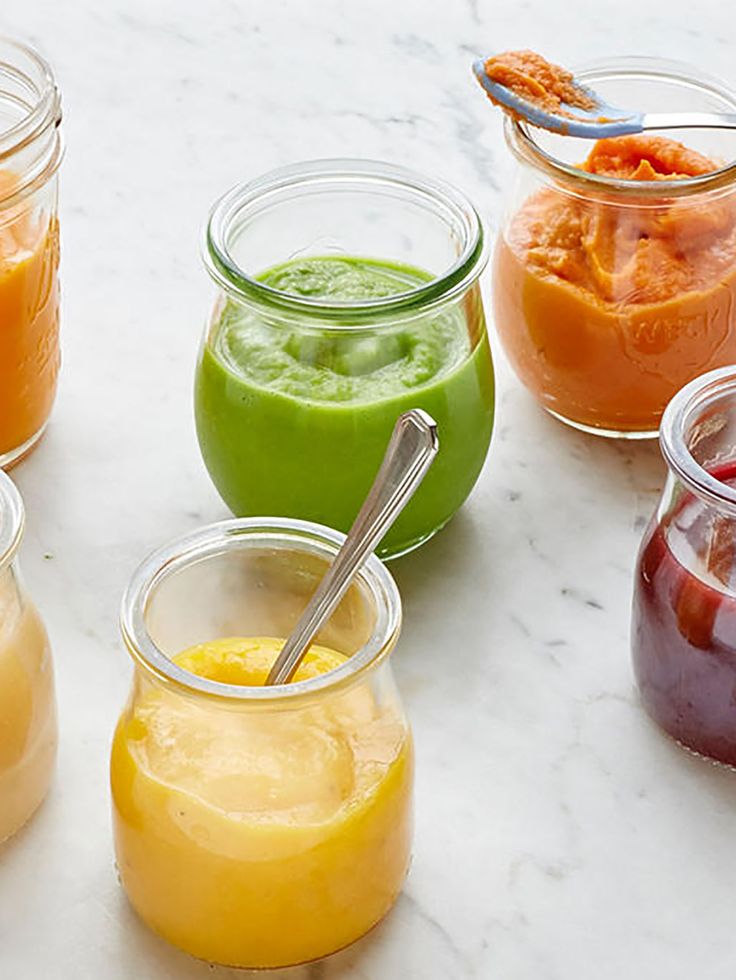
- Remove the bowls with fruits & veggies carefully. Puree each ramekin separately to the desired consistency, then store as directed.
What bowls can I use in the Instant Pot?
It is recommended to use oven-safe bowls such as these ramekins in the instant pot for pot-in-pot cooking as shown above. I also like to use small steel bowls for cooking in the instant pot.
Learn more about the instant pot pot-in-pot method with this comprehensive guide!
Tips for Pureeing Baby Food
- Some purees are thicker and some thin depending on the water content of the fruit or vegetable.
 For example, sweet potatoes will render a much thicker puree while pureed zucchini is much thinner and more watery.
 - It is best to add the least amount of water needed when pureeing so that you can add breastmilk or formula or water when serving as needed.
- Use a Baby Bullet, small blender, or food processor to blend the veggies and fruits.
Storing Baby Food
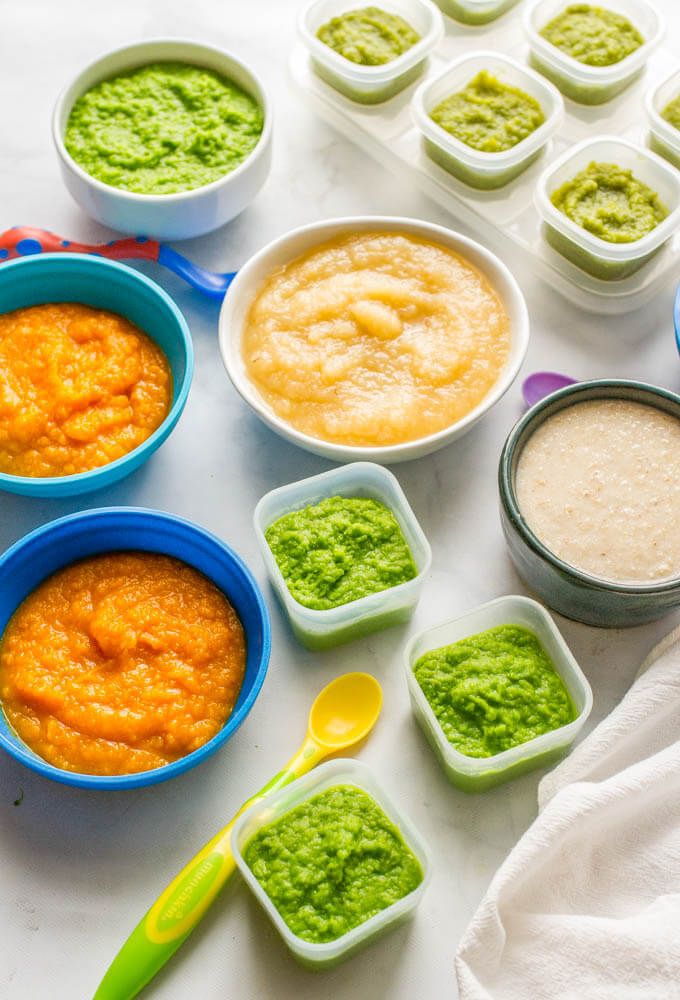
You can store your homemade Instant Pot Baby Food in the fridge or freezer. Follow these guidelines for storing baby food safely:
- In the fridge: Baby food should be stored in the fridge in an airtight container with a lid. I like to use small glass containers with lids for individual portions. It's easy to see what's inside each container and I can quickly grab a portion of baby food out of the fridge when I'm in a hurry.
- In the freezer: Spoon purees into ice cube trays, then cover and freeze for at least 24 hours. When the baby food is frozen, pop the cubes out of your ice tray and place them into zip lock baggies labeled with the type of food and the date the food was cooked.
 Frozen baby food will stay fresh for up to 3 months.
Homemade Instant Pot Baby Food Blends
You can also play with blending two or more flavors of purees to mix up your baby's meals. Here are some flavor pairings that go well together:
- Apple & carrot or butternut squash
- Squash and peas or green beans
- Pear & zucchini or apple & zucchini
- Sweet potato & apple
- Beets and butternut squash
Again, you can always add breast milk or formula to your homemade baby food purees for added liquid, fat, and nutrients. You can also add a small amount of unsalted butter to starchy foods like sweet potato & white potato for a little added flavor & fat.
Other Homemade Instant Pot Baby Food Recipes to Try
After working your way through the list above, you can start to play around with different blends, flavors, and textures.
To add a little excitement to your baby's pureed apples, try my 4-ingredient Instant Pot Applesauce recipe.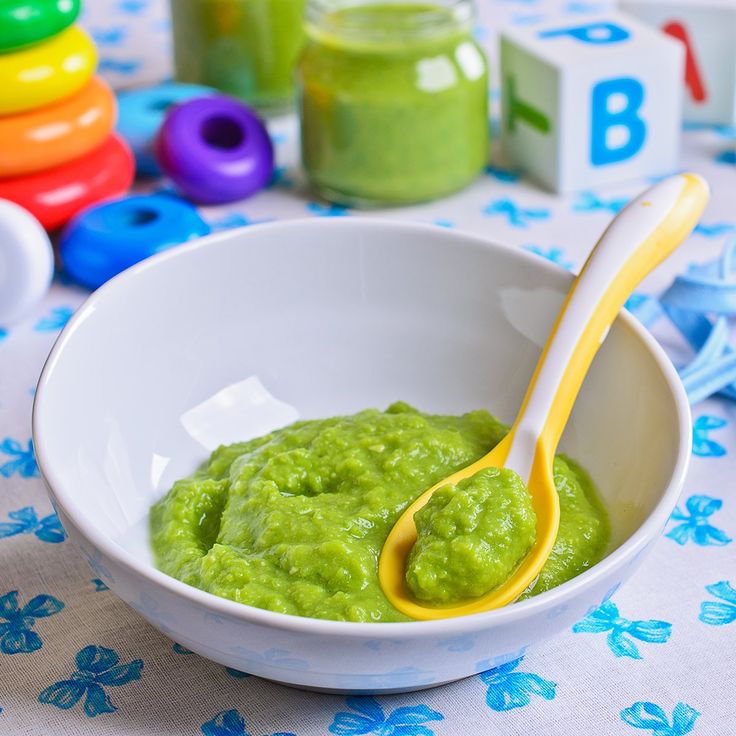
You can also do potatoes as long as they are boiled to soft, then mashed or whipped with enough liquid to make them smooth. Check out my tutorial for boiling potatoes in the Instant Pot, and try adding a little breast milk or formula to get a smooth consistency.
Tip for making potato baby food: Keep in mind that you should be careful not to over-process your boiled potatoes, or they will turn into a glue-like paste. I recommend mashing them by hand or with an electric hand mixer rather than placing them in a blender or food processor.
Another great option is lentils, but be sure to puree them first before feeding them to your baby. He or she might not be ready for whole lentils even if they are cooked super soft.
Finally, you can also feed your baby pureed soups as long as they are not spicy.
What to Avoid When Making Baby Food in Instant Pot
While it might be tempting to season your baby's food, especially when making purees, it's best to wait until your baby is a little older before introducing any additives other than breast milk, formula, or a little added butter during cooking.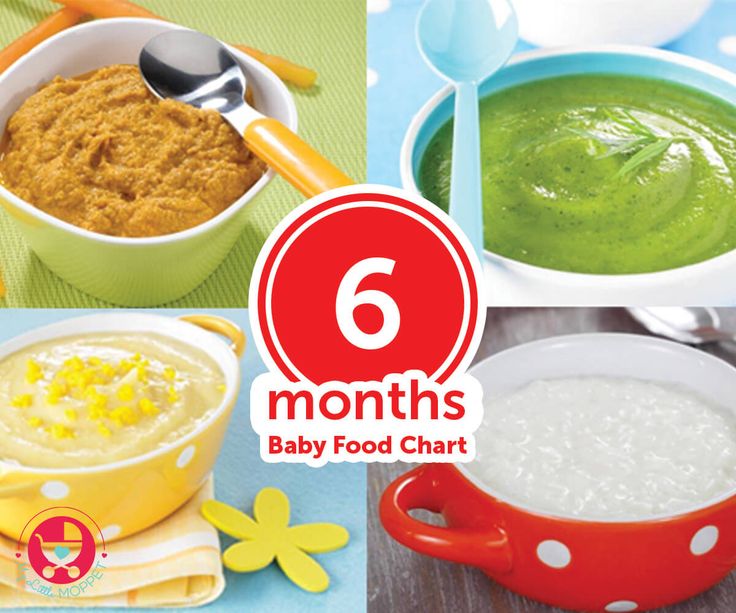
Remember that babies have sensitive tummies and their digestive systems may not be ready to handle things like chili and other spicy substances. Skip the salt & pepper too - they're unnecessary during infancy.
It is also best to avoid sugar and especially honey, as it can cause serious food borne illness in babies under 1 year of age.
How to thaw and reheat frozen baby food?
Take out as many cubes of food that the baby will eat within 1-2 days (do not refreeze thawed food). Thaw then in an airtight container (I prefer glass containers) and let them thaw in the refrigerator.
You can also microwave the food in the container or transfer to a small pan to warm on the stovetop. Make sure to stir the food well and check that the temperature is right before serving to the baby.
Hope you enjoy the benefits of making baby food in your instant pot!
Tried this recipe?Give a rating by clicking the ★ below
Instant Pot Baby Food
Meeta Arora
Did you know that you can make healthy, nutritious baby food right in your Instant Pot? Instant Pot Baby Food is a cost-effective and low-effort method for cooking nutritious meals for your baby at home.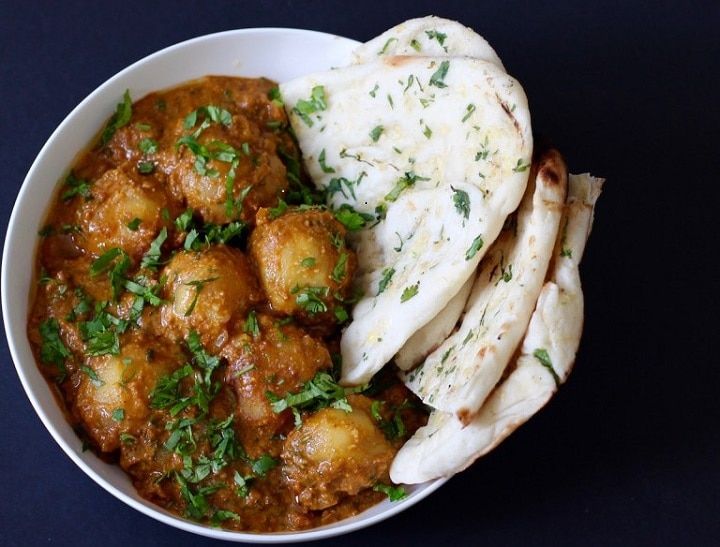
4.87 from 15 votes
Servings: 10
Calories: 26
Course: Main Course
Cuisine: American
Diet: Vegetarian
Method: Instant Pot/Pressure Cooker
Prep Time: 10 mins
Cook Time: 20 mins
Total Time: 30 mins
Instant Pot/Pressure Cooker
Ramekins
- ▢ ½ cup Carrot peeled and diced
- ▢ ½ cup Squash
- ▢ ½ cup Green peas frozen
- ▢ ½ cup Sweet potato peeled and diced
- ▢ ½ cup Apple diced (you can leave the peel on or remove it)
- ▢ ½ cup Pear diced (you can leave the peel on or remove it)
- ▢ ½ cup Green beans trimmed and diced
- ▢ ½ cup Broccoli diced
- ▢ ½ cup Zucchini chopped
- ▢ ½ cup Beets peeled and diced
Pour 1 cup water in the instant pot steel insert.
 Place a low trivet in the bottom.
Place 3-4 ramekins (or other oven safe bowls) filled with the diced fruits & veggies on the trivet.
If there is space, you can repeat with a second layer of trivets. You can also add a separating steamer basket between the 2 layers.
Close the lid with the vent in sealing position. Press the manual or pressure cook mode on high pressure for 5 minutes. When the Instant Pot beeps, let the pressure release naturally.
Remove the bowls with fruits/veggies carefully. Puree each food separately to your desired consistency, then refrigerate or freeze.
Tips for Pureeing Baby Food
- Some purees are thicker and some thin depending on the water content of the fruit or vegetable. For example, sweet potatoes will render a much thicker puree while pureed zucchini is much thinner and more watery.
- It is best to add the least amount of water needed when pureeing so that you can add breastmilk or formula or water when serving as needed.
- Use a Baby Bullet, small blender, or food processor to blend the veggies and fruits.
Storing Your Homemade Instant Pot Baby Food
- In the fridge: Baby food should be stored in the fridge in an airtight container with a lid. I like to use small glass containers with lids for individual portions. It's easy to see what's inside each container and I can quickly grab a portion of baby food out of the fridge when I'm in a hurry.
- In the freezer: Spoon purees into ice cube trays, then cover and freeze for at least 24 hours. When the baby food is frozen, pop the cubes out of your ice tray and place them into zip lock baggies labeled with the type of food and the date the food was cooked. Frozen baby food will stay fresh for up to 3 months.
Note: Nutrition facts are for 1 cup of carrots only.
Note: Nutrition values are my best estimates. If you rely on them for your diet, use your preferred nutrition calculator.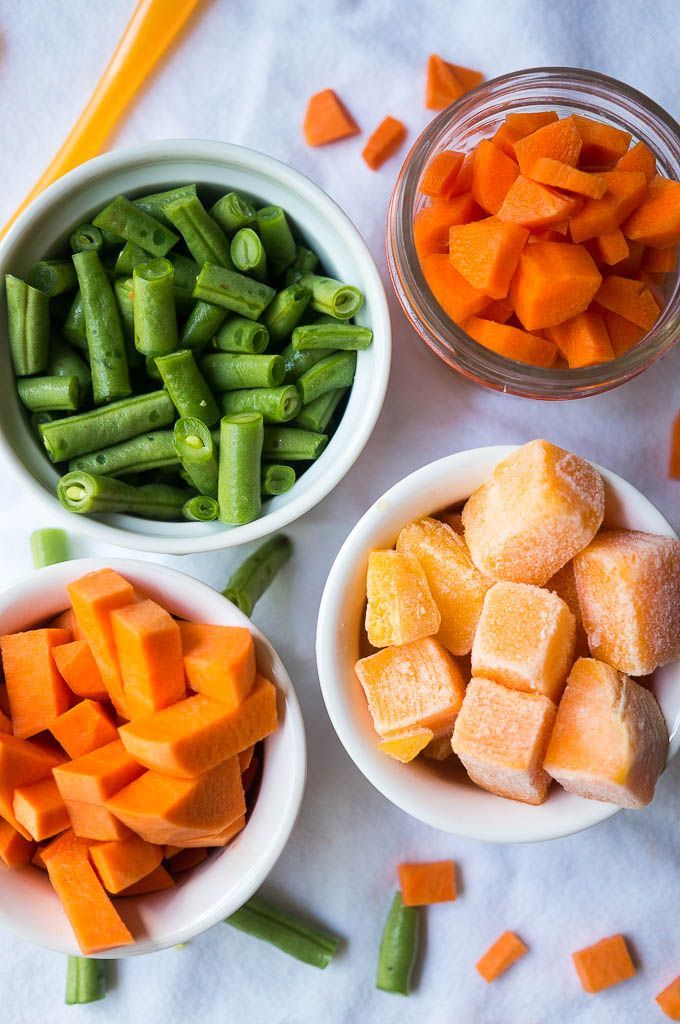
Calories: 26kcalCarbohydrates: 6gProtein: 1gFat: 1gSaturated Fat: 1gSodium: 44mgPotassium: 205mgFiber: 2gSugar: 3gVitamin A: 10692IUVitamin C: 4mgCalcium: 21mgIron: 1mg
Keyword baby food instant pot recipes, instant pot baby food
Tried this recipe?Share your photo and tag @PipingPotCurry or #pipingpotcurry
317 rub. food delivery in the Kurortny district from the supermarket Repinsky 24
home / Supermarket goods / Tea coffee / Black tea
Available
Add to cartAdd more
Product code: 4620770580548
Brand: Tiaton.
Country: Russia .
Similar items
- Product code: 4607051159945 Per PCS Tea Richard "Royal Ceylon" black (100 bags) 312
Order
- Product code: 4680014031113 Per PCS Tea Richman Classic "Assam", black large leaf, 100 g 367
Order
- Product code: 4620770580555 Per pack Thiaton tea with thyme 25 bags 317
Order
- Product code: 4792252100060 Per PCS Black tea Basilur Uva 100g 379
Order
- Product code: 4607003042660 Per PCS Black tea Svay Black Ceylon 20pir 290
Order
checkout
Do you eat this? 7 facts about the Indian cucumber
Buying an ordinary jar of pickled cucumbers, you almost always unconsciously join the South Asian culture - of course, vegetable. The point here is not even that the historical homeland of the cucumber is India, but that inside eight out of ten jars are vegetables grown in Hindustan. By the way, the rolling study of Roskachestvo indirectly confirmed this statistic. An impressive part of the test participants was produced in India, a large proportion was pseudo-Russian products repackaged from Asian raw materials. Such products, of course, have many advantages: they are usually cheaper and look more aesthetically pleasing. Nevertheless, Roskachestvo recommends paying attention to the domestic manufacturer. The arguments are purely practical.
Russian manufacturer holding back enormous pressure
Today, the share of Indian (to a greater extent) and Vietnamese (to a lesser extent) cucumbers in the Russian market reaches 80–85%. Neither the current economic situation nor the dollar exchange rate, which pays for imports, affected these figures in any way. Almost all pickled and pickled cucumbers made in India are exported, the country itself practically does not consume them.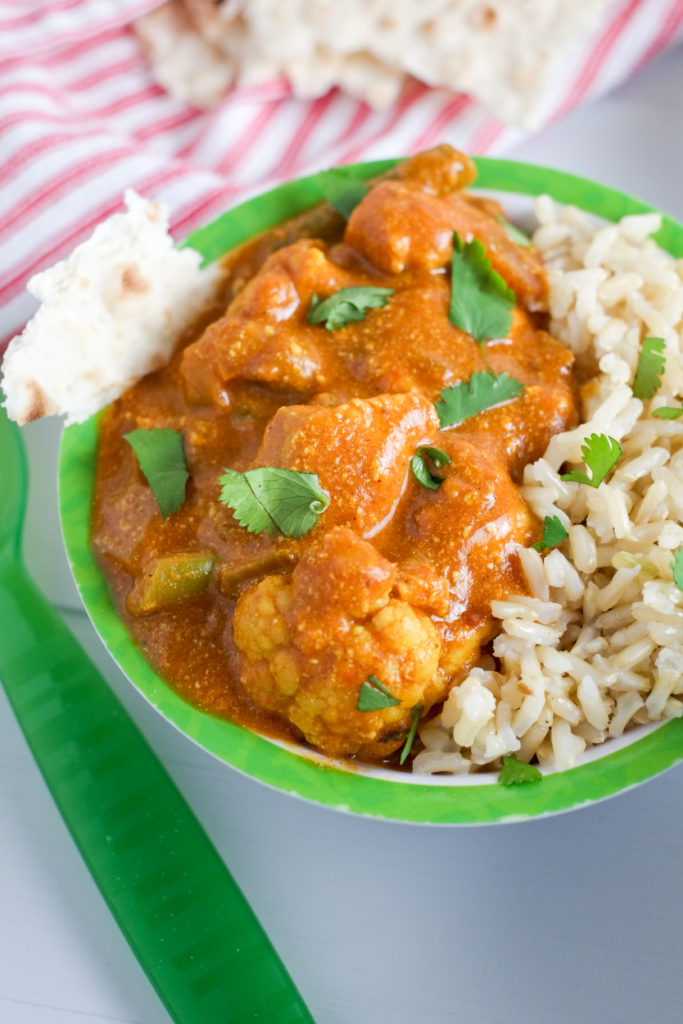 The first place in terms of imports is occupied by Russia, followed by Western countries: Canada, USA, France, Germany. Today, the domestic cucumber is in a very difficult situation, it is hardly fighting at least for the market of its country.
The length of a cucumber depends on the cheapness of labor
The most obvious difference between a Russian cucumber and an Indian one is its size. In our country, cucumbers less than 6 centimeters long are practically not harvested, this is difficult to do even from a technological point of view: planting and picking cucumbers cannot be automated. Huge human resources and low labor costs in India make it possible to effectively "comb" the beds in the very early morning and pick vegetables 1-3 and 3-6 centimeters long. Minors are often involved in the process of collecting and working in factories. This work is very difficult and, in the case of India, it is regular. The climate of the country allows you to collect 3-4 crops per year.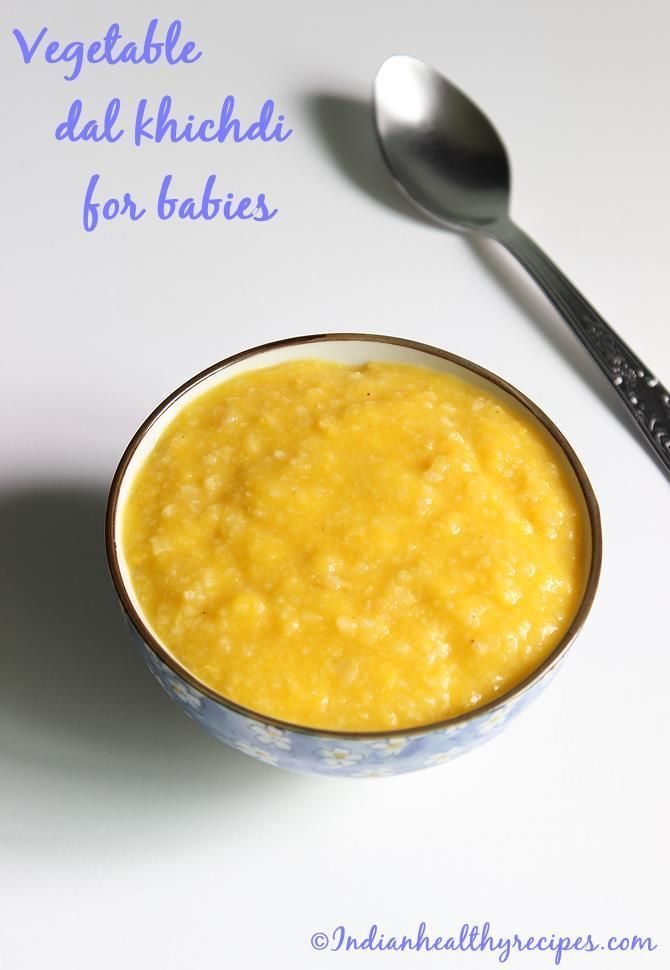 In other words, with the exception of two months of the year (May and August), the “cucumber season” continues.
Indian Manufacturing Priority - Ensuring Quantity
The process of harvesting cucumbers in India, unlike in Western countries, is not complicated by automation and the use of advanced technologies. After the picking and delivery of cucumbers for processing, the calibration process begins (it must be said, it is quite accurate). Next, the vegetables are washed, and some of them are sent for packing in jars. Such Indian products are of higher quality, but their deliveries to Russia cannot be called large-scale. Most of the raw materials are dumped directly from the conveyor belt into large plastic drums. In them, cucumbers are immediately poured with a deep vinegar solution and sent to the so-called settling tanks, where the pickling process takes place. Within a couple of weeks, the barrels are moved to a “warehouse”, which is usually the yard of the enterprise, and after that the products are sent for further packaging to Russia, the USA and European countries.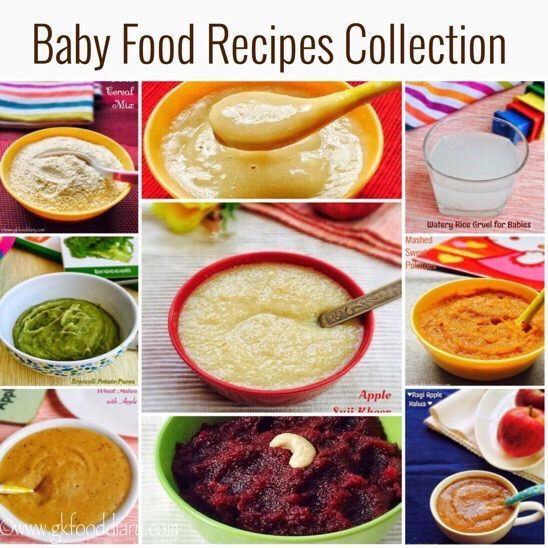
A barrel travels thousands of kilometers
Clogged to the eyeballs barrels are sent to Russia by various transport routes. It usually takes more than 30 days for the cucumber barrel to reach our country. During this time, pickled vegetables, repeating the feat of Afanasy Nikitin, must overcome half the globe. During transit, the cargo crosses 3 climatic (from subequatorial to moderate) and 3-4 time zones. In order for the products to reach their destination, vegetables are transported in concentrated acetic acid, which prevents cucumbers from spoiling during a long journey.
Cucumber undergoing chemical treatment
A strong acid solution is a kind of "armor" for products: it protects cucumbers from the effects of an aggressive environment. But it is impossible to immediately eat Indian cucumber. In order to bring down the sour taste, Russian repackers soak vegetables for 1-2 days or wash them with running water. Regardless of the approach, as a result, the cucumber loses the remains of nutrients and color. It is important to understand that the cucumber is 95% consists of water and 5% of other substances, including useful ones. After active flushing, the last percentage begins to tend to zero. In addition, after these procedures, the vegetable looks extremely unappetizing: it turns into a soft whitish cylinder. It is impossible to sell a cucumber in this form, and it is brought "in shape" with the help of dyes, sometimes chemical ones, and seasoned with calcium chloride. The first substances give the semi-finished product color, the second ones make it harden and endow it with a crunch. There is very little natural in such a cucumber. After that, the product is poured with an already weaker marinade, spices are poured into it, a label is glued and sent to distribution networks.
Indian cucumber often pretends to be Russian
Only a small part of Russian manufacturers, when labeling their products, indicate information about its Indian origin. A certain category of domestic enterprises prefers to disguise Indian products and label them as "made in Russia".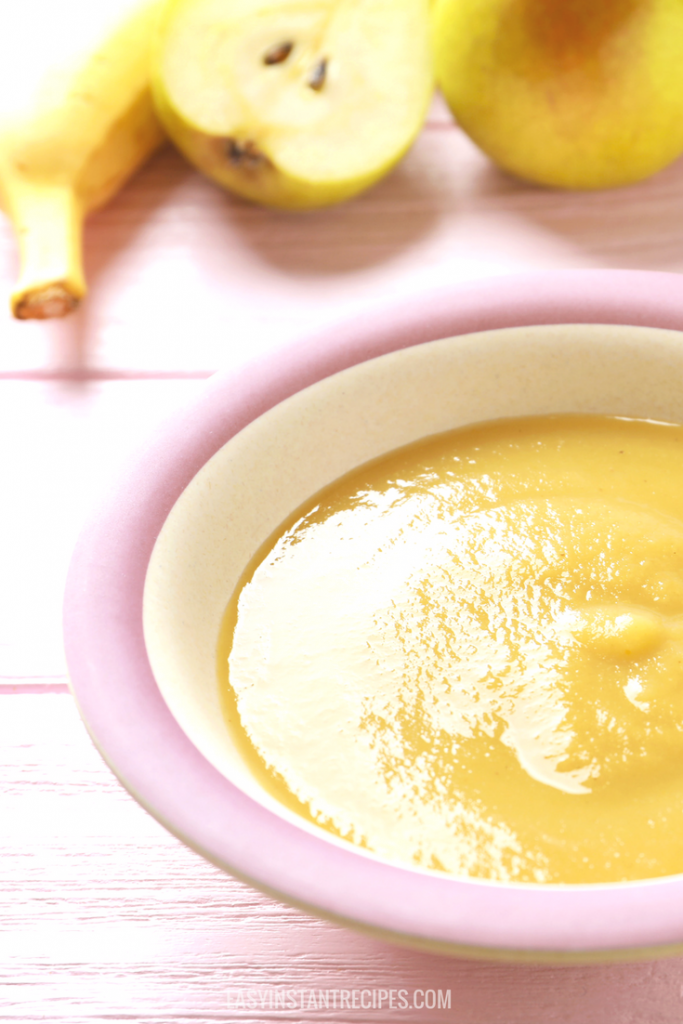 This practice is popular for two reasons. First, local origin increases sales. Secondly, it is impossible to reliably determine the geography of a cucumber even with the help of laboratory test . Pseudo-Russian products can be identified by some indirect signs: the length of an Indian vegetable, unlike a Russian cucumber, can be 1-4 centimeters, and the date of production of truly domestic products cannot fall on December or, for example, February.
The fact is that the industrial harvest of cucumbers in our country is limited to the period from July to September, more precisely, from mid-June to mid-August, but under good weather conditions - until September. And everything that is produced outside this period is most likely an Asian semi-finished product.
They don't taste better
The production chain for the production of Russian cucumber is much shorter; it does not require multiple conservation and artificial methods to correct external product defects.