Mixed vegetable baby food recipe
Mixed Vegetable Baby Food Recipe – Little Mashies
Why is potato a great baby food choice for reusable food pouches?
Potato is probably the most popular vegetable on the planet. You can add it to puree mixes of other vegetables and meat, or serve it on its own as a finger food down the track. It's one of those foods that is a great filler to bulk up meals and make them more substantial. Don't get stuck serving it just one way. Remember you can bake it before you puree it, you can stir fry it (with a healthy oil or water), you can steam it or mash it or even grate it!
Ingredients:
2 potatoes, peeled and diced
1 zucchini
1 cup cauliflower
Instructions:
Step 1: Cut vegetables into small pieces
Step 2: Steam the diced vegetables in a stovetop steamer or a Beaba Baby Cook system.
Step 3: Puree the vegetables in a food processor or blender, using a little of the cooking liquid to get a desired smooth consistency (usually 1-2 tablespoons). You can also use breast milk or formula to mix with the puree.
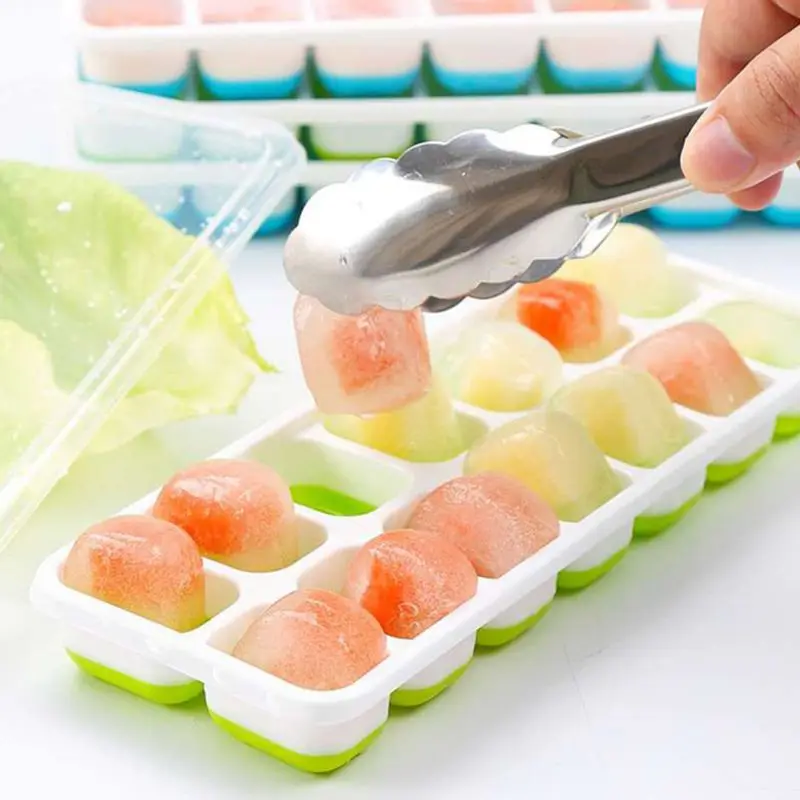
Step 4: If preparing your baby food recipe in bulk freeze the puree into ice-cube trays or spoon it straight into Little Mashies reusable food pouches and then store them in the fridge or freezer. For instructions on how to fill a refillable pouch you can read our blog. For info on how long to freeze specific baby foods for we have the information here. To heat food inside Little Mashies reusable pouches, simply run the pouch under a stream of warm water.
Step 5: Label and date your homemade pouches so that you know when to use the puree by. There is a space on the back of the Little Mashies yoghurt and baby food pouches so that you can write all the details.
Step 6: To clean your reusable food pouches you can check out our Little Mashies video here. Little Mashies are see through when held towards light, so it is very easy to see that all of the food is washed out. Because of the specifically designed curved shape, all of the food washes straight out when held upside down under a tap. Little Mashies can also be used in the dishwasher and steam sterilisers, and are BPA free, Phthalate Free, and PVC free.
Here is a selection of recipes from our bestselling Baby Food Recipe Book (see video flick through here). Right now, you can use the coupon code RECIPE to remove 100% of the price of the digital version (save $19.95). Simply add it to cart, apply the code, and pop in your details as though you were a paying customer. We only ask that if you have time after using our book could you please leave us a review. Thanks so much in advance!
For Baby Led Weaning and Older Kids
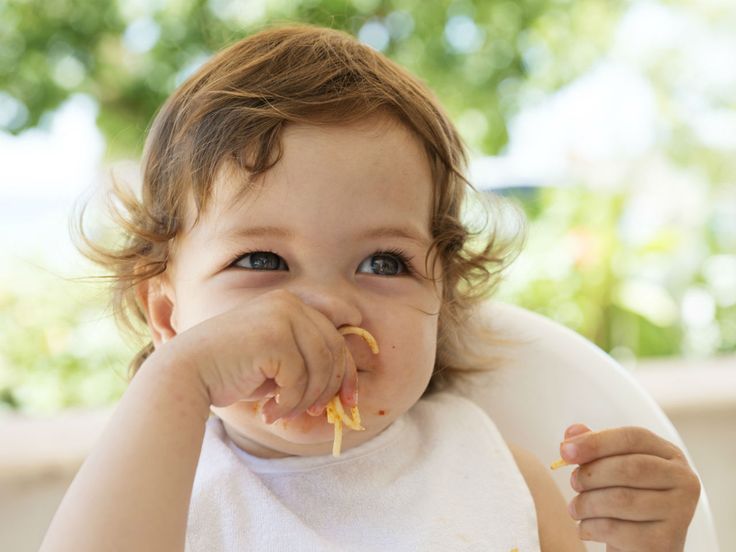
For baby led weaning you skip the baby food puree altogether and start with large (2 finger sized) pieces of the food. We would of course do this on our Little Mashies sucky platter! So from 6-9mths of age in baby led weaning foods should be the size of about 2 fingers so that the baby can pick it up and self feed.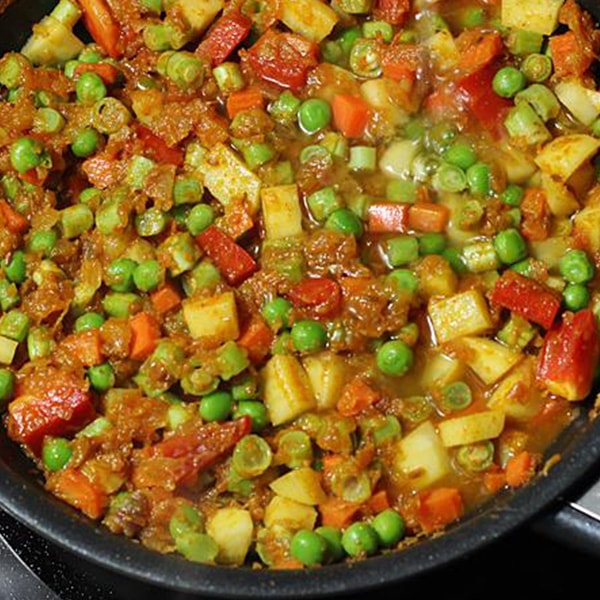 They also need to be well cooked so they are soft, and with no loose pieces (for example tiny florets that can break off on broccoli, or a slice of apple that's so thin it can break when gnawed on).
From around 9mths with baby led weaning you chop the food very small (to avoid choking). I would suggest 2-4 grains of rice in size. It's a small piece so that if they swallow it whole they won't choke. In traditional baby food recipes this is the stage where we mash food so it has a little texture. At around 12mths of age in baby led weaning the food goes up to bite sizes (and this is the same in non baby led weaning kids), about fingernail sized pieces. Of course some babies will be on a different timeline depending on whether they have heaps or a few teeth. Every baby is different and you just have to watch carefully and get to know how your baby is with food. Never leave them alone whilst eating, and I also recommend sitting them at a table with you for all meals if you can. It helps set the expectation for later in life and you can be a role model for how to eat well.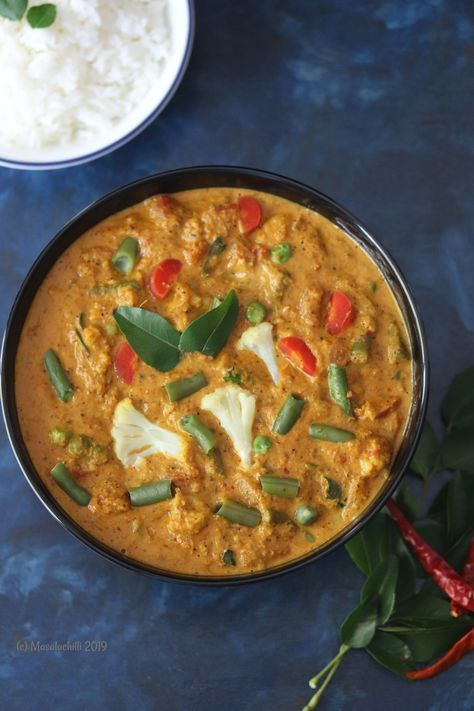 Around 18mths you can offer your little one larger serves again (so a whole apple for example) so that they can learn to take smaller bites themselves, to chew, and to swallow.
Little Mashies reusable food pouch reviews
Great Product!
POSTED BY CARLIE
Ticks all the boxes... firstly, the ziplock is SUPER strong, something I have been failed by in the past with similar items. It's a good size for toddler yoghurts etc, and its bright green appearance and 'little mashie' makes it pretty cool :) ! Thanks!
Very happy
POSTED BY KENDELLE
Had my little mushies for a week now & loving them so easy to clean. Perfect for the preschool lunch box :)
Fantastic!
POSTED BY A CUSTOMER
It's great to be able to pack easy to eat, healthy snacks that the kids love without the wasteful packaging. We so far have used them for yoghurt in lunch boxes. Look forward to using them for home made baby food when bubs is big enough for that.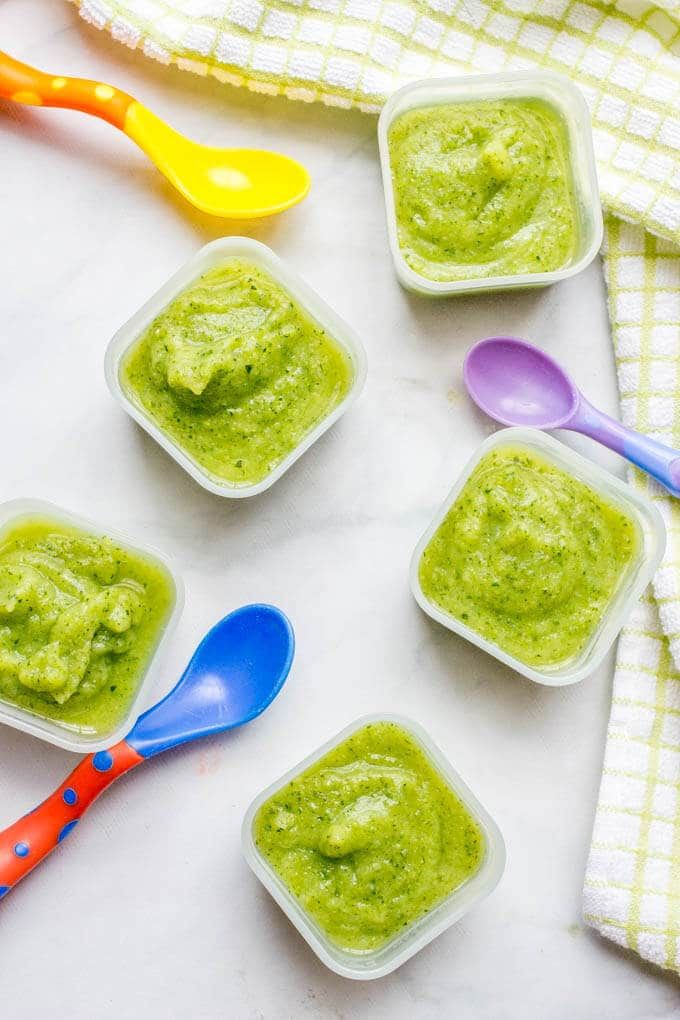
Reusable Baby Food Pouches 10pk
$35.95
Little Mashies Reusable Yoghurt Pouch Boho 10pk
$35.95
Sippy Cup (4 in 1)
$29.95
Little Mashies Bento Lunchbox
$49.95
View all
57 products
Simply add it to the cart, pop in the coupon code, and it will remove 100% of the price.
At 6 mths of age you can introduce a range of puree's to your baby (see our baby food recipe book and use coupon code RECIPE to remove 100% of the price at the checkout).
For baby led weaning you skip the baby food puree altogether and start with large (2 finger sized) pieces of the food. We would of course do this on our Little Mashies sucky platter! So from 6-9mths of age in baby led weaning foods should be the size of about 2 fingers so that the baby can pick it up and self feed.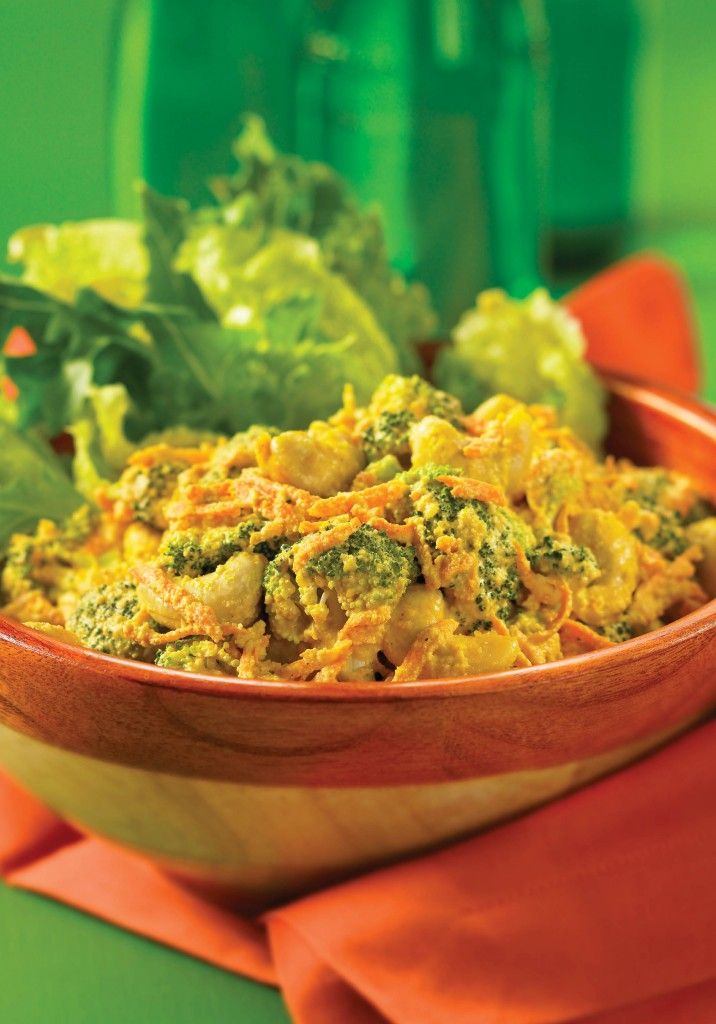 They also need to be well cooked so they are soft, and with no loose pieces (for example tiny florets that can break off on broccoli, or a slice of apple that's so thin it can break when gnawed on).
From around 9mths with baby led weaning you chop the food very small (to avoid choking). I would suggest 2-4 grains of rice in size. It's a small piece so that if they swallow it whole they won't choke. In traditional baby food recipes this is the stage where we mash food so it has a little texture.
At around 12mths of age in baby led weaning the food goes up to bite sizes (and this is the same in non baby led weaning kids), about fingernail sized pieces. Of course some babies will be on a different timeline depending on whether they have heaps or a few teeth.
Every baby is different and you just have to watch carefully and get to know how your baby is with food. Never leave them alone whilst eating, and I also recommend sitting them at a table with you for all meals if you can.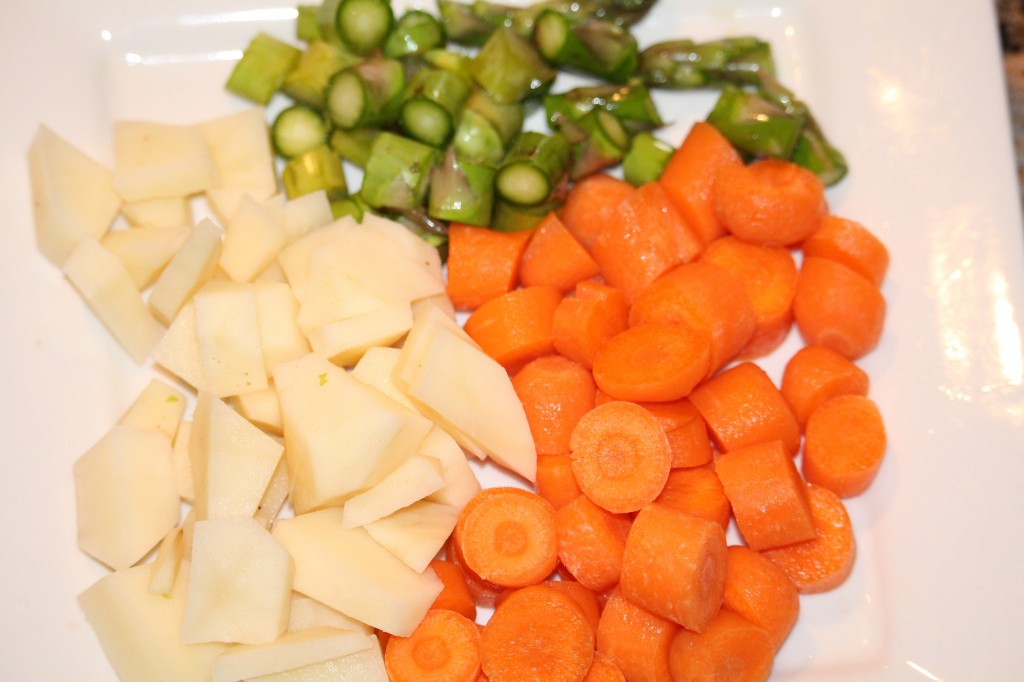 It helps set the expectation for later in life and you can be a role model for how to eat well. Around 18mths you can offer your little one larger serves again (so a whole apple for example) so that they can learn to take smaller bites themselves, to chew, and to swallow.
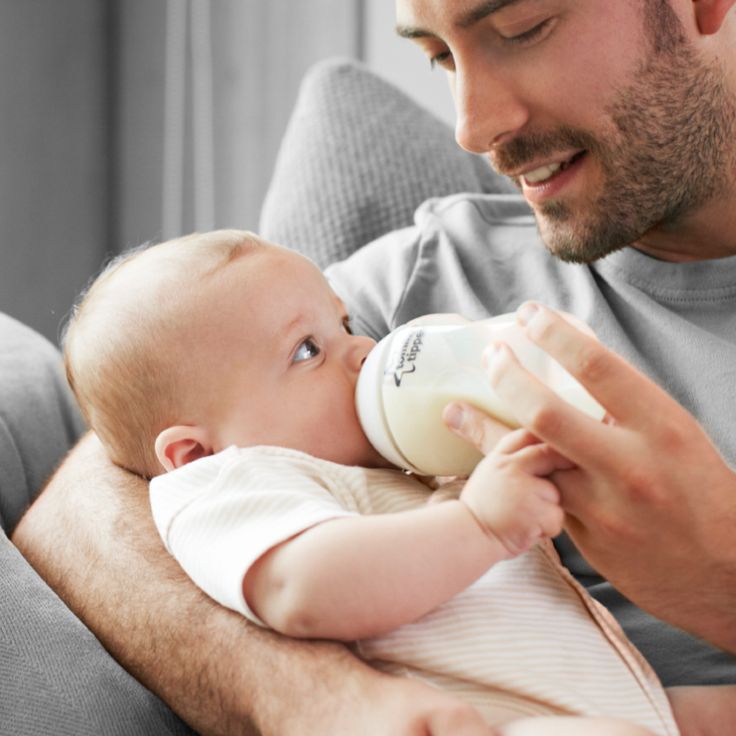
It is widely recognised that babies should start solids around 6 months of age. At this time reusable baby food pouches can be really convenient to take your homemade healthy puree with you when you are out and about. Spoon attachments are available so you can feed your baby directly from the pouch from 6 months old. Without a spoon attachment babies usually start feeding themselves pouched food around 8 months old. This is when they hit their independant phase and what to do everything themselves. A pouch is a lot cleaner than a bowl and spoon in these circumstances. We do however advise that you give your baby a variety of meals, not just ones that are in a refillable pouch.
Refilling your reusable yoghurt pouches is easy! Simply turn the reusable food pouch upside down and open the wide double ziplock at the bottom of the pouch.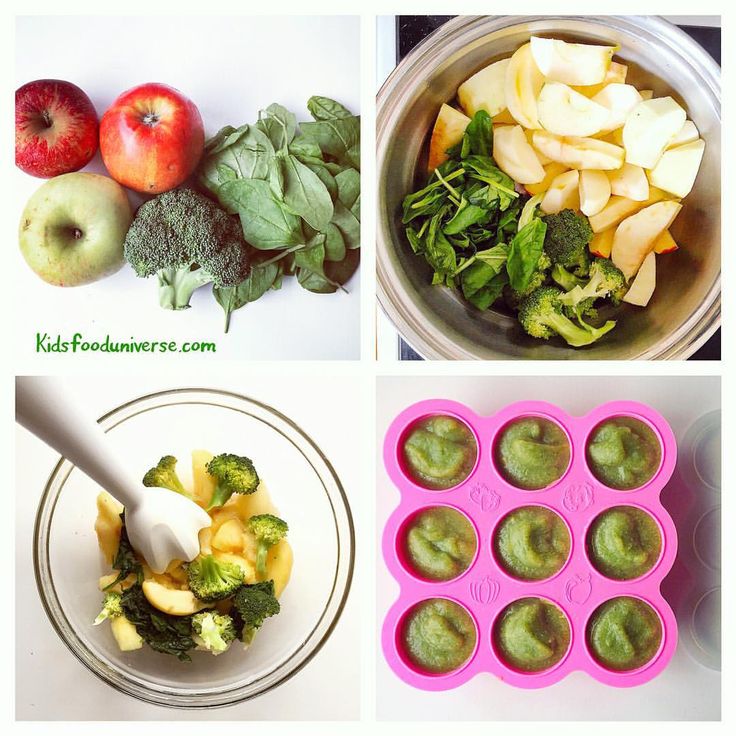 Once the zipper is open you can spoon yoghurt into the pouch or pour it in (out of a jug or bottle).
If you are concerned about making a mess you can use a kitchen funnel so that all of the yoghurt stays away from the yoghurt pouch zipper.
Another idea that we commonly do at home when filming videos (but it would also be useful when holding a baby in one arm), anyway.. the idea is that you put the pouch upside down in a glass (with the lid on), open the ziplock and the glass acts like a second hand, holding the pouch still whilst you spoon the yoghurt in. This is what I do when I only have one hand to use for the refill!I also tend to refill my reusable yoghurt pouches in bulk. I'll buy a good quality yoghurt from Coles or Woolworths and will fill a whole 10pk of pouches in one go so they are all ready for snacks on the go.
My kids always want to eat when they are out and refilling the reusable pouches one at a time just doesn't work for us. The only time i do that actually is when I've pureed a meal that my toddler refused, put it in a reusable pouch, and given it to her again. Oh and the other time I do singles.. there are two actually. When we go for ice-cream (it is so much cleaner when in a pouch), and when I have leftover smoothie (again, it stops me getting smoothie all through my car, pram, or playroom).
Little Mashies refillable yoghurt pouches are compatible with pouch filling machines that are on the market. Our spout is universal so even though we don't think you need a filling machine, our reusable pouches will fit. All of our yoghurt and baby food pouches come with anti-choke lids as standard.
Cleaning reusable baby food pouches is easy! We have designed Little Mashies refillable yoghurt pouches without corners so there are no places for food to get stuck (we would hate your little one to get sick from old food stuck in corners)!
When you open the ziplock you can see all the way through the pouch to ensure it is clean. If you have a dishwasher you can clean the pouch using that, otherwise you can wash your reusable baby food pouches by hand and this takes around 20 seconds.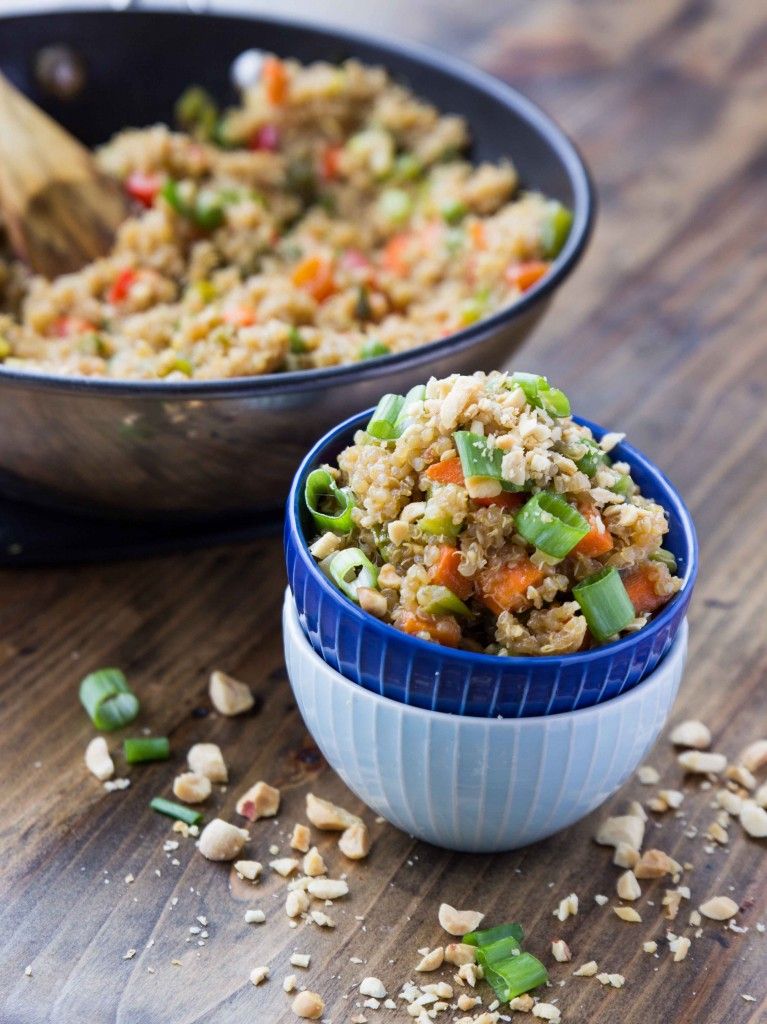 Little Mashies squeeze pouches are BPA Free and are safe to wash with warm water.
If you need some meal ideas for your refillable pouch you can find home made yoghurt here, baby food recipes here, and pouch smoothie recipes here.
Now, to clean your Little Mashies food pouches by hand simply open up the ziplock at the bottom and take off the cap. Run warm water through the open ziplock with the baby pouch facing downward so the water comes out of the spout and into the sink. The shape of Little Mashies reusable pouches acts like a funnel, pushing out food and making the pouch very easy to clean.
To start washing your reusable pouch, squirt some dishwashing liquid into the refillable pouch, then use a baby bottle brush to clean the inside walls (just like a baby bottle). To clean the spout use a straw brush (like the ones we have here), and clean it in the same manner that you would clean the teat from a baby’s bottle. Give the reusable pouch a rinse and place it over a kitchen utensil in the drying rack to dry.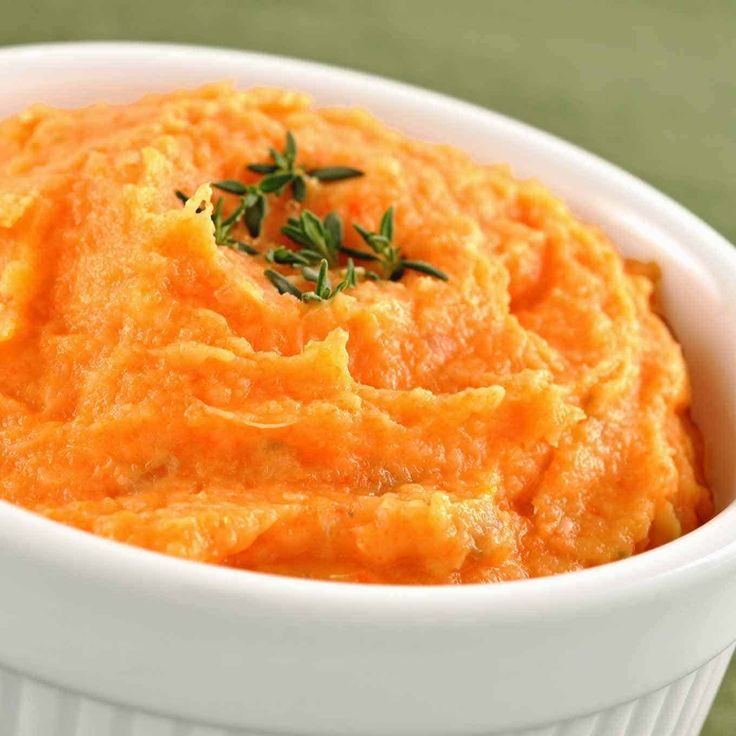 If you don’t have time to dry it fully place it in the freezer until you are ready to use it again. Do not put wet reusable food pouches in dark cupboards or draws. They are very easy to dry if you have removed the cap, and placed something inside the zipper to keep the pouch open (we use a whisk, tongs or a spatula).
Note that if you continuously wash your pouches in the dishwasher the high temperature will make the zipper wear out more quickly. At home we wash our pouches mostly by hand because it is so quick and easy and then just use the dishwasher when we have had loads of kids over and served reusable yoghurt pouches or smoothies to them all.
Oh and while I remember if you use the code RECIPE at the checkout it will remove 100% off the price of the baby food recipe ebook so you can get some inspiration for your refillable pouches.
Some parents start introducing a sippy cup or straw cup to their babies around 6 mths of age. This can make it easier to transition from breastmilk or bottle feeding around 12 mths of age.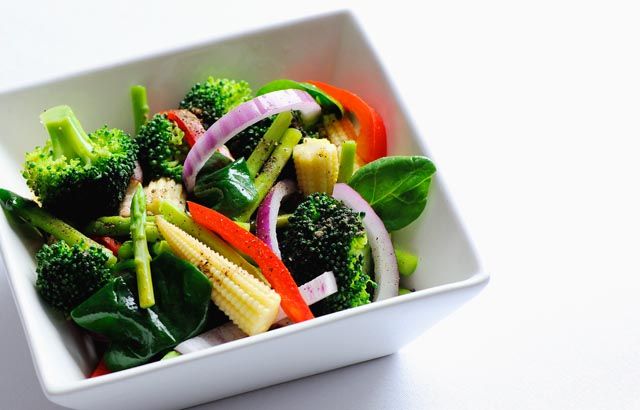 Most paediatricians recommend babies 18 mths or older use an open sippy cup rather than a bottle, so anytime before then is fine. This is why we have a 4 in 1 sippy cup, so that you don't have to purchase seperate products as your baby moves through the stages of learning how to swallow and drink. To shop the Little Mashies silicone sippy cup, check out our baby feeding range here.
All of our baby food recipes are contained within our ebook. You can get a free download by using the coupon code RECIPE at the checkout. Simply add it to the cart, pop in the coupon code, and it will remove 100% of the price.
Sale
Fridge Storage Bundle
Regular price $154.00 Sale price$99.00 Save $55.00
Sale
Gift of love
Regular price $79.90 Sale price$49.95 Save $29.95
5 x 30cm Reusable Baking Sheets
$64.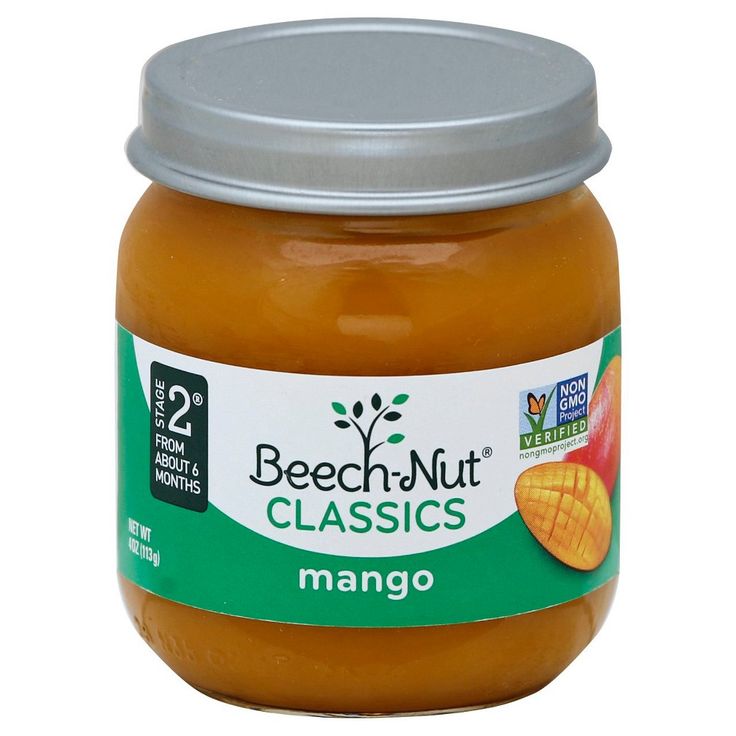 75
75
Sale
5 x Reusable Smoothie or Snack Bags
Regular price $74.75 Sale price$64.75 Save $10.00
View all
14 products
Best Baby Food Combinations (50 Easy Recipe Ideas + Tips)
Learn this simple approach to making baby food combinations with this master list of ideas. With this post, you’ll always have ideas for easy baby meals that both taste great and are realistic for you to execute…even with a busy schedule!
Baby Food Combinations
Moving from single ingredient baby foods to combinations in stage 2 baby food is such a fun stage of feeding babies because things can get so much more flavorful and interesting! And it means that you can batch cook basic purees and then combine them in so many delicious ways to keep things interesting and nutrition varied.
And while I am not opposed to sometimes buying baby food, each of these ideas is super easy—even if you are very busy.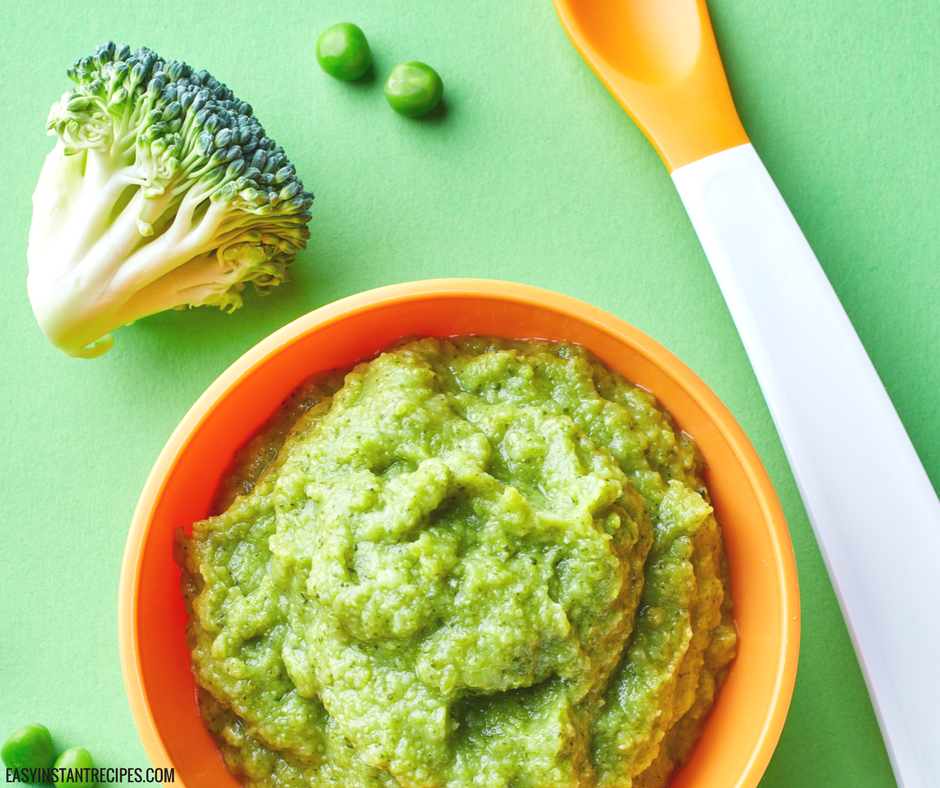 I love to have a stash of these in the freezer to use for quick meals in a pinch. (And to be honest, we still use them in the toddler years as easy ways to offer up veggies!)
TIP: Scroll to the recipe at the end of the post for all of the details, and read through the post for answers to common questions and basics about making baby food combos.
Ingredients in Baby Food Combinations
To make the baby foods in this post, you’ll need basic ingredients (that will obviously vary according to which specific puree you choose). The base purees are made with:
- Apples
- Bananas
- Blueberries
- Butternut Squash
- Carrots
- Mango
- Pear
- Peas
- Spinach
- Sweet Potatoes
TIP: Then, to mix things into combinations, you can add in peanut butter, plain whole milk yogurt, Baby Oatmeal, Baby Rice Cereal, and other purees including those made with beans, chicken, pineapple, avocado, peach, and more.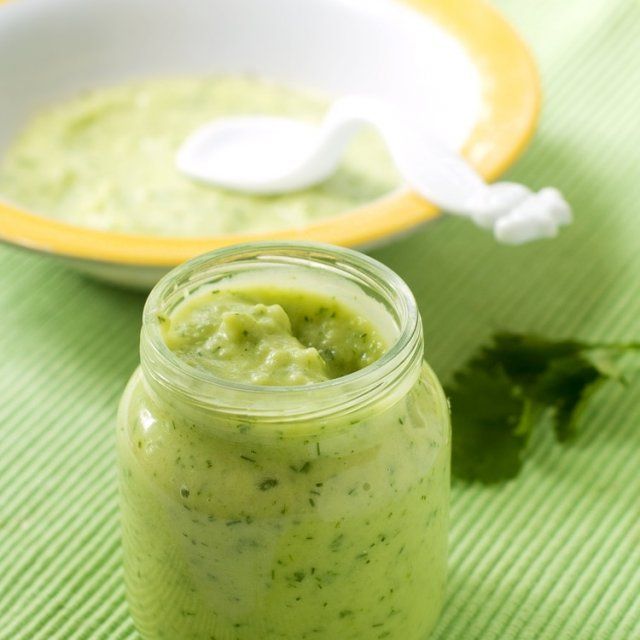
How to Make Stage 2 Baby Food Combinations Step-by-Step
Here’s a look at the simple process involved in making this sort of stage 2 baby food. Scroll down to the bottom of the recipe for the full information.
- Make your base purees.
- Store or freeze until ready to combine.
- Stir together the purees, adding any optional spices or ingredients, until uniform.
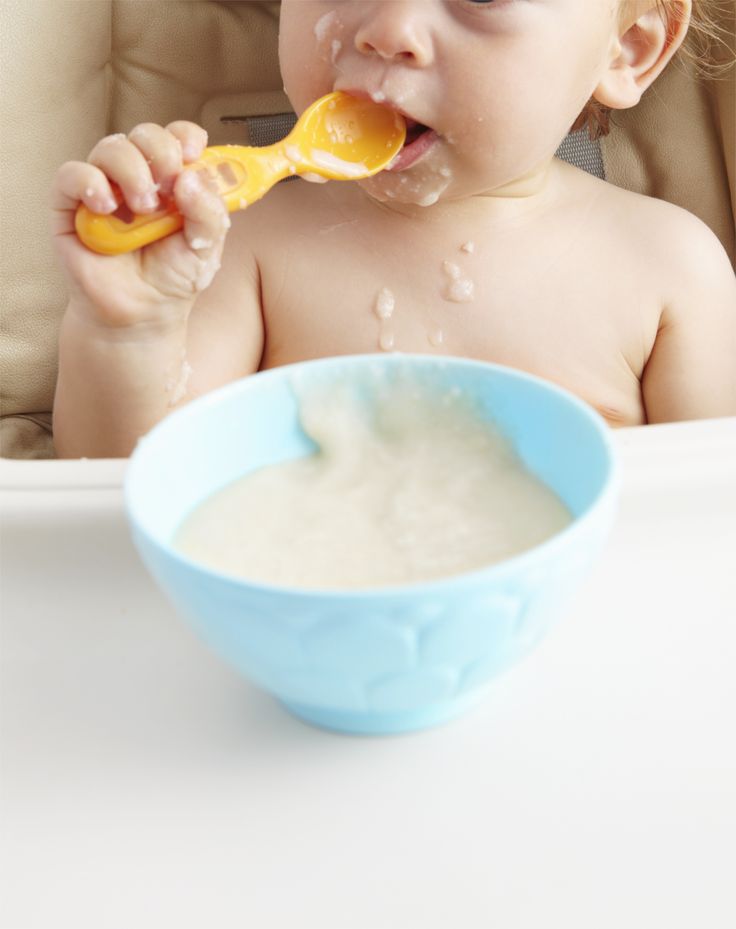
- Serve with a spoon or in a reusable pouch.
TIP: I like to make the single ingredient purees and freeze them, then mix and match frozen cubes of purees into yummy combinations. This ensures that you have flexibility to adjust if baby doesn’t love one combination and that you can change up the flavors you’re offering regularly.
How do you combine baby food?
With the way I do it, you simply make two purees (or one puree if you plan to combine it with something like yogurt or oatmeal) and mix them together. You can really do any combinations that sound good to you.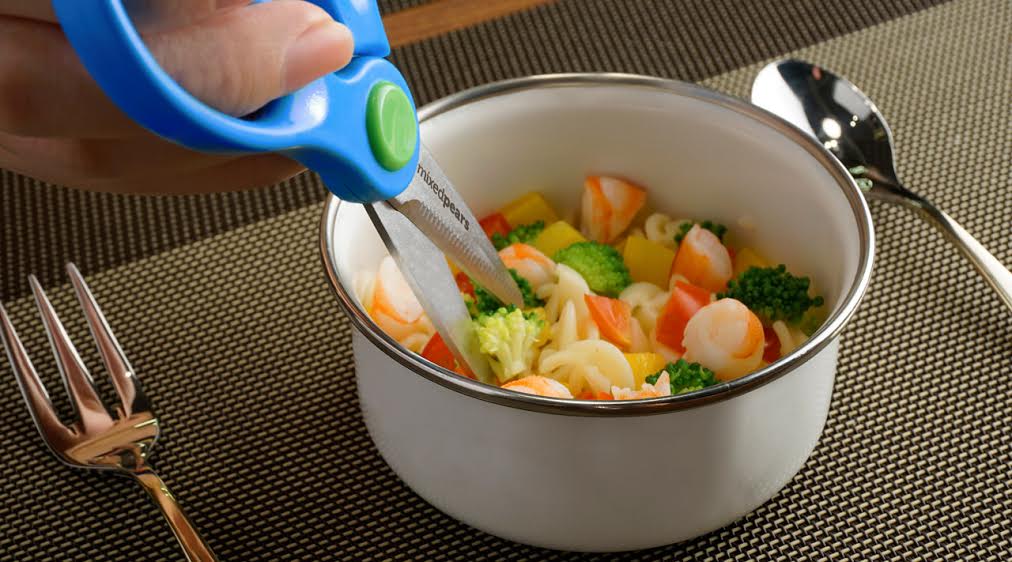 I have 10 base purees and 5 easy combination ideas for you to get started, but then you can totally run with it!
Best Baby Food Containers
For storing baby food, I like these Wean Green Storage Cubes (they are glass and are insanely durable—I’ve been using the same set for 8 years), these Beaba Clip Containers, and these Wee Sprout Containers. My go-to reusable pouches include this silicone one from Squeasy Gear and these Wee Sprouts BPA-free plastic ones. (I prefer the 3 ounce size for babies in both pouch options.)
Apple Baby Food Ideas
Once you make basic Apple Puree, you can combine it with so many yummy flavors!
- + plain whole milk yogurt = Apple Yogurt
- + Baby Oatmeal = Apple Oatmeal
- + Spinach Puree = Apple Spinach Baby Food
- + Carrot Puree = Apple Carrot Baby Food
- + Butternut Squash Puree = Apple Squash Baby food
Banana Baby Food Ideas
Try these easy combinations that start with Banana Puree.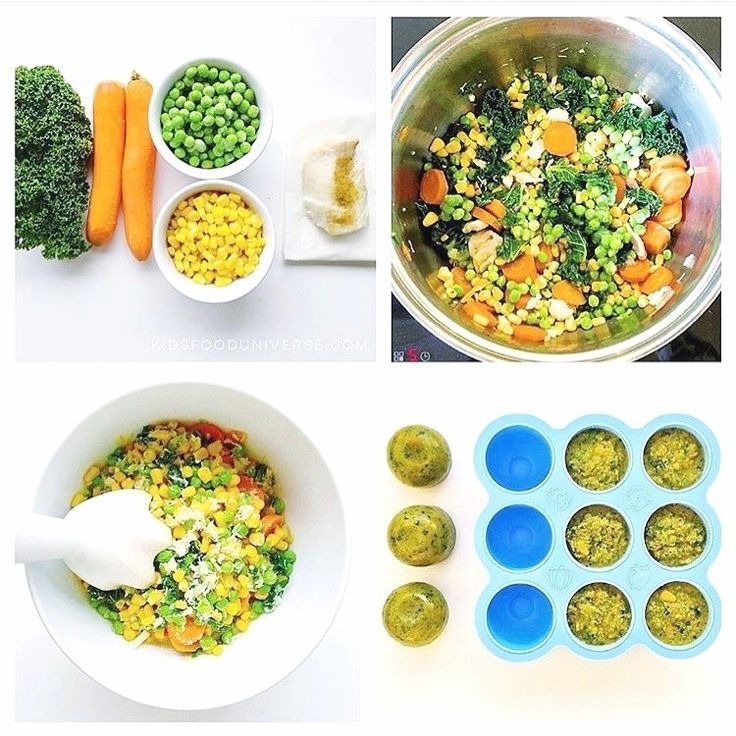
- + Peanut Butter Puree = Banana Peanut Butter Baby Food
- + plain whole milk yogurt = Banana Yogurt
- + Baby Oatmeal + Banana Oatmeal
- + Bean Puree = Banana Bean Puree
- + Avocado Puree + Banana Avocado Puree
Baby Food Combinations with Blueberries
Start with Blueberry Puree, then transform it into these fun flavors.
- + plain whole milk yogurt = Blueberry yogurt
- + Baby Oatmeal = Blueberry Oatmeal
- + Banana Puree = Blueberry Banana Puree
- + Mango Puree = Blueberry Mango Puree
- + Peach Puree = Blueberry Peach Puree
Baby Food Combinations with Butternut Squash
Smooth Butternut Squash Puree is a great base as it’s rich in nutrients and has a naturally mild flavor. (Any of these would be great with a tiny pinch of cinnamon.)
- + Pear Puree = Squash Pear Puree
- + Bean Puree = Squash Bean Puree
- + Banana Puree = Squash Banana Puree
- + Applesauce = Squash Apple Puree
- + plain whole milk yogurt = Squash Yogurt
Baby Food Combinations with Carrots
Start with Carrot Puree, then add in new flavors!
- + Apple Puree + Sweet Potato Puree = Carrot Apple Sweet Potato Puree
- + Pear Puree + Sweet Potato Puree = Carrot Pear Sweet Potato Puree
- + Banana Puree = Carrot Banana Baby Food
- + Quinoa Baby Food = Carrot Quinoa Baby Food
- + Bean Puree = Carrot Bean Puree
Baby Food Combinations with Mango
Mango Puree is a cinch to make and is so intensely flavorful—which makes it play really well with other purees!
- + plain whole milk yogurt = Mango Yogurt
- + Baby Oatmeal = Mango Oatmeal
- + Banana Puree = Mango Banana Puree
- + Avocado Puree = Mango Avocado Puree
- + Peach Puree = Mango Peach Puree
Pear Baby Food Combinations
Ripe pears make delicious Pear Baby Food that freezes and combines well.
- + Avocado Puree = Pear Avocado Puree
- + Baby Oatmeal + Cinnamon = Pear Cinnamon Oatmeal
- + Banana Puree = Pear Banana Puree
- + Pea Puree = Pear Pee Puree
- + Carrot Puree = Pear Carrot Puree
Baby Food Combinations with Peas
Keep a bag of frozen peas in the freezer and homemade Pea Puree is just minutes away. Then try:
- + Apple Puree = Pea Apple Puree
- + Pear Puree = Pea Pear Puree
- + Mango Puree = Pea Mango Puree
- + Banana Puree = Pea Banana Baby Food
- + Pineapple Puree = Pea Pineapple Puree
Baby Food Combinations with Spinach
My Spinach Baby food already has peas in it (to ensure it’s smooth and mellow in flavor). You can also combine it with:
- + Apple Puree = Spinach Apple Puree
- + Pear Puree = Spinach Pear Puree
- + plain whole milk yogurt = Savory Spinach Yogurt
- + Quinoa Baby Food and pinch Parmesan cheese = Spinach Parmesan Quinoa
- + Bean Puree = Spinach Bean Puree
Sweet Potato Baby Food Ideas
Start with a batch of Sweet Potato Baby Food and then try these yummy options:
- + Chicken Puree = Sweet Potato Chicken Baby Food
- + Bean Puree = Sweet Potato Bean Puree
- + Applesauce = Sweet Potato Applesauce
- + Carrot Puree + Cinnamon = Cinnamon Sweet Potato Carrot Puree
- + Bean Puree + Cumin = Mexican Sweet Potato Bean Puree
How to Store Baby Food—and Send it to Daycare
I prefer to freeze batches of baby food in a silicone ice cube tray overnight, transfer it to a zip top freezer bag, then store it until I’m ready to serve or combine it. You can then mix and match from the single ingredient purees you have in the freezer by adding a cube or two of two purees to a container. If you do that the night before you plan to serve the food, it will thaw and be ready to stir together.
This makes it easy to batch cook and have a lot of option to feed baby at home or at daycare.
Tips for Making the Best Baby Food Combinations (Stage 2 & Stage 3)
- These Stage 2 baby foods are great to introduce after baby has started solids with single ingredient baby foods.
- For a 6 month old baby, 1-2 tablespoons baby food may be plenty for a single serving. For a 9 month old baby, they might want ¼ cup or more.
- Adjust the servings based on your child’s hunger, using a roughly one to one ratio of the purees in each combination.
- Read more about the differences in Baby Food Stages here.
- Find my best tips for Baby Food Storage here.
- Add in a little mashed avocado, coconut oil, or Prune Puree to help with baby constipation.
- Serve with a spoon or in a reusable pouch.
I’d love to hear your feedback on these ideas, so please comment and rate the recipe ideas below! I appreciate all of your comments so much.
Prep Time 15 minutes
Cook Time 10 minutes
Total Time 25 minutes
Author Amy Palanjian
Cuisine American
Course Baby Food
Calories 5kcal
Servings 6
1-2 tablespoons Butternut Squash Puree and with one of the following
- ▢ 1-2 tablespoons Pear Puree
- ▢ 1-2 tablespoons Bean Puree
- ▢ 1-2 tablespoons Banana Puree
- ▢ 1-2 tablespoons Applesauce
- ▢ 1-2 tablespoons plain whole milk yogurt
1-2 tablespoons Spinach Puree and one of the following:
- ▢ 1-2 tablespoons Apple Puree
- ▢ 1-2 tablespoons Pear Puree
- ▢ 1-2 tablespoons plain whole milk yogurt
- ▢ 1-2 tablespoons Quinoa Baby Food and pinch Parmesan cheese
- ▢ 1-2 tablespoons Bean Puree
1-2 tablespoons Sweet Potato Puree and one of the following:
- ▢ 1-2 tablespoons Chicken Puree
- ▢ 1-2 tablespoons Bean Puree
- ▢ 1-2 tablespoons Applesauce
- ▢ 1-2 tablespoons Carrot Puree and pinch cinnamon
- ▢ 1-2 tablespoons Bean Puree and pinch cumin
Prepare each puree.
 Freeze in a silicone ice cube tray, transferring the cubes to a freezer bag once solid, or store in the refrigerator as needed.
Place roughly equal amounts of the two (or more) purees you plan to combine into a bowl. Stir together. (If the purees are frozen, place a cube or two of each into a bowl or storage container. the night before you plan to serve and let thaw overnight in the fridge before stirring together. Or thaw at room temperature for about 2 hours.)
Serve or store for later.
Mixing Bowl
Reusable Pouch
Silicone Ice Cube Tray
- Taste the purees and add more of a sweeter one if needed.
- Add small pinches of spices like cinnamon, ground ginger, and cumin to add flavor.
- Add small pinches of ground flaxseed to add healthy fats.
- Serve with a baby spoon or in a reusable pouch.
- Pack for daycare if needed in small airtight containers.
- Serve cold or warm just slightly.
- If. baby has a dairy intolerance, use a nondairy, unsweetened nondairy yogurt.
- If baby has a nut allergy, use a nut-free alternative that's unsweetened such as Sunbutter.
Calories: 5kcal, Carbohydrates: 1g, Protein: 1g, Fat: 1g, Saturated Fat: 1g, Polyunsaturated Fat: 1g, Monounsaturated Fat: 1g, Cholesterol: 1mg, Sodium: 2mg, Potassium: 11mg, Fiber: 1g, Sugar: 1g, Vitamin A: 30IU, Vitamin C: 1mg, Calcium: 5mg, Iron: 1mg
Tried this recipe?Rate in the comments and tag @yummytoddlerfood on IG!
Baby puree at home: recipes
Baby puree from vegetables and fruits at home: cooking secrets
Vegetable and fruit puree often becomes the first meal of the baby after breast milk or formula, so many mothers prefer to cook it on their own. Although modern manufacturers convince us that baby food is devoid of preservatives and harmful additives, fresh vegetables and fruits are much healthier, especially when it comes to infant nutrition. Yes, and cooking baby puree at home is not so difficult.
Vegetables or fruits?
Let's try to make baby puree for our beloved baby. Despite the fact that pediatricians of the last century recommended starting complementary foods with fruits, it is better to first introduce the child to vegetables - modern doctors and nutritionists have come to this conclusion. Boiled vegetables do not irritate the gastrointestinal tract, are better absorbed, satisfy hunger, do not cause allergies and increased gas formation. In addition, vegetables do not contain fructose, which irritates the pancreas. And one more weighty argument in favor of the fact that it is better to start with vegetables - fruits are tastier, and if the baby tries them first, he will refuse vegetables, because they will seem to him more insipid.
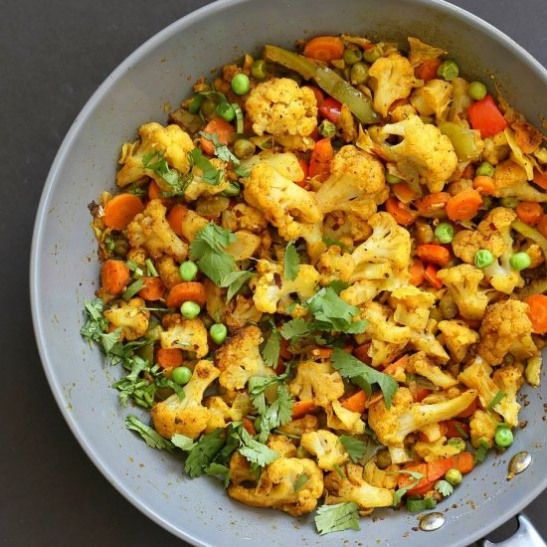
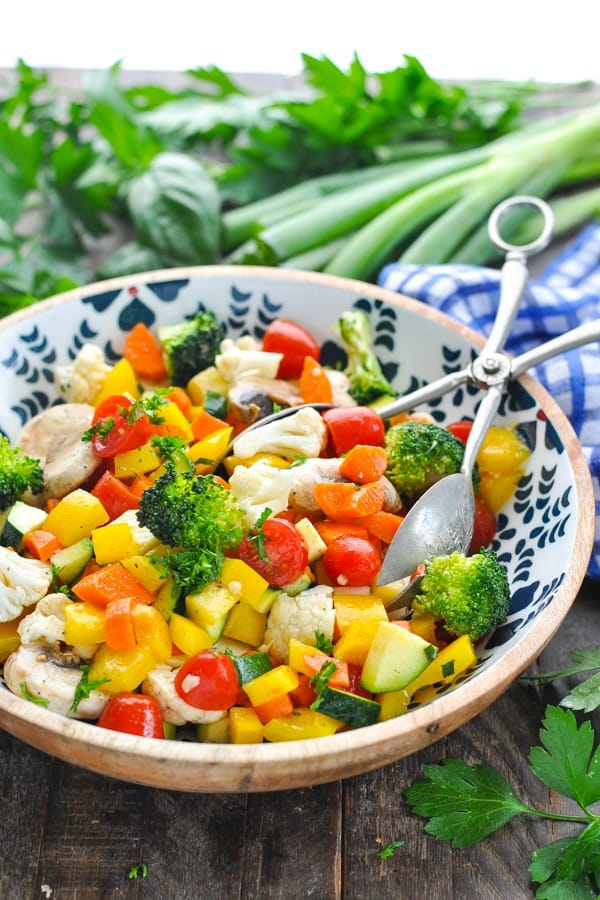
How to prepare baby vegetable puree
What can baby puree be made from? The ideal puree for the first feeding is from cauliflower or zucchini.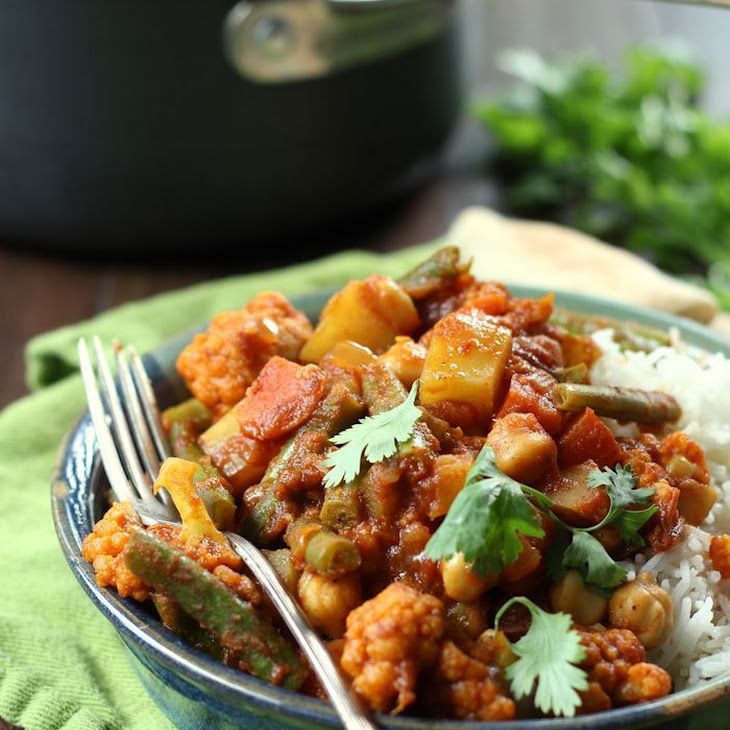 A little later, you can introduce pumpkin, broccoli, carrots, potatoes and green peas. Before cooking, vegetables are washed well, peeled, cut into pieces and cooked - steamed, in the oven or in the usual way, in water. The first two methods are preferable because oven roasting and steaming preserve the vitamins, minerals, nutrients, and natural color in the vegetables. And most importantly - such vegetables are much tastier. Some nutritionists recommend boiling vegetables with their skins on before peeling them, so choose your own cooking method.
If you do have to cook vegetables in a saucepan, use an enamel pot, add less water and put the vegetables in boiling water. Boil until soft, but do not overcook vegetables and fruits, otherwise they will become tasteless and lose a lot of vitamins. Ready vegetables are chopped with a blender until smooth and slightly diluted with water, vegetable broth, breast milk or mixture to a gruel state, since the child does not yet know how to digest thick food.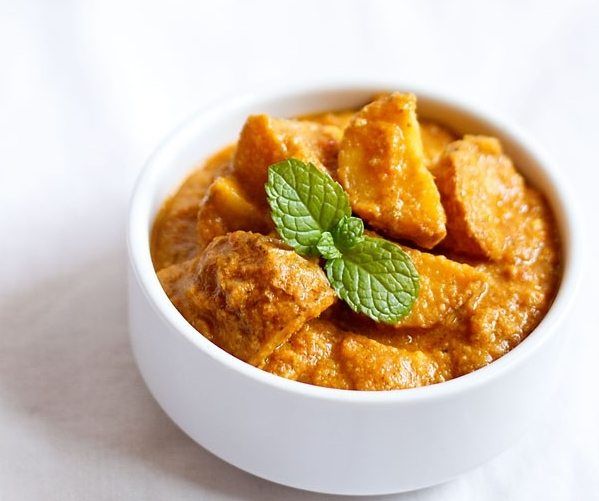 Small pieces of vegetables in puree sometimes cause the baby to refuse to eat, so the knives in the blender should be well sharpened, and if there is no technique, you can grind the vegetables through a sieve. Salt and spices are usually not added to baby vegetable puree, and if the baby is more than 6 months old, you can put a little butter in the puree.
A few rules for making baby puree at home
- Use only fresh vegetables and fruits.
- Water for cooking vegetables must be filtered or bottled.
- If you are using frozen foods, choose only whole fruits and vegetables as they retain the most nutrients.
- All utensils for preparing baby food should be perfectly clean, so if the knife falls on the floor, it should be washed well. Also, the presence of pets in the kitchen during the cooking process is not allowed.
- Avoid vegetables and fruits high in nitrates, such as spinach, lettuce, beets, melons, and watermelons, in infants' diets.
- Store-bought vegetables are recommended to be soaked in water to remove nitrates: 1-2 hours for this, up to 24 hours for potatoes.
- Mix sour-tasting fruits and berries with sweet fruits - for example, blackcurrant goes well with a banana or pear. Sour puree is unlikely to please the baby.
- Give your child only fresh food, but yesterday's puree from the refrigerator is better to eat yourself.
DIY fruit puree for children
Children are more likely to eat fruit puree, because fruits are tastier and sweeter. Fruits contain a large amount of vitamins, minerals, trace elements, fiber and antioxidants, so they are very useful for a growing organism. However, fruits are strong allergens, especially berries, bananas, pomegranates and apricots, so they should be given with caution, watching the child's reaction. The most low-allergenic fruits are apples and pears, so it is better to start complementary foods with them, and then introduce all other fruits. First, the baby is fed with a one-component puree made from only one product, and then you can mix different vegetables and fruits, and not only among themselves. Very tasty combinations of fruits and vegetables, such as apples and zucchini, pumpkins and pears.
Fruits must be of good quality, without damage, ripe and juicy, and the rules for preparing fruits do not differ from the rules for cooking vegetables. Naturally, fruit puree is not sweetened with honey and sugar - the later the child learns the taste of sugar, the stronger his health will be.
Aromatic pumpkin puree
Babies love to eat pumpkin because of its pleasant sweet taste, besides pumpkin is very healthy. It contains a whole storehouse of various vitamins, including vitamin T, which normalizes the metabolism in the body. For pumpkin puree, small pumpkins are suitable, since large fruits are not as tasty and difficult to peel.
Cut the pumpkin in half, and then into small slices, one or two of which (depending on the appetite of the crumbs) cut into cubes. Boil the pumpkin in a double boiler or in water for 20 minutes, while warm, beat with a blender to a smooth puree and dilute if necessary with water or a mixture. Add oil and salt depending on the age of the child.
Gentle Broccoli Puree
One of my favorite homemade baby puree recipes is broccoli. This cabbage is extremely useful because it contains potassium, iron, calcium and other valuable substances. It has much more vitamin C than lemon, and the reason for its nutritional value is its high protein content.
Separate the broccoli into florets, wash thoroughly and steam for 20 minutes. Cabbage cooks faster in water - fresh broccoli will take 7 minutes, and frozen - about 15 minutes. Broccoli puree does not need much water, it should lightly coat the vegetables. After the cabbage becomes soft, chop it in a blender or pass through a sieve. If you're mashing for kids older than a year old, be sure to add butter - the little ones will gobble up broccoli on both cheeks!
How to make baby pear puree at home
Pear is a very delicate, tasty and healthy fruit that rarely causes intolerance.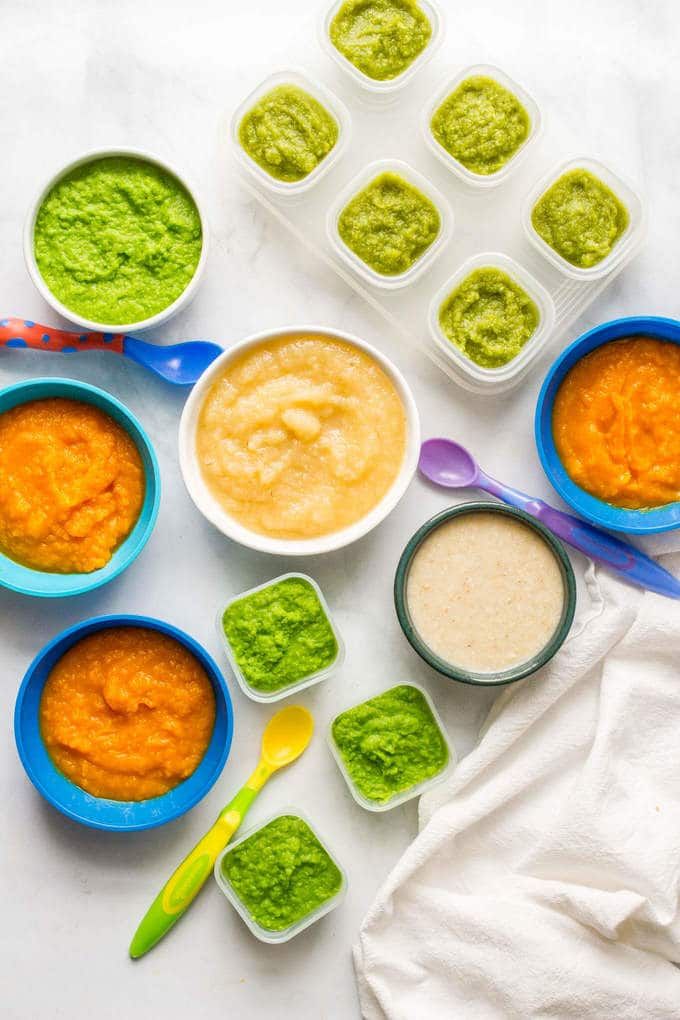 In addition to the high vitamin value, the pear has other beneficial properties - it facilitates digestion and removes toxins from the body.
For baby food, choose green pears to reduce the risk of allergies, which are rare among babies. Peel the fruits from the peel and core with seeds, and then stew the pear in a bowl with a thick bottom in a small amount of water for 15 minutes. Let the pear cool slightly and puree it in a blender with a little of the remaining pear broth. For large kids, fruits can not be boiled, but add half a teaspoon of natural honey to the puree.
Zucchini and apple puree
Little gourmets will love this delicious puree, besides, zucchini is considered the most hypoallergenic vegetables, which, due to their high potassium content, have a beneficial effect on the heart. Apples contain iodine, iron and phosphorus, and due to the high concentration of vitamin C, apples help in the prevention of colds and viral infections.
Wash the zucchini and apples well, de-seed them, cut into pieces and cook in a saucepan for about 20 minutes, considering that the zucchini will cook 5 minutes faster.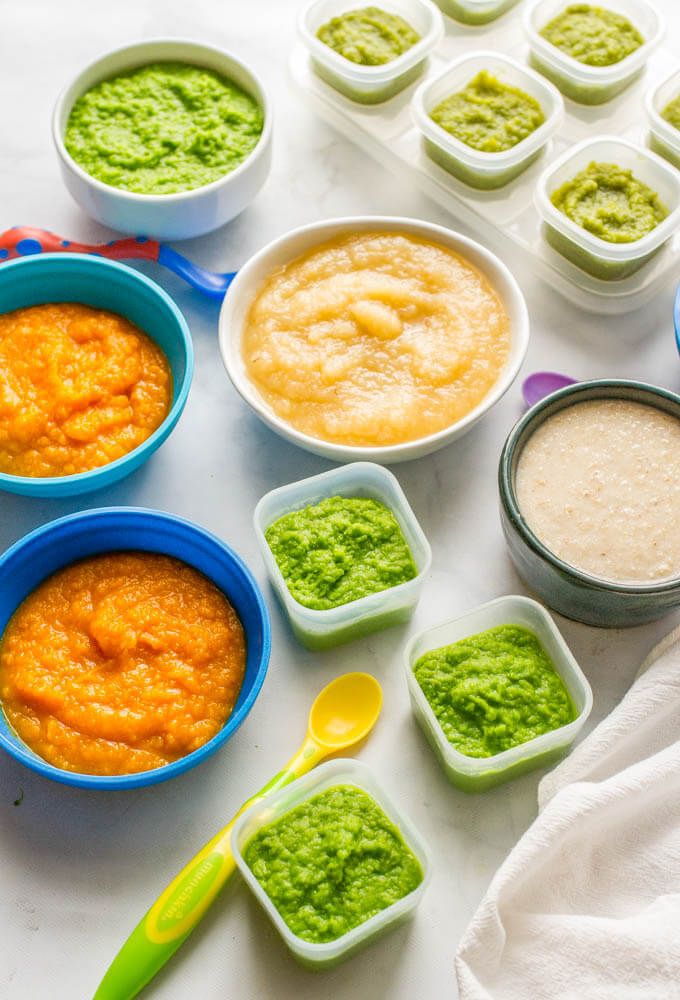 By the way, apples are steamed for 15 minutes, zucchini - 10 minutes. Next, vegetables and fruits are chopped in a blender, mixed and brought to a boil. For allergic children, this is the best side dish!
Exotic mango
Sometimes you can pamper your baby with exotic fruits - for example, make mango puree. This is a very delicate fruit with an original taste, containing 12 amino acids and improving sleep.
Choose only ripe fruits that are soft and reddish-yellow in color. Peel the mango from a thick skin and a large bone, put the pulp in a blender, add 2 tbsp. l. water and mash it, and then heat it in a saucepan for several minutes. For a baby up to a year old, it is better to give mashed potatoes with heat treatment to facilitate digestion, and older children can be fed raw mangoes.
Carrot and Potato Puree
Make normal potato puree without oil. Peel the carrots, grate them and stew them with butter and vegetable broth - about 1 tsp is required for 200 g of carrots.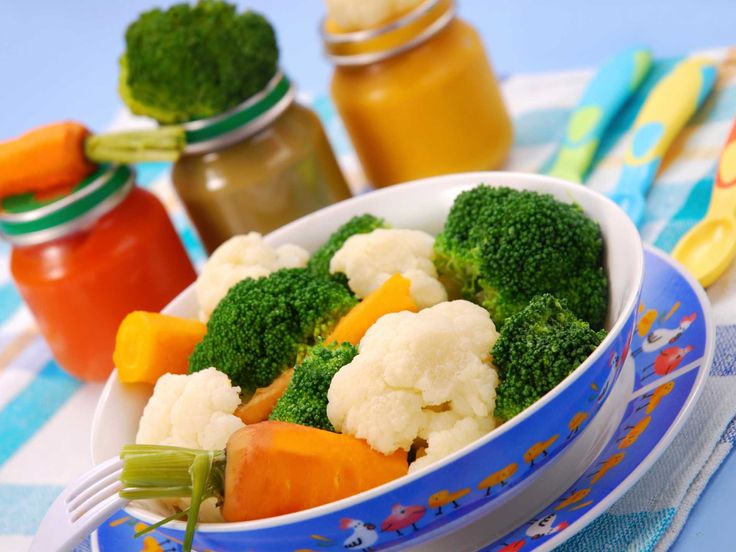 butter and 150 g of broth. When the carrot becomes very soft, wipe it through a sieve, and then put it on a plate, put mashed potatoes on the second half. Let the child choose whether to mix two types of puree for him or eat separately!
Pumpkin and apple puree
This sweet, sugar-free pumpkin-apple puree, cooked in a double boiler, is suitable for children who are already accustomed to “adult” food and are able to perceive a new unusual dish. It is better to take a pumpkin with a gray or green skin and with bright pulp - such fruits contain more vitamins and other useful substances. Apples are green because they have fewer allergens.
Cut pumpkin and apple flesh without peel or seeds into pieces, place in a steamer and cook for 20 minutes. Grind pumpkin, apples and raisins in a blender or by hand with a pusher if the child has already learned to chew. They say that this puree is very good for skin and hair, and you can check the truth of this statement yourself if you start feeding this dish to your baby.
In autumn, you can take care of preparing vegetables for baby purees. Some vegetables, such as pumpkin, carrots and apples, are stored fresh, and zucchini, broccoli, berries are frozen in small portions, because due to frequent freezing and thawing, vegetables lose vitamins and become tasteless. You can roll up fruit and vegetable puree in jars, but this snack should not be given to babies. Remember that the taste of vegetables determines whether the baby will love them in the future, so try to prepare an appetizing and tender puree - for health and good mood!
Vegetable puree for a child for the winter. Preparation of baby food for the winter at home. Tips for a new mother
Delicate pear puree with a creamy texture is an excellent option for winter harvesting. The undoubted advantage of this dessert is the ability to give it to even the smallest children without fear of negative consequences. After all, the minimum amount of sugar and soft, juicy pear pulp create the perfect duet. This baby puree can also be served as a dessert on its own.
The “correct” fruits must be selected to create the recipe. They should be sweet, ripe and juicy. Considering that this will be pear puree for the winter for a child, the fruits should be collected in a clean place, away from factories and highways.
Depending on the sweetness of the fruit, you can adjust the amount of granulated sugar in the recipe. The most delicious puree comes from ripe, slightly soft pears that have retained their texture and shape.
If you are preparing baby pear puree, use small containers. This way you can avoid microbes and bacteria getting into the puree. In addition, this will avoid storing an open jar, the contents of a small container will be guaranteed to be eaten.
How to make pear puree for the winter for a child
Prepare juicy pears: peel them from thin skins, remove the seed box. Cut into random pieces and put in a deep saucepan.
Pour the recommended amount of purified water into the pot.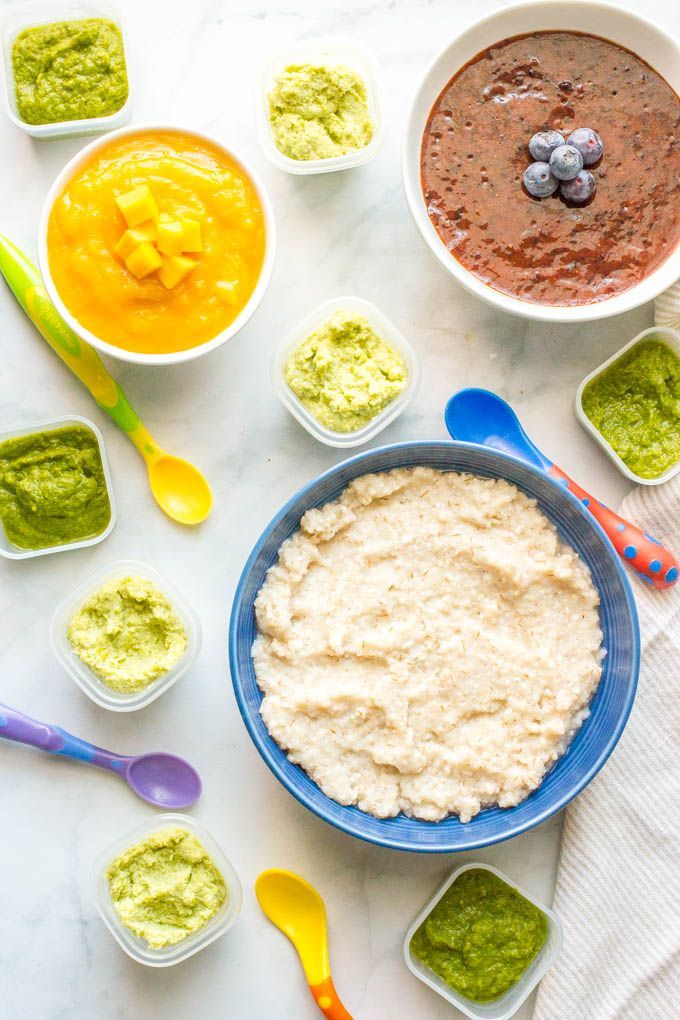
Cook the puree blank for 15-20 minutes until the pear mass is soft.
Grind the mass to a smooth puree. To do this, use any kitchen blender.
Pour sugar into a saucepan. Mix the ingredients and cook for another 10-12 minutes.
Pour the boiling pear puree into a pre-sterilized glass container.
Seal jars tightly and turn over. We cover the container with baby food with a warm shawl. We store pear puree for the winter for a child in a dark kitchen cabinet or a cool pantry.
Cooking Tips:
- Add a little citric acid to the puree to ensure that the jars do not bulge. It will also help to regulate the amount of sugar in the workpiece.
- For the nutrition of babies, fruits should be chosen carefully. Such varieties of pears as Conference, Williams Summer (Duchess), Grand Champion, Komis are perfect here. They differ in special juiciness and softness.
- If the puree is quite thick, you can dilute it with the syrup in which the fruit was boiled.
For making homemade baby puree Ripe and always fresh vegetables and fruits are taken. Rinse the selected fruits thoroughly, peel the vegetables. Soft and tender fruits such as strawberries, apricots, peaches can be rubbed raw through a sieve. Harder fruits and vegetables, after washing and peeling, cut and simmer until softened or cooked over low heat. The fruits should be boiled until they become soft, but not too long: the mashed potatoes darken with prolonged cooking.
Soaked fruit or vegetables, rub through a sieve or mince. Boil the resulting puree for no more than 5 minutes and immediately pour into sterile jars or bottles; fill to the edge of the neck. Seal the container hermetically and place upside down until completely cooled.
If you want to puree without pre-cooking, it must be bottled and sterilized. Fill the jars, leaving 2 cm to the top edge. After sterilization, quickly cool the jars to 40 degrees.
Recipe for baby puree for the winter from plums
To make plum puree, take any variety of plums, the main thing is that the fruits are sugary and ripe.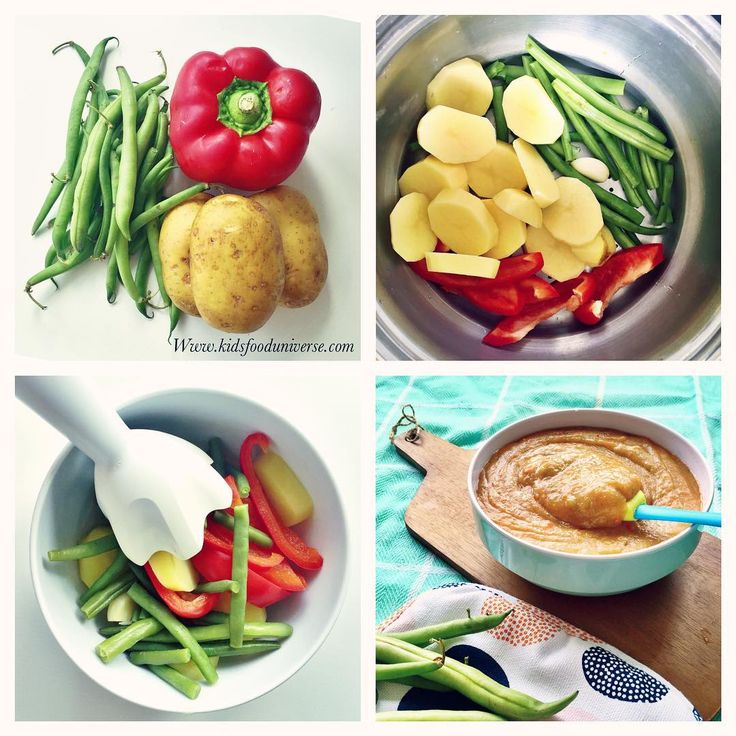 Rinse the plums well, cut into halves and heat in a small amount of water. Grind softened plums with a blender or meat grinder. Heat the puree without boiling, and immediately pour into sterilized jars, filling to the brim and corking. Turn over and cool.
Apple baby puree
Wash the apples well, remove the core and peel, cut into slices. Place the slices in an enamel bowl, cover with water and cook for 15-20 minutes. Wipe hot apples through a sieve or chop in another way convenient for you. Reheat the resulting puree and pour hot into jars. Seal the jars immediately, put them in a bowl of hot water (80 degrees) and sterilize for 30 minutes.
Do you like to cook fast? Then we offer you a quick recipe
Winter pumpkin puree
Remove skin and seeds from pumpkin. Cut the pulp into cubes, put in a saucepan, add a little water and cook until soft over low heat. Grind the mass to a puree state, put on fire again and bring to a boil. Pour the hot puree into jars and roll up.
It's no secret that most of the glossy vegetables and fruits that are on store shelves during the winter months have not only poor nutritional value, but also rather meager taste. That is why every autumn we rush to prepare delicious, vitamin-rich foods from our garden for the winter.
And we try not only for ourselves. All the best and vitamin, of course, for them, for our flowers of life, for children!
However, everything has its own nuances. For example, it is worth remembering that not all canning methods are suitable for a baby's diet.
Therefore, we tried to combine all the most delicious and healthy in this article.
Puree for the little ones.
It is worth noting that homemade fruit and vegetable purees are just as good as store-bought ones. Their taste is a little more intense. Consistency - often quite a bit thinner (especially compared to mashed potatoes, the consistency of which is "corrected" by the manufacturer using starch, pectin and other relatively harmless stabilizing components). If you are confident in the environmental friendliness of your vegetables and fruits and make mashed potatoes correctly (mandatory boiling, bottling only in sterilized containers), you can use your mashed potatoes even for the first complementary foods. And from 10 to 11 months, it is not only possible, but even better for the baby.
We consider the following purees to be the best tried and tested “from our own garden” options:
All purees are generally made according to the same scheme. Let's look at it using apple puree as an example.
Recipe.
Products:
Apples - peeled, pitted and pitted.
Preparation method:
1. Thoroughly washed, peeled, as mentioned above, cut the apples randomly into slices in an enamel saucepan.
2. Add some clean (filtered) water. Water should not completely cover the fruits, it is only needed so that the apples do not burn during cooking.
3. Place over low heat and cook, covered, until the apples are soft.
4. As soon as the hearths are soft, remove the saucepan from the heat and “turn” the boiled slices into a fine puree using an immersion blender.
5. Put on a low heat and boil for about 15-20 minutes more (the puree should boil a little, but not darken).
6. Pour hot puree into sterilized jars. We seal tightly.
Frozen mixtures for soups and compotes.
I am a big fan of freezing as a way to preserve valuable foods for the winter. Firstly, it allows you to save a fairly large (compared to other methods) part of the vitamins in vegetables and fruits. And for a child's diet, this is very important.
Secondly, frozen mixes are very convenient. They have helped our family many times.
Cooking delicious vegetable soup for your baby in winter is a matter of minutes. It is enough to put the mixture in a saucepan with boiling water, and after cooking, add the meat (separately cooked, of course). For the little ones, boiled vegetables with broth and meat can be turned into mashed soup using a blender.
It's also easy to make delicious berry compote from a frozen mixture.
Preparing the mixture itself in season is as easy as shelling pears. Its composition usually depends on your taste. I will talk about the preparation using the example of one of the mixtures for vegetable soup, which I am preparing for my child.
Recipe.
Products:
A small young zucchini, a few tomatoes, bell peppers, carrots.
It is worth mentioning right away that I also put unfrozen potatoes and onions in the soup, because they are perfectly stored and without freezing. But to simplify further cooking, if desired, they can also be frozen in a mixture with the indicated vegetables.
Preparation method:
1. Thoroughly wash vegetables, clean carrots and zucchini.
2. Cut all vegetables except carrots into small cubes, approximately equal in size. Three carrots on a coarse grater.
3. Mix, pack into sachets. A serving in a bag is for one brew.
4. Place in the freezer. If it is possible to regulate the temperature of the freezer (the function is present in almost all modern refrigerators), turn it on for 3-4 hours to the maximum, then to -18C. The faster the vegetables freeze, the more vitamins will remain in them.
Sweet for older children.
What child doesn't like sweets? And who would argue that homemade preserves and jams are much more preferable in the child's menu than cakes, sweets and sweet bars.
Speaking of bars. Up to a certain age, purchased ones with many E-components are easy to replace with delicious homemade ones. It is easy to make them by chopping dried fruits (dried apricots, prunes, figs) and nuts and making bars from the resulting mass.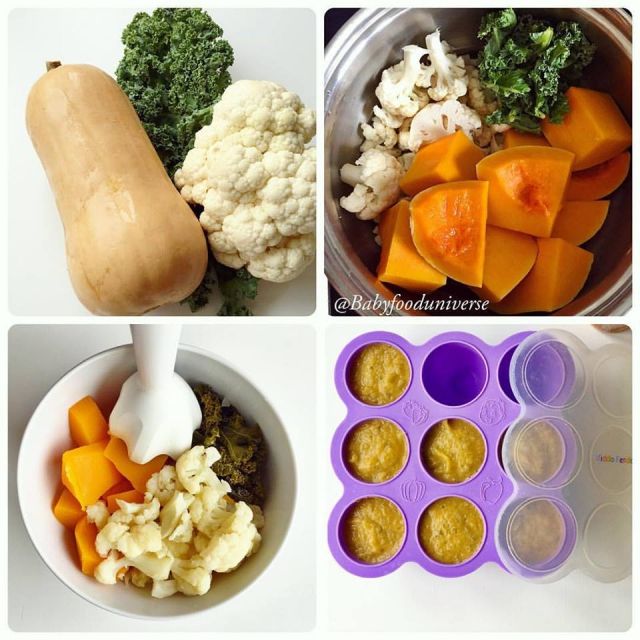 I also add some honey to them. But this is a digression.
So about jams and jams. They are certainly not as harmful as purchased sweets. And yet cooking "kills" a very important part of the vitamins. First of all, vitamin C is destroyed, which, oh, how our children need in winter. Therefore, we started introducing sucrose into the diet for our child with the most useful products - jams without cooking. These include red and blackcurrant jams. They are extremely useful in the autumn-winter period, because they retain absolutely all the benefits of fresh berries.
Redcurrant jam recipe we printed
Of course, there are many more useful ways to save healthy vegetables and fruits for children for the winter. Drying is one of them. Dried apples, for example, are good for compote, and you can eat them just like that.
But it is not recommended to give fermented and especially pickled products to babies. Many people think that if a product without vinegar is fermented in a natural way, then it will be harmless to the child.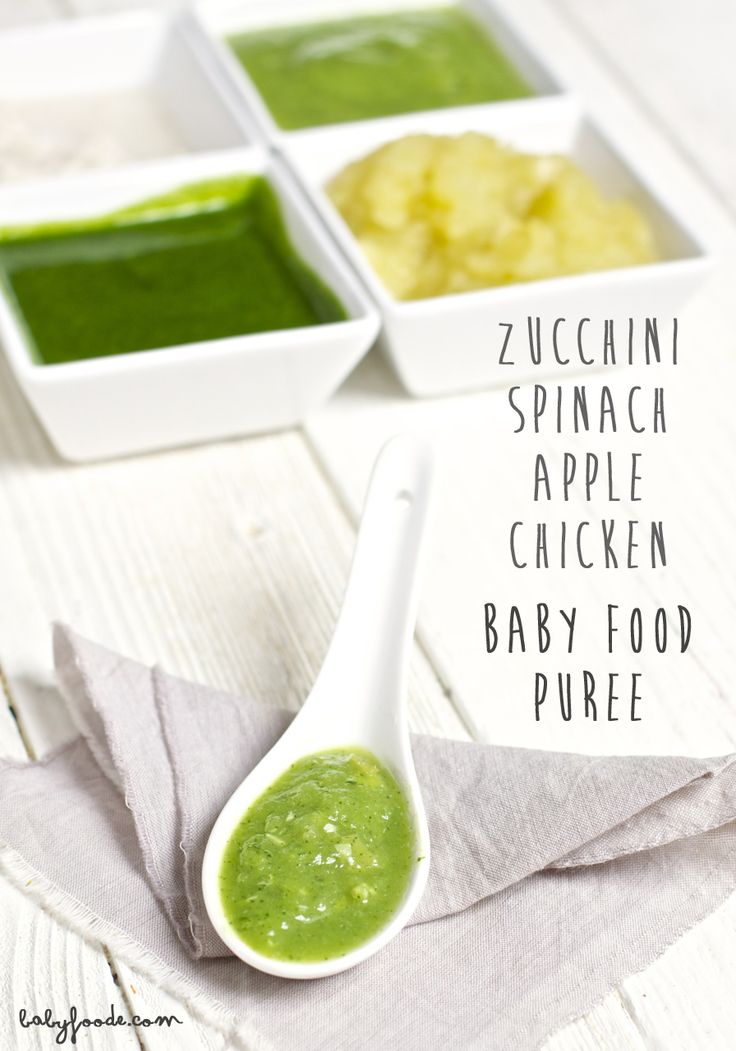 However, during fermentation, many fermentation products are formed, which the child does not need at all. Yes, and such products are difficult for a child's body, in which there are still not enough enzymes to digest them.
If you also have branded recipes for the winter for kids, we will be grateful if you share them in the comments!
The task of every mother is to provide a child with healthy and fortified nutrition all year round. But in the summer it turns out much easier, everything is fresh, natural, but with the advent of winter, many parents begin to think about what kind of baby food preparations for the winter can be cooked?
There are more than enough different purees and mixtures in supermarkets, but there are only preservatives and GMOs. Baby food for the winter can be prepared at home. The main thing is to harvest them at the time when their season begins so you save all the vitamins and minerals that the child needs. The benefits of such nutrition will be only if it is prepared from natural fruits and vegetables.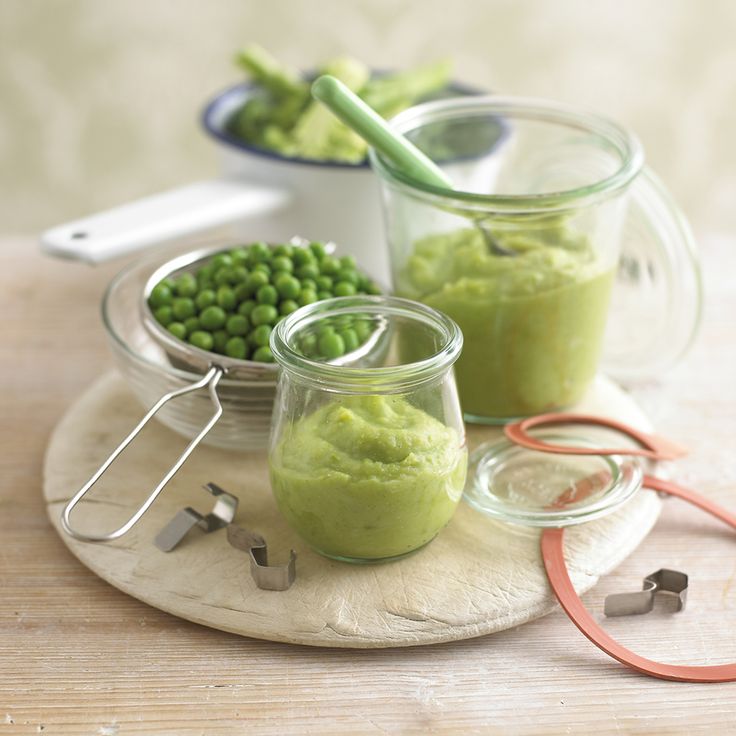
Preparing baby food for the winter: ways
There are two types of baby food preparations for the winter.
- The most popular method is freezing. This method perfectly preserves all useful substances. It is necessary to wash the berries, sort them out, throw out rotten or spoiled ones, dry them naturally, put them in a special container (you can attach a leaflet with the inscription what is in it) or a plastic bag. You can freeze both berries and fruits with vegetables.
- Preservation is a great way to prepare mashed baby food for the winter. Puree is an excellent side dish for meat and fish. You can close any puree from apples, pears, plums, peaches, zucchini, carrots, beets, broccoli, cabbage, etc. You need to prepare the products as indicated in the first method - freezing. Then put the chopped product in a saucepan, pour cold water and cook for 15 minutes. Then mash to a smooth consistency with a blender or with a sieve.
 Then we put it back in the pan, add granulated sugar and boil for 10 minutes. Be sure to sterilize the jar and lid. Store in a cool, dark place.
But then mothers have a question, what is the recipe for baby food for the winter choose? Which fruit or vegetable do you prefer? Consider the most popular recipes for children.
Baby food from apples for the winter
We prepare apples as for freezing. Then in a saucepan and cook for 15 minutes, remove, mash, put in a saucepan and cook again, boil for 10 minutes. We put it in a jar sterilized with boiling water and roll it up with a lid, let it cool, and put it in a cool, dark place. Also, delicious puree from apples and zucchini, apples and pears is prepared in the same way.
Zucchini for the winter for baby food
Prepare zucchini as you would for freezing. We canned, like apple food. An excellent combination of zucchini with carrots, zucchini with cauliflower or apple.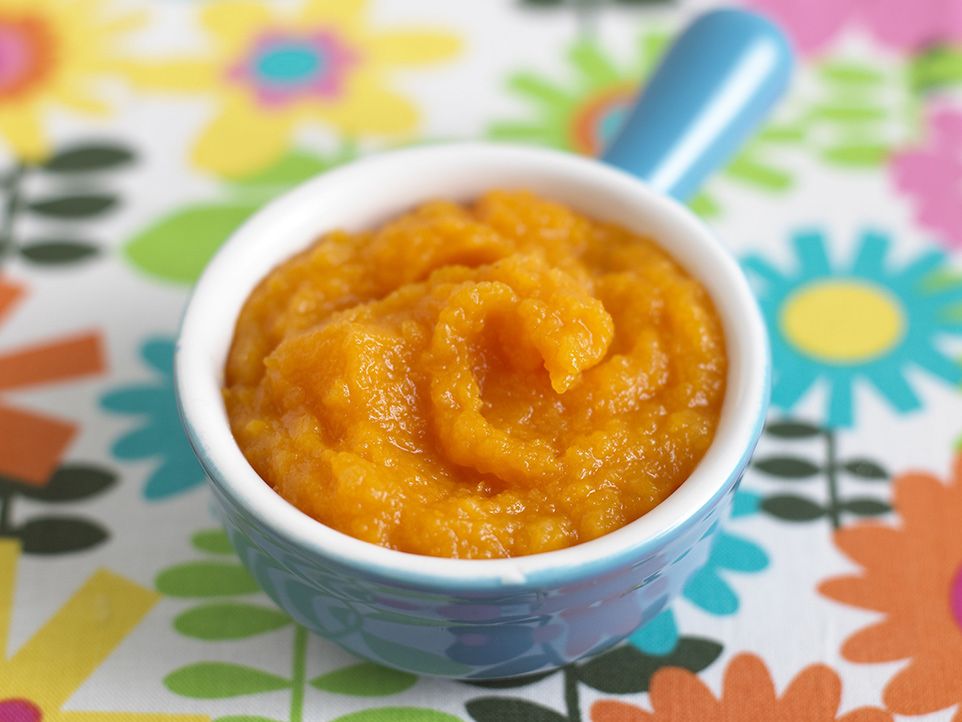 Puree can be preserved with or without granulated sugar.
So, despite the winter frosts, let your baby get all the necessary and useful vitamins, thanks to baby food prepared by his mother with love!
If you find an error in the article, please highlight the text and press Ctrl+Enter .
Top news
Anastasia Lukina.
Pretty interesting preparation for the winter , which has recently gained great popularity, is considered a fruit puree. The thing is that there are plenty of reasons for wasting time and effort on such a blank, and they are all quite important. For example, if you don't want to bother making jam, or if there's a surplus of fruit crops, purée is a great alternative to regular seamings like , jam, juice or jelly .
Well, if you have a small child, then you simply cannot do without such a winter preparation, which can later be used as an excellent complementary food, because puree is the main dish in the diet of not only infants, but also children under two years old.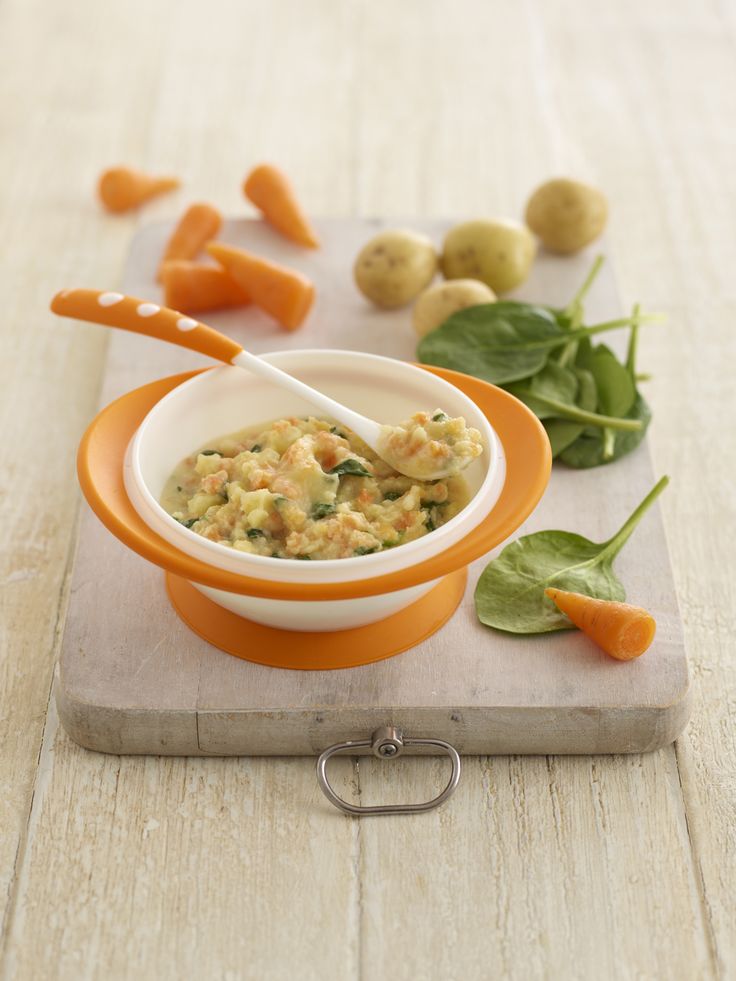 The main positive point in using such baby food is that the body receives not only delicious food, but also minerals, trace elements and vitamins. Of course, in any store and supermarket there is always a wide selection of various types of mashed potatoes, but caring mothers like you prefer to cook such a delicacy at home using natural and high-quality products. However, you should know that commercially produced puree goes through mandatory checks at all stages of its creation before the finished seaming appears on the shelves in the store. And by the way, for homemade puree, must adhere to the list of mandatory rules.
The main point concerns the choice of fruits, as you must purchase fruits that have not been chemically treated. For the preparation of baby puree, only natural and ripe berries and fruits should be used. You can choose the consistency of the dish at your discretion. Also, all containers, from those in which you will cook, and ending with jars, must be sterile and thoroughly washed.
Fruit Puree , among other things, can be a good filling for pies, pies, and also served as an independent dish as a dessert. They can also be poured over ice cream, and lovers of unusual flavors can use it as a side dish or sauce for meat dishes.
Preparing fruit jam for the winter is a completely simple procedure, and you can master it the first time.
Prepare fruit puree can be made from any berries and fruits, apples, apricots, pears, plums, peaches and even avocados, mangoes, bananas and other exotic fruits are perfect for these purposes.
If the preparation is prepared specifically for a child, then it is better to use pear, apple, nectarine, peach and apricot, since these fruits rarely cause allergic reactions in babies.
Almost all varieties of fruit puree are prepared according to the following technology: first, the fruit is baked in the oven, or boiled until soft, then the pulp is separated from the skin and seeds, and finally kneaded well. This method is good when you serve a fresh dish, but the situation is a little different with preservation, because the puree must be prepared so that it does not sour after a week. In general, detailed technology, process and recipe for cooking
Preparing apple puree for the winter. Recipe
Ingredients:
1. Wash the apples, peel them with a special vegetable peeler, cut in half, remove the middle and chop into small cubes. Take an enamel pan and put the fruit in it. Pour in some clean water and simmer for about five minutes until the apples are soft.
2. Remove the pan from the stove and let the mixture cool to room temperature. Grind the cooled, soft pieces through a sieve, or grind with a blender until smooth.
3. Wash jars and lids and be sure to sterilize them. Put applesauce on fire and bring to a boil. Stir and you can immediately pour into prepared, sterilized jars. Wrap and wrap.
This puree is best made from more acidic varieties of apples. You can add sugar and spices to the workpiece, to taste, but only if you are cooking for yourself, and not for an infant.
Preparation of pear puree for the winter. Recipe
Ingredients:
1. Citric acid
1. Wash, dry and peel the pears, even if they are soft. Remove the seeds and cut into small pieces. Transfer to an enamel saucepan, pour in some drinking water and simmer over medium heat until soft.
2. Blend until smooth with a blender and bring the mixture to a boil. To prevent the delicacy from being too sugary, add a little citric acid, literally at the tip of a knife. By the way, you can replace the citric acid with fresh lemon juice, or another more acidic puree, such as apple or plum puree.
Plum and peach puree preparations are prepared using exactly the same technology. If you are not making a delicacy for small children, then you can add other ingredients and spices there, at your discretion. Now you know that making pears, peaches, plums or apples puree is not at all difficult.
Preparation of apple and pumpkin puree for the winter. Recipe
Ingredients:
1. Apples - 1 kg
2. Pumpkin - 1 kg
3. Chopped orange (lemon) zest - 1 tsp.
4. Sugar - to your taste
1. Peel the pumpkin, do it carefully, as it is quite difficult. Also peel the apples and remove the seeds. Cut the fruits into small cubes and transfer to a saucepan. You can use a slow cooker or steamer. Cover with water and simmer until pumpkin is soft.
2. Grind the hot fruit in a puree, in any way convenient for you, add a teaspoon of grated zest, and sugar.
3. Place the puree over medium heat and bring to a boil, stirring constantly. Pour into clean jars and sterilize for about ten to twelve minutes. Seal, wrap and leave to cool.
If the puree is thinner than you would like, then boil it on the stove until it becomes thicker and more viscous.
Homemade fruit puree is very tasty and healthy. Such a treat will appeal not only to children, but also to adults.