
Oxo tot baby food mill
OXO Tot Baby Food Mill – The Baby Lab Company
Sale
Sale
Loading...
Loading...
Loading...
Loading...
Loading...
Loading...
Loading...
Loading...
Loading...
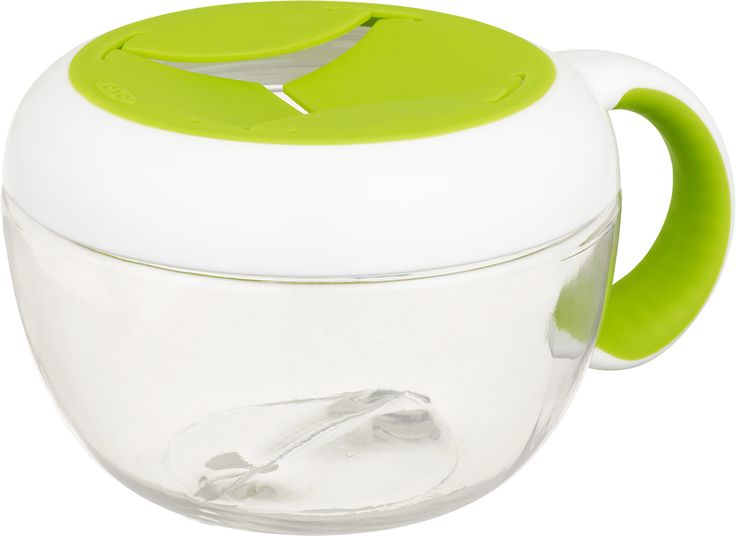
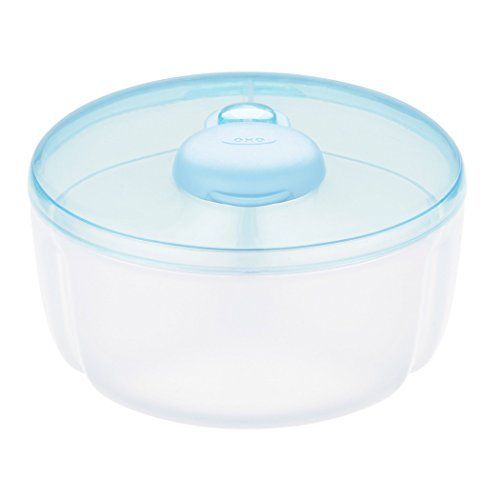
Make your own baby food and purees for your child in this Mash Maker Baby Food Mill from OXO Tot. It provides even consistency and can have liquid added as desired. It boasts a stable base and has a trough to catch excess liquids.
Why You’ll LOVE it:
– Purees grown-up food into baby food in seconds while ensuring consistent and even quality of the puree.
– Easily scoop or serve pureed food from top without disassembling.
– Shaped to allow for adding liquid to control puree thickness.
– Contoured body and non-slip grip for comfortable use.
– Non-skid base provides stability while milling.
– Convenient lid for storage and transport.
– Trough in the base catches excess liquid to minimize mess.
– BPA, phthalate and PVC free. Dishwasher safe.
Care Instructions: Washing with warm soapy water will do. Do not expose any plastic / silicone product to extreme heat or UV as it may cause damage and increase wear and tear.
Product Weight: 0.5 pounds
Product Dimensions (in inches): 8.7 x 7.0 x 3.7
Oxo Tot Mash Maker Baby Food Mill Teal
10
10
10
10
10
10
10
10
10
10
10
10
10
10
- Product
- Description
- What's in the box
Description
Highlight
- Ideal for pureeing adult food for baby consumption
- Creates even consistency and allows liquid to be added as desired
- Lets you scoop out food without need to disassemble
- Includes a lid
- Non-slip grip and easy-turn top handle
- Stainless steel grinding plate and blade
- Plastic/silicone/stainless steel
OXO Tot Mash Maker Baby Food Mill
Conveniently shaped to allow for quick filling and adding liquid to control thickness, the Mash Maker is designed to maximize ease.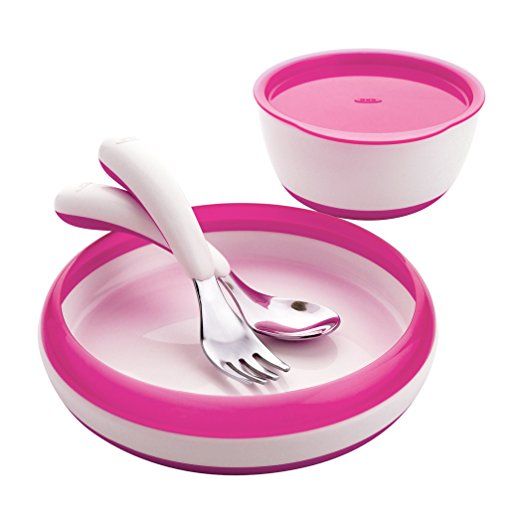 A non-skid base provides stability while mixing, and also catches excess liquid to minimize messes. The wide mouth lets you scoop and serve pureed food from the top without disassembling the Mash Maker.
What's in the box
- 1 x Oxo Tot Mash Maker Baby Food Mill (Teal)
Tags: Oxo Tot Mash Maker Baby Food Mill (Teal) Oxo Tot Baby Food maker Masher
Beautiful things. Overview of the winners of the "red dot product design 2011" award in the category "Tableware". Part I | posudka.ru
Н Let's not hide the fact that reviewing the red dot product design award in the tableware category is a real professional pleasure. At the heart of each award-winning product is an idea, or even a set of ideas, about how to make the environment more comfortable and supportive. Some of the products that deserved the award, our readers could already see in our previous materials of the "Design Ideas" section and in reports from the Ambiente exhibition, but we will write about others for the first time.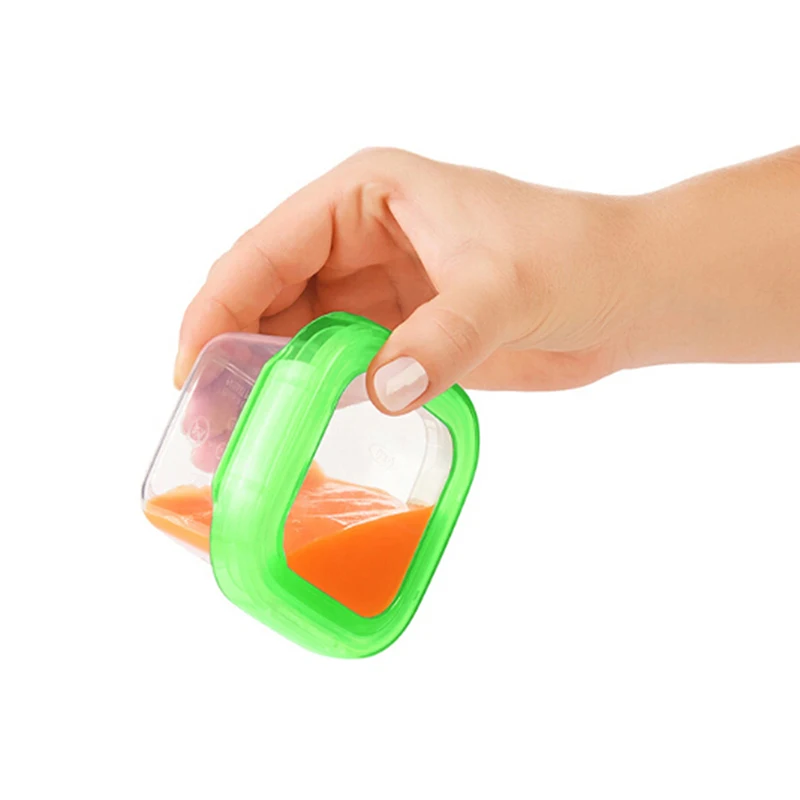
We start our review with the winners of the most prestigious award - red dot: best of the best 2011
Chopula Cooking Spatula
Manufacturer - Dreamfarm, Australia
Design - Dreamfarm, Australia
5 things always lie very simple and beautiful in their simplicity of solution. The Chopula spatula is one such example. Ordinary kitchen spatulas are a rather inconvenient tool (especially when it comes to their use in deep dishes), it is not always possible to lift and turn food with their help. Thought out to the smallest detail, Chopula solves a lot of problems and makes cooking easier. The flexibility of the tool makes it possible to apply it with high efficiency along the edges of the dishes, and the innovative shape of the working surface allows you to carry out the operations of mixing products, their separation and grinding without any effort and inconvenience.
VIDEO
________________________________________________
Eva Solo XO Collection Grater
Manufacturer - Eva Solo A/S, Denmark
Design - Tools Design (Claus Jensen, Henrik Holbæk), Denmark
claim the status of one of the most beautiful graters of all time.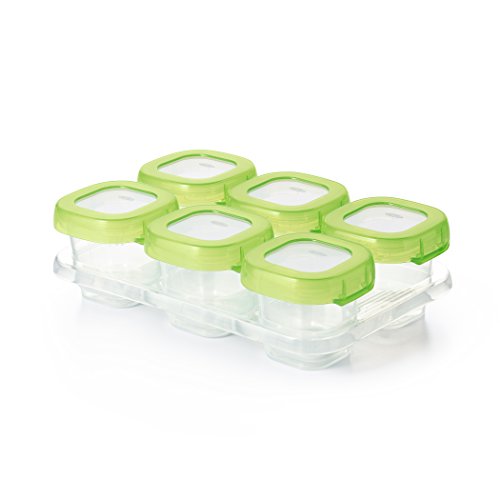 In addition to the bewitching appearance, this tool is surprisingly convenient and functional. The parabolic design of the grater provides a secure grip on the surface. The working parts of the grater are made of durable stainless steel and have excellent cutting properties and retain their sharpness for a long time. Graters are produced in four versions with different surfaces and all of them can be compactly packed and placed in a cupboard or on a shelf.
VIDEO
____________________________________________
This completes the category "best of the best" and we move on to the "ordinary" winners of red dot: product design 2011 in the category "Tableware"
bobble Water Bottle
USA
Design - Move Collective, USA / Karim Rashid, USA
People who think about the environment can easily be recognized by the fact that they exclusively use reusable water bottles, thereby reducing the amount of waste generated by our civilization.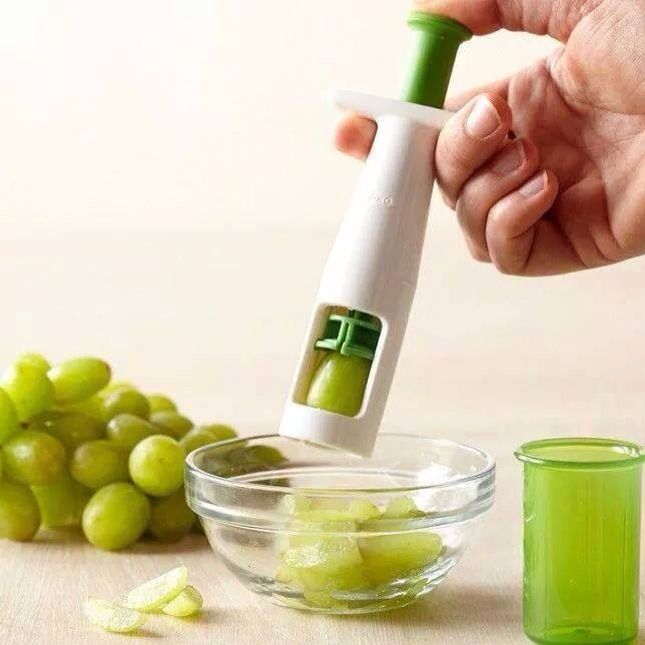 The Bobble series of refillable bottles are designed to keep quality water on hand at all times. Bobble have a carbon filter built into the cork that effectively removes chlorine and organic contaminants from the water. It is impossible not to mention the modern and ergonomic design of products, to which one of the most famous designers in the world, Karim Rashid, had a hand. Bottles are made from safe plastic, which is recyclable.
______________________________________________
Callista Lemon Squeezer
Manufacturer - blomus GmbH, Germany
Design - Daniels & Koitzsch, Germany
This elegant and ergonomic stainless steel mussel-like lemon squeezer . The Callista Lemon Squeezer mechanism allows you to filter the seeds and zest, giving pure juice as a result.
____________________________________________
CLIP & CLOSE 3D Perfect Clean Food Storage Boxes
Manufacturer - EMSA GmbH, Germany
Design - Razorbite design consultancy (Mike Ellams), UK
cover design. Thanks to a special production technology, the closing mechanism and the lid are one piece, which ensures easy closing and tightness inside the container. The series is thought out in such a way that different containers can be easily combined with each other, saving space.
____________________________________________
Confectionery Funnel
Manufacturer - Rösle GmbH & Co. KG, Germany
Designed by Thomas Amann, Germany
This culinary funnel can make life a lot easier for lovers of gourmet treats. With it, you can easily decorate ready-made dishes and pastries, up to very fine lines. Another function of the product is dosing products. By means of a special regulator on the handle, you can accurately measure the required amount of a particular product.
____________________________________________
Depot Streuer Spice Set (Shakers and Jars)
Manufacturer - WMF AG, Germany
Design - Metz und Kindler Produktdesign (Michael Kindler), Germany
handsome and elegant.
 Transparent glass allows you to see the contents of the containers, and a sealed stainless steel lid reliably preserves the aroma during storage. Shakers included in the set have three different holes for grinding different degrees of fineness. Universal design makes the set suitable for kitchen interiors with different styles.
 ____________________________________________
Garlic King Kitchen Utensil
Manufacturer - Leifheit AG, Germany
Design - Teams Design GmbH (Reinhardt Renner), Germany
, or on brass knuckles, serves to grind garlic. A feature of its working part is that the garlic does not choke, but is carefully cut into small pieces. The design of the tool also allows the hands not to come into contact with garlic, which, you see, is very convenient.
____________________________________________
Golden Spiral Wine Glass Lead Crystal Glasses
Manufacturer - Lotus Crystal Co.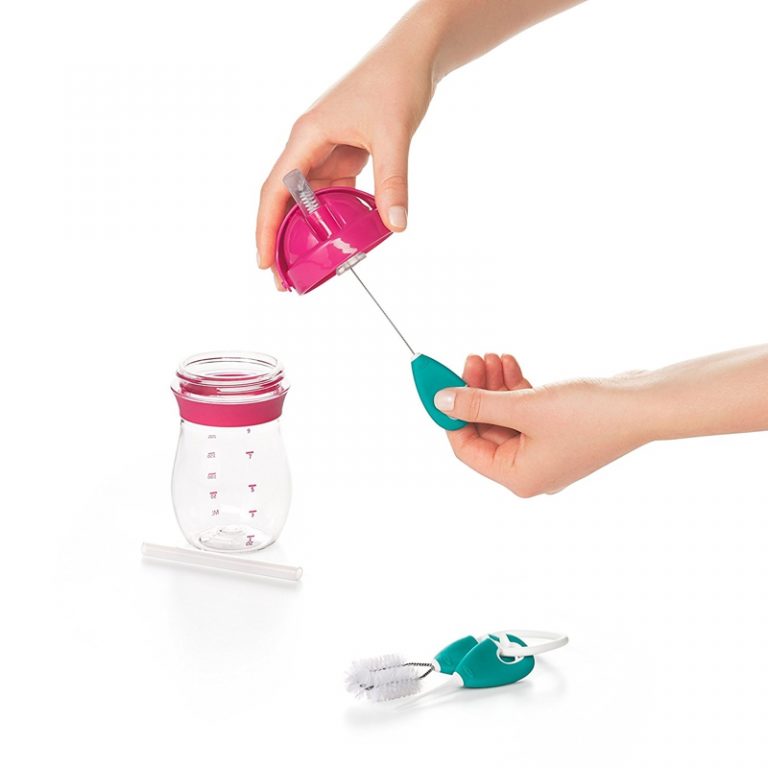 , Ltd., Thailand
Design - Viroj Leetrakul, Thailand
red wine Golden Spiral is based on the rule of the golden ratio, in which the division of a continuous value into two parts is carried out in such a ratio that the smaller part is related to the larger one, as the larger one is to the whole value. In addition to the mathematical harmony reflected in the classic form of products, the Golden Spiral series of glasses has other advantages. It is produced by Thai masters from crystal glass with a lead content of 24% and is great for revealing the aromas of fine wines.
____________________________________________
Lock & Lock Glass Euro (Boroseal II) Food Storage Container
Manufacturer - Lock & Lock Co., Ltd., Korea
Design - Woon-Hwan Choi, Korea
Another sample container for cooking and storing food, this time from Korea. The containers are made from borosilicate glass and can be used in the microwave and in the oven at temperatures up to 400 degrees Celsius.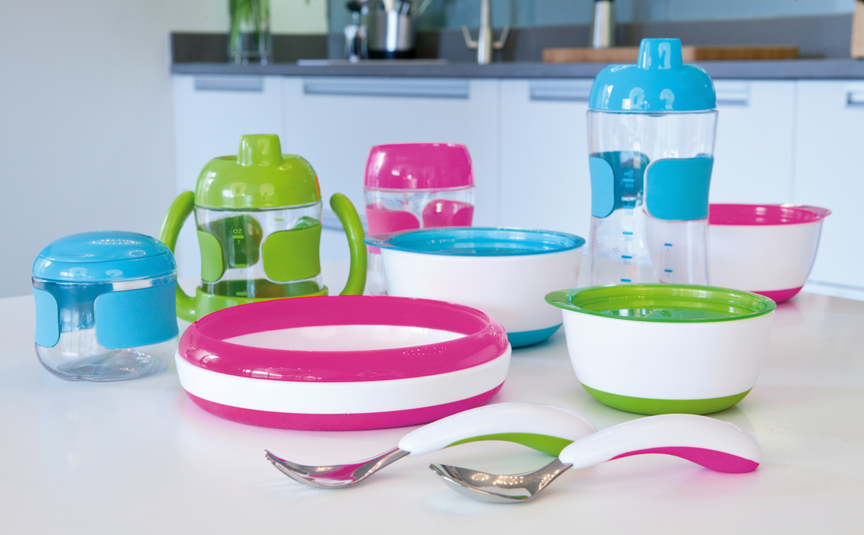 Plastic lids are lockable on four sides and provide airtight food storage.
____________________________________________
Madison Wheat Beer Glass
Manufacturer - Sahm GmbH + Co. KG, Germany
Design - Sylvia Weber, Germany
Madison wheat beer glasses are a classic style - they have nothing superfluous. From a functional point of view, glasses have such valuable qualities as impact and scratch resistance, as well as high transparency. These glasses are pleasant to drink and easy to clean.
____________________________________________
Multi-Grater
Manufacturer - Rösle GmbH & Co. KG, Germany
Design - Thomas Amann, Germany
This rather unconventional grater is a truly handy and versatile tool. Quite compact, it has an integrated handle and side edges with a comfortable angle of inclination. The anti-slip bottom of the product ensures its secure fixation on the table, and the attached container ensures simple and easy pouring of grated products.
5
____________________________________________
Neo Horizontal Peeler
Manufactured by Berghoff Worldwide, Belgium
Designed by Frederik Aerts, Belgium
Neo Horizontal Peeler stands out with its stylish black and white contrasting design. The product has a stainless steel blade with double-sided sharpening, an ergonomic plastic handle with a non-slip surface. Neo is beautiful, cleans vegetables easily, is hygienic and easy to care for.
____________________________________________
Omami Lunch Box
Manufacturer - Araven, Spain
Design - Estudio Borja Garcia (Borja Garcia Sanchis), Spain
The Omami lunch box series is the epitome of urban elegance. The high functionality of the product is combined with a fresh and remarkable design. Made of plastic, Omami lunch boxes are airtight and suitable for transporting various meals. In addition, the consumer can choose from several different design versions.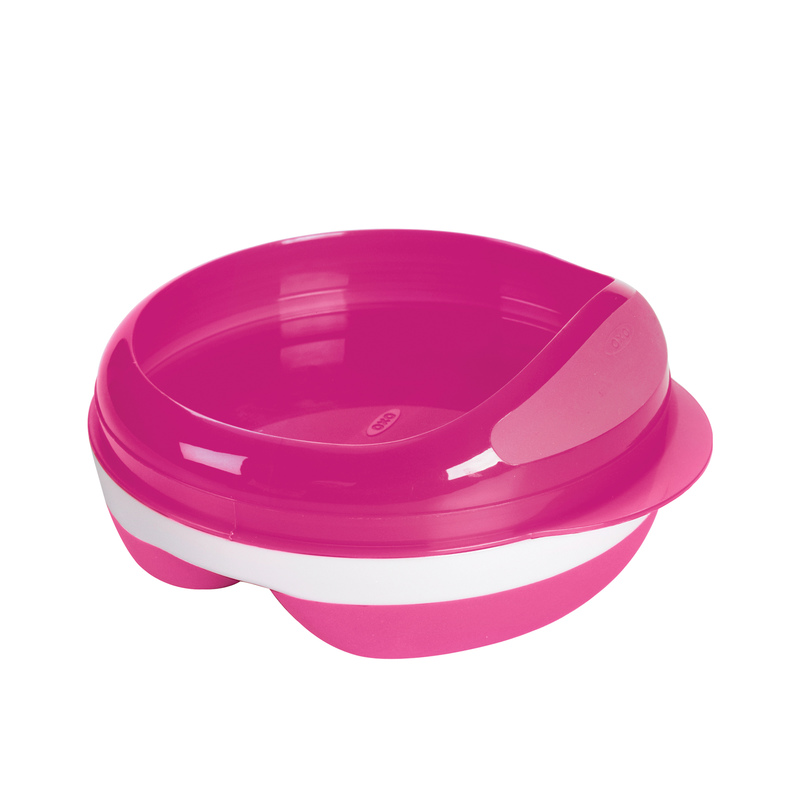
____________________________________________
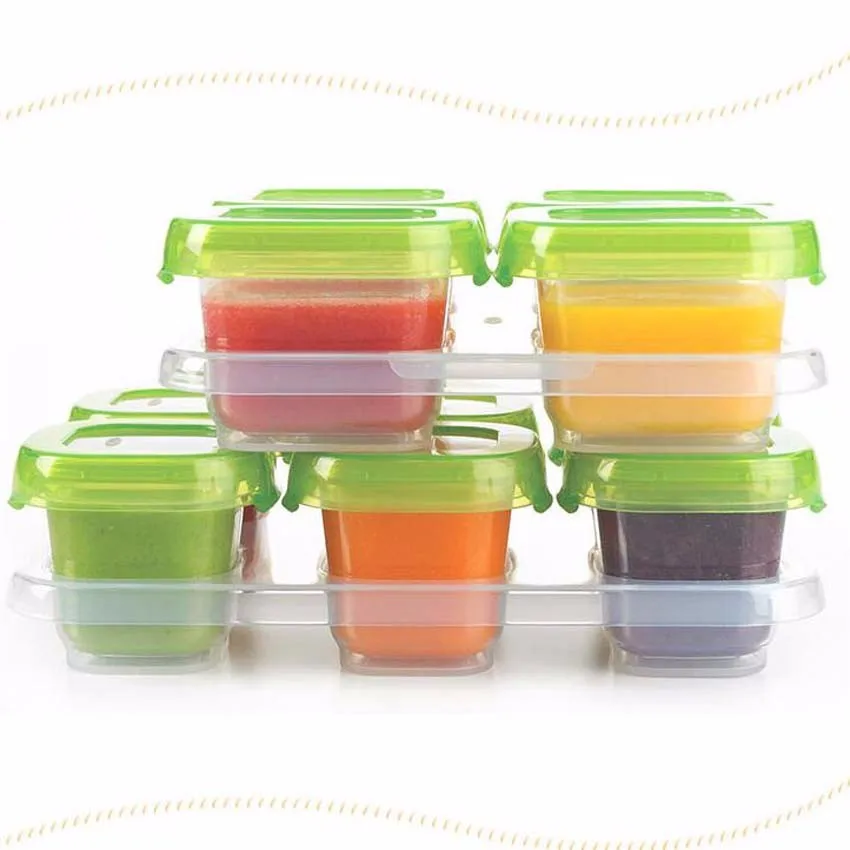
OXO Tot Feeding Line Training Tableware
Manufactured by Oxo International, USA
Designed by Smart Design, USA
As we all know, for significant children, self-feeding is always difficult. The OXO baby food set, thanks to thoughtful details, greatly facilitates the process of acquiring the necessary skills for the baby. Bright colors create a positive mood, high and concave edges of the products prevent food from falling out of the plate, a non-slip bottom fixes the dishes on the table, and cutlery, thanks to ergonomic handles, is securely held by children's hands. As you grow older, the set can be modified - the inner light green inserts can be easily removed.
Based on materials from the site http://en.red-dot.org
© Posudka.ru
Page 3883 - Guide +
DKPC
digital camera HOP Receiver
9000 Own Records:
Serial Number:
Date of Purchase:
Rio Rancho, New Mexico, USA
www. lectrosonics.com
Quick Start Steps
- Install receiver batteries and turn on power.
- Set the compatibility mode according to the transmitter.
- Set or synchronize the frequency according to the transmitter.
- Set the encryption key type and synchronize with the transmitter.
- Select analog or digital (AES3) output.
- Verify that RF and audio signals are present.
WARNING: Moisture, including talent perspiration, will damage the receiver. Wrap the DCHR in a plastic bag or other protection to avoid damage.
NOTE: This equipment has been tested and found to comply with the limits for a Class B digital device, pursuant to Part 15 of the FCC Rules. These limits are designed to provide reasonable protection against harmful interference in a residential installation. This equipment generates, uses and can radiate radio frequency energy and, if not installed and used in accordance with the instructions, may cause harmful interference to radio communications.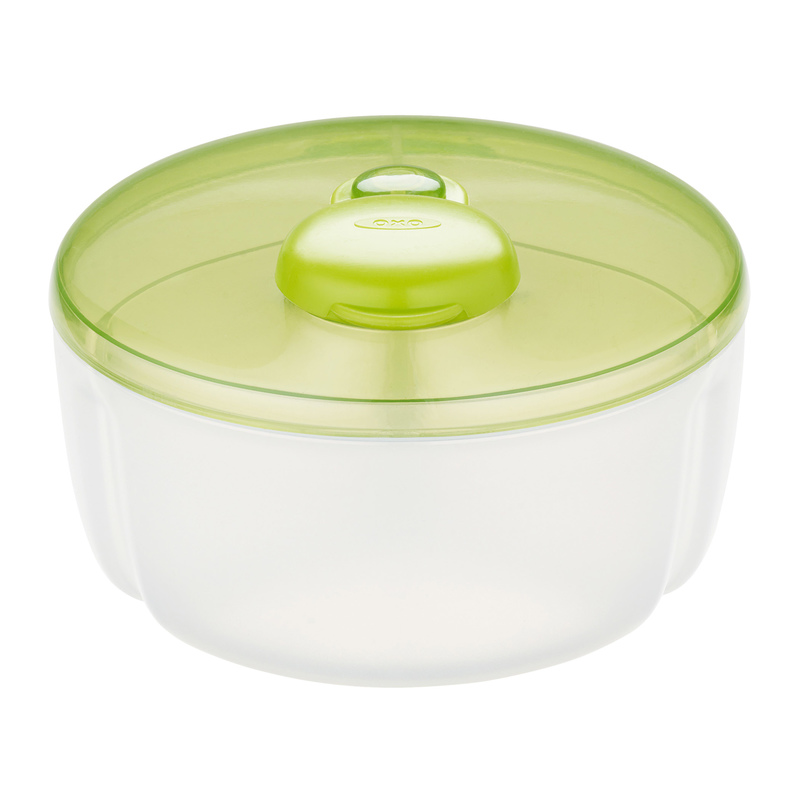 However, there is no guarantee that interference will not occur in a particular installation. If this equipment does cause harmful interference to radio or television reception, which can be determined by turning the equipment off and on, the user is encouraged to try to correct the interference by one or more of the following measures:
- Reorient or relocate the receiving antenna.
- Increase the distance between the equipment and the receiver.
- Connect the equipment into an outlet on a circuit different from that to which the receiver is connected.
- Consult the dealer or an experienced radio/TV technician for help.
DCHR Digital Stereo/Mono Receiver
The DCHR digital receiver is designed to work with a DCHT transmitter to form a digital camera switching system. The receiver is also compatible with M2T and M2T-X unencrypted digital stereo transmitters and D2 series mono digital transmitters including DBU, DHu and DPR. Designed to be camera-mounted and battery-powered, the receiver is ideal for location and sports broadcasting on TV, among many other applications.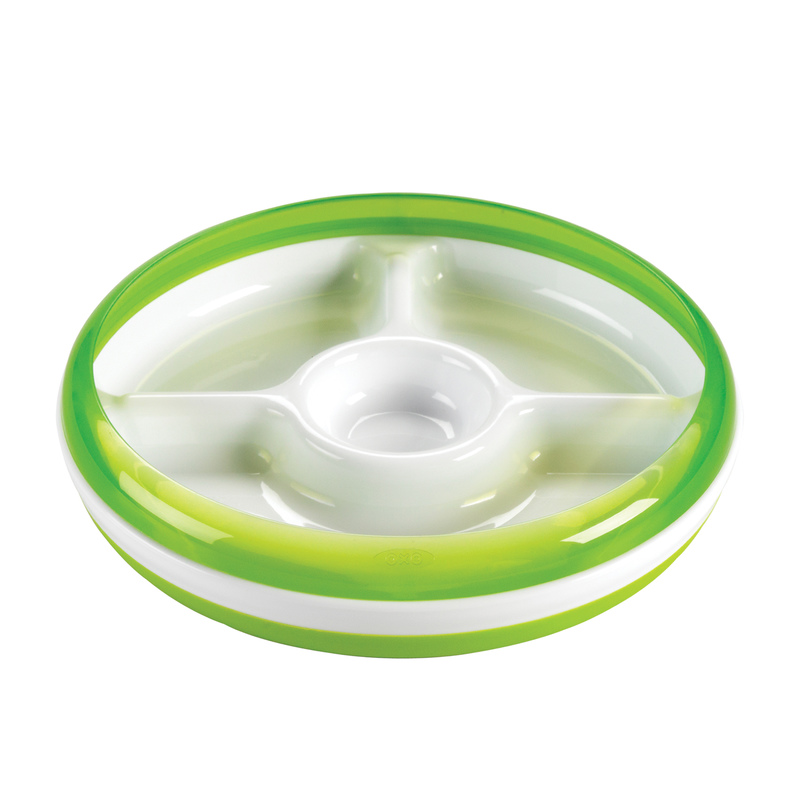 DCHR uses advanced antenna diversity switching during digital packet headers for seamless audio. The receiver is tuned in a wide range of UHF frequencies. 9The 0304 DCHR has one audio output jack that can be configured as 2 independent balanced line outputs or as one 2-channel AES3 digital output.
High-quality stereo sound is supplied to the headphone monitor output. amp is more cheerful with enough power to drive even inefficient earphones or headphones to a level sufficient for noisy environments. The intuitive interface and high-resolution LCD display on the device allow users to quickly know the status of the system. 9The 0304 DCHR also uses two-way IR sync so settings from the receiver can be sent to the transmitter. Thus, frequency planning and coordination can be performed quickly and reliably using local RF information.
Smart Tuning (SmartTune ™)
A major challenge faced by wireless users is finding clear operating frequencies, especially in an RF-saturated environment.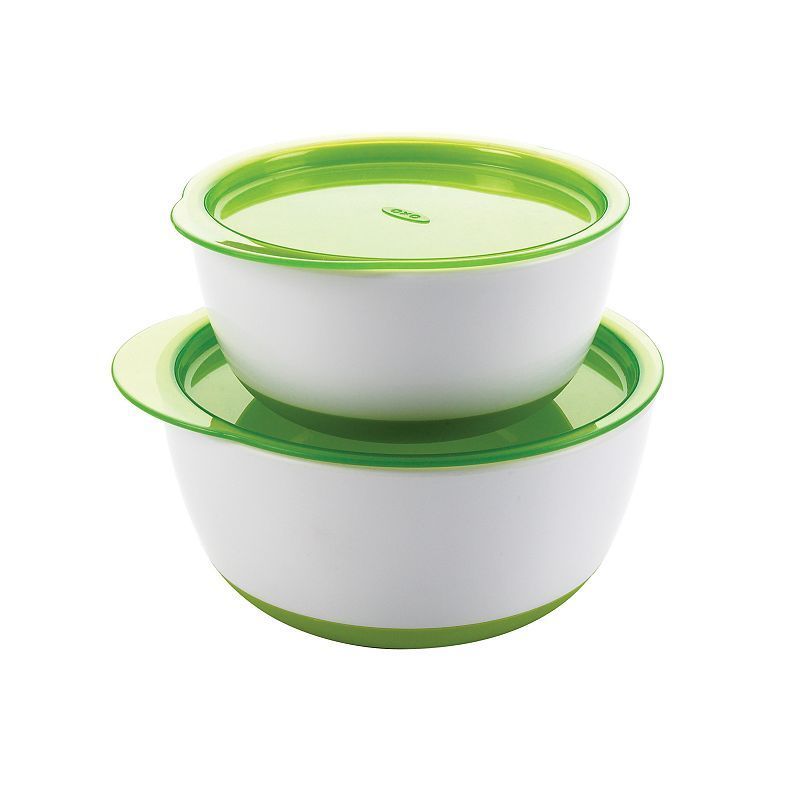 SmartTune™ solves this problem by automatically scanning all frequencies available on the device and tuning to the frequency with the least radio interference, greatly reducing tuning time.
Encryption
DCHR provides 256-bit AES encryption in CTR mode. When transmitting audio, there are situations where privacy is important, such as during professional sporting events. High entropy encryption keys are first generated by the DCHR. The key is then synchronized with an encrypted transmitter/receiver via IR. The audio will be encrypted and can only be decoded and heard if both the transmitter and the DCHR have the same key. There are four key management policies available.
RF Front-End with Tracing Filter
The wide tuning range is useful for finding clean frequencies to work with, but it also allows a larger range of interfering signals to reach the receiver. The UHF frequency band, in which almost all wireless microphone systems operate, is largely filled with high-powered television transmissions. TV signals are much stronger than a wireless microphone or handheld transmitter and will reach the receiver even if they are at frequencies that are significantly different from those of the wireless system. This powerful energy is perceived by the receiver as noise and has the same effect as the noise that occurs at the extreme operating range of the wireless system (bursts and drops in noise). To reduce this interference, high quality external filters are needed in the receiver to suppress RF energy below and above the operating frequency.
The DCHR receiver uses a selective frequency tracking filter at the front end (first stage circuit after the antenna). When the operating frequency is changed, the filters are retuned into six different "zones" depending on the selected carrier frequency.
In the input circuit, a tuned filter is followed by an ampLifier and then another filter to provide the selectivity needed for noise rejection, yet provide a wide tuning range and maintain the sensitivity required for extended operating range.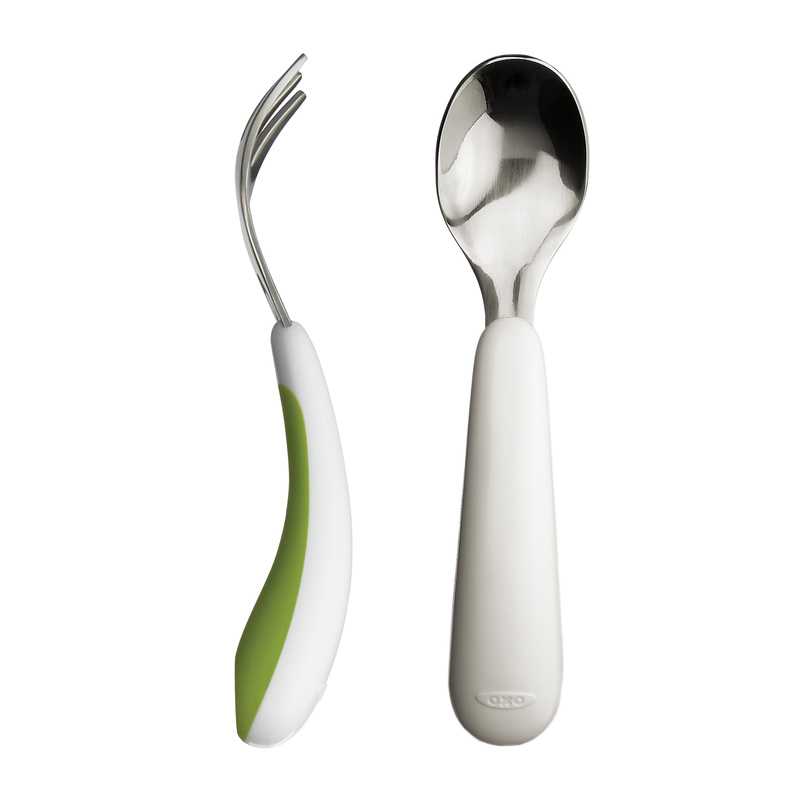
Panels and Features
Battery Status LED
When the battery status LED on the keypad is green, the batteries are healthy. The color changes to red in the middle during execution. When the LED starts flashing red, only a few minutes remain.
The exact point at which the LED turns red will depend on the brand and condition of the battery, temperature and power consumption. The LED is meant to simply grab your attention and not be an accurate indication of the time remaining. Correctly setting the battery type in the menu will improve accuracy.
Due to a weak battery, the LED indicator will sometimes turn green immediately after the transmitter is turned on, but soon it will be discharged to the point that the LED will turn red or the device will turn off completely.
RF Link LED
When a valid RF signal is received from the transmitter, this LED lights up blue.
IR (Infrared) Port
Settings including frequency, name, compatibility mode, etc.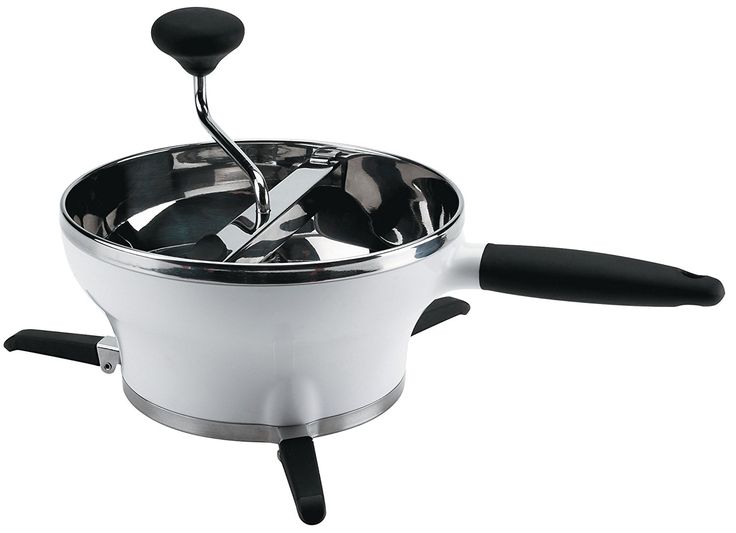 can be transferred between receiver and transmitter.
Outputs
Headphone Monitor
Extended duty cycle recessed 3.5mm stereo jack for standard headphones and headphones.
Audio jack (TA5M mini XLR):
- AES3
- Analog line out
5-pin input connector for connecting two discrete channels at mic or line level. The input connections are configured as follows:


 Plug-in headphones or headphones. (Be sure to start by setting the receiver's volume low!)
  Press MENU / SEL to open the setting screen for that item. See Menu Map on the next page.
 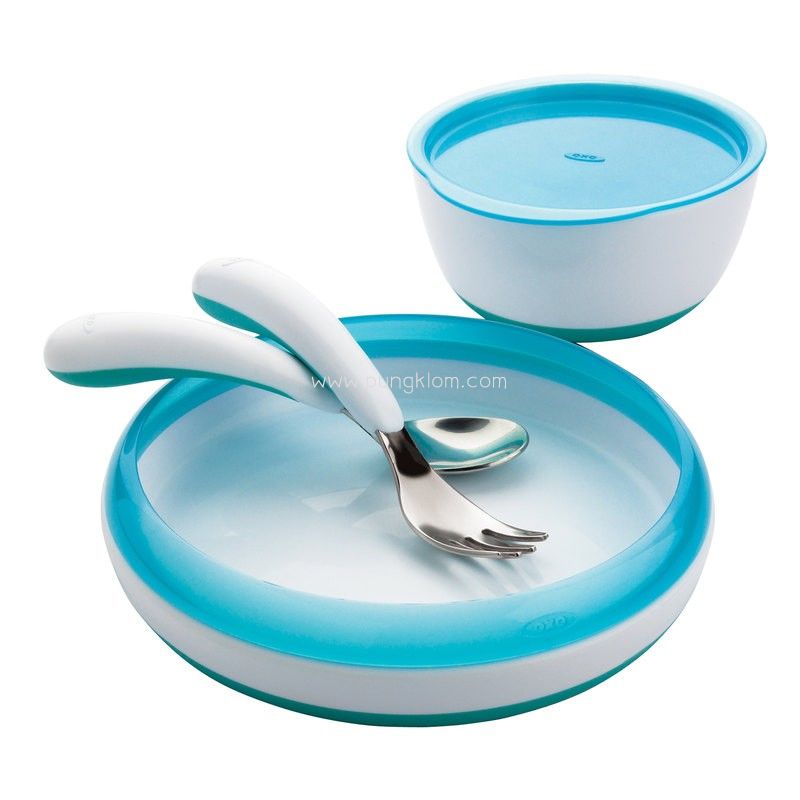 Select frequency group NONE for normal tuning.
  Now pressing the UP and DOWN arrow buttons moves the cursor in the list. To remove the selected frequency from the list, press MENU / SELECT + DOWN. To add a frequency to the list, press MENU / SELECT + UP. The frequency selection screen will open. Use the UP and DOWN arrow buttons to select the desired frequency (in MHz and kHz). Press MENU / SELECT to change from MHz to kHz. Press MENU/SELECT again to add the frequency. A confirmation screen will open where you can add the frequency to the group or cancel the operation.
  By default DCHR is set to "Off", while "Normal" provides some noise reduction without affecting the high frequency response, and "Full" is a more aggressive setting with minimal impact on the high frequency response.
 If an encrypted transmitter is turned off but DCHR remains on, the volatile key must be sent to the transmitter again. If the DCHR is powered down, the entire session ends and the DCHR must generate a new volatile key and send it to the transmitter via IR.
 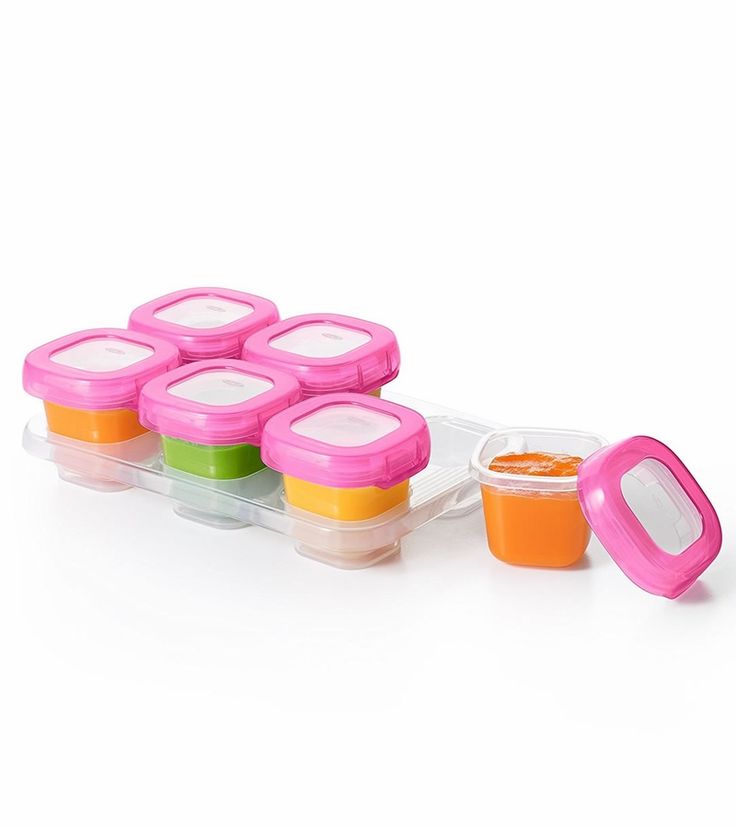 The key does not have to be generated by the DCHR. Simply set an encrypted Lectrosonics transmitter and DCHR to Universal, and encryption is ready. This provides convenient encryption between multiple transmitters and receivers, but is not as secure as generating a unique key.
| MCDTA5TA3F | TA5F miniature jack with XLR lock to single TA3F jack with XLRS digital audio lock from two channels of digital audio. |
| MCDTA5XLRM | TA5 mini socket with locking XLR to full size XLR plug for two channels of AES digital audio from DCHR.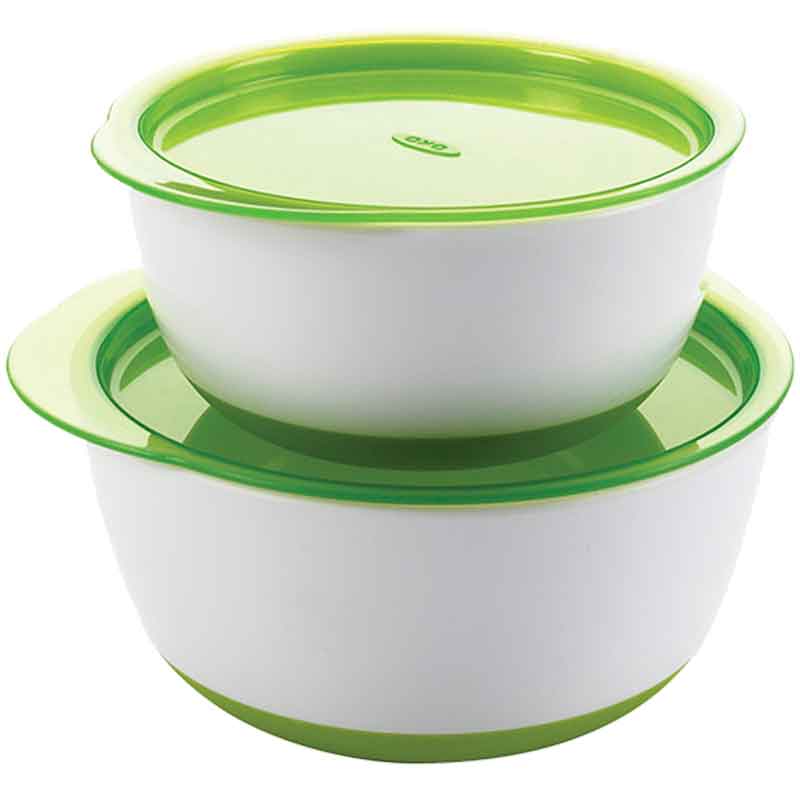 |
| MCTA5PT2 | TA5F mini female with double pigtail XLR fixing for two analog audio channels from DCHR; allows you to install custom connectors. |
| MCTA5TA3F2 | TA5F lockable mini XLR connector with TA3F double lock with mini XLR connector for two channels of analog audio from DCHR. |
included accessories
AMJ19
Rog Shtyrevo Antenna with a standard SMA connector, Block 19.
Antennas with a SMA, BCK 22. 9000 9000 9000 9000. 9000 9000. 9000. 9000 9000. 9000 9000. 9000 9000. 9000. 9000 The
DCHR comes with two (2) batteries. Brand name may vary.
Options
26895
Replacement wire belt clip.
21926
USB cable for firmware update
LTBATELIM
Battery discharger for LT, DBu and DC HT transmitters and M2R; Camera Hop and similar applications.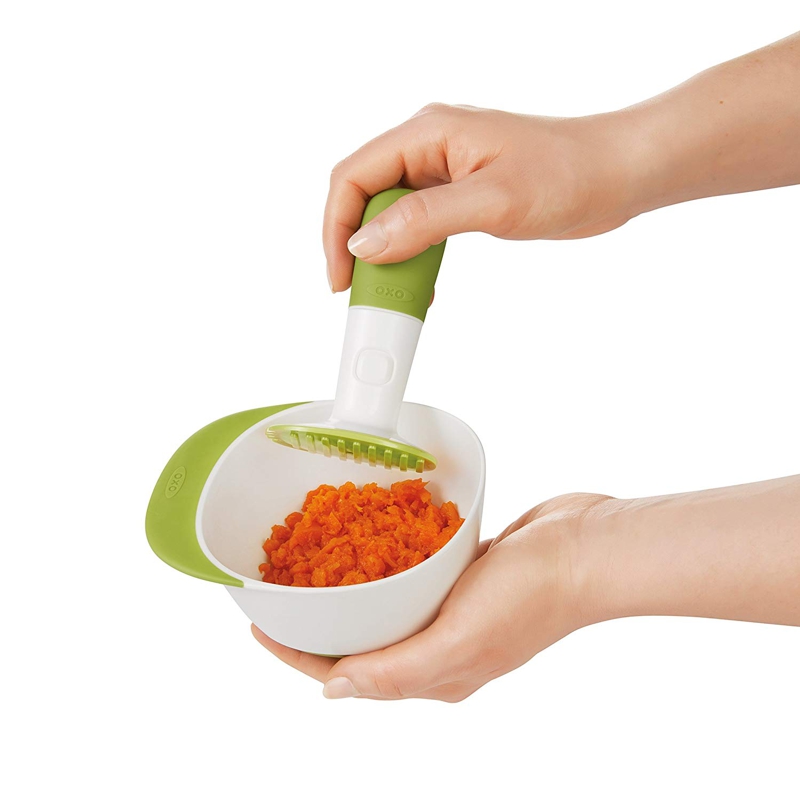 Optional power cables include P/N 21746 rectangular, retaining cable; Length 12" Part # 21747 Right Angle, Retaining Cable; 6 feet long; DCR12 / A5U universal AC power supply.
LRShUE
This accessory kit includes the accessories needed to mount the DCHR to a standard cold shoe using the wire belt clip that comes with the receiver.
AMJ (xx) Rev. A
Whip antenna; turning. Specify the frequency block (see diagram below).
AMM (xx)
Whip antenna; straight. Specify the frequency block (see diagram below).
About whip frequencies:
Whip frequencies are indicated by the unit number. For the former amp, that is, the AMM-25 is a straight pin model cut to a block frequency of 25.
L series transmitters and receivers are tuned in a range spanning three blocks. The correct antenna for each of these tuning ranges is the block in the middle of the tuning range.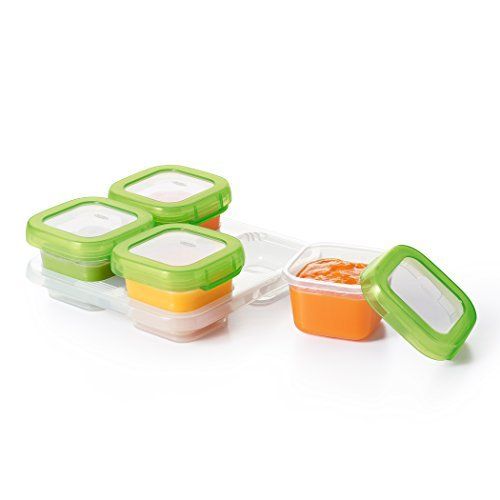 8PSK with forward error correction
Audio Performance:
Frequency response: D2 mode: 25 Hz - 20 kHz, +0 \ -3 dB
Stereo mode: 20 Hz - 12 kHz, + 0 / -3 dB
THD + N: 0.05% (1 kHz at -10 dBFS)
Dynamic Range: > 95 dB (weighted)
Adjacent Channel Isolation > 85 dB
Variety Type: Switched Antenna During Digital Packet Headers
Audio output: Analog: 2 balanced outputs
AES3: 2 channels, 48 kHz sample rate
Headphone monitor: 3.5 mm TRS jack
Level (linear analog): -50 to +5 dBu
Power requirements : 2 AA batteries (3.0 V)
Battery life: 8 hours; (2) Lithium AA
Power consumption: 1 W
Dimensions:
Height: 3.0 in / 120 mm. (with handle)
Width: 2. 375 in. / 60.325 mm.
Depth: 625 in. / 15.875 mm.
Weight: 9.14 oz / 259 g (with batteries)
Specifications subject to change without notice.
Service and Repair
If your system is malfunctioning, you should try to fix or isolate the problem before concluding that the equipment needs repair. Make sure you have completed the setup procedure and operating instructions. Check connecting cables.
We strongly recommend that you do not attempt to repair the equipment yourself and do not contact your local repair shop for anything other than the most basic repairs. If the repair is more complicated than a broken wire or loose connection, send the device to the factory for repair and service. Don't try to tweak any of the controls inside the devices. Once set at the factory, the various controls and trims do not move due to age or vibration and require no further adjustment. There are no adjustments inside that would make a faulty unit work.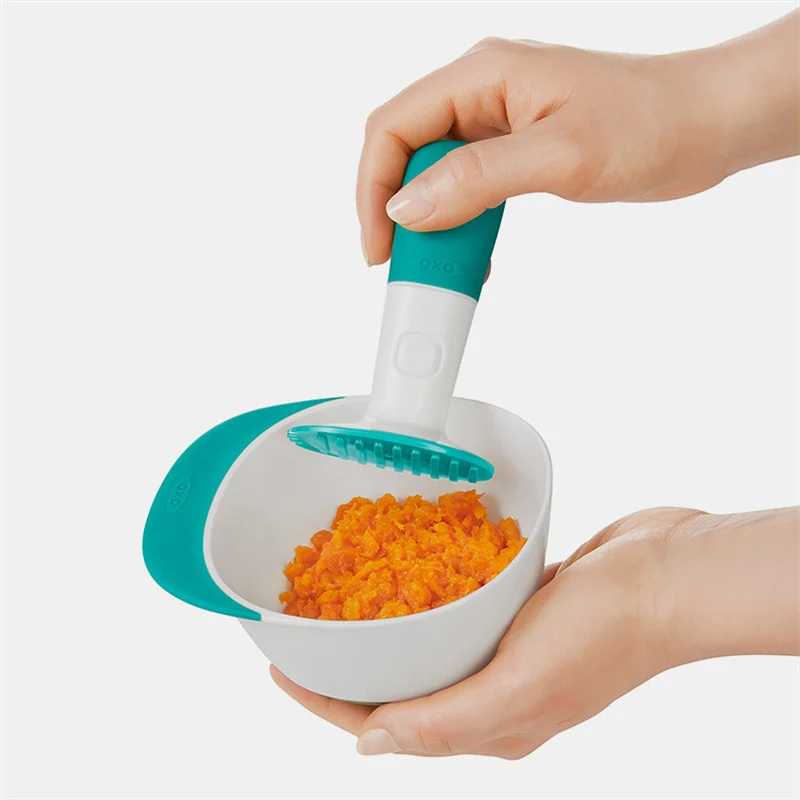
The LECTROSONICS service department is equipped and staffed to quickly repair your equipment. Under warranty, repairs are made free of charge in accordance with the terms of the warranty. Post-warranty repairs are charged at a moderate flat rate plus parts and shipping. Because it takes almost as much time and effort to identify a fault as it does to repair, a fee is charged for an accurate quote. We will be happy to inform you by phone of the approximate cost of post-warranty repairs. Returning equipment for repair For timely service, follow these steps:
A. DO NOT return equipment to the factory for repair without contacting us by email or telephone. We need to know the nature of the problem, the model number and serial number of the equipment. We also need a phone number where you can be contacted between 8 AM and 4 AM (US Mountain Standard Time).
B. Upon receipt of your request, we will issue you a Return Authorization (RA) number. This number will help expedite your repair through our receiving and repair departments.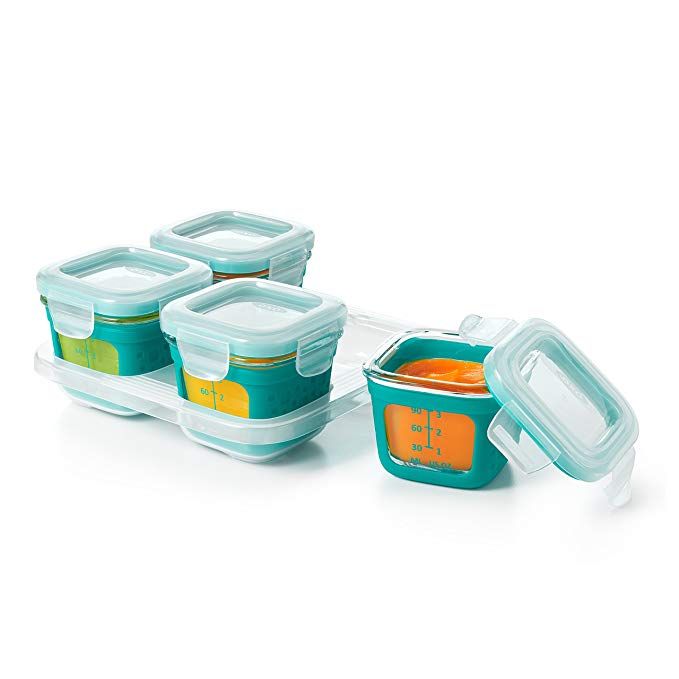 The return authorization number must be clearly marked on the outside of the shipping container.
C. Pack the equipment carefully and send it to us with shipping prepaid. If necessary, we can provide you with appropriate packaging materials. UPS or FEDEX is usually the best way to ship units. Heavy units must be "double crated" for safe transport.
D. We also strongly recommend that you insure the equipment as we are not responsible for loss or damage to equipment you ship. Of course, we provide the equipment when we ship it back to you.
LectroSonics USA:
| Mailing Address: Lectrosonics, Inc. PO Box 15900 Rio Rancho, NM 87174 USA | Delivery Address: Lectrosonics, Inc. 561 Laser Rd. Office 102 Rio Rancho, NM 87124 USA | Phone : + 1 (505) 892-4501 (800) 821-1121 (toll-free in the US and Canada) Fax 561 Laser Rd. 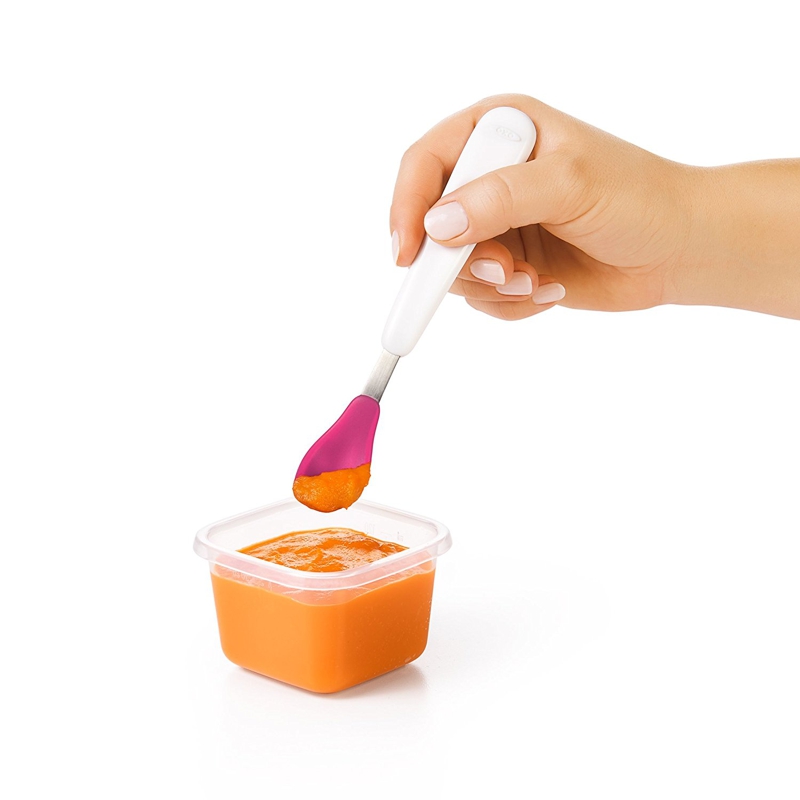 + 1 (505) 892-6243 + 1 (505) 892-6243 |
Web: www.lectrosonics.com
E-mail: [email protected]
[email protected]
ONE YEAR LIMITED WARRANTY
The equipment is warranted for one year from the date of purchase to be free from defects in material or workmanship, provided it was purchased from official dealer. This warranty does not cover equipment that has been misused or damaged as a result of careless handling or transportation. This warranty does not apply to used or demonstration equipment.
In the event of any defect, Lectrosonics, Inc. will, at our option, repair or replace any defective parts free of charge for parts or labor. If Lectrosonics, Inc. cannot fix the defect in your equipment, it will be replaced free of charge with a similar new item. Lectrosonics Inc. pay for the cost of returning your equipment.
This warranty applies only to products returned to Lectrosonics, Inc. or an Authorized Dealer with shipping charges prepaid within one year from the date of purchase.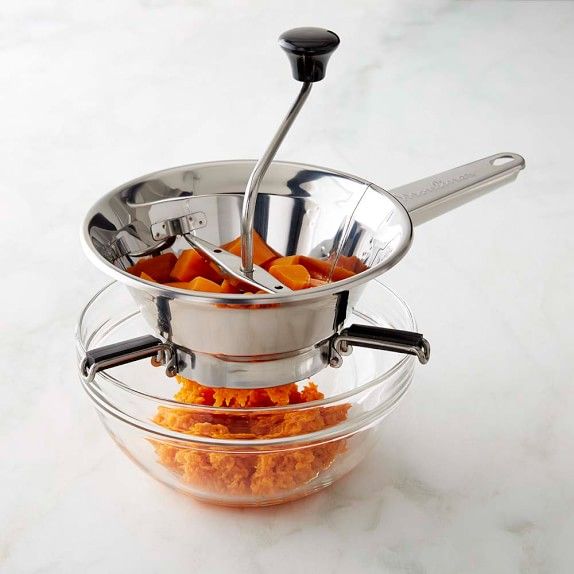


 .
.