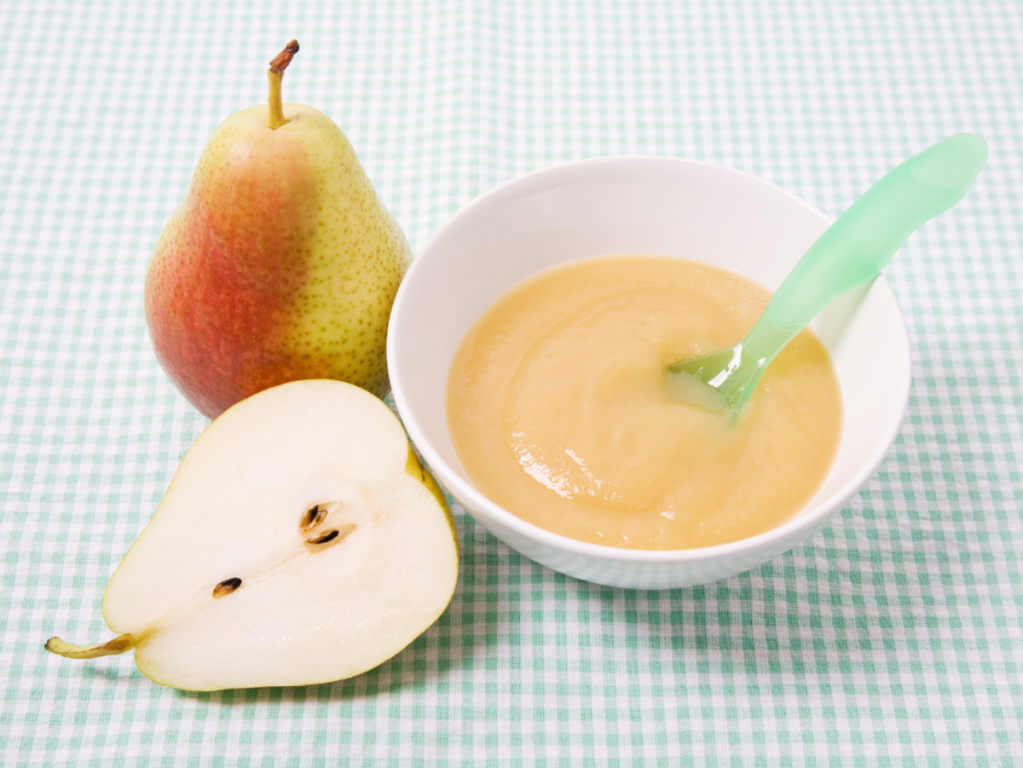
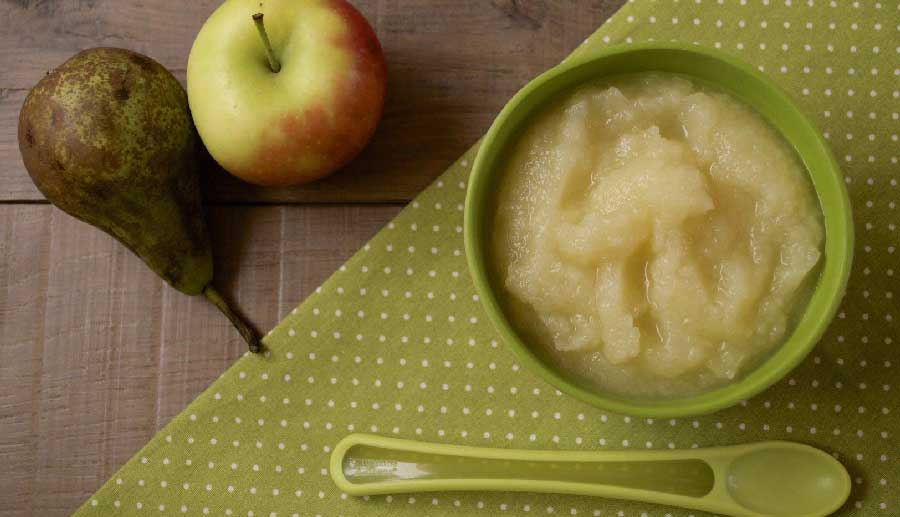
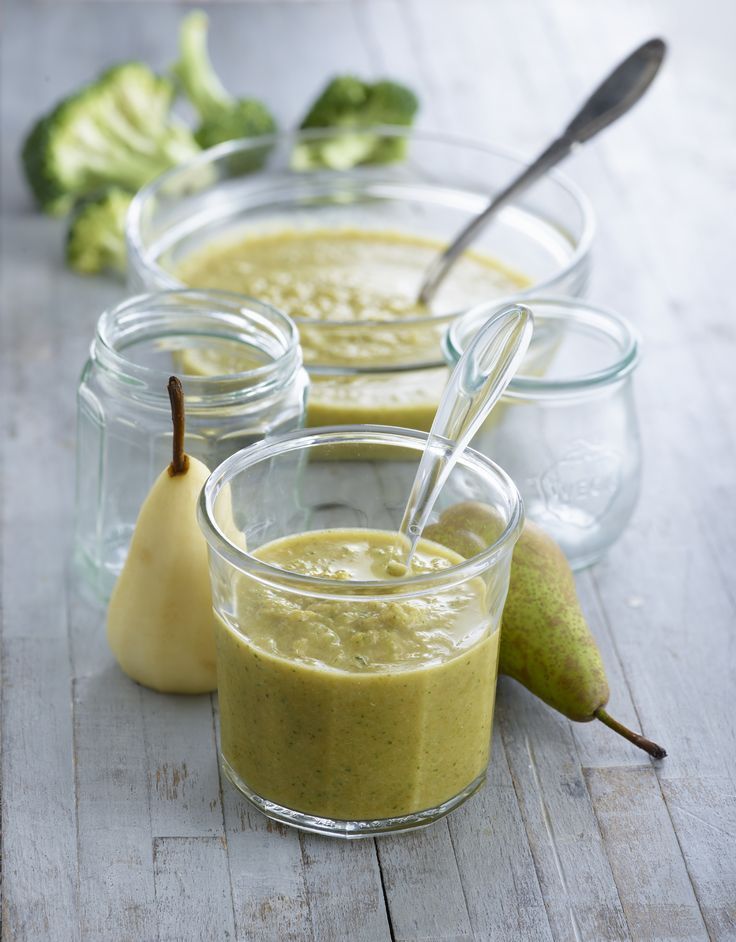
Puree pears for baby food
Pear Baby Puree (4+ Months - Stage One)
This Pear Baby Puree is so creamy and delicious that you will want to eat it as well! A healthy and homemade puree filled with wholesome pears, this recipe is a wonderful first puree for your baby. It’s a great Stage One Baby Food for 4-6+ month olds.
Medically reviewed and co-written by Jamie Johnson, Registered Dietitian Nutritionist (RDN), and Lauren Braaten, Pediatric Occupational Therapist (OT).
Pear Baby Food PureeLevel up the yumminess of your baby’s purees with pears! 👊
This is a simple recipe filled with simmered pears paired with a pinch of warming spices. It delivers an irresistible, delicious combo that easily hits the one-for-one status — one bite for your baby 👶, one bite for you 👩!
Is it your first time making homemade baby food? Then I suggest you start this journey by reading my in-depth Guide on how to Make Homemade Baby Food. The detailed guide goes over all the important information such as the best cooking tools to have on hand, safe storage, how to know when baby is ready for solids, how to introduce purees, the best first foods for baby, and more! You can also check out my best-selling cookbook for even more information and recipes!
Pear Baby Food Video
Watch this video to see how easy this Pear Puree is to make!
Reasons to Love this Pear Baby Puree- great baby food for 4-6+ months
- 1-ingredient recipe
- super smooth and creamy
- delicious
- great for digestion
- simple and easy to make — less than 20 minutes
- freezer-friendly
- budget-friendly
- homemade
- healthy
- organic – you can use organic pears in this recipe
- Good source of immune-boosting vitamin C
- Great source of fiber that helps with digestion and improves constipation
- Protects your baby’s heart by providing antioxidants, vitamins, and fiber
- Provides vitamin K to help strengthen bones
Make sure to read the recipe card below for full ingredients and instructions!
- Pears: Pears are inexpensive fruits that you can easily find at almost any grocery store year-round.
 You can use any pear variety you prefer for this recipe. Since organic pears are just a fraction more than conventional ones, I recommend going with an organic variety as they have more polyphenols and antioxidants, but that is completely up to you.
 - Warming Spice: We are kicking up the flavor profile of the pears by pairing them with a warming spice such as cinnamon, nutmeg, cloves, or cardamom. To be clear, you don’t add them all; just pick one and add a pinch. Trust me, they all taste amazing with pears, and I will not be surprised at all if I find you in your kitchen eating a bowl of this puree. 😉 But you can always skip adding the spices to your baby food if you prefer (see more below).
Type of Pears to Use: While my favorite pear to use for this recipe is Bartlett pear, you can use any type of pear you prefer — whether it’s Bosc Pear, Taylor’s Gold Pear, Anjou Pear, Asian Pear, or Comice.
Step-by-Step Instructions- Prep: Peel and roughly chop the pears.
- Mix: Place the pear chunks, spices (if preferred), and water into a medium saucepan.
- Cook: Cover and heat for 10-15 minutes or until tender.
- Blend: Let it cool slightly and then transfer to a blender and puree until smooth.
- Eat: Serve or freeze for another meal.
While I love the crisp and slightly sweet flavor of simmered pears, there are several ways you can cook pears for baby food.
SteamingPeel and roughly chop 6 pears. Place the cubes into a steamer basket over 2 inches of boiling water for 8-10 minutes or until tender when pricked with a fork. Puree in a blender as directed below.
RoastedCut 6 pears in half. Place them into a medium roasting tray with the cut side down. Add enough water to cover the very bottom of the tray. Cook at 400 degrees F for 30-40 minutes or until tender when pricked with a fork. Puree in a blender as directed below.
Frequently Asked Questions
When can baby eat pears?
Babies can have pears as one of their first foods. When a baby can start on solids is determined by their own rate of development, which generally comes between 4-6 months of age. Some of the developmental milestones babies need to reach in order to start solids include: if your baby has solid control of their head and neck, if your baby has doubled in weight, and if your baby is reaching for or opening their mouth when you eat (see my guide here). Before you start your baby on purees, you should consult with your pediatrician to make sure your child is developmentally ready.
Can pears be baby’s first food?
Pears can 100% be your baby’s first food if you want it to be. It is recommended to wait to introduce the top eight allergen foods to your baby once a few other well-tolerated foods have been introduced, but otherwise, foods can be introduced in any order so choose whatever you are most excited for your baby to have.
Are pears a common allergen for baby?
No, pears are not a common allergen, however, as with any food, start with a small portion and be aware of any signs that might be an allergic reaction after introducing it.
Do pears cause constipation for babies?
Pears are not known to cause constipation in babies, but are actually one of the “P” fruits known to help alleviate constipation.
Tools NeededThese tools will make it a lot easier for you to make this healthy Green Bean Puree. For more of my favorite kitchen tools make sure to check out my shop.
- Steamer insert with lid
- Blender or Food Processor
- Freezer Tray
- Storage Containers for Fridge
- Stasher Bag
- Bib with catch pocket
- Reusable pouches
While the most popular option is adding cinnamon to pear baby food, you can also add in cloves, nutmeg, cardamom, fresh mint, fresh basil, freshly grated ginger, or even allspice (see quantity recommendations in the recipe card).
Tip on Spices: I always add spices or herbs to my baby food purees, but you can choose to leave them out in all of your baby food. You do you! Either way, this puree will surely taste amazing.
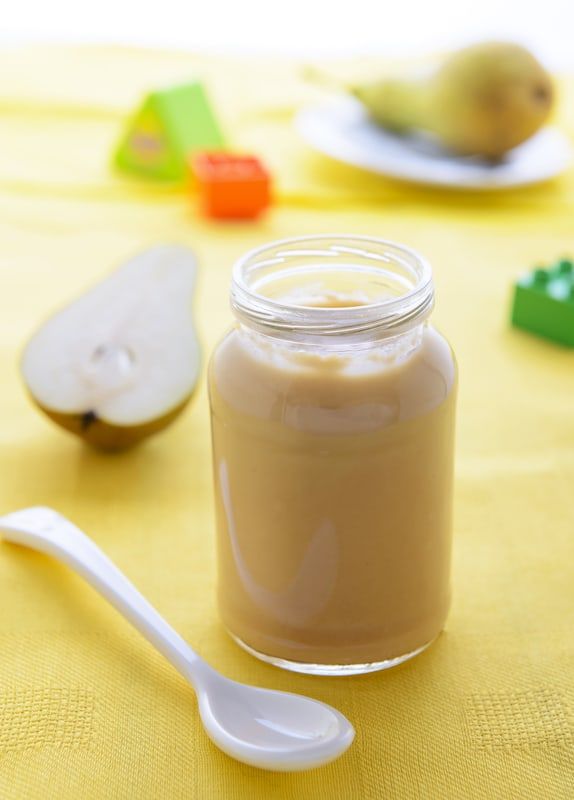
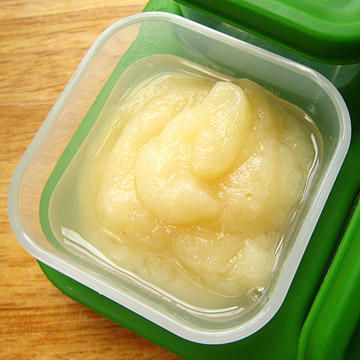
How to Store Pear PureeRefridgeratorYou can store this puree in an airtight container in the fridge for 3-4 days.
FreezerThis puree can be frozen for up to 4 months.
- Spoon puree into a freezer storage container. Do not overfill.
- Place the lid on the storage container or cover it with a piece of saran wrap, and label it with the date and recipe name.
- Place the tray into the freezer and let it freeze completely — preferably overnight.
- Pop-out the baby food cubes and place them in a ziplock baggie or stasher bag. Don’t forget to relabel the baggie or stager bag for future reference.
Need more information on how to store your baby foods? Head over to my Best Baby Food Storage Containers – Plus 6 Tips on Freezing and Thawing post!
Label Tip: Don’t forget to label your purees before you place them in the fridge or freezer with the name of the puree and the date you made it. Take it from me; by the end of the week, you will completely forget what is in your freezer and how long it’s been there… because you know… mommy brain. 😉
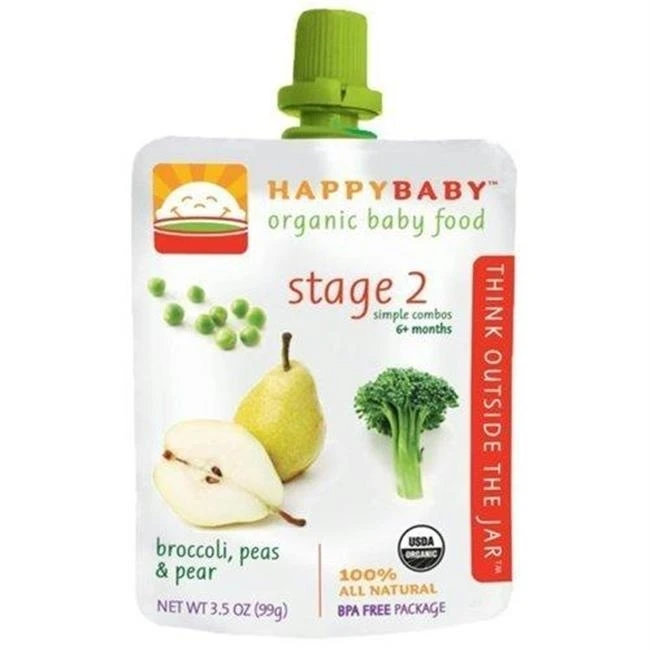
While this pear puree is flavorsome and great by itself, it’s also super easy to mix and match with other nutrient-dense baby food purees. So give these fun Stage 2 flavor combos a try!
- Apples
- Apricots
- Blueberry
- Bananas
- Quinoa Baby Cereal
- Prunes
- Kiwi
- Sweet Potato
- Soft Tofu
- Oats
- Pumpkin
- Mango
- Strawberry
- Yogurt
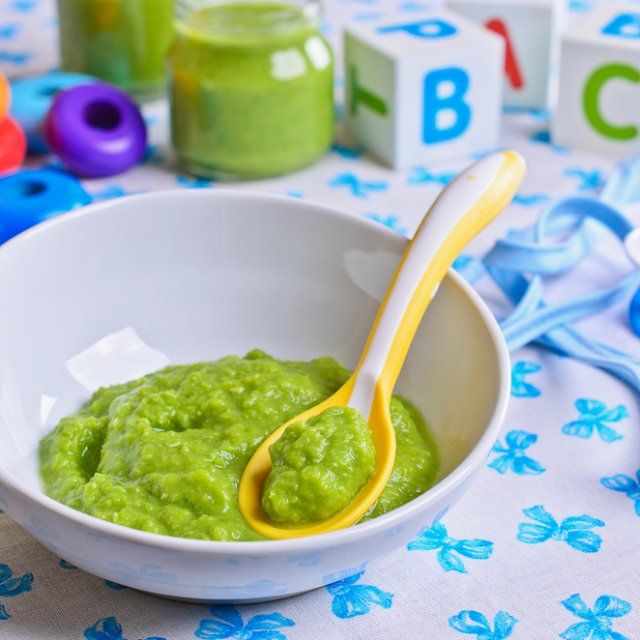
PUREE FEEDING TIPS
- Try adding a little seasoning or spice to purees – babies like flavor! Or consider changing the temperature of purees from time to time, to slightly warmed or slightly chilled. Varying these aspects adds to the sensory experience!
- Place a small amount of puree on the tray during spoon-feeding, so that your baby can dip their fingers or hands in the puree.
 Allowing your baby to explore foods in this way helps them learn to self-feed and can help them be more willing to try new textures and foods in the future.
 - Purees are great to keep in your baby’s regular rotation of foods – but if you start feeding with traditional weaning using purees, make sure to progress beyond eating ONLY purees. Once your baby can safely and comfortably swallow purees (usually by 7 or 8 months) it’s time to introduce other textures, such as teething biscuits and soft-cooked finger foods. Moving onto additional textures in a timely manner may help prevent feeding difficulties at a later age.
Or watch a shortened version of this video here.
- 6 pears
- 1/8 tsp cardamom or other spice (see notes)
- 1/4 cup water
Prep: peel and roughly chop the pears.
Combine: place the pear chunks, spices (if using) and water into a medium saucepan, cover.
Cook: heat on medium-low heat for 10-15 minutes or until tender when pricked with a fork
Transfer: let cool slightly. Using a slotted spoon, scoop the pears out of the saucepan, leaving the excess water behind, and place in a blender or food processor.
Blend: turn on the machine and blend for 1-2 minutes until you have your desired consistency. If your pear puree is too thick, add the leftover cooking water in 1/4 cup increments.
Eat: serve to baby or freeze for another meal.
Age: 4-6 months and up
Yield: roughly 20 ounces
Additional Spices: You can also use 1/4 tsp cinnamon, 1/8 tsp nutmeg, 1/8 tsp cloves, 1/8 tsp cardamom, 1/8 tsp allspice, 1/4 teaspoon freshly minced ginger, or a pinch of freshly chopped basil or mint.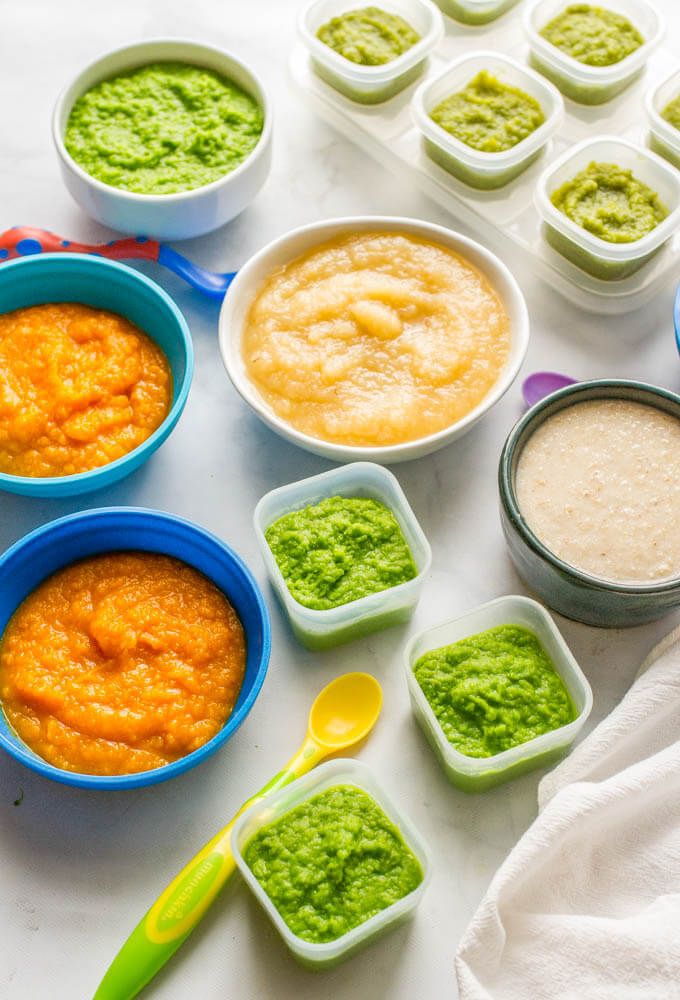
Note on Pears: while my favorite pear to use for this recipe are Bartlett pears, you can use any type of pear you prefer – Bosc Pear, Taylor’s Gold Pear, Anjous Pear, Asian Pear or Comice.
Storage: Fridge – store in an airtight container in the fridge for up to 4 days. Freezer – can be frozen for up to 4 months.
Blender
Tripp Trapp High Chair
Freezer Tray
Silicone Baby Bibs
Did you make this recipe?
Tag @babyfoode on Instagram and hashtag it #babyfoode!
Pin Recipe Email a Friend
NEW TO MAKING PUREES? THEN CHECK OF MY GUIDE ON WHICH KITCHEN TOOLS YOU ACTUALLY ARE GOING TO NEED TO MAKE THE CREAMIEST AND SMOOTHEST BABY PUREES. HINT, IT’S NOT MANY!Easy Pear Puree (Plus Flavor Combos and Freezing Tips)
Learn how to make the EASIEST Pear Puree for your baby or toddler with a super simple method and the best flavor. Plus easy flavor combinations and freezing tips!
Pear Puree
I love making simple baby foods with basic kitchen tools I already have and fresh produce. This puree recipe is so easy and so delicious that every time I made it for my third kiddo, his older sisters wanted some too! It’s delicious when pears are at their peak in North America in late summer and in fall, though you can make it any time of the year with ripe pears.
Is Pear Puree good for babies?
Pear Puree is a simple baby food that has fresh flavor, as well as fiber that can be helpful for little digestive systems. It’s a healthy early food that babies and toddlers can continue to enjoy as they grow. You can serve it with a spoon or in a reusable pouch like a Squeasy Gear.
Ingredients You Need
To make this simple recipe, all you need is pears. This is best when the pears are just ripe and give a little to the touch and are fragrant. I like using Bartlett pears best, though any kind will work.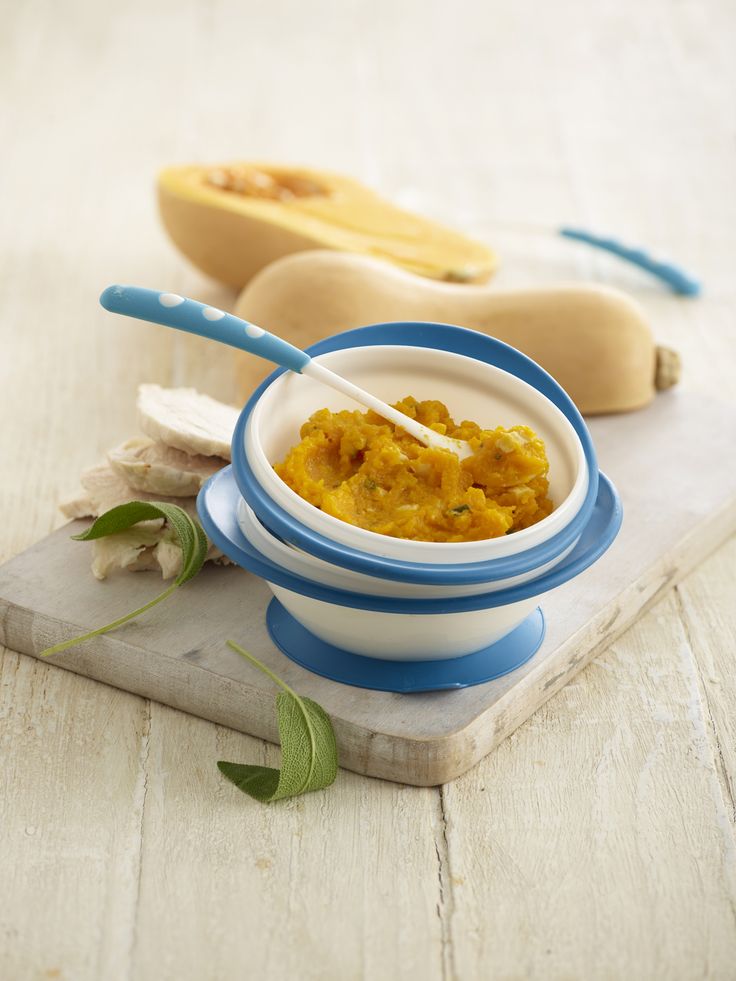 You may want to peel them first if using a pear with a thicker skin such as Bosc to ensure a smooth final texture.
Step-by-Step Instructions
Here’s a look at the simple process involved in making this recipe. Scroll down to the bottom of the post for the full information.
- Dice the pears, leaving the skin on and discarding the core.
- Add to a pot with water.
- Cook until soft.
- Blend until smooth.
TIP: You can make this puree thinner or thicker, depending on the age of your baby and the amount of water you add. You could even leave it a little chunkier to make a Stage 2 baby food if desired.
How do you steam pears for babies?
To make this recipe with a steamer, simply place the diced pears into a steamer basket fitted inside of a medium pot filled with 2 inches of water. Bring water to a simmer over medium heat, cover, and cook for the same amount of time. Use some of the cooking water to help blend the pears.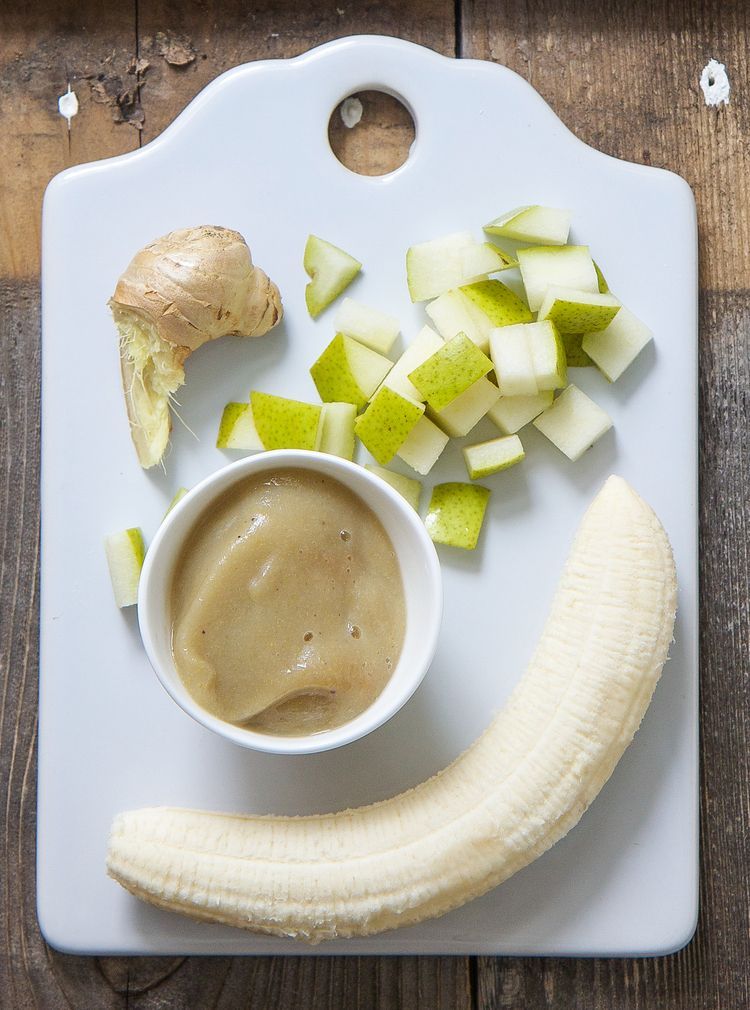
How to Store Pear Puree
You can store the final puree in small airtight containers in the fridge or freeze into small portions to have later. The batch is a nice size so you can have a few portions for this week and a few to freeze for a future week if you’d like. (But not so much that you’ll never use it all!)
Why did my Pear Puree turn brown?
Pears are one of the fruits that oxidize when the skin is broken and oxygen meets the surface of the flesh. This can cause them to turn brown. But in making this puree, I leave the skins on, which helps blend the final puree into a light and pale color. If you’re at all worried about the color if your puree, you can add a teaspoon of fresh lemon juice.
Can you freeze Pear Puree?
It’s so easy to freeze Pear Puree that I almost always freeze some of each batch that I make for future easy meal components. I like to spoon some of the puree into a silicone ice cube tray, freeze, then transfer the cubes to zip top freezer bags for longer term storage. Find all of my baby food storage tips here.
Tips for Making the Best Pear Puree
- To store in the fridge: Let cool and portion out into small airtight containers and refrigerate for up to 5 days.
- To freeze: Portion into a silicone ice cube tray and freeze overnight. Transfer to a zip top freezer bag and freeze for up to 6 months. Thaw in the fridge.
- Any kind of pear will work, though ripe pears that give just slightly to the touch is best.
- If you use brown Bosc pears, peel them before cooking as the skin tends to be tougher and may not blend totally smooth.
- Add a pinch of cinnamon or ground ginger for additional flavor.
- Add 1 teaspoon unsalted butter for richness and fat.
- I haven’t had my Pear Puree turn brown, but if you’re at all worried, you can add 1 teaspoon fresh lemon juice.
- Blend with Peanut Butter Puree, Sweet Potato Puree, Bean Puree, Avocado Puree, Banana Puree, or any other homemade baby food you like for additional combinations.

I’d love to hear your feedback on this recipe if you try it for your family, so please comment below. I love hearing how things go in your kitchens so thank you in advance!
Prep Time 5 minutes
Cook Time 12 minutes
Total Time 17 minutes
Author Amy Palanjian
Cuisine American
Course Baby Food
Calories 61kcal
Servings 6
- ▢ 4 cups diced ripe pears
Bring 1 cup water to a boil in a medium pot. Add the pears and reduce heat to medium-low. Cover and cook for about 15 minutes, or until the pears are very soft when poked with a knife.
Use a slotted spoon to transfer pears to a blender. Add ½ cup of the cooking water to the blender and blend, starting on low and working up to high, until very smooth. If the puree is thicker than desired, add a bit more water.
Let cool and serve or store for future meals.
Vitamix Blender
Silicone Ice Cube Tray
Reusable Pouch
- To store in the fridge: Let cool and portion out into small airtight containers and refrigerate for up to 5 days.
- To freeze: Portion into a silicone ice cube tray and freeze overnight. Transfer to a zip top freezer bag and freeze for up to 6 months. Thaw in the fridge.
- Any kind of pear will work, though ripe pears that give just slightly to the touch is best.
- If you use brown Bosc pears, peel them before cooking as the skin tends to be tougher and may not blend totally smooth.
- Add a pinch of cinnamon or ground ginger for additional flavor.
- Add 1 teaspoon unsalted butter for richness and fat.
- I haven't had my Pear Puree turn brown, but if you're at all worried, you can add 1 teaspoon fresh lemon juice.
- To make this recipe with a steamer, simply place the diced pears into a steamer basket fitted inside of a medium pot filled with 2 inches of water. Bring water to a simmer over medium heat, cover, and cook for the same amount of time. Use some of the cooking water to help blend the pears.
Blend with Peanut Butter Puree, Sweet Potato Puree, Bean Puree, Avocado Puree, Banana Puree, or any other homemade baby food you like for additional combinations.
Calories: 61kcal, Carbohydrates: 16g, Protein: 1g, Fat: 1g, Saturated Fat: 1g, Polyunsaturated Fat: 1g, Monounsaturated Fat: 1g, Sodium: 1mg, Potassium: 125mg, Fiber: 3g, Sugar: 10g, Vitamin A: 27IU, Vitamin C: 5mg, Calcium: 10mg, Iron: 1mg
Tried this recipe?Rate in the comments and tag @yummytoddlerfood on IG!
Pear Puree: How to Make Homemade Pear Puree
AnyutaN - Feb 21st, 2017
Categories: Puree
Tags: Pear puree
Pears are an ideal fruit for the first feeding. They are hypoallergenic and do not cause bloating in children. Adults, along with kids, also love to enjoy delicate pear puree. A selection of recipes presented in this article will please both children and adults.
Ingredients: Pear, citric acid, sugar
Time for laying: All year
9000
- 3.
 1 Natural puree for the winter
 - 3.2 Puree with sugar and citric acid
- 3.3 Puree with milk and pear0022
Choosing pears for mashed potatoes
For adults, mashed potatoes can be prepared from absolutely any variety of pears. The main thing is that the fruit is as ripe as possible. In case of a lack of natural sweetness, the workpiece can be flavored with granulated sugar.
When it comes to feeding your baby, you need to take the choice of raw materials more seriously. Pear varieties with green skins will not cause allergies. Preference should be given to fruits with juicy and tender pulp. Such properties are possessed by fully ripe varieties Williams, Komis and Conference.
In addition to varietal diversity, attention should be paid to the integrity of the skin. It must be undamaged. Fruits should not have dents, traces of rot or wormholes.
Pear puree for first feeding
Baked fruit
Well-washed pears are cut in half and the seed box is removed. Right with the skin, the fruits are sent to the oven, heated to 180 degrees. After 15 minutes, the pulp will completely soften and can be scraped out with a dessert spoon.
Instead of an oven, you can roast pears in the microwave at the maximum power setting. The cooking time is reduced by 5 times! The pear will be ready for further processing in 3 minutes.
The softened pulp is ground through a sieve or punched with a blender until smooth. If the puree is too thick, then it is diluted with clean boiled water.
Boiled fruit
Rinse the pear thoroughly under running water and peel. Then each fruit is cut into two parts and freed from seeds. The slices are crushed into small cubes or strips. Fruit slices are folded into a saucepan and poured with a small amount of water. Cook the mass under a tightly closed lid over medium heat for 10 minutes. The finished pieces are removed from the bowl with a slotted spoon and ground to a homogeneous consistency. The broth can later be used to prepare a delicious vitamin compote or jelly.
With natural apple juice
The technology for making this puree differs from the previous recipe only in that the pear is boiled not in water, but in freshly squeezed apple juice. Such puree is offered to the baby at a later date of complementary feeding.
Recipe for children's pear puree without cooking, see the video from the Golder Electronics channel
Pear puree for the winter in jars
Natural puree for the winter
This preparation is prepared only from pears, without additional ingredients in the form of sugar or citric acid.
Fruit is boiled and ground in a blender. The homogeneous mass is again put on fire and boiled for 10 minutes. In the meantime, sterilize the container. The hot mass is placed in containers and covered with boiled lids.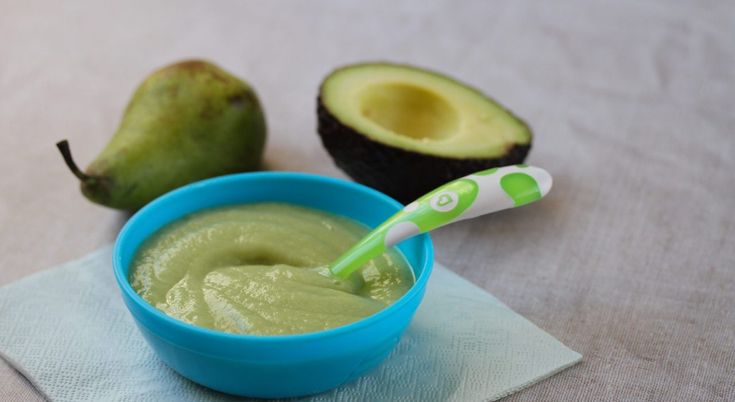 Tightly twist the jars only after 20 minutes of sterilization in a water bath.
Puree with sugar and citric acid
- pears - 1 kilogram;
- granulated sugar - 250 grams;
- water - 2 tablespoons;
- citric acid - 1/3 teaspoon.
Pieces of peeled pears are placed in a thick-walled saucepan. Add water to the cut. The container is put on fire and stewed under the lid for 15 minutes.
The boiled mass is crushed until smooth. Add sugar and acid to it. Before packing in jars, the puree is kept on fire a little more, 5 minutes will be enough. Tightly twisted jars are covered with a warm blanket and left for a day.
For more information about this recipe, see the video from the channel "Family Menu"
Pear puree with milk
- pears - 1.5 kilograms;
- milk 3.5% fat - 1.
 5 liters;
 - granulated sugar - 1.5 kilograms;
- water - 50 milliliters;
- soda - 5 grams.
Peeled pears are cut into random pieces, poured with water and put on fire for 1 hour. After boiling, add the right amount of sugar and continue heating the mass. When the fruit slices are well boiled, soda and milk are added. Bring the workpiece to a boil over high heat, and then reduce the heat to a minimum. Cook puree for 3 hours.
After the specified time, the mass is crushed with a blender to a creamy state, heated again on fire for a couple of minutes, and sent to sterile jars. Before being sent for long-term storage, the containers are slowly cooled under several layers of terry towels.
The taste of this puree is similar to condensed milk, with a distinct pear aroma.
Julia Niko in her video will talk about how to cook apple-pear puree in a steamer
How to freeze puree
Freezing can be used instead of the usual preservation. To do this, a preservative - citric acid - is not added to the puree, and the amount of granulated sugar is reduced, or completely excluded.
It is best to freeze puree in portioned doses. To do this, you can use small containers with a volume of 150 - 200 grams. Molds for baby puree should first be doused with boiling water. Puree for complementary foods is best frozen in silicone molds designed for making ice.
Tweet
Fragrant preparations from pears for the winter
Pumpkin puree: cooking methods - how to make pumpkin puree at home
Delicious peach puree for winter
Strawberry puree: storage in jars and freezing - how to make strawberry puree for the winter
Plum puree: homemade plum puree recipes
6 easy pear puree recipes
Good afternoon! Pear puree is a great alternative to jam.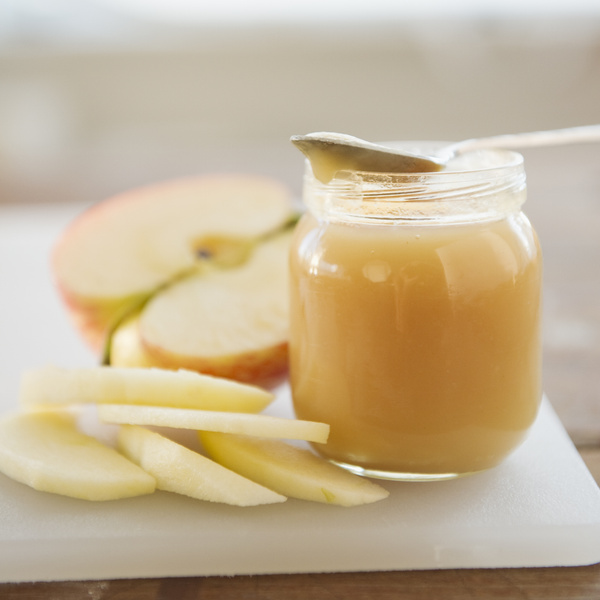 Even without added sugar, it can be stored all winter in the refrigerator. Therefore, it is so loved to be given to small children in the form of first complementary foods. It turns out tender and very fragrant. It is boiled very little, so the pulp retains most of its trace elements. And everyone knows about the benefits of pears.
Today I offer a selection of different puree recipes. They are very simple and do not contain complex actions and expensive components. And that's great.
Consider options with and without added sugar.
It should be understood that sugar-free preservation should be stored in cool conditions. Best kept in the fridge or underground. When adding a preservative, the workpiece stands well under room conditions.
The classic ratio of ingredients: only 200 g of sugar is taken per 1 kg of fruit. This is much less than we take for cooking jams. Therefore, the dessert turns out to be more useful. If, after mashing, you still have pears, then make jam out of them.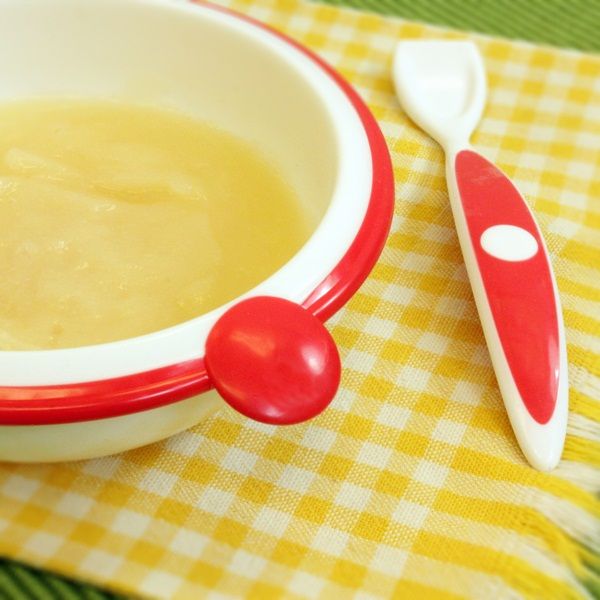 You will love its taste too. You can choose a recipe from this article.
I will focus on the cleanliness and sterility of canning containers. All jars must be thoroughly rinsed with a clean sponge with soda and sterilized. You can process jars over steam or in an oven with a microwave. Do what you are used to. The lids must be boiled for 5 minutes.
Do not neglect this moment. Since pear puree is prepared with a minimum amount of sugar, and sometimes without it at all, the container must be well prepared. Otherwise, the workpiece will have to be sterilized in order to destroy possible bacteria. And this is extra work. We try to make the process of conservation easy and comfortable. Maximum adapting to modern tastes and conditions.
Contents
- Pear puree for the winter - a simple recipe without sterilization
- Pear puree for children for the winter without sugar
- Pear puree "Nizhenka" with condensed milk for the winter
- Recipe for pear puree in a multi-cooker
- Pear puree with cream for the winter
- Video on how to make Condensed Pear puree
Pear puree for the winter - a simple recipe without sterilization
Preservation is worth starting with the simplest cooking option.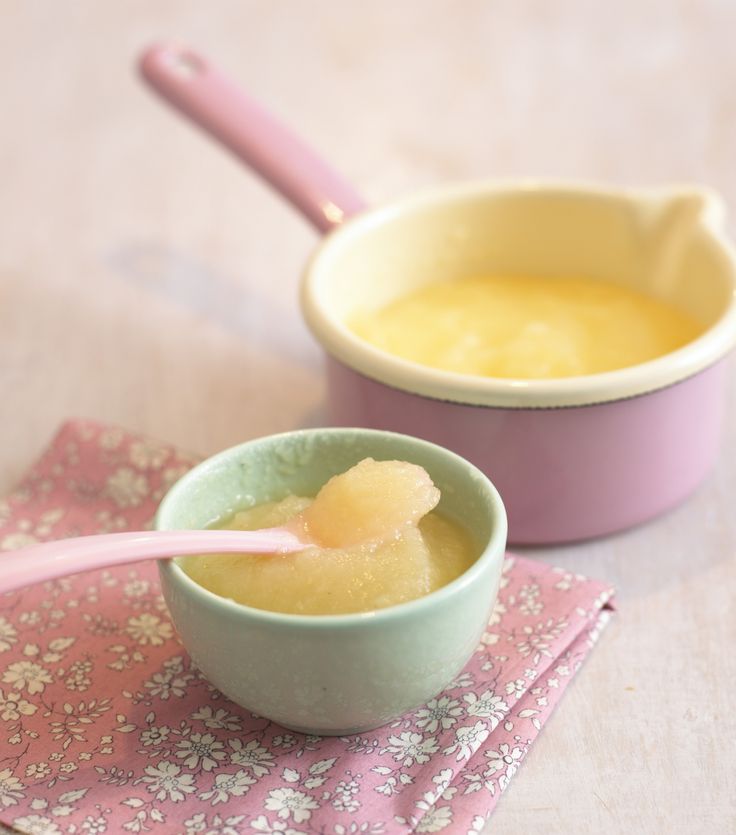 Here we use only three ingredients. And, in addition to the fruits themselves and sugar, we will also add a lemon. It is needed so that the pear mass does not darken during cooking. Because most garden varieties darken the flesh very quickly. And the output is a dark brown mass. This does not affect the taste in any way, only the aesthetic perception.
Since, in addition to the natural preservative in the form of sugar, we also use lemon, the amount of the first one will be slightly reduced.
Take:
- 500 g pears,
- 80 g sugar,
- 1 tsp lemons.
Step 1. Prepare the main ingredient. To do this, thoroughly wash the fruits. We carefully inspect each piece for the presence of rotten and beaten places, cut them out.
And carefully cut off the skin from them with a thin layer. Often it is quite dense and poorly boiled soft. Therefore, in a delicate texture, mashed potatoes are strongly felt. So that nothing distracts from the mild taste, we remove it.
Next, divide the pear into halves and cut off the core with seeds. We cut the pulp into pieces.
Since the pear is quite soft, you can immediately puree the pieces to a smooth puree consistency. For this we often use an immersion blender. But a juicer, auger or manual, is also suitable.
Step 2 . We put the resulting mass on maximum heating and bring to a boil with regular stirring.
Please note that our puree turned out to be thick, it will “spit” when boiling. Therefore, in order not to burn yourself, use a pan with high sides and a spoon on a long handle for mixing.
From the moment of boiling, reduce the heat to the minimum and add sugar with citric acid. We mix them into the fruit mass until completely dissolved. Cooking time is set to 15 minutes. It is necessary to stir at the same time, the mass is thick and easily burns to the bottom.
Step 3. Then immediately pour the liquid puree into sterile jars and seal them with sterile lids.
https://youtu.be/bbXJzt59wtoBe sure to put it upside down to check the tightness of the seam. The lid should hold the weight well. We leave the jars in this inverted state and wrap them with a blanket for self-sterilization with our own warmth.
And in a day, when the preservation has completely cooled down, we lower the blanks for storage in a cool place.
Pear puree for children for the winter without sugar
Let's take a closer look at how to make the first food for children. What is important for this? Of course, there should be no sugar in the food. We want the child to receive the maximum of useful substances and microelements. So that the consistency is tender and homogeneous without dense particles. And all these nuances are very easy to perform if you prepare mashed potatoes according to the recipe below.
Attention! Store the workpiece without adding sugar in a cool place, preferably in the refrigerator.
Take:
- 1 kg of pears,
- 50 ml water.
Step 1. Let's prepare the fruits. They should be thoroughly washed, cleaned from the skin and middle. The resulting pulp is cut into pieces and transferred to a saucepan with high walls and a thick bottom.
Step 2. To make the pear soft and not burn, add some water to the pot. We turn on the heat and simmer the fruit on the minimum heat of the stove until soft (10-20 minutes depends on the type of fruit).
Be sure to cover the pan with a lid to avoid strong evaporation of useful substances.
Step 3. Soft fruit must be crushed. Therefore, we grind them through a sieve or beat with a submersible blender. The consistency is homogeneous, smooth and not very thick.
Step 4. Boil again and boil the resulting mass for 5-7 minutes. And in a hot state, pour it into sterile jars to the very top. We try not to leave an air gap between the lid and the puree.
We roll up the preservation with hot sterile lids and turn it over the neck. We check the quality of seaming and then wrap it in blankets in the same form.
In a day, when self-sterilization occurs inside the cans under the influence of its own heat, we remove the preservation for storage.
“Nizhenka” pear puree with condensed milk for the winter
Next, we will experiment and add additives to the classic puree recipe. And you can think of quite a few of them. For example, a pear goes well with condensed milk. I do not know who came up with this recipe, he is clearly a genius. It turns out incredibly tasty jam. It stays soft. Light and not at all cloying in taste. At the same time, the pear flavor softens for some reason.
Take:
- 1 kg of pears,
- 80 ml condensed milk,
- 60 ml water,
- 50 g sugar.
Step 1. Well-washed fruits are removed from the skin and core. To speed up the cooking process, cut the pulp into pieces.
Pour them into a saucepan, where we immediately add water. Water allows the fruit not to burn, and also prevents the strong evaporation of beneficial trace elements.
Set the mass to maximum heat and after boiling, cook until the fruit is soft. In this case, heating should be reduced to a minimum.
Step 2. The softened mass must then be homogenized. Beat it with a blender or pass through a sieve.
Step 3. Introduce sugar into this homogeneous puree and immediately pour in the condensed milk. Mix thoroughly and boil again.
Place the pot on the stove and bring the mixture to a boil. We stir it constantly. It takes five minutes to cook.
Then immediately pour into sterile jars and roll up with sterile lids.
We check the tightness of the preservation and wrap it with blankets for self-sterilization. A day later, we put it in storage.
Pear and apple puree recipe in a slow cooker
Let's prepare a mix of pears and apples without adding sugar. These crops fruit at the same time and are often canned together. Moreover, the apple flavor does not interrupt the pear. It turns out quite a pleasant combination without cloying.
We will cook this miracle in a slow cooker. Therefore, we will spend a minimum of effort, and the result will be very pleasing. This puree can also be given to young children as complementary foods.
Take:
- 1 apple,
- 2 pears,
- 50 ml water.
Step 1. Let's start with the fruit. We wash them well, cut out all the beaten and damaged places. Then we clean the fruits from the peel and cores.
Cut the resulting pulp into pieces and transfer to the multicooker bowl. We immediately pour water into it.
Close the multicooker with a lid and select the menu function "Baking" or "Cooking".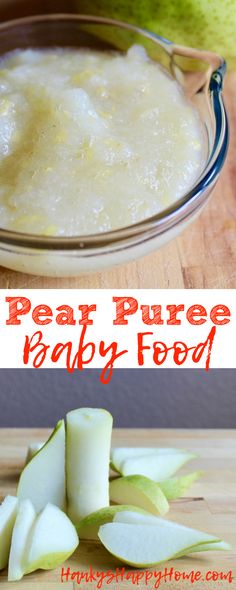 Cook for 20 minutes until fruits are soft.
If you want to steam fruit, to do this, transfer the pieces to the steamer, and pour 1.5 liters of water into the bowl itself. Turn on the "Steam Cooking" function and cook for 15-20 minutes. Usually the time is set automatically.
Step 2. Then grind the soft fruits with a blender or pass through a sieve. And turn on the program "Cooking" again.
Bring the mass to a boil and pour into sterile jars.
We tightly screw the lids on and put them away “under the bath”.
Pear puree with cream for the winter
You probably noticed that there are purees with cream added in stores. It tastes very tender and soft. It seems to immediately dissolve on the tongue. Did you think that you can cook such deliciousness at home?
Take:
- 2 kg of pears,
- 200 ml cream 20-35%,
- 100 ml water,
- 150 g sugar.
Step 1. Peel the washed pears and remove the core. Cut the pulp into pieces. Transfer them to a bowl and fill with water. Immediately add sugar and mix everything.
Set the stove to maximum heat and bring to a boil. Then boil until soft under the lid over low heat.
Step 2. Puree the resulting mass with a blender until smooth and put it back on the stove.
Step 3. Bring to a boil and pour in the cream. In this case, the puree must be mixed.
Boil the mass for 3-4 minutes and pour it into sterile jars while hot.
Step 4. We seal the container with lids and put it on the throat. Then we send "under the bath" for a day. Then we put it away for storage in cool conditions. I do not recommend storing such a workpiece at room temperature.
Video on how to make Condensed Pear Puree
I found a very unusual blank for you. It's called "Pear Condensed Milk". The consistency, smell and color is very similar to boiled condensed milk. It is prepared with the addition of milk and sugar. But based on pear puree. I highly recommend trying it.
Sometimes additions are added to the main classic recipe. These can be:
- other fruits and berries, such as plums or bananas;
- spices: cinnamon, cloves and star anise are suitable;
- condensed milk, whole milk or cream.
Let me remind you that citric acid is added to puree to prevent it from turning brown during cooking. And water is added to the pulp to reduce the loss of nutrients.
And, of course, the sweeter and sugarier you take the fruits, the tastier and more aromatic the dessert itself will turn out to be. It is pleasant to eat it separately with tea, you can spread it on toast and buns.