Raw food baby recipes
10 Easy Homemade Baby Food Ideas (No-Cook, Super Fast, Stage 1)
Learn how to make the EASIEST homemade baby food recipes (stage 1) for your little one with these super simple no-cook ideas. Plus: I have the best tips for making them ahead and freezing them so you can batch cook and simplify your days!
Homemade Baby Food
As a mom to three kids, I know firsthand how the urge to make homemade baby food can be both exciting and a little daunting. And if you have a busy schedule or other kids in the house, finding the time to actually do it can seem impossible. But, there are so many healthy foods that you can transform into stage 1 baby food purees with hardly any work or special equipment at all!
TIP: I use a regular blender for all of these recipes, so you don’t need to buy a special baby food maker unless you want to.
Baby Food Recipes for 6, 7, and 8 Month Old Babies
These homemade baby food ideas are designed for younger babies who are still eating thinner purees, but you can of course use them for older babies and toddlers too. Each can be served as is, or you can combine more than one together to create new flavors if you’re feeling creative!
TIP: If you want to add fat or protein to any of these fruit or veggie purees, simply stir in a little whole milk yogurt, coconut cream, or Avocado Puree.
Best Way to Make Baby Food
I’ve found that the easiest and most approachable way to make baby food is to simply use a blender. With fresh ingredients and a little water, breastmilk, or formula to thin it as needed, you can easily make your baby meals without investing in equipment you may not use very long.
TIP: You’ll want to start with at least 1 cup of any base ingredient to ensure that there’s enough in the blender to fully blend up.
Tools You Need to Make Homemade Baby Food
To make these baby food recipes you’ll need:
- Blender (you could also use an immersion blender if yours is very strong)
- Water, formula, or breastmilk to thin as needed
- Knife for chopping produce
- Spoon
- Bowls
- Ice cube tray
- Freezer bags for storage
- Baby food storage containers
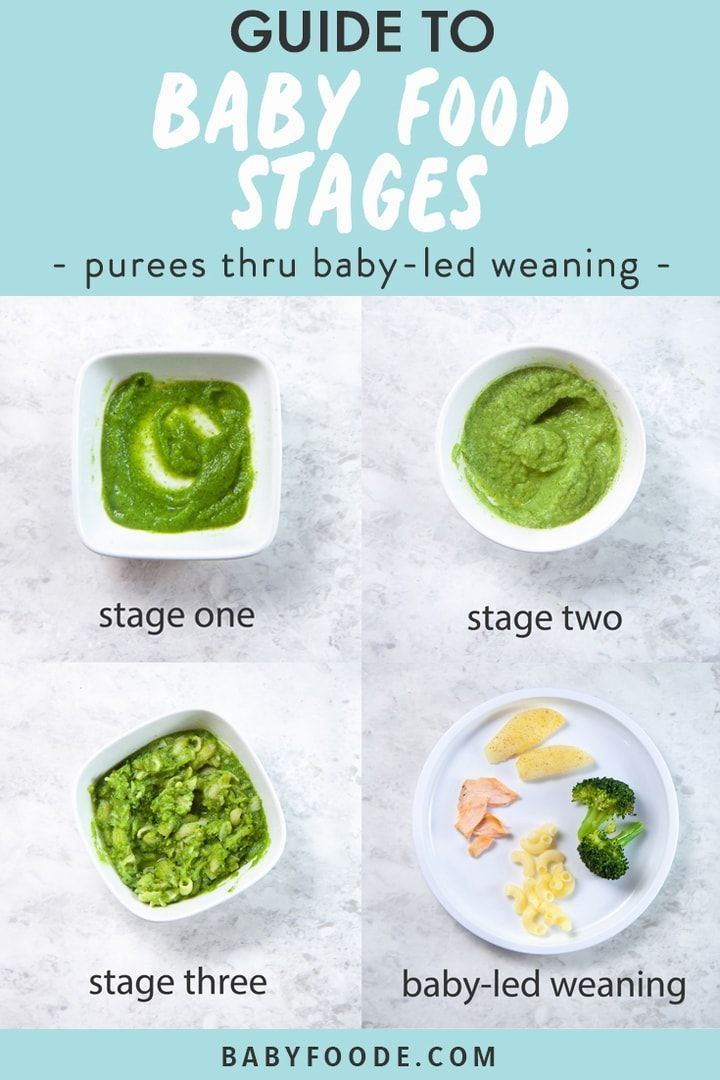
Stage 1 Baby Food
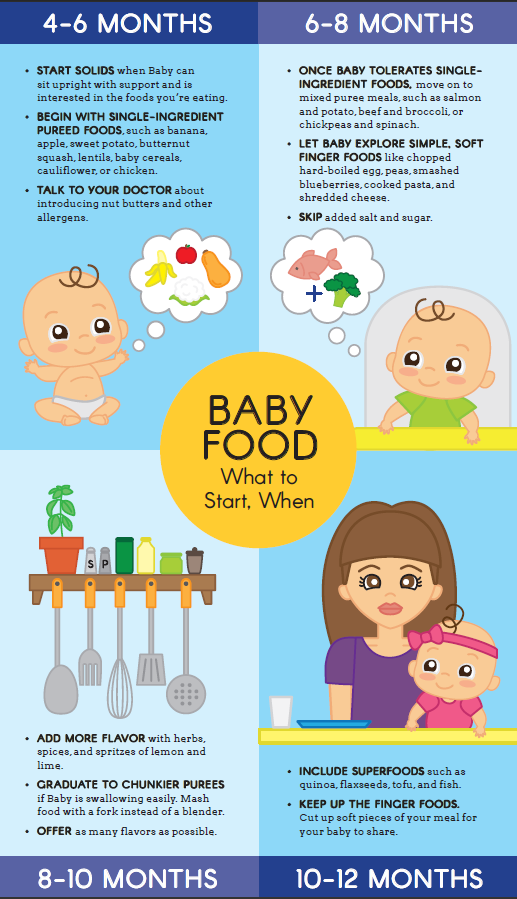
These baby foods are meant for early eaters as they are typically very thin and easy for a baby to move around in their mouths.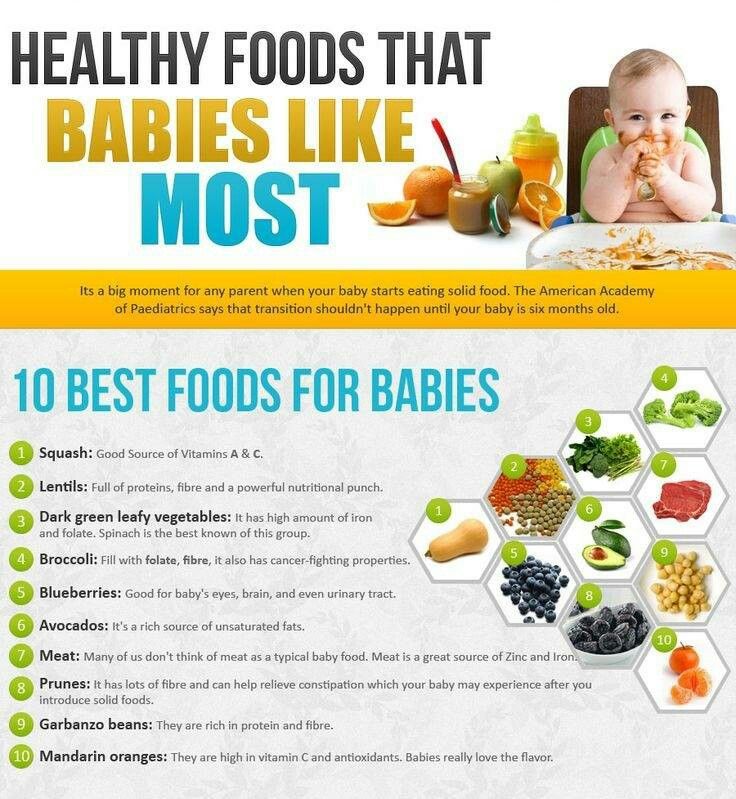 I follow the recommendations to wait until 6 months to start solids, so I personally don’t worry excessively about this distinction as I like babies to experience some texture in their purees. (The ones you find at the store are low allergenic foods and are meant for 4+ months.)
Stage 2 Baby Food
These baby foods are typically a little bit thicker, sometimes include more than one ingredient, and offer a wider variety of ingredients. Most babies are ready for these sorts of purees around 7-8 months, or once they’ve mastered thinner purees. (Again, since I like to do a combined baby feeding approach with both baby led weaning and purees, I don’t worry too much about following the calendar to decide when to introduce these.)
TIP: As a backup to my homemade baby foods, I love the options from Amara Organic Baby Food (paid affiliate link) since you simply need to stir it together with breast milk, formula, or water and it’s ready to serve.
And now, for my ten go-to homemade baby food purees that you don’t even need to cook!
1.
 Avocado Puree
To make avocado puree for a baby, you just need a fresh avocado, a blender, and some lemon juice if you plan to store it for later. I sometimes even do this with just a fork if the avocado is super soft! It’s a perfect way to introduce a low allergenic food that’s rich in healthy fats.
TIP: Get the full recipe for Avocado Puree here.
2. Bean Puree
Baby’s early foods don’t have to be all one food group and beans are a great food to have in the mix. You can do this easy bean puree with chickpeas, pinto beans, black beans, or even white beans, thinning it as needed with water, formula, or breastmilk. This is a great puree to mix with a little sweet potato or butternut squash.
TIP: Get the full recipe for Bean Puree here.
3. Blueberry Puree
Using fresh or frozen blueberries, this easy berry puree is loaded with fresh flavor and antioxidants. It’s delicious on its own or stirred into plain whole milk yogurt or baby oatmeal. (Note that it thickens up as it sits in the fridge, so you’ll need to stir it well to serve.)
TIP: Get the full recipe for Blueberry Puree here.
4. Kiwi Puree
With a bright flavor, this puree is great for babies who seem to love flavor—and it’s a fun one to make and store for later. You’ll want to make sure that you choose very ripe and sweet kiwi and taste it before you make the puree to ensure that it’s not too tart. (If it seems tart, you can mix with banana or applesauce.)
TIP: Get the full recipe for Kiwi Puree here.
5. Mango Puree
Using fresh or thawed frozen mango, this baby puree blends up in seconds. It’s bright, flavorful, and a great source of immune-boosting vitamins. Taste your mango to be sure that it’s sweet and not too tart. (If it’s tart, you can add Applesauce or ripe Banana Puree.)
TIP: Get the full recipe for Mango Puree here.
6. Peach Puree
Turn fresh or frozen and thawed peach slices into a super smooth Stage 1 baby food with this easy blender method. You’ll want to strain out the skin since it’s hard to blend up smooth, even with a high powered blender, but that’s so easy to do! This baby food recipe is a nice alternative to applesauce.
TIP: Get the full recipe for Peach Puree here.
7. Whipped Peanut Butter
This may not have occurred to you, but whipped peanut butter is a great baby food! This is a perfect way to introduce baby to peanut butter and to offer it safely there after. You just need to stir water into unsweetened creamy peanut butter until it forms a whipped consistency like yogurt. It’s smooth, not too sticky, and packed with protein.
TIP: Get the full scoop on introducing peanuts to baby here.
8. Pineapple Puree
Blend up fresh or frozen pineapple chunks into a tropical baby food puree that’s smooth and creamy. This is yummy on its own or paired with whole milk plain yogurt. Taste your pineapple to ensure that it’s not too tart. (If it’s tart, you can add Applesauce or ripe Banana Puree. )
)
TIP: Get the full recipe for Pineapple Puree here.
9. Strawberry Puree
Fresh strawberries blend up into a perfectly smooth homemade puree without the need for any additional liquid. You can serve this as is, or mix with applesauce if desired. The flavor of your berries will determine the flavor of your puree, so be sure to taste them for sweetness.
TIP: Get the full recipe for Strawberry Puree here.
10. Banana Puree
Ripe bananas make great homemade baby food with the help of just a blender. This is a super simple baby food to make at home and it’s easy to digest as a Stage 1 baby food. Use ripe bananas with brown spots to ensure that the puree tastes sweet and is easy for baby to digest.
TIP: Get the full recipe for Banana Puree here.
Homemade Baby Food Storage
The easiest way to store homemade baby food is to add fresh purees to an ice cube tray and freeze. Once frozen, simply pop out the cubes and store in labeled freezer bags for up to 3 months. These are a perfect way to make it easy to send homemade baby food to daycare or to simply get ahead for the coming week.
TIP: Find more information about storing baby food—including the best small food storage containers—here.
]
Tips for Making the Best Homemade Baby Food
- Use at least 1 cup base ingredient to ensure that a blender has enough volume to blend well.
- Thin any homemade puree with water, formula, or breast milk.
- Freeze any baby food you won’t use within 3 days in an ice cube tray. Transfer frozen cubes into freezer storage bags for up to 3 months. Thaw these frozen baby food recipes in an airtight container in the fridge overnight before you plan to serve.
- Taste all fresh foods for sweetness and to ensure that your puree isn’t too tart. To tame tartness, mix any puree with Banana Puree , Avocado Puree, Applesauce, or Mashed Sweet Potato.
- If you want to add fat or protein to any of these fruit or veggie purees, simply stir in a little whole milk yogurt, coconut cream, or Avocado Puree.
- Use breastmilk or formula in place of the water if desired.
- Mix two purees together for more complex flavors.
- Add texture to any puree by stirring in baby oatmeal or hemp seeds.
- For more details on each of these, find them here: Avocado Puree; Banana Puree, Bean Puree; Blueberry Puree, Kiwi Puree, Mango Puree, Pineapple Puree, Peanut Butter Puree, Peach Puree, Strawberry Puree
I’d love to hear your feedback on this way of making simple baby food, so please comment below. I so appreciate hearing your experience with my recipes!
Prep Time 5 minutes
Cook Time 0 minutes
Total Time 5 minutes
Author Amy Palanjian
Cuisine American
Course Baby Food
Calories 42kcal
Servings 4
- ▢ 1 cup blueberries, diced strawberries, diced peaches (peeled), diced kiwi (peeled), diced pineapple (peeled), diced banana (peeled), diced mango (peeled), diced avocado (peeled), OR beans (rinsed and drained)
- ▢ water, formula, or breast milk (as needed)
Choose one fruit, the avocado, or beans and add to a blender.
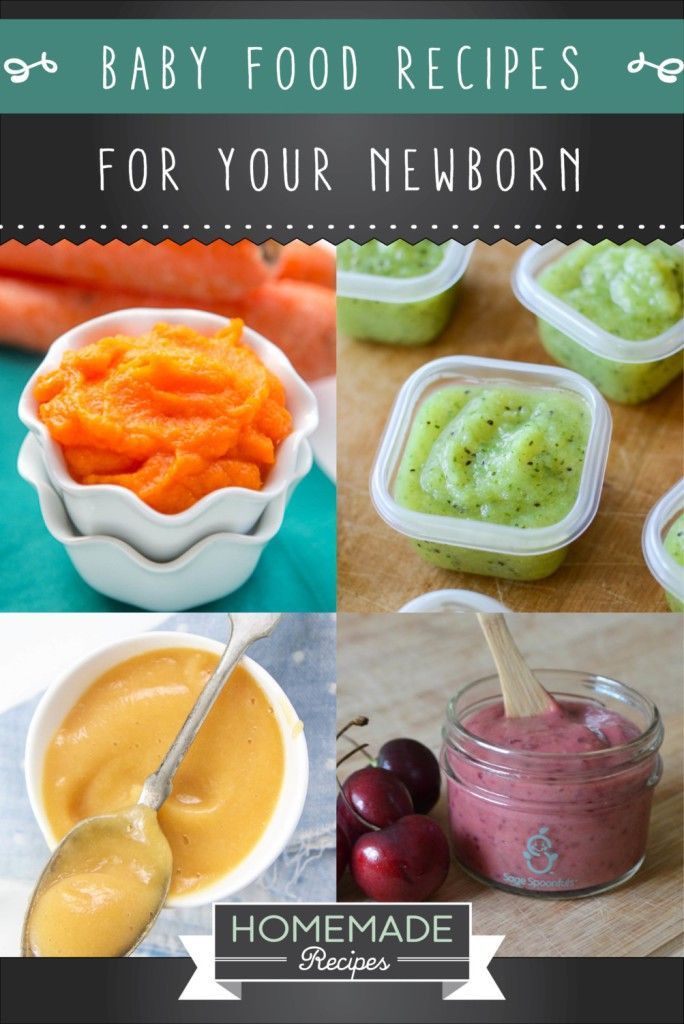
If making the puree with blueberries, strawberries, peaches, kiwi, pineapple, mango, or beans, add ¼ cup water and blend, adding more water as desired to make a thin, very smooth puree. If making avocado or banana, just blend (without water) until very smooth.
Serve or store in an airtight container for 3-5 days in the fridge, or up to 3 months in the freezer.
Vitamix Blender
Storage Containers
Silicone Ice Cube Tray
- Use at least 1 cup base ingredient to ensure that a blender has enough volume to blend well.
- Thin any homemade puree with water, formula, or breast milk.
- Freeze any baby food you won't use within 3 days in an ice cube tray. Transfer frozen cubes into freezer storage bags for up to 3 months. Thaw these frozen baby food recipes in an airtight container in the fridge overnight before you plan to serve.
- Taste all fresh foods for sweetness and to ensure that your puree isn't too tart.
 To tame tartness, mix any puree with Banana Puree , Avocado Puree, Applesauce, or Mashed Sweet Potato.
 - If you want to add fat or protein to any of these fruit or veggie purees, simply stir in a little whole milk yogurt, coconut cream, or Avocado Puree.
- Use breastmilk or formula in place of the water if desired.
- Mix two purees together for more complex flavors.
- Add texture to any puree by stirring in baby oatmeal or hemp seeds.
- For more details on each of these, find them here: Avocado Puree; Banana Puree, Bean Puree; Blueberry Puree, Kiwi Puree, Mango Puree, Pineapple Puree, Peanut Butter Puree, Peach Puree, Strawberry Puree
Serving: 0.25cup, Calories: 42kcal, Carbohydrates: 11g, Protein: 1g, Fat: 1g, Saturated Fat: 1g, Polyunsaturated Fat: 1g, Monounsaturated Fat: 1g, Sodium: 1mg, Potassium: 57mg, Fiber: 2g, Sugar: 7g, Vitamin A: 40IU, Vitamin C: 7mg, Calcium: 4mg, Iron: 1mg
Tried this recipe?Rate in the comments and tag @yummytoddlerfood on IG!
Tips on Freezing and Best Containers
Learn the secrets to storing and freezing homemade baby food for ultimate freshness—AND the best baby food storage containers to use to ensure that you never waste what you make!
Baby Food Storage
Going through the effort to make homemade baby food really only works if you have a good plan for how to store the food to ensure that it stays fresh and that baby has plenty of opportunities to enjoy it.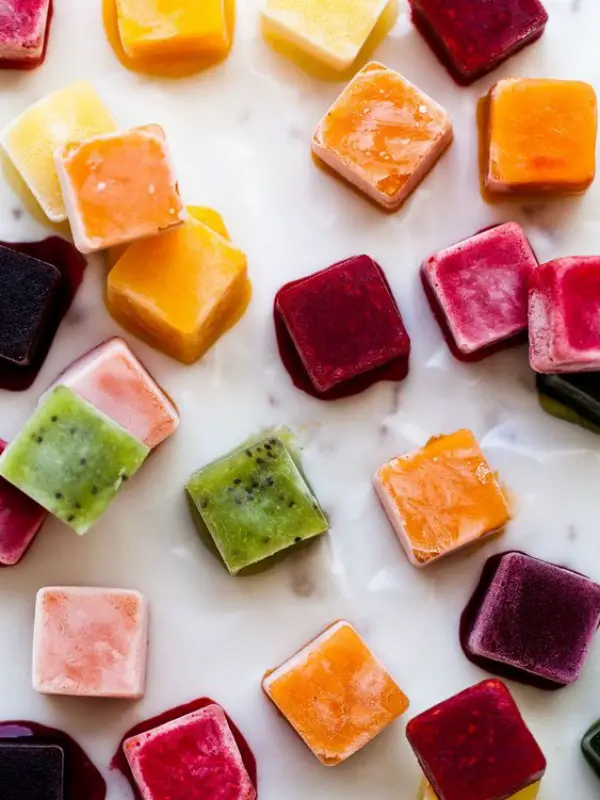 After making a LOT of baby food for my third kiddo to send with him to daycare, I got into a good routine of making and storing baby food—both in the fridge and freezer. Here’s how you can do it too.
TIP: You can find my favorite baby food recipes here.
Homemade Baby Food Storage: In the Fridge
You can store baby food in the fridge in airtight containers for up to 3 days. You can use masking tape and a Sharpie to label the containers with the contents and the date if you have a hard time keeping track of when you made something. (It’s definitely helpful to do that!)
Best Baby Food Storage Containers
I have a four favorite baby food storage containers that I use regularly.
1. Wean Green Baby Food Cubes
These are small, incredibly durable, and made from glass. They’re easy to clean and last forever. (Seriously, I’ve been using the same set for 7 years and they’re still as good as new!) $19.99 for a set of 4
2.
 Easy Lunchboxes Mini Dippers
These small containers are a perfect size for 1-2 frozen baby food cubes and they’re my go to for packing food for a baby to take to daycare. They also nest nicely when stored in the cabinet. $7.95 for a set of 8
3. Beaba Food Storage Containers
I have two sets of these and I use them regularly for larger amounts of baby food (you could probably fit 4 cubes of frozen food) and for toddler snacks. When assembled, they snap together, so they’re an easy way to stay organized. $14.95 for a set of 6
4. Oxo Tot Baby Food Blocks
This neat system is easy to keep contained in the fridge and is also made from a polypropylene body that is PVC, BPA, and phthalate free. They are dishwasher and microwave safe. $9.99 for a set of 6
Homemade Baby Food Storage: For Freezing
Storing homemade baby food in the freezer allows you to make a bigger batch at once, and then serve it to baby over the course of a few weeks or months. The easiest way is to use an ice cube tray, which has the added benefit of portioning out the baby food nicely.
TIP: Any ice cube tray will do. You can use silicone ice cube trays if you prefer a non-plastic option.
Baby Food Storage Without An Ice Cube Tray
If you don’t have an ice cube tray or you’d just rather not use one, you can place a predetermined amount of baby food into a pint-size freezer bag. Remove as much air as possible, press flat, and seal. Place flat in the freezer to freeze. Then you can thaw the entire bag in the fridge overnight, or break off a portion of it to thaw.
How to Store Baby Food in the Freezer Step by Step
- Place baby food into each compartment of the ice cube tray, or fill as many as you need to with the amount of baby food you have.
- Cover (if your ice cube tray has a cover) and freezer for 4-6 hours or overnight.
- Pop out frozen cubes and transfer to freezer storage bags. Label as desired with the type of baby food and the date.
- Store in the freezer for up to 3 months.
TIP: I like to have a bag of sweet fruit purees and more savory vegetable purees to avoid having too many separate bags in the freezer at any given time. Then you can combine them into baby food combinations easily!
How to Thaw Baby Food
To thaw baby food, simply remove a cube (or as many as you need) and place into airtight containers. Thaw overnight in the fridge and serve. 1 cube may be plenty for a baby aged 6-7 months and older babies may enjoy two cubes.
Tips for the Best Baby Food Storage
- Keep fresh baby food in an airtight container for up to 3 days in the fridge.
- Use a regular ice cube tray to freeze, a silicone ice cube tray with a lid, or a small freezer bag with the contents pressed flat.
- Store frozen baby food in a freezer storage bag in the freezer for up to 3 months.
- To avoid freezer burn, try to remove as much air as possible from the storage bags.
- Label your bags with the contents and the date.
- To thaw baby food, simply remove a cube (or as many as you need) and place into airtight containers. Thaw overnight in the fridge.
- Use leftover baby food to flavor yogurt, baby oatmeal, baby rice cereal, smoothies, or cottage cheese.
- See some of my favorite Baby Food Pouch recipes here for more ideas on how to serve your baby food!
I’d love to hear your feedback if you have another storage technique or container that you love, so please comment below!
Raw food recipes for every day: simple recipes
Greetings! A special food system based on the use of fresh foods that were not amenable to heat treatment is called a raw food diet. Due to this, they retain a maximum of useful substances. The raw food diet is considered a strict form of vegetarianism. We bring to your attention simple recipes for a raw food diet for every day.
Contents
- Foods for raw foodists
- Easy daily recipes from raw foodists
- Soups for raw foodists
- salads for raw foodists
- recipes for raw foodists
- raw potatoes for raw foodists
- Rolls for rahs 9000
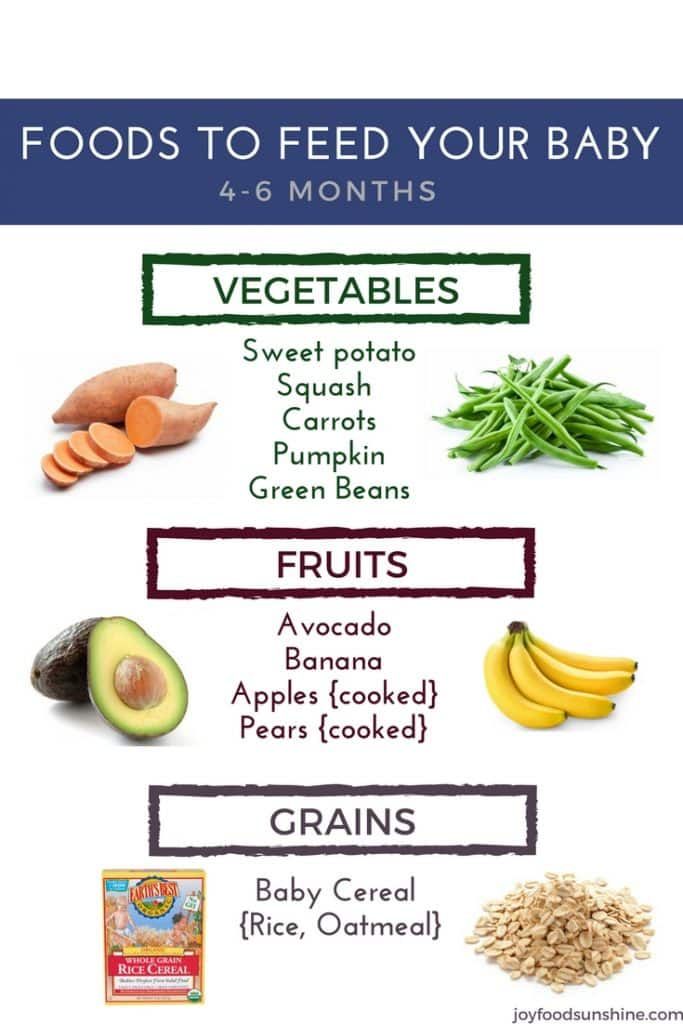
There is a certain list of products that people who decide to switch to a raw food diet can safely include in their menu.
 In addition, you should take into account a number of rules for their use, so that there are no health problems.
 - Do not mix fat (nuts, coconut and avocado) and sugar, which means fruits and dried fruits.
- Nutrition for a raw foodist is based on the fact that digestion is due to enzymes. It is forbidden to combine starches and acids.
- Do not mix foods that are similar in composition, such as different types of fats (nuts and avocados).
- Raw food recipes allow the use of dried products, the main thing is that the temperature during cooking does not rise above 40 degrees.
Simple recipes for every day from raw foodists
The opinion that the diet of people who have given up thermally processed food is scarce is wrong, because even fresh products can be used to prepare different dishes: soups, salads, snacks, cereals, desserts. Problems with the formation of a full menu should not arise. Recipes for raw foodists are simple, since heat treatment is excluded.
Soups for raw foodists
The first courses are good for the digestive system, but this does not mean that they should be hot, because when combined with ordinary vegetables, you can get the original taste. The most famous cold soups are okroshka and beetroot, but there are other recipes for raw foodists at home that diversify the diet. You can cook not only traditional first courses, but also sweet options.
Cream of squash soup
Ingredients:
- sunflower sprouts - 100 g;
- zucchini - 2 pcs.;
- carrots - 2 pcs.;
- avocado - 1 pc.;
- olive oil - 20 ml;
- almond milk - 8 tbsp. spoons;
- greens.
Preparation:
- Raw food soups involve chopping vegetables in a blender, so do this procedure with all vegetables and avocados.
- Add oil and mix thoroughly.
- For sauce, combine almond milk and chopped herbs.
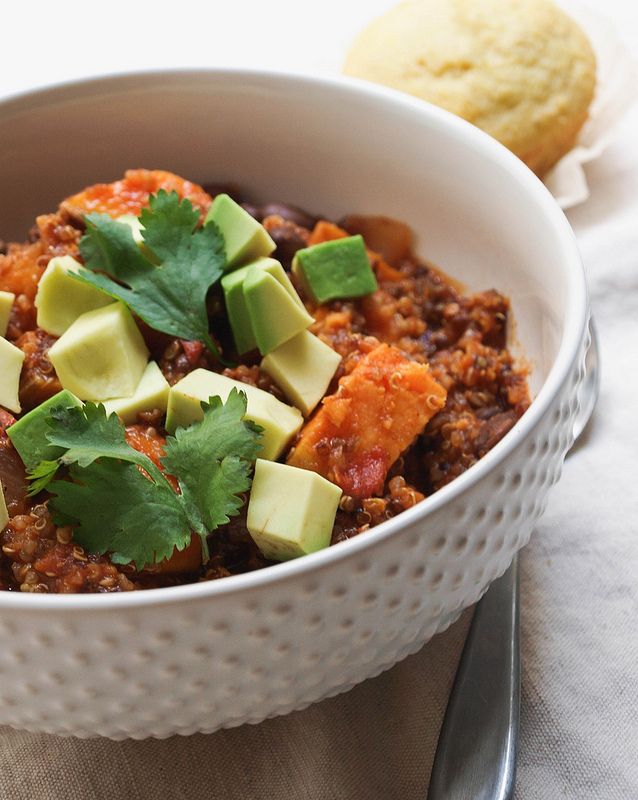 Pour soup over them and serve.
Salads for raw foodists
The most popular dishes for people who choose a raw food diet are salads made from vegetables, herbs, fruits and other ingredients. Some products can be baked, but just remember that the temperature should not be higher than 40 degrees.
This can be achieved using a dryer or slow cooker. Recipes for a raw food diet may be an interpretation of popular but taboo salads.
Raw olivier
Ingredients:
- cucumber - 2 pcs.;
- carrots - 2 pcs.;
- zucchini - 400 g;
- peas - 6 tbsp. spoons;
- raw mayonnaise - 4 teaspoons;
- salt, pepper and herbs.
Preparation:
- Cut the peeled vegetables into small cubes.
- Mix ingredients, add sauce and spices.
- Leave the salad in the refrigerator for a while.
Porridge recipes for raw foodists
Many may think that it is impossible to cook porridge without heat treatment, but this is not so.
 Having chosen a raw food diet for yourself, porridge recipes will become essential for a delicious and satisfying breakfast. For them, flax seeds, germinated grains of lentils and wheat can be used. Thanks to the right combination of products, you can get a tasty and healthy dish.
 Flax seed porridge
Ingredients:
- flaxseed - 8 tbsp. spoons;
- banana - 2 pcs.;
- sunflower seeds - 6-10 pinches.
Preparation:
- Raw food recipes require seeds to be soaked for at least 4 hours.
- Bananas cut into pieces and grind them in a blender, adding swollen flax seeds.
- Serve porridge sprinkled with seeds. If desired, you can add some raw berries, raisins, fruit or a pinch of cinnamon.
Raw potato dishes for raw foodists
Potatoes are a popular product, but what about those who have chosen the path of a raw food diet? In fact, there are many different recipes that use raw root vegetables.
To reduce the amount of starch, it is recommended to soak the peeled and chopped vegetable in cold water for a while. Raw potato dishes for raw foodists are more acceptable for Korean cuisine, because thanks to spices, the neutral taste of potatoes can be made original.
Korean style potatoes
Ingredients:
- potatoes - 1 kg;
- garlic - 3 cloves;
- ground coriander - 1 teaspoon;
- hot pepper - 1 pc.;
- salt - 3 tbsp. spoons;
- table vinegar - 200 ml;
- oil - 100 ml.
Preparation:
- Immediately place about 3 liters of water on the stove to heat. Peeled and washed root crops cut into thin strips or use a special grater.
- Pour vinegar into boiling water and put salt, and then dip the potatoes in it in a sieve for a couple of minutes.
- Put the potatoes in a bowl, sprinkle with coriander, crushed pepper and pour over hot oil.

- Mix well and add minced garlic. Infuse in refrigerator 2-3 hours
Rolls for raw foodists
Japanese cuisine has been at the peak of popularity for several years, and rolls are especially loved, and you can enjoy them both in restaurants and at home. Since raw food dishes involve the rejection of cooked rice, the classic version of this dish is banned. By making some changes to the recipe, you can get a delicious dish that can be included in the menu.
Raw rolls
Ingredients:
- carrots - 2 pcs.;
- tomato - 2 pcs.;
- raisins - 2 handfuls;
- sunflower seeds - 1 tbsp.;
- garlic - clove;
- curry - 2 tbsp. spoons;
- linseed oil - 2 tablespoons;
- nori - 4 sheets;
- salt.
Preparation:
- First, soak the seeds for an hour and rinse the raisins.
- Chop the tomatoes and pass the garlic through a press.
 Mix and leave to marinate.
 - Using a blender, chop the carrots and squeeze out the juice from the resulting mass.
- Grind a handful of raisins and seeds. Mix the mass with carrots, tomatoes and the remaining raisins. Add the rest of the ingredients and mix well.
- Put the filling on the nori and roll up the rolls. It remains only to cut them into pieces and you can serve.
Bread for raw foodists
Store-bought breads are prepared by baking at high temperatures, and raw food diets prohibit such foods. You can cook delicious sandwiches with homemade bread, for the preparation of which there are different recipes for a raw foodist. You can make bread with additives, for example, dried fruits or vegetables. You can use the same recipe just by changing the additives.
Carrot bread
Ingredients:
- wheat germ - 1 tbsp;
- flax and sunflower seeds - 0.5 tbsp each;
- carrot cake from 2 carrots;
- onions - 0.
 5 pcs.;
 - olive oil - 20 ml.
Preparation:
- All seeds must be ground using a blender.
- Add pomace, oil and mix well.
- Grind the onion on a grater and add to the finished mass.
- Make flat cakes from the dough, which should be the size of pancakes. Dry in the dryer on both sides at a temperature not exceeding 40 degrees. In most cases, this process takes 5-6 hours.
Cocktail recipes
Various cocktails can be used as a main meal and as a snack. Smoothie recipes for raw foodists, which include a large amount of fruits, vegetables and herbs, are healthy and very tasty. Raw food recipes consist of two parts of greens and three parts of fruits or vegetables. Blend all ingredients in a blender until smooth.
Banana Strawberry Smoothie
Ingredients:
- banana - 2 pcs.;
- strawberries - 1 tbsp.;
- lettuce - 6 leaves;
- water - 1 tbsp.
Carrot-orange cocktail
Ingredients:
- orange pulp - 1 pc.;
- carrots - 2 pcs.;
- ginger juice - 1 tbsp. a spoon;
- lettuce - 1 bunch;
- water - 1 tbsp.
Desserts for raw foodists
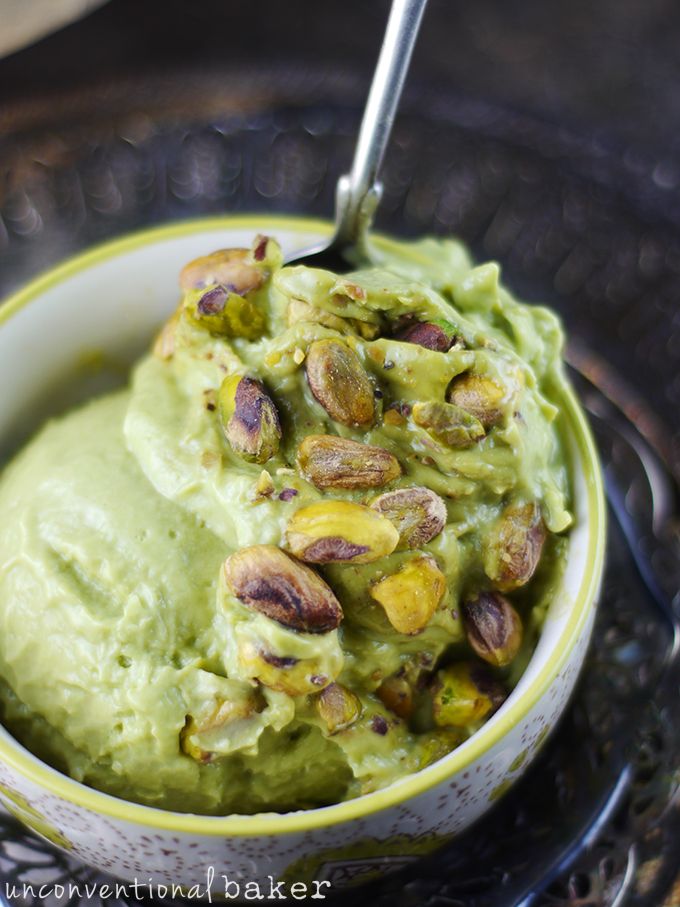
Switching to a raw food diet is not a reason to deny yourself the pleasure of eating something tasty and sweet. There are various desserts for raw foodists, which are prepared from numerous fruits, dried fruits, berries, seeds, honey, nuts and other permitted ingredients. From them you can make cakes, cakes, ice cream and other favorite treats for both adults and children.
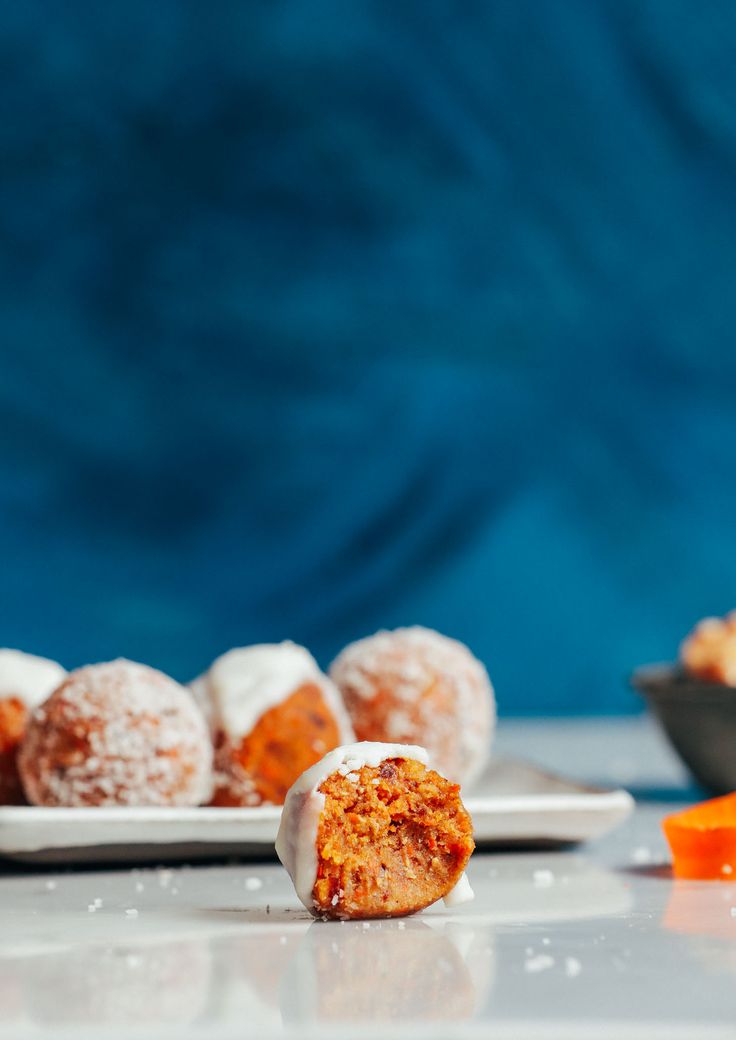
Candies for raw foodists
Ingredients:
- hard nuts - 1 tbsp;
- sesame seeds - 0.5 tbsp.;
- a mixture of dried fruits - 1 tbsp.;
- honey - 1-2 tbsp. spoons;
- ripe peach - 1 pc.
Preparation:
- For this raw food recipe, soak dried fruits for 40 minutes and nuts for 8 hours.

- Grind all the ingredients in a blender and form round sweets.
Also on our website you can read: delicious pumpkin for raw foodists. 7 autumn pumpkin recipes.
Source.
Raw food diet and children - My living food
Raw food diet is very useful! And today we'd like to share some of the most common questions and answers we get about live food in our diets, as well as some tips to help your kids practice a raw food diet.
Contents
- Is live food suitable for children?
- Is it possible for a child to start practicing a raw food diet?
- Should we supplement our child's diet with food supplements?
- What nutrients will we get on a raw food diet?
- Vitamin D
- Calcium
- Vitamin B12
- Iron
- What foods can children start practicing a raw food diet with?
Is live food suitable for children?We asked ourselves the same question because we all want the best for our children.
Children and the raw food diet We do not advocate a 100% raw food diet for young children because, according to our personal experience and research, a "diet" of 100% live food may not be suitable for everyone, especially if you live in a colder climate and have very limited access to ripe fruit and limited sunlight. However, we are a big proponent of including as much live food as possible in children's daily diets due to its health benefits.
 So our answer to that question is yes, the raw food diet is good for young children and you don't have to be 100% vegan to experience the health benefits. However, if you decide that your young children should be 100% raw foodists, you must first prepare and think about such cases in case your child does not like such a diet.
Is it possible for a child to start practicing a raw food diet?Absolutely!
First, we must mention the enormous benefits of breastfeeding. Breast milk is the best source of all nutrients and the best food for babies.
Live foods and babies
You can start introducing live foods to your baby's diet from about 6 months of age or later (your baby will let you know when he's ready to wean). Recommended to start with the introduction of green juices and green smoothies (not too sweet) and suggested a few teaspoons first. If your child takes the bottle, you can offer him a green drink and experiment with what your child likes. Breast milk should remain the main food source. If you are unable to breastfeed for any reason and you do not wish to give the typical infant formula (cow, oat, rice or soy milk), you can replace it using raw coconut milk mixed with filtered or distilled water. At first, you can use a sweetener or other natural product of your choice. For example, vanilla bean extract is a great start. You can also use calcium supplements if you are concerned that your child is not getting enough calcium. Be careful with iron as adding iron can be toxic! If you suspect any deficiency, check with your doctor first.
Should we supplement our child's diet with food supplements?In general, it is very difficult to say, because we are all different, lead different lifestyles and consume different foods in different amounts. Personally, we try to refrain from them. It's very individual, and we'll go into more detail on this when we get to "nutrients to watch." Personally, in our life we have not seen a child whose diet would be 100% live foods. Who has never taken any supplements. Especially these days, when the food we eat is not as nutritious as it was in the past.
What nutrients will we get on a raw food diet?A live food lifestyle is extremely rich in most nutrients, so you don't have to worry too much about calories or % of recommended daily intake (RDI). As long as your kids eat leafy greens daily and follow a well-balanced diet, they should be fine.
However, as a parent, you should be aware that your raw foodist can afford to overdo it, just like any other diet.
 There is no need to be obsessed if your child is not 100% raw! Please be kind to yourself as a parent and to your child. The thing to remember here is that the raw food lifestyle should be an enjoyable and exciting journey, not a daily struggle.
 Here is a short list of the most important nutrients to consider on a raw diet, the basics to keep in mind and some tips on how to get them:
Vitamin Dand the main source of its content in food is in egg yolk and fish.
Vitamin DRaw food sources of this vitamin are green leafy vegetables such as nettles and some mushrooms. You should monitor your children's vitamin D levels, especially if you live in colder climates with limited sunlight (you may be deficient in vitamin D). Twenty minutes of sunbathing without any sun protection should be enough to ensure you get enough vitamin D. Though if you have darker skin, you need to stay in the sun a little longer! If your body lacks calcium, vitamin D cannot be synthesized as well.
CalciumAs above. Calcium is related to vitamin D. Calcium as well as vitamin D are important for bone growth and healthy teeth. Leafy green vegetables contain calcium, as well as poppy, tahini, almond, quinoa, or chia seeds.
CalciumPoppy milk is a great source of calcium, as well as chia seed porridge with coconut or almond milk (We do not recommend giving nut milk to your children. For example milk like cashew as some children may have allergies or sensitivities to nuts) .
Vitamin B12If your child is a raw foodist, you should be aware of this vitamin as the main food sources of this vitamin are dairy products such as eggs and animal products.
Vitamin "B12"Some algae contain B12, but don't rely on them alone. So, if your child does not eat eggs or meat, then you should look at some supplements.
IronThis mineral is available in heme and non-heme forms.
Vitamin Iron Heme iron is more easily absorbed by the body than non-heme iron. Heme iron is found in meat, while non-heme iron is found in plants and eggs. Now you understand why vegetarians and vegans may be at greater risk of iron deficiency. So, how can they get enough? You have to be careful as iron supplementation (we are not talking about natural sources of iron) can be toxic. Before you start taking supplements, make sure you have an iron deficiency with a blood test. To ensure good absorption of iron, you need to consume foods rich in vitamin C. Here are the main raw food sources of non-heme iron, as well as rich in vitamin C: wheatgrass, spirulina, amaranth, pistachios, pumpkin seeds, sesame seeds, quinoa, sun-dried tomatoes, goji berries and much more. You can make wheat juices or smoothies mixed with fruits and ground seeds to sprinkle on salads or soups. If you have a small child and are still breastfeeding, you should not worry too much, as iron is passed through breast milk. Just make sure you don't have an iron deficiency.
These are essential nutrients that should always be included in your raw food diet. And also don't forget to keep an eye on vitamin K1 and K2, as well as omega-3 fatty acids (DHA and EPA).
What foods can be used to start a raw food diet for children?We started with green juices, smoothies, coconut water and coconut meat, which are very nutritious. Coconut water is very similar to breast milk. Later, I used mashed avocado, papaya or banana with breast milk. Babies, especially if they're breastfeeding, don't need a lot of solid food until they're about a year old.
Remember that you are a role model for your child. Therefore, if you eat what you expect from your child, you are giving your child the right instruction. But be careful, namely: you tell your child: "You must have breakfast in the morning, otherwise you will get hungry very quickly," BUT you are in such a hurry that you yourself do not sit down and do not have breakfast.
