Small freezer containers baby food
Buying Guide 2022: Best Baby Food Storage (6 expert tips)
The Best Baby Food Storage Containers for storing and freezing homemade baby food. Plus – 6 expert tips on how to store baby food, as well as a how-to guide on freezing and thawing your own baby food, FAQs, pros and cons and so much more!
Medically reviewed and co-written by Lauren Braaten, Pediatric Occupational Therapist (OT).
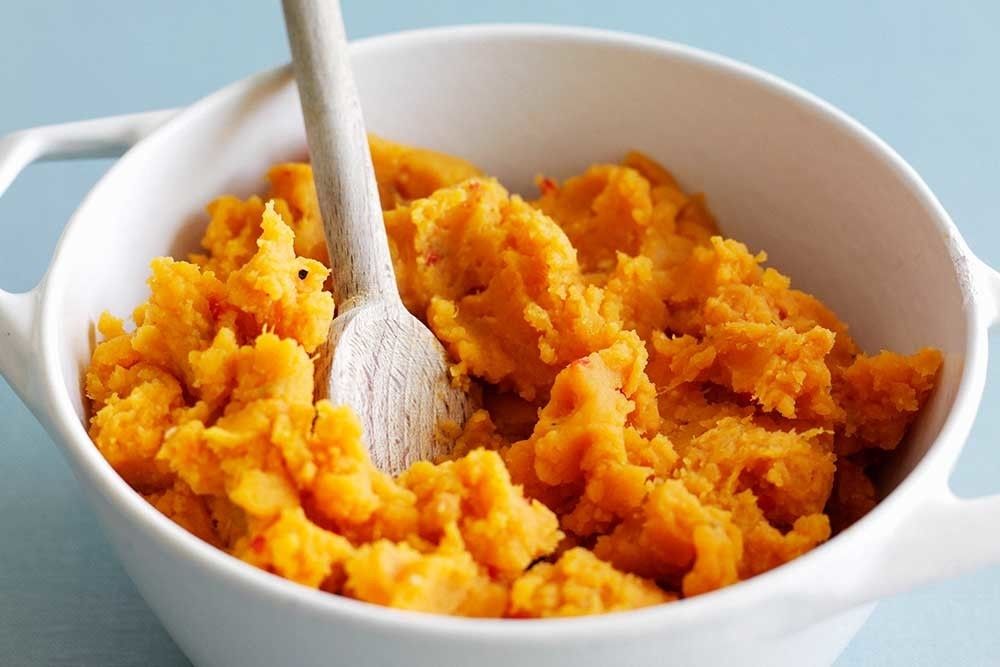
Best Baby Food Storage ContainersWant to make your own homemade baby food, but are not sure the best way to store it?
Then this post is for you!
Regardless if you are making homemade purees or going with the baby-led weaning approach to feeding your baby, you will need some small fridge and freezer-safe containers to store your baby’s food in.
Below you will find my tried-and-true storage containers at all price points, along with my guide on how to freeze and thaw baby food purees., FAQs, pros and cons of each container, as well as 6 tips on the best way to store baby food.
How to Make Baby Food Video
Watch this video to see how easy it is to make and store your own baby food!
Top Baby Food Freezer Storage ContainersIf you just want to cut straight to the chase – these are our absolute favorite storage containers for baby food.
Baby Food TraysWEESPROUT Silicone Baby Food Freezer Tray – great 10-sectioned baby food tray that holds 1.5oz each, but has a 1 oz fill line for smaller portions. Is made out of premium food-grade silicone and has a plastic lid for easy stacking. These trays or worth their price and we would recommend getting a couple of their fun color trays so you can easily stock up on your homemade baby food.
4 Pack of Silicone Ice Cube Molds Tray with Lid – This is a newer purchase for us and so far the quality has been great and you can’t beat the price for 4 trays! The trays are made out of food-grade silicone and BPA-free plastic and each cube gives you 1oz of baby food.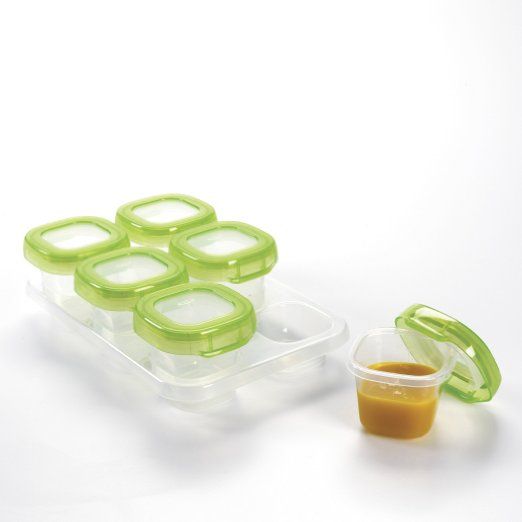
WEESPROUT Glass Baby Food Storage Containers – We absolutely love these jars! You get 12 colorful glass jars that hold 4oz each. Great for storing baby food purees as well as yogurts, overnight oats, chia seed pudding for toddlers and kids. While the price is a little high, you will get many years worth out of these jars. Well worth the investment in our opinion.
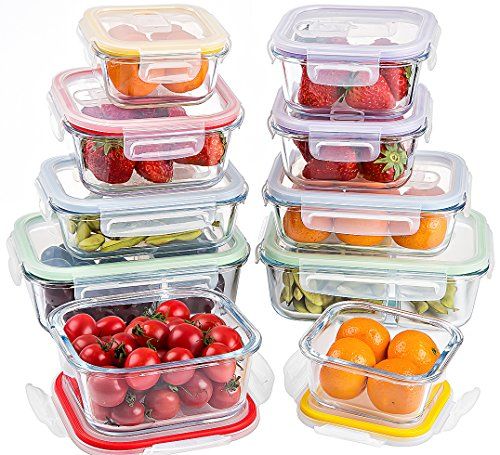
Babymoov Glass Food Storage Containers – I love that this set comes with two different sizes of containers – 4oz and 8oz. This is great if you have a baby that is a bigger eater and needs more than an ounce or two of purees at each meal.
Plastic Baby Food ContainersWEESPROUT Leakproof Baby Food Storage – just as amazing as their glass jars, just with a smaller price tag! This set comes with 12 colorful 4oz jars made out of BPA free high-quality polypropylene plastic.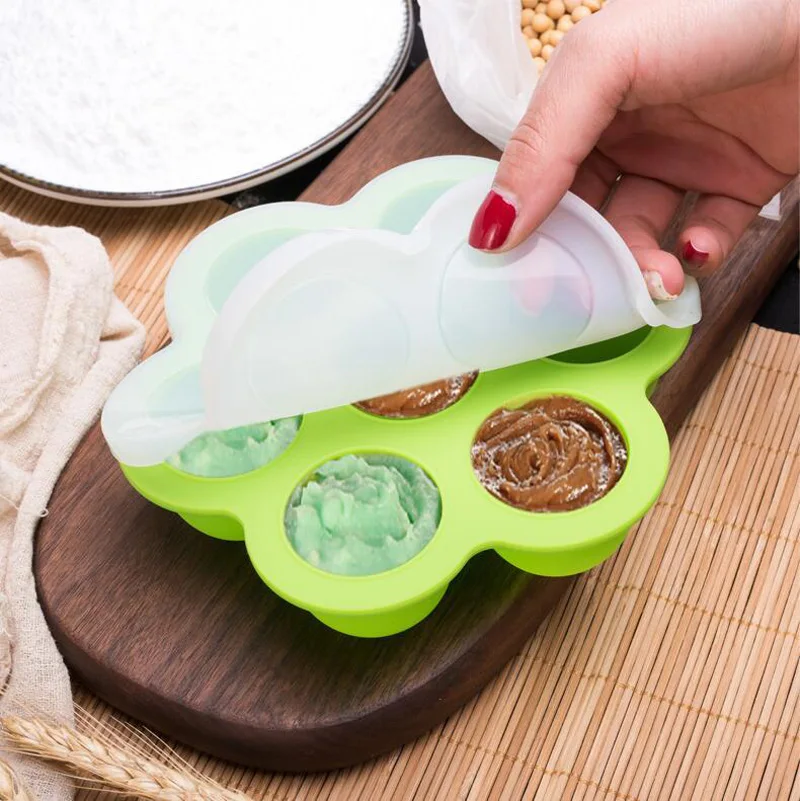 I also love that this plastic version is easier (and lighter) to toss into your diaper bag for a quick baby meal on the run.
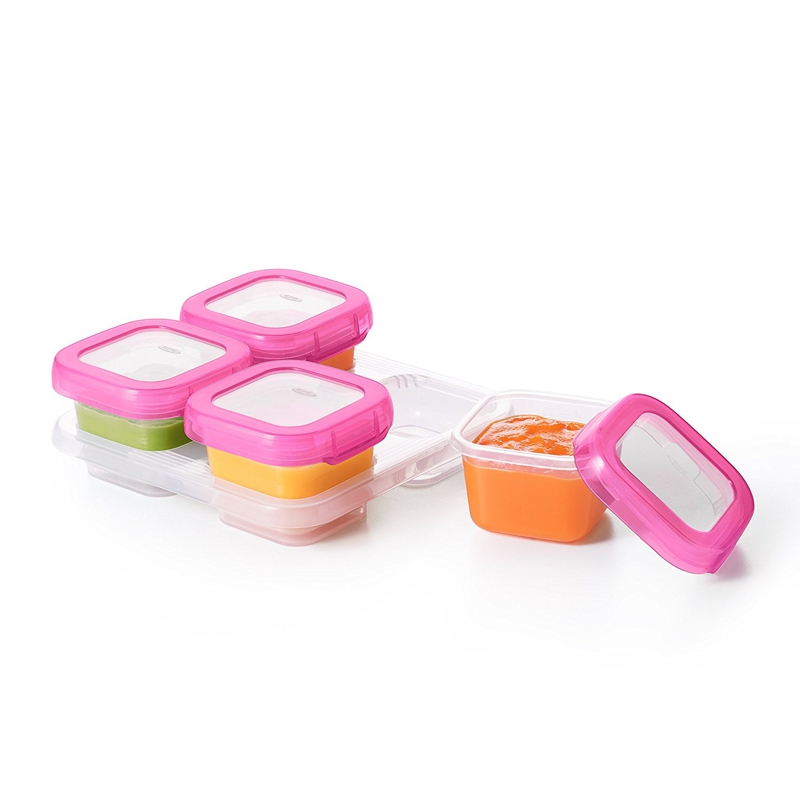
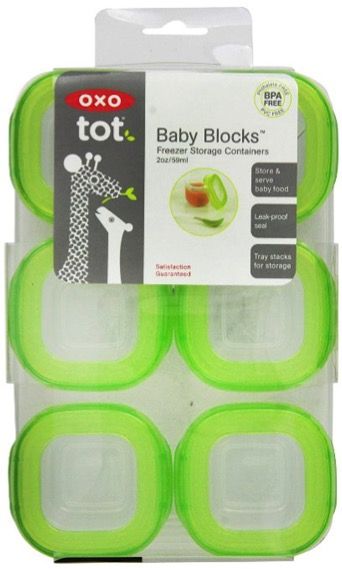
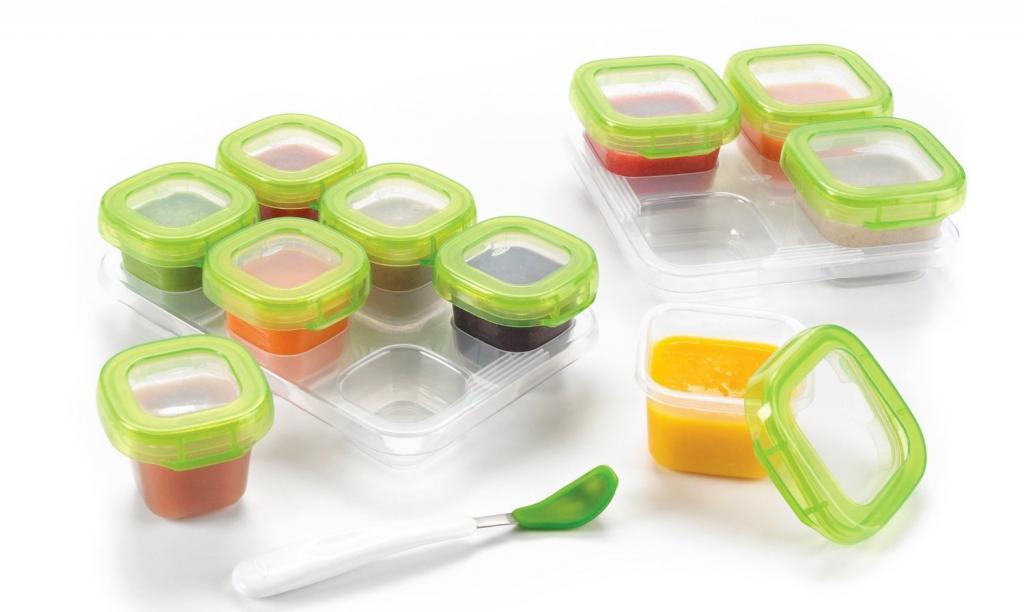
OXO Tot Baby Blocks Freezer Storage Containers – a great smaller set that contains 4 – 4oz PVC, BPA, and phthalate-free jars and a storage tray. Great space-saver system that helps keep your jars of baby purees organized and tidy. Plus, you can easily stack more trays on top of each other if you need a bigger freezer stash.
Full Review of each Container: for our full reviews on each of the above products, including pros and cons, go to the end of this guide.
Other Helpful Tools- Stasher Bags – these silicone reusable bags can hold your frozen cubes of baby food purees.
- ZipLock Bags – another option for storing your frozen purees in.
When making homemade baby food purees, your freezer is about to become your best friend, allowing you to keep several weeks’ worth of baby purees at the ready.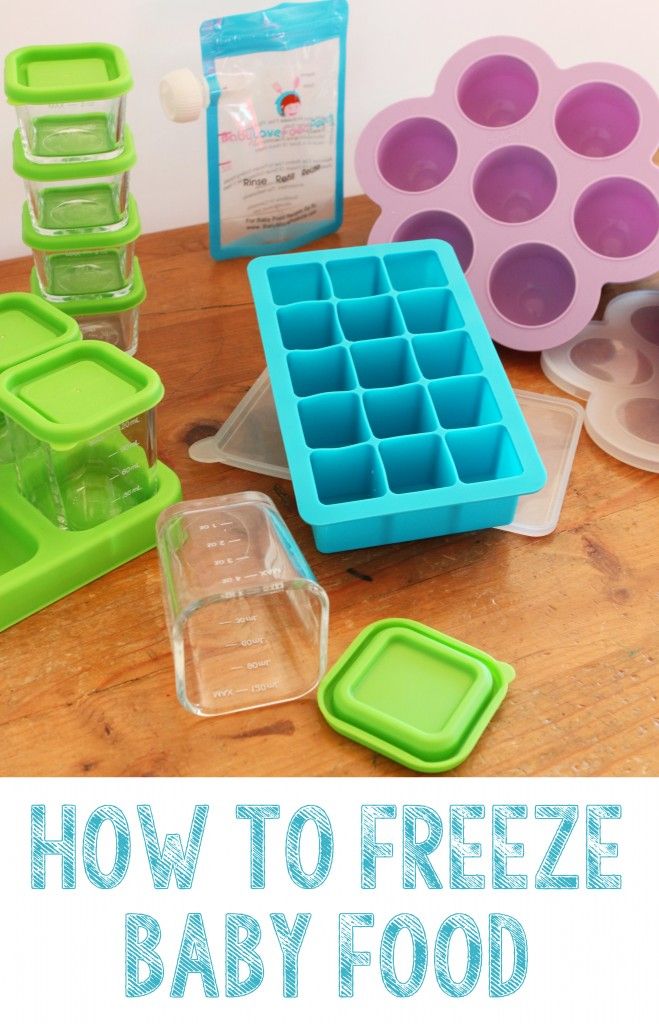
For more information on how to make your own baby food, check out my Ultimate Guide on Making Your Own Baby Food!
- After making your puree, let it cool until just warm.
- Spoon the puree into your choice of baby food storage container.
- Cover your container with a lid or plastic wrap, and place in the freezer.
- Let the puree freeze completely before you crack the purees out of the tray and place the cubes into a plastic freezer zip-lock or stasher bag. If using jars, the frozen purees would stay in the jars.
- Label each bag or jar with the name of the puree and the date you made it.
Thawing may seem like a no-brainer, but it never hurts to know your options. There are three different ways to thaw purees:
MicrowaveTake the frozen puree cubes that you want to serve out of your freezer, place them in a glass container, and microwave in 20-second increments, stirring every time. The puree is ready when it is just warm to your touch.
Grab two clean spoons, one for you and one for your baby, and test your puree before serving.
Some infants like their puree cold, warm, or really warm, and some will devour it no matter the temperature. You will get to know your baby’s personal preferences as the two of you bond over food.
FridgeThis one takes the longest time, but it is a great alternative to using a microwave.
Take the frozen puree cubes you want to serve out of your freezer, and place them in glass containers with airtight lids and leave in the fridge for 12 to 16 hours. Do not leave the puree in the container to thaw on the counter or anywhere out of the fridge, as bacteria will start to grow at a rapid rate – which is definitely not good.
The puree will be cold but thawed, so if your baby likes her puree warmed, you’ll have to finish the job using the microwave or stovetop method.
StovetopIn the smallest saucepan, you can find, place the frozen puree cubes you want to serve, and gently thaw them on medium-low heat until warm, stirring occasionally.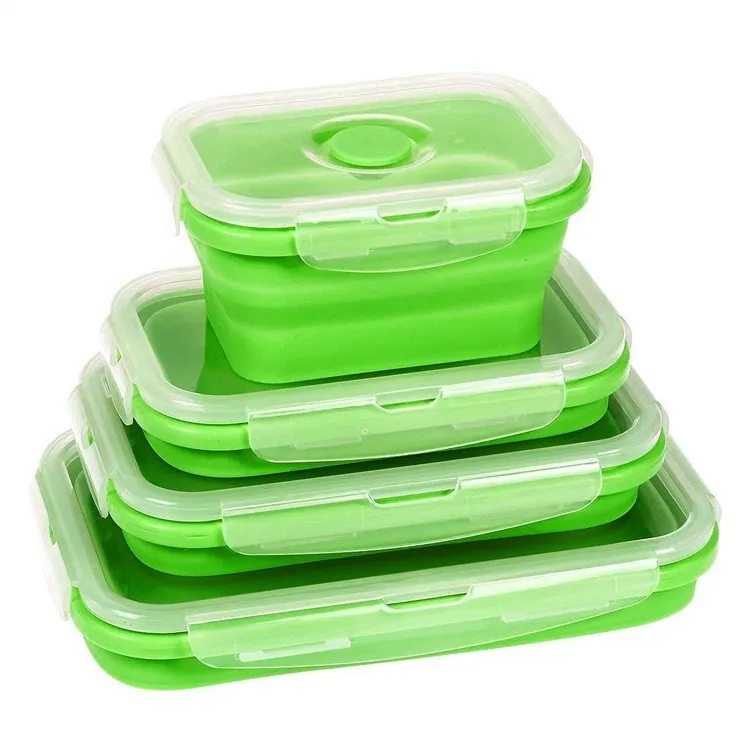
Frequently Asked Questions
How long can you store homemade baby food?
You can store homemade purees in the fridge for up to 5 days or up to 4 months in the freezer. For small finger foods, depending on the item, you can store those in the fridge for 2-3 days.
Is it better to store baby food in glass or plastic?
You can do either! Just make sure to use plastic containers that are BPA-free and container no scratches or dents. To keep the plastic in tact, be sure to wash the containers by hand and do not place in the microwave.
6 Expert Tips on Storing Baby Food- Do Not Overfill: it’s important not to overfill any baby food storage container as the purees will expand slightly when freezing.
- Label Purees: in order to know what you are feeding baby, it’s important to label your purees while they are freezing in the storage containers and when they are stored in freezer bags.
 Make sure you put the name of the puree as well as the date you made it on. Putting the date on it helps you remember when the puree will expire.
 - Keep Some/Freeze Some: whenever you make a puree, put several ounces in the fridge for your little one to enjoy that week, then freeze the rest of the batch for her to finish up at a later date.
- Dedicate Space in Freezer: I found it helpful to dedicate a certain space in the freezer (a shelf or drawer) just for your homemade baby food purees. That way you don’t have to go rummaging around your freezer trying to find a puree when your baby is already hungry for dinner. I also found this helpful so that I could take a quick look in my freezer to know exactly how much purees we had on hand and when I would need to make some more.
- Have Multiple Storage Containers on Hand: while not cheap, having multiple storage containers on hand is really needed to be able to have a good freezer stash of your own baby food.
 I usually recommend having at least 4 storage trays or 2 sets of jars. This way you can make and store a good amount of purees for the weeks ahead. With the trays, you will freeze the purees in them and then once frozen you can pop out the cubes and place them into a freezer bag, thus leaving you with more trays to work with. For the baby food jars, you will freeze the purees in the jars but they do not pop out, you have to thaw and serve the purees in order to get the jar ready for the next round of food. Either work great, just depends on how you work in your kitchen.
 - What to Look For: regardless of which jars or trays you go with, look for a freezer-safe and dish-washer-safe brand, cuz I know you have better things to do than handwash dishes!
More Resources
Here are some more in-depth guides that will help you feed your baby!
- Best Spoons for Baby
- 12 Best High Chairs for Baby
- Best Sippy Cups for Baby
- Best Baby Cereals
- Beaba Babycook Neo Review
Key Features
- Includes 10 sections that hold 1.
 5 ounce each, with a 1-ounce fill line for smaller portions
 - 100% food-grade silicone
- Reinforced bottom with a sturdy build for stacking multiple trays
- Non-stick for easy food removal
- Easy clip-on lid provides coverage
- Dishwasher safe
- Available in a variety of fun colors
Why Our Experts Love it
No more time spent looking for lost container lids! We love this compact, all-in-one baby food storage design. It’s ultra-durable, unbreakable, and made with 100% food-grade silicone, which means no harmful chemicals contacting your baby’s food.
Pros/Cons
Pros
- Multiple sections make it possible to mix and match flavors for a balanced meal
- 100% food-grade silicone
- Sturdy design makes it easy to stack multiple trays at once
- Comes with easy clip-on lid
- Dishwasher safe
Cons
- Lid is made of plastic, although contact with baby food is minimal to none, depending on how full you decide to fill containers
Parent’s Review
WEESPROUT Silicone Baby Food Freezer TrayI’m really pleased with the baby food cube trays.
-JenniI’ve now been using them for 2 weeks to do my batch cooking for my baby boy. They’re fantastic, good portion sizes, easy to remove and clean, great clip-on lid to prevent food from spilling out before frozen. I will most likely invest in a couple more trays in the near future.
No more making baby food every day or cleaning multiple containers throughout the week! Batch prep baby food, purees, breastmilk, and more – then store your food in the tray or transfer to a Ziploc bag for easy meals.
Amazon
Walmart
Key Features
- Food grade silicone
- Comes with removeable lid
- Easy to stack and store in the freezer
- Dishwasher safe
Why Our Experts Love it
The quality is great and you can’t beat the price for 4 trays! Each cube gives you 1 ounce of baby food for perfect portion sizing to help minimize waste.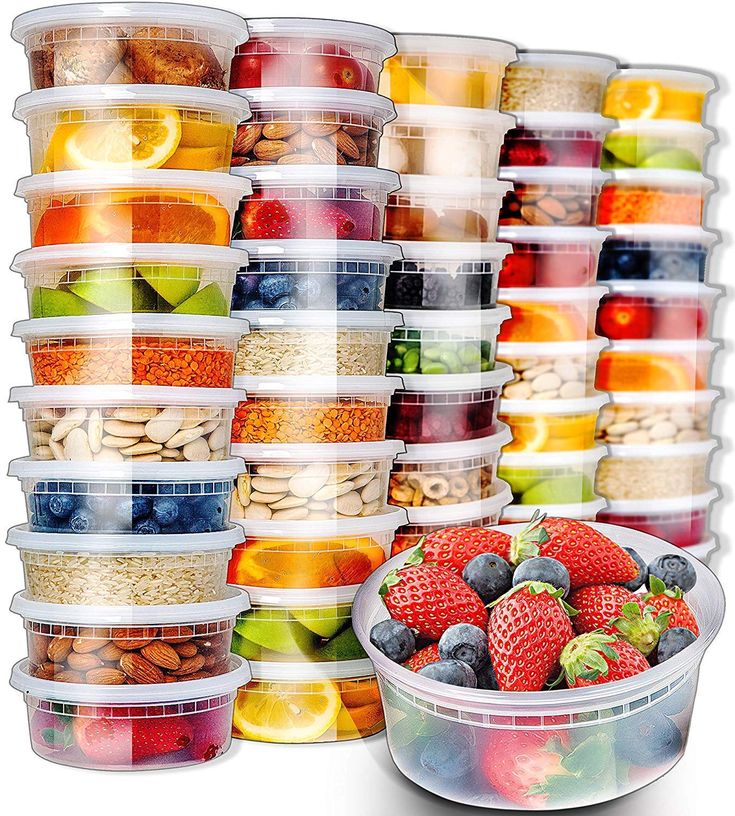
Pros/Cons
Pros
- Great price
- Each tray has 14 small sections, giving you plenty of space for different baby food flavor combinations
- Small portion size can be useful for other items, such has freezing bone broth, fresh herbs in olive oil or candy molds
Cons
- Not made with the same high-qualilty materials as the trays marketed for baby food – which may not last as long.
Parent’s Review
4 Pack of Silicone Ice Cube Molds Tray with LidI bought the trays to freeze my homemade baby food (thanks to COVID-19, I needed to save money and had the extra time). These trays are AMAZING! The lids made for easy stacking in the freezer. The cubes were very easy to pop out, definitely more sturdy than they feel, easy to clean, great colors, and can’t beat the price for he quality. I highly recommend this product!! Thank you!!
-Lacey
These silicone ice cube molds are quite the bargain! The flexible silicone material shapes the bottom well, making it easy to release baby food.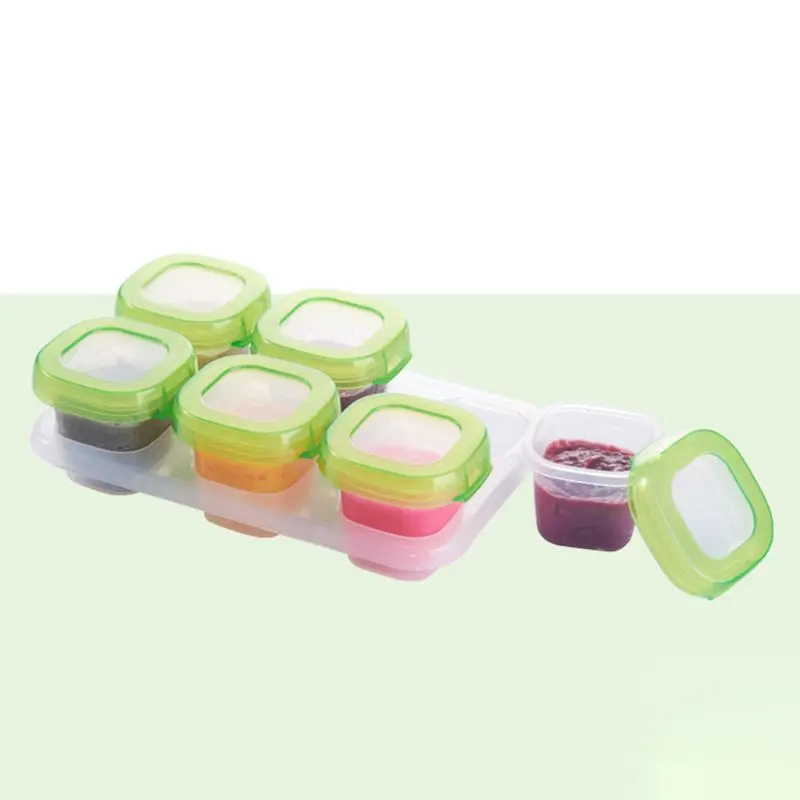
Amazon
Key Features
- Set of 12 glass baby food storage containers with lids
- 4-ounce capacity jars with measurement markings
- Made of food-grade glass
- Airtight, twist-on lids
- Microwave, freezer and dishwasher friendly
- Also available in 8-ounce capacity
Why Our Experts Love it
We love these colorful, eco-friendly glass jars. They are great for storing baby food purees as well as yogurts, overnight oats, and chia seed pudding for toddlers and kids. They also come in a BPA-Free plastic version – WEESPROUT Leakproof Baby Food Storage.
Pros/Cons
Pros
- Ultra-durable glass jars
- Airtight twist-on lids helps keep food fresh
- Convenient measurement markings lets you control the portion size
- Jars are stackable for space saving
Cons
- More expensive than other storage containers, although many reviewers feel their durability makes the investment well worth it
Parent’s Review
WeeSprout Glass Baby Food Storage ContainersI’m thrilled at this product.
-MichelleI was looking for non-toxic, non-plastic container options to store baby food and to take to daycare. This has been an awesome solution! I love that I can store in freezer, write on lid, and thaw food in warmer without worrying about heating up plastic. The glass is sturdy, they look great, and I can reuse for more than just baby food. I’m really happy with this purchase. The package came safe with thoughtful minimal packaging. Love this eco-friendly, zero waste baby product. Wee Sprout has been excellent to work with and offers amazing customer service.
WeeSprout Baby Food Storage Containers make batch preparing baby food quick and easy. Airtight lids keep food fresh, nutritious, and delicious longer.
Amazon
Walmart
Key Features
- Set of 8 glass containers and lids (four, 4 ounce and four, 8 ounce containers)
- Measurement markings on the jars
- Leak proof lids
- Made of environmentally-friendly glass, BPA and Phtalate free
- Microwave, freezer and dishwasher safe
Why Our Experts Love it
We love that this set comes with two different sizes of containers – 4 ounce and 8 ounce.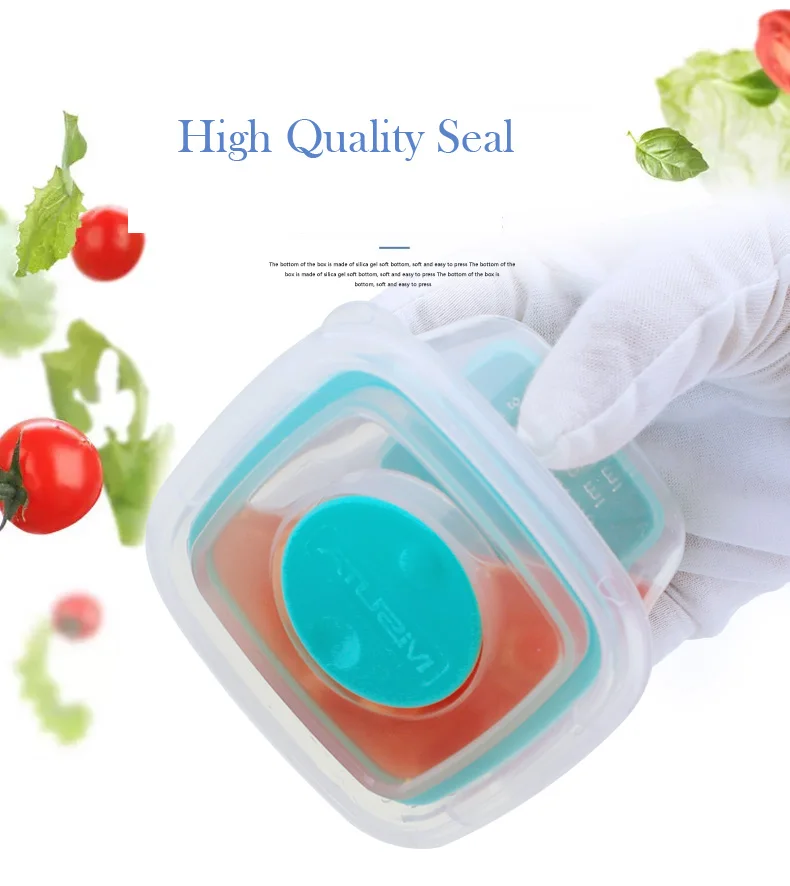 This is great if you have a baby that is a bigger eater and needs more than an ounce or two of purees at each meal.
Pros/Cons
Pros
- Multi size pack provides convenience
- Airtight screw top keeps food fresh
- Stain resistant and free from harmful components
- Stackable for easy storage
Cons
- More expensive than other storage containers, although many reviewers feel their durability makes the investment well worth it
Parent’s Review
Babymoov Glass Food Storage ContainersI bought a set to test out as reusable containers for my breast milk and I am not disappointed!! I love that they’re able to hold a good quantity of milk even more so than the baggies and the main reason I got them is because I can easily just wash them and reuse them…. they fit perfectly fine and could be easily stacked so I’d say they’re the perfect size!! The lid is a twist on so you don’t have to worry about leaks at all which was another important thing for me very easy to use clean and reuse… the best part is I can use them for this now and later on when needed I can use them for other things so I’ll be getting my money’s worth with them.
-Adriana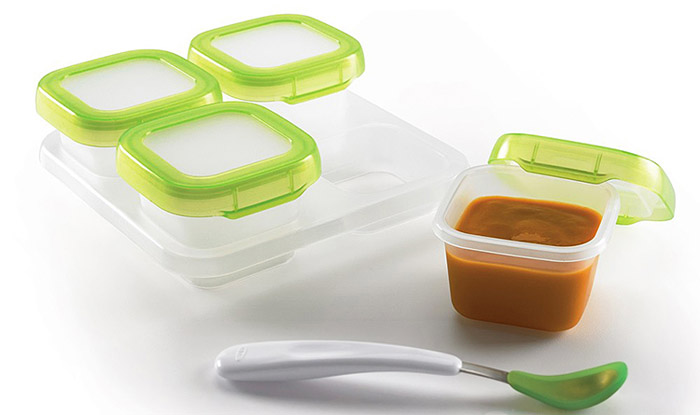
Provides a healthy and easy way to store your baby’s meals, in addition to preserving the taste of food for longer. Stackable for easy storage and microwave, freezer, and dishwasher safe.
Amazon
Walmart
Related
Title of Related Post
Key Features
- Set includes four, 4-ounce containers and stackable tray
- Leak-proof seal
- Measurement markings indicate portion sizes
- BPA free
- Microwave and dishwasher safe
- Also available in 2-ounce capacity
Why Our Experts Love it
The OXO Tot Baby Blocks are a great smaller set if you don’t plan on making a lot of baby food or only making baby food occasionally. The space-saver system helps keep your jars of baby purees organized and tidy.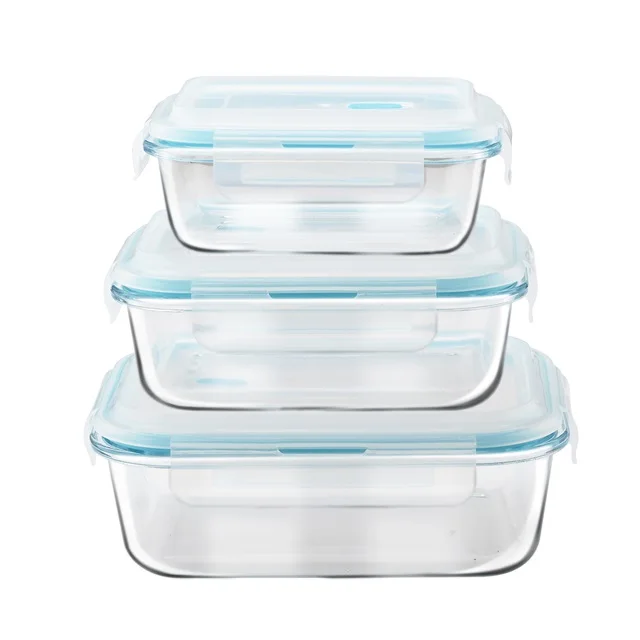
Pros/Cons
Pros
- Airtight, watertight, leak-proof seal prevents spills in freezer or diaper bag
- Stackable tray keeps containers stable and organized in the freezer
- Measurement markings make portioning simple
Cons
- Some reviewers find that taking apart 3 pieces to wash can be tiresome, but does allow for a thorough cleaning
Parent’s Review
OXO Tot Baby Blocks Freezer Storage ContainersThe quality of these containers is definitely much superior than the other cheap ones we see here on Amazon. Why buy a cheaper thing to your baby if you will be using these containers over an over again? Also they are beautiful and very easy to clean. They are so good that I decided to buy more sets, I have 2 of 4 oz containers and 2 of the 6 oz containers. For now, that my baby is 8 months old his meals are 4 oz but might improve in the future so I decided have those bigger ones and fill with whatever quantity I want now.
– Renata
Baby Blocks are airtight, watertight and leakproof for safe storage and spill-free outings. Blocks fit into the freezing tray, and multiple trays can be stacked to save space in the freezer.
Amazon
Walmart
Target
Tips on Freezing and Best Containers
Learn the secrets to storing and freezing homemade baby food for ultimate freshness—AND the best baby food storage containers to use to ensure that you never waste what you make!
Baby Food Storage
Going through the effort to make homemade baby food really only works if you have a good plan for how to store the food to ensure that it stays fresh and that baby has plenty of opportunities to enjoy it. After making a LOT of baby food for my third kiddo to send with him to daycare, I got into a good routine of making and storing baby food—both in the fridge and freezer. Here’s how you can do it too.
TIP: You can find my favorite baby food recipes here.
Homemade Baby Food Storage: In the Fridge
You can store baby food in the fridge in airtight containers for up to 3 days.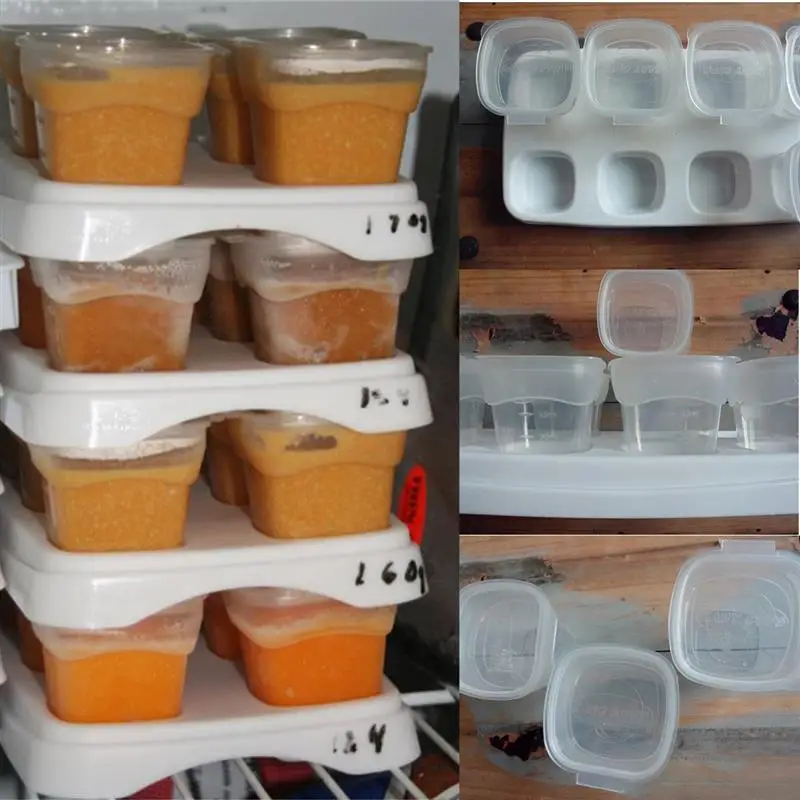 You can use masking tape and a Sharpie to label the containers with the contents and the date if you have a hard time keeping track of when you made something. (It’s definitely helpful to do that!)
Best Baby Food Storage Containers
I have a four favorite baby food storage containers that I use regularly.
1. Wean Green Baby Food Cubes
These are small, incredibly durable, and made from glass. They’re easy to clean and last forever. (Seriously, I’ve been using the same set for 7 years and they’re still as good as new!) $19.99 for a set of 4
2. Easy Lunchboxes Mini Dippers
These small containers are a perfect size for 1-2 frozen baby food cubes and they’re my go to for packing food for a baby to take to daycare. They also nest nicely when stored in the cabinet. $7.95 for a set of 8
3. Beaba Food Storage Containers
I have two sets of these and I use them regularly for larger amounts of baby food (you could probably fit 4 cubes of frozen food) and for toddler snacks.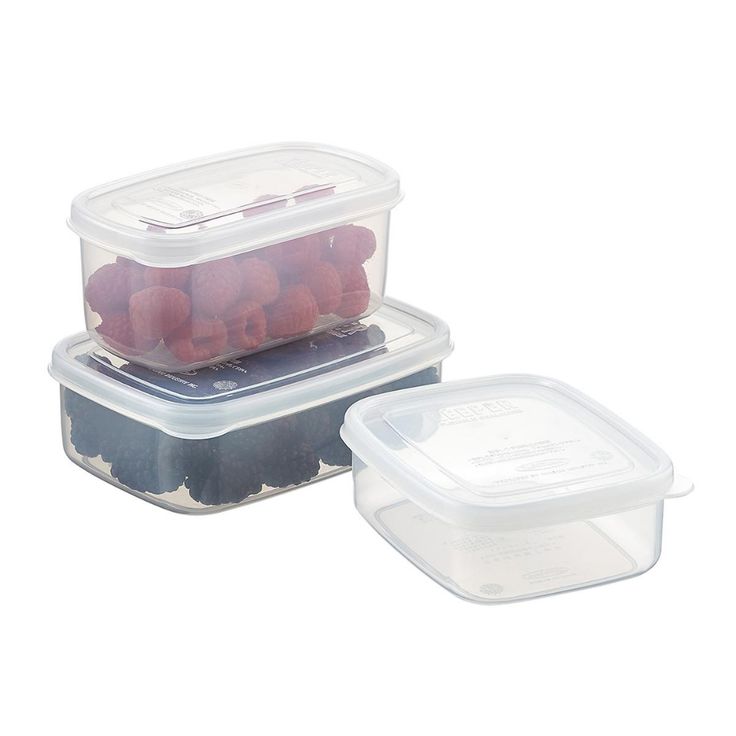 When assembled, they snap together, so they’re an easy way to stay organized. $14.95 for a set of 6
4. Oxo Tot Baby Food Blocks
This neat system is easy to keep contained in the fridge and is also made from a polypropylene body that is PVC, BPA, and phthalate free. They are dishwasher and microwave safe. $9.99 for a set of 6
Homemade Baby Food Storage: For Freezing
Storing homemade baby food in the freezer allows you to make a bigger batch at once, and then serve it to baby over the course of a few weeks or months.The easiest way is to use an ice cube tray, which has the added benefit of portioning out the baby food nicely.
TIP: Any ice cube tray will do. You can use silicone ice cube trays if you prefer a non-plastic option.
Baby Food Storage Without An Ice Cube Tray
If you don’t have an ice cube tray or you’d just rather not use one, you can place a predetermined amount of baby food into a pint-size freezer bag.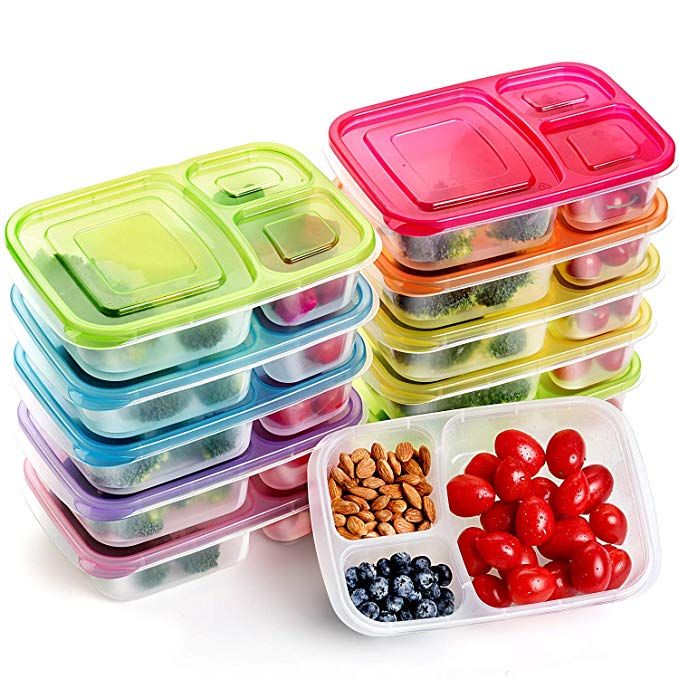 Remove as much air as possible, press flat, and seal. Place flat in the freezer to freeze. Then you can thaw the entire bag in the fridge overnight, or break off a portion of it to thaw.
How to Store Baby Food in the Freezer Step by Step
- Place baby food into each compartment of the ice cube tray, or fill as many as you need to with the amount of baby food you have.
- Cover (if your ice cube tray has a cover) and freezer for 4-6 hours or overnight.
- Pop out frozen cubes and transfer to freezer storage bags. Label as desired with the type of baby food and the date.
- Store in the freezer for up to 3 months.
TIP: I like to have a bag of sweet fruit purees and more savory vegetable purees to avoid having too many separate bags in the freezer at any given time. Then you can combine them into baby food combinations easily!
How to Thaw Baby Food
To thaw baby food, simply remove a cube (or as many as you need) and place into airtight containers.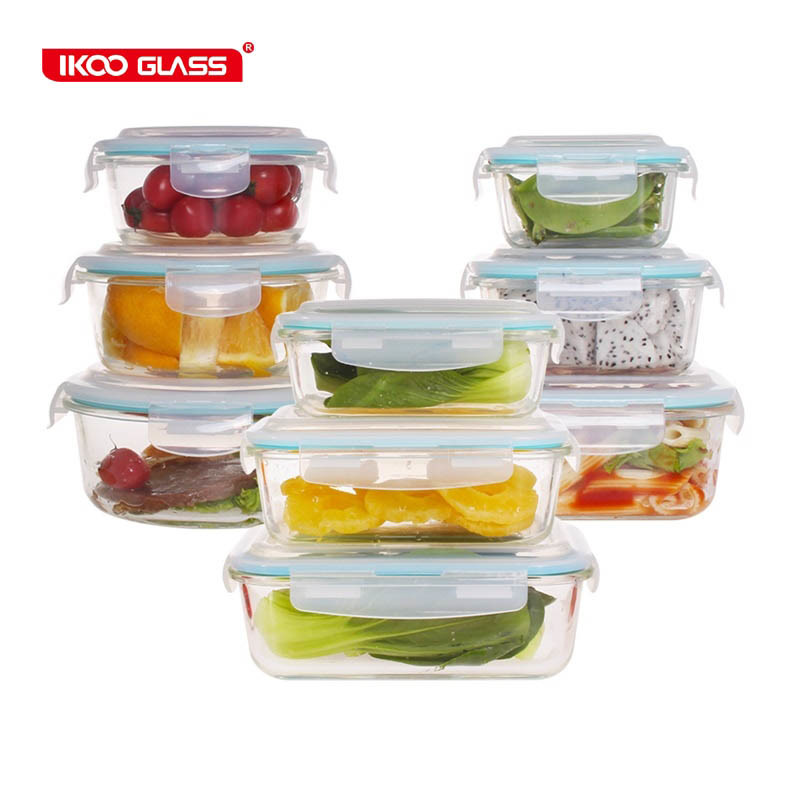 Thaw overnight in the fridge and serve. 1 cube may be plenty for a baby aged 6-7 months and older babies may enjoy two cubes.
Tips for the Best Baby Food Storage
- Keep fresh baby food in an airtight container for up to 3 days in the fridge.
- Use a regular ice cube tray to freeze, a silicone ice cube tray with a lid, or a small freezer bag with the contents pressed flat.
- Store frozen baby food in a freezer storage bag in the freezer for up to 3 months.
- To avoid freezer burn, try to remove as much air as possible from the storage bags.
- Label your bags with the contents and the date.
- To thaw baby food, simply remove a cube (or as many as you need) and place into airtight containers. Thaw overnight in the fridge.
- Use leftover baby food to flavor yogurt, baby oatmeal, baby rice cereal, smoothies, or cottage cheese.
- See some of my favorite Baby Food Pouch recipes here for more ideas on how to serve your baby food!
I’d love to hear your feedback if you have another storage technique or container that you love, so please comment below!
Utensils for storing, freezing and preparing baby food - let's discuss?
What does it take to cook a baby?
I am convinced that almost every kitchen already has everything.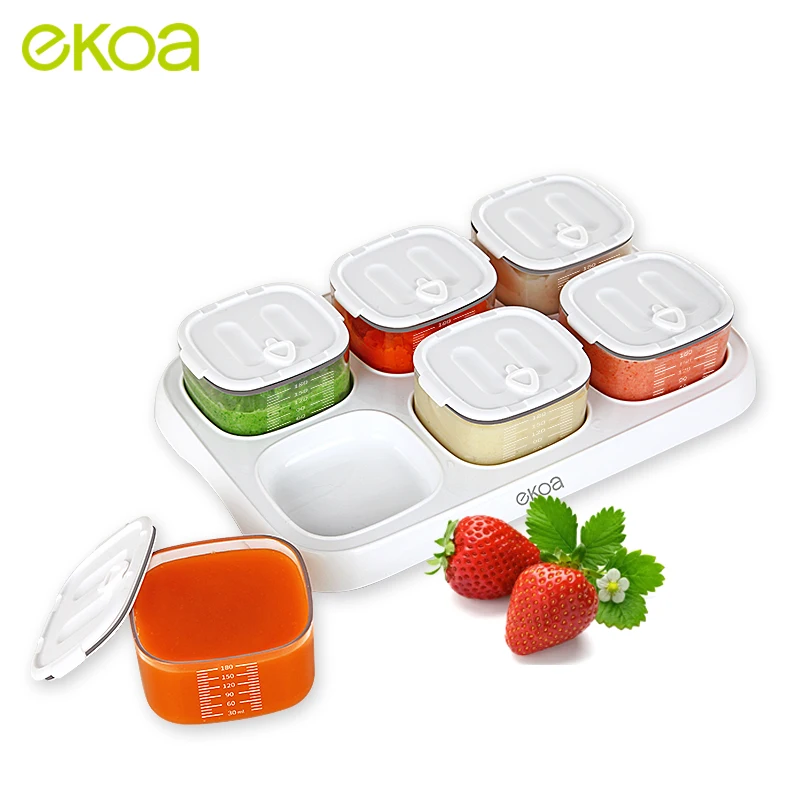 It remains only to buy containers for freezing and storage, which I did. There is no science here, but I will show off my purchases. Are we girls? And girls love all sorts of pretty things. After all, ideally, cooking for children should be joyful. So?
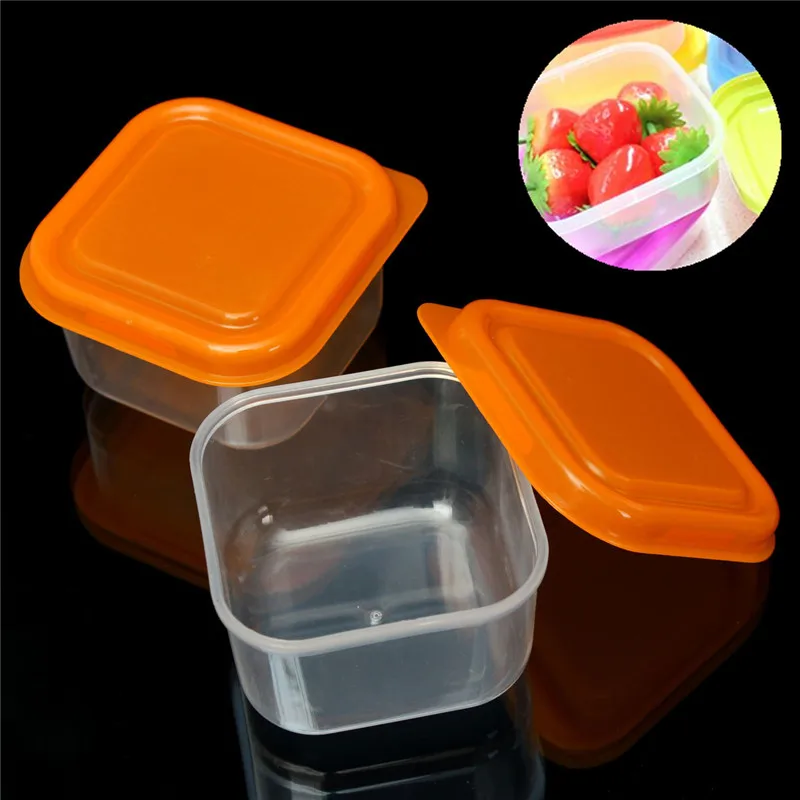
Ice cube container
Very handy at the start of weaning when you need only the smallest portions. You can start with one food cube, gradually adding more cubes. It is also convenient to freeze broths for baby food in them.
I have two containers - one Tupperware, one from Ikea (pink flowers).
Taperovsky is convenient because it has a lid. Still, it is very important for us to observe hygiene in regard to baby food. Ikeevsky can be wrapped in something, it's cheaper. But there are also silicone “pimps” at the bottom in Taperovsky, which help to squeeze out the cube more easily.
Brown taper cake tin. I highly recommend. You can freeze a lot of puree in it at once. Its volume is approximately one full meal (approximately 80 ml).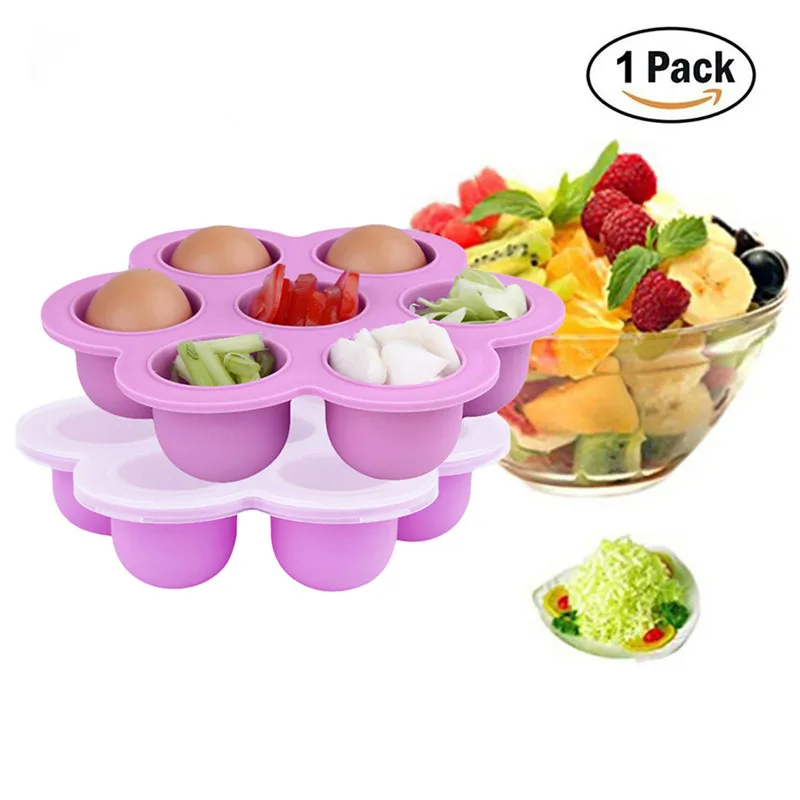 Well, baking muffins for a three-year-old in it is ideal.
Storage and Freezing Containers
I looked at containers for a long time on various sites, and chose three types, with different principles of operation and volume. At first the baby needs less food, then more. Something can be mixed after defrosting. Therefore, it is convenient to have containers of different sizes.
Beaba for 80 ml. Agree, a beautiful container :) It happens in 4 colors. Mine is actually purple :)
Brown - all jars are inserted into one another. It is convenient to feed the baby from them.
Brother Max - could not pass by. Very comfortable. Can be attached to each other in different ways. Volume 40 ml. If there is not enough space in the freezer, it is convenient to separate them and scatter them in free places.
When the child grows up, these containers will do as well as ordinary small adults. I am a Tupperware fan.
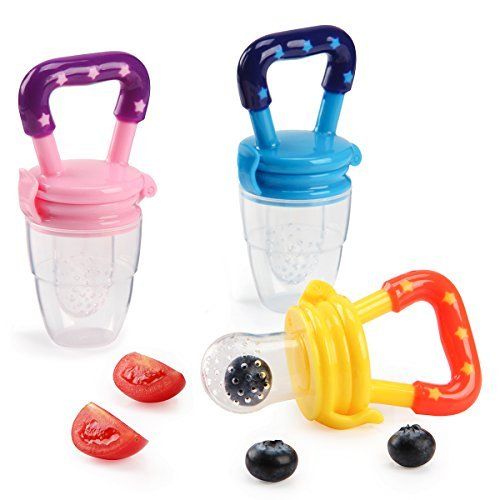
Nibbler
I think everyone knows what it is.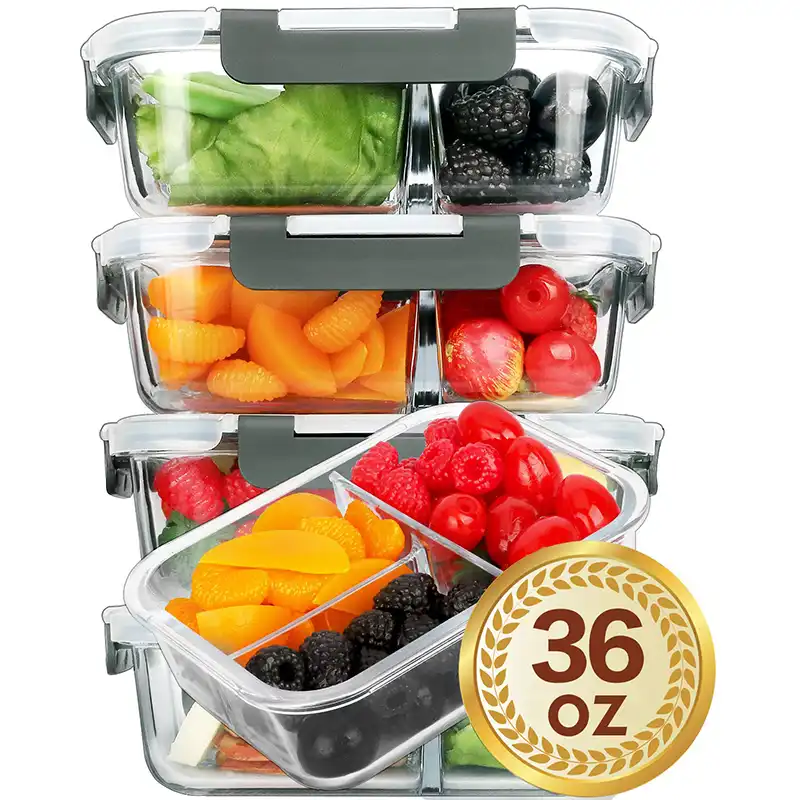 But just in case: an apple is placed in the net, for example, and the child sucks it without the risk of choking. With spoons for feeding in the same photo, everything is clear. Plastic soft, will not hurt the baby's gums.
And now let's discuss dishes. What do you need to have in the kitchen?
Immersion blender or stationary - an absolute must! Needed for making mashed potatoes and mashed soups, as well as meat at first. It is important that the blender is powerful and has a “pulse” mode. When the baby grows up, we will not need an absolutely homogeneous puree, and it is convenient to break something into pieces in this mode.
Small and Medium Saucepans - even if you are cooking for a child, it is unlikely that you will be comfortable doing this in a large saucepan. It is good to have a small cast-iron for making stews.
Small to Medium Pans - Again, the small size is better for cooking smaller amounts of food.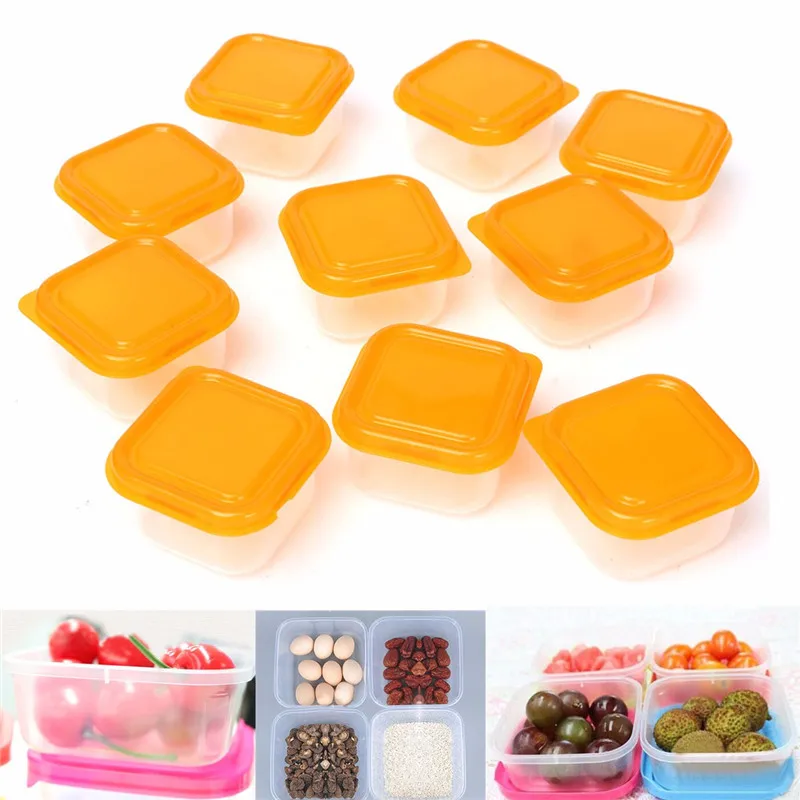
Small and small (serving) casseroles - kids love casseroles, both sweet and meaty.
Strainer and Potato Press Nice to have, but not essential. A strainer is an alternative to a blender. It is good to wipe the berries in it. The potato press produces excellent mashed potatoes. Children usually love it very much.
The steamer is an excellent gentle food preparation. If I choose only for feeding the baby, I would buy a small one-story one. Although, in a two-story one, you can cook several products at the same time, for example, meat from below, vegetables from above. In a double boiler, it is easier not to digest vegetables, and such processing preserves more vitamins.
Cutting board and knife - cutting board preferably plastic, safe (antibacterial) and dishwasher safe.
Meat thermometer - not necessary, but especially restless mothers will be able to make sure that the meat has reached the right temperature (70 degrees).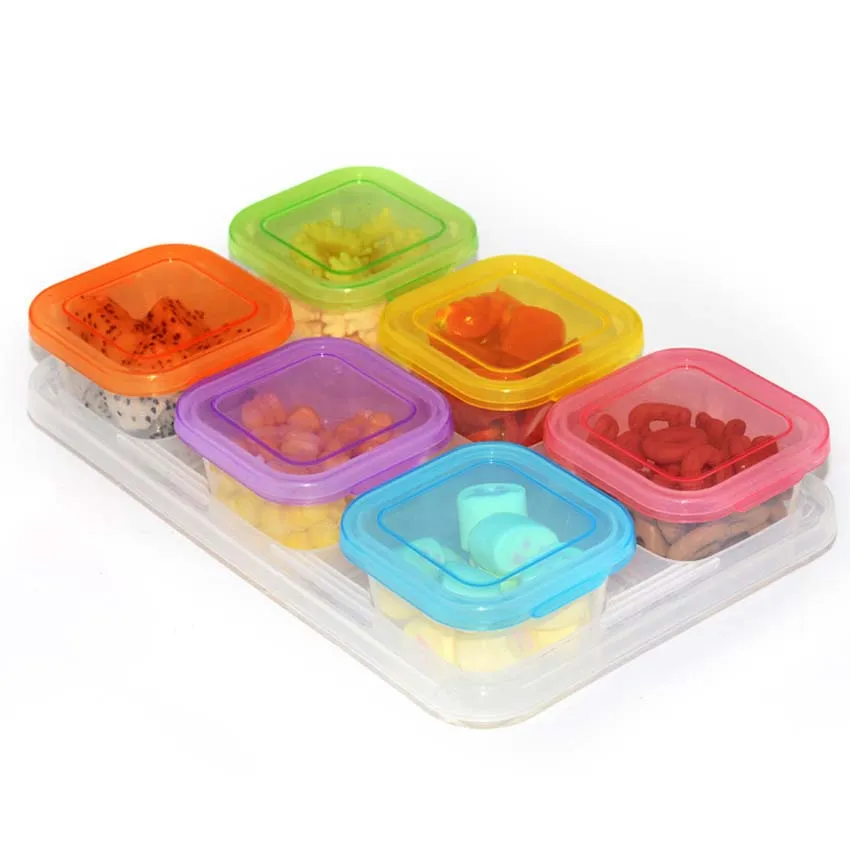
Measuring cups, spoons, scales are needed in any kitchen, and especially with baby food - they are much more convenient.
Spatulas and silicone spatula, whisk - know comments.
Feeding utensils - bowls and spoons. Convenient plates and cups with a special rubber nozzle on the bottom so that the dishes do not slip.
Sieve - after the blender, you can pass the puree through a sieve for greater homogeneity. Well, drain the liquid, or sift the flour.
Peeler - you can't do without it, and it's good to invest in a very high-quality one. Fruits and vegetables will need to be cleaned regularly.
What do you think? Am I forgetting something? What do you think is useful and what is useless?
And another question. I was with Matyusha at the homeopathic doctor about the condition of his skin. The doctor explained to me that it had nothing to do with food (mine or his) and why traditional medicine associated these manifestations with mom's diet.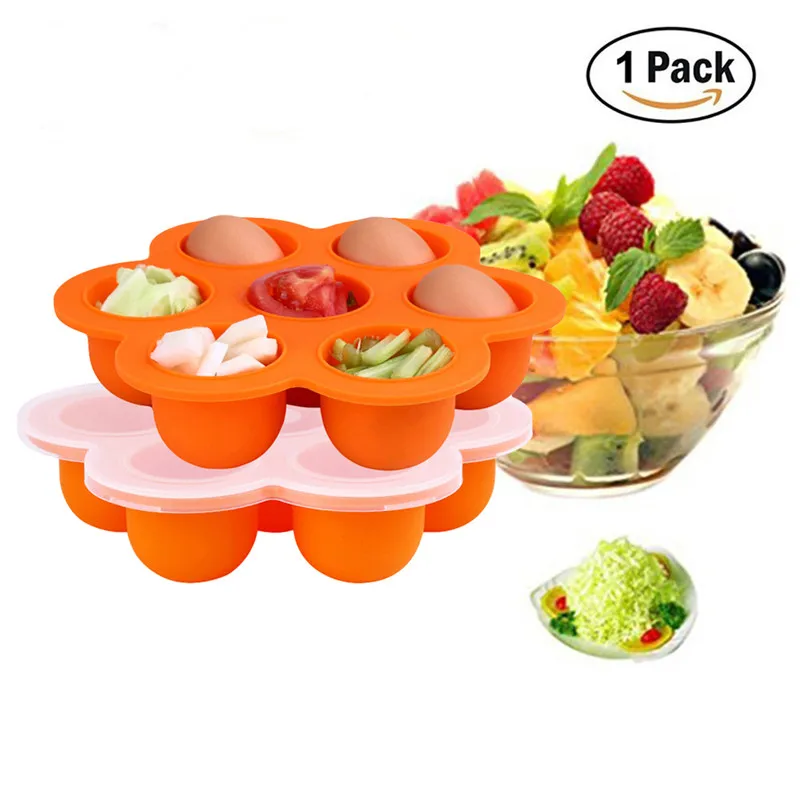 I want to share, but I perfectly understand what kind of reaction I can expect from skeptical moms. Does someone really need this, or should I save my nerves? Or maybe for those who need to create a closed group?
Breast milk storage and freezing containers
› ›
Sometimes a mother needs to be away from her baby for a while. Here, grandparents, sisters, friends or husbands who are more experienced in parenting matters come to the rescue. But how to feed a baby when mom is not around? Special containers for storing breast milk will allow any member of the family to do this.
Photo: depositphotos.com. Author: konevaelvira.
Contents
- Advantages
- Disadvantages
- Varieties
- Glass
- Plastic
- Additional functions
- How to choose?
- Overview of popular models
- How to collect and store milk?
- How to use frozen milk?
- Parent Testimonials
Benefits
Special containers allow you to express breast milk and preserve its valuable nutrients, including antibodies.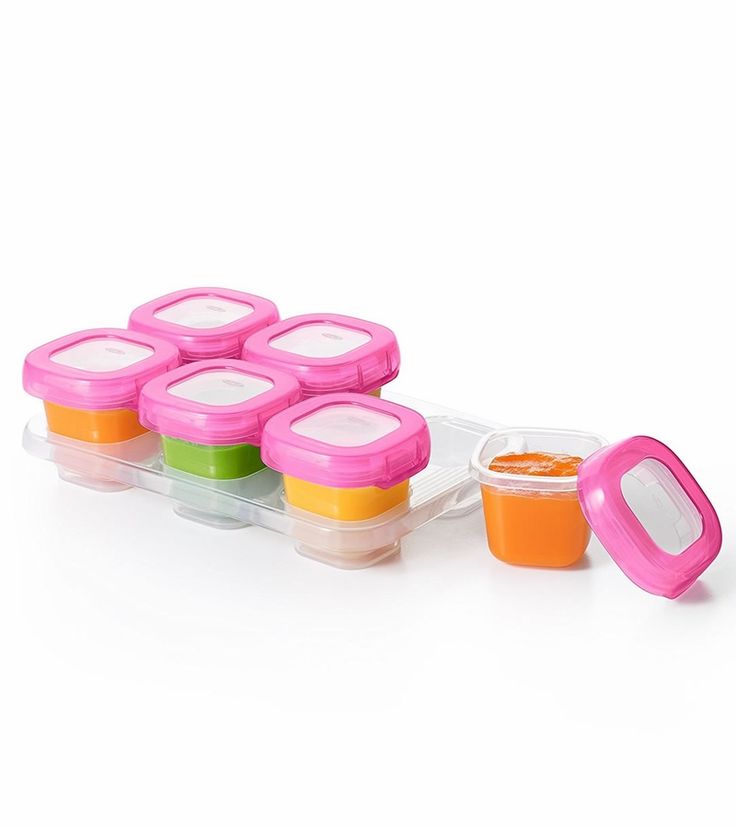
There are many products on the market today made of different materials: glass or plastic. Such containers:
- are easy to store;
- easy to use;
- are absolutely safe.
Disadvantages
Milk storage containers have one serious disadvantage. If there is even a small volume of air in the internal cavity, the liquid can deteriorate: milk fats are oxidized, which is why the product acquires a rancid taste. The kid, most likely, will refuse to eat such tasteless food.
To prevent spoilage of breast milk, the container must be filled to the brim. This is problematic if the baby prefers to eat often, but in small portions.
Varieties
Glass
Glass products are the most expensive, but are considered to be of the highest quality. However, you will have a lot of trouble with them:
- are only suitable for short-term storage;
- require sterilization before each use;
- part of the valuable milk fats settles on the glass walls, which slightly reduces the nutritional value of milk;
- must be handled with care so as not to break.
Such containers also have plenty of advantages:
- do not turn yellow from long-term use;
- tolerate high and low temperatures well;
- easy to clean;
- do not contain toxic compounds.
Plastic
Plastic containers are usually much cheaper than glass containers. But cheap containers can be molded from polycarbonate (marked “O” or “Other”), which is relatively safe, but under certain conditions can release harmful substances. Fortunately, they are easy to recognize: they are solid and transparent, and at the same time have a low cost. Another disadvantage: transparent walls let light through, which causes premature breakdown of nutrients. When it comes to food plastics, it is better to give preference to polypropylene containers (marked “PP”). They withstand temperatures up to +140 °C. But when in contact with sugar, fats and alcohol, they can also release toxic substances: formaldehyde or phenol. On polypropylene containers, in addition to the main marking, as a rule, there are messages like: “Does not contain bisphenol A”, “Does not contain BPA” or “BPA free”.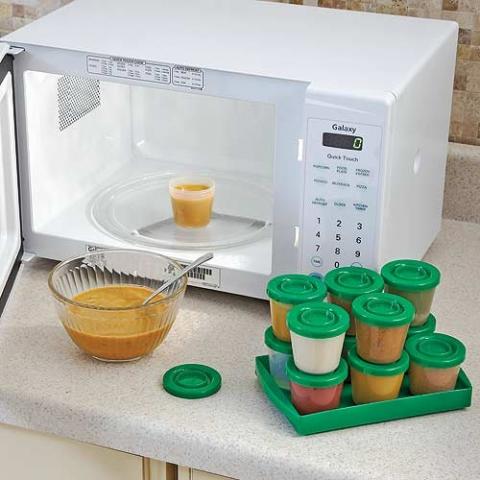
It is preferable to buy milk dishes made of special plastic - cloudy and rather soft. It doesn't look as pretty, but it won't harm the baby. Such containers are allowed to be heated and used up to 20 times (but it is better to limit yourself to 4-5) with careful handling. But if cracks or scratches appear on the inside, it will have to be thrown away.
Additional features
Today you can purchase containers with various additional features.
- Disposable, which should be thrown away immediately after use - not the most economical option, but they are safe for a baby.
- With venting system - these models do not have to be completely filled. In addition, they can freeze small portions of milk.
- Compatible containers with breast pumps and/or silicone nipples.
- Bottle containers - suitable for both collecting milk and feeding the baby.
How to choose?
First you need to decide which material suits you best. If you are careful and attentive, it is better to take a glass container that will last a long time without requiring replacement. If you often break mugs, choose a plastic container.
Another thing to consider:
- how long the milk will be stored;
- how much does your child eat at a time;
- whether you plan to use a breast pump.
If you already have a breast pump, buy a container that is compatible with it - this will make collecting and pouring your breast milk easier.
Having decided on the key characteristics, go to the store. When buying, check several properties of the product:
- how comfortable it is to hold the container in your hands;
- how strong and reliable it looks to the eye;
- for cracks, chips or other defects;
- Lid is tight.
Do not select Chinese or unknown brands. This is especially important for plastic containers. Cheap products often contain bisphenol A.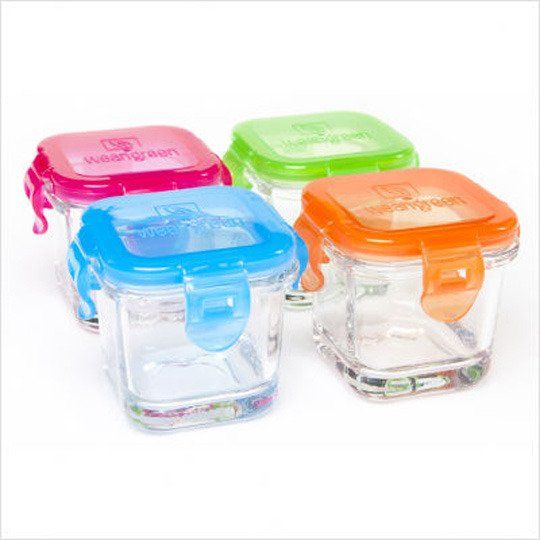 Once in breast milk, it can cause serious harm to the health of the child.
Overview of popular models
A wide variety of products and a wide range of prices make it difficult to choose a container for storing and freezing milk. A short review will help determine the product and brand that is most suitable for you.
- Canpol Babies containers (Poland). The set can contain from 1 to 4 containers with a volume of 180 ml. Each product is completed with a cover for tight storage of milk. The containers are made of safe and durable plastic - polypropylene. An important point: containers of this brand will remain in demand even when the baby grows up. You can store soups, cereals, mashed potatoes and other children's dishes in them. A scale is applied to the wall of the product, which allows you to determine the size of the children's portion. The products are compatible with the Easy Start breast pump.
- Set of three Medela containers. Relatively inexpensive device, consists of 3 durable polypropylene bottles, caps and protective discs.
 Each 150 ml container has a measuring scale on the wall. Additionally, you can buy a silicone pacifier and feed your baby directly from the bottle. Containers are suitable for collecting, storing and freezing milk, as well as for transportation. A breastfeeding mother has the opportunity to express milk directly into a bottle - the model is compatible with the breast pump of the same brand "Medela".
 - Container set “Philips Avent VIA SCF612/10”. The package includes 10 sterile containers, 10 caps, 2 feeding adapters and breast pumps. Each container has a capacity of 180 ml and is made of BPA-free safe plastic. This storage and transport system can be used for milk, puree, porridge, soups and baby food. Suitable containers "Avent" and for feeding a child. They don't take up much space. Equipped with tightly screwed caps that protect milk from contamination or leakage. The system is compatible with Avent brand breast pumps and teats.
How to collect and store milk?
Collect milk preferably in the morning.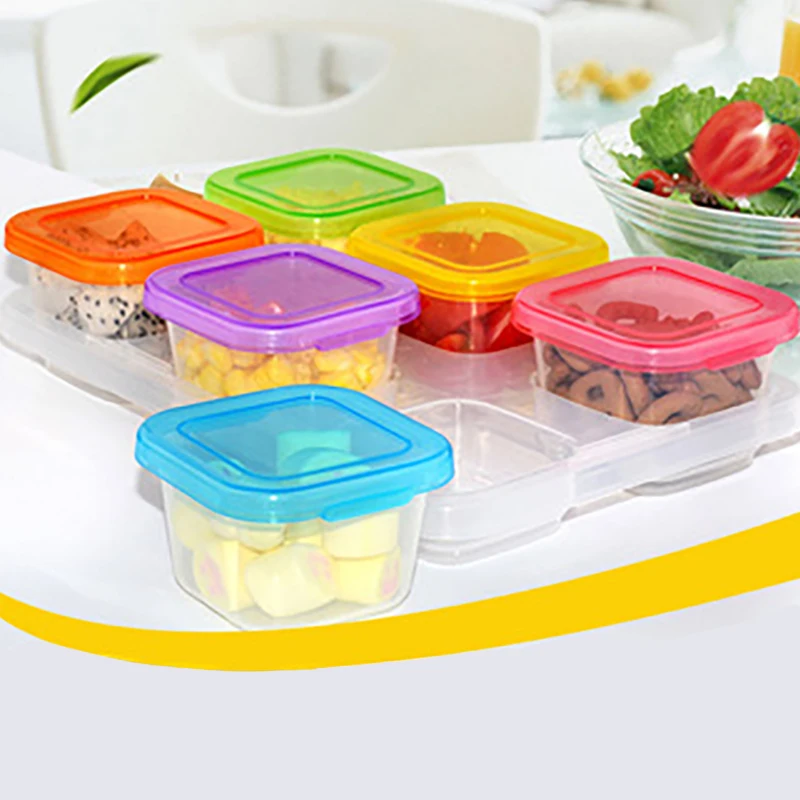 Since the baby eats more during the day, it will be more difficult for you to “save” milk for pumping. Lying in bed, give the baby only one breast so that the other remains full. Then express the milk - this will take about 20 minutes. To save more, don't feed your baby from a "full" breast for several hours.
Step-by-step instructions:
- Sterilize the breast milk container. To do this, either boil it in water for 5 minutes, or use a sterilizer.
- Thoroughly, but without using soap, wash your hands and chest.
- Express milk from one breast into a cool container until it stops spurting.
- If you run out of milk and you haven't filled the container yet, rest for a few minutes and continue pumping.
- Close the filled container tightly with a lid.
- Label the container with the time and date of pumping. For these purposes, a sticker or patch is suitable.
- Place the closed container in the freezer.
Expressed breast milk can be stored in the freezer for up to 6 months.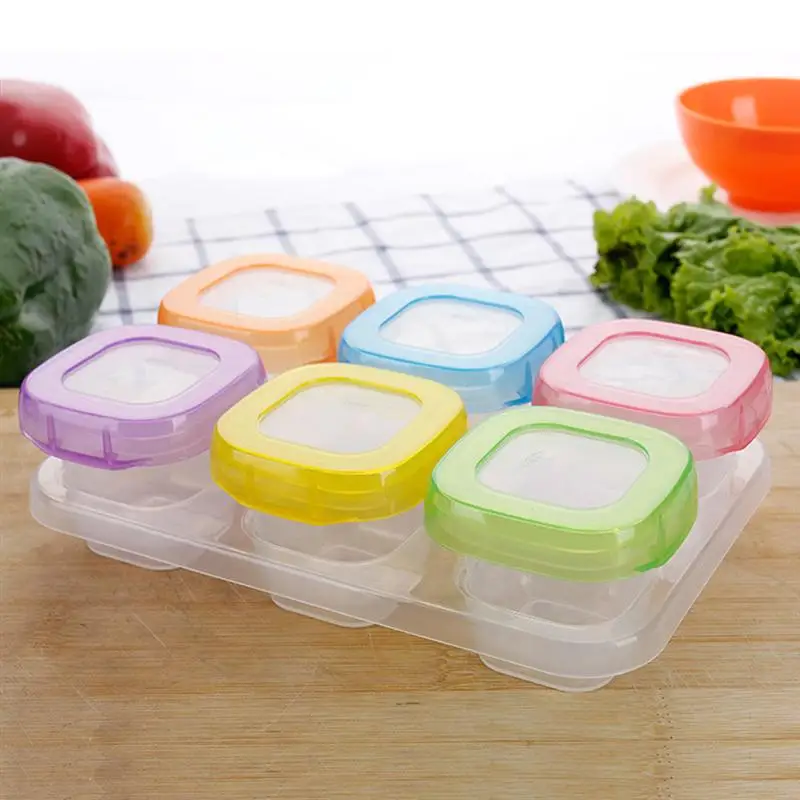
Rinse the used container and lid thoroughly with hot water and a saline or soda solution. Then rinse again and sterilize.
We recommend periodically inspecting the containers for damage.
How to use frozen milk?
- Place the frozen milk in the refrigerator to allow it to defrost gradually.
- Then heat in a water bath or bottle warmer. The use of a microwave is not recommended.
- Shake the bottle before feeding.
- Feed with a spoon or directly from a container using a teat.
Leftover milk after feeding must not be re-frozen and used for the next feeding!
Why you shouldn't heat the mixture in the microwave.
Parents' testimonials
Elena Pochueva, Slavgorod. Bought Philips Avent containers before my son was born. The fact is that I could not completely leave work, so I knew that I would have to leave the baby for 4-5 hours. I did not regret the purchase: it is convenient to express and feed (I bought a pacifier).