Steam or boil vegetables for baby food
Making Your Own Baby Food
You don’t have to buy commercially prepared food for your baby. Homemade baby food is easy to make, inexpensive and environmentally friendly. It can be as nutritious, if not more nutritious, than store-bought baby food. Eating homemade baby food teaches your baby to enjoy the same foods that you prepare for the rest of the family, also.
Your baby is ready for table food when they can move their tongue from side to side, chew with their new teeth, and spoon feed themselves with their fingers or with your help. When your baby is between six and 11 months old, you can start gradually adding a variety of table foods to their diet. Refer to HGIC 4100, Feeding Your Infant for a general guideline of suggested times to offer different foods to your infant.
At first, feed your baby single ingredient foods that have been pureed. Offer only one new food at a time for several days in a row. Watch for signs of a food allergy (e.g. rash; hives; coughing; diarrhea or vomiting), and contact the doctor if your baby has any of these signs. Otherwise, give your baby about a week to adjust to a new food before offering another one.
Gradually your baby will be ready for some foods that are not pureed. You can begin mashing their foods with a fork or finely chopping soft foods like vegetables, fruits or cooked chicken. You can feed them small cubes of toast or bread, also.
Do not serve your baby a mixed-ingredient food until they have eaten each individual food separately, and you know they are not allergic to any of them. Mixed foods (e.g. casseroles and pizza) are not appropriate for babies under a year old. These foods may cause an allergic reaction, or they may contain ingredients that could choke your baby.
Pureeing Table Food
Definition: Pureeing food means that you put it through a sieve or grinder to make it into a liquid-like, smooth texture. For a thinner consistency, add water or other liquids.
Equipment: You can puree many foods from the family table for your baby by using a fork, potato masher, blender, strainer, food mill or baby food grinder.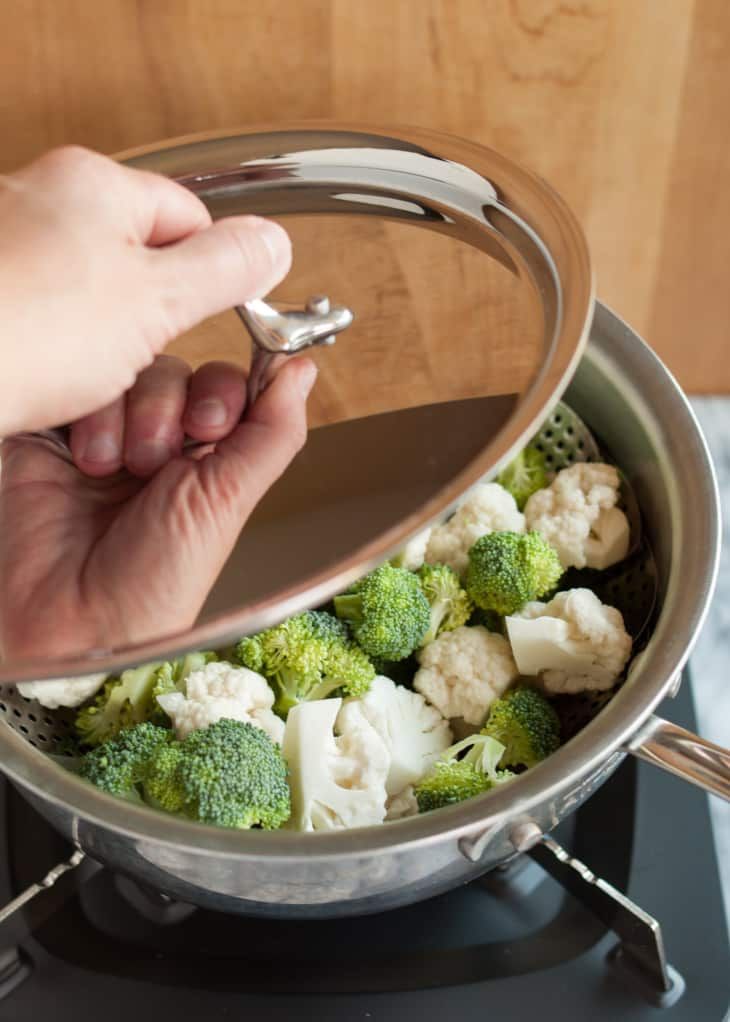 Foods can be mashed with a fork or chopped finely for older babies.
Safe Preparation Procedures: Follow clean, sanitary procedures in all food preparation and storage. Wash your hands, all surfaces and equipment with detergent in hot water and rinse thoroughly. Use separate utensils and cutting boards for animal foods (e.g. meat and poultry) and non-animal foods (e.g. vegetables, fruits and breads).
After cleaning food preparation surfaces, sanitize them by flooding the surfaces with bleach solution made from 1 teaspoon unscented chlorine bleach to 1 quart water. Allow solution to stand for several minutes, then rinse and air dry or pat dry with fresh paper towels.
Thoroughly rinse fresh fruits and vegetables under running tap water, including those with skins and rinds that are not eaten. While rinsing firm-skin fruits and vegetables, scrub them by rubbing with your hands or with a clean vegetable brush. Remove and throw away bruised or damaged areas where bacteria can thrive on produce.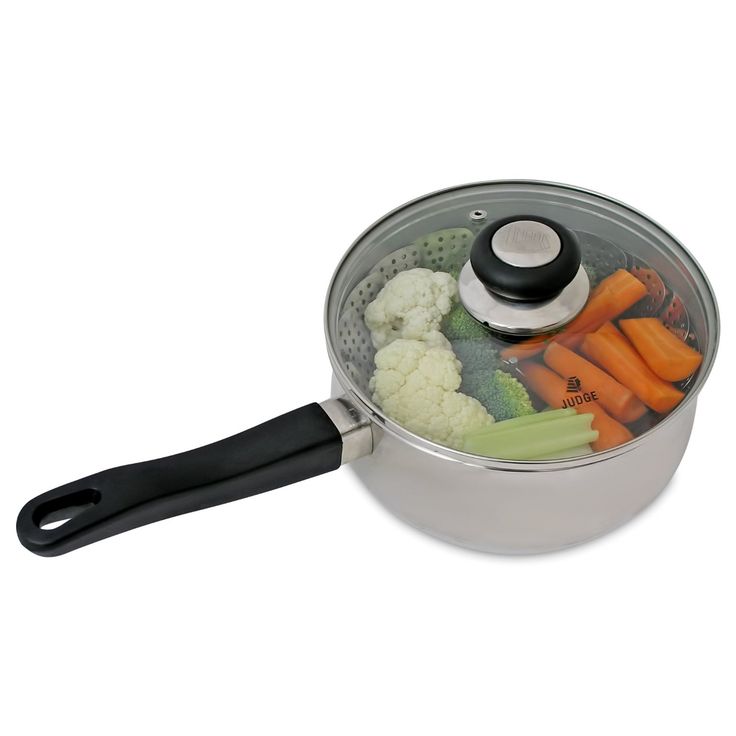 Washing fruits and vegetables with soap, detergent, chlorine bleach solution, or commercial produce wash is not recommended, because they could be absorbed into the produce or leave a residue that could make some babies sick.
Ways to Cook: Steaming and boiling are the best cooking methods to conserve nutrients. Microwave cooking is acceptable, especially for vegetables. Do not add salt, seasonings, sugar, margarine, butter, lard, oil, cream, syrups, gravy, sauces or fat drippings to food for babies less than one year old. Foods taste differently to your baby than they taste to you.
Rub a small amount of pureed food between your fingers to test for smoothness. You may need to add some fluid (e.g. formula, breast milk, fruit juice, water or cooking water) to make it the right consistency.
Foods to Use: Choose high-quality fresh (preferred), frozen or canned vegetables, fruits and meats. The United States now requires Country of Origin Labeling (COOL) to give consumers information about the origin of foods. The following foods sold in retail stores must have a COOL label: meat, poultry, wild and farm-raised fish and shellfish; fresh and frozen fruits and vegetables; peanuts, pecans and macadamia nuts, and ginseng sold by designated retailers. However, these foods are not required to have a COOL label if they have been physically or chemically changed through a process such as cooking, curing or smoking.
Vegetables & Fruits: Wash vegetables and fruits well in clean cold running water. Before cooking, remove parts not to be eaten (inedible peels, seeds, pits). Edible skins and peels can be removed either before or after cooking.
Fresh-cooked vegetables and fruits can be pureed with no added salt, sugar, fat or other unnecessary additives. To minimize vitamin loss, boil fresh vegetables or fruits in a covered saucepan with a small amount of water. Or, steam them until just tender enough to either puree, mash or eat as a finger food.
Canned or frozen vegetables and fruits may be pureed, also.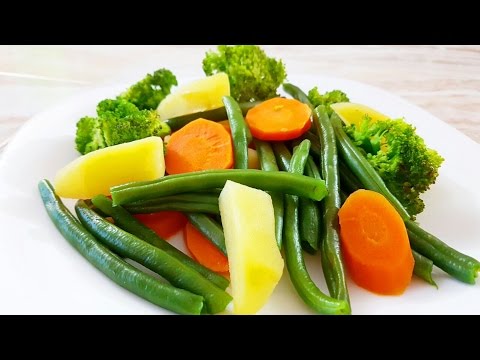 When using commercially processed canned or frozen items, check the ingredient label to avoid extra sugar, salt, fat, and other unnecessary additives.
Commonly Pureed Vegetables & Fruits: Ripe mashed bananas; applesauce; dried, cooked prunes; fresh pears and peaches, soft-cooked and pureed; potatoes; sweet potatoes; winter squash; peas; asparagus and green or wax beans. Do not serve citrus fruits or juices until the baby is one year old.
High-Nitrate Vegetables to Limit: A baby under six months old should not eat home-prepared high-nitrate vegetables, including: beets; broccoli; cabbage; carrots; celery; collard greens; lettuce; spinach and turnips. It is best to wait until your child is a year old before feeding them these vegetables. Limit to no more than one to two tablespoons per feeding.
Nitrates in these foods can change to nitrites, which bind iron in the blood, making it hard to carry oxygen. This may cause breathing difficulty and may even make the skin turn blue.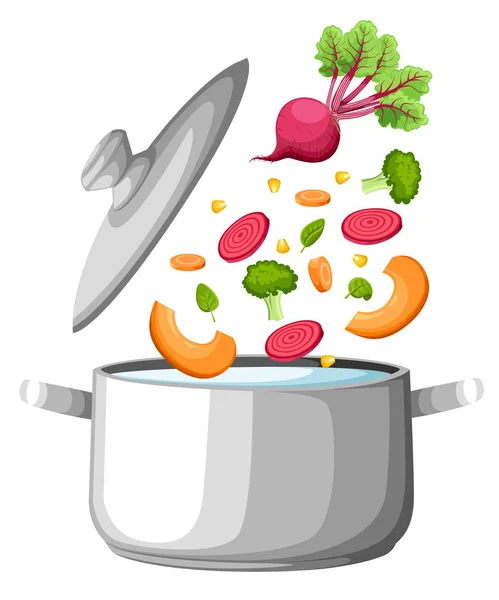
Meats: Remove all bones, skin, connective tissue, gristle and fat from meats, poultry and fish before cooking. After cooking, remove tough parts and visible fat.
All meats, poultry and fish should be well cooked to kill harmful bacteria, viruses or parasites. Baking, boiling, broiling, braising, roasting, stewing, poaching and steaming are good cooking methods, but frying is not. Cook food until soft and tender and it reaches a safe temperature, according to a meat thermometer. Refer to HGIC 3580, Cooking Meat Safely for more information.
Cut cooked meat into small pieces or thin slices and puree. Warm meat is easier to blend than cold meat. Do not cook food in an oven at a temperature below 325 °F. Do not heat pureed meats in the microwave, because hot spots in the meat could seriously burn your baby’s mouth and throat.
Before you feed your child hot dog wieners, luncheon meats or deli meats, thoroughly reheat these meats until steamy hot. Let them cool before serving. Reheating destroys Listeria, a foodborne bacteria that, if present, could make your infant sick.
Eggs: Buy refrigerated eggs with clean, uncracked shells. Store them in the original carton in the main section of the refrigerator, not on the refrigerator door. Use eggs within three to five weeks after getting them home and putting them in your refrigerator.
Hard cook eggs until the yolks and whites are firm and not runny, and then separate the yolks from the whites. Serve only the yolks to babies less than one year old, because egg whites may cause an allergic reaction. To soften the yolks, mash them with some liquid, such as sterile water or infant formula. Make sure that eggs are not kept at room temperature for more than two hours, including serving time.
Never feed a baby raw or partially cooked eggs or foods that contain them (e.g. homemade ice cream, mayonnaise or eggnog). Pasteurized egg products, such as dried egg yolks that are used by some chefs and institutions, are extremely safe to serve your baby.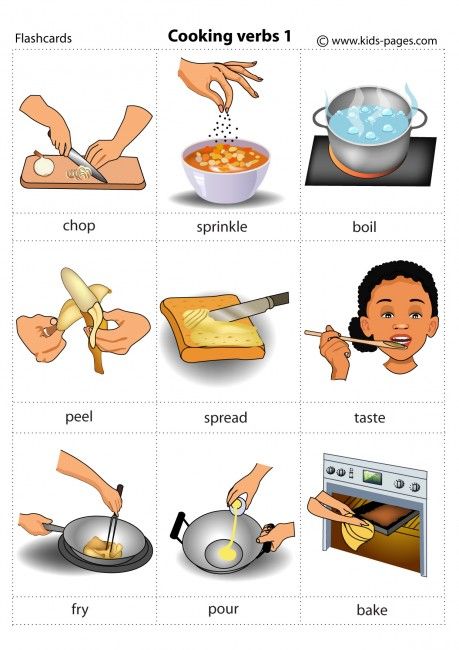 However, pasteurized egg products contain some salt or sugar for stability if frozen.
Dry Beans & Dry Peas: Follow cooking instructions on the package label or a basic cookbook. Do not add seasonings, salt, or fat to the beans or peas. Cook until soft enough to puree or mash easily. If canned beans or peas are used, drain the salty water and rinse them with clean water before pureeing or mashing.
Grain Products: Cook noodles, macaroni, spaghetti, rice, barley and other grain kernels until very soft. Then mash, puree, or finely chop, depending on the baby’s development. Babies can choke on cooked grain kernels that are not mashed or ground.
Unsafe Foods to Avoid: Do not give babies any baked goods or other foods that contain honey (e.g. graham crackers made with honey or Honey Nut Cheerios®). Never add honey or corn syrup to your baby’s food, because it may contain bacterial spores that could cause a life-threatening illness or even death.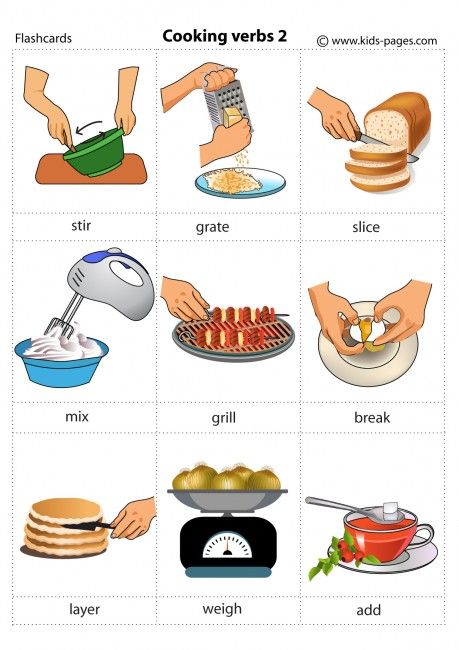 Avoid canned food from dented, rusted, bulging, leaking or unlabeled cans and jars.
Do not feed your baby any home-canned food except fruits. In addition, do not feed them raw fruit purees, because some raw fruit can carry pathogens and is a food safety risk. Therefore, you should heat the puree of raw fresh fruits (e.g. apples, peaches, pears, melons and other soft fruits) to about 180 °F, or to a simmering temperature, and then cool. The Food and Drug Administration (FDA) also warns against giving young children unpasteurized fruit juices.
Serving Table Food
Prepare foods for a baby immediately before use, and avoid using leftover food. Allow freshly cooked food to cool for 10 to 15 minutes so that it does not burn your baby’s mouth and throat. Before feeding the food to the baby, taste test the temperature using a CLEAN spoon.
Food that is not eaten right away should be refrigerated or frozen immediately after cooking. Cover, wrap, or protect food, and label with the date and time prepared.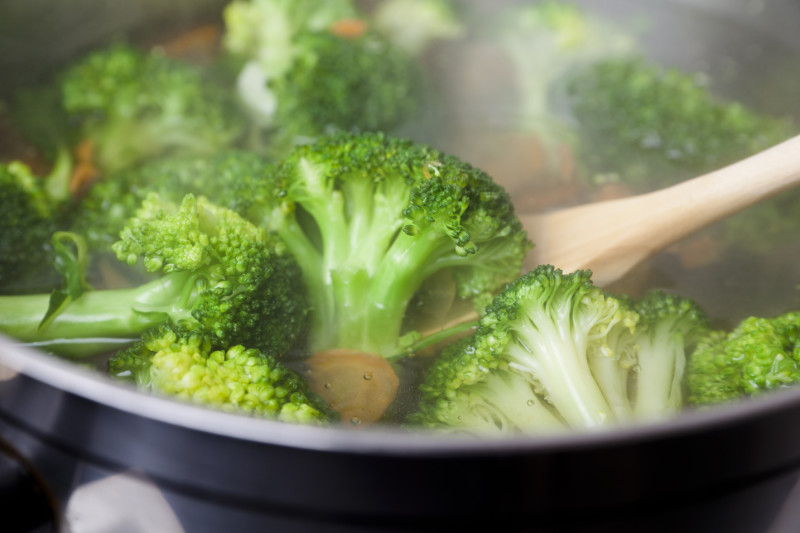
Never leave baby food (solid or liquid) for more than two hours at room temperature (between 40 °F and 140 °F) or for more than one hour if the temperature is above 90 °F. Throw out any foods left unrefrigerated for longer times. When food is left out longer, bacteria can grow to harmful levels and may cause your baby to get sick.
Storing Table Food After Cooking
Refrigerator: Baby food spoils more easily than other foods, because it has been pureed or ground. It also does not contain the preservatives needed in many shelf-stable processed foods. If freshly prepared baby food (pureed food) is not used right away, refrigerate it in shallow covered containers and use within one or two days. Meats, poultry, fish and egg yolks should be used within 24 hours. Make sure your refrigerator maintains the food at a consistent temperature of 40 °F or lower to keep food safe.
Freezer: Freeze pureed baby food in single-serve portions so that it can be heated and safely fed to your baby. There are two recommended ways to freeze it.
Ice Cube Tray Method: For single-serve portions, pour cooled, pureed food into a paper cupcake liner or directly into sections of a clean ice cube tray. Cover with plastic wrap or foil and place in freezer.
Cookie Sheet Method: Drop 1-2 tablespoons of cooked, pureed food in separate spots on a clean cookie sheet. Cover with plastic wrap or aluminum foil and put in freezer.
When cubes or pieces of food are frozen solid, put them in a plastic freezer container or bag and store in the freezer. Write the name of the food and the date on the container and use within one month for best quality. Make sure the freezer temperature is cold enough (preferably 0 °F or below) to keep food safe.
Thawing: Frozen food can be thawed, or defrosted, three ways: in the refrigerator; under cold running water or as part of the reheating process. Don’t thaw baby food on the counter at room temperature or in standing water (e.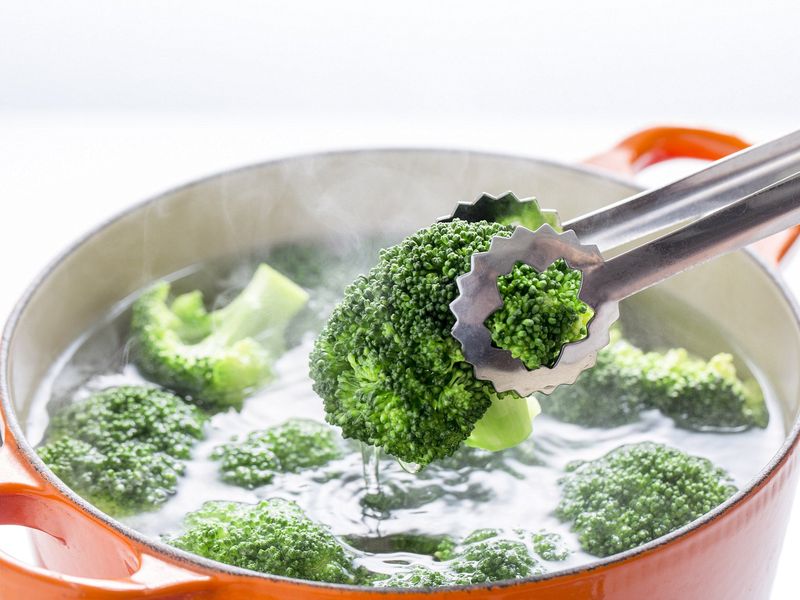 g. in a pan or bowl).
When you remove baby food from the freezer, label it with the date and time removed. Store thawed food in the refrigerator and use most within 48 hours or throw it out. Meats, poultry and fish should be thrown out after 24 hours, however. Do not refreeze baby food that has thawed.
Warming: Baby food can be served cold, at room temperature or slightly warmed. Refrigerated or frozen home-prepared baby food should be thoroughly reheated to at least 165 °F before feeding it to your baby.
There are three ways to warm baby food.
An Electric Baby Dish: This keeps the food at constant temperature, but food should always be stirred and tested for temperature before feeding to the baby.
A Small Heat-resistant Dish Placed in a Saucepan: After dishes are placed in about an inch of water in a saucepan, heat water to simmering, not boiling. When food is warm, remove, stir and test for temperature.
Higher-fat foods, such as meat and eggs, should always be warmed on the stove, because they heat faster and splatter or overheat more.
A Microwave Oven: Microwave ovens heat unevenly and cause “hot spots,” even if the food feels cool to you. If you decide to heat your baby’s food in the microwave, follow these safety tips. Cover the dish with a microwave-safe cover, not plastic wrap. Stir food well and turn dish often. Heat food only a few seconds to a lukewarm temperature. Stir to prevent “hot spots,” then let sit for a few minutes.
Regardless of the warming method you use, always stir and taste test food yourself. Make sure the temperature is lukewarm and won’t cause severe burns to your baby’s mouth and throat.
Feed your baby with a CLEAN spoon, and throw away any leftover food in the baby’s dish or the serving dish. Reheat food only one time, and never refreeze food that has been thawed.
Pureed Baby Food Recipes
Making your own fresh fruit purees is a food safety risk, unless you heat them first. Raw fruit purees are unsafe for babies to eat, because some raw fruit can carry pathogens. Therefore, you should heat the puree of raw fresh fruits (e.g. apples, peaches, pears, melons and other soft fruits) to about 180 °F, or to a simmering temperature, and then cool. The Food and Drug Administration (FDA) warns against giving young children unpasteurized fruit juices, also.
Bananas Plain & Simple:
Choose a ripe banana with an unbroken peel and no damage to the outside. Rinse the banana under running water and remove the peel. Puree or mash the banana with a clean fork. Serve immediately, and throw away leftover banana.
Applesauce Deluxe:
1 medium apple
4 tablespoons (¼ cup) pineapple juice
Peel, quarter and core apple. Combine with pineapple juice and heat to about 180 °F, or a simmering temperature, until soft. Blend until smooth in texture. Let cool before serving to baby.
Apples & Peaches:
1 apple
½ cup + 2 tablespoons water
1 cup peaches (fresh, frozen, or canned in juice)
Peel, core, and dice apple. Combine with ½ cup water in a saucepan, then bring to a boil over high heat. Cook for 5 minutes. Let cool for 10 minutes, then puree mixture until smooth.
While apple is cooling, prepare the peaches. If using fresh peaches, peel and slice them. Combine peaches with 2 tablespoons water in a blender. Puree until smooth. Combine apple and peach mixture and heat the puree to about 180 °F, or to a simmering temperature. Let cool before serving to your baby. Freeze no longer than one month for best quality.
Pureed Fruit Delight:
½ cup freshly cooked or home-canned fruits. Use apples, pears, peaches, nectarines, apricots or cooked dried prunes (without sugar).
2-4 teaspoons liquid (water, formula, breast milk or unsweetened fruit juice – not citrus)
Remove skin and seeds. Press through a sieve, or put ingredients in food mill or blender and puree until smooth. Serve or freeze. Freeze no longer than one month for best quality.
Yummy Fresh Fruit:
¾ cup ripe fruit (uncooked peaches, nectarines, pears or apricots) without sugar
1 tablespoon unsweetened fruit juice (not citrus)
Remove skin and seeds. Puree ingredients in baby food mill or blender until smooth. Heat the puree to about 180 °F, or to a simmering temperature. Let cool, then serve or freeze. Freeze no longer than one month for best quality.
Green Peas:
1 cup frozen peas
¾ cup water
Place peas and water in saucepan. Bring to a boil over high heat, and cook for 6 minutes. Let cool 10 minutes, then puree until smooth. Serve or freeze. Freeze no longer than one month for best quality.
Vegetable Medley:
½ cup cooked fresh, frozen or canned vegetables (potatoes, sweet potatoes, green beans, peas, carrots, yellow squash), no salt added
2-4 tablespoons cooking liquid, formula or water
Cook fresh vegetables, or use frozen or canned vegetables without salt or seasoning. (Read labels for ingredients.) Press vegetable chunks through a sieve or baby food mill. Thin with cooking liquid or formula to eating consistency. Or, put cooked vegetables and liquid in a blender and puree until smooth.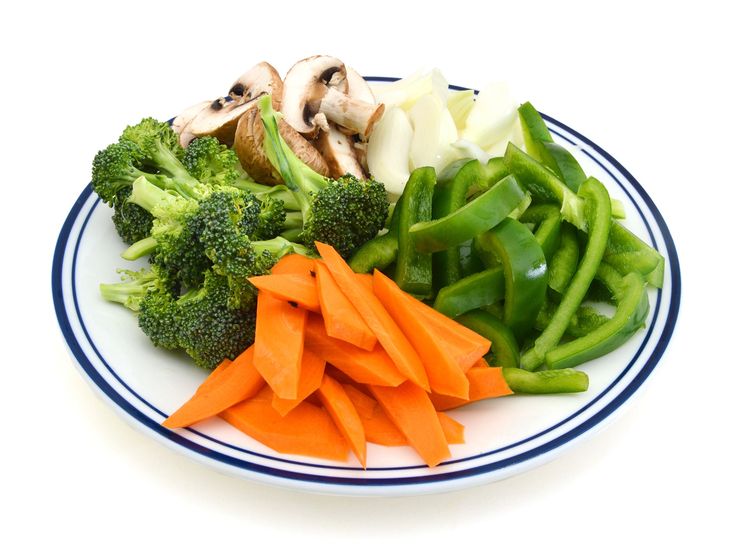 Serve or freeze. Freeze no longer than one month for best quality.
Note: After the individual vegetables have been fed several times, some good combinations are: potatoes and carrots, potatoes and green beans, carrots and peas.
Simple Strained Meat or Poultry:
(for babies over 8 months)
½ cup cooked meat (small pieces of lean chicken, beef, turkey or pork)
2-4 tablespoons meat broth or formula
Cook lean meat (fat, skin and connective tissue removed) over low heat in a small amount of water. Puree meat and liquid until smooth. Serve or freeze. Freeze no longer than one month for best quality.
Your Choice Combo Dish:
(for babies over 8 months)
1 cup cooked, cubed or diced meat (cut off fat)
½ cup cooked rice, potatoes, noodles or macaroni
⅔ cup cooked, diced vegetables
¾ to 1 cup liquid (formula, broth or water)
Combine and blend until smooth. Serve or freeze in serving-size containers. If frozen, use within one month for best quality.
Note: Serve combination dishes only after you have fed the individual foods several times.
Egg Yolk Puree:
(for babies over 8 months)
Put eggs in a saucepan and cover them with 1 inch of cold water. Put pan on a burner on medium-high heat. Let water come to a boil, put a lid on the pan, and move the pan onto a cold burner. Set a timer for 15 minutes for large-sized eggs (12 minutes for medium-sized or 18 minutes for extra large-sized). When the time is up, cool the eggs promptly by setting the pan in the sink and running cold water into the pan.
Peel eggs and remove yolks. The recommended way to peel an egg is to gently tap the cooled egg on the countertop or table until it has cracks in it. Roll it between your hands until the cracks turn into small crackles all over the egg. Starting at the large end of the egg, use your fingers to peel off the shell.
Combine egg yolks with 1 tablespoon of formula or water per yolk and mash until smooth.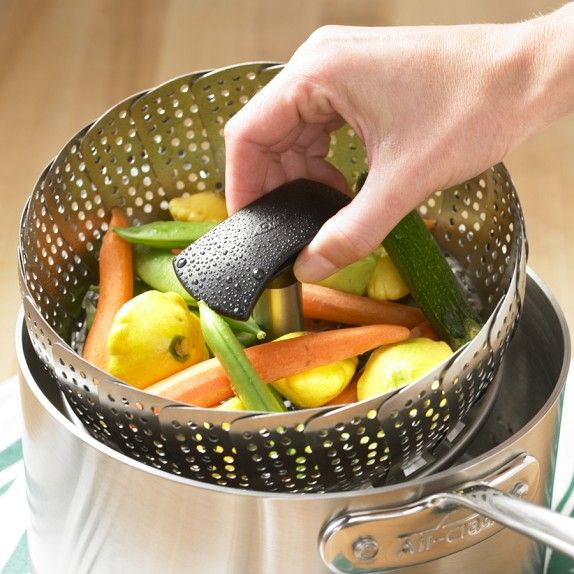 Store in refrigerator and use within one day. Or, freeze and use within one month for best quality.
Note: Use only the yolks. The extra egg whites can be used in the family’s casseroles, salads or other dishes. To avoid problems with allergies, wait until your baby is a year old to feed them egg whites.
Fruit & Yogurt:
(for babies 10 months and older)
¼ cup plain yogurt
¼ cup cooked, unsweetened fruit
Combine yogurt and fruit, mashing lumps of fruit if necessary.
Creamy Custard:
(for babies over 1 year)
3 egg yolks
2 tablespoons sugar
2 cups milk, warmed
Mix egg yolks and sugar. Stir in milk and mix well. Cook over low heat, stirring constantly, until mixture coats the spoon. Store in refrigerator and use within one to two days.
Home Canning of Baby Food
Fruits Only: Fruits are the only type of baby food that may be canned safely at home.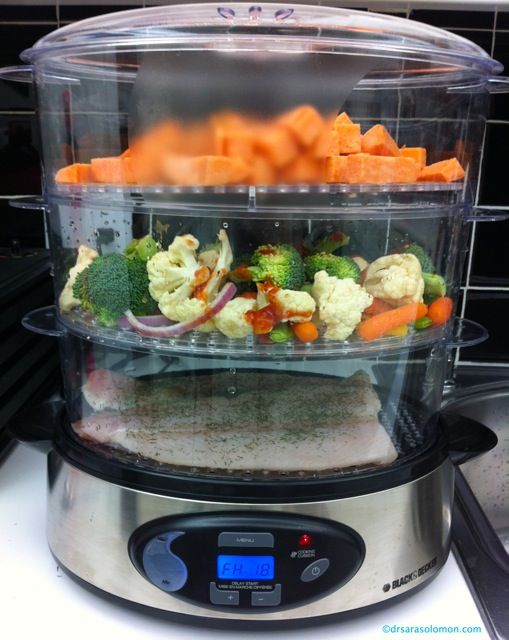 However, the following fruit purees should not be home canned: bananas; figs; Asian pears; tomatoes; cantaloupe and other melons; papaya; ripe mango or coconut. There are no safe recommendations for these fruits. Other fruits can be pureed or mashed (chunk-style), and then processed in the following way.
Hot Pack: Select your favorite fruit or mixture of fruits. Stem, wash, drain, peel and remove pits from fruit if necessary. Measure fruit into a large saucepan, crushing slightly if desired. Add 1 cup hot water for each quart of fruit. Cook slowly until fruit is soft, stirring frequently. Press through a sieve or food mill. If desired for flavor, add sugar to taste. Reheat pulp to boil. If sugar was added, boil until it dissolves. Pack hot fruit into clean, hot half-pint or pint jars, leaving ½-inch headspace. Remove air bubbles. Wipe jar rims. Adjust lids. Process half-pints or pints in a boiling water bath for 20 minutes of actual boiling over the tops of the jars. For step-by-step instructions on using the boiling water bath method, refer to HGIC 3040, Canning Foods at Home.
Do not use commercial baby food jars for canning, because they require special equipment for sealing that is not available for home use.
To Serve: Heat the blended foods to boiling, simmer for 10 minutes, cool and serve. Store unused portions in the refrigerator and use within 2 days for best quality.
Caution: Do not attempt to can pureed vegetables, red meats or poultry. Proper processing times for pureed foods have not been determined for home use. Instead, can and store these foods using the standard processing procedures. Then puree or blend them at serving times.
Commercial Baby Foods
Sometimes you want to make baby food at home from fresh ingredients, but at other times you may need to feed your baby store-bought baby food, which is a convenient, nutritious option.
Nutrition Labels: Read nutrition labels so you’ll know what ingredients are in the food you buy for your baby. Most commercial baby food companies no longer add salt, sugar and starch like they did in the past. Combination foods (e.g. dinners and desserts) often have added starch and sugar. They also are more expensive and may be less nutritious than individual foods.
Infants grow so fast that they need more calories from fat than older children and adults. Therefore, labels on food for infants and children less than two years old do not list the calories from fat, saturated fat, polyunsaturated fat, monounsaturated fat or cholesterol. Labels also don’t contain the column “Percent Daily Values” or the reference to the 2,000-calorie diet.
Baby food is packaged for different stages (e.g. stage 1, 2 or 3), depending on the texture of the food.
Cautions: Do not feed a baby under one year of age any commercial foods containing whole eggs or egg whites. Never heat commercial baby food in the jars, because they could crack or break when heated in the oven, boiling water or the microwave.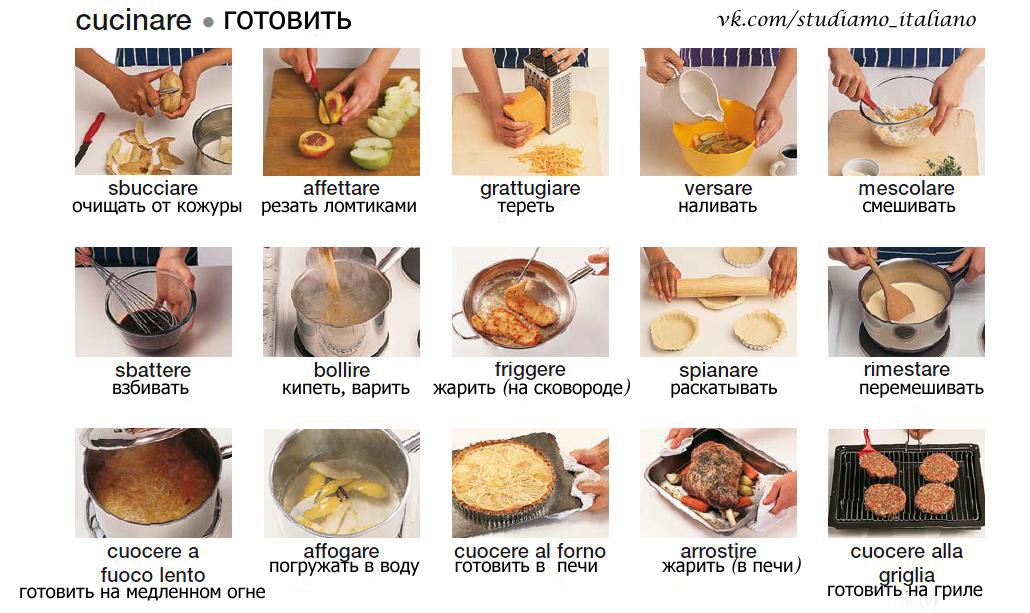
For More Information
For related information on feeding your baby, refer to HGIC 4100, Feeding Your Infant, HGIC 4101, Breast Milk or Infant Formula?, HGIC 4102, Introducing Solid Foods to Infants and HGIC 3640, Food Safety for Pregnant Women & Their Babies.
Originally published 09/05
If this document didn’t answer your questions, please contact HGIC at [email protected] or 1-888-656-9988.
Making Your Own Baby Food
Read time: 7 minutes
What to know about making your own baby food- Advantages to making your own baby food purees
- Supplies you need to get started
- Cooking methods to make homemade baby food
- Baby food puree recipes to get you started
Once your little one is ready to start solids, the next question often asked is: Do I make baby’s food or buy it? The store offers many baby food options, but making at least some of the food at home may allow for even more variety.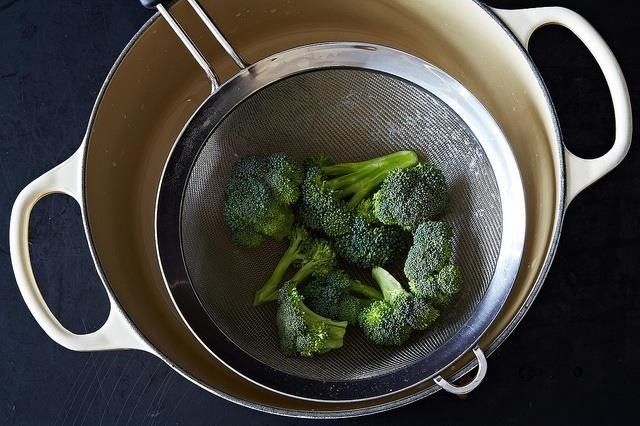
With a little bit of planning and use of some of the utensils you likely already have around the house, making homemade baby food doesn’t have to be as daunting as it sounds.
What are some advantages of making your baby’s pureed food?- Greater control over what you feed your baby: You can use a wider variety of ingredients that are not always available in store-bought baby food.1,10
- Money saver! Did you know the price of 2 to 3 containers of baby food is almost equal to that of 4 to 6 pears, which can create enough pureed food for 10 or more meals for your baby?1
- May help reduce picky eating: Repeatedly offering a greater variety of foods, as well as foods the family eats (with minor changes in textures and ingredients to meet your baby’s needs), may help make your little one a more adventurous eater, even into childhood.2
Read more: Introducing Solids: First Foods & Textures
You might be worried that you need an elaborate kitchen setup and all new kitchen tools to make your baby’s purees, but the good news is that you likely have many of the tools already needed to whip up some homemade baby food!
Here is a list of some of the tools that can be used to make homemade baby food:- Vegetable peeler
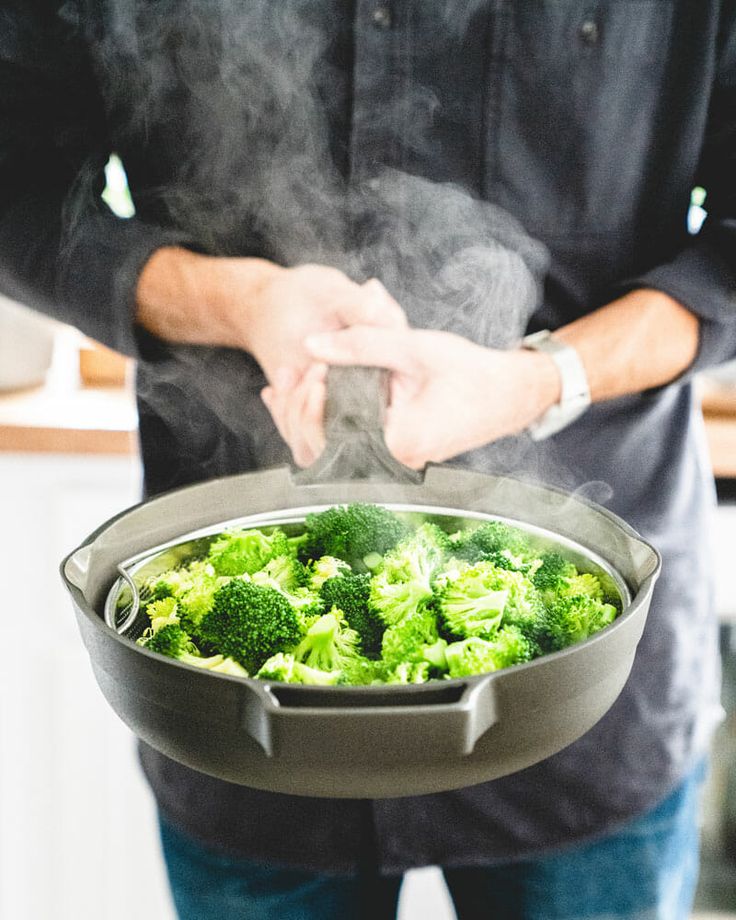
- Pot for boiling or steaming
- Sheet pan for baking
- Steamer basket
- Blender or food processor
- Fork and knife
- Food mill
- Potato masher
- Strainer
- Ice cube trays
Following proper food safety is especially important when cooking for children and especially for baby’s first foods.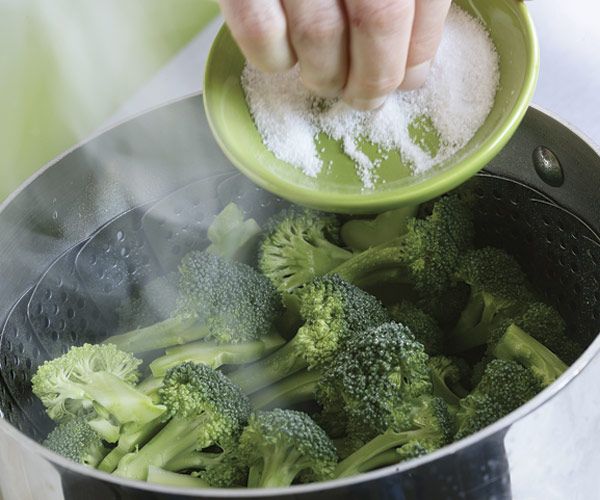 3 Babies are more prone to foodborne illness than older children or healthy adults, so always wash your hands, rinse the food items, clean your work area, cook foods to their recommended internal temperatures, and avoid cross-contamination.3
For more specifics on proper food safety protocols, see Food Safety for Babies and Toddlers
What cooking methods should I use when making baby food?There are many cooking options available for pureeing food for your baby. Each method has pros and cons in terms of ease and retention of nutritional value:
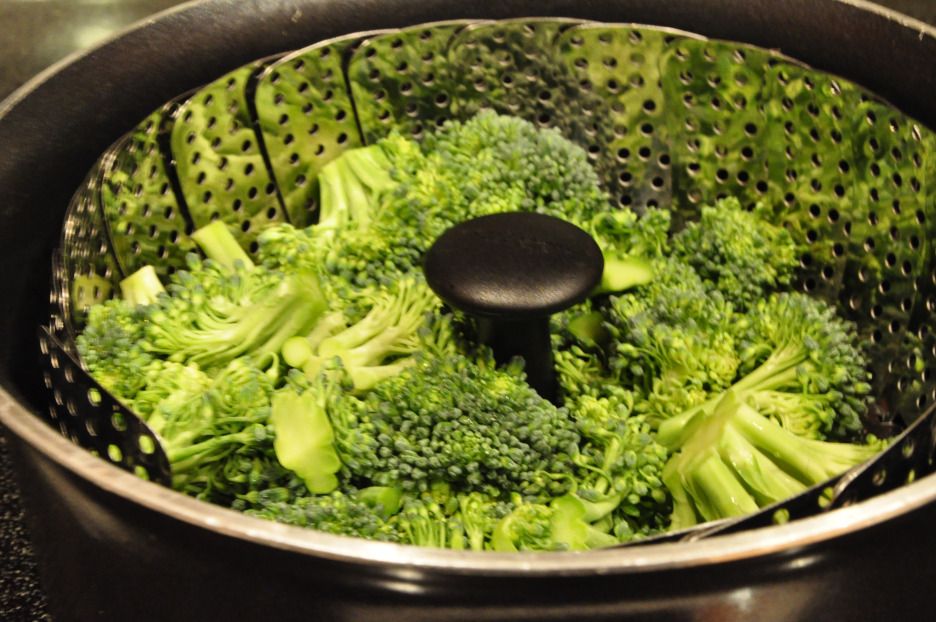
- Steaming: A very popular (and easy!) method, steaming allows for minimal nutrient loss and the leftover water can be used as stock for pureeing.4
- Boiling or Stewing: While also convenient, this cooking method results in greater nutrient loss into the surrounding water. To recoup these nutrients, you can use the cooking water when you make a puree or broth.
 4
4 - Baking or Roasting: Great for making large quantities in the oven. Baked food items retain a good amount of their nutrients.4,5
- Microwave Cooking: Super easy but mainly best used for only small quantities. Be aware that microwaving may lead to uneven cooking and hot spots in the food or liquids.6
- Pressure Cooking: This technique may require additional kitchen equipment but retains much of the foods’ nutrients because this method uses very little water and is fairly quick.5
- Grilling: Babies and small children can eat grilled foods. When grilling, aim for a low temperature and avoid burning or charring meats.7
- Sautéing and stir-frying: Another fast and flavorful option!
*Note that the longer you cook a food for and the higher the temperature used in cooking, the more nutrients may be lost. 5
5
Fruits, vegetables, grains, and meats can all be cooked and pureed into baby food. In fact, the American Academy of Pediatrics (AAP) states there is no specific order that foods should be introduced.8
Some foods need to be avoided as they are choking hazards. Read more on Preventing Choking
Here’s how to prepare homemade foods for your baby:VegetablesAlways cook vegetables before serving to your baby – steaming, roasting, or baking are the best methods. Once cooked, softer vegetables like sweet potatoes and squash need only be mashed with a fork or potato masher.
If the vegetable has a thick skin, like green beans or peas, push the cooked food through a strainer or sieve to remove the tougher parts. You can also just use a very powerful food processor or blender to puree the entire vegetable once cooked!
Try adding herbs such as oregano, rosemary, or dill; or spices such as cumin, ginger, or curry powder.
Try one of these vegetable puree recipes: Avocado and Pea Puree or Root Vegetable Puree
FruitsCertain fruits, like avocados and bananas; or very ripe pears, mango, and peaches; require no cooking before feeding to your baby. Simply peel then mash them up with a fork or blend quickly.
Other harder fruits, like apples, firmer pears, and underripe nectarines and mangos can be baked or steamed to soften them up for a puree. Simply halve or quarter your fruit of choice, remove the skin, remove the core, pit, or seeds. Place the cut fruit in a shallow baking dish with about 1 inch of water in a 400F degree oven.
Bake for 20-40 minutes, or until fruit is tender, then allow to cool before pureeing in a blender or dicing for finger food.
You can even sprinkle the fruit with ginger, nutmeg, or cinnamon!
Fruit puree recipes to try: Orange Sunny Soup or Beet and Cantaloupe Puree
Grains and CerealsYou can make your own baby cereal at home using whole grains such as oatmeal, brown rice, or barley.
Finely grind the uncooked grain using a coffee grinder, food processor, or blender. Then cook the powder in water for 15 minutes until you get a thin, soupy consistency. You can also cook the raw grain whole, as you normally would for yourself, and then puree or mash. But this method can sometimes create a pasty consistency.
Try one of these homemade cereal recipes: Whole Ancient Grain Baby Cereal or Strawberry Quinoa Cereal
MeatYes, you can even puree meat for your baby using a food mill or blender. Cook the meat to well-done before pureeing (but avoid luncheon, cured, and smoked meats at this stage due to the high salt and additive content).9
Try one of these meat based baby food recipes: Avocado and Chopped Chicken or Ginger Carrot, Sweet Potato Mash and Lean Beef
.
If you have questions on how to make these recipes, or are looking for more ideas, reach out to our team of registered dietitian nutritionists and lactation consultants for free! They’re here to help on our free to live chat from Monday through Friday, from 8am–6pm (ET). Chat now!
Our little one’s food preferences are formed early in life, so avoiding or severely limiting these strong added flavors before the age of one is important. In fact, the 2020-2025 Dietary Guidelines for American recommends no added sugar at all before the age of 2 years.12
Additionally, you want your baby to experience and get used to the true flavors of food so that they are more likely to accept them in the future!11
Read more: Minimizing Added Sugar
Find the right texture for baby’s pureeFind the right consistency for your purees. Most babies start with thinner purees and work their way up to thicker ones as they learn to manage food in their mouth and then swallow.
- If you need to thin your puree for a younger baby, try adding reserved cooking water, no-salt-added veggie stock, prepared formula, or breastmilk.
- If you need to thicken up your puree for an older baby, it can sometimes be as simple as adding less liquid. You can also try adding baby cereal, plain whole milk yogurt, wheat germ, mashed low-sodium cottage cheese, mashed banana, pureed sweet potato, or pureed tofu.
Note that food textures can – and often do – change in the freezer. For example, certain fruits and vegetables like blueberries, pears, and eggplant contain a lot of water and can become quite runny when thawed. You may need to tinker with the consistency either before or after freezing some of these homemade purees.
Advance textures when your baby is readyAdvancing textures steadily as your baby is ready will help develop their oral motor skills as well as prepare them to be more adventurous eaters.11
Start with thinner purees and then move to thicker purees over several weeks as your baby’s chewing and swallowing skills becomes more coordinated.
Once your little one can handle thick purees, it’s time to move onto lumpy purees as they prepare for soft solids.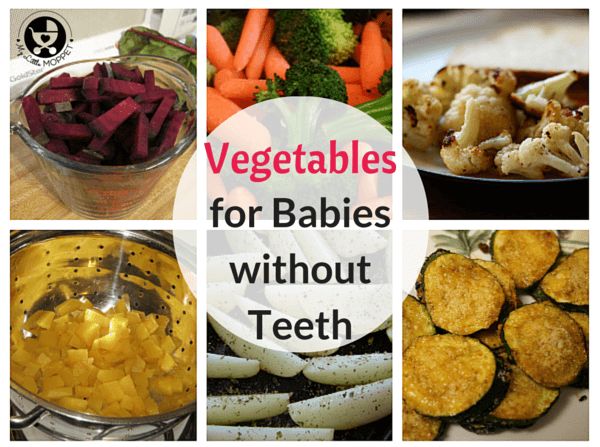
Read more: Introducing Solids: Different Approaches and Strategies
Storing your homemade baby foodAfter making a batch of baby food, either use the food right away or freeze it in small portions in an ice cube tray. Once frozen, pop out and place into a freezer-safe air-tight bag to help save room in your freezer. Be sure to label the bag with type of food and the date it was made.
For more information: How to Store Baby Food
Let’s Chat!We know parenting often means sleepless nights, stressful days, and countless questions and confusion, and we want to support you in your feeding journey and beyond.
Our Happy Baby Experts are a team of lactation consultants and registered dietitian nutritionists certified in infant and maternal nutrition – and they’re all moms, too, which means they’ve been there and seen that. They’re here to help on our free, live chat platform Monday through Friday, from 8am–6pm (ET). Chat Now!
Read more about the experts that help write our content!
For more on this topic, check out the following articles:
Introducing Solids – Signs of Readiness
Introducing Major Food Allergens to your Infant
Introducing Solids: Baby Led Weaning
Vegetable purees for feeding: how to cook them for your baby - Parents.ru
About nutrition
- Photo
- Getty Images/iStockphoto
nutritionist
Usually complementary foods start with a monocomponent hypoallergenic vegetable puree. Zucchini, cauliflower and broccoli have tender fiber necessary for the first feeding.
Cooking instructions
To prepare the dish, you will need separate utensils specially designed for the baby: an enamel pan, a grater, a plastic or metal spoon, a plate, a knife. And besides them, there is also a cutting board, a sieve, a brush for washing vegetables and a blender. nine0003
First, rinse the vegetables thoroughly under warm running water. If they are heavily soiled, use a brush. If necessary, peel the fruit. Then cut into 2-3 cm pieces and boil. You can do this both in a saucepan, and in a double boiler or slow cooker. Pour water so that it only slightly covers what you put there. To reduce the loss of vitamins, cover the container with a lid. The fruits will be ready in 15-20 minutes. Cool them slightly and grind them with a blender or rub through a sieve, achieving a uniform consistency. A 6-8-month-old baby can grate vegetables on a fine one, and 8-9- monthly - on a coarse grater.
- Photo
- AlinaMD/Getty Images/iStockphoto
For taste
You can add a little vegetable broth and 1–3 ml of vegetable oil to the puree. It will provide the baby with essential polyunsaturated fatty acids and vitamin E, which are not synthesized in the body and therefore must be supplied with food. In this case, it is better to do without salt. For the taste of an adult, food for a baby should be unsalted.
Proper storage
It is recommended to prepare small portions of puree for the baby. Uneaten food should not be stored until the next feeding. Some mothers freeze homemade puree to save time. But it’s better to send the ingredients themselves to the freezer, and before they are cooked. Cut raw washed and peeled vegetables into slices, put a container or special bags with a lock in a plastic bag and put in the freezer. As needed, it will be possible to quickly prepare mashed potatoes from their contents. You need to cook without defrosting, immediately lowering into boiling water. nine0003
More useful materials about baby nutrition - in our channel on Yandex.Zen.
Lyubov Prishlaya
Today they read
Literacy test: do you make mistakes in these New Year's words and congratulations?
She matured and became a copy of the pope: what does the 15-year-old daughter of Alexander Abdulov look like
Calculate your year: what awaits you in 2023 - forecast by date of birth
Online broadcast and funeral at sunset: 8 features of the burial of Elizabeth II
Benefits for pregnant women and parents in 2023: a complete list of new payments
How and what to cook for children in a double boiler?
Breast milk is valuable for feeding babies from birth. If for some reason breastfeeding does not work out, then the children switch to artificial nutrition.
But all babies, without exception, closer to 6 months (babies later, artificial babies a little earlier), begin to taste almost adult food. At this time, the introduction of the first complementary foods is recommended. These are easy-to-digest, healthy dishes - vegetables, fruits, cereals, sour milk, meat, fish, boiled or steamed. nine0003
Modern mothers more and more often use convenient kitchen appliances – a double boiler to prepare first foods.
What is a steamer?
There are many models of electric steamers, but they all share the same design and function.
Loading...
The steamer is a multi-level construction of bowls (baskets) stacked on top of each other. The lower container serves to fill with water and further steam generation in the structure. The upper basket (there can be from 1 to 3-4) has a perforated bottom, products are placed in it.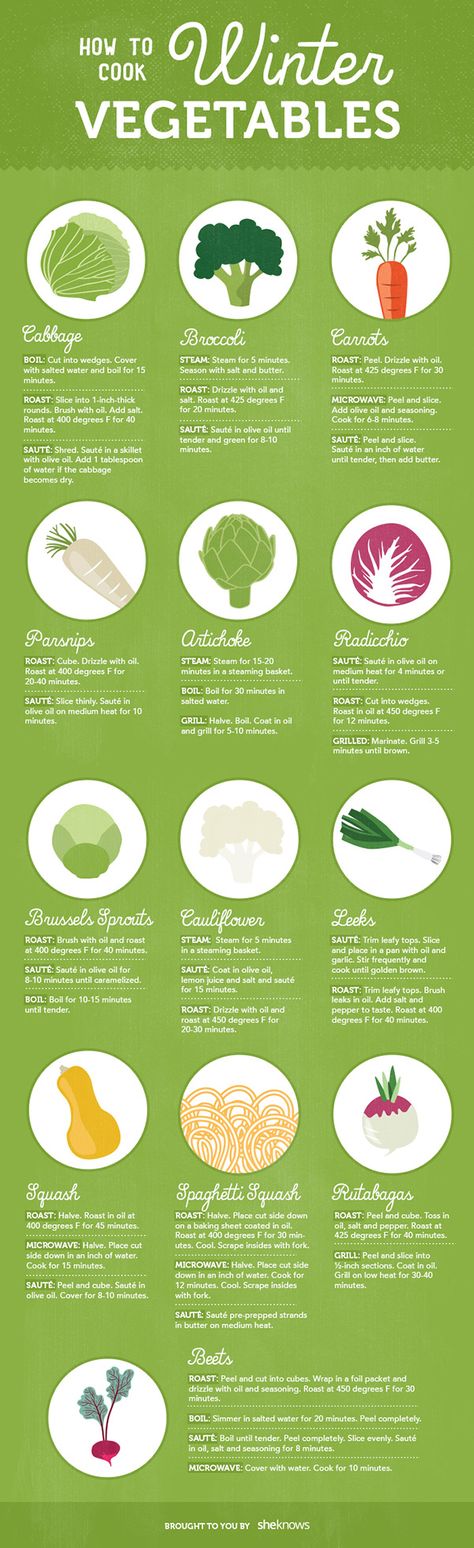 If the double boiler has several containers, then several dishes can be cooked in it at the same time - the products are laid from the bottom up, depending on the cooking time. The top bowl has a lid. nine0003
Depending on the model of the steamer, the appliance may have additional functions:
- a timer for delaying the start - it is convenient for mothers when by a certain time, for example, after a walk, there will be cooked food in the steamer;
- hole for topping up water;
- separate container for herbs and spices;
- different cooking programs.
What are the health benefits of steamed food?
Steam cooking allows you to save the maximum amount of vitamins and biologically active substances in the products.
This cooking method:
- uses a lower temperature than baking or frying;
- part of water-soluble vitamins, minerals does not pass into the broth and is not destroyed, as during cooking; nine0081 Meals do not require the mandatory addition of vegetable or animal oils, so cooked foods are easily digestible and help prevent excess weight;
- steam dishes do not contain carcinogenic substances that irritate the gastric mucosa, which are formed when the oil is heated to high temperatures, as during frying;
- Steamed dishes have an optimal consistency.
 In addition, they retain the structure of dietary fiber and fiber, which is necessary for the normal functioning of the intestine, stimulation of its peristalsis and prevention of constipation; nine0082
 - this type of cooking allows you to preserve the natural appearance, taste and aroma of food as much as possible. It is steam dishes that contribute to the formation of proper eating behavior in the baby.
What to cook for a child in a steamer?
There are principles of proper nutrition during the introduction of the first complementary foods. This applies to the types of products, and portion sizes, and the time of administration. Here and here you can read some recommendations or ask your pediatrician for advice. nine0003
Below are some easy meals for babies as first foods.
One-component vegetable purees. In the steamer you can easily cook vegetables for one-component puree - cauliflower, zucchini, pumpkin, zucchini. Beat already cooked vegetables in a blender, for a more liquid consistency, add a mixture diluted with water or even breast milk (especially important in the early stages of introducing complementary foods).
Multi-component vegetable purees. nine0038 Various variations are possible, depending on what is available and what the child likes more - onions, zucchini, cauliflower, broccoli, carrots, green peas, zucchini, Brussels sprouts, potatoes, beets.
Meat dishes. You can steam young veal, rabbit, turkey, chicken breast and then grind. You can chop raw meat, form cutlets or meatballs and steam. You can add cereal flakes (rice, oatmeal, wheat, corn), chopped vegetables to minced meat and form steam cutlets combined in composition. nine0003
Fish. Easily and quickly prepared lean sea fish fillet, which is recommended by experts as the first complementary food. As with meat, minced fish can also be formed into fish meatballs and steamed.
For older children, the range of dishes is limited only by the parent's imagination and the peculiarities of the perception of a particular product.
In the steamer you can cook:
1. Vegetable casserole with cheese. For it you will need: any vegetables, cut into pieces, one egg, grated cheese (about 150 g) and salt. Everything is mixed, placed in a rice container, covered with foil and put in a double boiler for 30 minutes. nine0003
2. Stuffed marrow. Cut the zucchini lengthwise into two halves, take out the middle with a spoon to get a “boat”. Fill the boats with minced meat with onions and into a double boiler for cooking.
3. Rice chicken pudding. Grind the chicken fillet, add rice, egg, soft butter, warm milk, pre-boiled and beaten with a blender, to obtain a homogeneous mixture of medium consistency. You can beat everything together again with a blender. Line a container for rice with foil, grease the inside with vegetable oil, pour the mixture over.