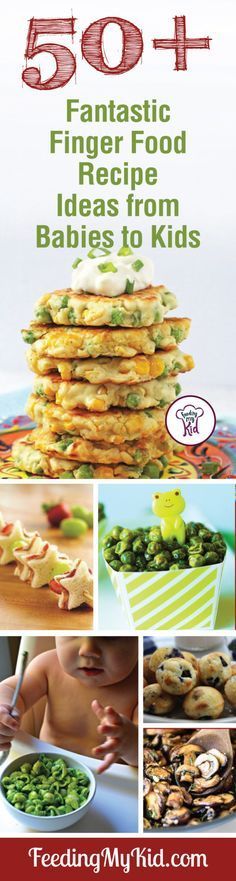
Teaching baby to eat finger foods
7 Tips for Teaching Your Baby to Self-Feed
Now that your baby has been introduced to solids and is experiencing different foods and flavors, you may be ready to help your little one begin to self-feed. But when is the right time to encourage this new skill? What are the signs of readiness that we should look for? And what are the best foods to begin with when teaching baby to self-feed? We are answering all of your questions and sharing our tips on making this milestone easier for you and your child.
When will my baby be able to self-feed?
Usually, by about nine to 12 months of age, you may notice your baby showing an interest in self-feeding. They have become more experienced with eating solids at this age and are feeling the different textures of foods between their fingers. Hopefully, they are also making attempts at bringing some of that food to their mouth to lick and taste. This usually looks like them grasping for their food with their whole hand in a raking-like motion and then trying to shove what they have in their hand all into their mouth. You may even notice your baby trying to grab the food with their thumb and forefinger, which is an important fine motor skill called the pincer grasp. These are all good signs and are great indications that your baby is ready to begin self-feeding.
What are the signs that my baby is ready to self-feed?
There are a few readiness signs to look for that will indicate it’s the right time to begin teaching your baby to self-feed:
- Grabbing the spoon while you are holding it during mealtime.
- Reaching for their food on their plate, bowl, or tray.
- Reaching for your food or plate.
- Practicing the pincer grasp — bringing food and other items to their mouth during mealtime or playtime.
- Pushing your hand away when you try to feed them.
It’s important to pay attention to these readiness signs and not just rely on your child’s age. If a baby is 9 or 10 months old but does not show these readiness signs, parents should wait until they do. But once your baby does show these self-feeding readiness signs, it’s important to provide many opportunities for them to practice this skill. Allow them to try and try again. That’s how they will learn and master this skill!
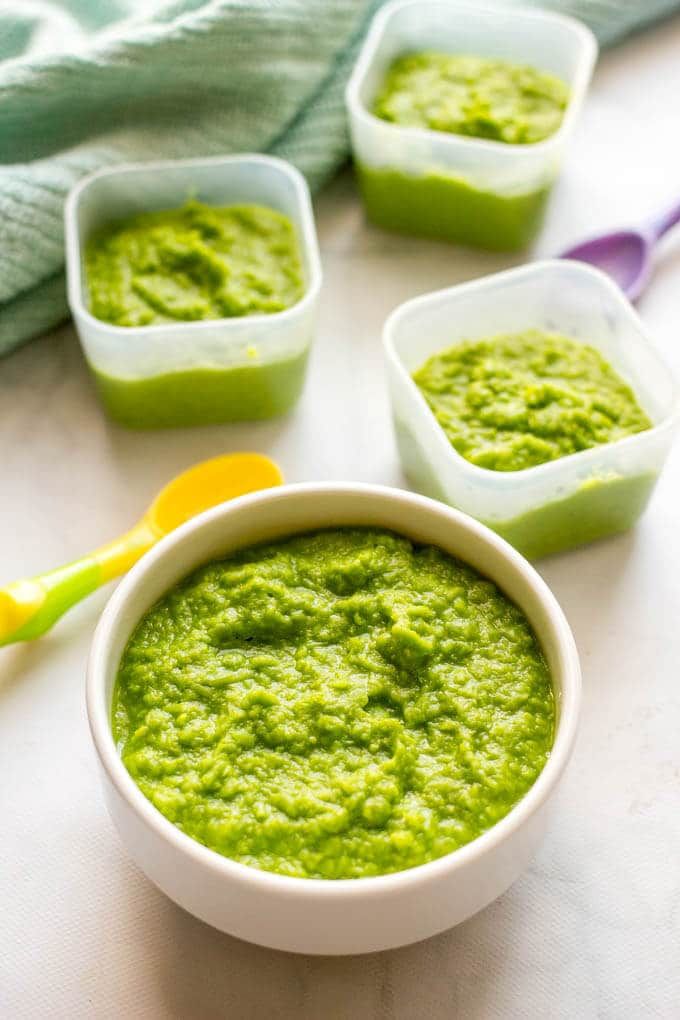
What are the best foods to start with self-feeding?
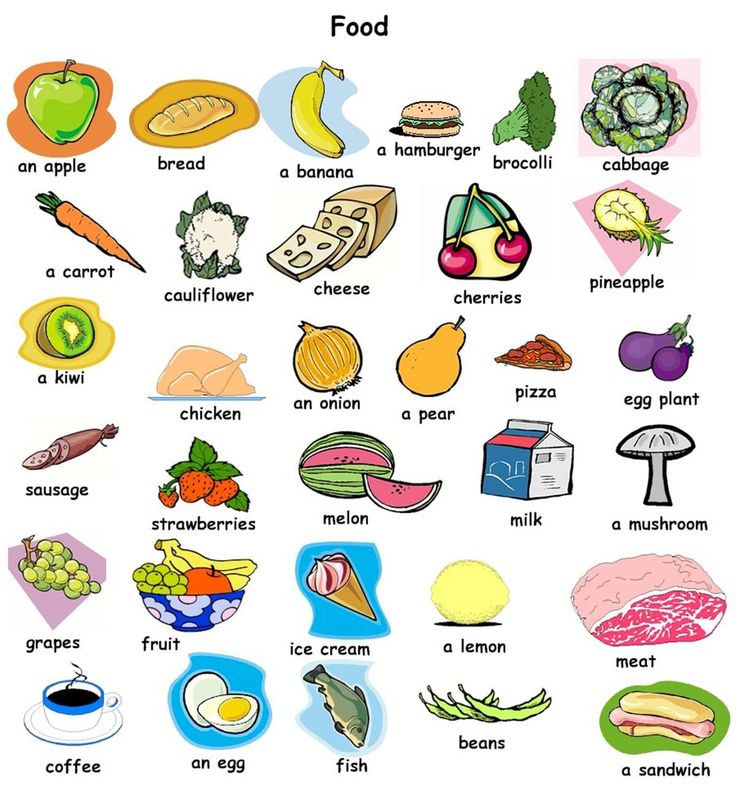
The best foods to give your baby to practice self-feeding are easy for them to grab, hold, pick up, and bring to their mouth. Here are some recommendations to try:
- Stonyfield YoBaby Pouches
- Soft cooked carrots, sweet potatoes, butternut squash, or peas
- Small pieces of soft, ripe bananas, avocados, kiwi, or peaches
- Soft-cooked apples or pears
- Soft-cooked whole grain pasta
- Diced pieces of cooked chicken, turkey, or fish
- Cubes or strings of cheese
YoBaby® yogurt pouches are a great option for multiple reasons. First, they are easy for your little one to pick up and bring to their mouth. Second, they nourish little tummies with real fruit, live and active cultures, vitamin D, calcium, protein, and prebiotics! Third, the consistency is creamy and delicious — easy for baby to eat and swallow. And four, it combines whole milk yogurt and oats for a quick meal for baby!
All foods should be soft, easy to mash, and big enough for your baby to pick up but small enough to prevent them from choking.
What are the foods to avoid when my baby is beginning to self-feed?
Foods that should be avoided when beginning to teach your baby to self-feed are foods that pose a potential risk of choking.
- Nuts
- Popcorn
- Raw carrots
- Whole grapes
- Raisins
- Hot dogs
- Portions of food that are too large
Your baby doesn’t have all of his teeth, so all foods should be soft. Once your baby’s 2-year molars come in, your child will be able to chew harder food properly. If you want to test to see which foods are safe and soft enough for your baby to eat, take a piece of their food and try to mash it between your fingers. If you cannot easily mash it, it’s probably too hard for your baby to chew.
How do I teach my baby to self-feed?
Now that you know your baby is ready to start self-feeding and you know which foods are best to start with, how do you begin? Here are some helpful tips.
The more opportunities you give them to practice, the quicker they will learn and master self-feeding. Give them opportunities to try self-feeding with their hands and with utensils.
2. Begin with encouraging hand feeding.Before introducing feeding utensils to your baby, encourage her first to use her hands to move the food toward her mouth. A good way to start is to place a yogurt pouch or a few pieces of food on your baby’s highchair tray. Encourage her to reach for it, feel it, and play with it with her pincer grasp. It may look as if she isn’t doing much and not eating, but that’s actually how she starts to learn.
3. Also, introduce and encourage baby to use utensils.It’s never too early to introduce utensils to your baby! It’s good for them to get used to utensils during mealtime. In the beginning, I recommend having two spoons–one for you to help feed baby a few bites and one for them to hold and practice using. He may even try to imitate your motions by dipping his spoon into the food and maybe attempting to bring it to his mouth.
Another thing you can try is pre-loading his spoon with food and handing it to him. This can help him practice balancing the food on the spoon as he brings it to his mouth. With this, I recommend using thicker foods like yogurt and oatmeal. They are good practice foods since they stick more easily to the spoon. Overall, be sure to allow plenty of practice opportunities with both utensils.
4. Stay close to your baby during meals.As your baby practices self-feeding, it’s important that you stay close and monitor her. We don’t want any food getting stuck in her nose or anywhere else, and you want to ensure that she is tolerating all of the new textures and flavors. By staying close, you will also monitor how much or little she is putting in her mouth and eating. These are all reasons why remaining by her side is necessary. She’s learning something new, and she needs your help and guidance!
5. Be prepared and expect a big mess.
When babies are allowed to touch and explore new foods and feeding themselves, things get messy. And that’s okay! Don’t stress about it, and expect the mess. Have your baby wear a baby apron, put a towel on the floor if you’re worried about food falling, or undress your baby down to her diaper! Also, have baby wipes and power towels close by. You may even have to give your baby a bath after mealtime. Again, this is normal. A messy meal is still a success because that means your baby was trying to self-feed. Soon enough, she’ll get better at handling the different foods and make less of a mess. This is all a part of the process.
6. Eat together as a family.One of the best ways to teach your baby to self-feed is to have them watch the family eat. Babies are learning new things all the time, and they learn from modeled behaviors. By watching how their parents and siblings use their utensils and eat their food, babies want to mimic the same behaviors. They gain confidence watching you and believe that they can do it too! If you are feeding your baby at a different time than the rest of the family, they are missing out trying to mimic your movements with utensils and foods and observing other appropriate mealtime behaviors.
It takes time to learn how to self-feed, so be patient with your little one. Don’t try to rush the process or mealtimes. Your baby should set the pace because they understand their hunger and fullness cues. This is why it’s good to allow plenty of time for their meals. With lots of practice and patience, your baby will be self-feeding in no time!
What if my baby starts gagging or choking?
When teaching your baby to self-feed, expect some gagging to occur. Gagging is a natural occurrence and is the body’s natural defense against choking. This happens when babies have too much food in their mouth and are presented with new textures and flavors.
Choking, however, is different and much more serious than gagging. Choking is when a piece of food gets lodged in the airway. Your baby may first begin coughing, then become silent. He will show difficulty breathing and will not be able to cry or make sounds due to the food obstructing his airway. This is a serious and life-threatening matter. This is why the types of food, foods’ sizes, and the consistency of foods are important when teaching your baby to self-feed.
Final Thoughts
This is an exciting time in your baby’s development. Remember, self-feeding is a learning process and takes time. If you see that your baby isn’t able to self-feed enough foods to fill them up during mealtime, which is common in the beginning, alternate feeding them purees and finger foods to fill them. I also suggest offering them a YoBaby yogurt pouch to fill them and allow them to continue practicing self-feeding! In the meantime, take lots of pictures of this fun and messy milestone and enjoy the process!
Note that the views and opinions expressed in this post are solely that of Baby Chick and do not necessarily reflect the opinions and views of Stonyfield. The content provided and in any linked materials are not intended and should not be construed as medical advice. If you have any questions about health or nutrition, we always think it’s best to consult with your doctor or healthcare practitioner.
Teaching Your Baby to Self-Feed
Read time: 5 minutes
What should I know about teaching my baby to feed themself?Signs your baby is ready to self-feed
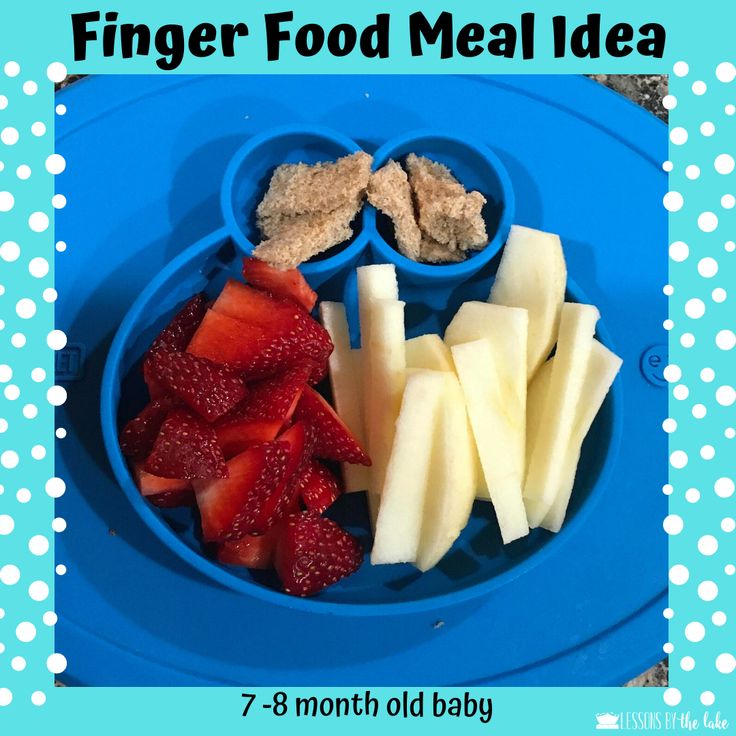
Ideas for first finger foods
Tips for introducing spoons and cups to your baby
As your baby becomes more experienced with eating, you may notice them becoming more interested in feeding themself.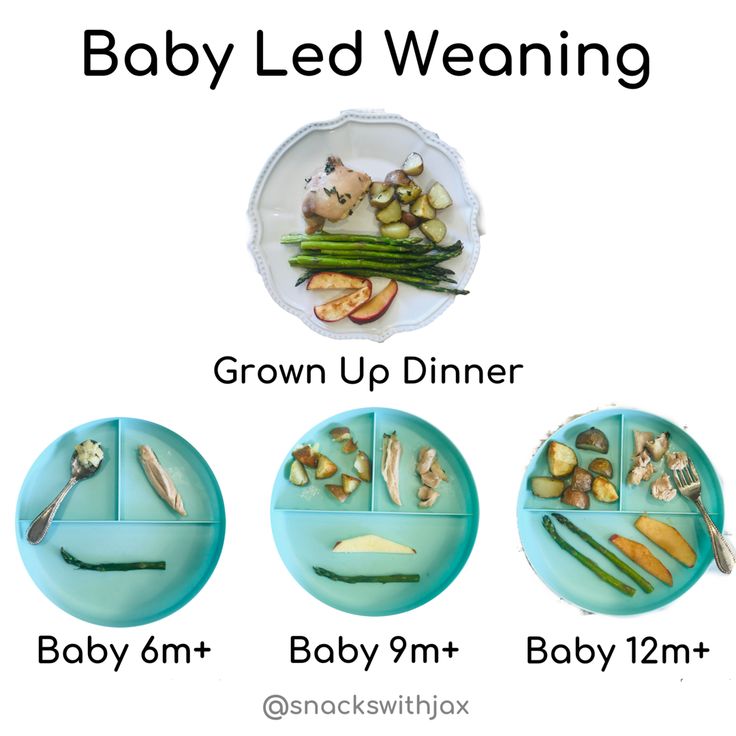 This transition to self-feeding usually starts between 7 and 9 months.1,2,3
Grabbing the spoon while you are holding it
Reaching for food from their (or your!) plate
Even grabbing other objects, like toys, and bringing them to their mouth4,5
Once your baby starts showing an interest in feeding themself, it’s important to provide many opportunities for them to practice this skill. The key to mastering self-feeding is to let your baby try and try again.
Don’t wait until your baby’s teeth emerge to start finger foods! Babies do not actually need teeth in order to enjoy foods beyond purees. In fact, the teeth we use to chew are the molars, and those teeth generally don’t come in until well after baby’s first birthday.15
Babies’ gums are incredibly strong – if your little one has ever gnawed on your finger when teething, you know! And as long as the foods you present to your baby are size and texture appropriate, they can chew perfectly well without a full mouth of teeth.14
Ideally, the food you provide your little one should be soft and pea-sized to prevent choking. Make sure the food is ‘smushable’ between your fingers so that it’s soft enough to be gummed by your baby.
How to start teaching your baby to self-feed with finger foodsA good way to start is placing a few small pieces of food on your baby’s highchair tray. Let your baby feel it. It may seem as if baby is just playing with the food, but touching and playing is a step in their learning process.2,5
Initially, your baby may grab for the food with a raking motion, using the entire fist to move the food toward their mouth. Grabbing the food in this way is called the palmer grasp, which is when baby’s fingers close over an object (such as your finger) in the palm of their hand.16
Around 9 months, your little one will develop the fine motor skill of grasping food with their thumb and forefinger, called the pincer grasp.5
Read more: Introducing Solids: First Foods and Advancing Textures
When to practice self-feedingYou can go about practicing self-feeding in many ways. First, try setting aside time at the beginning of the meal for practice. Since baby is hungrier at the start, this may help in motivating your little one to bring the food to their mouth themself.
Another way to try is to simply leave several pieces of food on baby’s tray to play and practice with while you alternate with spoon feeding. Allow your little one to try and put food in their mouth, then practice chewing and swallowing. Be sure that baby’s mouth is clear of food before offering anything from the spoon.
If your baby gets frustrated, allow them to finish the meal and eat how they normally would (such as with spoon feeding). Just remember to keep trying at other meals throughout the day (and every day).
Read more: Meal Plan for 6 to 9 Month Old Baby
First finger foodsThe foods you give your baby to practice self-feeding should be soft, easily ‘smushed’ between your fingers, and cut into small pea-sized pieces.
Here are some ideas for first finger foods:
Small pieces of ripe, soft bananas, avocados, peaches, mango, kiwi
Soft cooked sweet potatoes, carrots, butternut squash, turnips
Grated or soft cooked (skinless) apples and pears
Soft cooked whole grain pasta
Scrambled eggs
Cubes, strings, shredded, or small pea-sized pieces of cheese
Cooked shreds, small diced pieces, or ground cooked chicken, fish, or turkey
Berries cut into quarters
Beans cut into halves or quarters
In addition to the above ideas, your baby can eat bits of what you eat (without added salt or sugar) including different fruits, veggies, grains, meat, beans, spices and seasonings as long as the foods are small and soft enough to reduce choking risk.
Foods that pose a risk of choking should be avoided. Examples include nuts, whole grapes, hot dogs, raw carrots, raisins, popcorn, and portions of food that are too large.14 Also note that honey should not be given to infants before the age of 1 year.
Read more: Preventing Choking in Infants and Toddlers
Time to practice with spoons and cupsLearning how to use spoons and cups not only involves demonstrating how to use each one, but also allowing your baby lots of practice both with your help and without. Let your little one get messy as they step into their independence with eating and drinking!
Teaching your baby to use a spoonAfter your baby masters self-feeding with their hands, the next step is offering utensils. Most children become good at using spoons and forks to self-feed between 15 to 18 months, but that doesn’t mean you need to wait until then to start exposing them to utensils. 1,6,7
1,6,7
Just as your baby needed a lot of practice eating with their hands, they will also need many opportunities to attempt eating with utensils. A good way to begin encouraging this transition is to give them their own baby or toddler-friendly spoon or fork.
Teaching your baby to use a cupLearning to drink from a cup can also begin around this time.4,7 Use an open, sippy, or straw cup and allow your little one to practice with a small amount of water. Since formula and/or breastmilk will still provide a large amount of nutrition and all of the hydration for your little one at this age, only about 4 to 8 ounces of water total spread through the day are recommended.8
Letting your baby drink water from a cup on their own will not only build their fine motor skills (which may include lots of spills!), but will also help them form the important habit of drinking water. 8
8
Which should you use: cups? Sippy cups? Straw cups? Learn more here: Transitioning to Cups for Babies and Toddlers
Which foods to use when practicing using a spoonThicker foods like oatmeal, mashed sweet potatoes, or yogurt blended with fruit are good practice foods since they will more easily stick to the utensil. It will be messy for a while but just remember that practice makes progress.
Once your baby has gotten the hang of dipping the utensil into the food and bringing it to their mouth, consider giving baby their own small bowl. There are some bowls with suction cups on the bottom and some that are attached to a mat – these may help prevent too many spills.
Let your baby to feed themself from their bowl while still feeding them from yours. Soon enough they’ll be eating a full meal without your help!
Remember, it is a learning process; it will take quite a while before your little one is neatly and skillfully feeding themself. In the meantime, have fun and be prepared to get messy!
It’s important to monitor your baby as they begin to eat more independently. Your baby is not only getting used to a new way of eating, but new textures too. Remaining by your baby during meals will allow you to monitor their tolerance for new textures and the amounts they are putting into their mouth.9
Know the difference between gagging and chokingGagging is the body’s natural defense against choking and is very common when babies start eating solid foods.10,11 Gagging may occur if the baby has too much food in their mouth or if the food moves towards the back of the mouth before they have chewed it sufficiently. While your baby may look scared and be making gagging noises, baby’s airway is not blocked. The gag reflex helps baby move the food back toward the front of the mouth so they may chew it more before swallowing.
Choking is when a piece of food becomes lodged in the airways causing baby to stop breathing.12 Your baby will be silent and perhaps flailing their arms. Choking is life threatening and requires immediate attention.
Learn more: Preventing Choking in Infants and Toddlers
Expect and embrace the messTeaching your baby to feed themself will be messy. Invest in a few good bibs or apron type smocks that can better catch the food. Consider placing an old towel underneath the highchair if you are concerned with food falling on the floor. Keep a damp washcloth or paper towel by your side to help with spills.
Enjoy family mealsBabies learn from you! If your baby is eating meals with the rest of the family, they will observe how everyone else is using their utensils to feed themselves, eating healthy foods, as well as other appropriate mealtime behaviors. 4,13
4,13
Read more: Family Meals: Developing Healthy Eating Patterns
Be patientLearning to self-feed takes time. Allow plenty of time for meals and never rush your baby to finish. Your little one is eating at the pace they are most comfortable with, allowing them to boost their learning.
Let's Chat!We know parenting often means sleepless nights, stressful days, and countless questions and confusion, and we want to support you in your feeding journey and beyond.
Our Happy Baby Experts are a team of lactation consultants and registered dietitians certified in infant and maternal nutrition – and they’re all moms, too, which means they’ve been there and seen that. They’re here to help on our free, live chat platform Monday - Friday 8am-6pm (ET). Chat Now!
Read more about the experts that help write our content!
For more on this topic, check out the following articles:Introducing Solids: Signs of Readiness
Learning to Love Healthy Foods
Understanding your Baby’s Hunger and Fullness Cues: Responsive Feeding
Introducing Solids: Baby Led Weaning
Feeding Tips for Healthy Weight Gain in Infants and Toddlers
Nutrient Needs and Feeding Tips for 6 to 12 Month Olds
Sources
How to teach a child to chew food properly
Modern man has a big problem - we don't know how to eat. Adults do not have enough time for a normal meal at a calm pace, and in most cases children are not even taught to chew. Many parents specifically feed their babies soft or pureed foods. Everyone is afraid that the child will be capricious or choke. Let's figure it out - what is the mistake of this approach and why is chewing so important?
Usually people literally swallow food and quickly wash it down with a hot or sweet liquid, and this is where the meal ends. Among the consequences: digestive problems and regular overeating, since the body requires much more energy to absorb poorly chewed food. nine0003
The process of digestion of food begins in the mouth. Saliva is secreted in the mouth, which contains enzymes and breaks down easily soluble substances and softens more dense ones. Teeth and tongue grind and grind food. By the time the food enters the stomach, it will be much easier to digest and assimilate it than if you just swallow the product (otherwise it will ferment, which will negatively affect the digestive tract).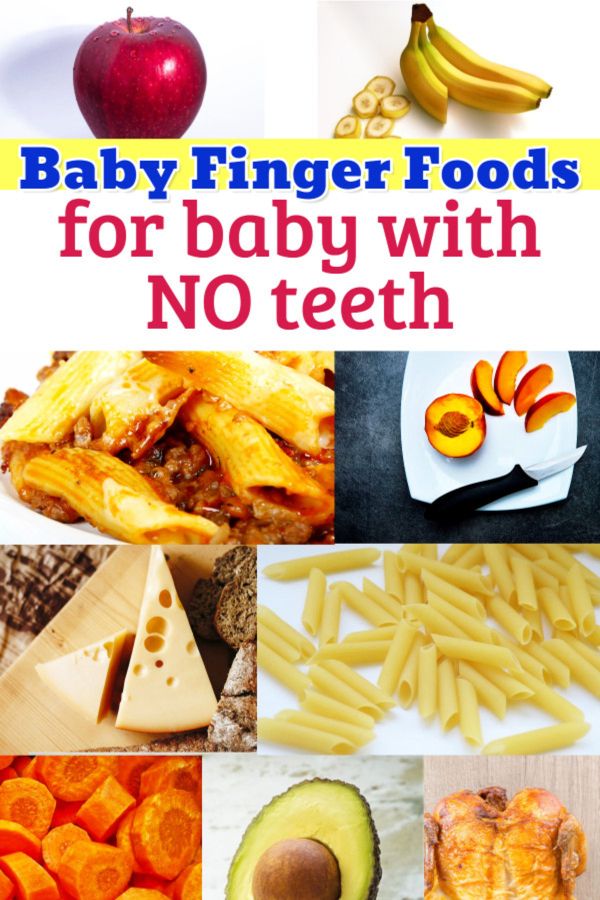
According to Chinese and American studies published in The American Journal of Clinical Nutrition, participants in the experiment consumed 11.9% fewer calories, regardless of their build, their body was satiated faster, less likely to have a feeling of hunger, and even managed to lose some weight.
We are not united with food
Chewing not only ensures a normal digestive process, but also has a number of other benefits. If in time (from 6-7 months) you start to teach the baby to chew, he will form an overbite. What's more, a Belgian study published in the journal J Voice showed that chewing promotes the proper development of speech. When a baby chews, bites, or licks, the lips, tongue, cheeks, and jaws work. This is how the same motor skills develop as when speaking. In practice, it turns out that the process of eating food is the most pleasant type of articulatory gymnastics. nine0003
Pediatrician of the highest category Yulia Viktorovna Andronnikova told us about other functions of chewing:
- Slow chewing allows you to get enough of less food, as the signal will have time to arrive at the hunger and appetite regulation centers.
- Chewing movements activate areas of the cerebral cortex that are responsible for cognitive abilities. In children, chewing stimulates development. If this process is disturbed, dementia can progress in old age. nine0020
- Chewing movements form the facial skeleton, which is very important for proper breathing and blood supply to the central nervous system.
- Not a single cosmetic procedure will help to keep in good shape and improve the blood supply to the mimic muscles of the face like proper (slow) chewing.
How to chew
Eat consciously, disconnecting from external stimuli. Place a small portion in your mouth and chew at least 32 times. (1 for each healthy tooth + 3 for each missing one). nine0003
There is a method of therapeutic chewing:
- the first week - each spoonful of food is chewed ONE minute
- second week - TWO minutes
- third week - THREE
- fourth - TWO
- fifth - ONE
When and how to teach your child
To prepare your child for chewing, you can make faces, make faces and make chewing movements.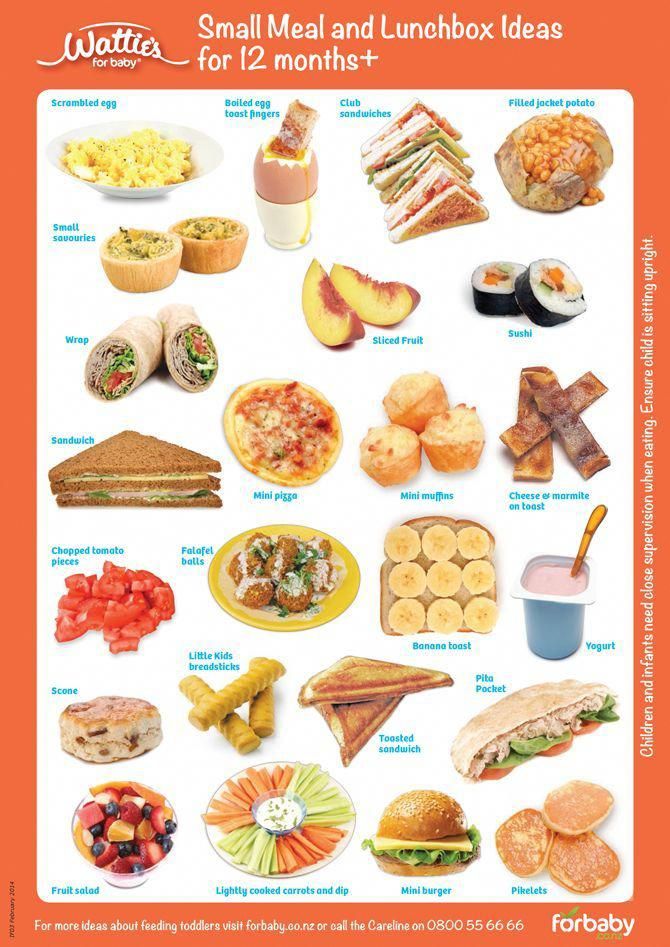 When the baby "speaks baby", answer him. The child will repeat after you and actively move his jaws, tongue and lips. nine0003
The sooner parents introduce the child to foods of different hardness, the more willingly he will try new foods. As soon as the child began to make chewing movements, slurp and smack, he developed a food interest, and especially when the first teeth appear, you can give pieces of food (soft boiled vegetables, such as carrots). The optimal age for the first acquaintance with food is 6-7 months. Children are old enough to accept new food, but still too young to start acting up and resenting at the table. nine0003
What to feed
Offer your child food that won't crumble in the mouth or get stuck. No bread or berries! You can give your child a banana, boiled potatoes, baby cottage cheese or a baked apple. When the child "masters" these products, offer him boiled beets, peeled cucumber or a piece of cheese.
Pitfalls
Up to six months, children have an active expulsion reflex - a natural defense against suffocation.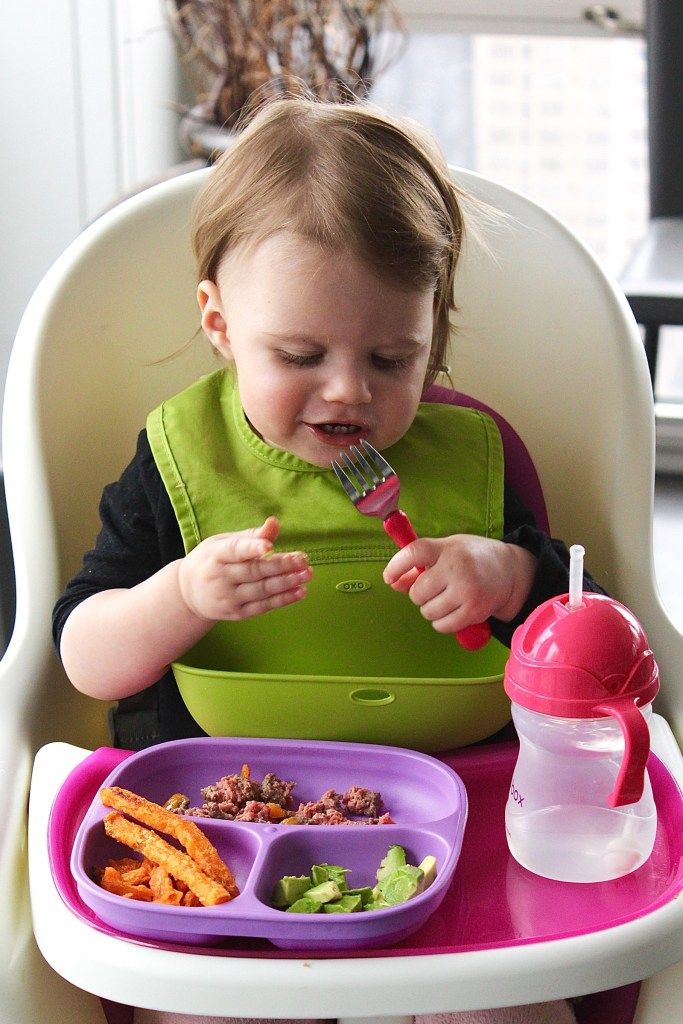 Therefore, at the beginning of "communication" with semi-solid food, the child may choke and spit out food. There is no need to be frightened and abruptly return to mashed potatoes and ground products! Chewing is a skill and needs to be developed. nine0003
If you have introduced semi-solid food long enough and the child is still choking, give him time. Put food in front of the baby and watch - let him try to put food in his mouth with his hand on his own. Children should be praised and not scolded at the table! Otherwise, eating can become associated with violence and lead to an eating disorder.
References:
- The American Journal of Clinical Nutrition, Volume 94, Issue 3, September 2011, Pages 709–716, https://doi.org/10.3945/ajcn.111.015164
- The American Journal of Clinical Nutrition. Mastation of almonds: effects of lipid bioaccessibility, appetite, andhormone response. Bridget A Cassady. http://ucce.ucdavis.edu/files/datastore/608-11.
 pdf
pdf - Cell. Nicolas Dutzan. Published: January 10, 2017 DOI: https://doi.org/10.1016/j.immuni.2016.12.010
- Effectiveness of Chewing Technique on the Phonation of Female Speech-Language Pathology Students: A Pilot Study. Meerschman I DOI:10.1016/j.jvoice.2015.06.016
How to teach a child to eat independently
A spoon for mom, a spoon for dad - this is what any loving parent probably says while feeding their baby. However, the introduction of complementary foods and similar feeding is only an intermediate step in the development of a child: from breastfeeding to full self-feeding. How to make the process of learning food “on your own” as simple and easy as possible?
Everyone will learn this
The most important and basic rule when a small child learns to use a spoon, plate, cup, bottle, fork and knife correctly is to have maximum patience. Understand: shouting, rushing or irritating you will not help the baby in any way.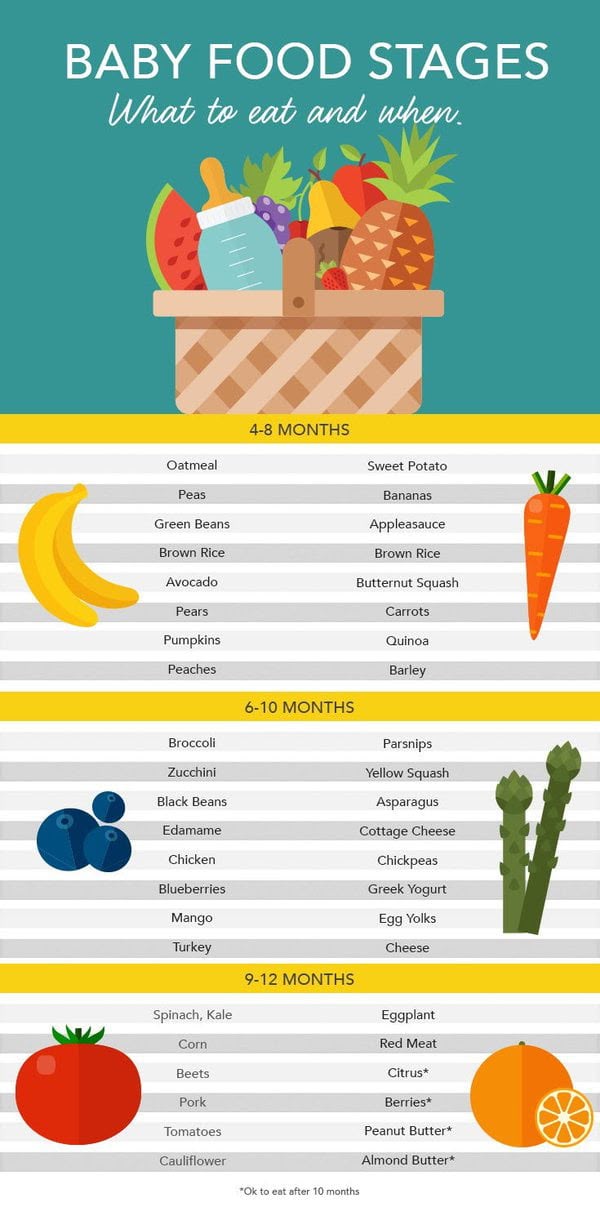 On the contrary, the process will slow down for him, and with constant abuse from his parents, almost a reflex may even develop - nutrition for him will automatically mean a scandal, which, of course, does not contribute to the development of a healthy appetite and, accordingly, the whole body. Agree, in the end, at some point, absolutely all people master the wisdom of self-catering - such as the ability to use the potty or sleep in a separate bed away from mom and dad. Therefore, just carefully clean the kitchen or dining room after the next "lesson", wash clothes and the child - and continue all over again after a few hours ... nine0003
When to start training, at what age? Here everything is strictly individual. Some children are already ready by 7-8 months, others at 1.5-2 years persistently ask to be spoon-fed. But usually, on average, around the year, the development of a little man already allows you to confidently try to hold the same spoon and direct it into your mouth. It is hardly worth forcing to do this, but if the baby, on the contrary, takes the initiative, reaches out to grab it himself in order to scoop porridge from the plate, lick it, “feed” the mother, of course, you shouldn’t interfere - such interest is only a plus, it can to a noticeable extent help you. Therefore, watch your child - he himself is the best indicator when it's time to start! nine0003
How to organize training directly?
In order for a child to learn to eat on his own faster and with fewer problems, it is worth learning a number of certain rules and techniques, an approximate list of which includes the following points:
Introduce your baby to the spoon as early as possible, even before the introduction of complementary foods. This object should be familiar to him: it is better that he turn it in his hands, like a rattle or a cube, try it by touch and taste, knock on it - in general, he completely mastered and got used to it. Then she will not frighten him and will not cause rejection either at the moment of weaning from her mother's breast, or later, when she will need to wield it on her own.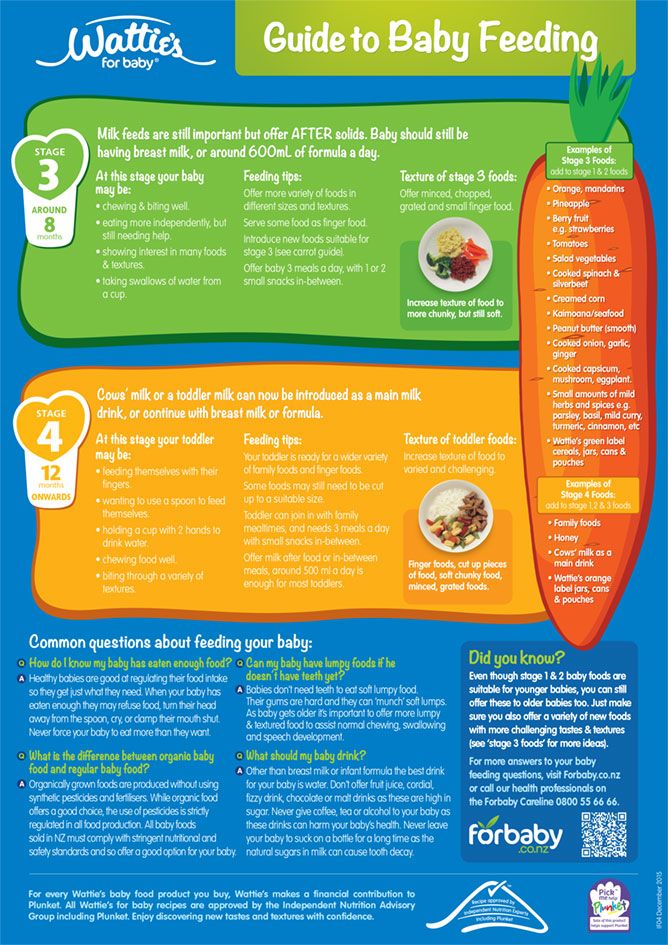 nine0003
Buy plastic utensils. You can also use the standard: metal, ceramic or gift silver. But for a very young child, they are not very suitable: such spoons and plates may seem unpleasant to the touch, cold, hard for delicate gums, and heavy. It is important that the plastic is unbreakable, food-grade and free of harmful dyes - the quality certificates from the seller will tell about this.
Choose a children's set. Such dishes are most adapted for a small child: the spoon has a special grip for children's fingers, the plate has high edges (and sometimes even suction cups so that it cannot be knocked over from the table!), The mug has two handles, and the fork and knife are not sharp, so as not get hurt. Well, of course, such dishes are usually made bright, with attractive patterns and designs to interest the child. nine0003
Prepare a place. Not a single child manages to bring soup or mashed potatoes from a bowl to their mouths whole, either from the first, or from the second, or even from the tenth time.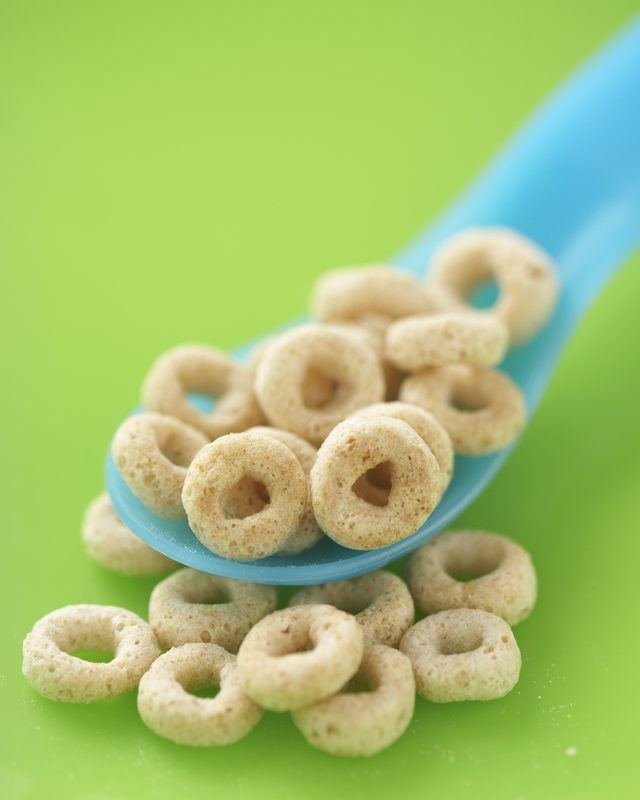 Therefore, be prepared that at first they will be literally everywhere! And it’s better to immediately prepare the feeding area for subsequent cleaning: cover the table, children’s chair and the floor with oilcloth, remove everything valuable and afraid of moisture, move away from the wallpaper, grab a set of napkins.
Prepare your child. During such “lessons”, of course, the baby himself gets dirty. Therefore, at least a bib or an apron is required - and the larger it is, the better. Sometimes on sale there are special oilcloth jackets for teaching self-catering, but if the room is warm, you can do without clothes, leaving panties or a diaper. It’s easier to wash a child than to wash his clothes every day. nine0003
Pick a moment. Although parents should try to accustom their child to a certain daily routine, it is not worth forcing him to eat when he has no desire. This is especially critical for learning to use dishes. If the child is not hungry, he will not take this process seriously: it will either become a game for him, or simply cause a negative reaction. Therefore, teach when he really wants to eat, is not sick and is ready for a new one.
Show an example. Take a spoon, scoop up food with it, bring it to the baby’s mouth or your own, commenting on each of your actions (even if the baby is not talking yet). Then invite the child to try to repeat all this himself. Support is very welcome: help his fingers grab and hold the spoon, point the child's hand to his mouth - and after a dozen or two or three repetitions, he will understand what they want from him. nine0003
Pay attention to food. For the first attempts, the baby should like it and be moderately liquid (but not too much, the soup will spill). Also, do not put on a full plate, adding parts of the portion gradually - it is easier for the child to scoop up, and there is less risk of splashing, and the food itself will be warm (the learning process may be delayed). And one more thing: cook with a margin so that the baby, having “lost” part of the food, probably does not remain hungry.
Stop games. It was possible to play with a spoon during the acquaintance, but not now - the child must learn this rule ironically. Therefore, gently, but very persistently, stop when he tries to knock over a spoon, plop it on the soup, spill everything on the floor, or throw it at mom and dad. And also watch when he is full to stop learning - it is at this moment that food for him can turn into a game, and he himself can be capricious. nine0003
Supplement. At first, there is nothing wrong with the fact that the child abandoned what he started right in the middle of the process. He could get tired, lose interest if he didn’t succeed, be afraid of spilled food on himself or the fact that he choked or choked on it. Therefore, in reserve, keep "your" spoon nearby so that you can finish your meal the old fashioned way, feeding him yourself.
Create a ritual. In order for the baby to take the rules of nutrition seriously, turn food into a ritual. To do this, you can decorate food (put on a plate of it, for example, funny faces), gather the whole family at the dinner table, set and clean the table together (including spilled ones) - this will increase the child's level of responsibility for their actions.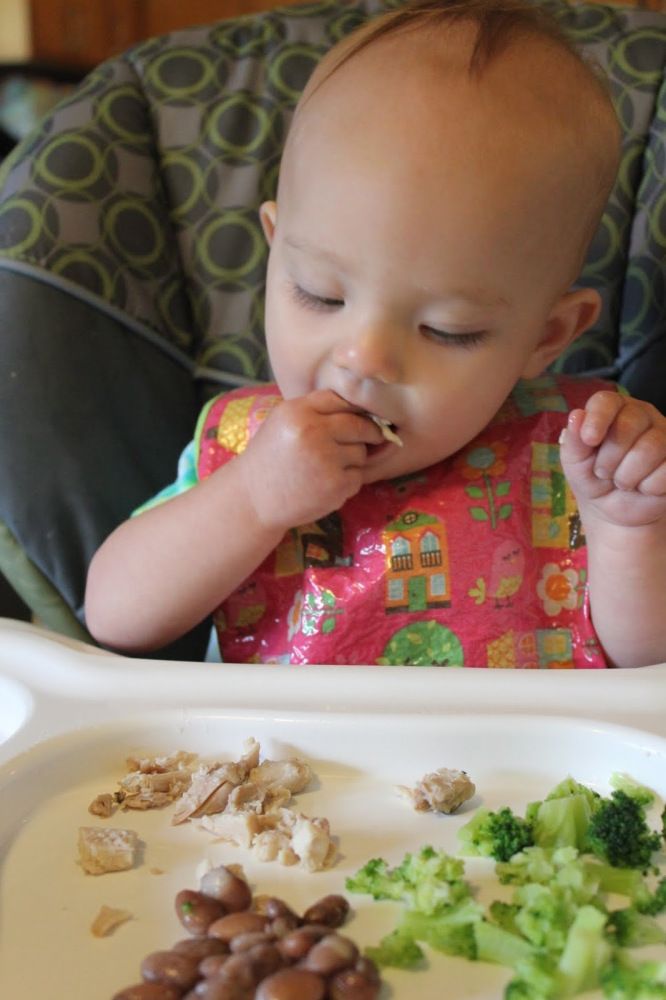 And, of course, learn to wash your hands before eating and wipe your mouth after. nine0003
Discuss learning with your family. Everyone who has access to feeding the baby (mother, father, grandparents, older brothers and sisters) must be aware of the ongoing training. Otherwise, at some point, the child will simply begin to be lazy: after all, why learn to eat with your mother yourself, if the same beloved grandmother feeds him from a spoon herself, without requiring him to repeat complex procedures?
Don't rush things. Start with a spoon, but you can wait a little with a cup, fork and knife. So, give out a cup when the baby has mastered the bottle (showing how to lean it against his lips and supporting it at first so that he does not choke), the plug is available by 1.5-2 years (at the same time, you need to pay attention to both ways of its use: picking up a side dish, and piercing pieces of food), and a knife - after 2-3 years. nine0003
Don't impose rules. Remember: your ultimate goal is for your child to eat on his own. But how he will do it, in principle, does not matter: the main thing is that it is clean and dry around. Therefore, if it is more convenient for him to hold the spoon a little differently than you showed, it does not matter. Moreover, do not force him to eat with his right hand - even if he is right-handed (there is nothing to say about the left-hander), he himself will determine how it is more convenient for him to deal with these devices.
Praise! It is very important for a little man to hear a high assessment of his work. Therefore, any achievement in the matter of teaching independent nutrition should be celebrated and encouraged. Of course, you shouldn’t overpraise, but the joy of mom and dad from the fact that he learned to hold a spoon and didn’t spill anything on the floor will raise his self-esteem and make him even more actively master the wisdom of this business. nine0003
Step aside. As the learning process progresses, it is important to start gradually giving the child more and more independence.