Ways to bottle feed your baby
How to Bottle-Feed a Baby
Whether you’re breastfeeding, formula-feeding or doing a combination of both, chances are you’ll eventually use a bottle with your infant. No big deal, right? But while images of a parent blissfully holding a bottle make the process look easy, there’s a learning curve when it comes to proper bottle-feeding. Here, everything you need to know about how to bottle-feed a baby safely and happily.
In this article:
How to choose the right bottle and nipple
How to make a baby bottle
Best bottle-feeding positions
What is pace feeding?
How to get baby to take a bottle
When to wean baby off the bottle
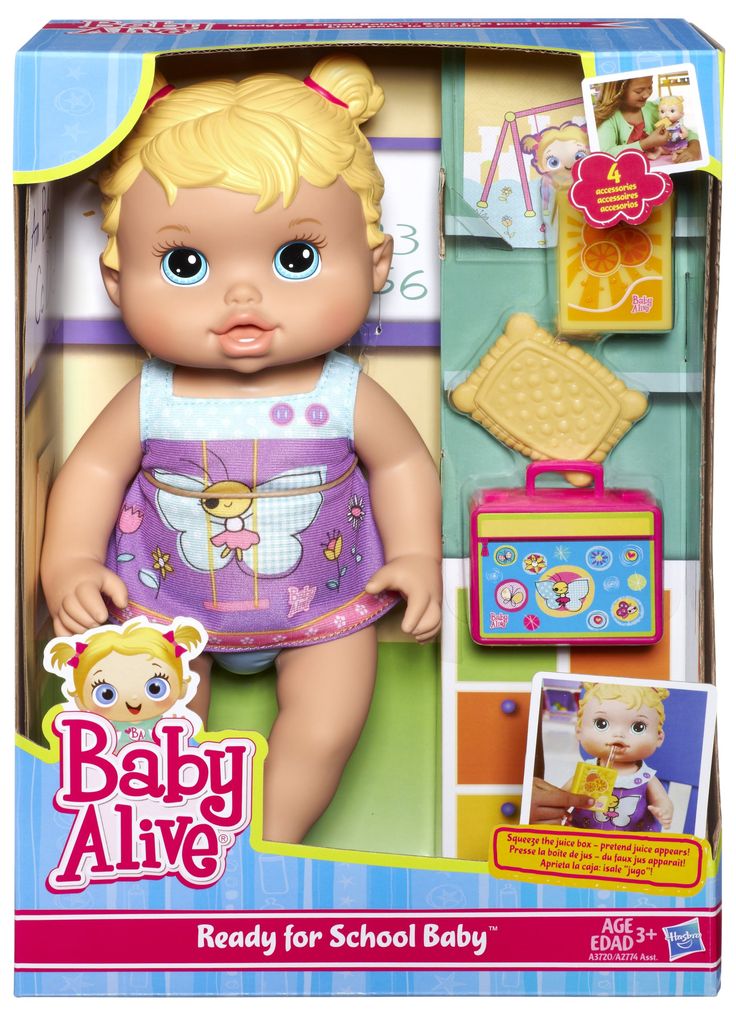
How to Choose the Right Bottle and Nipple
When it comes to figuring out how to bottle-feed a baby, selecting an appropriate bottle and nipple is step one. If people gifted you a bunch of bottles at your baby shower, you may want to hold off before opening and sterilizing them until baby is born, or at least take out just a few to try in the early days of feeding. Why? Because you won’t know what kind of bottle is best until you figure out what baby’s feeding needs are.
“Certain bottles work better for certain babies,” explains Jamie O’Day, BSN, RN, CLC, a registered nurse, certified lactation consultant and cofounder of Boston NAPS, a pre- and postnatal resource center in the Boston area. “For example, some babies who have issues with gas may do better with a bottle that has a filtration system, like a Doctor Brown’s style bottle, while babies who are used to being breastfed may have more success drinking from a bottle that aims to mimic the shape and feel of a mother’s breast, like the Comotomo.”
That said, O’Day has a universal tip for all parents: Look for a bottle that’s easy to take apart and clean. That generally means a nice wide neck and the fewest parts possible. “Proper cleaning is so important, so I always tell parents to choose the simplest bottle, which may just have a nipple, bottle and collar,” she says. If your child seems happy and easily takes the bottle, then there’s no need to switch.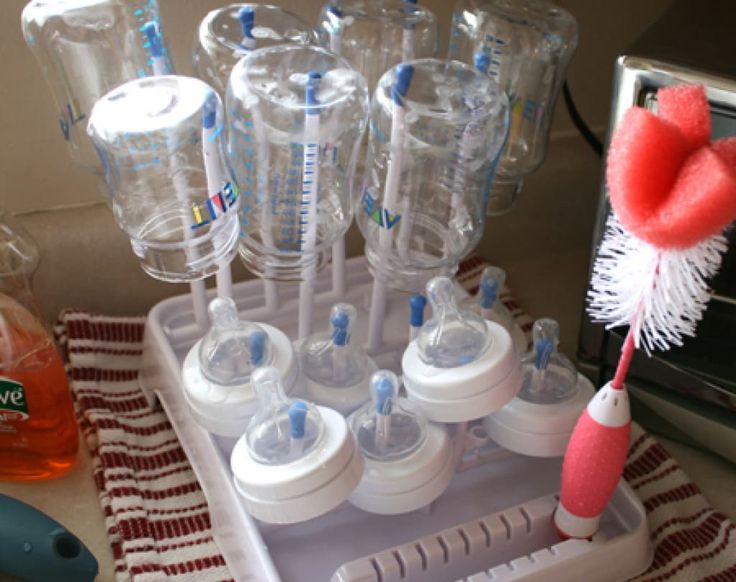
Of course, it’s not just the bottle that you have to consider. It’s also important to pay attention to the flow of the nipple, which varies based on infant age. Generally speaking, young babies need a slower flow, while older babies who’ve mastered the art of bottle-feeding can handle a faster flow. The nipple may be called “slow flow,” “medium flow” or “fast flow” or may be numbered from one to three, with one being the slowest flow. There is no standard of flow between different brands, but most newborns should begin on level one or slow flow.
So how can you tell when it’s time to change the nipple size? That depends. Some infants happily use the same flow nipple throughout their infancy, while others may need a faster flow nipple. “If you notice your child taking a long time to finish a bottle, or losing interest midway through feedings, a faster flow nipple may be needed,” O’Day says, adding that this might happen at around 3 or 4 months of age, with another potential upgrade around 6 or 7 months.
If your infant finishes a bottle quickly (say, under five minutes), seems gassy or cranky, or spits up a lot of milk right after feedings, it may be time to go back to a slower-flow nipple. Your pediatrician can also help determine if it may be time to switch the flow of the nipple.
How to Make a Baby Bottle
If you’re wondering how to bottle-feed a baby, you’re probably new to prepping baby bottles. Take a new skill, add in sleep deprivation and sprinkle in some very real safety concerns and you’ve got the somewhat daunting process of making a baby bottle (at least at first). Don’t despair. By reading directions, following the advice of a pediatrician and making sure to err on the side of caution, you’ll get the hang of it in no time.
How to make a baby bottle with formula
Baby formula comes in three different forms: ready-to-feed, concentrate and powder. The Centers for Disease Control and Prevention (CDC) recommends that babies under 3 months start off with ready-to-feed formula because of the small but real risk of cronobacter, a bacteria that can live in powdered infant formula.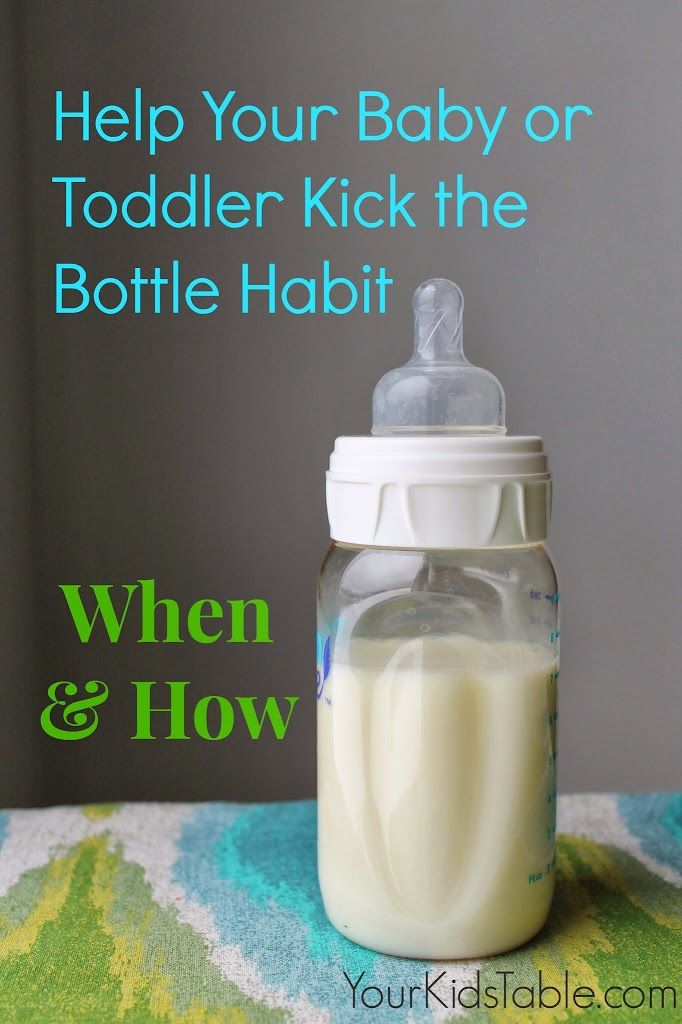
• Preparing ready-to-feed formula: These require very little prep, since they come ready to be poured into a bottle and fed to an infant. Some ready-to-feed formulas come in bottles that can accomodate disposable nipples—all you need to do is screw a nipple on, feed and discard.
• Preparing concentrate formula: To prepare a baby body with this liquid formula, you’ll need to add water. It’s important to read the directions to learn the right ratio of water to concentrate. As for what type of water should you use, that depends on where you live, your pediatrician’s recommendation and your own wishes. If your tap water is safe, feel free to use it—just run it for several minutes before you fill the bottle to remove any trace contaminants in the water. You can also use filtered water, bottled water or boiled (and cooled) tap water.
• Preparing powdered formula: Just like concentrate, it’s important to follow directions on the right ratio of scoops of powder to ounces of water, says Carmen Baker-Clark, an International Board Certified Lactation Consultant (IBCLC) in Hoboken, New Jersey. When using powdered formula, make sure to shake well so the liquid isn’t clumpy. “Some parents notice powdered formulas may make their infant more gassy, more prone to spit-up or more constipated. A lot of this is due to the bottle preparation. For example, not shaking enough can create uneven consistency that may be harder for baby to digest,” Baker-Clark explains.
Regardless of what kind of formula you choose, Baker-Clark recommends sticking with the same brand or being deliberate as you try new ones, instead of just using whatever formula is on sale. While all infant formulas are regulated by the FDA and must pass the same nutrient tests, babies may react differently to various brands of formula. If an infant has frequent reflux, crying episodes or seems uncomfortable after a feeding, speak with your pediatrician. Your child may have an allergy or intolerance and may need a special formula.
Whether you warm the bottle up is up to you. “Many infants have no problem taking a cold bottle and the advantage is that you then don’t need to warm a bottle when you’re on the go,” Baker-Clark says.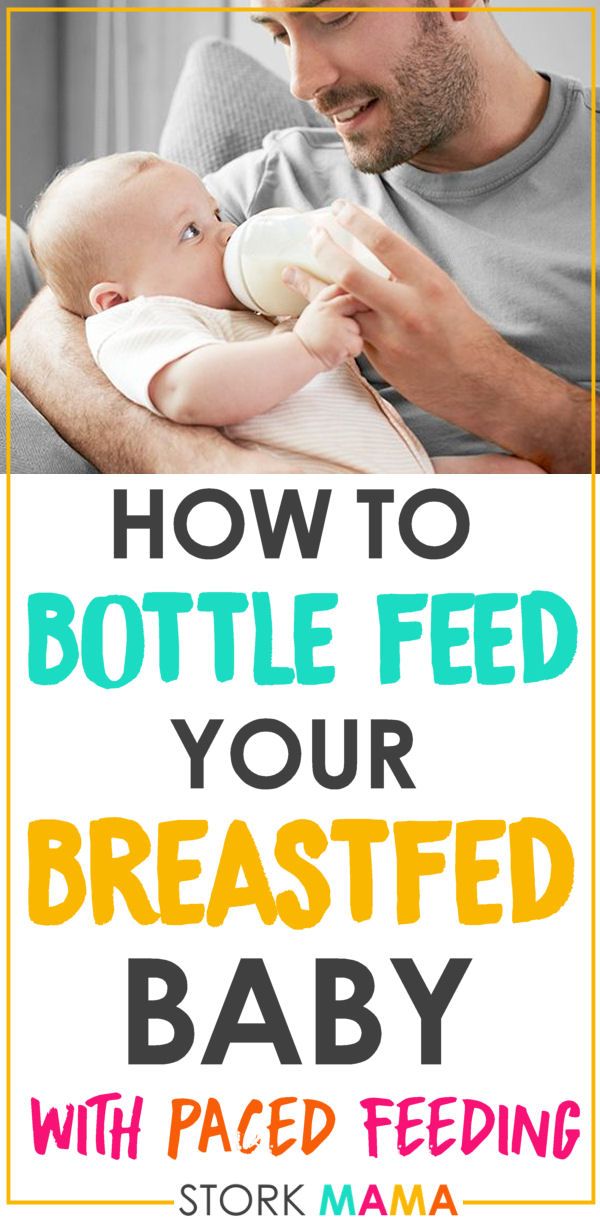 Once a formula bottle has been made and the nipple has touched baby’s lips, the bottle is good for an hour. But if the bottle isn’t used, a bottle may be refrigerated for a day, O’Day says. Some parents like to prepare and refrigerate a bottle in advance to make middle-of-the-night feedings easier, while others may prepare a pitcher to use during the day.
How to make a baby bottle with breast milk
Preparing a bottle of breast milk is of course much more straightforward, since the milk itself is ready to go. But when grabbing a bag of breast milk to use, it’s important to keep an eye on when it was pumped and how it’s been stored since. According to breast milk storage guidelines, it’s safe to use freshly pumped milk that’s been stored at room temperature for up to four hours, in the fridge for up to four days or in the freezer for up to 12 months. Always use the oldest milk first. If baby doesn’t finish a bottle, you can offer it again within two hours of the last feeding.
Before giving baby the bottle, you can warm the milk up by placing the bottle (or milk storage bag) in a cup of warm water for a few minutes, or pop the bottle into a bottle warmer. Whatever you do, steer clear of the microwave, which can cause dangerous hot spots.
Best Bottle-Feeding Positions
How you hold your little one during a feeding is a crucial part of knowing how to bottle-feed a baby properly. Chances are, you’ve come across loads of images of parents bottle-feeding babies—but the positions you sometimes see in photos or on TV may not actually be the best for baby. For one, forget about laying baby across your lap. “Have you ever easily drank something while you lay on your back?” O’Day asks. (Answer: no.) “It’s the same for baby.” Not only can a back position lead to reflux, but it may also cause ear infections. Try these bottle-feeding positions instead:
• Cradle baby in your arms. This is the classic position you probably think of when you imagine giving baby a bottle. In this bottle-feeding position, baby’s head rests in the crook of your arm as you hold her head and chest at a slight incline—close to your chest is great.
• Hold baby upright. Instead of lying down, baby should be almost in a seated position, with his head on your chest or in the crook of your arm. “This position can work especially well for infants who have reflux,” Baker-Clark says. Tilt the bottle so the milk completely fills the nipple, since a nipple filled only halfway with milk may lead to baby gulping some air, which can lead to gassiness or reflux.
• Use a pillow. A nursing pillow can be helpful in keeping baby’s chest and head propped up at an angle. Bonus: It can give your arms a break too as you cradle baby in your lap.
• Switch sides. Regardless of whether you’re breastfeeding or bottle-feeding exclusively, switching baby from one side to another can help prevent your little one from developing a side preference and can give your arms a break. Switching sides can also naturally pace a feeding session and can give baby a chance to decide whether or not he’s full before the bottle is finished.
As baby gets older, she may toy with holding the bottle. That’s fine, if she wants to, but it’s not a developmental milestone. “She may want to hold the bottle at 6 months, so you can let her, but you should still be close by, holding her and supervising her,” O’Day says. And if baby doesn’t show any interest in holding her bottle? As long as she’s reached other developmental milestones, like reaching or grasping for toys, it’s totally normal if your older infant wants his bottle served to him.
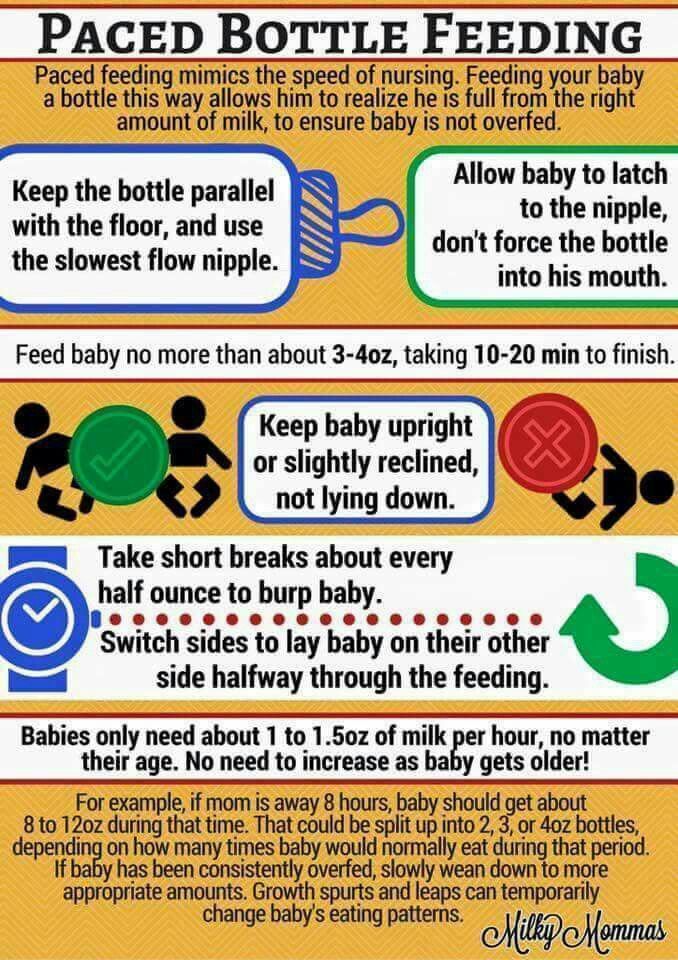
What is Pace Feeding?
You may have heard of “pace feeding” and wondered how to bottle-feed a baby using this method. “Paced bottle-feeding is where you follow baby’s cues and allow for breaks,” Baker-Clark says. “Taking the bottle away and re-offering it benefits both breastfed and exclusively bottle-fed babies.”
Pace feeding helps babies learn to regulate their hunger and allows ample time for digestion. It can also cue you into baby’s biorhythm, O’Day says. You may find baby doesn’t uniformly eat the same size bottle at each time of day. For example, maybe he’s extra hungry in the morning and drinks 8 ounces, but prefers 4-ounce bottles post-nap. Paying attention to baby’s cues can help you clue into her unique needs and natural schedule.
Plus, paced bottle-feeding makes a feeding session—which can last about 15 to 20 minutes—a great time for baby and his caregiver to bond. Here, some tips for how to pace feed:
• Hold the bottle at a horizontal angle. When the bottle is held horizontally, baby has to work to pull milk from the bottle, instead of the milk dripping into her mouth.
• Give baby some breaks. Instead of pulling the bottle away from baby’s mouth, lean the bottle back so the milk leaves the nipple. That way, baby has a chance to catch his breath. If he seems like he’s still rooting for milk, offer him more.
• Burp mid-feed. “If baby is pulling away, seems fussy or seems to be playing with the nipple with her mouth, give her a burp,” O’Day says. Then offer the bottle again.
How to Get Baby to Take a Bottle
Even if you’re planning to exclusively breastfeed, at some point you’ll likely need some pointers on how to get baby to take a bottle. “I tell my clients to introduce baby to a bottle once breastfeeding has been established, which depends on each mother-baby dyad, but on average, it’s around one month,” O’Day says. “Even if they’re not planning to regularly bottle-feed, doing so can give peace of mind if an emergency comes up, and can also be a way for mom to get a break.”
Some babies take a bottle no problem—after all, sucking is an instinctive reflex, which is why bottle-fed babies tend to get the hang of it in the first few days of life. But other breastfed babies may initially be reluctant to take a bottle. And sometimes breastfed babies have no issue taking a bottle when they’re one month old, but if a bottle hasn’t been regularly offered, by 3 or 4 months of age, they’re less happy to accept a bottle.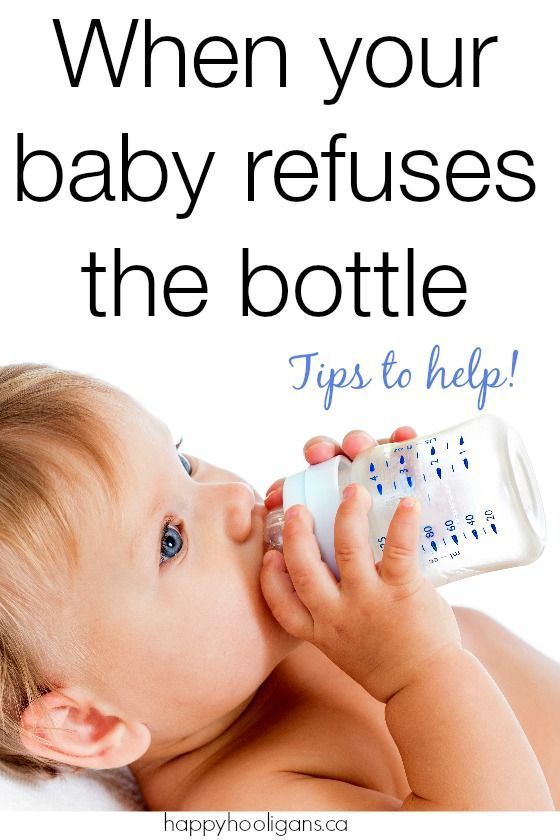 Bottle resistance is pretty common, but luckily there are some tried-and-true tips for what to do when baby is refusing a bottle.
• Offer often. Even if you’re breastfeeding, O’Day recommends giving baby at least one bottle a week, once breastfeeding has been established. “That way it’s part of their routine, so they’re less likely to resist it,” she says.
• Don’t offer it when baby is starving. If you’re regularly nursing your infant, O’Day suggests offering a bottle in between nursing sessions. “If they’re too hungry, they may be too worked up to take a bottle. If they’re calm and not super hungry, they may take it,” she explains.
• Let others try bottle-feeding. Some moms have success leaving the house and allowing their partner to try feeding baby a bottle. Again, try it at a time that’s not baby’s “must-feed” time.
• Don’t get frustrated. If baby isn’t taking the bottle, O’Day suggests putting it down and trying again later rather than forcing it, which can make both you and baby upset.
• Ask for help. A lactation consultant can suggest some techniques to help get even the most resistant bottle-feeders to accept a bottle. They may check your infant’s mouth and tongue for any latch problems that could contribute to the difficulty, suggest the best bottle for your infant, troubleshoot any behavioral issues or offer alternate nutritive methods, such as cup- or syringe-feeding.
When to Wean Baby Off the Bottle
The American Academy of Pediatrics recommends parents stop offering bottles by 18 months due to tooth decay concern, but it’s smart to talk with your pediatrician about exactly when baby should wean from the bottle around the 9-month mark, O’Day says. “How and when to wean depends on how much table food baby is eating, any developmental concerns and your pediatrician’s assessment,” she says. Note, though, that cow’s milk shouldn’t be introduced until baby is 12 months old.
When baby is around 6 months old, offer a sippy cup or straw cup for water, O’Day says, since learning to drink from cups can help make the transition from bottles seamless. Some babies have no problem giving up the bottle, while others may require more time to make the transition, but looping in your pediatrician or lactation consultant can help make sure you’re all on the right track.
Whether you’re breastfeeding and offering the occasional bottle, combo-feeding or exclusively bottle-feeding, you might hit some bumps along your bottle-feeding journey. But there are ways to navigate through any problems that arise. If you’re struggling to find the best baby bottle for your child, need some pointers on how to bottle-feed a baby in an optimal position or encounter a full-on bottle strike, reach out to your pediatrician or lactation consultants for guidance.
Published August 2018
Please note: The Bump and the materials and information it contains are not intended to, and do not constitute, medical or other health advice or diagnosis and should not be used as such. You should always consult with a qualified physician or health professional about your specific circumstances.
Plus, more from The Bump:
14 Best Bottles for Every Feeding Need
Pumping 101: How to Pump Breast Milk
The Best Baby Formulas for Your Child’s Needs
How to Bottle-Feed a Baby
Whether you’re breastfeeding, formula-feeding or doing a combination of both, chances are you’ll eventually use a bottle with your infant. No big deal, right? But while images of a parent blissfully holding a bottle make the process look easy, there’s a learning curve when it comes to proper bottle-feeding. Here, everything you need to know about how to bottle-feed a baby safely and happily.
In this article:
How to choose the right bottle and nipple
How to make a baby bottle
Best bottle-feeding positions
What is pace feeding?
How to get baby to take a bottle
When to wean baby off the bottle
How to Choose the Right Bottle and Nipple
When it comes to figuring out how to bottle-feed a baby, selecting an appropriate bottle and nipple is step one. If people gifted you a bunch of bottles at your baby shower, you may want to hold off before opening and sterilizing them until baby is born, or at least take out just a few to try in the early days of feeding. Why? Because you won’t know what kind of bottle is best until you figure out what baby’s feeding needs are.
“Certain bottles work better for certain babies,” explains Jamie O’Day, BSN, RN, CLC, a registered nurse, certified lactation consultant and cofounder of Boston NAPS, a pre- and postnatal resource center in the Boston area. “For example, some babies who have issues with gas may do better with a bottle that has a filtration system, like a Doctor Brown’s style bottle, while babies who are used to being breastfed may have more success drinking from a bottle that aims to mimic the shape and feel of a mother’s breast, like the Comotomo.”
That said, O’Day has a universal tip for all parents: Look for a bottle that’s easy to take apart and clean. That generally means a nice wide neck and the fewest parts possible. “Proper cleaning is so important, so I always tell parents to choose the simplest bottle, which may just have a nipple, bottle and collar,” she says. If your child seems happy and easily takes the bottle, then there’s no need to switch.
Of course, it’s not just the bottle that you have to consider. It’s also important to pay attention to the flow of the nipple, which varies based on infant age. Generally speaking, young babies need a slower flow, while older babies who’ve mastered the art of bottle-feeding can handle a faster flow. The nipple may be called “slow flow,” “medium flow” or “fast flow” or may be numbered from one to three, with one being the slowest flow. There is no standard of flow between different brands, but most newborns should begin on level one or slow flow.
So how can you tell when it’s time to change the nipple size? That depends. Some infants happily use the same flow nipple throughout their infancy, while others may need a faster flow nipple. “If you notice your child taking a long time to finish a bottle, or losing interest midway through feedings, a faster flow nipple may be needed,” O’Day says, adding that this might happen at around 3 or 4 months of age, with another potential upgrade around 6 or 7 months.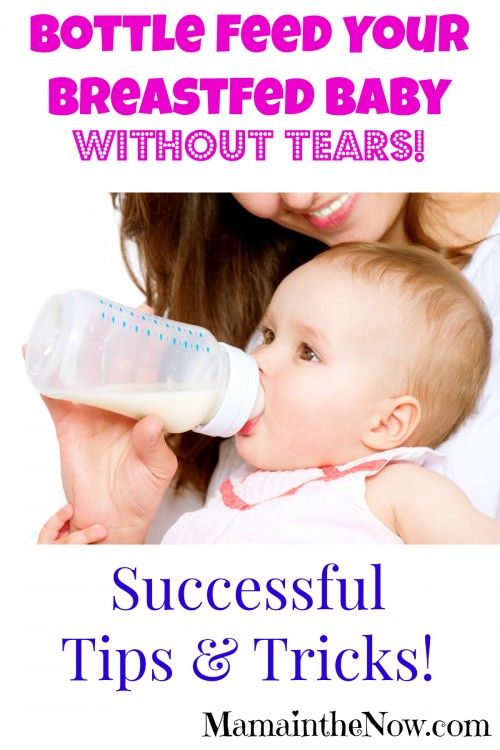
If your infant finishes a bottle quickly (say, under five minutes), seems gassy or cranky, or spits up a lot of milk right after feedings, it may be time to go back to a slower-flow nipple. Your pediatrician can also help determine if it may be time to switch the flow of the nipple.
How to Make a Baby Bottle
If you’re wondering how to bottle-feed a baby, you’re probably new to prepping baby bottles. Take a new skill, add in sleep deprivation and sprinkle in some very real safety concerns and you’ve got the somewhat daunting process of making a baby bottle (at least at first). Don’t despair. By reading directions, following the advice of a pediatrician and making sure to err on the side of caution, you’ll get the hang of it in no time.
How to make a baby bottle with formula
Baby formula comes in three different forms: ready-to-feed, concentrate and powder. The Centers for Disease Control and Prevention (CDC) recommends that babies under 3 months start off with ready-to-feed formula because of the small but real risk of cronobacter, a bacteria that can live in powdered infant formula.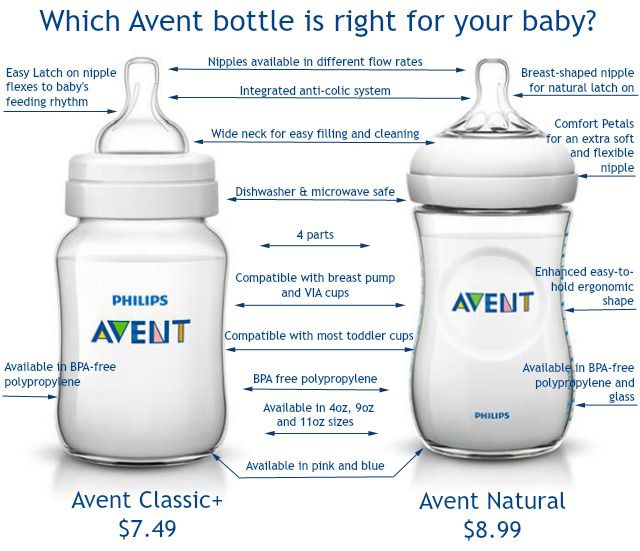
• Preparing ready-to-feed formula: These require very little prep, since they come ready to be poured into a bottle and fed to an infant. Some ready-to-feed formulas come in bottles that can accomodate disposable nipples—all you need to do is screw a nipple on, feed and discard.
• Preparing concentrate formula: To prepare a baby body with this liquid formula, you’ll need to add water. It’s important to read the directions to learn the right ratio of water to concentrate. As for what type of water should you use, that depends on where you live, your pediatrician’s recommendation and your own wishes. If your tap water is safe, feel free to use it—just run it for several minutes before you fill the bottle to remove any trace contaminants in the water. You can also use filtered water, bottled water or boiled (and cooled) tap water.
• Preparing powdered formula: Just like concentrate, it’s important to follow directions on the right ratio of scoops of powder to ounces of water, says Carmen Baker-Clark, an International Board Certified Lactation Consultant (IBCLC) in Hoboken, New Jersey. When using powdered formula, make sure to shake well so the liquid isn’t clumpy. “Some parents notice powdered formulas may make their infant more gassy, more prone to spit-up or more constipated. A lot of this is due to the bottle preparation. For example, not shaking enough can create uneven consistency that may be harder for baby to digest,” Baker-Clark explains.
Regardless of what kind of formula you choose, Baker-Clark recommends sticking with the same brand or being deliberate as you try new ones, instead of just using whatever formula is on sale. While all infant formulas are regulated by the FDA and must pass the same nutrient tests, babies may react differently to various brands of formula. If an infant has frequent reflux, crying episodes or seems uncomfortable after a feeding, speak with your pediatrician. Your child may have an allergy or intolerance and may need a special formula.
Whether you warm the bottle up is up to you. “Many infants have no problem taking a cold bottle and the advantage is that you then don’t need to warm a bottle when you’re on the go,” Baker-Clark says. Once a formula bottle has been made and the nipple has touched baby’s lips, the bottle is good for an hour. But if the bottle isn’t used, a bottle may be refrigerated for a day, O’Day says. Some parents like to prepare and refrigerate a bottle in advance to make middle-of-the-night feedings easier, while others may prepare a pitcher to use during the day.
How to make a baby bottle with breast milk
Preparing a bottle of breast milk is of course much more straightforward, since the milk itself is ready to go. But when grabbing a bag of breast milk to use, it’s important to keep an eye on when it was pumped and how it’s been stored since. According to breast milk storage guidelines, it’s safe to use freshly pumped milk that’s been stored at room temperature for up to four hours, in the fridge for up to four days or in the freezer for up to 12 months. Always use the oldest milk first. If baby doesn’t finish a bottle, you can offer it again within two hours of the last feeding.
Before giving baby the bottle, you can warm the milk up by placing the bottle (or milk storage bag) in a cup of warm water for a few minutes, or pop the bottle into a bottle warmer. Whatever you do, steer clear of the microwave, which can cause dangerous hot spots.
Best Bottle-Feeding Positions
How you hold your little one during a feeding is a crucial part of knowing how to bottle-feed a baby properly. Chances are, you’ve come across loads of images of parents bottle-feeding babies—but the positions you sometimes see in photos or on TV may not actually be the best for baby. For one, forget about laying baby across your lap. “Have you ever easily drank something while you lay on your back?” O’Day asks. (Answer: no.) “It’s the same for baby.” Not only can a back position lead to reflux, but it may also cause ear infections. Try these bottle-feeding positions instead:
• Cradle baby in your arms. This is the classic position you probably think of when you imagine giving baby a bottle.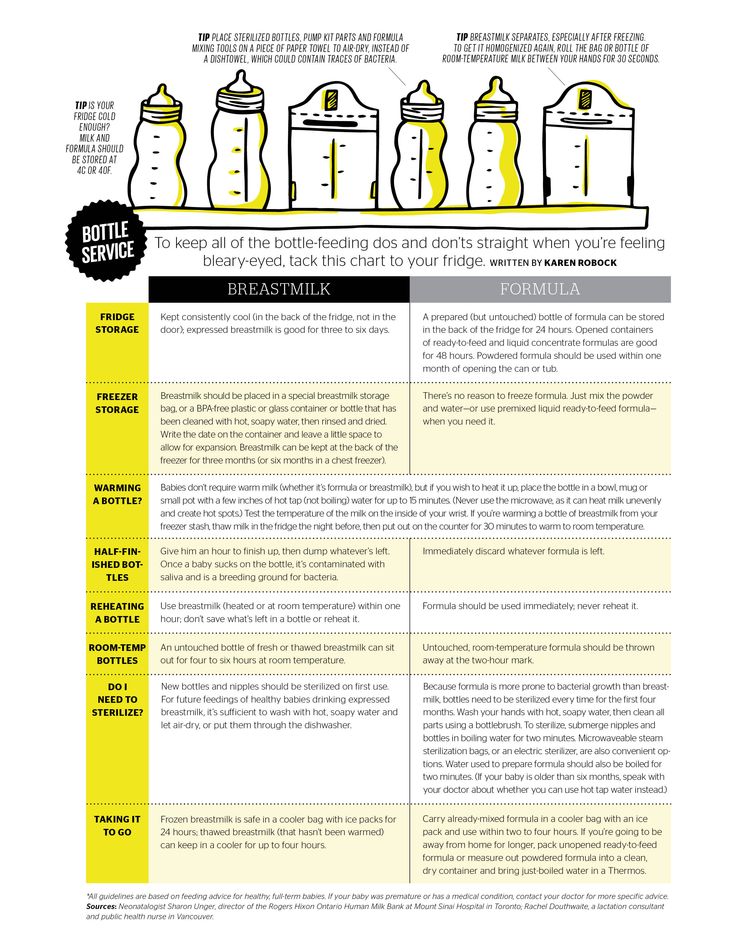 In this bottle-feeding position, baby’s head rests in the crook of your arm as you hold her head and chest at a slight incline—close to your chest is great.
• Hold baby upright. Instead of lying down, baby should be almost in a seated position, with his head on your chest or in the crook of your arm. “This position can work especially well for infants who have reflux,” Baker-Clark says. Tilt the bottle so the milk completely fills the nipple, since a nipple filled only halfway with milk may lead to baby gulping some air, which can lead to gassiness or reflux.
• Use a pillow. A nursing pillow can be helpful in keeping baby’s chest and head propped up at an angle. Bonus: It can give your arms a break too as you cradle baby in your lap.
• Switch sides. Regardless of whether you’re breastfeeding or bottle-feeding exclusively, switching baby from one side to another can help prevent your little one from developing a side preference and can give your arms a break.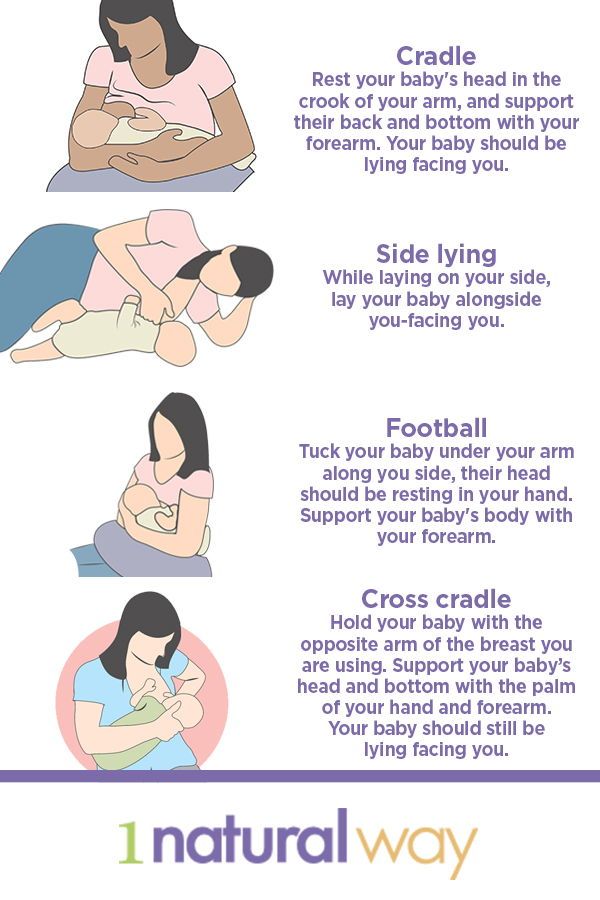 Switching sides can also naturally pace a feeding session and can give baby a chance to decide whether or not he’s full before the bottle is finished.
As baby gets older, she may toy with holding the bottle. That’s fine, if she wants to, but it’s not a developmental milestone. “She may want to hold the bottle at 6 months, so you can let her, but you should still be close by, holding her and supervising her,” O’Day says. And if baby doesn’t show any interest in holding her bottle? As long as she’s reached other developmental milestones, like reaching or grasping for toys, it’s totally normal if your older infant wants his bottle served to him.
What is Pace Feeding?
You may have heard of “pace feeding” and wondered how to bottle-feed a baby using this method. “Paced bottle-feeding is where you follow baby’s cues and allow for breaks,” Baker-Clark says. “Taking the bottle away and re-offering it benefits both breastfed and exclusively bottle-fed babies.”
Pace feeding helps babies learn to regulate their hunger and allows ample time for digestion. It can also cue you into baby’s biorhythm, O’Day says. You may find baby doesn’t uniformly eat the same size bottle at each time of day. For example, maybe he’s extra hungry in the morning and drinks 8 ounces, but prefers 4-ounce bottles post-nap. Paying attention to baby’s cues can help you clue into her unique needs and natural schedule.
Plus, paced bottle-feeding makes a feeding session—which can last about 15 to 20 minutes—a great time for baby and his caregiver to bond. Here, some tips for how to pace feed:
• Hold the bottle at a horizontal angle. When the bottle is held horizontally, baby has to work to pull milk from the bottle, instead of the milk dripping into her mouth.
• Give baby some breaks. Instead of pulling the bottle away from baby’s mouth, lean the bottle back so the milk leaves the nipple. That way, baby has a chance to catch his breath. If he seems like he’s still rooting for milk, offer him more.
• Burp mid-feed.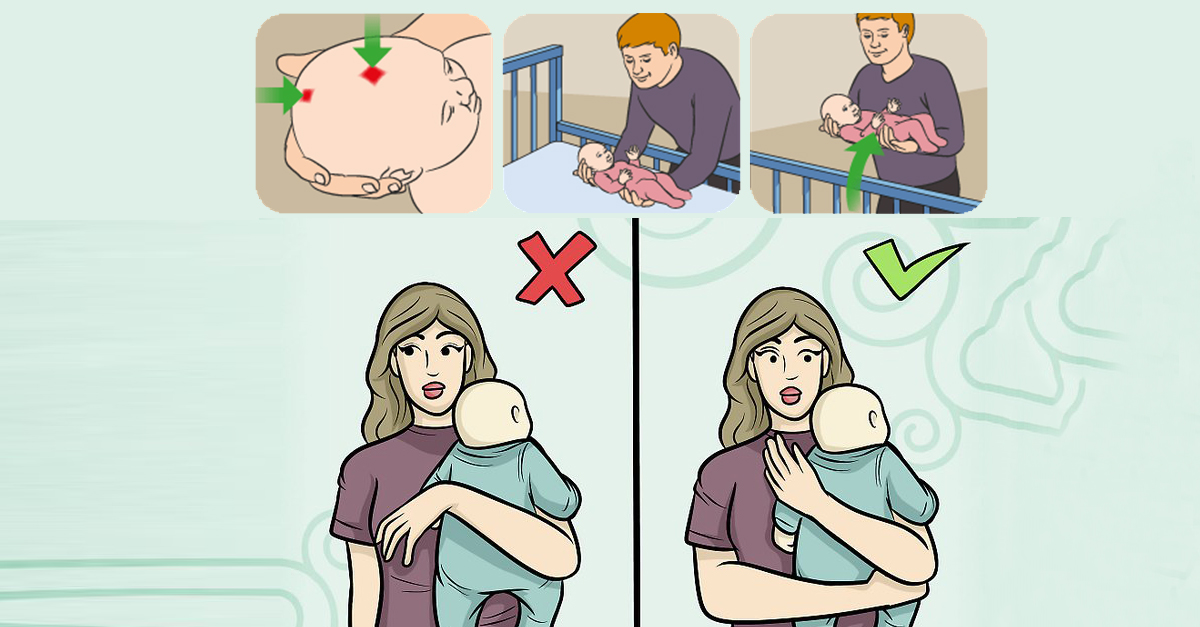 “If baby is pulling away, seems fussy or seems to be playing with the nipple with her mouth, give her a burp,” O’Day says. Then offer the bottle again.
How to Get Baby to Take a Bottle
Even if you’re planning to exclusively breastfeed, at some point you’ll likely need some pointers on how to get baby to take a bottle. “I tell my clients to introduce baby to a bottle once breastfeeding has been established, which depends on each mother-baby dyad, but on average, it’s around one month,” O’Day says. “Even if they’re not planning to regularly bottle-feed, doing so can give peace of mind if an emergency comes up, and can also be a way for mom to get a break.”
Some babies take a bottle no problem—after all, sucking is an instinctive reflex, which is why bottle-fed babies tend to get the hang of it in the first few days of life. But other breastfed babies may initially be reluctant to take a bottle. And sometimes breastfed babies have no issue taking a bottle when they’re one month old, but if a bottle hasn’t been regularly offered, by 3 or 4 months of age, they’re less happy to accept a bottle.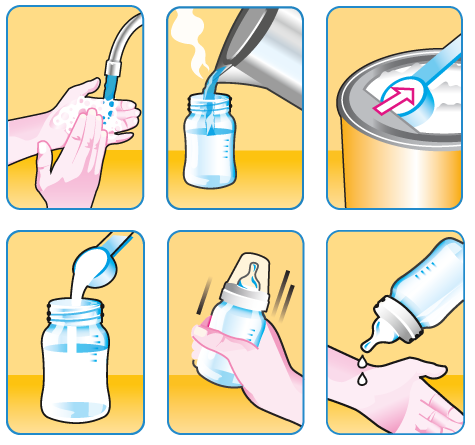 Bottle resistance is pretty common, but luckily there are some tried-and-true tips for what to do when baby is refusing a bottle.
• Offer often. Even if you’re breastfeeding, O’Day recommends giving baby at least one bottle a week, once breastfeeding has been established. “That way it’s part of their routine, so they’re less likely to resist it,” she says.
• Don’t offer it when baby is starving. If you’re regularly nursing your infant, O’Day suggests offering a bottle in between nursing sessions. “If they’re too hungry, they may be too worked up to take a bottle. If they’re calm and not super hungry, they may take it,” she explains.
• Let others try bottle-feeding. Some moms have success leaving the house and allowing their partner to try feeding baby a bottle. Again, try it at a time that’s not baby’s “must-feed” time.
• Don’t get frustrated. If baby isn’t taking the bottle, O’Day suggests putting it down and trying again later rather than forcing it, which can make both you and baby upset.![]()
• Ask for help. A lactation consultant can suggest some techniques to help get even the most resistant bottle-feeders to accept a bottle. They may check your infant’s mouth and tongue for any latch problems that could contribute to the difficulty, suggest the best bottle for your infant, troubleshoot any behavioral issues or offer alternate nutritive methods, such as cup- or syringe-feeding.
When to Wean Baby Off the Bottle
The American Academy of Pediatrics recommends parents stop offering bottles by 18 months due to tooth decay concern, but it’s smart to talk with your pediatrician about exactly when baby should wean from the bottle around the 9-month mark, O’Day says. “How and when to wean depends on how much table food baby is eating, any developmental concerns and your pediatrician’s assessment,” she says. Note, though, that cow’s milk shouldn’t be introduced until baby is 12 months old.
When baby is around 6 months old, offer a sippy cup or straw cup for water, O’Day says, since learning to drink from cups can help make the transition from bottles seamless.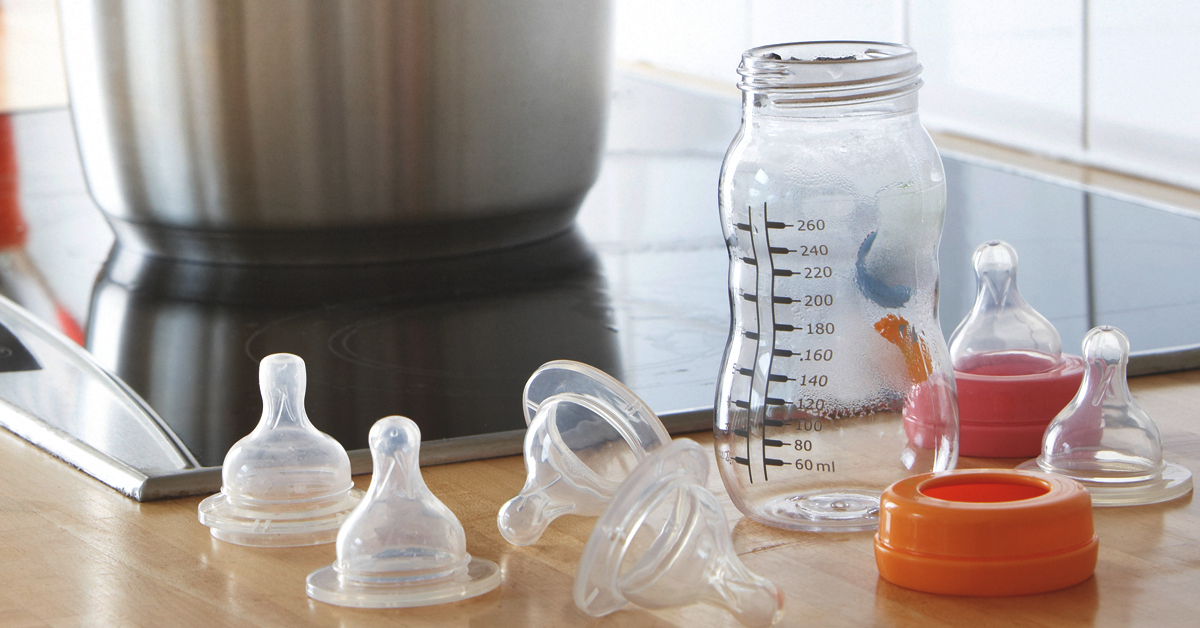 Some babies have no problem giving up the bottle, while others may require more time to make the transition, but looping in your pediatrician or lactation consultant can help make sure you’re all on the right track.
Whether you’re breastfeeding and offering the occasional bottle, combo-feeding or exclusively bottle-feeding, you might hit some bumps along your bottle-feeding journey. But there are ways to navigate through any problems that arise. If you’re struggling to find the best baby bottle for your child, need some pointers on how to bottle-feed a baby in an optimal position or encounter a full-on bottle strike, reach out to your pediatrician or lactation consultants for guidance.
Published August 2018
Please note: The Bump and the materials and information it contains are not intended to, and do not constitute, medical or other health advice or diagnosis and should not be used as such. You should always consult with a qualified physician or health professional about your specific circumstances.
Plus, more from The Bump:
14 Best Bottles for Every Feeding Need
Pumping 101: How to Pump Breast Milk
The Best Baby Formulas for Your Child’s Needs
Organizing bottle feeding | Philips
In the early days, mothers try to keep their baby safe and carefully monitor the cleanliness and sterility of everything that can get into the baby's hands or mouth. This is due to the fact that the child's immune system is almost not formed, and the body is vulnerable to external bacteria. That is why the process of sterilizing children's dishes cannot be neglected.
Every meal of the child should be held in accordance with the rules of hygiene, from washing hands and breasts, and ending with the sterilization of accessories necessary for feeding during artificial feeding. In terms of preparation, artificial feeding is always more time-consuming: before each feeding, clean dishes must be sterilized to remove all bacteria from the surface. It takes time to sterilize and dilute the mixture, and the baby can become very hungry and express his impatience by screaming.
Everything that comes into contact with the baby's food or mouth must be sterile clean: from the spoon used to apply formula to the bottle, nipple and breast pump if the baby is fed with expressed milk.
How to sterilize baby dishes
Today, every mother can choose the most convenient way to sterilize bottles.
Time-tested sterilization method used by our mothers, of course boiling . It is better to immediately allocate a separate pan of a suitable volume for boiling bottles and baby supplies, which will continue to be used only for sterilization. The volume of the pan should contain all the accessories, including the breast pump, if you use one.
Boiling time is at least 10 minutes: during this time, all bacteria are destroyed. However, too high temperatures can have a negative effect on the teat, and it quickly becomes unusable.
A more delicate method for children's dishes is to sterilize with a steam sterilizer. In addition, steam sterilizers are easy to use due to their compact dimensions. They are easy to use: water is poured into a special container, the mode is set and after 6 minutes you have completely sterilized dishes. Modern Philips Avent sterilizers destroy 99.9% of harmful microorganisms.
Interesting mobile versions of steam sterilizers are microwave sterilizers and sterilization bags. They can come in handy on the road if you need to quickly sterilize baby dishes or pacifiers that have fallen on the floor.
Second step: Milk heating and formula dilution
Expressed milk
First of all, the milk must be heated properly. The consistency of milk is such that it separates into fractions, so it must be shaken before use. There are several ways to heat milk.
Water bath
A container of water is heated on the stove, after which a bottle of water is placed in it.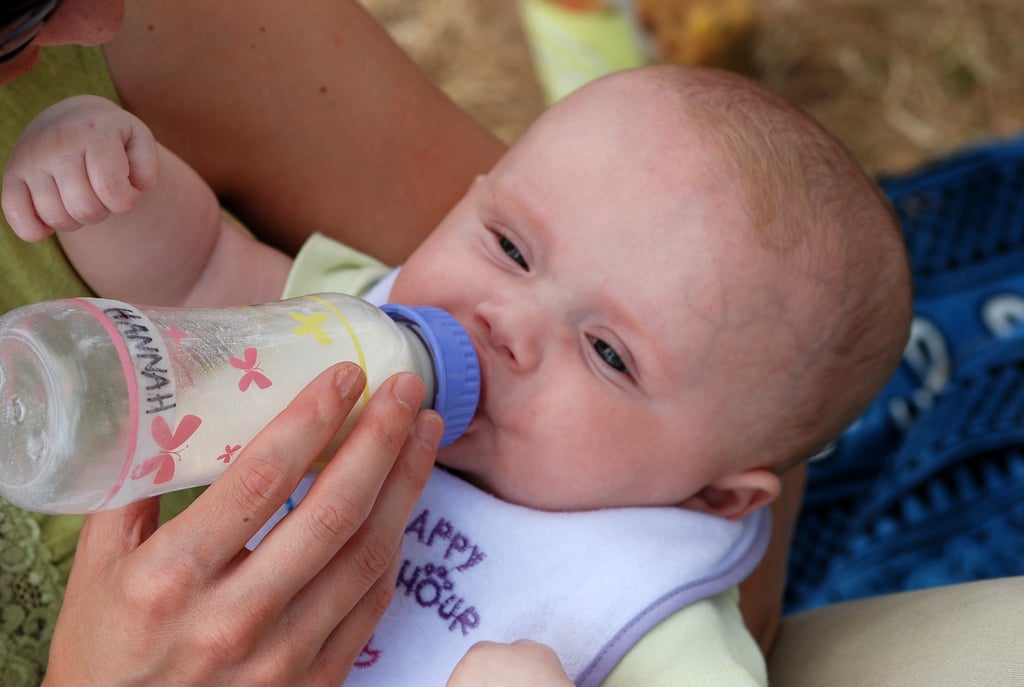
Advantages:
- The most inexpensive way
- Milk is quickly heated by
Disadvantages:
- It is very easy to overheat milk
- is not convenient on trips
- bottles placed in a water bath, should withstand boiling and do not contain bispenol. A
Hot water
The bottle is placed under the hot water tap or lowered into a container of hot water.
Advantages:
- The method does not require financial costs
- The convenient method for defrosting
Disadvantages
- to bring the mixture to the required temperature, you need a lot of time
9000 BUTS INDECTION
BUTS milk is placed in a special heater, after which the heating mode is set.
Advantages
- Milk warms up evenly, the overheating points of
- are quickly heated
- It is impossible to overheat the bottle, so all the beneficial substances
Disocations 9,0003
- The purchase of the heater requires financial costs
- for food
microwave oven
The bottle or container with milk is placed in the microwave oven. It is necessary to make sure that the container is made of a material that can be heated in a microwave oven. Preheat on low or medium power.
Advantages
- Fast heating method
Disadvantages
- Microwave food is heated unevenly. For this reason, pediatricians consider this method unsafe, since there is a risk of burning the throat.
Feeding formula
Read the instructions carefully before preparing the formula, which must be followed. The mixture must be fresh: you can not use the leftover mixture from the previous feeding, so prepare a new batch each time.
Boil the water and let it cool. Too hot water can dissolve the mixture unevenly, and form lumps, which then clog the nipple. Each package has recommendations for serving size according to the age of the child. Try not to violate the recommendations, do not report the mixture to make the portion more satisfying.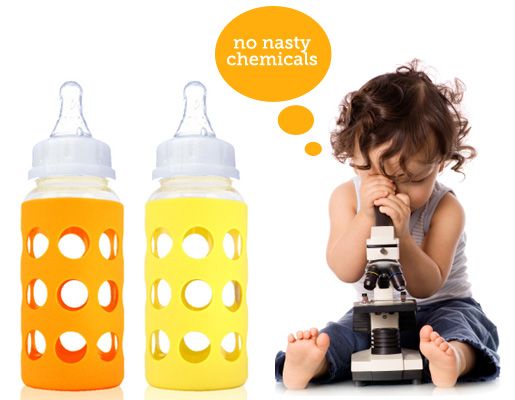 There is a risk that too thick a mixture will cause extreme thirst and dehydration.
Third step: Comfortable nursing position
The position for bottle feeding does not differ fundamentally from the position for breastfeeding. When you hold the baby in your arms, make sure that the head is raised so that it will be convenient for him to swallow. If the head is turned to the side or back, it will be difficult for him to swallow, he may choke on food. Pediatricians insist on this position of the child during bottle feeding, because the baby feels the warmth and smell of the mother, establishes close emotional contact with her. For a baby, such psychological contact is vital: he learns to trust his mother.
Do not hold the bottle upright during feeding, especially if the opening in the bottle is too large: due to the strong pressure of the liquid, the baby may choke. The correct position of the bottle: at an angle of 30-45 degrees, when the nipple is constantly filled with liquid. If it is always filled with liquid, then this reduces the chances that the child will swallow air and develop colic.
How to bottle feed your baby
There is no better food for a newborn baby than breast milk. But sometimes breastfeeding is contraindicated for the mother.
Website editor
Tags:
Children
newborns
Philips
There is no better food for a newborn baby than breast milk. But sometimes breastfeeding is contraindicated for the mother.
Do not self-medicate! In our articles, we collect the latest scientific data and the opinions of authoritative health experts. But remember: only a doctor can diagnose and prescribe treatment.
Mother's milk has an optimal composition, it contains substances that help the baby fight infections and strengthen his immunity.
However, unfortunately, there are often situations in which it is impossible to continue breastfeeding:
- mother's illness when she has to take medicines that affect the quality of breast milk;
- mother's going to work;
- lack of breast milk.
Depending on the situation, breast milk can be expressed and bottle fed to the baby; transfer the baby to artificial feeding; alternate breast milk feeding with bottle feeding. In each of these cases, the mother is faced with the question of how to feed the baby from a bottle.
Bottle feeding technique
To ensure that the baby does not experience discomfort during bottle feeding, some basic rules must be observed:
ADVERTISING - CONTINUED BELOW
- Try to give your baby warm milk or formula - most babies prefer to be fed warm. To check the temperature of the mixture, drop it on the inner surface of your wrist - the feeling should be comfortable.
- If you are formula feeding your baby, be sure to check the expiration date on the box and carefully follow the instructions for preparation.
- For bottle feeding, choose a position that is comfortable for both you and your baby.
- The pacifier should be pressed lightly against the baby's lower lip so that he opens his mouth wide enough. Make sure that the tongue is located below, under the nipple. If the baby's lips close around the wide part of the nipple, closer to the base, it means that he took the nipple correctly.
- Do not rush your child and do not force him to eat the whole portion: some children eat quickly, others slowly, and some like to eat with breaks. Be patient.
- Always hold the bottle in a tilted position: this helps the nipple fill with milk or formula, which means that the baby will not swallow air. Make sure that the nipple does not become clogged or flattened. If this happens, change the pacifier.
- After the child has eaten, pour out the rest of the mixture so as not to provoke a bacterial infection.
- After eating, lightly pat your baby on the back to help expel the swallowed air.
We hope this bottle feeding technique helps you and your baby.
Choosing a bottle
The first thing to consider is the material the bottle is made of. Glass bottles tend to be heavier than plastic bottles and break easily. But they have a longer service life, while plastic bottles can become cloudy or crack quite quickly. But you can’t do without a plastic bottle on a walk and when the baby begins to learn to hold it on his own.
Another important nuance - when choosing a bottle, be sure to pay attention to the presence of clear divisions that will help you determine the volume of breast milk or formula.
Most baby bottles from well-known manufacturers are equipped with anti-colic protection. They are equipped with various mechanisms that prevent air from entering the baby's stomach and thereby reduce the likelihood of colic.
Philips AVENT bottles have a unique one-piece valve in the nipple skirt that lets air in and prevents a vacuum. Such a valve is easy to clean and does not break, and due to the lack of vacuum, the baby can suck in his usual rhythm, which brings bottle feeding closer to breastfeeding.
For bottles Dr. Browns has developed a special ventilation system that prevents the air entering the bottle from contacting the liquid. As the baby sucks and the liquid decreases, the bottle fills with air and no vacuum occurs.
The presence of a special valve in bottles Nuby also does not allow air to mix with formula or milk, thereby relieving the child of stomach cramps.
Just as important is choosing the right pacifier. Most nipples today are made from latex or silicone. Silicone teats are odorless, more durable and easy to disinfect. The second important point when choosing a nipple is the intensity of the flow. For the smallest, it is better to choose a nipple with one or two small holes, for an older child - with several holes.
Some manufacturers offer large-diameter nipples that mimic the shape of a woman's breasts to prevent breast rejection during mixed feeding.
Bottle and nipple care
If your baby is less than a year old, it is important to practice good hygiene when bottle feeding. The immune system of young children is still weak enough to successfully resist all infections. If you do not pay enough attention to the handling of the bottle, pacifier and other feeding items, the baby may experience indigestion or diarrhea.
Wash items thoroughly with warm soapy water after each feeding and sterilize before the next feeding to remove all bacteria from the surface. For sterilization, it is best to use bottled or clean filtered water - this will help to avoid the appearance of plaque on the dishes. One of three sterilization methods can be used:
1. Boiling. Items that need to be sterilized should be placed in a saucepan, filled with water and placed on the stove. Boil 5 minutes.
2. Microwave processing. Place the items in a glass saucepan, fill with water, cover with a lid and put in the microwave for 5-8 minutes.
3. Treatment in a special bottle sterilizer.
Advice from Leyla Namazova-Baranova, Doctor of Medical Sciences, Professor of MMA named after. Sechenov., Director of the Research Institute of Preventive Pediatrics and Rehabilitation Treatment, Philips AVENT expert
1. Clean and sterilize all parts before each use.
2. Do not use abrasive cleaners or antibacterial cleaners on bottles and teats.
3. While inspecting the nipple, pull it in all directions to make sure it is intact.
4. Throw away bottles and nipples at the first sign of damage, wear and scratches.
5. Change nipples and cups every 3 months.
6. Do not heat milk in a microwave oven, as uneven heating may occur, which may cause burns to the baby during bottle feeding.