Baby food calendar template
Baby Meal Planner - Etsy.de
Etsy is no longer supporting older versions of your web browser in order to ensure that user data remains secure. Please update to the latest version.
Take full advantage of our site features by enabling JavaScript.
Find something memorable, join a community doing good.
(288 relevant results)
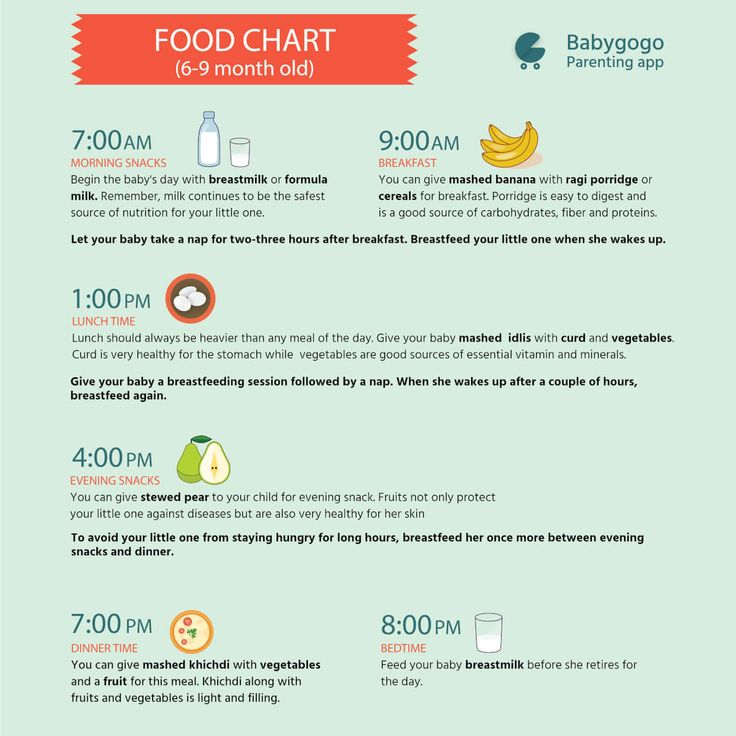
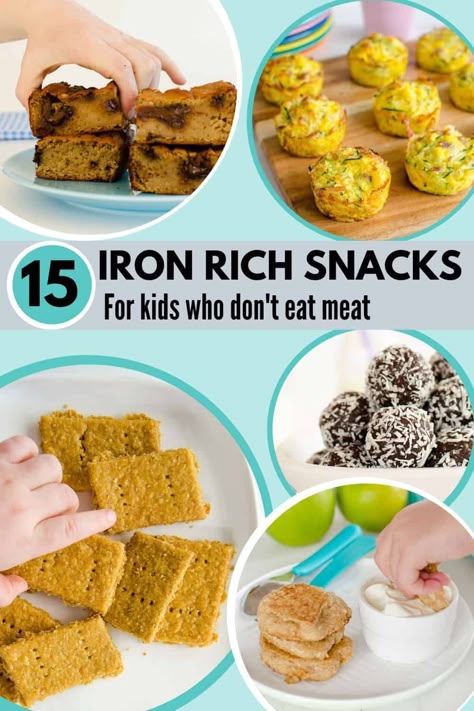
6-9 Month Old Baby Food Puree Menu (FREE Printable)
Home » Recipes by Age » 6-9 Months » 6-9 Month Old Baby Food Puree Menu (FREE Printable)
This 6-9 Month Baby Food Menu brings new and exciting ideas to the table — literally! Know what to feed your baby for breakfast, lunch, and dinner using Stage 1 and Stage 2 baby foods. Plus, there is a free printable menu that you can use to map out your baby’s meals for the entire week!
Medically reviewed and co-written by Jamie Johnson, Registered Dietitian Nutritionist (RDN), and Lauren Braaten, Pediatric Occupational Therapist (OT).
6-9 Months Baby Food MenuAre you looking to plan your baby’s meals out for the week?
Then this meal plan is for you!
This easy-to-use meal plan guide featuring Stage 1 and Stage 2 Baby Food purees has month-to-month meal suggestions for your baby’s breakfast, lunch, and dinner.
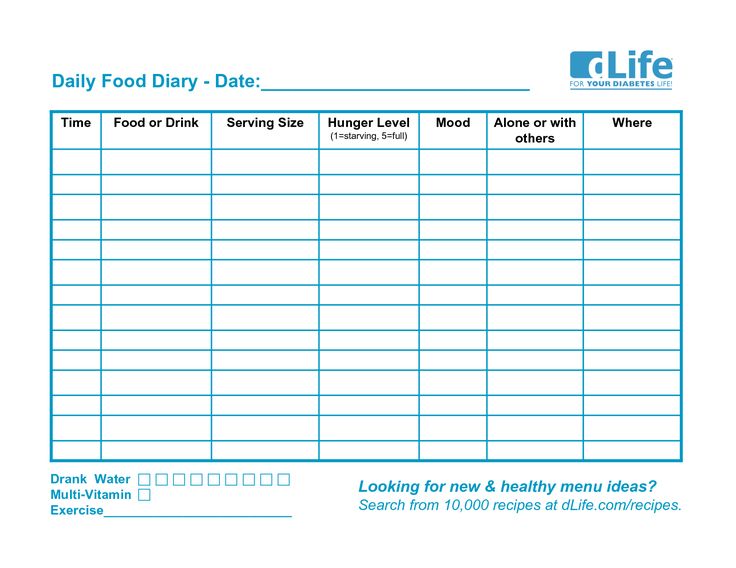
I even included a free printable for you to print and fill out with what your baby will eat at each meal. It’s a convenient tool for use at home or to be sent to your daycare, grandparents, or caregiver’s house.
Is it your first time making homemade baby food? If you answered yes, then I suggest you start this journey by reading my in-depth Guide on How to Make Homemade Baby Food. The detailed article goes over all the essential information such as the best cooking tools to have on hand, safe storage, knowing when your baby is ready for solids, introducing purees, making the best first foods for baby, and more! You can also check out my best-selling cookbook for even more information and recipes.
How to Make Baby Food
Watch this video to see how easy it is to make your own baby food!
Frequently Asked Questions
When can baby eat purees?
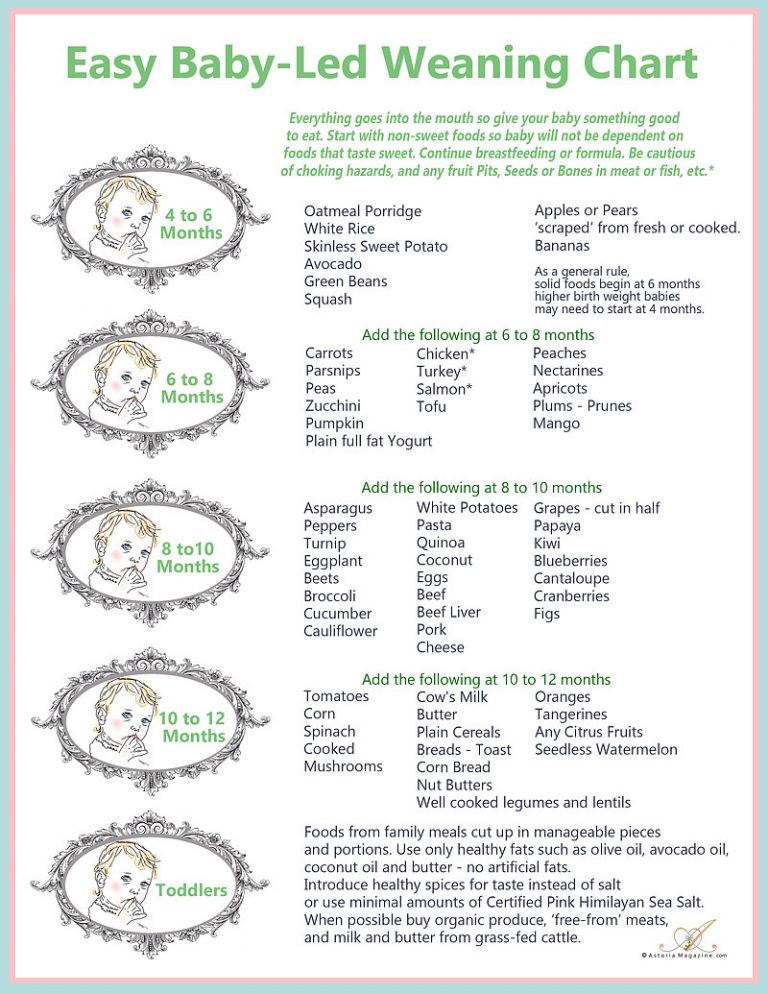
When a baby can start on solids is determined by their own rate of development, which generally comes between 4-6 months of age. Some of the developmental milestones babies need to reach in order to start solids include: if your baby has solid control of their head and neck, if your baby has doubled in weight, and if your baby is reaching for or opening their mouth when you eat (see my guide here). Before you start baby on purees, you should consult with your pediatrician to make sure your child is developmentally ready.
How many ounces of purees should baby eat?
By the time baby is ready for finger foods, she should be eating around 4 ounces of food at each meal. If it is more or less than this, do not worry. Babies get most of their nutrition from formula or breast milk until they turn 1 year old.
Does baby need teeth to eat?
The question of how babies can chew foods without teeth makes any parent scratch their heads! But in reality, we all chew food with our back molars, not our front teeth, which baby doesn’t get until 18-22 months of age. Good thing babies have super tough and strong gums, which they use to mash, gnaw and chew foods. Baby’s gums are better at chewing food than you would think, and your baby will be able to chew more foods the older they get, even without their molars.
Helpful ToolsThese tools will make it a lot easier to make homemade baby food purees.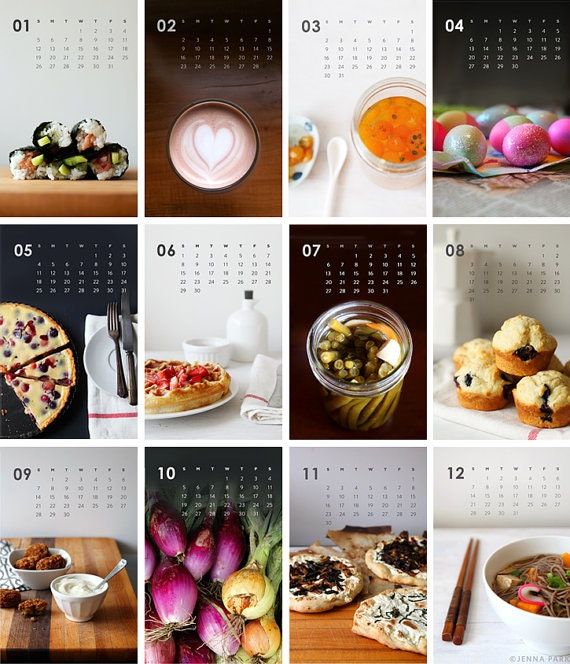 For more of my favorite kitchen tools make sure to check out my shop.
- blender or food processor
- baking sheet
- saucepans
- knives
- veggie peeler
- spatula
- freezer tray
- storage containers for fridge
- stasher bag
- reusable pouches
- baby food maker
- highchair
- suction bowl or baby bowl
- baby spoon
- open lid cup
- bib with catch pocket
- sleeved bib
- splat mat to cover the floor
2-3 Meals a Day
Aim to serve your baby 2 to 3 meals a day, and then add 2 more meals as your baby gets more comfortable with the eating process.
Start with a Small PortionStart by feeding your baby 1-2 ounces of a puree, and if they want more food, then, by all means, offer them more. However, if they turn their heads or clamp their mouths shut, take the food away and try again later.
You don’t want to try out new food or have mealtime when your baby is hungry. It’s best to feed your baby solid foods when they already had a little breastmilk or formula in their tummies but not when they’re too full either.
Breastmilk & FormulaBabies will continue to get most of their calories from breastmilk or formula until around one year of age. So don’t be stressed if it takes a little more time for your baby to develop their new eating skills. At this stage, feeding your baby solids is mostly for exposure and practice.
Serve a Wide Range of FoodsIt’s significant to serve babies assorted foods. Aim for lots of colors, textures, and flavors. Exposing your baby to various foods now will help them be comfortable with a wide range of foods down the road and help prevent picky eating.
ExposureIt may take your baby up to 10 times of trying a certain recipe to decide if they like it or not. So remember to keep offering them that particular kind of food, even if they push it away the first 9 times you offer it.
Some days your baby might eat everything you put in front of them, and other days, they might refuse to open their mouths. As challenging as it may be, you just have to increase your patience with them and follow their lead. Remember that each time you sit down for a meal together is a chance to work on new skills — how to sit on a high chair, hold (and drop) a spoon, reach out, grab a sippy cup, etc. So nothing is lost even if they don’t eat a single bite of food; they are still learning.
Get your FREE Printable HERE!Download
7 Month Menu OptionsAt 7 months, your baby’s expanded palate can probably tolerate thicker purees compared to last month. However, they should still be getting the majority of their calories from breastmilk or formula.
Breakfast- Roasted Banana + Cinnamon Puree
- Apple, Raspberry + Vanilla Puree
- Banana, Blueberry + Avocado Puree
- Full Fat Plain Yogurt mixed with Banana, Cherry + Beet Puree
- Spinach Avocado Oatmeal Breakfast Cereal
- Spinach + Apple Puree
- Blackberry + Kale + Apple Puree
- Sweet Corn, Squash + Apple Puree
- Blueberry Chickpea with Rosemary Puree
- Green Pea Hummus for Baby
- Roasted Root Veggies Puree served with Multi-Grain Probiotic Baby Cereal
- Broccoli + Asparagus Puree
- Mango + Kale Puree with Ginger
- Turkey, Corn + Zucchini Puree
- Oats, Spinach + Avocado Puree
At 9 months, your baby should be extremely comfortable with stage 2 purees and may start transitioning to stage 3 purees, which have soft chunks that babies can easily chew. By now, your baby should be eating from all of the food groups with 3 meals and 1-2 snacks a day, along with breastmilk or formula.
- Strawberry Quinoa Breakfast Cereal
- Blueberry Oatmeal for Baby
- Apple + Mint with Cottage Cheese
- Cherry, Banana + Raspberry Puree
- Spiced Pear Oat Puree
- Sweet Potato, Carrot, Cauliflower Puree with Chia Seeds
- Carrot, Corn + Pumpkin Puree
- Apple, Spinach + Pea Puree
- Superpower Green Puree
- Thai Chicken Puree with Mango
- Beef + Sweet Potato Puree with Thyme
- Sweet Potato, Beets + White Beans Puree (can be served chunky)
- Chunky Summer Veggie Pasta for Baby
- Peach Rice Pudding for Baby
- White Fish + Carrot + Leek Puree
Baby Menu PrintableDownload
DIY Advent calendar for the New Year 2022, templates with tasks for children
Hello!
The New Year will come in just a month and it's time to actively prepare for it! Toys are made for competitions in kindergartens and schools, crafts and garlands are glued.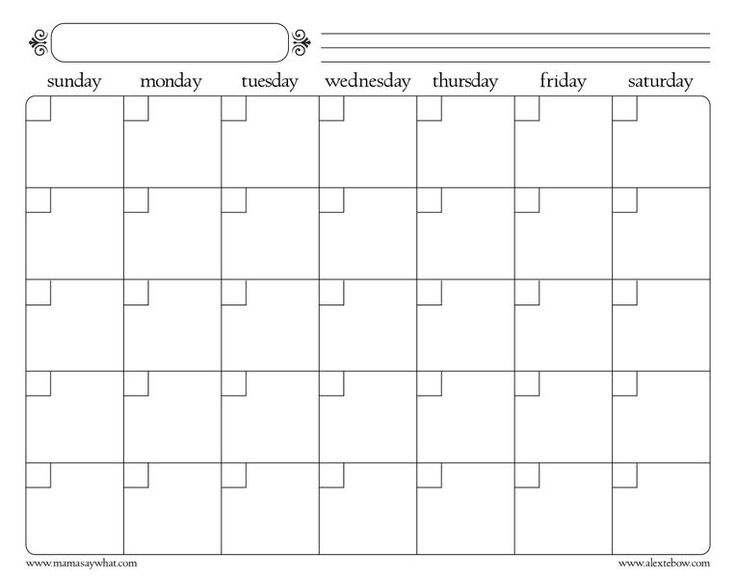 Santa Clauses, Christmas trees and snowmen are being made. Mothers are actively sewing New Year's costumes for matinees.
But this is not enough! I want to make the child an unforgettable expectation of the holiday! And advent calendars will help us with this. To be honest, I didn't quite understand them before. But it turned out to be cool stuff! The point is that the child receives daily New Year's tasks and small presents (it is possible without them).
You can read more about the calendar itself in free access on the Internet. I will not repeat. I will only note an important detail. In Europe, it is more often done before the 25th. It's two weeks before their Christmas. You can do for a month (the whole of December 31 days), two weeks, 7 days, 5 days and three days before the New Year.
For example, this year I managed to prepare assignments and gifts for the whole of December. However, a month is a long time, and not all children can wait. Look at your abilities and the nature of your child.
One thing for sure! It's never too late to make this idea come true! And positive emotions, joy and burning eyes of the child are provided to you.
I thank in advance all the craftswomen who did not hesitate to share their ideas and results of creativity with us mortals. You inspire us!
Contents
- DIY Advent calendar for the New Year made of cardboard for children from 5-7 years old
- Different ideas for a child from 2 years old with their own hands from improvised material
- How to make a boxed advent calendar for 9-10 year olds (templates and diagrams included)
- Quick Christmas tree calendar ideas
- Paper house calendar, house templates can be downloaded child
- Pockets for gifts made of felt and fabric
- Calendar made of bags and fabric (diagrams and patterns)
- Advent calendar ideas in a frame
- How to quickly and without a pattern make a calendar in the form of Santa Claus?
- Cup ideas
- Toilet paper rolls advent calendar
- Matchbox ideas
- Easy calendar made of paper envelopes for Christmas
- What can be put in a child's advent calendar?
- Tasks for every day
- Patterns of numbers
- Video on making an advent calendar in the form of a Christmas tree from a tree with your own hands
DIY Advent calendar for the New Year from cardboard for children from 5-7 years old
So, let's see what can be done with ordinary cardboard. I offer a step-by-step master class on making a house with surprises. This calendar is suitable for children over 5 years old. The thing is that the doors open with a surprise and you need to have internal discipline so as not to open them all at once.
It looks like such a craft as New Year's decor, do you agree?
So, your sizes and colors may vary. depends on how many days you decide to prepare a calendar.
But in any case you will need:
- cardboard box or sheets of cardboard,
- two-tone acrylic paint (blue and black),
- thermo gun and silicone rods for it,
- tasks on paper,
- gifts,
- decor in the form of ribbons, beads, shaggy wire, etc.,
- stationery knife,
- ruler,
- pencil.
First, cut out the two large parts of the house with the roof. I repeat that I do not give dimensions, you may have a completely different box. I have a side wall height of 30 cm, a width of 30 cm. A height in the middle to the tip of the roof is 40 cm.
Next, we need to cut out 2 sides from the same cardboard 3.5 cm wide and 30 cm high. wider than about 4.5 cm. The roof will protrude slightly above the craft.
Paint these pieces blue. You can take acrylic paint, or you can gouache. Let the blanks dry.
Take the front of the house. We mark the windows in which we will insert gifts. Their number depends on the number of days you have chosen.
Make windows of different lengths and heights, arched and opening up. it will be much more interesting that way.
Then we cut the shutters with a clerical knife so that the windows open outwards.
We paint both cardboard parts from the inside.
Next, we begin to assemble the calendar. Take the bottom and sides and use a hot glue gun and sticks to glue them to the base.
If desired, stiffeners can be made.![]()
Let me remind you that the painted sides go inside. We collect the roof.
Now decorate the front of the house with black acrylic paint. this will be the façade.
How the paint dries. With a white marker or white paint, select and draw each window.
A paper label must be glued to the wrong side of each shutter and door. To make it easier to open the door.
We decorate the workpiece.
We fold the prepared cards into four.
It is also better to put gifts in bags or wrap them in cling film so that they do not wake up.
Glue the task to the sweets and fix them on the back of the door near the window.
It turns out that the child will open the shutters with the date number. Take a gift and complete the task.
I think it's a very cool idea!
Similar options.
And so.
By the way, if you don't want to invent something by hand.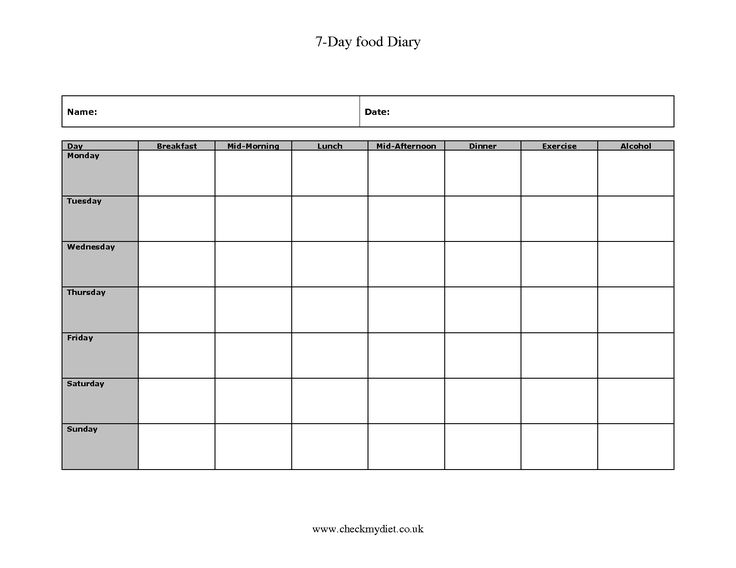 A similar opening calendar can simply be printed.
Stick on whatman paper and cut through the windows. Also cool! You can download and print this calendar from the link, there will also be tasks and assembly instructions.
Do-it-yourself ideas for a child from 2 years old from improvised material
Now let's see what can be made from improvised material. Ideas will pleasantly surprise you - believe me.
Let's start with the fact that you can buy holiday plastic or paper bags. Put gifts and tasks in them and number them.
You can hang them randomly or arrange them in the form of a Christmas tree.
The numbers were glued from children's toy numbers on magnets.
Someone just decorate jars.
Suitable for baby food containers.
By the way, this idea is good for those who have small children! From a year to three. Inside, you can put small and different texture objects for the development of fine motor skills and sensations.
Open new jars every day and give the child new sensations in the knowledge of the world.
Here's a tin can idea, but be careful here. Carefully process the edges so that the baby does not cut himself.
Now for a simple paper roll idea.
Cut out strips of the same width and length, but in different colors. Glue the number and task. We turn the edge with the task into a tube.
And tie it with a ribbon.
Below is an idea for original and creative.
All you need is a cake tin. The finished calendar looks like this!
The meaning is that a present is placed inside each cell. Which is closed with a paper plug with a serial number.
The process of preparation looks like this.
This is what a child will see when he opens the first of December.
Another similar option.
When time and materials are short, hang a paper balloon garland on the wall.
On the wrong side of the job.
Here is a creative calendar made from empty yogurt jars. Before the New Year, manufacturers launch a series with a winter design.
We take:
- 31 jars,
- PVA glue,
- napkins,
- rope,
- scissors,
- white,
- masking tape or self-adhesive,
- brush.
I won't name the brand. We will wash all the jars.
Next we do decoupage. We paint the jars with whitewash and let dry. We tear off the bottom layer from the napkin. Lubricate the jar with glue and fix the upper part of the napkin with a pattern.
Next, put tasks with gifts inside. Cover the neckline with masking tape. And then it's up to your imagination. You can hang the jars on a rope, as in the photo above.
And here is an idea from kinders.
Candy variant. Containers for sauces or containers from shoe covers are inserted inside.
Who is not afraid of noise, tasks can be put into a balloon.
And create a composition.
Homemade version of rope, paper tubes and clothespins (paper clips).
Stretching from mittens also looks unusual.
Similar to socks.
It is not necessary to make all bags the same size.
The question often arises of how to hang a calendar. Here's an idea for a ladder.
Pouches on the door.
Wonderful candy fabric idea.
And if it's not so interesting, then make a calendar in the form of a composition, like here.
Here's another idea.
For those who have little time, advice: print out your child's favorite characters. And between them glue cotton pads with tasks.
It is not necessary to make sweet gifts, you can do without them. The calendar anyway already creates a New Year's atmosphere of a holiday and a premonition of a miracle.![]()
How to make a school advent calendar out of boxes 9-10 years (templates and diagrams are attached)
Now let's see a master class on creating three-dimensional calendars from boxes. They usually take up a lot of space. But they do look very interesting.
The first idea is a Christmas tree made of boxes.
Take:
- 32 boxes (for symmetry),
- decor,
- glue,
- printed figures,
- stand cardboard,
- gifts.
We will make boxes according to this template. It is desirable that the sides of the blanks are 5*5 cm.
You can also use this template, it also fits.
So, cut out patterns from different colors of paper. So it will be more interesting.
Fold them along the lines.
Cut out a stand from cardboard. It can be of any shape, for example round.
Next, randomly glue rows of blanks. You need to glue them so that the box opens on you. And a gift could be pulled out of it.
We form the rows as it is written in the photo. 10 parts go to the first row, 8 to the second, then 6, 4.3 and 1.
It remains to decorate the Christmas tree with balls, tinsel and other New Year's decor.
Paste the numbers of the month and enjoy the resulting beauty.
Here is a version of the calendar in the form of a cake.
Another option.
Several schemes for such boxes.
Smaller size.
You can simply roll different sizes of parts. And just lay them out on a table or floor.
How to hang the blanks.
Idea in the form of a house for inspiration.
More options in the form of a Christmas tree, Santa Claus.
Very beautiful composition of houses.
Idea how to arrange the boxes in the frame.
Simple decoration of blanks from cotton pads, paper napkins.
Beautifully arranged gifts in the form of a wreath.
In general, do not limit yourself to fantasy!
Christmas tree templates from printed boxes download here in full size. A pdf file will be released. It is adapted to the size of an A4 sheet.
Quick Christmas Tree Calendar Ideas
Another quick Christmas tree idea for little ones. Only small children are unlikely to be able to count every day. Therefore, it is better for them to make a New Year's Eve surprise of five or three days.
A similar idea is to cut out the base of paper or felt in the shape of a Christmas tree. Numbers from 1 to 31 are written on it. Next, Christmas toys are cut out of paper. Tasks are written on the reverse side.
And Christmas balls cover the numbers.
A child opens a balloon every day and completes a task.
You can print these pictures of Christmas decorations.
You can attach them with double-sided tape or with clothespins, as in this photo.
You can use this template as the basis for the Christmas tree.
In general, the idea is simple and easy to implement.
Paper calendar in the form of a house, house templates can be downloaded
So, there is a wonderful idea in the form of a composition of houses. This option looks amazing. Below are the design options.
Or this.
Reduced versions of houses are given here.
Windows are also cut out near the templates, and a halogen candle is placed inside. It turns out a flashlight.
Here is a template for a high-rise building.
You can get creative and color the templates with markers or markers.
Below are the house options. You can download them in full from this link.
Or just make a base-house, and filling inside.
Similar Christmas clothespins are sold in many hobby and art stores.
Bag and bag ideas for baby
But the easiest thing, probably, is to roll a bag or a small bag. Therefore, below are some simple ideas.
You don't even have to hang them, but put them nicely in a box.
Here they are hung on a stick.
We used a hanger for hanging!
It looks very nice when the bags are hung at different heights.
We use natural material.
We alternate the bag with toys.
Options for alternating different shapes of boxes and bags.
They hung it in the form of a cone - a symbolic Christmas tree turned out.
Again hung on clothespins. If desired, you can return the bag back so as not to spoil the composition.
To design and create such an option, it is better to take kraft paper or packaging paper.
Felt and fabric gift pockets
Of course, our needlewomen love felt. This handy material is great for crafts. And suitable for a colorful calendar in the form of a deer.
Closer view. that felt Christmas toys are inserted into the pockets. You can put gifts, tasks or wishes.
Here is the deer pattern.
Scheme with toys.
I also suggest that you familiarize yourself with other felt ideas.
Boots and houses.
Just hanging with pockets and Christmas decor.
The disadvantage of pockets is that the child can see what is stored inside.
But nevertheless, the beauty and availability of such advent calendars is captivating.
Of course, the pockets can be sewn on completely or glued with Velcro, and then no one will know what is hidden inside.
Use Christmas colors: red, white, green and blue!
Other fabric options such as fleece and ribbons can be added to the felt.
Here are some more hanging ideas.
Photo inserted here.
Calendar in the form of a garland of stars.
Or Christmas trees.
Idea with Father Frost or Santa Claus.
Snowman fleece.
So the child takes out something interesting from his pockets. I don't think it will stop at one. Most likely everyone will watch.
But it's up to you, maybe this is the only option that suits you.
Calendar of bags and fabric (schemes and patterns)
If you have time and desire, sew fabric bags. By the way, they can then be used on the farm. They look elegant and gifts are more environmentally friendly. Most often, canvas, satin, calico are taken for them. in general, you can take any cotton.
So, below are detailed diagrams with sewing instructions.
Description.
Here is a pouch with a round bottom.
Here are options for using different color schemes.
Red elegant tones immediately create a festive atmosphere.
But gentle pastel shades also look beautiful, take a look.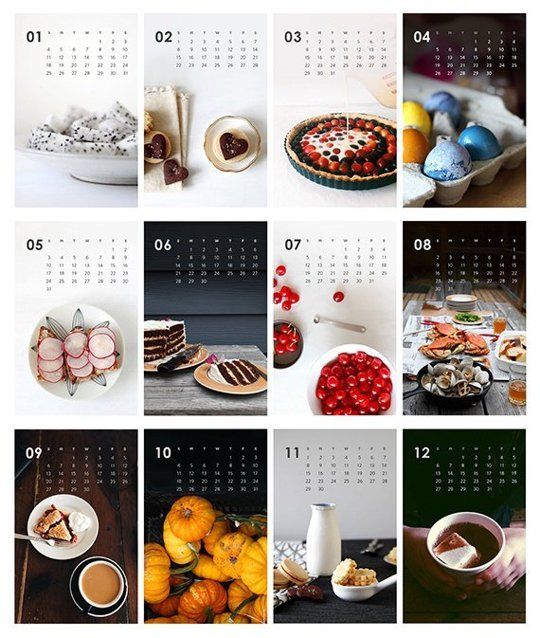
Canvas bags also have a stylish look.
See how they came up with hanging gifts. On pins!
Decorate the bags with embroidery, felt or markers.
Framed advent calendar ideas
So, for my calendar, I chose the idea of design in a frame. We just had one 40 * 50 format.
I came up with the idea to make it only on November 30 at night, then there was not much time to decorate it, so I used very improvised materials. And here's what happened.
I put a green cloth in the frame. I wrapped the frame with a green ribbon on top, fixing the sides with double-sided tape.
I pasted gifts on the same double-sided adhesive tape. These envelopes themselves are made from paper wrapping paper. I cut out 31 squares from it with sides of 10 cm. I wrote wishes inside. I put the presents in, rolled them into a tube and fixed them with a stapler on both sides.
Attached to the tape with double-sided tape.
But if you have more time than I did, here are some ideas.
Still beautiful.
I think. that this is one of the most convenient design options. After all, then the calendar has boundaries, and it is not necessary to mount it on the wall, you can put it against the wall.
How quickly and without a pattern to make a calendar in the form of Santa Claus?
Now let's make bags in the shape of Santa Claus. This is how beauties will turn out.
Polka dot pattern.
One more.
Printable numbers.
A more simplified version of the calendar.
Take this scheme.
Glue the number and fold.
Numeric options
You can also just print Frost's head and cover the numbers with cotton wool.
Or use a cutting beard. View from the front.
We glue the wrong side with wishes.
It is also possible to have a beard for fewer days, eg a week.
Or 10.
Here's another option.
Who needs an idea with a beard, catch it.
Santa Claus.
Black and white pattern.
Here are some very simple pouches.
These templates are suitable for this.
More templates can also be downloaded in pdf format.
Cup ideas
I also liked the cup ideas. This is how people's imagination works.
Look, the neck of the cups is sealed with a napkin or tissue paper.
The photo shows the order of operations.
Hanging mobile calendar.
Circles were cut out of corrugated paper, wider than the neck of the glass.
The bottom of the blanks was pierced and the thread was pulled out. We put a gift inside and tighten the neck with a paper circle.
Or make ice cubes out of them.
Arranged cups in the form of a Christmas tree.
They didn’t even bother here, they just carefully attached them in a row.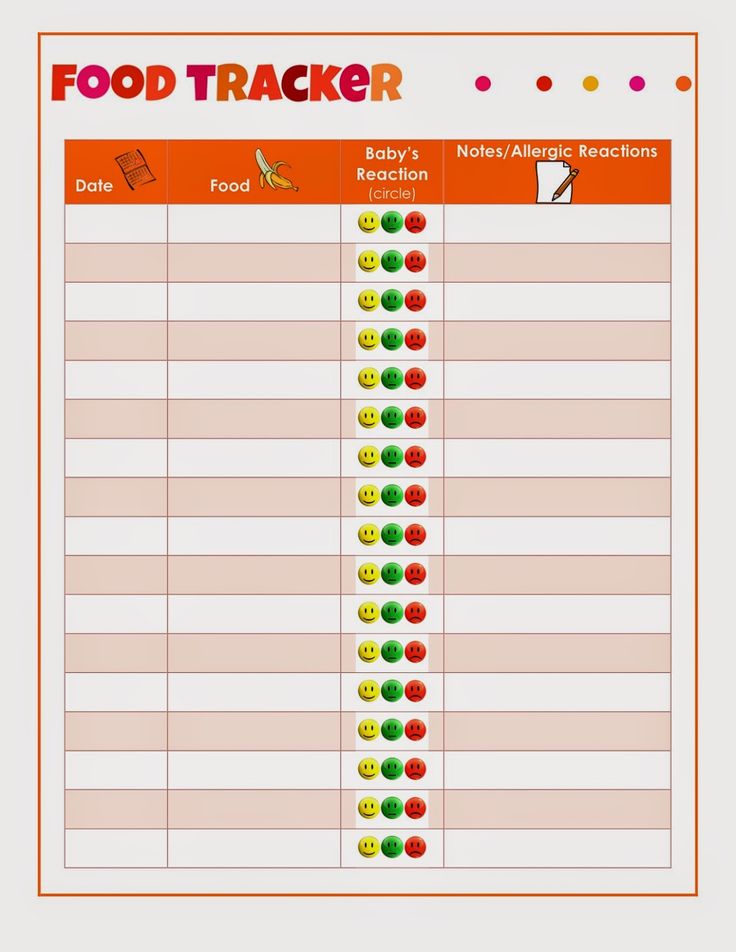
And so that the filling was not visible, they covered the top with gauze and cotton.
Advent calendar from toilet paper rolls
Let's make a similar house.
Take:
- 25 bushings,
- cardboard,
- paint,
- tissue paper,
- cotton pads,
- glue,
- stationery knife.
Cut the sleeve in half.
We print the numbers on papyrus paper.
Glue the sleeve to the cardboard.
Cut out the bottom in a circle.
Fill the tubes with sweets and cover with paper.
We set the sleeves and measure the size of the cardboard so that all the sleeves fit. Cut out holes for them.
Glue the bushings to the wrong side and install the stiffeners.
What it looks like.
We paint the upper part in any color.
Glue both sides.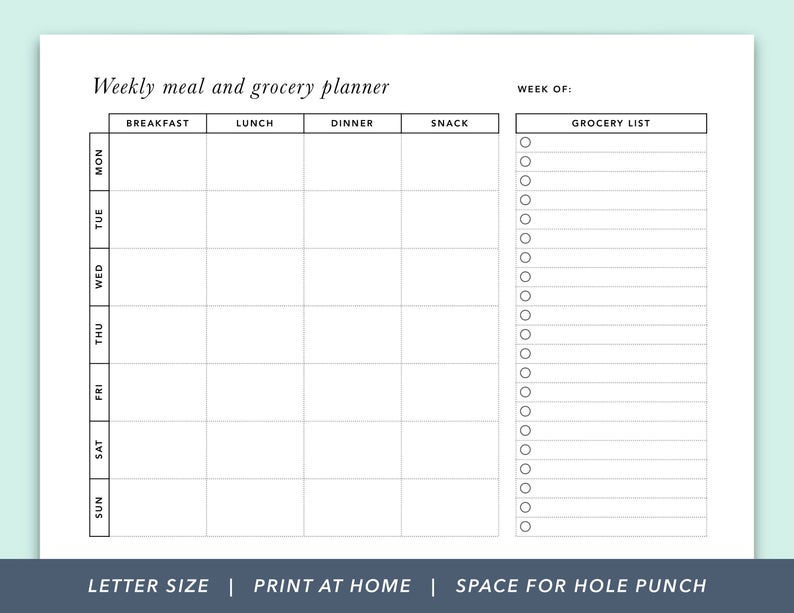
Cut out a ring from a cotton pad and put it on the sleeve. So we close the slices.
For logs, cut out circles from cardboard. We paint them. And we simulate snow from a cotton pad.
Mark the boards with a marker and glue the “logs”.
We pierce the paper and take out the present.
You can make it easier and glue the bushings together.
It is not necessary to take the same sides.
Cover with decorative paper.
Shown here is a version of the calendar made from herringbone bushings.
Let's take a closer look at the whole process below.
Beauty!
I'll tell you more about how to make a similar Christmas tree.
Sleeves can be cut in half. You can take whole. Paint them green on the outside. I have acrylic paint.
Then, after drying, glue them together to form a Christmas tree.
Apply one side to whatman paper and trace the back side. Cut and paste.
Now you need to fill in all the cells.
We close them with numbers.
You can glue them randomly.
Or build a house.
Create Christmas characters.
Cover with decorative paper and roll into a box.
Like here.
Make a circle of candy. Also, by the way, an interesting idea.
Paper towel rolls are more suitable for her.
Matchbox ideas
Matchbox calendars are also interesting. Moreover, the boxes are now very expensive.
Here is the first idea to repeat.
We take wrapping paper and 31 boxes.
We stick a number on each of them.
And distribute on the basis. Inside we put sweets and a task.
The second idea is to make a chest of drawers out of boxes.
To do this, glue them together. It just won’t work out for 31 days, because the craft should be even .. Do it before the 30th. After all, the 31st is always a holiday.
We sign them on the front side.
Cover with beautiful paper.
We decorate and fill. Here's what happens with this technique.
Another option.
Scrapbook style variation.
The third idea. We glue the boxes of matches into a similar box.
To do this, you need to expand them as in the pictures. Here you need 24 boxes.
Or just place them in a transparent vase.
Pyramid can be glued together.
Create cute owls with gifts and tasks.
The real sizes of owls can be downloaded here.
Here is the description and instructions.
How to download the blanks and glue the matchbox with it.
It is better to stick them on double-sided tape.
Easy Christmas Paper Envelope Calendar
Also consider using Advent envelopes. For example, in the photo below, ordinary postal envelopes were bought. In each of them there are tasks for two days. The child has already done his bit and decorated them)))
Envelopes, rope and clothespins are classics.
Face envelope ideas.
Let's take a closer look.
Another option.
You can also think that the child will receive a task from Santa Claus every day.
There are also commercial calendars with tasks.
What can I put in my child's advent calendar?
So, briefly, what to put inside for a child. Most often, these are small sweets. We put Fructella, gummy bears and pieces of quality chocolate.
Also add MMDs, Tick Tock and vitamins. Put ChocoPie and cookies.
But in order not to provoke sweet affection, replace deliciousness with usefulness. For girls: hairpins, elastic bands.
Also suitable are stickers, small coloring books (I printed them myself), puzzles, stamps, magnets, photographs, etc.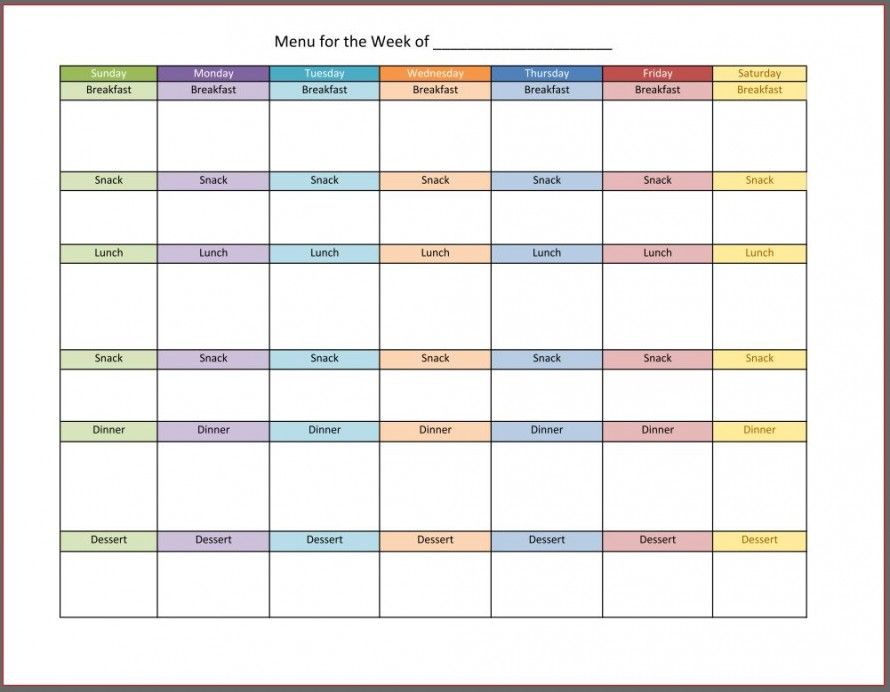
Gifts are selected according to the preferences of each child separately.
Tasks for every day
So, the question still arises what tasks to write to the child.
For example, you can print pictures like this.
Or just a to-do list.
Here are some printable sheets. You can download them from this link in full size in pdf format.
You can write riddles. If you want the baby to make a craft, you can already prepare everything for this and put it in an envelope.
There are a lot of ideas.
Patterns of numbers
For convenience, I give separately options for patterns of numbers. You can save them to your computer and print. Very comfortably.
Choose from templates to suit your design.
Next option.
A more classic idea.
Without some numbers.
With cute multi-size designs.
Also clear design.