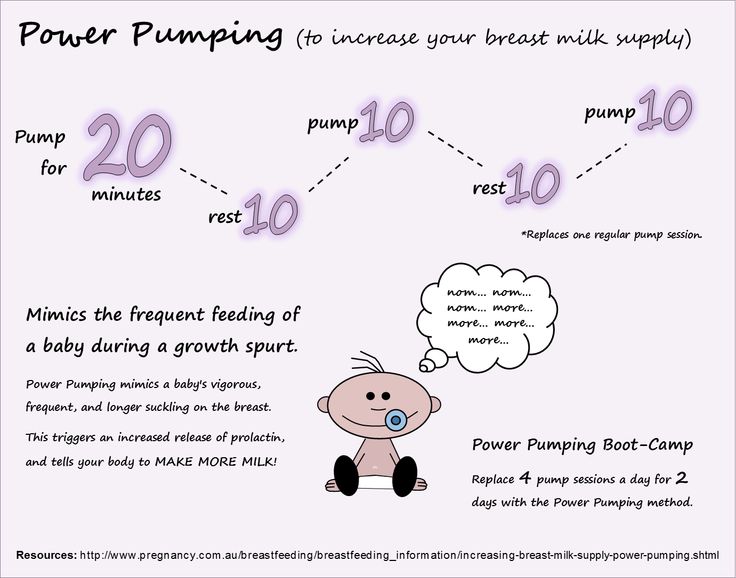
Baby food jar santa
Pre-K Fun
Santa Misc. Ideas & Links
So Be Good for Goodness' Sake
Use this interactive display to help with
classroom management during the holidays.
To begin, program a board or sheet of tag board as below... Each
day that
a child's behavior is acceptable, invite her to sign her name on the
board.
Dear Santa,
I've been good!
Love,
____________
Special Visitor
(Photo submitted by Shell)
Invite someone (a friend, family member, neighbor, or someone that
one of the parents may know)
to dress up as Santa for your class Christmas party.
Encourage the kiddos to go up and sit on
Santa's lap and tell him what he/ she would like for Christmas.
This is perfect photo opportunity.
Beforehand, go out and buy small gifts for each child.... dollar
stores are perfect place to find cheap
little toys for Santa to pass out or you can buy candy canes and have
Santa hand those out to
each child. Some children will not go up to Santa when their
parents take them to the
mall or wherever... but when they see their friends going up, they usually
will.
Track Santa
You can track Santa on the government's NORAD site, the same
site they use to track any object in the sky.
http://www. noradsanta.org/
~ LINKS ~
Santa Claus Paper Craft
Postcard to Santa
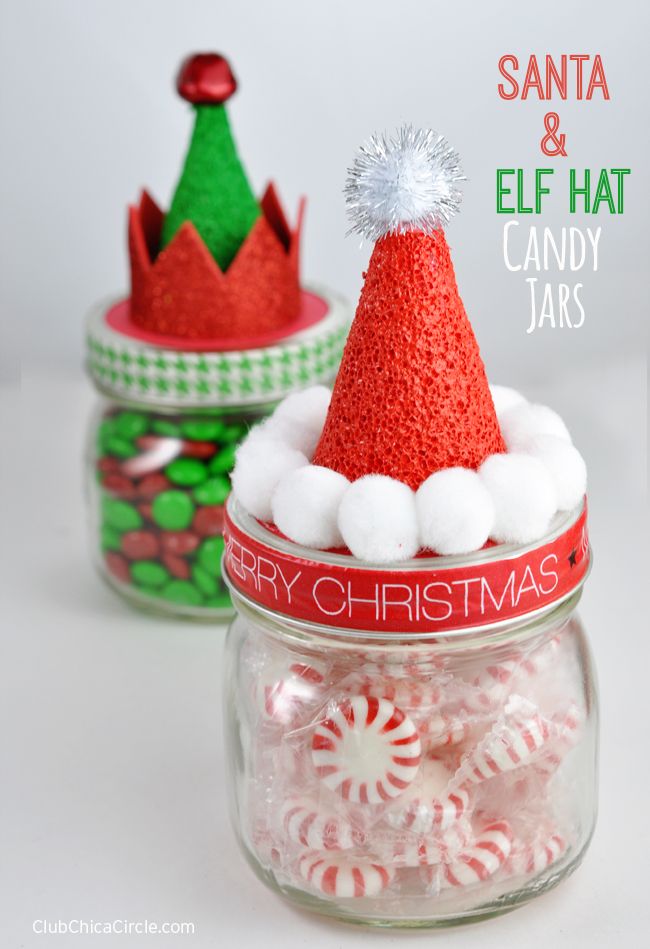
Baby Food Jar Santa Candy Jar
Pre-K Fun Theme Pages are
for educational reference only!
No copyright infringement is intended.
I do not claim any of these as my own ideas.
They are shared from friends and fellow group
members.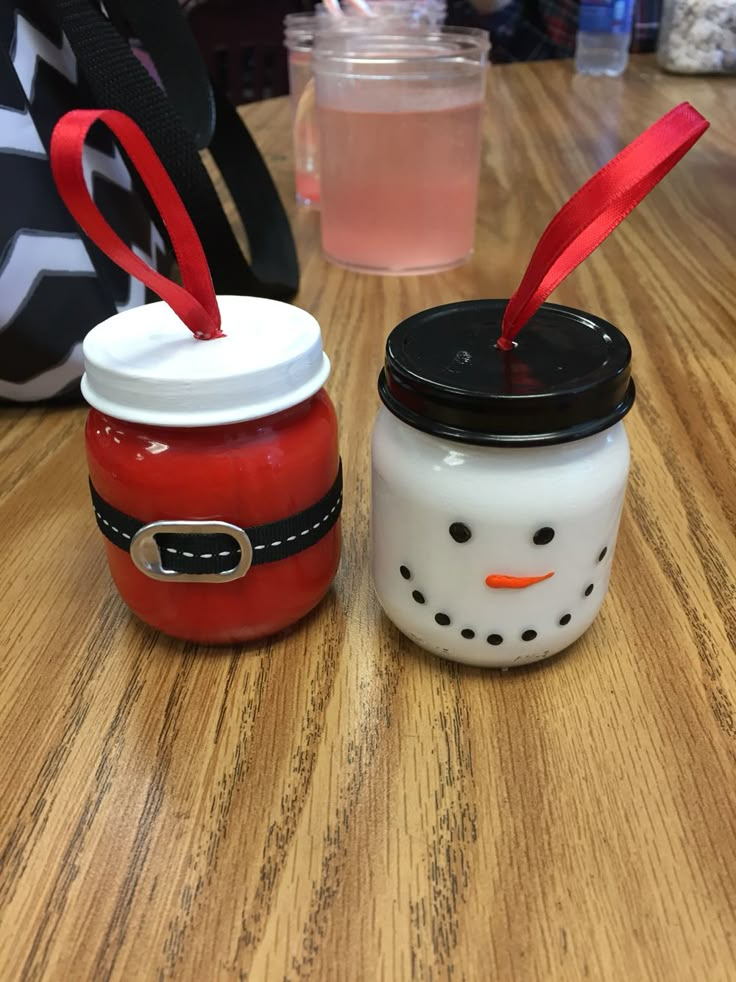
Thanks for sharing all your great ideas!
Beth's Lemonade: Baby Food Jar Week: Baby's-First-Christmas Ornaments
Since I started yesterday's post with a confession, I suppose I shall start today's with one as well. Here it is: I never believed in Santa Claus. I know, right? Pretty crazy stuff. This confession has been met with a number of reactions through the years, but the most common opinion seems to be pity--that somehow my parents failed me by never telling me that Santa Claus was real. But in all honesty, that is a little bit obnoxious to me. I don't feel like I missed out on anything , except maybe having a cool story about when I found out that my parents had been lying to me my whole life, and I am okay passing on that. When everyone else is sharing their stories, I just tell people the story about the mean third grader on the bus in first grade that had just found out and wanted to spoil it for me.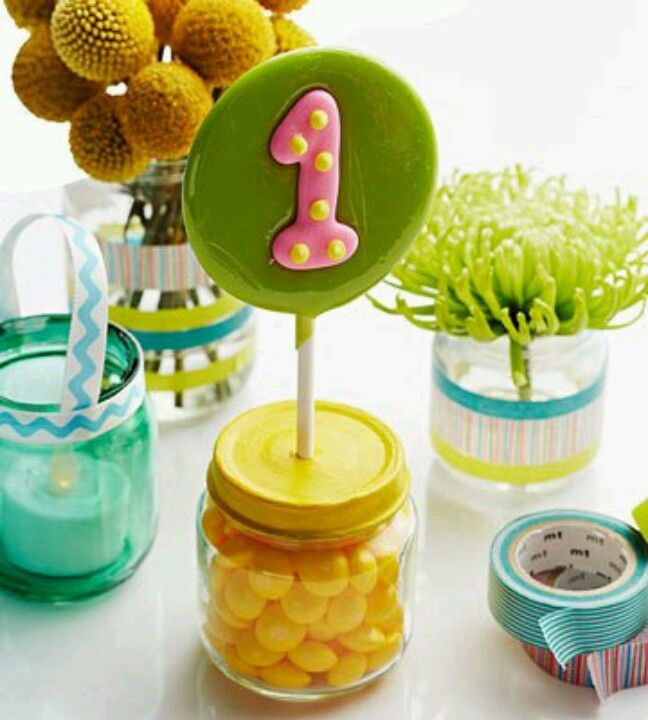 He said "Santa Claus isn't real," and I said "I know." I don't think it was quite the reaction he was looking for.
But really, don't pity me. I love Christmas. I always have and I always will. I still left out cookies for "Santa Claus" and my parents ate them (just like everyone else's). As we grew up we started leaving rice pudding for Nisse, a mischievous Danish elf that tends to play pranks if not pacified (we are part Danish). We didn't believe in him either, but rice pudding is my Mother's favorite dessert. Basically, Santa Claus was a fairy tale, much like Cinderella; it isn't real, but it is sometimes fun to pretend like it is.
In any case, I don't think my Christmases have suffered for my lack of belief in Santa. In fact, I still love it so much that I have been doing some ornament making in September. Then again, maybe I have just been scarred for life and am overcompensating for it. Oh, well.
I think these ornaments would be especially cute as a baby's first Christmas ornament, but they work as ornaments in general as well.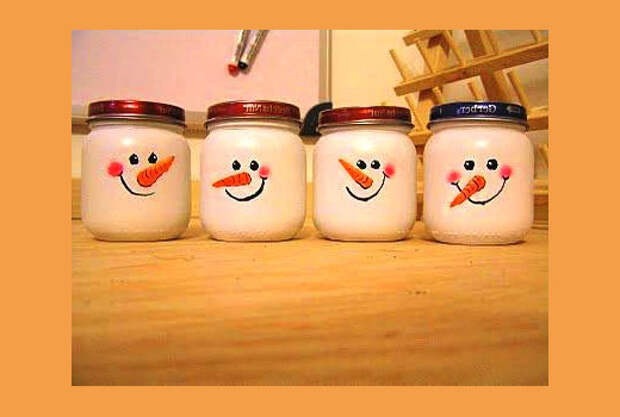 This coming Christmas is not David's first, but he was far too young to have baby food last Christmas. I guess for babies born in the latter part of the year this will only work if he or she has an older sibling (or a neighbor) to get the jars from.
I made the holly ornament by cutting out the leaves in wax paper, painting them, and applying them to the inside as I did with the candle holders. I then put the berries on with a paint brush on the inside. When that was completely dry, I put white paint inside and rolled it around, much like in the apples. The words I painted on the outside, which makes them more susceptible to being rubbed off, but I didn't feel like putting writing on the inside today; I was lazy (but in my defense, we all got flu shots this morning and David is about a half a millimeter away from another tooth).
The hanger is attached through a hole in the center of the lid, which I punched with a nail. I simply put both ends of some wire through the lid and twisted them around a bead that is larger than the hole.
The Santa face I just painted on the inside of the jar. I was going for a rougher look, probably because every Santa craft I have ever done looked that way. That is possibly because almost every Santa Craft I have done in the past was done in elementary school. Still, I think it is a viable Christmas aesthetic.
For the hat I used some red fabric that was apparently once a sheet (I got it from someone else who had already cut it up), but felt would probably be great for this. I cut the shape to the right. The long side is slightly longer than the circumference of the lid.
For the fur trim, I used some batting and cut out a circle a little larger than the lid. I then cut a circle out of the center by folding it in half. I was going for a circle the size of the lid. The resulting ring was slightly too small to fit around the lid, so I just stretched it until it fit. For the white on the end of Santa's hat I just used part of the scrap from the center of the ring. You could use a pompom if you would like.
The next step is to attach the hanger, which I did exactly like the holly ornament. I then assembled the hat on the lid with hot glue. I glued the bottom edge on first and then mad a tiny hole for the hanger to come through. Finally, I glued up the seam. I glued the batting on in the appropriate places and put a dot of glue near the tip of the hat on the seam side and glued it down to hide the seam. Santa hats shouldn't stand up straight anyway.
Really, the patterns and possibilities are endless. This post from Crazy Little Projects has some really cute snowman faces. Baby food jars do make somewhat heavy ornaments, but I think a fake tree should be able to handle it fine and if you are careful about placement a real tree should be fine too.
See the rest of Baby Food Jar Week:
| Apples |
| Storage Vessels |
| Tea Candle Holders |
| Coin Sorter |
New Year's hand-made with children December 22, 2014 17:01
PROJECTS
As well as lanterns and a winter fairy tale in a jar.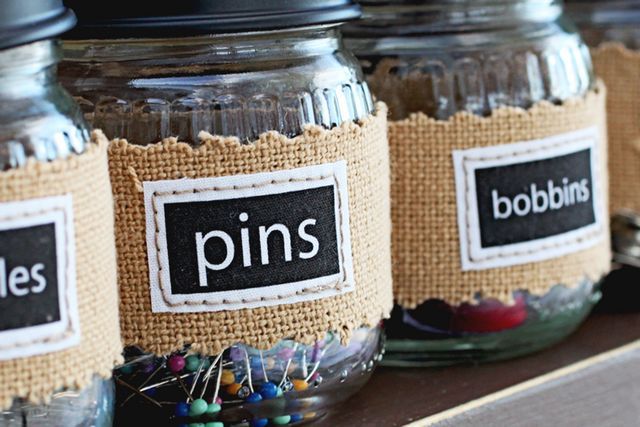
We involve the preparation of New Year's souvenirs and decoration of the house of the little ones! The Izhlife.ru portal has collected simple, but at the same time original crafts from what is always at hand. Not only children, but even the most distant from creativity adults can easily cope with them.
Christmas palm wreath
Making a Christmas wreath is not easy. But everyone can handle this wreath. We need green cardboard, preferably several shades. We put our palm on a sheet of cardboard on the reverse side and circle it with a pencil. We make more painted palms. You can make both children's and adults - in the finished wreath they can be alternated. Then we glue the palms in a circle so that the fingers of one are glued to the base of the next. We glue decorations to the finished wreath - circles of colored paper of bright colors and a bow of satin ribbon.
Paper Christmas balls
Cut colored paper into strips of the same length. Paper can be taken as one color or different. You will also need a thick thread - you will need to thread it into the needle and tie a knot at the end. Fold the strips together and pierce by threading first through one end of the strips and then through the other. Pull the thread so that the strips of paper take a curved position, and tighten the knot. Now straighten the strips so that they take the shape of a ball. From the remaining thread, make a loop so that the ball can be hung on the Christmas tree. It will be nice if the colored stripes on the ball alternate.
Winter fairy tale in a glass jar
Take any small glass jar with a screw cap. It's great if the jar has a non-standard shape, but, by the way, any will do. Depending on the size of the jar, we cut out any New Year's figurines from thick paper - a Christmas tree, a deer, Santa Claus, a snowman - so that they can be glued to the lid and fit freely into the jar. If you have ready-made figures - great. We glue the figures to the lid - one or more (for example, a Christmas tree and a deer nearby). Pour a little artificial snow into the jar itself (if it is not there, you can cut thin white paper into small squares). We twist the lid and turn the jar over - now our figures are sprinkled with snow. The winter fairy tale is ready.
P.S.: small jars of baby food are perfect for flashlights - paint them with paint as you like (preferably translucent, on glass), and put a pill candle inside.
Lamb from paper strips
The symbol of the coming year is easy to make using the now fashionable quilling technique. The bottom line is that all the figures are made up of strips of paper twisted into a spiral. The lamb is curly, so quilling is especially suitable for him. Cut out the base of the lamb: two cardboard ovals - a larger one for the body and a smaller one for the head, as well as four rectangles for the legs. We glue everything together. Then you need to cut more thin paper strips.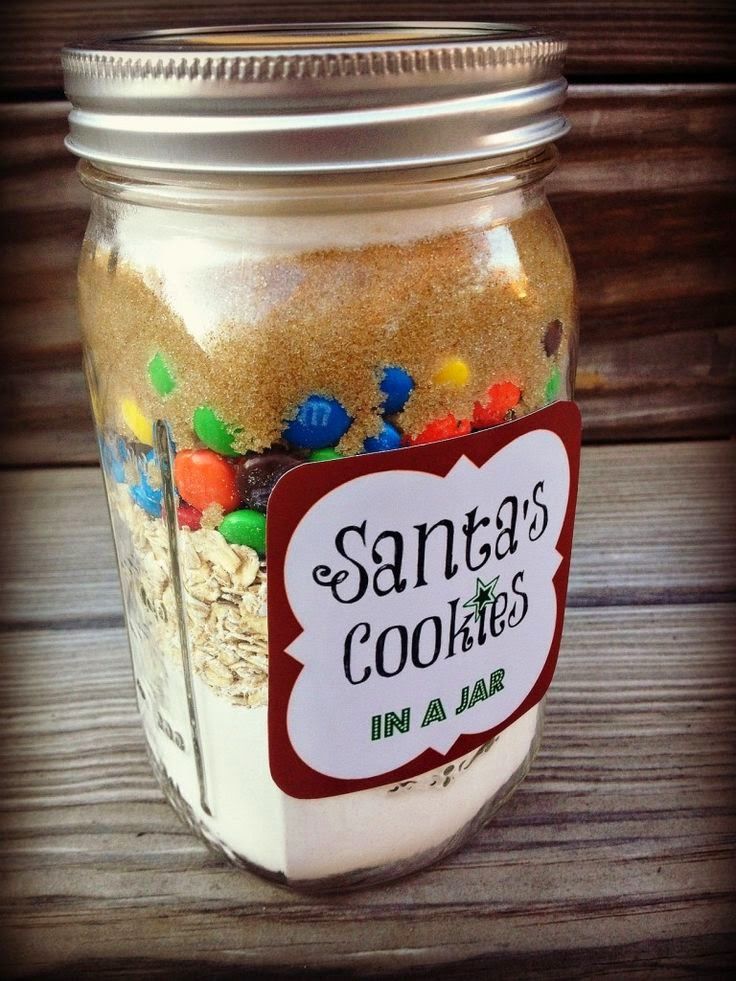 We fold them, as shown in the photo, and glue them to the base. On the "head" draw a muzzle and glue the ears.
Cotton swab sheep
This lamb will look like a soft toy. Just as in the previous version, you need to prepare a cardboard base for it. And now we take more cotton buds, which girls usually have on the farm. We cut off the cotton ends from them - this will be the wool of our lamb. Glue them tightly to the base. We glue a few pieces for the bangs and two for the ears to the “head”. We draw a muzzle, and our lamb is ready!
Clothespin Santa Claus
Everything is even simpler here - we paint an ordinary clothespin (preferably a straight shape and a wooden one) in red or blue color - depending on what kind of fur coat your Santa Claus will have. We draw a belt and buttons (or just paint in one color) and glue the “head” drawn and cut out of paper to the top. In this way, you can make absolutely any character, and attach the resulting figure anywhere.
Light Bulb Snowman
Do not rush to throw away the burnt out light bulb - it turns out to be a very cute and extremely easy-to-make snowman. We take a classic-shaped light bulb and paint it well with white paint. In the place of narrowing, we glue a strip of felt or fleece (at worst, colored paper is suitable) and fold it in the form of a scarf. We glue a nose-carrot from a triangle of paper, painted in red color, draw eyes, mouth and hands for our snowman. Buttons can also be drawn or glued real.
And finally, for the laziest - Santa Claus from a square of red paper:
Share material:
- # Izhevsk
- # children
Subscribe to IZHLIFE and get the news of Izhevsk where it is convenient
Crafts from baby food jars
Skip to content
Search for:
The kid ate the puree with pleasure, smearing its contents on all surfaces. And the jar was carefully washed out and sent to the shelf to its fellows.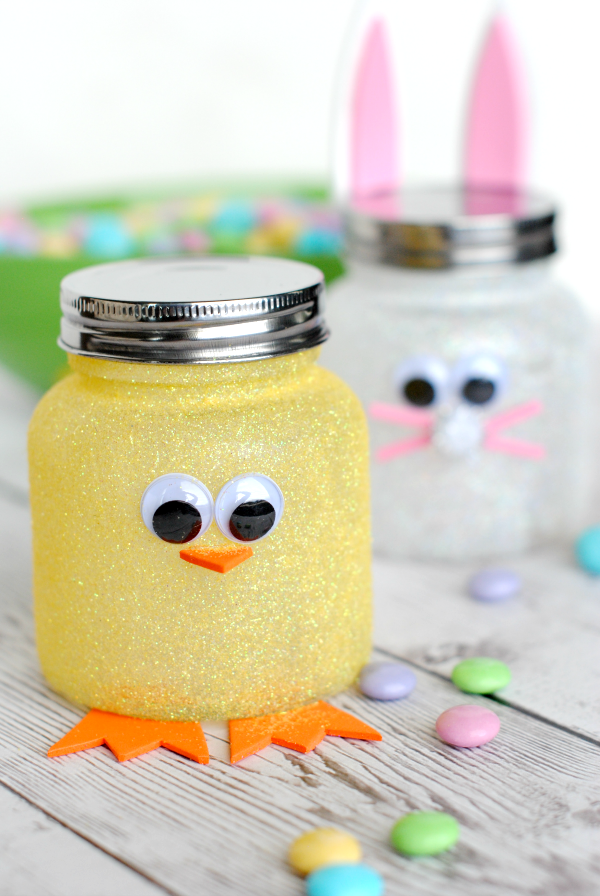 What to do with her?
There are a lot of ideas for using glass baby food jars. Website "Mom can do anything!" collected the most interesting of them.
- Needle beds. From glass jars it is easy to make such cute pincushions that can fit buttons and other small handicraft things.
- Houses for fairies. If you are fond of modeling, then you should try to make such a delightful house for fairies.
- Aquarium. A jar is a small aquarium for a toy fish. Pour soil inside, install algae - the craft is ready. You can also mold plasticine fish together with your child and place them in a jar.
- Terrarium. Plant moss and other small, low-maintenance plants inside.
- Decorations for the holiday. Decorate the jars with glitter, make holes in the lids and install decorative elements, letters and numbers. A very original decoration is ready.
- Bird feeder. Few people realize that such delicious drinkers and bird feeders are obtained from an ordinary baby food can.
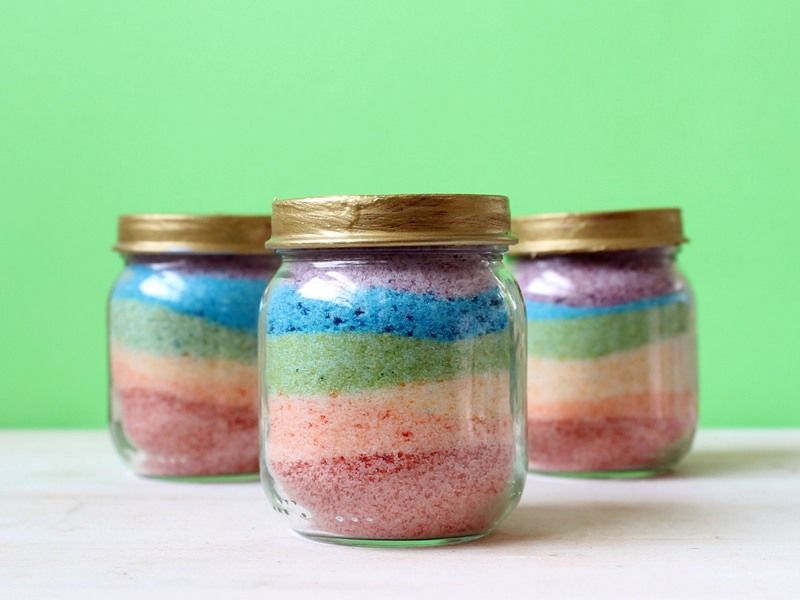
 In the sun, they will shimmer with all the colors of the rainbow and delight the eye.
 - Storage for small items. From cans, not only beautiful things are obtained, but also very practical. Screw the lids to a wooden surface and you will get very convenient containers for storing small things.
- Candlesticks for the garden. Buy a lot of small candles, put each one in its own jar and hang them by ropes on tree branches. A beautiful setting for a romantic evening is ready.
- Pot for growing onions. Green onions are a storehouse of nutrients that are so lacking in the cold season. Growing such an onion is not difficult. Pour water into the jar, put the bulb on top, in a few days we will get the first shoots.
- Pots for seedlings. It is convenient to plant parsley, dill and other herbs in small jars.
- Crafts from baby food jars. Such beautiful flowers in pots are easy to make yourself with your children. We circle the palm on a green sheet of cardboard, cut it out, gluing a flower on each finger.
 We put it in a pot-jar - a beautiful craft is ready. Such flowers will be a great gift for mom or grandmother by March 8th.
 - Storage containers. In puree jars it is very convenient to store buttons, beads, beads.
- Pencil holders.
- Night lamps.
- Snow globe. A can of baby food makes a delicious snow globe. Just stick the figurine on the lid. Pour the baby oil and glitter into the jar, close the lid tightly and shake.
- Gift-treat for guests or children.
- Original frames. Just place photos inside the jar.
- Spice storage. Glass jars with screw-on lids keep spices fresh for a long time.
- Vases for flowers. Just dip the jar in the paint and get unusual vases for small flowers.
- Jelly mold. Small jars are great for making jelly. It looks beautiful and appetizing in them, one jar holds one serving, and the screw cap will help keep it in the refrigerator for a long time.
- Portioned desserts. In small jars it is convenient to make portioned desserts.