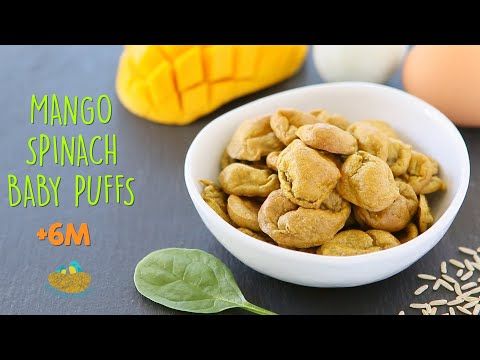
Baby food puffs recipe
Healthy Homemade Baby Puffs (Gluten Free, Dairy Free)
Healthy homemade baby puffs are a great gluten free and dairy free baby finger food that can also be made egg free. Melts in your mouth and it’s a great mess-free snack for babies over 6 months!
I’m always looking for easy baby snacks that are convenient, healthy, and yummy. Recently, we’ve been finding ourselves doing lots of driving and spending time outside of the house, so portable snacks are a must. While I love bringing fruits and veggies sticks, they can get messy and I just don’t want to worry about having to clean up after her constantly.
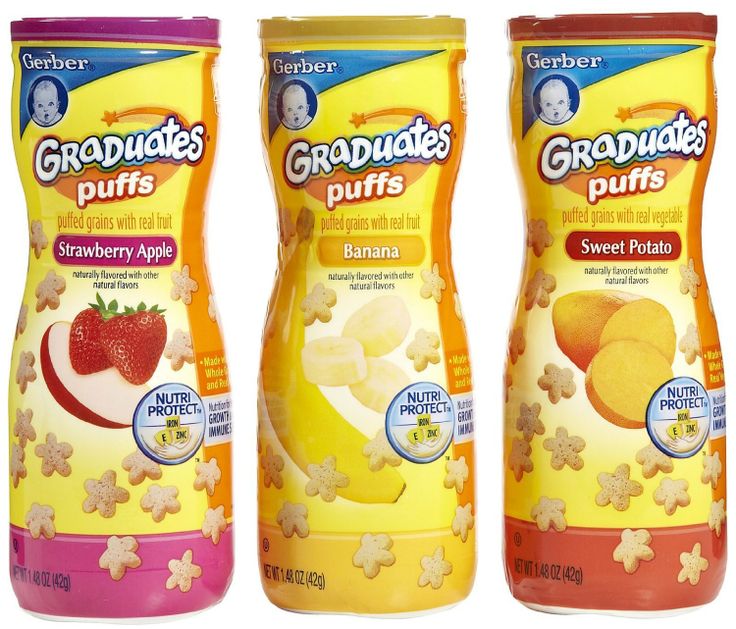
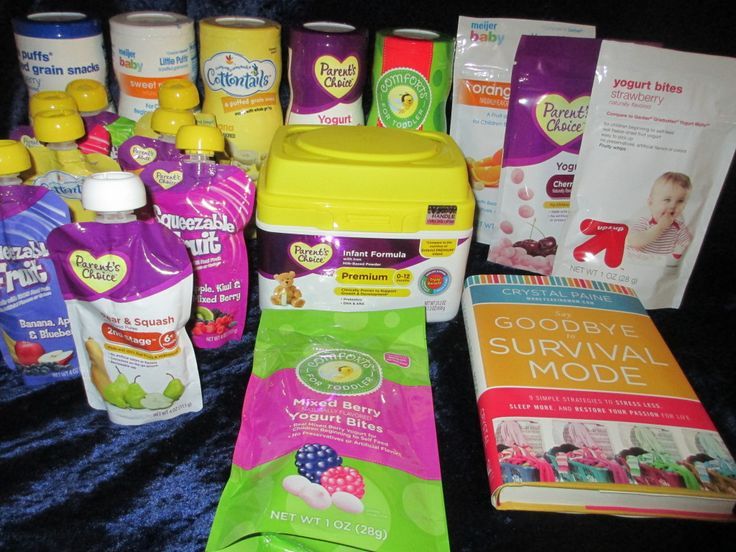
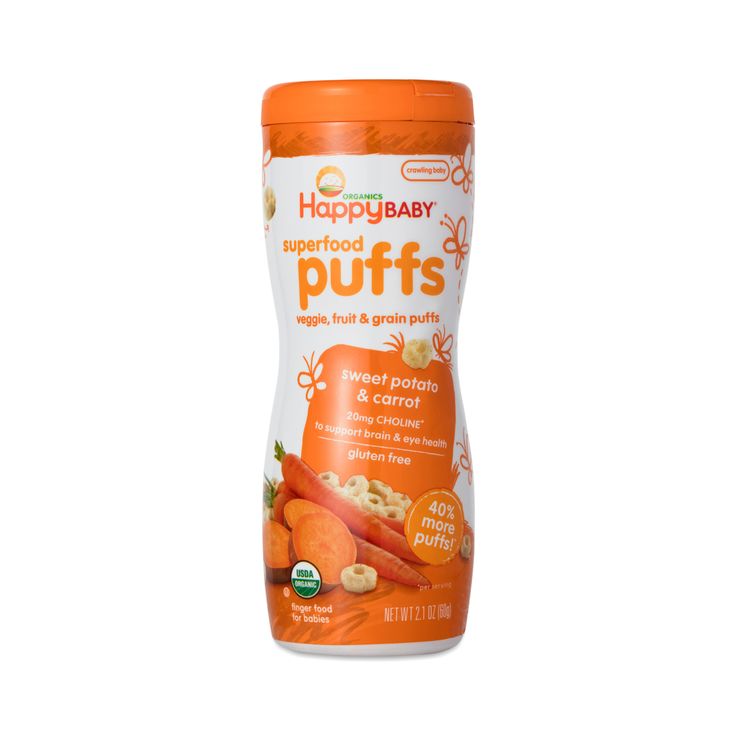
So I started searching for baby puffs and baby finger food ideas. However, I found that I wasn’t too happy about the ingredients in most store bought brands of baby puffs and baby cereal. Many of them contain added sugar, vegetable oils which are highly inflammatory, and “natural flavors” which isn’t a term regulated by the FDA and can have other hidden ingredients behind it.
How to Make these Healthy, Homemade, Gluten-Free Baby Puffs
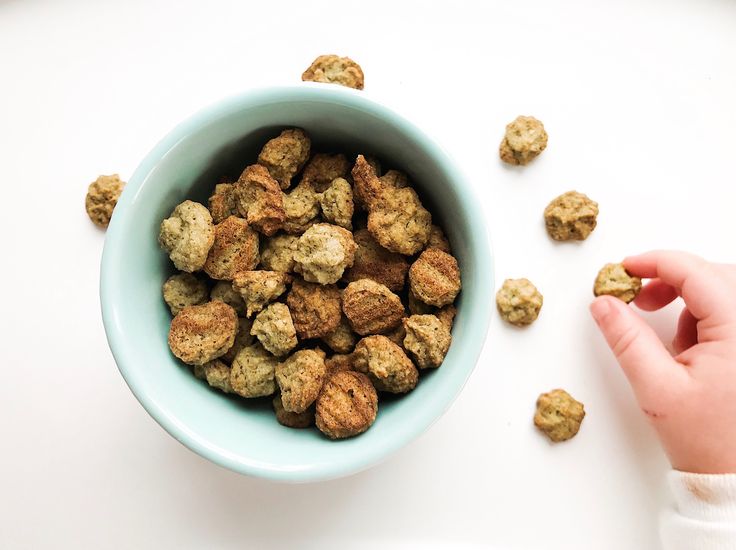
So I started experimenting in the kitchen to make healthy baby puffs that are free of processed ingredients, and I’m really excited about these! Not only are they really versatile with the ingredients you can use, they are also gluten free, dairy free, and can easily be made egg free. Plus, my little girl loves them, and they melt in your mouth so babies without teeth can easily gum and enjoy them as well. I feel so much better about these than any store bought puffs.
Ingredients & Substitutions
One of the best things about these healthy baby puffs is that you can pretty much use any fruit or veggie you have on hand. Here are the ingredients for these easy homemade baby puffs, including any substitutions you can use:
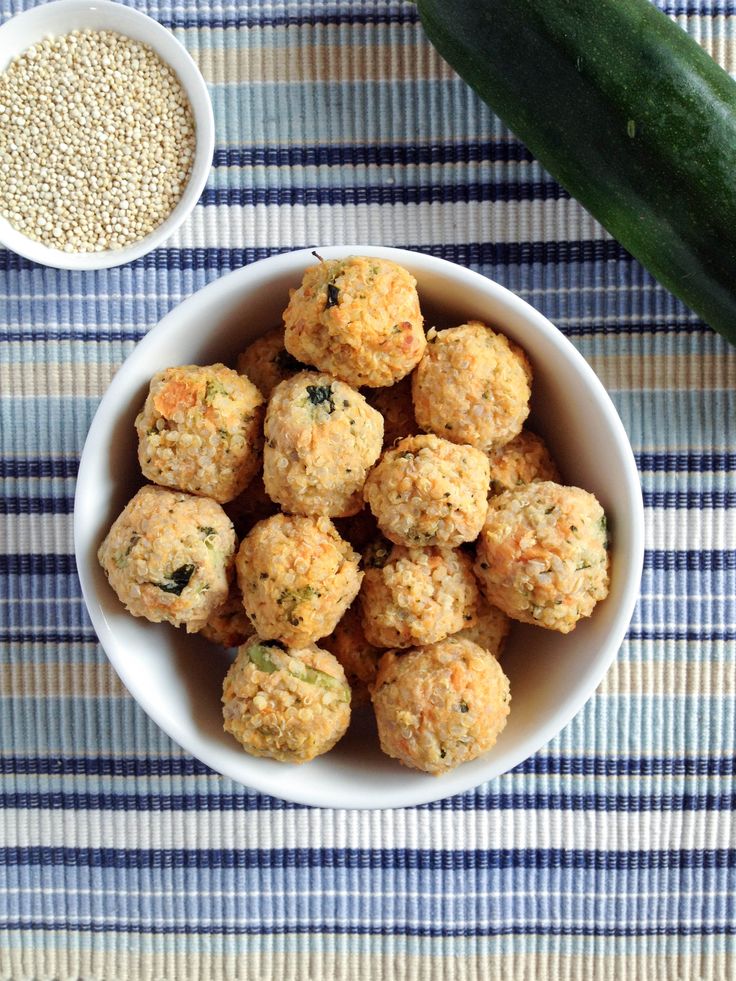
- Sprouted oat flour: While my baby has eaten a variety of grains, I like to serve them in a sprouted or fermented form for easier digestion. Most grains contain anti-nutrients like phytates, which block the absorption of beneficial minerals.
 Sprouting breaks down these anti-nutrients (while making the grain more digestible) so we can absorb the nutrients better. If you don’t have sprouted oat flour on hand, you can use regular oats flour or rice flour (or even brown rice flour) instead for this recipe.
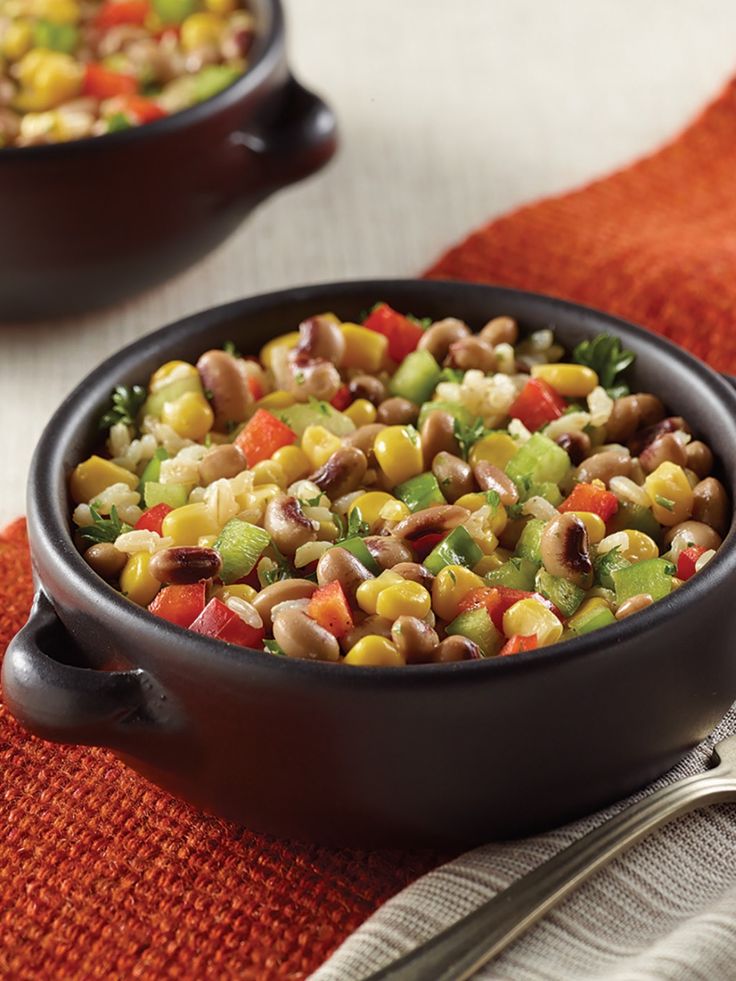
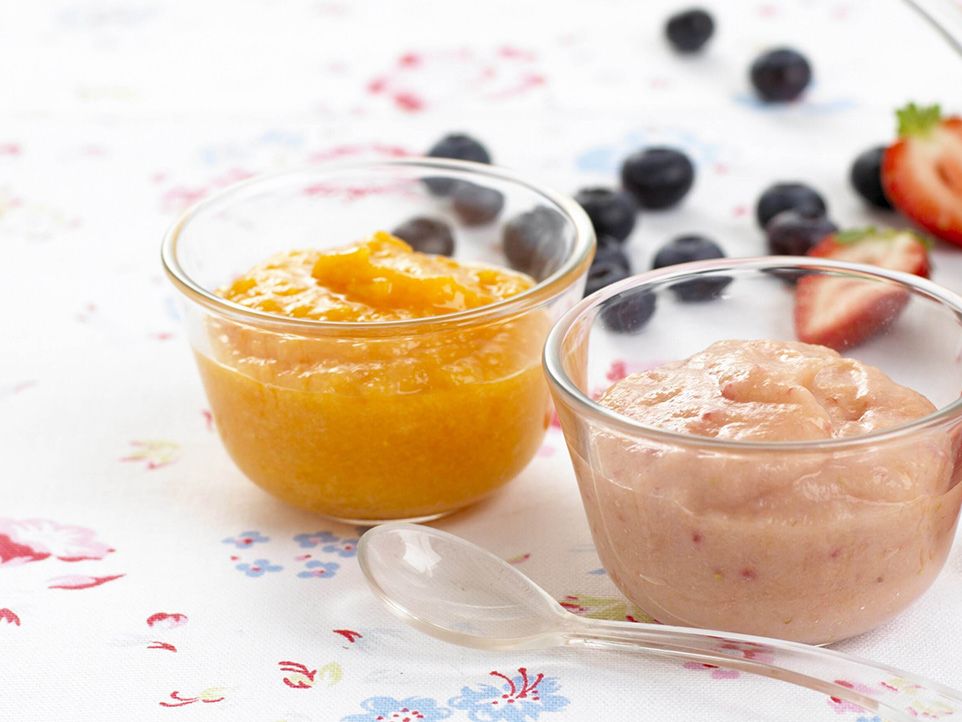
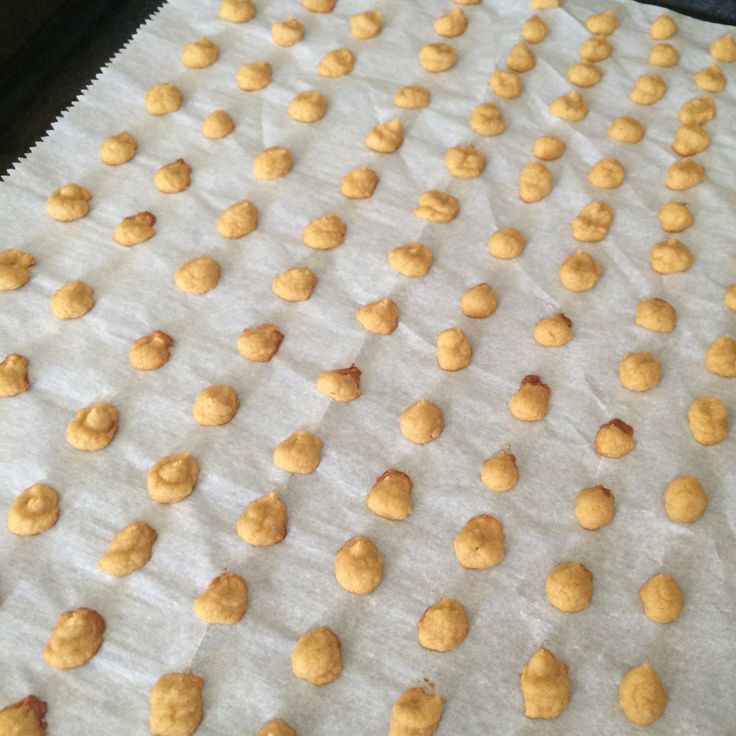
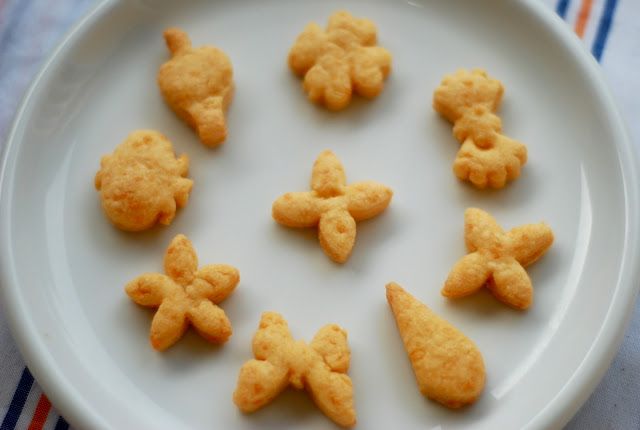
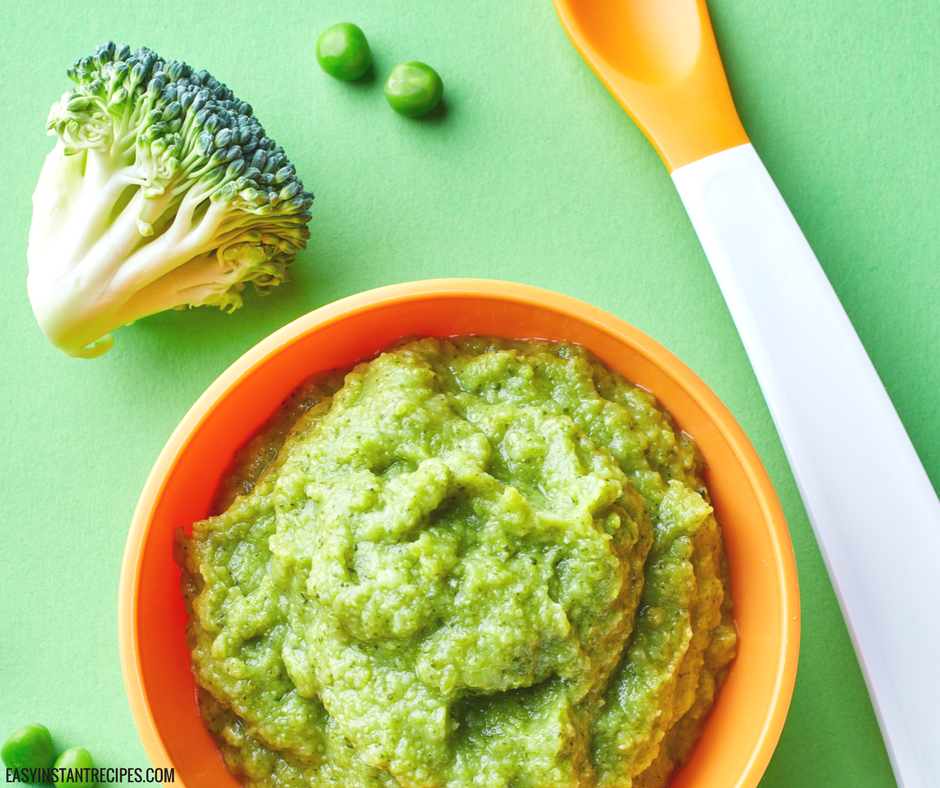
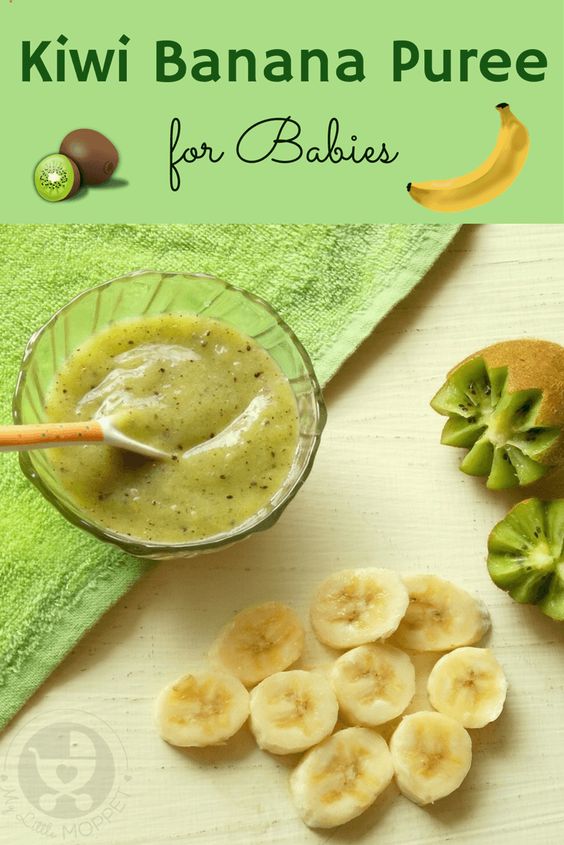
 - Pureed fruits: You can use a variety of fruits you have on hand, and add veggies as well. Just blend them together in a blender or a food processor. For the ones you see in the photos, I made them with pureed apple, banana, and kale. Most of the puree should be fruits because they are what give these gluten free baby puffs their sweetness. Here are some ideas for what you can add to your puree:
- banana
- apple
- pear
- peach
- mango
- spinach
- kale
- beet
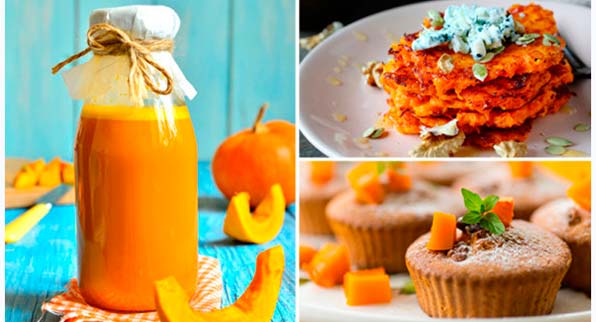
- sweet potato
- chard
- Coconut oil: Ghee can also work if your baby tolerates dairy.
- Egg yolks: If your babe can’t do eggs, flax eggs will also work! Just mix 2 tbsp of flaxseed meal with 5 tbsp of water.
- Baking powder: I love this aluminum free one.
- Spirulina: This is an OPTIONAL ingredient, but spirulina has so many amazing benefits for the baby and it’s a complete real-food source of protein. It also promotes healthy development with amazing nutrients like iron, calcium, zinc, magnesium, vitamin A, and B vitamins. I incorporate it into my baby’s diet often. This is my favorite brand and you can get 10% off with my code: GREATGRANDMA10.
- Bone broth, breast milk, or water (IF NEEDED): The amount of moisture for these healthy baby puffs will vary depending on the puree you use and if you use real eggs or flax eggs. If the mixture seems too dry, you can add any of these ingredients 1 tbsp at a time until the texture is similar to a thick pancake batter.
Step by Step Directions for Making These Baby Puffs
- Preheat oven to 350 degrees F, then line a baking sheet with parchment paper.
- Mix all the ingredients together to form the texture of thick pancake batter.
 Pour the batter into a piping pastry bag. If you don’t have a pastry bag, you can use a plastic resealable bag with one of the bottom corners snipped off.
 - Pipe the batter onto the baking sheet into small circles or any shape you like.
- Bake for 8 minutes, turning the tray once halfway through. Turn down the oven to 250 degrees F. Bake for additional 20-30 minutes until they are lightly golden and dry.
- Cool completely on the countertop before removing from the baking sheet. They’ll firm up more as they cool.
- Serve! These healthy baby puffs can be stored in an airtight container for up to a week at room temperature.
Frequently Asked Questions and Tips on Making these Healthy Baby Puffs
How do you know when the baby is ready for puffs?
Babies are ready for puffs once they have established solids and show that they are ready like:
– sitting upright
– showing chewing motion when they have food in the mouth.
– putting food in their mouth on their own.
Of course, every baby is different, but they can generally start around 6 months.
Can my baby eat puffs without teeth?
Even if your baby doesn’t have teeth, these homemade baby puffs melts in the mouth so they should be safe. If you are nervous, I would make the puffs on the smaller side (like baby cereal) or cut them up before serving.
Are baby puffs a choking hazard?
I would test these out yourself to make sure that they melt in your mouth before giving it to your baby. If you use the ratio stated, the puffs should melt, but it can vary depending on amount of moisture in the fruits and veggies you use.
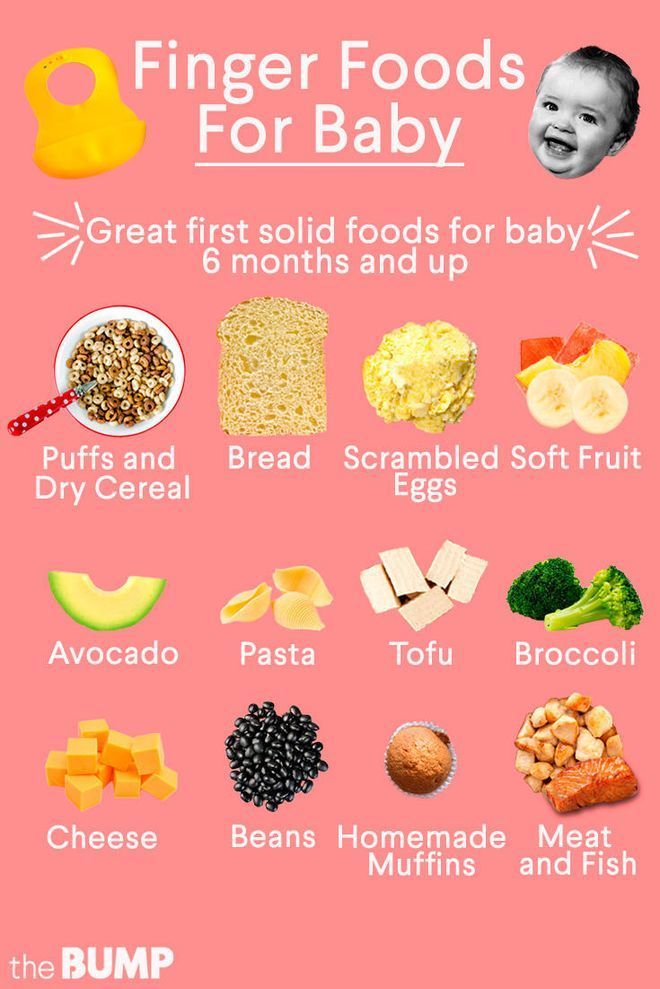
Finger foods are great for developing fine motor skills, and it’s really fun to watch your baby figuring out feeding him or herself and learning pincer grasp. As with any food, make sure to supervise your baby during feeding time!
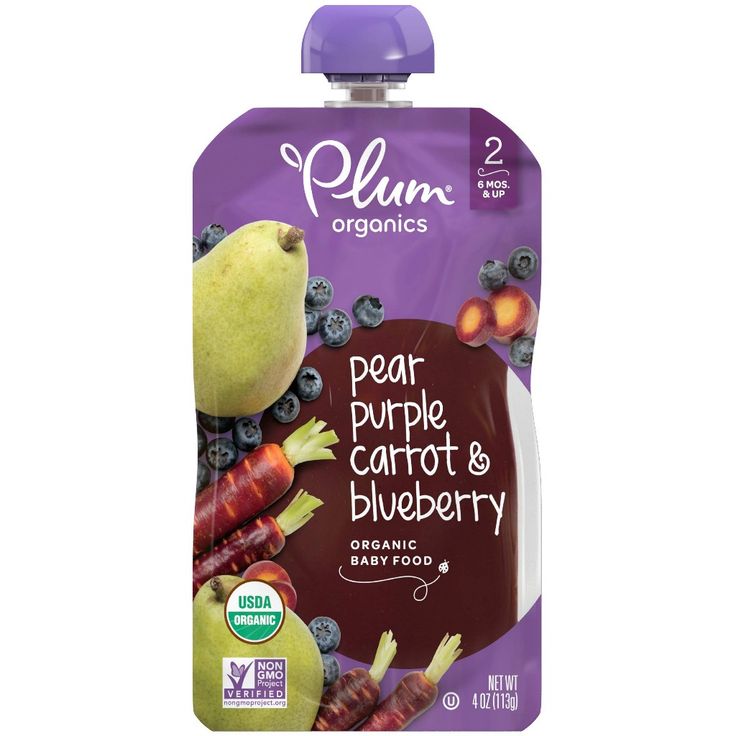
If you are interested in other baby food ideas and snacks, read my blog post all about how to start solids!
Healthy Homemade Popsicles for Toddlers
AIP & Paleo Blueberry Sour Gummies
How to Start Solids at 6 Months: Our Experience
Non Toxic Baby Products For The Nursery and Registry
Healthy Homemade Baby Puffs (Gluten Free, Dairy Free) – 6+ Months
Healthy homemade baby puffs are a great gluten free and dairy free baby finger food that can also be made egg free. Melts in your mouth and it's a great mess-free snack for babies over 6 months!
5 from 7 votes
Print PinCourse: Snack
Cuisine: American
Keyword: baby finger food ideas, blw snacks, gluten free baby puffs, healthy baby puffs, homemade baby snacks, how to make homemade baby puffs, vegan baby puffs, when can babies start eating puffs
Prep Time: 15 minutes
Cook Time: 40 minutes
Cooling time: 15 minutes
- 1 cup sprouted oat flour or regular oat flour or rice flour
- 1 cup puree of fruits can combine with veggies (such as any combo of bananas, apples, pear, mango, kale, spinach, carrots, sweet potatoes, etc)
- 1 tbsp coconut oil melted
- 2 egg yolks or flax eggs*
- 1 tsp baking powder
- OPTIONAL: 1 tsp spirulina use code GREATGRANDMA10 for 10% off
- IF NEEDED: 1-4 tbsp bone broth or water or breastmilk
Preheat oven to 350 degrees F and line a baking sheet with parchment paper.
Add all ingredients (except bone broth) to a bowl and stir until a batter forms.
 It should resemble a thick pancake batter in consistency. If it's too thick, add bone broth (or breast milk or water) 1 tbsp at a time until it reaches the right consistency. If too thin, add a bit more flour.
Pour the batter into a piping bag or a plastic resealable bag with one of the corners snipped off.
Pipe the batter on the baking sheet into circles or any shape you want, making sure they don't touch each other.
Bake for 8 minutes, turning the baking sheet halfway through.
Lower the oven temperature to 250 degrees F, then bake for another 20-30 minutes (depending on the shape and size of the puffs), until the puffs are dry to touch and lightly golden on the sides and the bottom. They can get too crunchy and not "melt" if they are baked too long.
Remove from the oven, transfer to the countertop, and cool completely in the baking sheet. The puffs will firm up more as they cool.
Once cooled, you can test the puffs to make sure they soften and melt in the mouth before serving.
Store in an airtight container at room temperature for up to a week.
* For an egg free option, make flax eggs: Mix 2 tbsp flaxseed meal combined with 5 tbsp of water. Let this sit for a few minutes until thick. Add to the recipe.
What Great Grandma Ate / Jean Choi is a participant in the Amazon Services LLC Associates Program, an affiliate advertising program designed to provide a means for sites to earn advertising fees by advertising and linking to Amazon.com.
Regarding other affiliate links and affiliate relationships: In order for me to support my blogging activities, I may receive monetary compensation or other types of remuneration for my endorsement, recommendation, testimonial and/or link to any products or services from this blog. Thank you for your support and understanding.
By Jean Choi |
Strawberry Kiwi Baby Puffs - Feeding Tiny Bellies
These dairy-free, nut-free homemade strawberry kiwi baby puffs are a perfect snack for at home or on the go! They are mess-free, tasty, and not to mention, nutritious!
This post may contain affiliate links.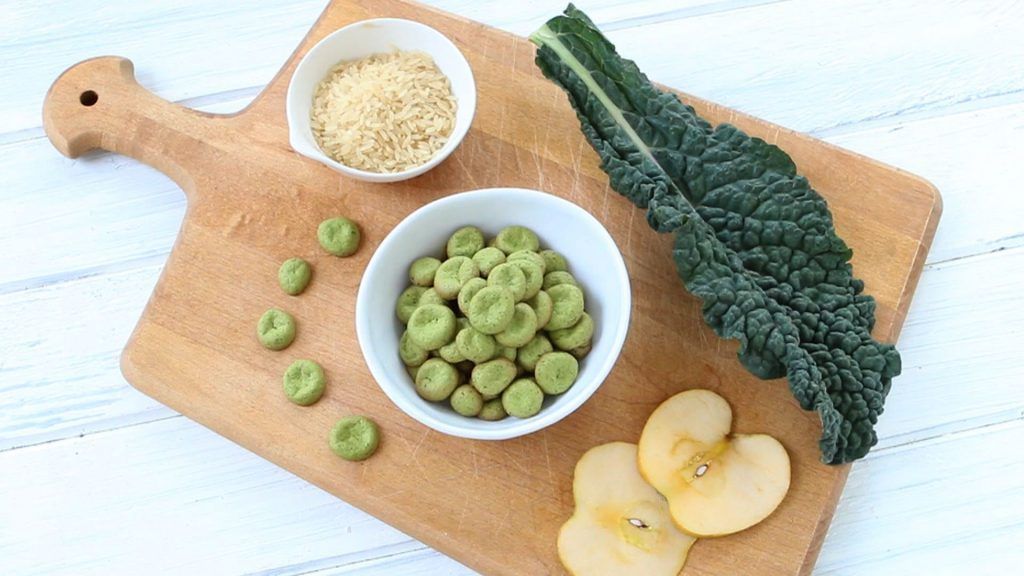 If you shop with one of our links we may earn small a commission.
These strawberry kiwi baby puffs are another take on the spinach apple puffs that I previously shared! I love the versatility of these puffs with all of the flavor combo possibilities! The strawberries add a bright pink color and I love knowing that these snacks are a great source of fiber and vitamin C!
WHAT YOU’LL NEEDHere is what you’ll need to make these strawberry kiwi baby puffs:
- Rolled Oats: I love baking with rolled oats as they are packed with nutrition! Gluten-free rolled oats make these strawberry kiwi puffs gluten-free.
- Strawberries: The main source of sweetness for these puffs. Try to use strawberries that are ripe, sweet, and not sour.
- Kiwi: Tangy fruit for added flavor.
- Egg Yolk: Used as a binder to help the puffs maintain their shape.
- Oil: I used extra light tasting olive oil.
 Any other mild tasting oil works as well.
 - Baking Powder: Leavening agent to help the puffs rise.
- Blend all of the ingredients together until smooth.
- Pour the mixture into a piping bag or Ziploc bag with the corner tip cut off.
- Pipe out small dime-sized circles onto a pan lined with parchment paper and bake at 350 degrees F for 10 minutes. After 10 minutes, reduce the temperature to 250 degrees and bake for another 10-15 minutes.
- Let them fully cool and serve!
Once cooled, store the puffs in an airtight container for up to 5 days. These puffs may also be frozen, but the texture may be slightly different when thawed.
SUBSTITUTIONS- Eggs: For an egg-free version, substitute the egg yolk with a flax egg by mixing one tablespoon of ground flaxseed meal with three tablespoons of water and letting it sit in the fridge for 15 minutes to set and thicken.
- Strawberries/Kiwi: You may replace this fruit combo with any puree! If you are using a different fruit and/or veggie combo, puree them first and measure out ½ cup of that puree to blend together with the other ingredients.
- Oil: I used extra light-tasting olive oil in this recipe, but you may use coconut oil or any other mild-tasting oil.
- These puffs do not melt in your mouth the same way the store-bought ones do (since those are usually freeze-dried), but they are pretty soft and easy for baby to break down! They break down pretty easily with saliva but use your discretion to decide if you are comfortable offering them to your baby. Try testing a few in your mouth first to see how easily they break down!
- The batter should be a smooth consistency, similar to that of a pancake batter. It should be easy to pipe out into small circles. There should be no chunks in the batter.
- When it comes to baking these puffs, oven temperatures vary, so check on them a few minutes after lowering the temperature.
 You will know that they are done when they are dry to the touch and leave no sticky residue on your fingers.
 - Depending on the type of blender you are using, it might be good to blend the oats into a flour first before adding in the other ingredients. This recipe makes a small amount of batter, so it might be hard for a larger blender to break down the oats with such little batter. I love using this nutribullet blender to blend the ingredients into a smooth batter!
You may also like:
- Spinach Apple Puffs
- Pumpkin Puffs
- Strawberry Banana Yogurt Melts
- ½ cup old fashioned rolled oats
- 6-8 medium strawberries
- 1 kiwi
- 1 egg yolk
- ½ tbsp oil mild tasting
- ½ tsp baking powder
Preheat the oven to 350 degrees F (180 degrees C).
Blend all of the ingredients together until smooth.
Pour the mixture into a piping bag or Ziploc bag with the corner tip cut off.
Pipe out small dime-sized circles onto a pan lined with parchment paper and bake at 350 degrees F for 10 minutes. After 10 minutes, reduce the temperature to 250 degrees and bake for another 10-12 minutes.
Let them cool and store in an airtight container at room temp!
- These puffs do not melt in your mouth the same way the store-bought ones do (since those are usually freeze-dried), but they are pretty soft and easy for baby to break down! They break down pretty easily with saliva but use your discretion to decide if you are comfortable offering them to your baby. Try testing a few in your mouth first to see how easily they break down!
- The batter should be a smooth consistency, similar to that of a pancake batter. It should be easy to pipe out into small circles. There should be no chunks in the batter.
- When it comes to baking these puffs, oven temperatures vary, so check on them a few minutes after lowering the temperature.
 You will know that they are done when they are dry to the touch and leave no sticky residue on your fingers.
 - Depending on the type of blender you are using, it might be good to blend the oats into a flour first before adding in the other ingredients. This recipe makes a small amount of batter, so it might be hard for a larger blender to break down the oats with such little batter. I love using this nutribullet blender to blend the ingredients into a smooth batter!
Nutrition Facts
Strawberry Kiwi Puffs
Amount per Serving
Calories
352.95
% Daily Value*
Fat
15.11
g
Saturated Fat
Trans Fat
Polyunsaturated Fat
Monounsaturated Fat
Cholesterol
195.3
mg
Sodium
226.52
mg
Potassium
560.71
mg
Carbohydrates
47.49
g
Fiber
Sugar
Protein
Vitamin A
347. 37
37
IU
Vitamin C
126.7
mg
Calcium
204.26
mg
Iron
3.01
mg
* Percent Daily Values are based on a 2000 calorie diet.
TRIED THIS RECIPE?Rate in the comments below or tag @feedingtinybellies on Instagram!
Similar Posts
90,000 cherry layers, step -by -step recipe for 1343 kcal, photo, ingredientsAdd recipe
Recipe
Advertising
Viderait on the topic
Recipe from Julia Vysotskaya
Oat Coats and Eyels
9000 tea at work - a great, healthy snack! If the bananas are medium in size, it is better to take three pieces. You can add cinnamon or vanilla to the dough.Yulia Vysotskaya
Recipe by Yulia Vysotskaya
Coffee Canele
Canele is a wonderful dessert from the city of Bordeaux, great for breakfast with coffee or after dinner when you want something sweet, but there is no room for a big piece of cake.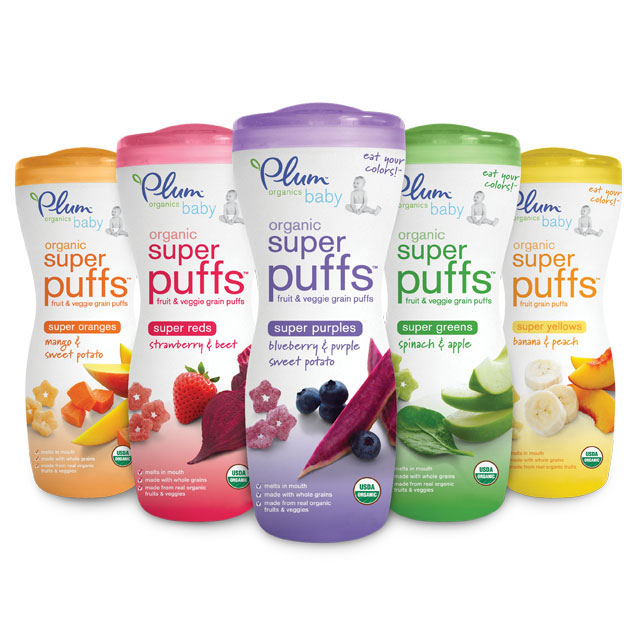 The dough is not here
Yulia Vysotskaya
Advertisement
Related video recipes
Recipe from Yulia Vysotskaya
Open pie with zucchini and shallots0003
For such a pie, you can take any dough - for example, shortbread or yeast. Gruyère cheese is perfect for the filling. Ready-made pastries can be decorated with herbs.
Yulia Vysotskaya
Recipe from Yulia Vysotskaya
Almond pie with raspberries
Yulia Vysotskaya
Advertising
Amaliya
Preparation
40 minutes
Recipe for:
2 persons
Description
Such cherry layers, sulfur zimny evenings, always raised you, always raised your mood and always rack your mood remind you of summer.
To the cookbook
With pictures No pictures
To favorites
With pictures No pictures
Log in or register and we will be able to withdraw your daily consumption of proteins, fats and carbohydrates
Enter/Register
Ingredients for
Portions
for filling
| g | g | g | g | g | g | g | g | g | g | g | g 9010 g | g | g | g | G. |
| starch | 1 tsp. |
| 4 st. l. |
Basic
| chicken eggs | 1 pc. |
| milk | 1 tbsp. l. |
| butter | 1 tsp. |
| Dough drill | 200 g |
Select all
photo reports to the recipe 3
Add photograph
081
Prepare the ingredients. Puff pastry should be at room temperature. Defrost cherries.
Combine cherries with starch and sugar in a saucepan, cook for 5-7 minutes over medium heat, stirring occasionally. Remove from fire and cool.
Roll out the dough on a floured surface to a 3 mm thick rectangle, then cut into 4 rectangles.
Visually divide the rectangles in half and place a spoonful of cherries on one half in the center. On the second half, make three cuts in the middle. Cover the filling with half of the sheet with cuts, pinch the edges.
Line a baking sheet with parchment paper, grease with butter and lay out the cherry puffs, brush them with beaten egg and milk. Sprinkle with sugar and put in a preheated oven at 190°C for 20-25 minutes or until golden brown.
Let the finished cherry puffs cool. Enjoy your meal.
share photo
agree?
VOTES FOR THE RECIPE OF THE DAY(2)
Recipe tags0003
advertisement
advertising
RECRECTION RECIPTION
tell friends
Filters
Rate all
Selection
Recipes of the day 9000 berries
Meat lovers
Cabbage salads
Pumpkin season: 30 recipes
Ingredients
Add to search
and or
Remove Ingredient
Users
Display
5 minute ready-made puff pastry cheese puffs
07/31/2018
Leave a package of ready-made puff pastry to thaw overnight on the shelf of the refrigerator, and in the morning in just 5 minutes prepare cheese puffs for breakfast.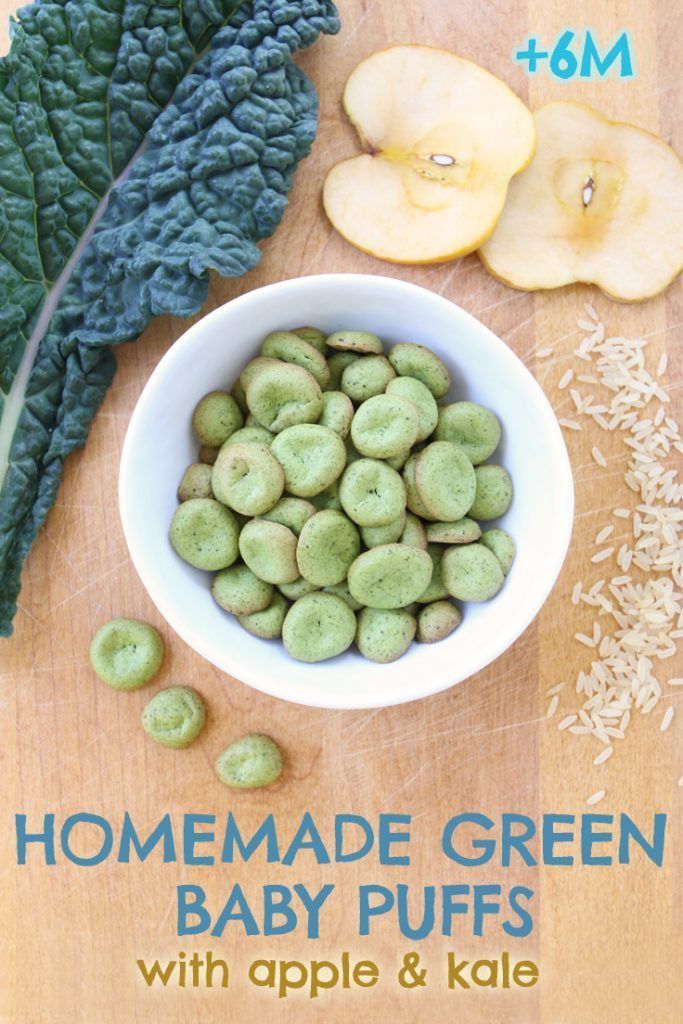 Put the baking sheet in a hot oven and after 15-20 minutes crispy and fragrant puff pastries for tea will be ready! Great start to the day, right?
You will need ready-made puff pastry (yeast-free). It is advisable to buy already sheet, it does not need to be rolled out. Simply cut the defrosted dough into squares, spread the filling on top and pinch the edges. From a package of 500 g you get 8-10 puffs. You can take some with you to work for a snack or give the children for school lunch. Cheese puffs tolerate microwave heat well, they can be eaten cold, but they are, of course, tastier when hot.
For the filling, take a piece of hard cheese and the same amount of Adyghe - in the mix they will give a brighter taste than if you used only one type of cheese. I advise gourmets to rub parmesan, cheddar or emmental, however, you can buy the usual "Russian" or "Kostroma" cheese. It will melt beautifully, and soft Adyghe cheese will make the filling more tender and fragrant, the pie will look like khachapuri. For a change, you can add chopped dill to the filling, it will also be delicious.
Total cooking time: 30 minutes
Cooking time: 20 minutes
Yield: 8-10 pcs.
Ingredients
- yeast-free puff pastry - 500 g
- flour - 2-3 tbsp. l. for dusting
- hard cheese - 150 g
- Adyghe cheese - 150 g
- chicken egg - 1 pc. for lubrication
- sesame - 1 tbsp. l.
Cooking
Large photos
Small photos
-
Ready-made puff pastry must first be thawed - you can in the refrigerator or at room temperature, if you are in a hurry. In the latter case, I recommend spreading the dough on a board sprinkled with flour, and so that it does not wind on top, cover it with cling film.
 In this form, it will defrost for about 1 hour if the kitchen is warm. I use sheet dough, it is already completely ready for shaping and baking, no need to roll out. If you have too thick a layer of dough, then you can walk a little with a rolling pin, but be sure to roll it in one direction - from the center to the edges, “toward” and “away from you”. The thickness of the dough should be approximately 3-4 mm. We cut the dough layer with a knife into squares of about 10x10 cm. In total, 8 or 10 pieces will be obtained, depending on the thickness of the rolling.
 -
Turn on the oven to heat up to 200 degrees. In the meantime, prepare the cheese filling. To do this, grind hard and Adyghe cheese on a coarse grater, mix. Salt is not needed. We divide the cheese mass into 8-10 parts and roll each into a ball (it is more convenient to lay out the filling, it does not interfere with pinching the edges of the dough).
-
Place a cheese ball in the center of each square.