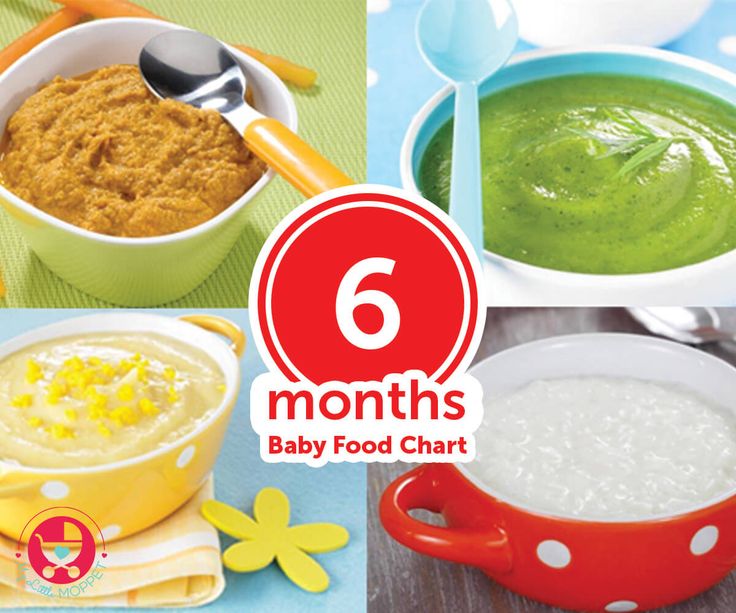
Best mesh feeder baby
5 Best Silicone Baby Food Feeders To Buy 2020
A baby feeder is used to introduce solid food to babies without worrying about the risk of choking.
A food feeder looks pretty similar to the shape of a baby pacifier but much bigger than that.
The food feeder comes with either a mesh or silicone pocket where you fill your solid food in.
Every food feeder comes with a cover that closes at the bottom to hold the food inside the pocket.
The food feeders also feature an easy to grip handle for babies to hold and gnaw the food. Some food feeders have a cover that goes over the pocket for hygiene.
Table of Contents
How Do Baby Feeders Work?
Food feeders serve a pretty simple purpose and are not complicated to use.
- Choose some age-appropriate food you want to feed your baby
- Clean the baby feeder
- Open the lid and put the solid food inside the mesh or silicone pocket
- Close the lid, remove the cover (if your feeder has one)
- Hand it over to the baby and watch them make funny faces while trying new foods.
- Once they are done, dump the excess food, wash, dry and repeat.
Sounds simple, right?
Are Food Feeders Good For Babies?
There are a million baby gadgets in the market today, and you are probably wondering if you need one more. Hear me out.
I swear the baby feeders are AWESOME! For the price they cost, they do a fantastic job, and babies enjoy them.
Here are 5 reasons why you need a baby feeder.
1. Teething:
If you have a teething baby, then you might already know that teething babies love to bite on everything. Baby feeders, especially when served with cold food, can be soothing to aching gums and relieve their teething pain.
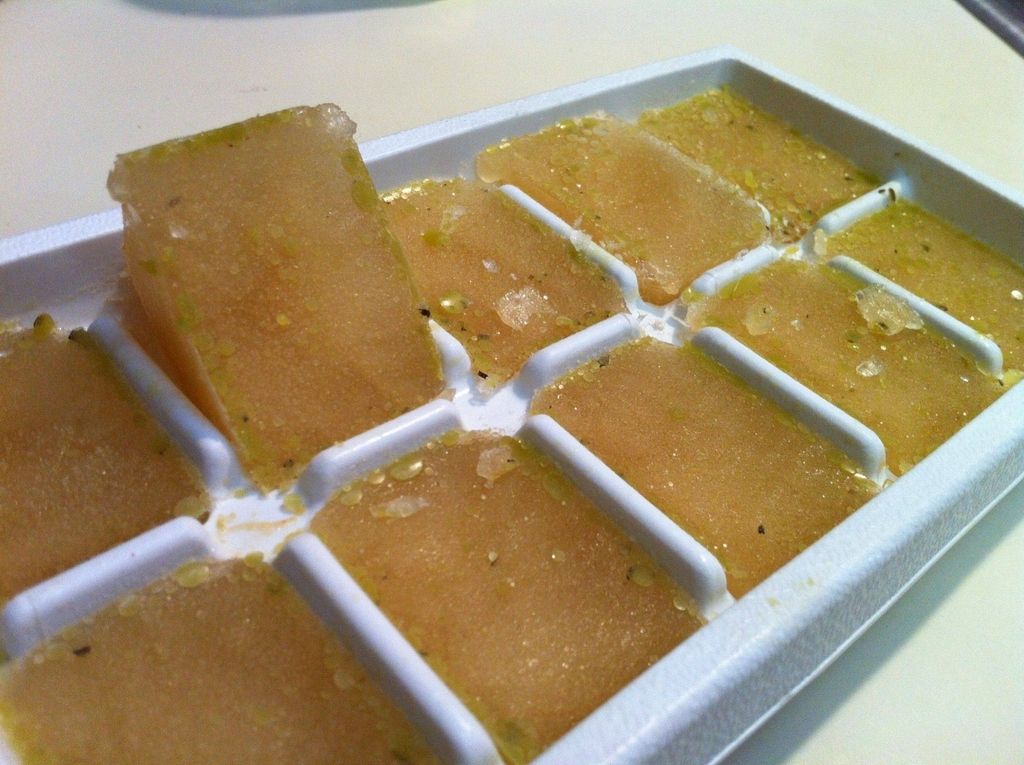
If your baby has not yet started solids, then you can fill the feeder with frozen breast milk or formula ice cubes.
2. Prevents Choking:
One of the scariest things that I faced while introducing solid food to my babies was when they started to gag or appeared to choke.
By using food feeders, you are not exposing your infant to big portions of food particles, which creates a safe feeding environment for them to try new food.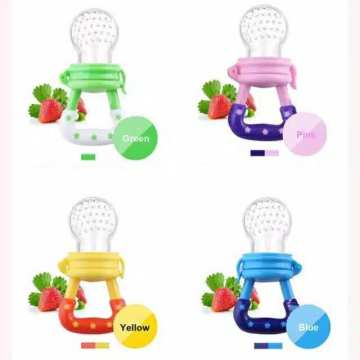
3. Develop Motor skills:
Food feeders encourage babies to practice self-feeding. It develops the hand-eye coordination that is needed to master spoon or finger feeding.
4. Keep Them Busy:
This has to be my favourite reason!
When I ran out of ways to keep them busy, I would just put some frozen fruit in the baby feeder and hand it over to them.
They happily enjoy their snack while I get some time to finish my work.
5. Sensory Experience:
Food feeders also provide a good sensory experience which babies love. It also instils a positive attitude towards trying new food.
Silicone or Mesh? Which one to Choose?
I am 100% team silicone, and I would highly be using silicone feeders because they are easy to clean and a plastic-free option to use.
Mesh feeders are a pain to clean, food gets stuck in between the mesh, and it is challenging to get them out.
I tried mesh feeders before; I was naive enough to try them with bananas.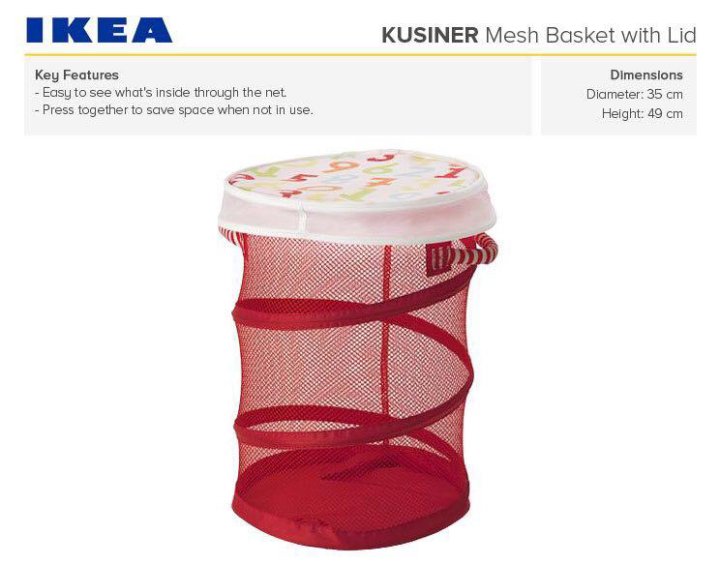 I let them sit on the counter before washing them.
Let’s say that I had to throw the mesh feeder away; I went and bought a silicone feeder and never looked back again.
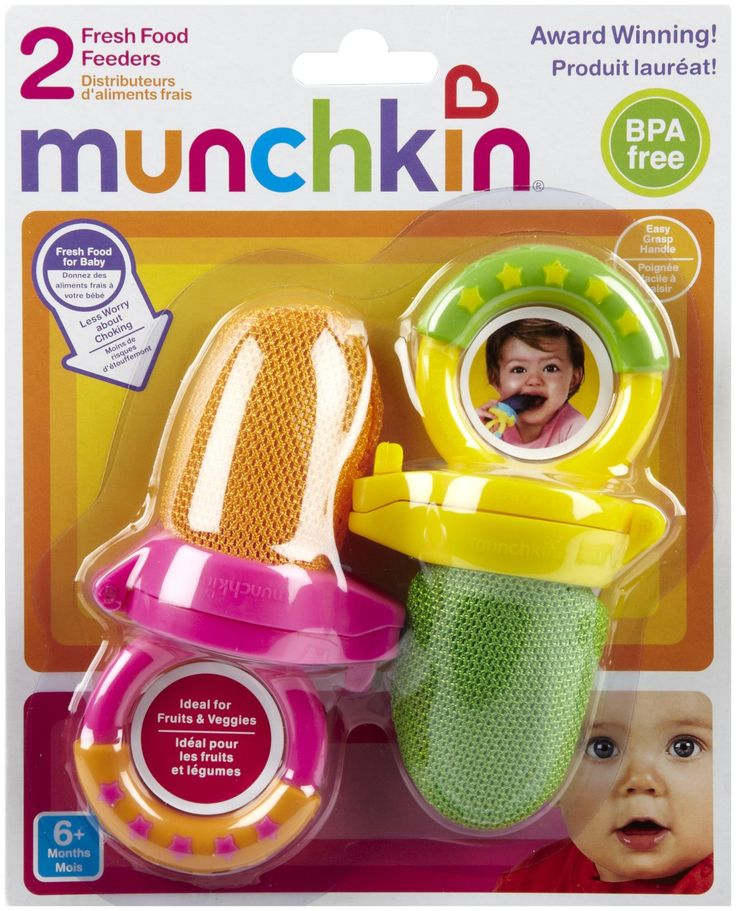
If you still want to try mesh feeder, then munchkin ones are hands down the best.
Best Silicone Baby Feeders:
1.Boon:
BUY NOW
Boon is one of my favourite brands. They really care about their customers and only use safe materials to make their products.
Their silicone feeder is particularly my dearest. The feeder itself is made of soft, food-grade silicone with small holes through which your baby can taste the food.
It comes with a firm handle for babies to grab and enjoy their treat.
Boon feeder was perfect when we started with solids and was great relief during the teething phase.
Some parents complain that they find it small, I did not find it so and you can always refill and offer seconds if they want more.
I did find that my kids had a hard time getting any solid food like solid apples out of the boon feeder, so I always offerred food that were soft and juicy like berries.
2.Kids Me Food Feeder:
BUY NOW
Kids me feeder comes very close to Boon feeder for me. For serving at home, I usually alternated between both Boon and Kidsme.
When I am out and about, Kidsme was the winner for various reasons.
1. Boon does not come with a cover, but Kids me does. You can easily keep the feeder closed, hygienic using the cap.
2. Kidsme feeder also comes with a hole between the handles that attach to clips or holders to prevent dropping on the floor.
3. Kidsme comes in two different sizes, medium and large; you can use the appropriate size based on your baby’s age.
4. My babies seem to love the double handle, and they found it easier to grab them with both the hands.
The sac itself is made from food-grade silicone and FDA certified. You can also buy replaceable silicone sacs to use instead of buying the whole feeder if you want.
The textured silicone sac is also great for teething babies. Seriously, it is a lifesaver when you offer chilled or frozen foods in this feeder.
Your babies will thank you and may even reward you with 30 minutes of fuss-free time.
3. Ashtonbee Baby Feeder:
BUY NOW
AshtonBee Feeder looks pretty similar to Kidsme. AShtonBee also comes with a cap to cover the silicone sac and a safety lock that ‘clicks.’
Ashtonbee is marketed as a silicone feeder and pacifier because it clams your child down during teething pain.
The silicone sac itself is food-grade silicone that is free of BPA, Lead, Petroleum, Phthalates, so it is safe for your baby to nipple.
4.Nature Bond Fruit Feeder:
BUY NOW
If you dislike the idea of buying different size feeders as your baby grows and wondering if there is a product that grows with your baby, then Nature Bond food feeder is where it is.
You get two pack baby feeders, and it comes with 3 different pair of sizes-small, medium and large.
The sac is made of food-grade silicone that is BPA Free, Latex Free, Phthalates Free, and Lead-Free.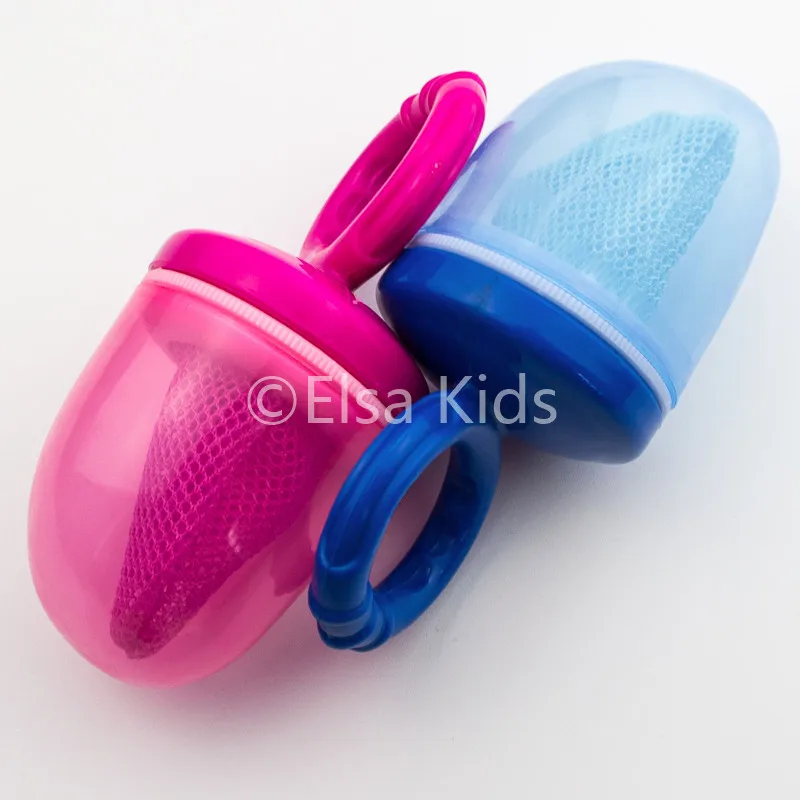
Nature bond feeders come in fun colors (think candy!) that your kids will love.
5. Moss and Fawn Forage Feeder:
BUY NOW
We at ANM, love supporting mom businesses and that’s why this brand is special to me. Sofia, the owner of Moss and Fawn, sent me her forage feeder to try and I loved it.
Please note that I only received the product for free; I was not compensated to write this post; all opinions are my honest views.
The product comes with a feeder and three silicone sacs that grow with your baby.
The forage feeder comes neatly packed in a cloth bag and also contains a booklet that guides on how to use the feeder and offers suggestions on best foods to try.
I love the company how this brand believes in sustainability and makes a conscious choice at every step of making the product.
Their packaging is recyclable, the booklet is printed in a wind-powered facility, and printed with vegetable ink on recycled paper.
They also use 100% cotton bags to pack their feeder and 100% natural wood strands as filling that are easily compostable.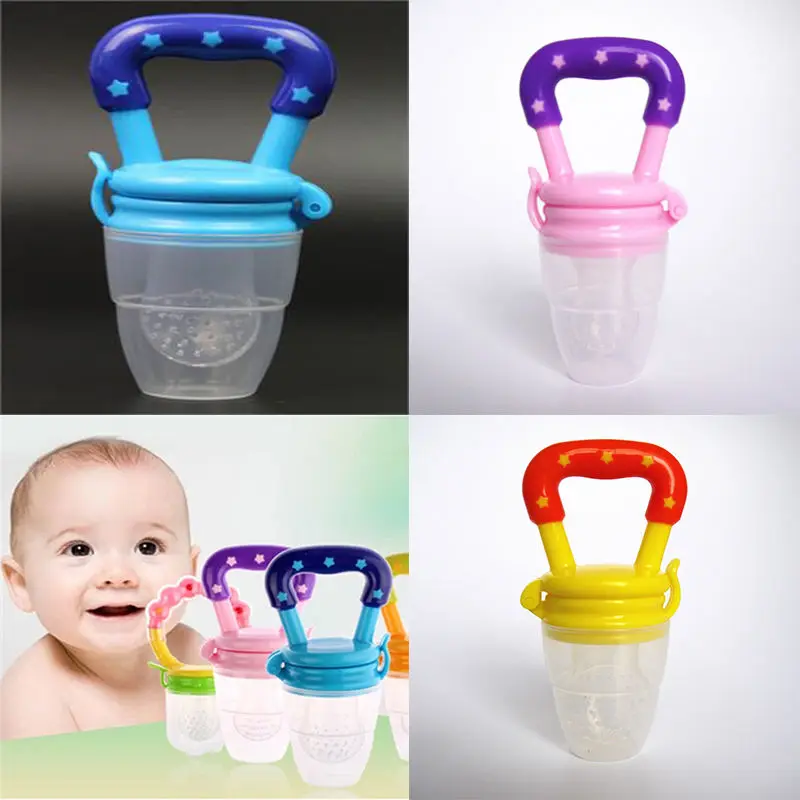
The forage feeder is made of safe, non-toxic food-grade silicone, tested free of BPA, PVC, Phthalates, and Lead and is also FDA and CPSIA compliant.
Yay! for this company for looking out for your baby and the environment.
Let’s Wrap Up:
Silicone feeders are safer and easier than using mesh baby feeders, in my opinion. They are perfect to introduce solid foods to your baby and works wonders during teething.
Not all silicone feeders are made the same, though. It is important to look for one that is made with food grade silicone without any fillers.
Also, I highly recommend using a one that is free of unwanted chemicals like BPA, phthalates, lead and pvc.
Considering all the above points,
Here is my list of Best Silicone feeders to Buy (2019):
- Boon Silicone Feeder
- Kids Me Food Feeder
- AshtonBee Feeder
- NatureBond Food Feeder/ Pacifier
- Moss and Fawn Forage Feeder.
Did you use any food feeder? Which one did you use and how did you like it?
Sharing is caring!
108 shares
Ultimate Guide to Baby Feeders: Mesh and Silicone
You may have seen baby feeders, whether mesh or silicone, and wondered what they are for.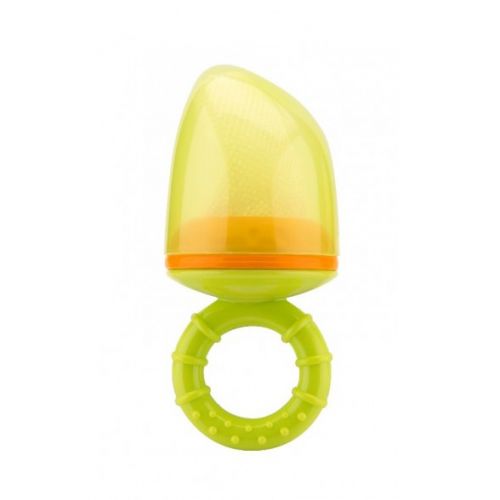 They are a great tool for feeding babies and toddlers—and are especially awesome for teething relief. There are many on the market though, so today I’m sharing the best of the best.
Baby Feeder
A baby feeder is made up of an easy-hold handle and a little pouch with lots of holes. The idea is that the holes allow some of the flavor and texture of the food to come out, without the concerns that may come with larger pieces of food.
This means you can worry less when it comes to choking risks.
One thing to keep in mind: They don’t allow babies to have the full texture experience of the food—since the texture is mostly the mesh of the feeder. That means you don’t want to use one of these for every meal (or even most meals).
Lots of exposures to lots of textures helps babies and toddlers gain confidence in handling all sorts of foods, which can make feeding kids a lot easier over the long run.
But an infant feeder can be a handy tool to have in the mix, especially if on the go, starting to transition to baby food, or trying out a new food that has you a little nervous.
And they are a great way to offer cold teething relief to soothe baby’s gums.
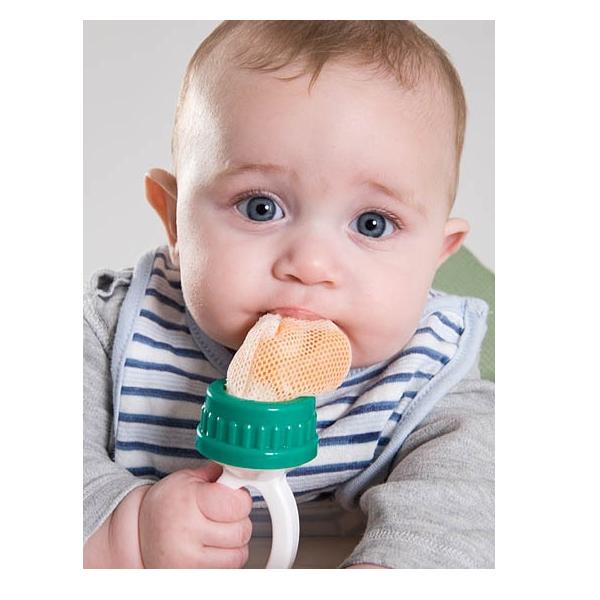
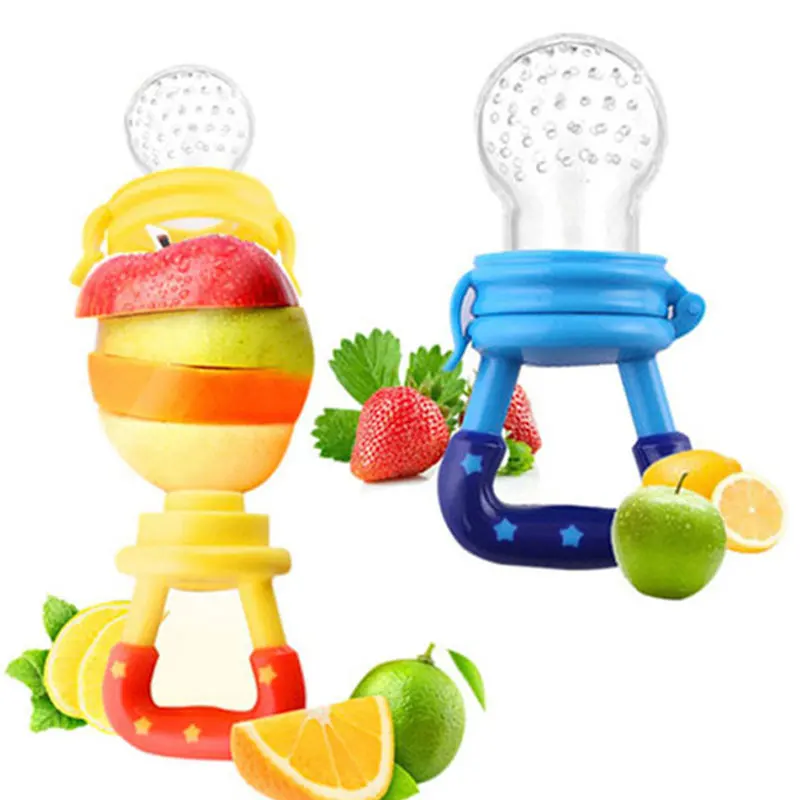
Baby Fruit Feeder
Many people like to use baby feeders to offer fruit, either fresh or frozen, since the product is a safe way for baby to suck on and explore the flavor of a wide range of fruit.
TIP: Another name for this is Baby Fruit Pacifier.
Best Baby Food Feeders
Below are my top picks for infant feeders chosen for ease of use, durability, and ease of care (as in washing!). There are different materials listed, as well as specific information on each product.
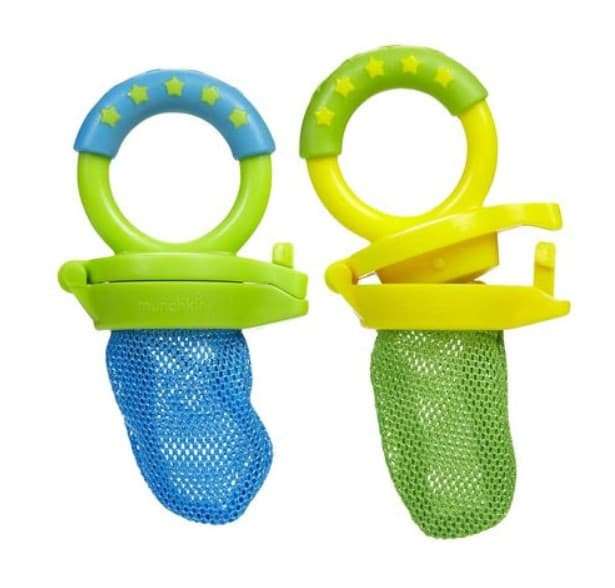
Best Mesh Feeder
Munchkin Baby Feeder, sold in a set of two. (Or choose the ones that come with travel caps.)
This baby feeder has a streamlined, simple design of a mesh bag for the food and a ring for baby to hold onto. Small, digestible pieces of food come through so baby is getting some nourishment (and comfort if using for teething) without the risk of choking. It’s about $7 for two of them.
Best Silicone Feeder
Boon Silicone Feeder
This baby feeder, which is priced at under $6, is made from durable silicone and can be used with fresh or frozen foods. The interior stem forces food toward the tiny holes in the feeder and the small handle is sized just right for baby’s little hands.
Kidsme Baby FeederBaby Feeder Pacifier Combo
Kidsme Food Feeder
This popular Kidsme feeder has a replaceable silicone pouch that comes in two sizes, so you can adjust and replace as your child grows. It has a unique handle style that some babies may prefer and can be used as a pacifier too. It’s usually priced around $15 and is recommended for ages 4-24 months.
What baby foods should I put into a baby feeder?
Here are some fruits that are good to serve in a baby feeder:
- Raspberries, fresh or frozen
- Strawberries, fresh or frozen
- Blackberries, fresh or frozen
- Cantaloupe
- Honeydew
- Banana
- Mango, fresh or frozen
- Roasted sweet potato
- Roasted butternut squash
- Ripe fresh pear
- Fresh cucumber, skin removed
- Watermelon
- Cooked red meat such as steak
- Frozen grapes (These are NOT safe served to a child this age in any other way as they are a choking risk.
 They are fine served inside the feeder, though.)
TIP: You can use frozen fruit or ripe fresh fruit that’s soft and easy to gum. Avoid any fruits or veggies that are very hard as baby may be frustrated by that texture.
Frequently Asked Questions
What age can baby use a mesh feeder?
Babies can use an infant feeder soon after starting solids around 6 months, or when they can easily hold it and bring it to their mouth.
How do I use a baby feeder to help with teething?
If you fill the feeder, whether mesh or silicone, with frozen fruit, you can soothe teething in infants who are eating solids or in toddlers. It’s cold and yummy, yet requires no real work for the child to suck on, so it’s comforting.
Are all of these baby feeders BPA-free?
Yes, if you choose a mesh baby feeder or one made from silicone, they are BPA-free.
What’s the best way to clean a baby feeder?
Try using a bottle brush or just running water to clean out the mesh. It should be fairly easy to clean if you avoid letting it sit too long with food in it!
Are baby feeders good for babies?
The one downside could be that if you rely on them too much, the child learns the texture of the feeder, rather than of the food. This can make it harder for a child to learn to move actual food around in their mouths and harder for them to accept a range of textures in the future when you don’t want to be using the mesh feeder as much.
Because of that, I recommend using this product at limited times such as when on the go at a restaurant or to help sooth a teething infant, baby, or toddler.
This is not recommended as a way to feed your child at every meal.
If you are worried about choking, review this information on toddler choking and trust that if you serve foods that are easy to squish between your fingers, baby is sitting down at meals, and you are with them, they will learn to eat like so many other kids who have gone before them!
You May Also Like
- Best Baby Puffs
- Favorite Sippy Cups
- Best Snack Containers
- Best Lunch Boxes
- Favorite Suction Bowls
- Top High Chairs
I’d love to hear your thoughts on baby feeders in general or on these specific products, so please comment below to share!
This post was first published May 2019.
BIRD FEEDERS (14 ways + 62 photo ideas).
Good afternoon. Today in the article I have collected the best models of winter bird feeders. I will show you what options for bird feeders you can make with your own hands - from a variety of materials (bottles, boards, twigs, etc.). If your task is to make a feeder for the window of a city apartment , here you will find a suitable idea. If you want to make a feeder for a competition in kindergarten or school , then you have come to the right place. That is, any home bird feeder is made according to one of the methods described below. And there are 9 collected here in total0003 12 easy ways to make your own feeder, with a detailed description of each model.
So, let's start making our dining houses for our feathered friends.
Feeder Model #1
4 support posts.
We start with simple classic design winter bird feeder. Here he is in the photo below. Let's see what are the main parts of such a wooden feeder
FEEDER BOTTOM is a simple board with sides.
FEEDER SUPPORTS are 4 bars stuffed into the corners of the bottom sides.
GED - this is an almost triangular board, stuffed to the bars (pediment on the left, and the same on the left)
ROOF SLOPE - two wide boards that lie on the edges of the pediment, forming the actual roof.
Here in the photo of the winter feeder below we see that the ROOF SLOPE can be made not with ONE SOLID wide board - but with two narrow boards that overlap each other.
Such a homemade feeder can be hung from ropes threaded under the roof of the feeder, or you can drive a large metal hook into the ridge of the roof (as in the photo of the bird feeder below).
By the way, please note that the pediment of your wooden feeder can be made in different designs. Just triangular (first photo), a triangle with an arched saw cut (second photo), or a fountain in the form of divergent beams (third photo).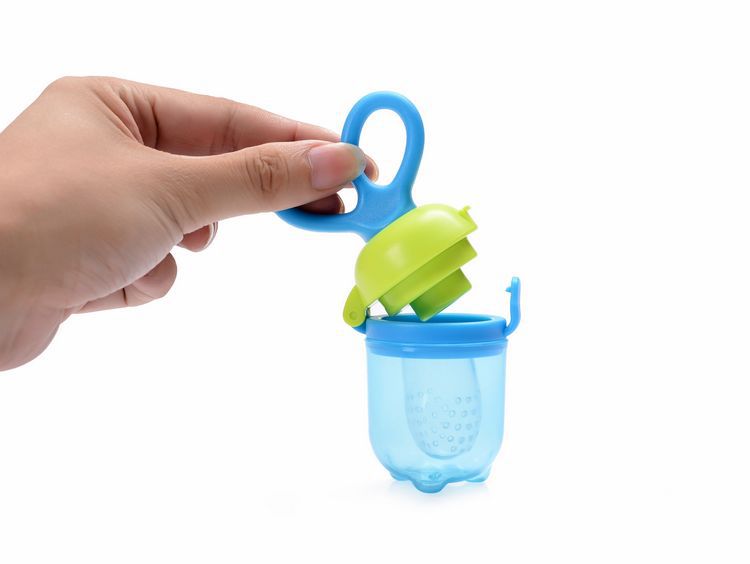
In one more photo-example of a home-made craft-feeder, we see that the SUPPORT LEGS do not have to be positioned PERPENDICULARLY DIRECTLY. They can have a beveled shape and are not stuffed at the corners of the bottom, but a little closer to the center to the inner edges of the sides of the bottom of the feeder.
Also on this wooden feeder (from the photo above) we see an example of a carved roof - when the roofing boards have a carved edge. This can be done if you have a wood lathe.
You can also cut the tiles for the roof of the bird feeder with scissors from a soft roofing material - from roofing material.
Here in the photo below we see the creative work of MASTER Alexander from Taganrog. He came up with an original design for a bird feeder in the form of a Japanese pagoda. And the roof on the roof of this winter feeder pagoda was cut out by from roofing material and fastened with nails and metal staples.
If you want to see the best beautiful and original feeder crafts , made by hand from wood - I recommend that you go to the site Fair of Masters and in the line SEARCH ON THE SITE, enter the query "bird feeder".
QUESTION:
Do I need to paint the feeder?
Birds are wild animals that are used to trusting nature and not trusting humans. If you want the feathered inhabitants to settle in faster than , you should not paint it in bright juicy colors.
The best color for birds to trust is the color of wood. Simple wooden boards do not cause fear in titmouse birds, and they almost immediately begin to fly to feed in such a street house familiar to their bird world.
Even better if the outdoor feeder is made of wood with bark preserved. Ideal for working on a homemade bird feeder bars from birch saw cuts thick branches (as in the photo below).
And you can also stuff a thin twig (or lath) over the sides of such a winter feeder - so it is more convenient for titmouse to sit, clasping a narrow branch with its paws, and turn its head, look around.
The roof slope of this bird feeder can also be disguised as a natural design. Below in the photo we see a small master class, which shows the process of sheathing the roof of a forest feeder with coarse branches.
Also, the roof of the forest bird feeders can be masked with small branches or straw (as in the photo of the winter feeder below).
Such natural winter bird feeders are made by Master SERGEY from Mytishchi. You can find and buy his beautiful works on the site FAIR OF MASTERS . Below in the photo you can see his personal profile and examples of works made by his skillful hands. All works are for sale - and you can buy them just in time for this winter season. Only you will have such a house-feeder - as an exclusive and original decoration of your garden.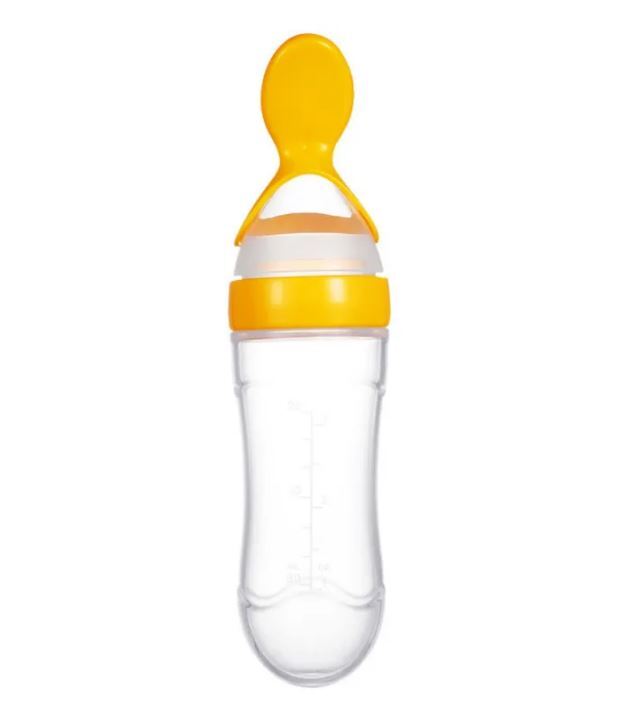
Now let's look at a slightly different bird feeder layout. Here the drawing of our bird dining project will be a little different.
Feeder Model #2
2 reference planes.
The next model of the wooden bird feeder differs from the first one in that its roof is supported not on four support legs, but on TWO PLANES (left and right).
So you don't have to have four blocks for the legs of the roof support for the winter feeder. And it is enough to fill with one vertical board on both sides of the bottom of the feeder. And on these 2 supports put the gable and the roof.
What's more - you can make such a feeder double deck . If you just extend these side boards down and nail another bottom to them. Or you can come up with your own even better and more beautiful bird feeder ideas.
As you can see, this double wall bird feeder project can have DIFFERENT DESIGNS.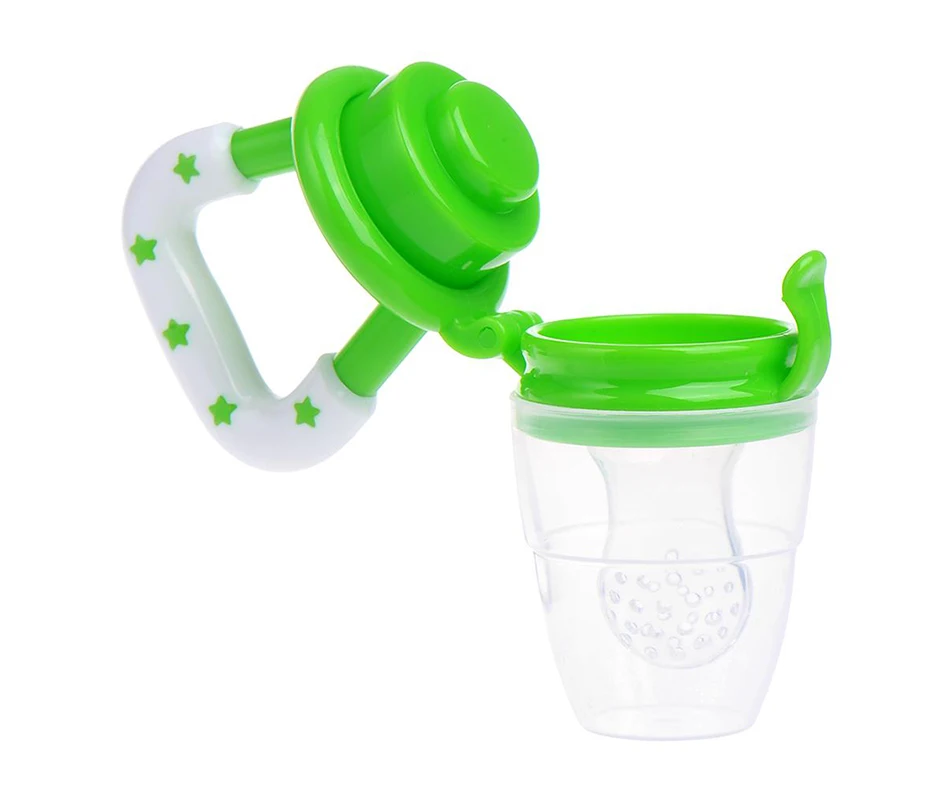 And you do not need to know the exact dimensions, diagrams and drawings with numbers. There are no limits to your creative thought.
Any bottom shape.
The shape of the side supports can be any.
The shape of the roof can also be any.
And these molds can have any size.
You can make wide low supports. Or tall and narrow. In any case, you will get your own original bird feeder. And you yourself decide what to saw off and how to nail.
The side walls can also be used for feeding devices on which whole apples and large pieces of lard can be strung - on metal pins. Below we see a design for a winter feeder where large round holes are sawn into the side walls - a metal spoke passes through them. It is easily removed, a piece of lard, pumpkin, an apple is placed on it, and the needle is again threaded into its hole.
Let's look at the works below, taken from the same site Fair of Masters, which I advertised above.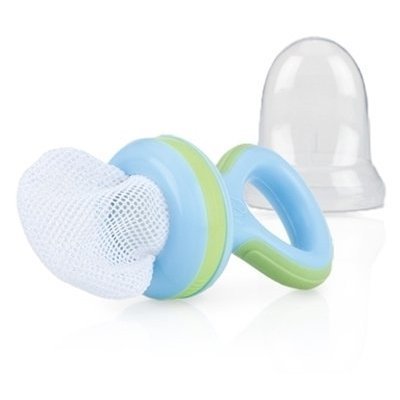 Master Mikhail987 from Moscow took the same two-wall model of a homemade feeder that we are now talking about (a feeder based on two side boards).
And turned these two side boards into the walls of the house (he drilled four holes with a thick drill and framed them in the window). And the bottom of the feeder was extended by - it was made protruding beyond the wall, and supplemented with a fence. And along the edges of the roof, I filled crosswise with two slats - to get a roof with a cross ridge.
Wonderful craft for the competition of the best winter feeders – and quite easy to make.
And here is the idea of a wooden feeder that looks like a birdhouse in its design. Side walls and high sides make such a feeder protected from the wind. In such a house-dining room, titmouse birds will be warmer.
You are free to realize your own ideas and make the most unusual designs of wooden bird feeders. And decorate them imitating any subject. For example, this barrel-feeder idea was invented by Master Dmitry from Kemerovo.
And here is the work Craftswomen Ivushka , also from Moscow. She decided to cut the support boards in the shape of a branched tree. And I got my original idea for a feeder.
Feeders similar in style are made by Workshop #13. She is selling children's gift SETS for prefabricated wooden feeders . The set comes with paints that you can use to decorate your children's craft-feeder.
At Workshop No. 13 you will find sets of children's feeders with the funniest pictures - with bullfinches, with cats and even in the form of Baba Yaga's Hut.
Feeder model no. 3
with grain box and dosing unit.
And here is another work of the creative team called WORKSHOP #13 . Here is the usual double-wall design of a winter feeder - supplemented with a GRAIN METER.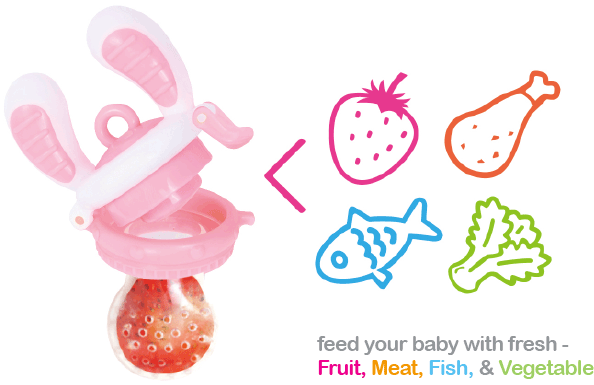 In such a bird feeder, you can pour a large pile of grain, and leave for a few days, knowing that the birds will have enough food for a long time.
Here's how it's done. Narrow vertical grooves are sawn from the inside of the walls of the feeder. Glass (or plastic) is inserted into these grooves. The glass does not go down to the very bottom (it is not allowed to go down by two slats stuffed at the bottom) - and thanks to this, there is a gap under the bottom of the glass. Seeds will fall through it. As the grain is eaten by birds, a new portion of food will fall into the gap.
Right now you can go to the Fair of Masters website in the search bar to find Workshop No. 13 and buy yourself such a convenient feeder. It can be hung in the country, or donated to a kindergarten.
Here in the photo below we see the same feeder with a dispenser glass . But with one addition. sticks are stuffed along the edge.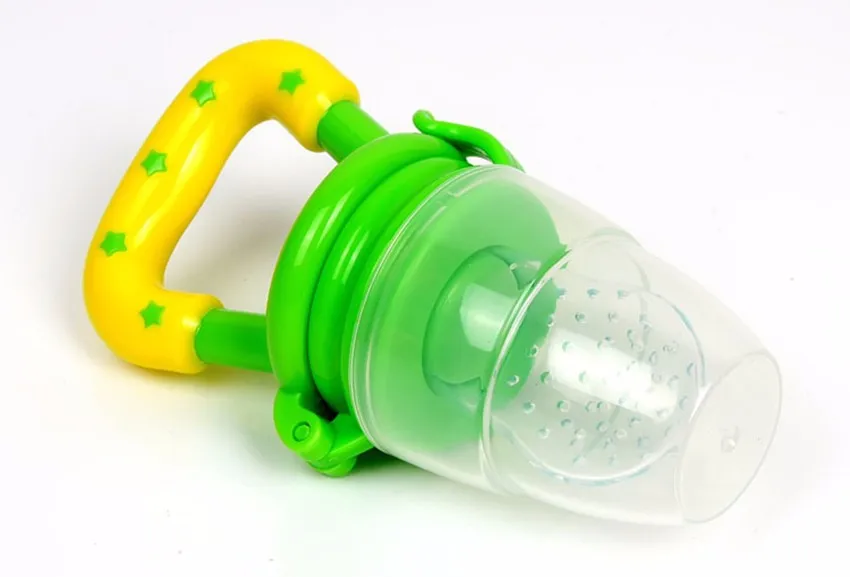 Pieces of apples or lard can be strung on them , which tits like to eat.
By the way, here is a drawing of a similar feeder with a dispenser glass. Please note that the roof on the feeder house is hinged - and therefore it opens like a door.
Here are two models of the feeder where the glass limiter is located on the four walls of the feeder.
And here is a simple idea where the dispenser is a cut-off plastic bottle . It is hung inside the feeder 2 cm short of the bottom of the house . Thus, a gap is formed between the edge of the bottle-pipe and the bottom , through which part of the seeds spills to the bottom. And in order to make it convenient to add new food into the mouth of the bottle, removable cap.
Another feeder design with a slot dispenser. Here the feed compartment is located on both walls of the feeder.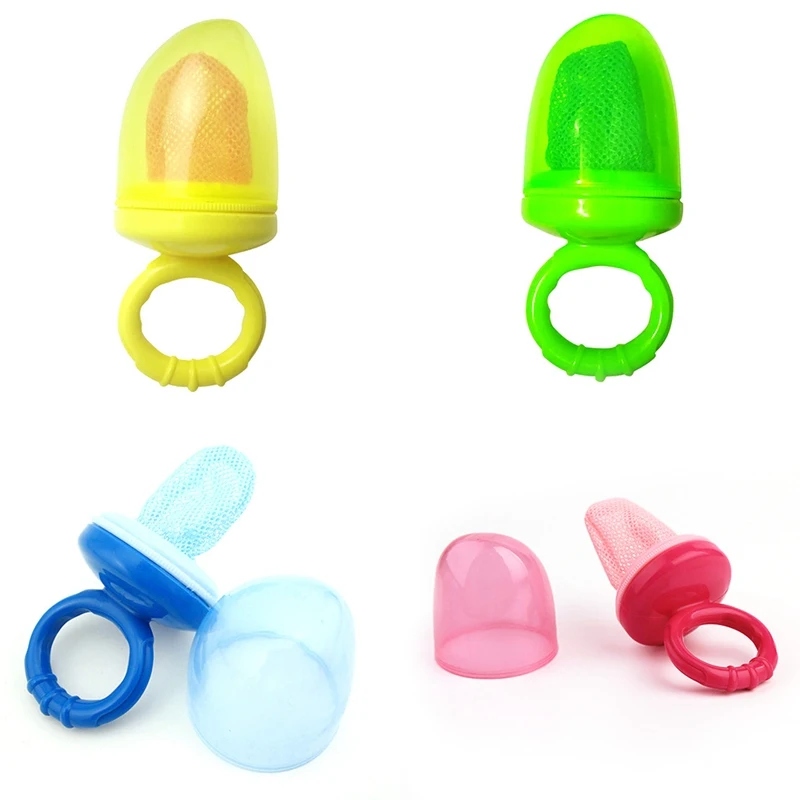 And in the middle compartment, where the bird sits, the grain passes through the gap below - leaks from both grain compartments.
Feeder model #4
WALL.
If your property has very tall trees and you can't reach a branch to hang your home feeder on a bough, you can model simple feeders to hang from a tree trunk.
You can also come up with your own devices with which you can hang the feeder against the wall or at the window of your house (to hide behind the curtain and watch how the chickadees eat).
Feeder model #5
with bottle dispenser.
And here is another winter feeder model. Perhaps the best option for those who want to quickly and easily make a do-it-yourself feeder. To do this, make a fastening system made of wood that will support the bottle in an upside down vertical position.
This feeder can be made from a plastic bottle or glass - it doesn't matter.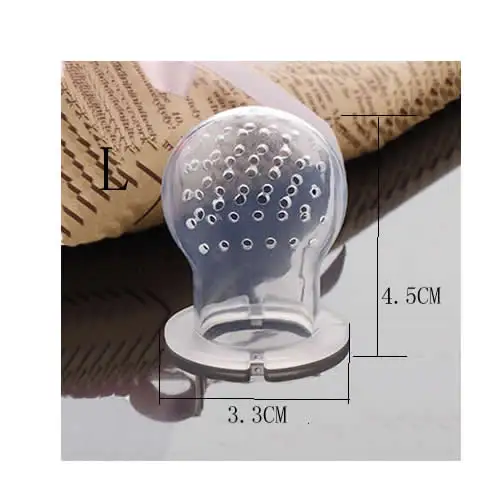 It is even easier to attach a plastic bottle - just make a hole in the cut of the bottle and thread the wire. And a glass bottle can also be attached to a wire or rope, if the bends of bottle do not allow it to slip out of such a rope grip (as in the photo below - there the expansion at the bottom of the bottle is just a bend that allows it not to slip out.
This winter feeder can be hung on a tree trunk - on a nail or a rope wrapped around the trunk.
Feeder Model #6
WITH METAL MESH.
Now let's talk about titmouse feeders, where the food lies behind a mesh fence, where the mesh size allows the titmouse's beak to reach the treat.
Below on the left photo of we see a simple mesh feeder WITH A PULL-OUT COMPARTMENT. The compartment is pulled out, bird food is poured into it, and it is put back into the feeder.
On the right photo of we see the drawer SEPARATE from the feeder .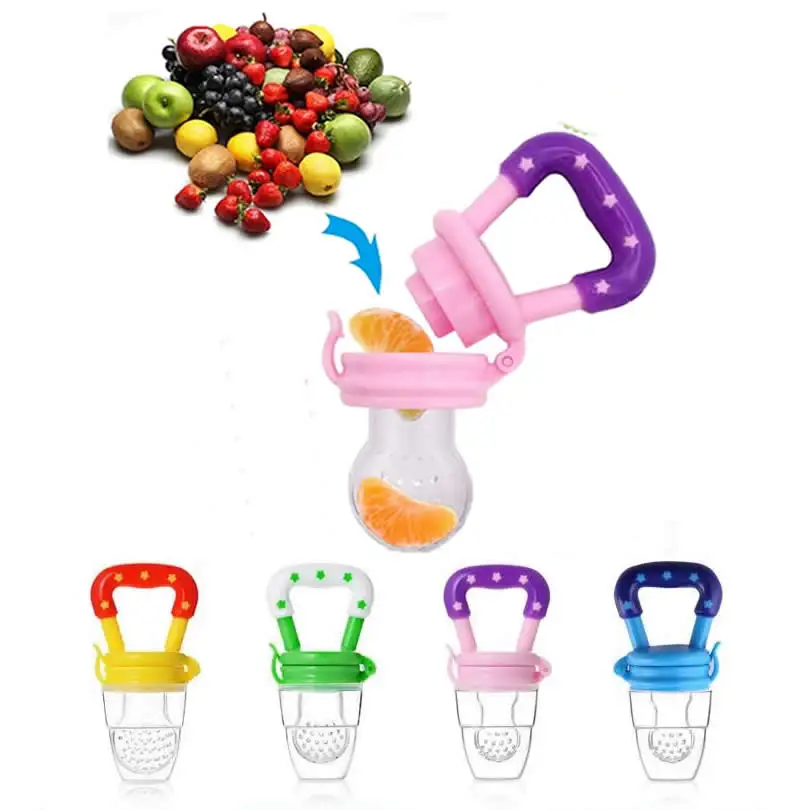 It does not even stick anywhere - and the mounting ears are screwed into the compartment frame itself - and for them it is hung on a tree. The mesh can be nailed to the frame with nails with wide round spacer nozzles (so that they press the mesh to the frame). Or you can fix it with staples (as in the photo). Or fix with thin nails - but not hammering them to the end, but only half, and then bend at an angle so that the nail presses the mesh against the frame with this fold.
But in the photo below we see a large feeder, where the net is used in two different designs.
Firstly, two thick slats are stuffed onto the side blank wall of the feeder, and a net is attached to them (it is convenient to put whole slices of bread there).
Secondly, the mesh is wrapped around a cylindrical socket. And in such a home-made mesh glass is filled with peanuts.
Gorgeous large feeder. Using her example, you can also take a swing at such a serious project and draw your own drawing of a large-scale house for wintering birds with all the amenities..png) And then bring that blueprint to life.
And then bring that blueprint to life.
Or you can make this mesh cylindrical mesh separately. The bottom is a simple tin lid from a jar of cucumbers. Roof - plastic plate for potted flowers. We roll a piece of mesh into a pipe - fix the sides with wire. Drill two holes in the bottom of the lid. we thread a rope into them (a thick knot prevents the rope from slipping out of the hole). We stretch the ends of the rope through all the cells of the mesh wall to the very top of the cylinder. We also drill the same holes in the roof plate - we bring the ends of the rope up through them - and hang the ends of the rope on a tree on the same ends.
In the photo of feeder below we can see a long section of the net, which is stuffed along the figured frame, which is stuffed on the end wall of the house.
And on the bottom of such a house we fill, or we hang a hook. It is convenient to cling nets with lard for tits, loaves of bread, or feed balls on it (as in the photo below). Feed balls are molded at home. We take oil and grain. In a bowl, mix the fodder grain with oil into a homogeneous mass and sculpt a round ball from it. Wrap in cellophane and put in the fridge. Then it can be put in a net and hung on a feeder. It will be useful for birds to eat such fatty foods - in winter it is not superfluous to accumulate spare calories under feathers.
Feeder model no. 7
For hanging feed.
Winter feeders of the following designs are designed specifically for such hanging food in nets, in the form of grain balls, lard, slices of bread or bagels. That is, the conditional outlines of a house with a roof (in order to protect food from wet snow or rain). Below I am just attaching a drawing of such a feeder. And the sizes can be the most any, depending on the material you have available.
Feeder Model No.
 8
8 assembled from plywood.
Prefabricated plywood feeders are also common. They are assembled according to the principle of children's cardboard 3D puzzles - figured ears are inserted into sawn grooves.
On the site Fair of Masters, I found two craftsmen at once who offer such light hanging plywood feeders.
And if you yourself are fond of cutting plywood with a jigsaw, you can come up with your own design of the feeder. And your ideas can provide winter shelter for hungry birds.
For starters, you can make a template for the future feeder out of cardboard, see how the parts fit together. And then circle these cardboard template parts on a sheet of plywood and cut them out with a jigsaw.
And then such plywood feeders can be given to children for coloring with paints . Such a craft-feeder painted by children's hands will become a real family heirloom and will be proudly hung on an apple tree every year.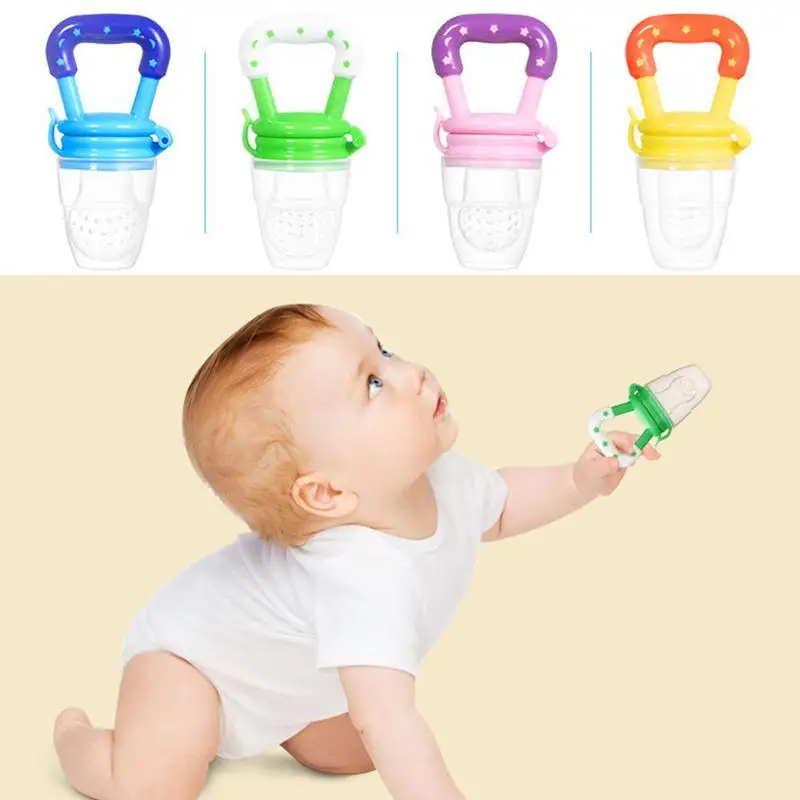
Baby feeders - will warm your soul with warmth even when your native "chicks" grow up and scatter to different parts of the country, and you will do a little family magic "Here I hang the feeder on a tree - titmouse will fly in, which means my children will soon arrive visit me."
Feeder model no. 9
WITH SUCKERS.
I also really like the idea of a transparent plastic feeder that attaches directly to your window glass with suction cups. Transparent walls allow you to watch birds hiding behind a curtain. Children will be delighted to eat even in a city apartment you hang such a feeder on the window - after all, even titmouse sometimes fly to the 9th floor, sit on the ledge for half a second and fly away. And here they will linger for a long time and you can watch these cute little yellow lumps with bated breath.
You can order and buy such window feeders at Art-Feeder on the Fair of Masters website. Or try to make such a feeder with your own hands - from a transparent tray and suction cups from towels.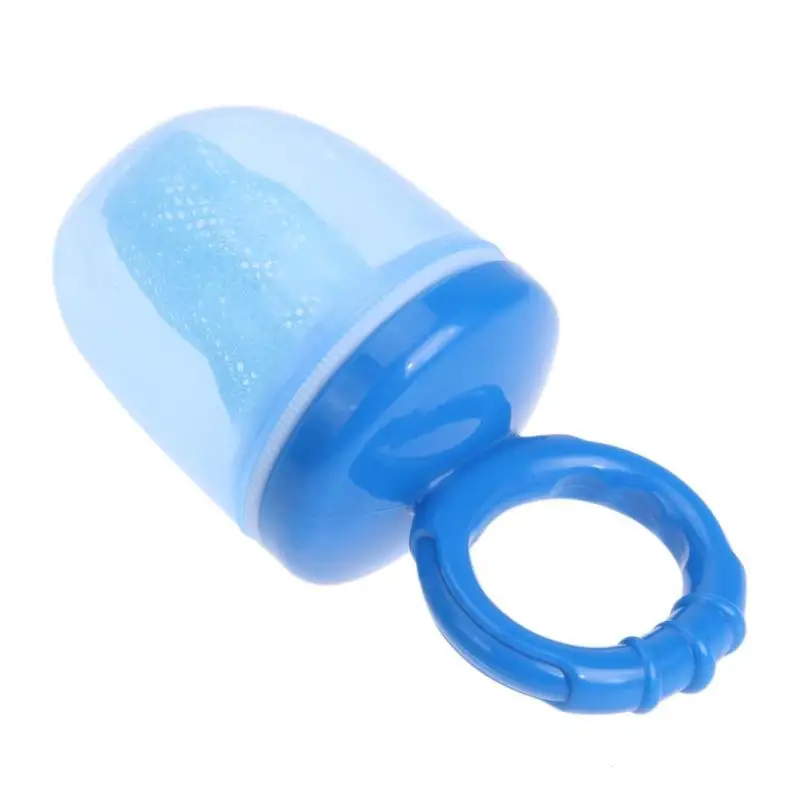 Or buy a ready-made transparent shelf for the bathroom with suction cups and adapt it to the grain hopper.
As you can see, making feeders with your own hands is possible from a variety of materials. Why not come up with your own creative idea for a feeder made from an unusual material that is easy to find in a hardware store or hypermarket.
Feeder Model #10
And thin willow twigs (vine) are also an excellent material for making beautiful bird feeders. Moreover, birds immediately trust such wicker houses, for the reason that they are made of branches. And birds are not afraid of branches - branches are their home.
An old wicker bread box, a wicker jug can be an excellent bird feeder. Unusual use of ordinary things.
Just found a craftsman who makes such birdhouses with his talented hands. In winter, such a feeder will become a real decoration of your garden.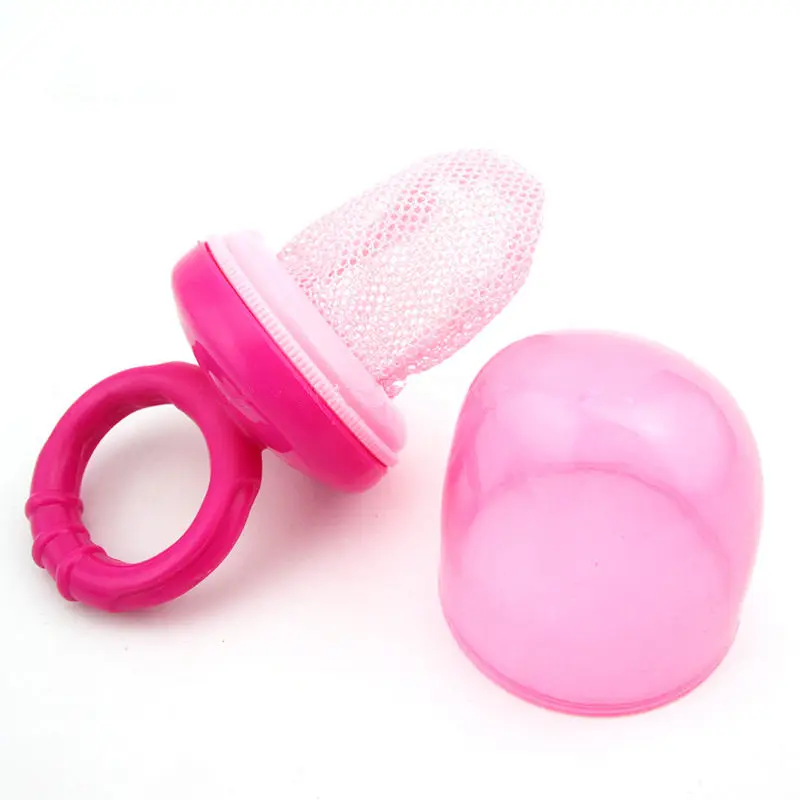 In summer, you can put lanterns there for decoration.
Making such a feeder is an art, for which it is not a pity to pay a good price. And you have a real exclusive in your garden.
Feeder Model #11
CLAY.
Here are creative bird feeders made from clay or ceramics. You can, of course, if your talent allows you to make a real stucco masterpiece. And you can blind easier.
And if you are a wood carver, you can also cut a similar model from millet wood. Cut out individual elements, and then collect everything into a single composition.
And you can start with simple clay molds. And make a cat. Although I have no idea how it's done. It is one thing to turn pots on a wheel, but here such a complex shape as a cat. Here you need the hands of a master. Below we just see the work of a craftswoman from the Masters Fair - her profile is below (and her work is a cat and a creative teapot-feeder).
Feeder Model #12
In general, the feeder can be made from any handy materials.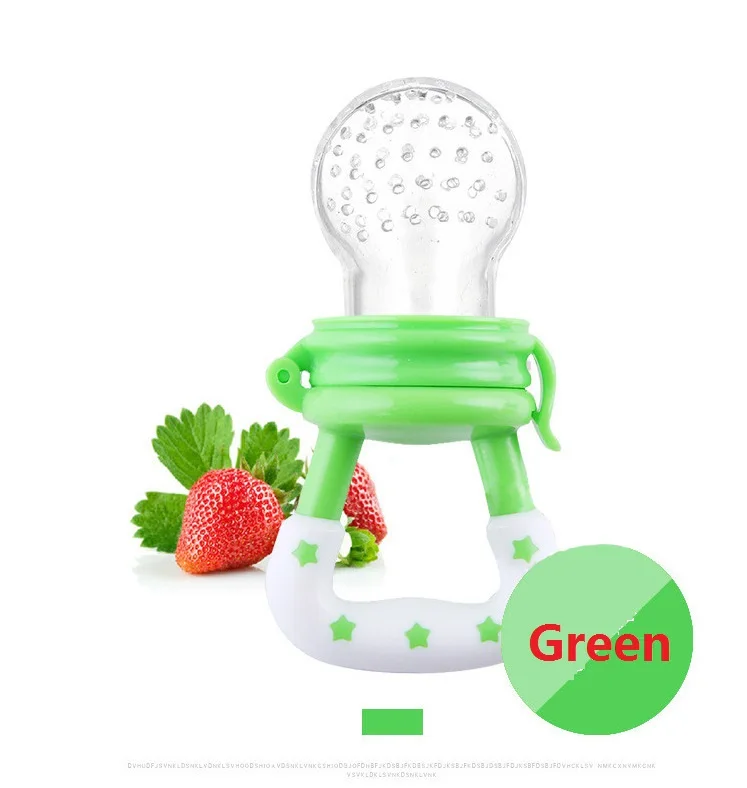 From a tin can. Just do not paint it in very bright frightening colors.
It's even better to mask the body of the jar with branches and twigs, as shown in the photo below.
And here is a creative two plate feeder. They were drilled and screwed into a metal pipe. The upper plate became the roof of the feeder, the lower one became the bottom.
Even egg cassettes can serve as a quick and easy feeder. It can be made even by children's hands. You get a simple home-made children's feeder for sparrows and titmouse. True, in a wet snowy winter, such a feeder will quickly get wet and become unusable - but if it is often replaced with a fresh one, then it will do.
Feeder Model #13
Out of the box.
And here are options for feeders made from juice or milk boxes.
Here you can involve the children in the design of these cardboard feeders made of milk packs. They will be happy to decorate the feeder with an applique of paper, twigs and even buttons.
Kids will also love decorating box feeders in the shape of an owl. To do this, we cut the side walls of the box in the shape of a wing and bend the cut parts to the sides.
And you can make the wings of the owl feeder differently. Just make a horizontal SLOT in the side walls. And put a long rectangular plastic tray with small sides into it. You can also fill it with food. And it turns out that on the wings of an owl there are seats for feeding birds.
The eyes of such an owl-feeder from a milk box are made from ordinary muffin tins and bottle caps, and a cardboard circle of a contrasting color is glued inside the lids.
We make perches-legs for convenient planting of birds from ordinary pencils or twigs. We push them through two walls of the box.
You can also make this baby bird feeder in the form of a minion. A great idea for a feeder for a competition in kindergarten or school.
Feeder Model #14
FROM BOTTLE.
And of course, how to get around the most common material for home feeders - plastic bottles.
The easiest way is to make two round holes in the bottle - in opposite sides . We put the handle of a spoon into these holes. We make a hole from the side of the spoon part wider so that through it part of the seeds wakes up into the spoon. Titmouse sits on the edge of the spoon and eats.
Or it could be simpler - design a bottle as house with a hole in the entrance . And under this round hole, make another smaller hole - put a stick-perch into it, on which it will be convenient for the bird to bridge.
And you can take a large 5-liter bottle and cut out folding doors-stands in its barrel. We will immediately receive both entrance for the titmouse and landing pad for its landing on the feeder.
These are the ideas of homemade winter feeders I could collect here for you. I really hope that you found what you were looking for on our website.
Good luck with your winter crafts and more birds for you - in the feeder and in good karma.
Olga Klishevskaya, especially for the site "Family Bunch".
what types are there, what materials can be made, how to fill them, examples of feeders
It is very difficult for small birds to feed themselves in winter. One feeder can save up to 50 bird lives during the winter. In the article we will tell you how to make a feeder from improvised materials with your own hands with diagrams and photographs together with children. We will give practical recommendations for installing and filling the feeder with food.
Audio version of the article "HOW TO MAKE YOUR OWN BIRD FEEDER" The audio tag is not supported by your browser. Download. How to make a bird feeder with your own hands
Content
Why feed the birds in winter
What should be the feeder, when and where to install it
- Square
- LOTTRAL NEWS or house
- Lushchini Blink
How to make a feeder
Why feed birds in winter
All birds have a very fast metabolism, which means that in winter they need to eat almost continuously with high energy costs.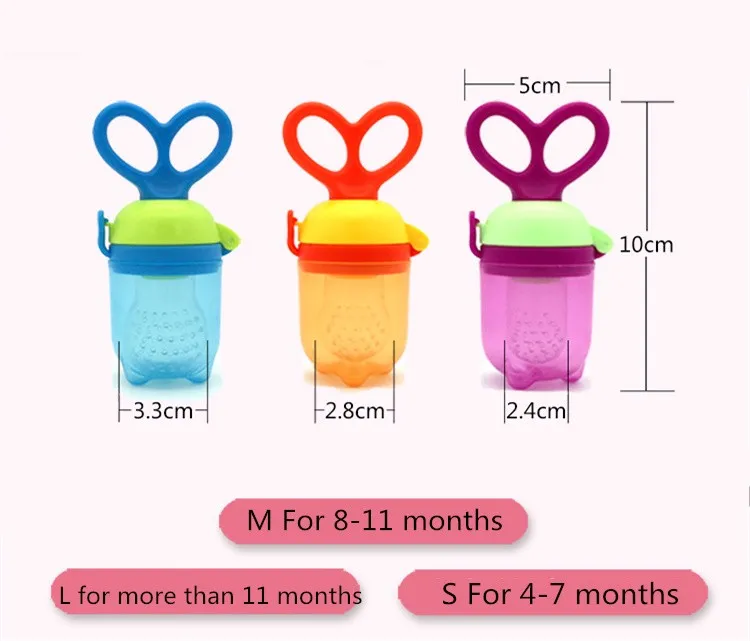 In one frosty night, a bird can lose up to 10% of its weight trying to keep warm.
But it is much more difficult for birds to renew their stocks in winter: insects have hidden, and seeds and berries are under snow and ice. In addition to this, daylight hours are getting shorter, so you need to look for food faster, but this does not always work out. Did you know that from 1 to 3 small birds out of 10 survive until spring? And this is due to lack of food. Small birds are especially affected: bullfinches, tits, sparrows. Large birds, for example, rooks, crows, magpies, endure winter much easier and get food easier.
You can significantly help the birds survive the winter by filling the feeders with grain and lard. Birds remember where the replenished feeders are located, settle nearby and fly to the "dining room" regularly.
Creating feeders with children is one of the classics. This is taught to boys in labor lessons, and before that - by parents. Such an activity develops empathy in children, they begin to take care of animals and birds, and take responsibility. For example, children can remind their parents to grab some bird food before every outing. In addition, by feeding birds, you can learn a lot about birds: which of them are migratory and which are wintering; what they eat; how they look; how they sing. If the child is old enough, then taking care of the birds during the winter can become a real project, during which he will write down all the results, draw conclusions. In addition, the manufacture of the feeder itself is a creative activity that requires perseverance and well-developed motor skills.
What should be the feeder, when and where to install it
Birds can be fed all year round. If you are making a summer "dining room", then it can be open. In this case, you just need to remember to change the contents of the feeder in time, especially after rain. Here is an interesting option for decorating your garden - a mug and a saucer.
All you have to do is glue the mug to the saucer, tie the wire and hang it on the tree.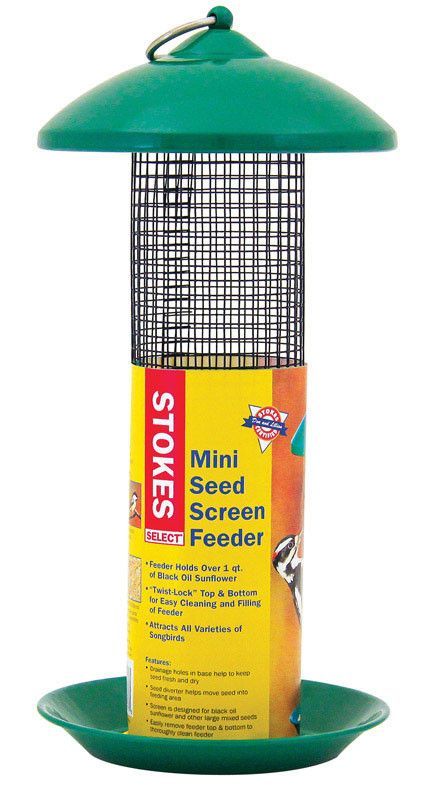 Birds will be happy to fly into your garden for tea drinking and decorate it with their singing.
But wintering birds need feeding most of all during frosts. Colds come in central Russia already in early November and continue until the end of March. All this time it is worth adding food and keeping the feeders clean, as they can be covered with snow.
Where to place the feeder? If you live in a private house and want to attract titmouse to your garden, then choose trees that are tall enough with thin branches so that cats do not show interest in food. In the city, you can organize a dining room for birds in the park, in the courtyard of an apartment building, and even on your own balcony. However, think in advance about whether such a neighborhood will bring you trouble, because the birds may not be too neat. Try to hang the product in places where there are no drafts, and even better if there is a small visor.
Here are a few suggestions for creating a feeder:
- Do not use too bright and shiny materials, they will scare away birds.

- Food should be visible and not hidden deep, as birds use their sight to find food.
- High sides, a roof and a few medium-sized bird holes are features that will keep rain and other forest animals out. But sometimes you can deviate from this "classic", for example, if you plan to hang a feeder under the visor.
- Feed should not spill too much on the ground, especially if you set up a feeder in the forest. This can attract ferrets and other predators, and birds will definitely not like this neighborhood.
- Only water-based paints should be taken for coloring, they are safe for birds.
There are many types of feeders: from plastic bottles and from wood; durable and disposable; original and stylish and not very beautiful, but practical. Regardless of what design you decide to make with your child, most importantly, do not forget to pour food in time and clean the feeder from softened food and snow. And when spring comes, don't forget to take it off the tree.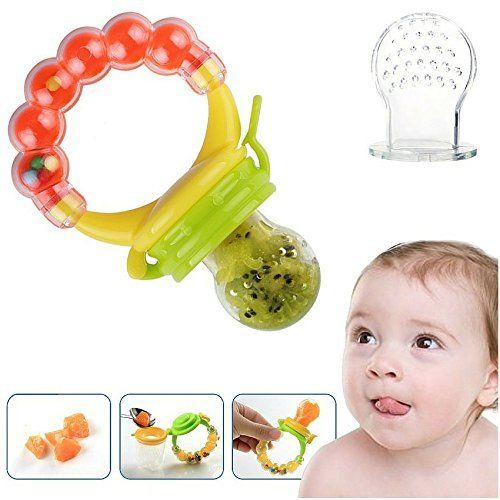
We offer you feeder ideas in different materials. All of them differ in shape and method of attachment - suspended, stationary and others. Let's see how the main varieties differ.
Hanger
A mesh bag with food, a cone with fat and cereals or just pieces of lard - all these treats are hung on a branch. The easiest to make, short-lived, but effective for tits, bullfinches and waxwings.
Platform
Flat surface without roof. The main advantage is that the birds see food from a distance. Great for sparrows, siskins, buntings, greenfinches and songbirds.
Tray feeders or house
Platform with sides and roof. If you make part of the structure out of plastic, then not only baited birds will fly in, but also flying by. If you make a house with a perch, then it is suitable for pigeons, waxwings, jays, nutcrackers
Peeler
The design assumes a net from which the bird will hatch grains.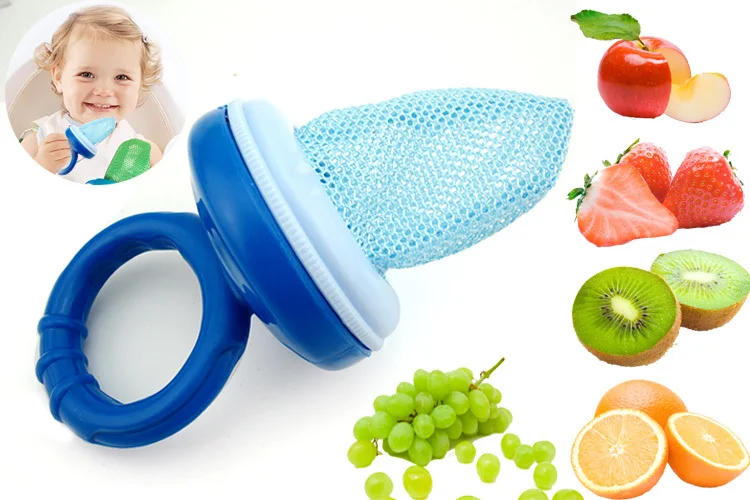 Suitable for crossbills, jays, nutcrackers.
Bunker
Small, solid base and roof, this allows for feeding one at a time. You can arrange automatic feeding. Tits, small spotted woodpeckers, buntings and other birds, except for sparrows, will be able to eat.
How to make a feeder
Wooden feeder
A wooden house is the most durable version of a “dining room” for birds. If the tree is covered with paintwork, then moisture is not terrible for it. Typically, feeders of this type are installed permanently, nailed to a tree or pole. Such a house perfectly protects food from precipitation and sparrows. Sparrows are very shy, so at the slightest danger they fly up. If there is a roof, they first have to move to the side and then up, so sparrows very rarely fly into wooden houses to feed. The only disadvantage of a standard house is high ventilation, so it makes sense to make one or two sides solid.
When creating a house, you have a lot of variability.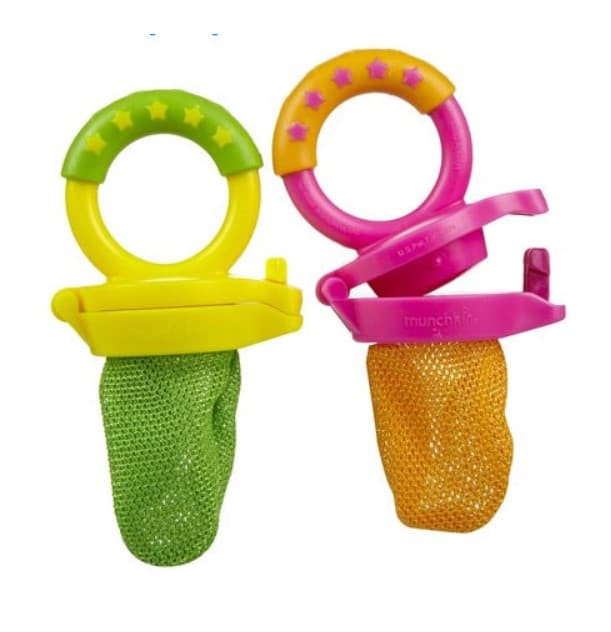
Various materials can be used (look at what you have left after the repair), for example, solid wood blocks, glued plywood, clapboard. The design can also be very different.
The photo shows a diagram with the dimensions of the most elementary wooden house with a flat roof, a wide platform and sides on all sides.
Here is another diagram made of plywood:
There are many ways to modernize the house. For example, make a gable roof. Or make walls with windows instead of open space. Such houses will better protect the birds from the wind.
Here is a diagram of such a house:
Of course, tools and an equipped place are needed to create wooden feeders. If there are no such conditions, then it is problematic to make a wooden feeder.
Although, the masters offer this option. Instead of bars, take the usual packaging cardboard. It has crepe paper inside.
It is necessary to glue the sheets of cardboard so that the direction of the corrugated paper inside changes.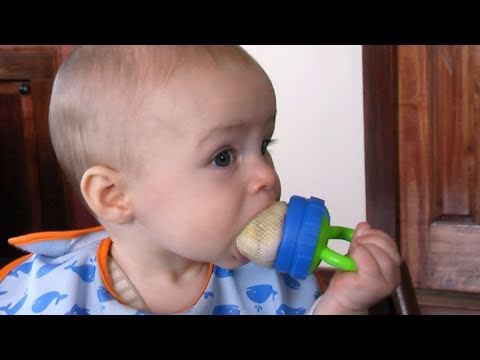 Then you can do without tools only with scissors and glue.
This version of cardboard wood is less durable, but with proper paintwork treatment, the construction can last 2-3 seasons.
Sometimes you can find very beautiful wooden feeders, which obviously took a lot of time and effort to create.
Another option to make a wooden house without tools or shavings is to buy a kit. It has wooden parts that need to be assembled according to the scheme and, if desired, painted. A child can cope with such work even without the help of adults.
When assembling a wooden house, pay attention to the following. The closed design assumes that only baited birds will eat. If you want to attract the attention of birds, then you need to decorate the house. For example, you can put a branch of mountain ash on the roof, hang a rope from dried rose hips. Just don't overdo the decoration. Too bright or shiny colors and materials, on the contrary, repel birds.
Plastic bottle feeder
If you walk through the yards, you can conclude that this is one of the most common ways to feed birds.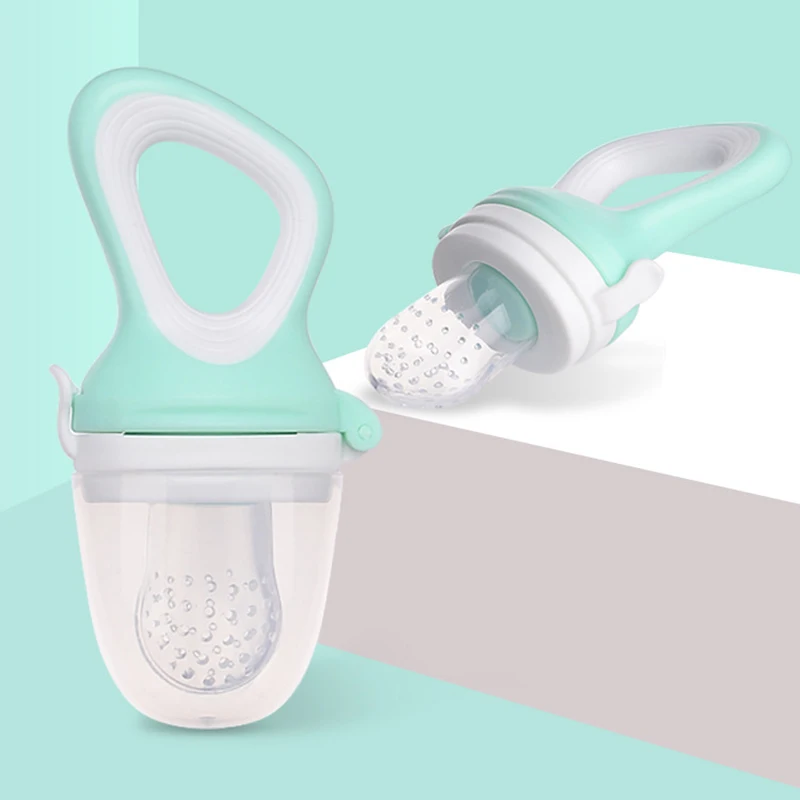
Indeed, plastic bottle feeders have many advantages:
- An affordable material that is easy to work with even for children. For manufacturing, special tools and building materials are not needed, the “dining room” will be ready within a day.
- Lightweight material, so the feeder can be hung on thin branches.
- Protected from drafts and precipitation.
- Transparent walls give birds a good view, so they can see attractive food from a distance.
- The material is resistant to moisture, wind and wear.
The main disadvantage of such feeders is that, unfortunately, they often cease to be replenished and are left hanging on trees. Such abandoned and devastated feeders look very unattractive.
We offer several variants of plastic bottle feeders. But first, let's give general recommendations when working with this material:
- Plastic is slippery, making it difficult for birds to stay on the surface. The best way out is to equip the structure with wooden perches.

- At least two through holes. It is best to make the holes large so that the birds do not perceive the feeder as a trap.
- Cover the edges of the hole with adhesive tape or duct tape. So it will be more convenient for the birds to move inside, and the person will not be cut on the edges.
- If the bottle is lying horizontally, it is desirable to make the "roof" opaque so that the birds do not have difficulty flying out.
Let's take a look at some of the best plastic bottle feeder ideas.
Option 1: hanging classic feeder
If you have a five-liter bottle, step back 7 cm from the bottom and cut out 2 windows on two opposite sides. The diameter of the holes is about 10 cm. During work, you can use a clerical knife. At the bottom of the jar through the holes, you can pour a dry grain mixture.
Use an awl to make a hole in the lid for the wire. From the inside, a wire can be hung to the lid, on which a piece of unsalted fresh fat will be put on.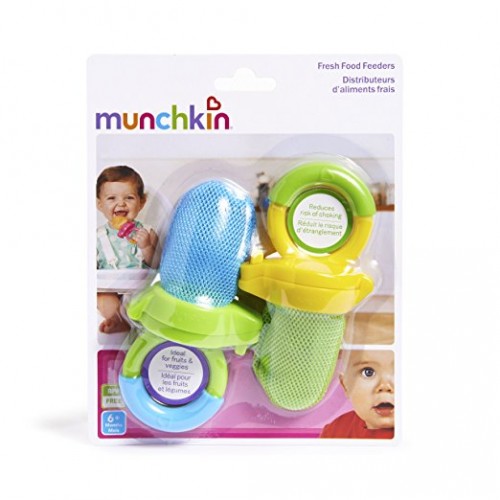 And outside the wire in the center of the lid will serve for hanging on a branch.
If only a one and a half liter bottle was at hand, then one large window can be made. Be sure to seal the edges with tape. You can attach such a feeder to a tree by the neck.
Option 2: hanging feeder with perches
The previous method of creating a feeder is the easiest and fastest. But if you want a more durable and bird-friendly design, add one or more perches. First, the wooden perches help the bird stay on the bottle. Secondly, they make the structure heavier, the container will not fly up from the wind and scatter grain.
To do this, use a heated nail to make holes in the plastic opposite each other. Pass one or two perches through them. It can be bamboo sticks, pencils or ordinary branches. The perches should be 2-3 cm below the windows so that the birds can sit comfortably and peck.
To prevent snow from getting into the feeder, when cutting windows, you can leave the plastic and bend it like a visor.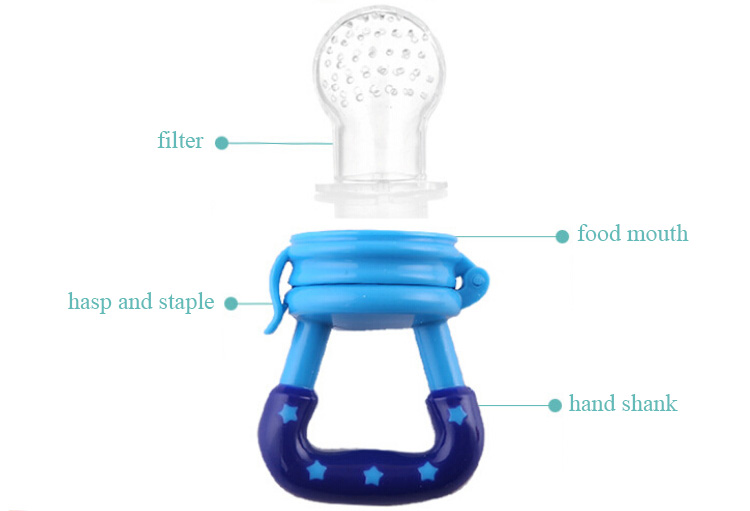 Such a roof also needs to be pasted over with electrical tape or adhesive tape.
3rd option: simple feed hopper
Ordinary feeders should always be filled with food. And if it started to rain or snow obliquely, then they need to be cleaned, the remnants of damp food removed so that mold does not appear. You can go the other way and make a self-replenishing bunker-type feeder. By the way, she looks very nice.
They are very easy to make. We will need a plastic one and a half liter bottle and two wooden spoons for cooking.
Two holes need to be made for one spoon: one is narrow, the second is a little wider, here the “dining room” itself will be located, and the grain needs space to sleep freely.
Arrange the spoons at different levels and exit in opposite directions. Don't make the holes too high or the food won't spill out too early, even if the feeder is half full.
The spoon has two functions. It is convenient for birds to sit on it, like on a perch.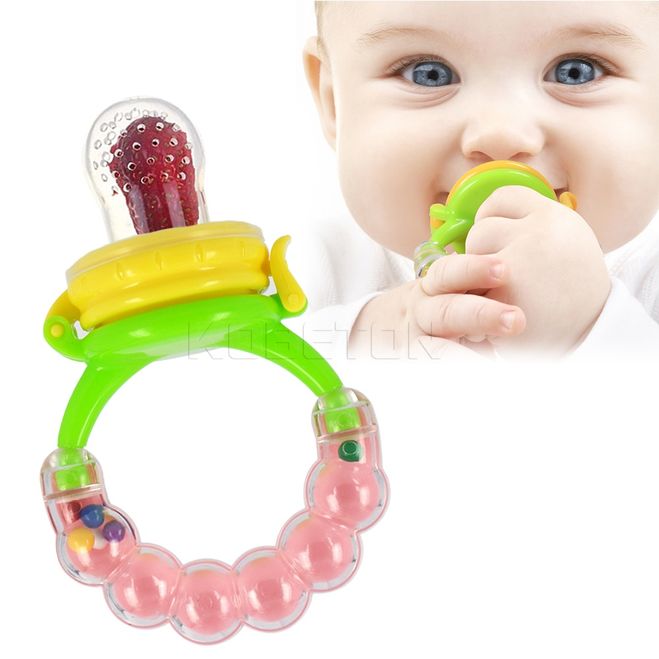 And also in its recess grain will accumulate, as in a plate.
If you don't have cooking spoons, use regular pencils. They need to “pierce” the bottle through, but both holes must be narrow so that the pencils sit firmly.
In this case, the pencil only functions as a pole. And the birds will feed themselves from small holes in the bottle.
Holes can be made with a heated nail. They should be very small so that the grains do not spill out spontaneously.
When the feed hopper is ready, fill it with grain mixture through the neck, tie off the thread and screw on the lid. The bottle can be hung from a tree.
The second option for a simple plastic bottle feed hopper is to use a plate. Tightly glue a plate of durable plastic to the bottom of a one and a half liter bottle. You can do this with liquid nails. At a distance of 2-3 cm from the bottom, cut centimeter holes in the walls of the bottle. Through them, the grain will spill out onto a plate, where wintering birds will fly to eat.
Feeders with a simple hopper system have two noticeable drawbacks:
- Grain often spills onto the ground, which can attract a flock of sparrows and even small predators.
- Snow and rain will easily wet grain left on spoons or plates.
Both of these problems can be solved by improving the design.
Option 4: complex silo feeder
The concept of this feeder is simple - one bottle contains feed and it is inside a second larger bottle. So the food gradually spills out, but at the same time it is always protected from precipitation and from spilling onto the ground.
For example, you can take one can of liquid soap or building primer. It must be rinsed very well from the inside and dried. One wide window is cut out on a wide wall. The bottom of the bottle is cut off, and 3-4 small holes are cut near the lid at the narrowing of the neck.
The bottle must be inserted into the large container so that it is exactly under the lid of the canister. Since the bottom of the bottle is cut off, the grain can be poured into it through the canister lid. To prevent the bottle from falling, secure it to the canister with a wire.
But more often two five-liter bottles are used. One of them needs to be cut in half, removing the narrowed part with the neck. Stepping back from the bottom 5-7 cm, you need to cut out several windows, process the edges.
The second bottle should be filled with grain, and a few holes should be cut near the cap itself. A whole bottle is inserted into the cut one with the neck down. The neck should fit snugly against the bottom of the cut bottle. Make perches if you wish.
It remains only to hang the structure. You can do it in two ways:
- Wrap the ropes around the bottom bottle. The top will just fit tightly on top.
- Fasten the cap and bottom of the second bottle with wire. In this case, to replenish the grain, you will need to turn the entire structure over to unscrew the lid.
 And for hanging, you can, for example, make two opposite holes at the bottom of the top bottle and stretch a rope through them.
You can use different sizes of bottles - 1.5 and 5 liters.
At the same time, the most common hanging feeder with high sides and windows, with visors and perches, is made from a five-liter bottle. And a small bottle is inserted inside with the cut bottom up.
Bottles can be fastened with wire. You can fill the inner bottle through the neck of a five-liter bottle.
If a five-liter bottle is not found, a similar design can be made with any two containers, different in volume.
For example, how a liter bottle fits into a 2 liter bottle.
Finishing with plastic bottle feeders, it is worth noting that the main measure will remain the imagination. Decorate the feeders as you and the child want, but, most importantly, so that functionality does not suffer. A small selection of photos to see how you can decorate and upgrade a plastic bottle feeder:
Feeder from a box
To create feeders, boxes are taken from liquid products - from kefir, milk, juice.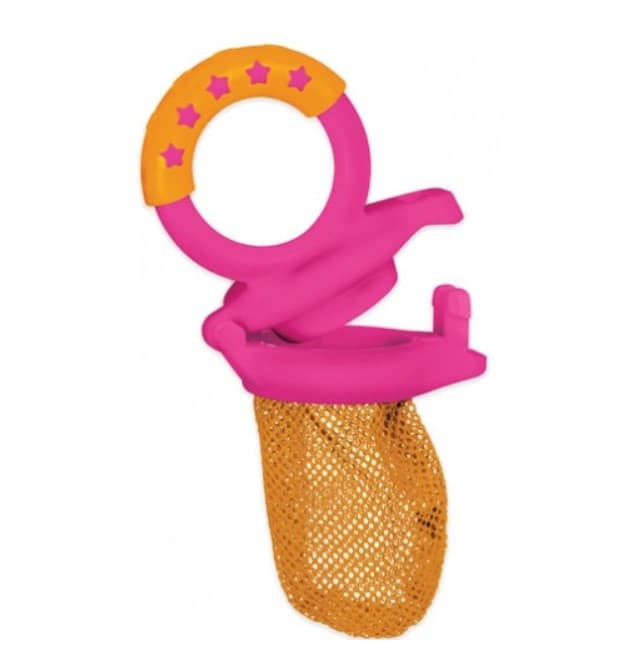 These cardboard boxes are sealed with polyethylene and foil, so they are strong enough to last through the winter.
Box feeders are especially good because they can be made by the child himself from start to finish. After all, to work with cardboard, you need not the most difficult tools to use - scissors, pencils, a ruler. The second advantage is that cardboard boxes are easy to color with felt-tip pens, which makes the process of making a “canteen” even more fun.
Feeder making steps:
- Wash and dry a milk or juice bag.
- 5-7 cm from the bottom. This height of the sides is enough to prevent the feed from spilling and getting wet.
- Use scissors to make an oval or rectangular hole. You should get one or two windows opposite each other.
- Finish the edges with electrical tape.
- Use a plastic or wooden stick to poke through the box to make perches.
This feeder can be painted with felt-tip pens and covered with a layer of adhesive tape on top so that it does not lose its appearance and remains even more durable. Photo-ideas of feeders from the box:
Can be adapted to feeder and other larger boxes, for example, from under shoes or household appliances. The manufacturing technique remains the same, just the "dining room" will be much larger. And you need to think about the fact that most packaging boxes are not designed for contact with water, so they must be taped or painted.
Mesh Peeler Feeder
This feeder provides constant access to food, but it must be taken out of the net with the beak. The design is successful in many ways:
- The feed does not fall on the ground, and we have already told you how harmful it can be.
- Two or three birds can peck at the feeder at once, but this does not form a flock, as happens with sparrows.
- Pleasant appearance – concise, even stylish.
- Durability.
- The feed does not need to be constantly replenished. A full grid will last for several months.
The disadvantages include the fact that not every food is suitable.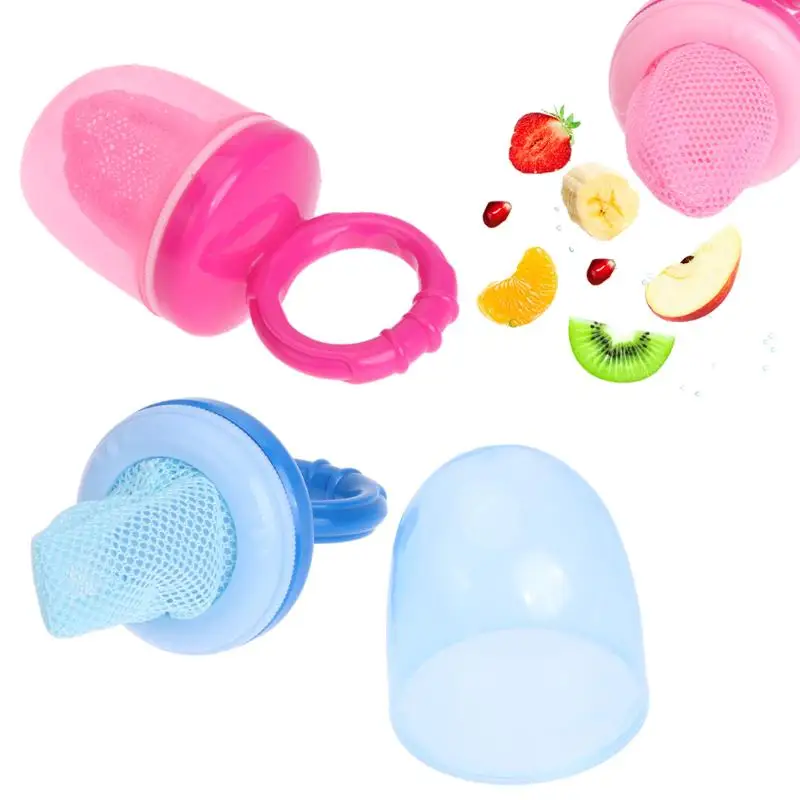 Usually sunflower seeds or peanuts are poured there. Both must be without roasting and without salt. Peanuts can be left in their skins. And if the mesh is large, then for the peeler you need to make special compressed layers of feed. Small grain will simply fall out of such a feeder.
The most common version is the cylinder. The design is similar to a lantern, it looks very good in the garden. You need to take materials and tools for work:
- Choice of two clay saucers, old plates or plastic lids from round containers. Diameter approx. 15 cm.
- Metal construction or plastic garden net with meshes 5 mm in diameter.
- Ties.
- Rope or heavy rope.
- Tools: wire cutters, drill.
Roll the mesh into a roll that fits the flat inside of the saucers in diameter. Connect the sides with ties, and process the edges at both ends with wire cutters and turn inward. Drill holes in the center of the saucers. Now string the first saucer, net, and then the second saucer onto the cable, wire or rope.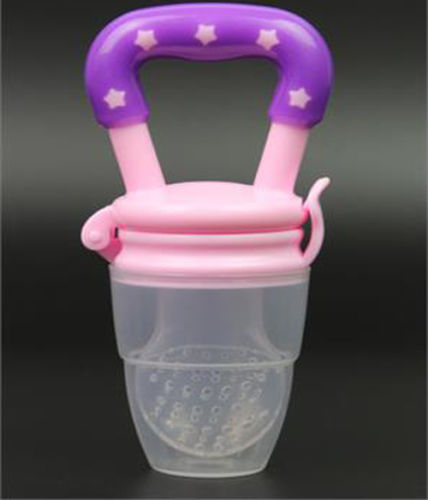 From below you need to make a strong knot. Above is not required. The top cover can be opened to pour grain.
If you take a mesh with a larger mesh, you can make feeders for fat. So cats or other predators will not be able to encroach on them. You can also put nuts or homemade cookies from grains and gelatin in such mesh houses, we will talk about them below.
But the simplest version of a mesh feeder is a bag made of a string bag. You can put apple slices or nuts in it.
Eco feeders
Eco feeders are not durable. They "end" as quickly as the appetite of birds is great.
But besides this shortcoming, they have solid advantages:
- They do not harm nature. Only edible or rapidly degradable materials are used. No plastic, paint, metal or glass.
- They do not spoil the appearance of the garden or yard. A big problem for the city is abandoned, neglected feeders made of bottles or boxes. They spoil the view of the trees and add work to the janitors.
- Easy to do with your own hands, even with children. Bird biscuits may be the first self-made "baking" without baking for a child.
- It is convenient for birds to peck at these hanging feeders.
- The ecological feeder does not need to be removed in the spring, especially if you use ropes made of completely natural fibers, no synthetics.
The easiest, fastest and most beneficial option for birds is hanging lard. Any animal fat will work, including natural butter. But fat is cheaper, so it is more often chosen. Make sure that the lard is raw and without any seasonings, including without salt.
Animal fat is a very high-calorie food, and this is exactly what you need in winter. Pieces of lard can simply be planted on tree branches. Or make a “kebab” out of them on a bamboo stick. You can hang a piece on a rope, nail it to a tree trunk - there are a lot of ways to fasten it.
But there are vegetarian birds, they prefer grains and berries.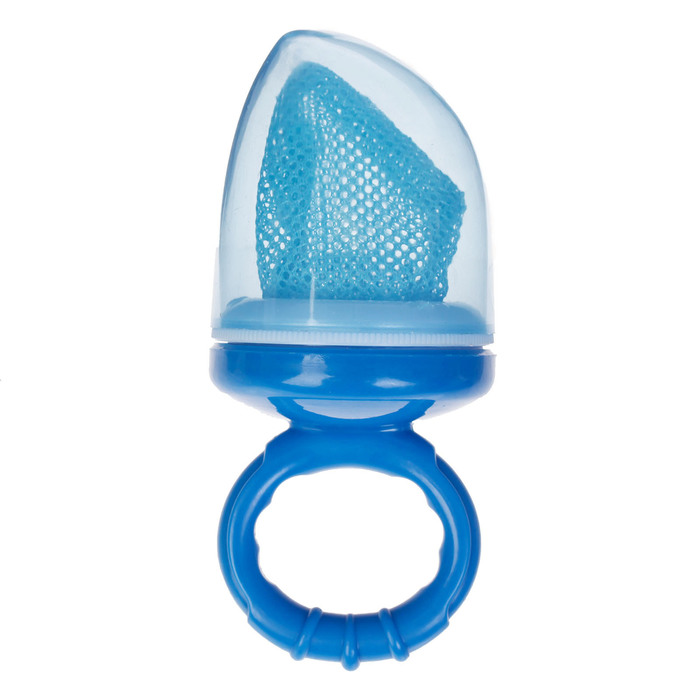 For them, you can hang a dried sunflower hat or an ear of corn on a tree. Corn is better to take with small grains.
Another simple version of the eco-feeder is a “barbecue” or beads made of berries. In winter, birds especially like twigs with rowan berries, dried hawthorn, and pieces of fresh apple. You can alternate berries with nuts and dried fruits. Shelled peanuts are great.
Bird biscuits
Don't be afraid, you don't need any baking, but the birds also want something sweet. Honey will help us with this.
Take your packing (corrugated) cardboard and draw and cut out shapes, eg bagel, heart, star. Make a loop with a needle and thread.
Make a glue mixture by mixing 1 egg, 1 teaspoon honey, 2 tablespoons oatmeal and a pinch of flour. Let it swell for half an hour. Coat the cardboard blank with this mixture on both sides. Add the rest of the mixture to the grain. Grain mass stick around the workpiece and put your cookies in the refrigerator for 2-3 hours.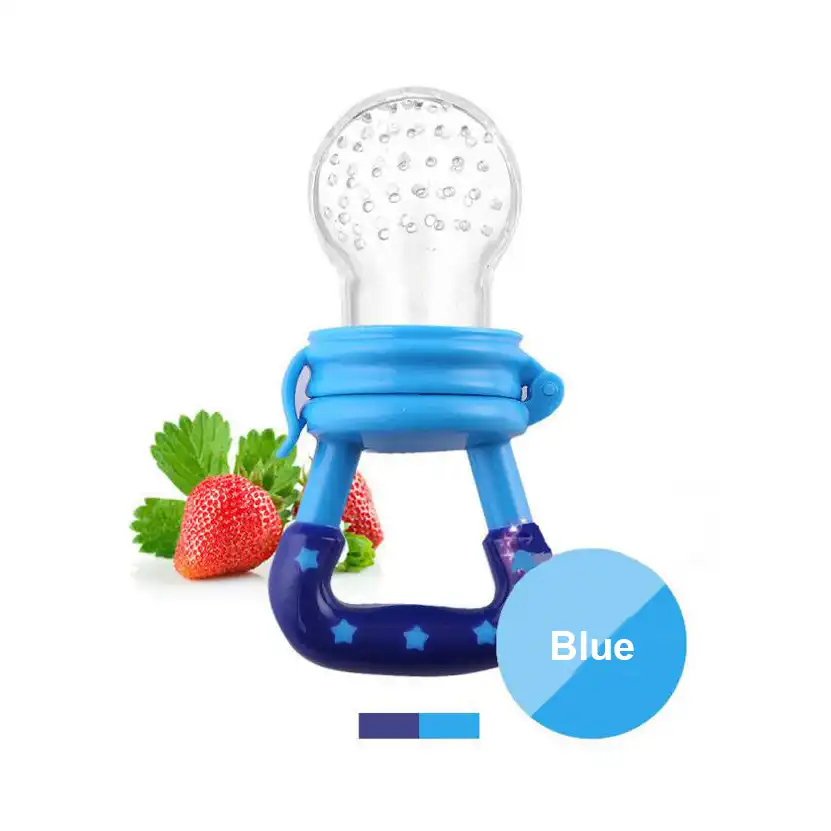
By the way, instead of a mixture of honey and eggs, you can melt butter and mix it with grains. Such cookies will be even more high-calorie.
True, butter is not cheap, but it should never be replaced with margarine, it is dangerous for birds. In cold weather, the butter will harden quickly and will attract birds.
Gelatin or bacon cupcakes
If you have silicone cupcake liners in your kitchen, you can do without cardboard. The recipe for gelatin cupcakes is simple. You will need to dissolve 30 grams of gelatin in 300 ml of water. When the gelatin swells, add 500 grams of the grain mixture with crushed nuts and oatmeal to the bowl.
Pour this mass into molds, do not forget to attach the rope for fastening. Or you can stick a straw for drinks so that a hole remains, and only after drying, insert the thread. The mixture needs at least 2 hours to set in the refrigerator. Then you can pull the cupcakes out of the molds.
Melted lard can be added instead of gelatin.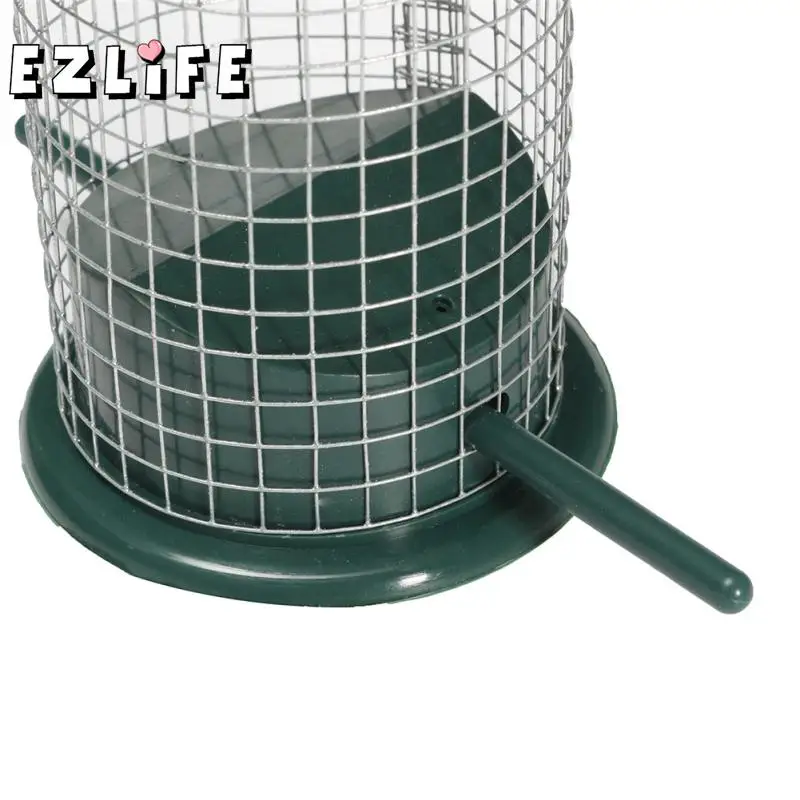 Such a feeder will be more high-calorie, but at the same time it may begin to melt at a positive temperature. If your weather in winter is about zero, it is better to choose gelatin.
You can also coat an ordinary pine cone with this mixture. Perhaps this is an even simpler and more environmentally friendly option. And it looks very pretty. You can even make a structure out of cones or hang them like a garland on trees.
Vegetable, fruit and nut feeders
The same grain mixture with the addition of lard or in dry form can be placed in a natural container. A simple open hanging feeder can be made from a pumpkin, an apple or an orange.
By the way, pumpkin seeds and pulp are very useful for birds. But they don't like citrus. But if you use only the peel, carefully removing the pulp, then the smell will not prevent the birds from eating. An apple, like a pumpkin, will also be eaten completely.
Coconut shells are suitable for grain mix. The main problem is to carefully split the coconut itself. Then the shell can be filled with a mixture of grain and butter, it will harden, which will prevent the food from spilling out.
Nut shells nailed to a flat vertical surface look very interesting. First, the nut itself will be in the shells, and then you can fill them with a grain mixture with lard.
Original ideas for bird feeders: photo
If you start creating a bird feeder with imagination, you can use a wide variety of materials. Literally everything that is at hand, for example, excellent bunker-type feeders will come out of a transparent glass bottle.
In general, any old utensils can be used as a feeder - a kettle, a tea set, spoons, ladles, pots, a flower pot and tin cans, everything will be used. Here's what it might look like.
Here are some more feeder ideas made from scrap materials: ice cream sticks, corks, an egg tray. You certainly wanted to throw them in the trash!
How to fill the bird feeder
The main principle is to feed, but do no harm. Therefore, first we list what is absolutely impossible: everything is salty, smoked, with the addition of preservatives, dyes, any food additives. Rye bread can also cause intestinal upset in birds. It is better to give white, and dried, and even better to do without bakery products at all.
Can be poured into the feeder:
- Fresh unsalted lard.
- Butter, full-fat cottage cheese (not milk or margarine).
- Wheat, rice, oatmeal, millet, barley, corn, split peas.
- Sunflower, pumpkin, flax seeds.
- Apples, dried fruits, mountain ash, hawthorn, wild rose.
- All nuts except almonds.
- Meal worms.
If you hang up a feeder with your child, you have already done a good deed. But you also took responsibility. Birds get used to the hospitable place and regularly come to eat. In addition to replenishing the feeder, one must not forget about cleaning it, because wet food can become moldy and become dangerous for pichuga.